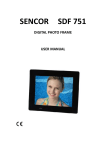
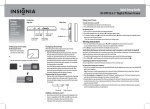
Download KGNDPF8VAA USER MANUAL
Transcript
KGNDPF8VAA USER MANUAL TABLE OF CONTENTS SAFETY INFORMATION……………………………………….…………2 PACKAGE CONTENTS ………………..……………………….………….2 SPEC SUMMARY………………………….……….…………….…………2 DPF INTRODUCTION………………………..……….…………....………3 REMOTE CONTROL OVERVIEW………..…………..............................4 QUICK START……………………...……………………………..…………4 OPERATION GUIDE…………………………………………………..……4 Picture Display……….…………………...…………………………….……….…….5 Setting…..…………………………………………………………………………..….6 OSD FUNCTION…………………………….………………………………7 FAQ………………………………………………………………………….14 1 Safety Information: Important Safety Precautions: Keep away from water, moisture and dusty areas. Working temperature 0-40℃. Never store in a hot or very cold place. Be careful not to drop or knock the photo frame. Never try to open the case yourself, always seek technical support. Connect the AC adaptor to both the DC IN jack and to the power outlet. (mains socket) Only use attachments / accessories approved by the manufacturer. When left unused for a long period of time, the unit should be unplugged from the household AC outlet. Warning: To reduce the risk of fire or electronic shock, do not expose to rain, moisture, dripping or splashing. Package Contents: PHOTO FRAME REMOTE CONTROL ADAPTER Spec Summary Main Features: Play as slideshow, thumbnail, split screen picture display.. Rotate and zoom photos Brightness, contrast and saturation adjustable Memory Card Slots Secure Digital (SD) Multi Media Card (MMC) Memory Stick (MS), MS Pro, MS Duo, MS Pro Duo Secure Digital High Capacity (SDHC) MS Duo adapter required Specifications Pictures: JPEG up to 26 mega pixel resolution USB ports: - USB 2.0 Device - USB 2.0 Host AC adapter -Input AC 100V~240V 50-60Hz 2 -Output DC5V-1A Digital Photo Frame Introduction Stand installation Note: Insert the jack of stand into DPF. And then rotate stand 90o to lock the stand. 3 Remote Control Overview Note: a) To edit or adjust, press MENU on the remote control; or you can instead press button Menu on the frame for 3 seconds. b) To go back a step or go to the main menu, press EXIT on the remote control; or you can instead press button Menu on the frame. Quick Start: 1. Insert the jack of the DC adapter into the digital photo frame, and then plug the DC adapter into a standard power outlet. 2. Turn on the power, the pictures from the inserted memory card will be displayed. Operation Guide: 1. Select Menu In the main menu, you will see highlighted the device you have inserted. Press / and ENTER to select. 2. Picture display screen Choose the memory card you want to view, and then press ENTER to go to the picture preview mode. 4 To slideshow pictures, press / to choose a picture, and then press ENTER. Note: If you want to stop the slideshow and keep the picture on the screen, you can press ENTER, and then continue pressing ENTER to slideshow. When playing a picture, you can press MENU on remote control or you can instead press button Menu on the frame for 3 seconds. (Pause) (Zoom out) 0 0 (Rotate left 90 ) (Rotate right 90 ) (Ratio) (Delete) (Exit) Change the photo display mode in “SETTING” menu, Press / ] to choose “Display mode”. There are “Slideshow” “Thumbnail” and “Splitscreen” mode available. a. Slideshow 5 b. Thumbnails c. Splitscreen 3. Setting Press Setting icon to set display information. 6 4.OSD Menu Functions Menu item Description Slide show time 3sec / 5sec / 15sec / 1min / 15min Transition effect Random / Snake / Partition / Erase / Blinds / Grid / Cross / Rect Set time Time setting (hour / minute / mode) Set date Date setting (dd/mm/yyyy) Language Multi language Brightness Brightness adjust Contrast Contrast adjust Saturation Saturation adjust Display Ratio Original--preserves dimension ratios of original picture Stretch-- stretches picture to fit screen Crop-- full screen picture, preserves dimension ratios, but crops picture to do so. Display Mode Slide Show / Thumbnail / Splitscreen Power on Set time to power on automatically Power off Set time to power off automatically Alarm set Set alarm Default Restore to the factory settings. 5. Frequently Asked Questions Q. Why can’t the Digital Photo Frame play all images? A: The Digital Photo Frame supports JPEG format pictures, It may not read some files downloaded from the internet. Q. I have a memory card in the Digital Photo Frame, but it’s not reading the card, what should I do? A: First, make sure that you are using a memory card that is supported by the Digital Photo Frame. Second, ensure that the memory card is inserted all the way into the correct slot. Third, choose the correct card icon which you want to play. Q. Why do some pictures load faster than others? A: Higher resolution pictures usually load slower. 7 The above settings are subject to change if the product specifications are modified. 8


