1
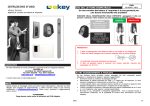
Navigator
TM
Userʼs Manual
Interel, Inc.
140 Carl Street
San Francisco, CA 94117
415-566-0554
USA Toll Free: 877-INTEREL
email: [email protected]
INTRODUCTION
Navigator is an Orienteering Challenge that challenges participants to use leadership and
team skills required in successful organizations. Participants must discover and navigate a
number of designated courses that have the same 8 control points/locations. In place of
the traditional map and compass, participants use polarized Viewers to decode/decipher
Location Indicating Beacons located at each control point. The beacons direct the
participants to two different control points determined by the viewer. Two teams of
participants compete to see which team can navigate the orienteering courses most
effectively. Activities can be conducted in a classroom location or in a large ballroom.
The key challenge is for participants to discover how to use the Viewers and find creative
ways to communicate non-verbally in order to effectively discover and navigate the
designated courses. Navigator is designed to have participants experience and then dialog
about ways to work effectively with people with different points of view and people from
different cultures. Navigator can also be used in curricula related to Creative Problem
Solving, Decision Making, Negotiation, Conflict Resolution, Listening and other
leadership and team skills.
ACTIVITY SCENARIO
You will be a member of one of two competing teams that are made up of elite Orienteers
from all over the world. The two teams will compete in an Orienteering Challenge that
involves discovering and navigating a number of different courses, that utilize the same 8
control points, in the most efficient manner.
Your team is composed of members from different parts of the world who speak different
languages and therefore have different ways of looking at things. You will have a brief
planning periods with all members, with the aid of interpreters, and you must decide on
non-verbal ways to communicate while you’re discovering and navigating the
orienteering courses.
Winning this challenge will depend less on physical abilities and more on the ability of
team members to understand and utilize different points of view, to find creative ways to
communicate with team members that do not speak the same language and to quickly
problem solve based on real time information.
NAVIGATOR OPERATION
The Navigator consists of eight Location Indicating Beacon (LIB) units, Beacon Viewers,
Pathfinders, User’s Manual, LIB Symbol Sheet, Path Record Form and Clue Sheet
Originals and Instructor Guide.
The Navigator orienteering courses are determined by the arrangement of the eight
Location Indicating Beacons located at 8 control points. The beacons are normally placed
on the floor. They can also be placed on stands or tables if desired. The beacons are
placed inside a circular course perimeter, with the front side facing toward the inside of
the course.
The beacons are designed so that participants cannot see their symbol unless they stand
directly in front of them and use a Beacon Viewer. When the beacons are correctly placed
inside a circular course perimeter, the participants must stand on the opposite side of the
course from each beacon in order to see the symbols. The number on the bottom panel of
the beacon is the control point number. The participant who is navigating the course
(Runner) will be able to see this number when approaching each control point. The
Runner may then use a Pathfinder device to verify that they are on the correct path.
NAVIGATOR SET-UP
Set Up the LIB units by removing the folded beacon covers, with identifying letters A to
H, and the rectangular white bases, numbered 1 to 8, from the shipping box. Attach each
cover to the appropriate white base as shown below. Close the cover around the base so
that the Velcro pieces hold the unit together. The Navigator Set Up Diagram for the
activity indicates which cover is attached to each base. The number on the base is the
control point number. Other course arrangements are available upon request.
Control Point Number
Course Perimeter
LIB
1
B
8
2
C
F
E
7
3
A
G
H
6
D
5
NAVIGATOR SET UP DIAGRAM
4
BEACON VIEWER OPERATION
The Beacon Viewer has a polarized lens that enables participants to see the two different
location symbols displayed by each Location Indicating Beacon. When a viewer is used
with the stripes in the vertical direction they will see a Vertical View Symbol when
viewing the beacon. When a viewer is used with the stripes in the horizontal direction,
the participants will see a Horizontal View Symbol when viewing a beacon. The viewer
should be held so that the lens is in front of one of the participant’s eyes and a dark
square is in front of the other eye. The viewer can be used with either side facing the
participant.
In the activities, participants are not told how to orient the viewers. They must discover
how to orient the viewers, in order to see the correct beacon symbol at each of the eight
beacon locations, in order to successfully Travel over designated paths.
LIB UNIT
VERTICAL VIEW SYMBOL
MEANING OF SYMBOL
A
Go from this Beacon to Control Point 1
B
Go from this Beacon to Control Point 2
C
Go from this Beacon to Control Point 3
D
Go from this Beacon to Control Point 4
E
Go from this Beacon to Control Point 5
F
Go from this Beacon to Control Point 6
G
Go from this Beacon to Control Point 7
H
Go from this Beacon to Control Point 8
LOCATION INDICATING BEACON SYMBOLS
LIB UNIT HORIZONTAL VIEW SYMBOL
MEANING OF SYMBOL
A
Go from this Beacon to Control Point 5
B
Go from this Beacon to Control Point 4
C
Go from this Beacon to Control Point 7
D
Go from this Beacon to Control Point 2
E
Go from this Beacon to Control Point 1
F
Go from this Beacon to Control Point 8
G
Go from this Beacon to Control Point 3
H
Go from this Beacon to Control Point 6
LOCATION INDICATING BEACON SYMBOLS
PATHFINDER OPERATION
The Pathfinder is used to indicate whether or not Runners are navigating the correct
course. They are stored in a CD holder. Each Pathfinder has 8 numbered discs, one for
each of the 8 designated courses. Open the Pathfinder case and insert the appropriate
course disc with numbers facing up. Both teams will start with the disc for course A. The
disc should be oriented so the Pathfinder shows control point number each team starts
navigating from. Each time a Runner, holding a Pathfinder, has reached a control point
they will rotate the Pathfinder disc one digit. If the number indicated is the same as the
control point they have reached, they are on the correct course. If they travel a leg that is
not on the correct course, they must return to the control point at the beginning of the leg
and then travel to the correct control point indicated by the Pathfinder. After both teams
have discovered the designated course, take their Pathfinders and insert the discs for their
next course.
LIB SYMBOL SHEET
The LIB Symbol Sheets enable participants to interpret the symbols they see, when they
view the beacons with the Viewers. The symbols instruct the Guides to direct the
Runners to move from the control point where they are standing to one of the other
control points.
SYMBOL
MEANING OF SYMBOL
Go from this Beacon to contol point 1
Go from this Beacon to control point 2
Go from this Beacon to control point 3
Go from this Beacon to control point 4
Go from this Beacon to control point 5
Go from this Beacon to control point 6
Go from this Beacon to control point 7
Go from this Beacon to control point 8
LOCATION INDICATING BEACON SYMBOLS
ORIENTEERING CHALLENGE ACTIVITY
OVERVIEW
Eight Location Indicating Beacon (LIB) units are placed at 8 control points on a circle
(10 to 30 feet in diameter) and are arranged to designate up to eight different courses that
connect to the same 8 control points. The beacons display symbols that refer to the 8
control points. Team members use the beacons to guide their runner along each course.
The beacons are designed so that the symbols can only bee seen by a team member
standing on the opposite side of the course periphery from each beacon.
Two teams of up to10 members attempt to discover and guide runners to navigate up to
eight designated courses. Each course has eight legs that connect to the same 8 control
points. Teams earn points for each course they complete.
The teams are issued Beacon Viewers, LIB Symbol Sheets and Pathfinders to use in
discovering and navigating the paths
INTRODUCTION SCENARIO
You will be a member of one of two competing teams that are made up of elite Orienteers
from all over the world. The two teams will compete in an Orienteering Challenge that
involves discovering and navigating a number of different courses, that utilize the same 8
control points, in the most efficient manner.
Your team is composed of members from different parts of the world who speak different
languages and therefore have different ways of looking at things. You will have a brief
planning period with all members, with the aid of interpreters, and you must decide on
non-verbal ways to communicate while you’re discovering and navigating the
orienteering courses.
Winning this challenge will depend less on physical abilities and more on the ability of
team members to understand and utilize different points of view, to find creative ways to
communicate with team members that do not speak the same language and to quickly
problem solve based on real time information
ACTIVITY INSTRUCTIONS
Your task is to use the resources you have been issued to discover and navigate a number
of designated courses as efficiently as possible. There are eight different designated
courses, from your assigned starting control point, that connect to the same 8 control
points and beacons. The allowable legs of each course are designated by the symbols that
the beacons at each control point display.
A member of your team, the Runner, must navigate the correct 8 legs of a designated
course. Runners will need the guidance of the other team members because, they will not
be allowed to use a viewer to see and interpret the beacon symbols.
Runners will use the Pathfinder to check that each leg they navigate is on the designated
course. If they travel a leg that is not on the designated course, they must return to the
control point at the beginning of the leg and then travel to the control point indicated by
the Pathfinder.
Team members who are not traveling will be responsible for guiding the traveler. The
Guides will use the Beacon Viewers to see the beacon symbols at each control point and
use the LIB Symbol Sheets to interpret the beacon symbols.
When a Runner has navigated all eight legs of a designated course, the team will be
awarded 8 points minus 1 point for each incorrect leg traveled. Then the team will receive
another Pathfinder disc that will indicate a new designated course for the next Runner.
RULES
You will have a limited time, in your planning area, to discuss your strategy.
You may not talk after you leave your planning area, until you discover and navigate a
course and then return to your planning area.
Team members must take turns running the designated courses. If there are less than 8
team members, some members may navigate two courses. Runners may not use the
viewer or the LIB symbols sheet when navigating a course.
The Runner must consult the Pathfinder after each leg traveled by rotating the indicator
disc, in a clockwise direction by one number. If the number that is visible, when the disc
is advanced one digit, is not the same as the control point at the end of the leg, the Runner
must return to the control point at the beginning of the leg and then travel to the control
point indicated by the Pathfinder. Runners may not rotate the Pathfinder indicator
disc until they have reached the control point at the end of each course leg they
travel.
Team members must guide the Runner to find the designated courses that connects to all
8 beacons. The courses will have only 8 legs and will start and end at your assigned
starting control point. Guides may only direct the runner to a location indicated by the
beacon at the control point where the runner starts each leg of the course. When leaving a
control point, Runners must take the path leg indicated by the Guide viewing the beacon
at that location.
You must stay outside of the course perimeter unless you are a Runner navigating a
course. Team members will return to their planning area, after completing each course to
plan and select a new runner.
DESIGNATED COURSES
Guide Position &
ViewerOrientation
1
8
Guide Position &
ViewerOrientation
2
1
8
7
2
3
7
6
3
4
5
6
Course A
4
5
Guide Position &
ViewerOrientation
Course B
1
8
Guide Position &
ViewerOrientation
2
1
8
7
2
3
7
3
4
6
5
Course C
6
4
5
Course D
Courses A, B, C, & D
Guide Position &
Viewer Orientation
1
8
Guide Position &
Viewer Orientation
2
1
8
7
2
3
7
6
3
4
5
6
Course E
4
5
Guide Position &
Viewer Orientation
Course F
1
8
Guide Position &
Viewer Orientation
2
1
8
7
2
3
7
6
3
4
5
Course G
6
4
5
Course H
Courses E, F, G, & H
INSTRUCTOR DIRECTIONS
Divide participants into two teams with approximately same number of participants, not
to exceed 10 people
Read the activity scenario and then the activity instructions. Give all participants a copy
of the rules and read the rules.
Give all participants a copy of the LIB Symbol Form and instruct the teams to go to
separate planning areas to select a Runner and decide how they will discover and
navigate the first course.
After the planning period, give each Runner a Pathfinder with the A course disc inserted.
One team will start at control point one. Their pathfinder disc should be set at number 1.
The other team will start at control point five. Their Pathfinder disc should be set at
number 5.
Give a Beacon Viewer to each of the remaining team members and instruct then to start
the activity.
After both teams have discovered and navigated the course, instruct the teams to return to
their planning areas and announce their score.
Instruct the teams to return to their planning areas to select a new Runner and plan for the
next course.
Collect the pathfinders and insert the discs for course B.
After the planning period and give the pathfinders to the new Runners and instruct the
teams to start the activity.
The last three steps are repeated, with different Pathfinder discs, for as many different
courses as desired, before conducting the debriefing.
INSTRUCTOR NOTES
The Navigator activity creates a significant team challenge because when the Guides look
at a beacon with a Beacon Viewer, they will see two different symbols, depending on the
orientation of the viewer. If the viewer is held so that the stripes are vertical, they will see
one symbol (a vertical view symbol). They will see a different symbol (a horizontal view
symbol) if the viewer is held with the stripes horizontal. Note: The teams do not
receive the viewers until they have com pleted their first planning
session and are ready to start navigating the first designated course.
The team will discover the A course if all Guides hold their viewers with the stripes
vertical and the team will discover the B course if all Guides hold their viewers with the
stripes horizontal. The other courses can only be discovered if one half of the Guides hold
their viewer with the stripes vertical and the other Guides hold their viewer the stripes
horizontal. This creates a significant team challenge because there are many
combinations of Guide location and Viewer orientation that will not be successful.
The activity challenge level can vary from easy to very difficult, depending on the
number of courses the teams attempt. Each time a team navigates a course, they receive 8
points for completing the course minus one point for each incorrect course leg traveled.
No points are awarded for the first team to complete each course. However, if a more
physically challenging activity is desired, one or more points can be awarded to the team
that finishes each course first.
Team performance will improve if the members notice that Course A and Course B are
compliments. Course A requires that all Guides hold their viewers with the stripes
vertical and Course B requires that all Guides hold their viewers with the stripes
horizontal. Also, courses C and D are compliments, courses E and F are compliments and
courses G and H are compliments. For each complimentary pair of courses, after Guides
have found the first path of the pair, they need only hold their viewers in the alternate
orientation to find the second path.