1
User’s
Manual
Model MXS
Universal Computing Unit
(1-input, Isolated 2-output Type)
IM 77J04X11-01E
Network Solutions Business Division
2-9-32, Naka-cho Musashino-shi, Tokyo 180-8750 Japan
Phone: +81-422-52-7179 Facsimile: +81-422-52-6793
Please read through this User’s Manual before use for correct handling.
Please keep this User’s Manual for future reference.
IM 77J04X11-01E
1st Edition Aug. 2005 (YK)
2nd Edition Nov. 2005 (YK)
CAUTIONARY NOTES FOR SAFE USE OF THE PRODUCT
This User’s Manual should be carefully read before installing and operating the product. The following symbol is used on the product and in
this manual to ensure safe use.
This symbol is displayed on the product when it is
necessary to refer to the User’s Manual for information on
personnel and instrument safety. This symbol is displayed
in the User’s Manual to indicate precautions for avoiding
danger to the operator, such as an electric shock.
The following symbols are used only in this manual.
IMPORTANT
Indicates that operating the hardware or software in a
particular manner may cause damage or result in a system
failure.
NOTE
Draws attention to essential information for understanding
the operations and/or functions of the product.
CHECKING PRODUCT SPECIFICATIONS AND PACKAGED ITEMS
(1) Checking the Model and Product Specifications
Check that the model and specifications indicated on the nameplate
attached to the main unit are as ordered.
(2) Packaged Items
Check that the package contains the following items:
● MXS: 1
● Range label: 1
● Spacer: 1
● Receiving resistor (for current input): 1
● User’s Manual (this manual: IM 77J04X11-01E): 1
* When the optional specification “/R250” is specified, the 250 Ω
receiving resistor is attached. When the optional specification
“/R250” is not specified, the 100 Ω receiving resistor is attached.
GENERAL
This plug-in type universal computing unit receives DC current or DC
voltage signals, applies various computing functions to them, and then
converts them into isolated DC current or DC voltage signals.
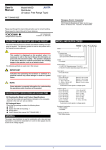
MODEL AND SUFFIX CODES
MXS-
-
Model
Function
A: Free program
G: Limiter
B: Moving average H: Velocity computation
C: Dead time
J: Linearizer
D: 1st-order lag
K: Ratio setter
E: 1st-order lead
F: Uniform-speed response (velocity limiter)
Input signal
A: 0 to 50 mA DC
B: 0 to 10 mA DC
1: −10 to +10 V DC
2: −2 to +2 V DC
Span is 1 mA or more
Span is 0.1 mA or more
Span is 0.1 V or more
Span is 10 mV or more
Output-1 signal
A: 0 to 20 mA DC
Span is 2 mA or more
B: 0 to 5 mA DC
Span is 1 mA or more
1: 0 to 10 V DC
Span is 0.1 V or more
2: 0 to 100 mV DC
Span is 10 mV or more
3: −10 to +10 V DC Span is 0.2 V or more
4: −100 to +100 mV DC Span is 20 mV or more
Output-2 signal
A: 4 to 20 mA DC
6: 1 to 5 V DC
Power supply
1: 15-40 V DC (Operating range: 12 to 48 V DC)
2: 100-240 V AC (Operating range: 85 to 264 V AC)
Optional specification
/R250: With 250 Ω receiving resistor
*B/
1. MOUNTING METHOD
2. INSTALLATION LOCATIONS
● Avoid the following environments for installation locations:
Areas with vibration, corrosive gases, dust, water, oil, solvents, direct sunlight, radiation, a strong electric field, and/or a strong
magnetic field
Installation altitude: 2000 m or less above sea level.
● If there is any risk of a surge being induced into the power line
and/or signal lines due to lightning or other factors, a dedicated
lightning arrester should be used as protection for both this computing unit and a field-installed device.
● Operating temperature/humidity range: 0 to 50C/5 to 90%RH (no
condensation)
NOTE
Plug/disconnect the main unit into/from the socket
vertically to the socket face. Otherwise the terminals may
bend and it may cause bad contact.
1.1
Wall Mounting
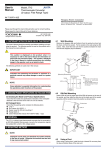
Unfasten the upper and lower stoppers of the computing unit to disconnect the main unit from the socket. Next, anchor the socket onto the
wall with two M4 screws. Then, plug the main unit into the socket and
secure the main unit with the upper and lower stoppers.
3. EXTERNAL WIRING
Stopper
WARNING
To avoid the risk of an electric shock, turn off the power
supply and use a tester or similar device to ensure that no
power is supplied to a cable to be connected, before carring
out wiring work.
Main unit
Socket
Wires are connected to the terminals of the computing unit’s socket.
M3.5 screw terminals are provided for the connection of external signals. Attach a crimp-on lug to each wire for connection to the terminals.
● Recommended cables: A nominal cross-sectional area of 0.5 mm2
or thicker for signal cables, and that of 1.25 mm2 or thicker for
power cables.
Mounting
screws
<Mounting Dimensions>
Unit: mm
Pitch: 56 or more
Socket
5 or more
(85)
2-4.5 or 2-M4
Note:
• When mounting the
computing units close
together, leave a space of at
least 5 mm between them.
• Use the supplied spacer to
keep a space of 5 mm for
DIN rail mounting.
Receiving resistor
(for current input)
Power
supply
L+
N−
400.2
(51)
Input
+
7
8
GND
5
R
8
7
6
5
9
6
−
R: Receiving resistor
for current input
4
1.2
9
DIN Rail Mounting
Output-2
Locate the computing unit so that the DIN rail fits into the upper part of
the DIN-rail groove at the rear of the socket, and fasten the socket using the slide lock at the lower part of the socket.
+
11
−
10 11
1
2
Output-1
1
+
2
−
Fit into here
IMPORTANT
DIN rail
● The power line and input/output signal lines should be
installed away from noise-generating sources. Other
wise accuracy cannot be guaranteed.
● The grounding resistance must be 100 Ω (JIS Class D
grounding). The length and thickness of the grounding
cable should be as short and thick as possible. Directly
connect the lead from the ground terminal (terminal no.
9) of the product to the ground. Do not carry out daisychained inter-ground terminal wiring.
● Use of the product ignoring the specifications may
cause overheating or damage. Before turning on the
power, ensure the following:
(a) Power supply voltage and input signal value applied
to the product should meet the required
specifications.
(b) The external wiring to the terminals and wiring to
ground are as specifications.
● Do not operate the product in the presence of
flammable or explosive gases or vapors. To do so is
highly dangerous.
● The product is sensitive to static electricity; exercise
care in operating it. Before you operate the product,
touch a nearby metal part to discharge static electricity.
DIN rail
Push
(Rear of the socket)
Spacer
Slide lock
1.3
10
3
Using Ducts
Wiring ducts should be installed at least 30 mm away from the top or
bottom of the main unit.
2
IM 77J04X11-01E
2nd Edition
Nov 30,2005-00
Power Supply and Isolation
4.3
Power supply rated voltage:
15-40 V DC or 100-240 V AC
50/60 Hz
Power supply input voltage:
15-40 V DC (±20%) or 100-240 V AC (−15, +10%) 50/60 Hz
Power consumption:
24 V DC 2.3 W
100 V AC 4.6 VA, 200 V AC 6.4 VA
Insulation resistance:
100 MΩ or more at 500 V DC between input, output-1, output-2,
power supply, and grounding terminals mutually.
Withstand voltage:
2000 V AC for 1 minute between input, (output-1, output-2), power
supply and grounding terminals mutually.
1000 V AC for 1 minute between output-1 and output-2 terminals.
Position of selection switch
0
1
2
3
4
5
6
7
4. DESCRIPTION OF FRONT PANEL
Rotation direction of adjustment switch
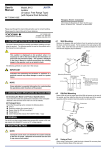
The figure below shows the computing unit of which the front panel
cover is open.
Connector for
communication
Selection Switch and Adjustment Switch
The following adjustments can be performed using the switches on the
front panel (selection switch and adjustment switch) without the dedicated setting tool (refer to “4.2 Connector for Communication”).
The adjusted value is saved about 1 second after operating the adjustment switch. Also when the rotation direction of the adjustment switch
is changed, the adjusted value becomes effective about 1 second after
the change.
Item to be adjusted
No function
Output-1 zero adjustment
Output-1 span adjustment
Output-2 zero adjustment
Output-2 span adjustment
No function
No function
No function
Adjustment operation
Clockwise Increase of output adjusted value
Counterclockwise Decrease of output adjusted value
Operation indicating lamp:
Turns on at power on.
Selection switch
[Adjusted volume by the adjustment switch]
One click changes about 0.005% of output range.
Adjustment switch
4.1
4.3.1 Adjusting Output Using the Switches on the Front Panel
(1) Output-1 zero adjustment
Turn the selection switch to “1.” Then turn the adjustment switch
clockwise to increase the output, or turn it counterclockwise to decrease the output.
(2) Output-1 span adjustment
Turn the selection switch to “2.” Then turn the adjustment switch
clockwise to increase the output, or turn it counterclockwise to decrease the output.
Output-2 can be adjusted by the same operation as the above.
(3) Output-2 zero adjustment
Turn the selection switch to “3.” Use the adjustment switch for adjustment.
(4) Output-2 span adjustment
Turn the selection switch to “4.” Use the adjustment switch for adjustment.
Operation Indicating Lamp
The operation indicating lamp shows the operation status, abnormalities in a setting, and adjustment operation status by the adjustment
switch on the front panel.
(1) When the lamp is lit:
Power is turned on and the computing unit is in the normal status
provided that the selection switch is set to the position “0.”
(2) When the lamp is blinking rapidly:
The lamp repeats the rapid blinking until the internal processing is
completed during output adjustment by the adjustment switch.
(3) When the lamp is blinking slowly:
The lamp repeats the slow blinking until the computing unit regains its normal status when the following abnormalities occur.
• Abnormalities in a parameter setting
• The selection switch is set to the positions other than “0.”
4.2
NOTE
•
•
Connector for Communication
Use the connector for communication when setting the parameters using a PC (VJ77 Parameters Setting Tool) or the Handy Terminal.
Be sure to set the selection switch back to the position
“0” after each adjustment. Otherwise it may cause an
incorrect operation or malfunction because the
positions other than “0” are adjustment modes.
When the selection switch is set to the positions other
than “0”, the setting tool can not be used for the setting.
< How to connect with the setting tool>
JUXTA communication cable
with 5-pin connector (F9182EE)
[Provided with VJ77 and JHT200]
JHT200
Handy Terminal
Modular jack conversion
adapter (E9786WH)
[Provided with VJ77]
Dedicated adapter (E9789HA)
[Provided with VJ77]
Dedicated cable (E9786WK)
[Provided with VJ77]
PC which is installed
with the VJ77
*: Use the VJ77 of version R1.04 or later.
3
IM 77J04X11-01E
2nd Edition
Nov 30,2005-00
6.3
5. SETTING PARAMETERS
Set the parameters using a PC (VJ77 Parameter Setting Tool) or the
Handy Terminal. Refer to “7. List of Parameters” in this manual and the
User’s Manual for VJ77 PC-based Parameters Setting Tool (IM
77J01J77-01E) or the User’s Manual for JHT200 Handy Terminal (IM
JF81-02E). Parameters are indicated inside the [ ].
■ Setting Input Range
Set the 0% value of input range in [D27: INPUT1 L_RNG] and the 100%
value of input range in [D28: INPUT1 H_RNG].
NOTE
Changing the input range resets the input adjusted value.
■ Setting Output-1 Range
Set the 0% value of output range in [D38: OUT1 L_RNG] and the 100%
value of output range in [D39: OUT1 H_RNG].
NOTE
Set the first-order lag time constant (T) at % value in H01: CONST.
The value of 0 to 100% corresponds to that of 0 to 100 seconds.
● Setting range of first-order lag time constant:
1.0 to 799.0 seconds; the value of 1.0 to 799.0% corresponds to
that of 1.0 to 799.0 seconds; minimum unit is 0.1 second.
However, when not using the first-order lag function, set 0 second.
● Setting accuracy of first-order lag time constant :
(±5.0% of set value) ±1 second
Changing the output-1 range resets the output adjusted
value.
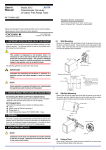
6. COMPUTING FUNCTIONS
6.1
MXS-A Free Program
This computing unit is used to meet individual applications by programming the available commands using a PC (VJ77 Parameters
Setting Tool) or the JHT200 Handy Terminal. Set the computing program in G01 to G59.
6.2
MXS-C Dead Time Computation
This computing unit stores the input values (X) sampled at intervals of
one-fortieth of the dead time (L) into 40 buffers in order and outputs
data (output-1 = Y1, output-2 = Y2) after the dead time has elapsed.
Minimum sampling time is the set computation cycle. Therefore,
when the dead time is set shorter, the number of samplings is less
than 40. The output between samplings is smoothed out by interpolation.
However, for the dead times of 3, 2 and 1 second, the number of samplings is 30, 20, and 10, respectively (when the computation cycle is
100ms). When using a first-order lag filter for input (X), set the first-order lag time constant (T).
Set the dead time (L) at % value in H02: CONST. The value of 0 to
100.0% corresponds to that of 0 to 1000 seconds. For example, enter
“6” in H02 to set 60 seconds.
● Setting range of dead time:
0 to 320000 seconds (about 3.7 days) with 4 significant digits;
minimum unit is 1 second (however, 0.1 second for a setting of
4 seconds or shorter). 0.0 to 32000% can be set in H02.
( e.g. 12345% unacceptable, 12340% acceptable)
● Setting accuracy of dead time: (±5.0% of set value) ±1 second.
e-L[s]
Y1=Y2=
X
1+T[s]
e.g. 0% → 100% step input
MXS-B Moving Average Computation
This computing unit stores the input values (X) sampled at intervals of
one-fortieth of the moving-average time (L) into 40 buffers in order,
and outputs the moving average of 40 input values (output-1 = Y1,
output-2 = Y2). The output between samplings is smoothed out by interpolation. Minimum sampling time is the set computation cycle.
Therefore, when the moving-average time is set shorter, the number
of samplings is less than 40. When using a first-order lag filter for input (X), set the first-order lag time constant (T).
Set the moving-average time (L) at % value in H02: CONST. The
value of 0 to 100.0% corresponds to that of 0 to 1000 seconds. For
example, enter “6” in H02 to set 60 seconds.
● Setting range of moving-average time:
0 to 320000 seconds (about 3.7 days) with 4 significant digits;
minimum unit is 1 second (however, 0.1 second for a setting of 4
seconds or shorter).
0.0 to 32000% can be set in H02.
( e.g. 12345% unacceptable, 12340% acceptable)
● Setting accuracy of moving-average time : (±5.0% of set value)
±1 second
Input
Output
6.4
X40
X39 X38 X37
e.g. 0% → 100% step input
100%
Input 0%
63.2%
Output 0%
100%
T
6.5
MXS-E First-order Lead Computation
This computing unit provides a first-order lead computation on input
(X) with a time constant (T) and outputs the result (output-1 = Y1, output-2 = Y2). Set the time constant (T) at % value in H01: CONST. The
value of 0 to 100% corresponds to that of 0 to 100 seconds.
● Setting range of first-order lead time constant:
1.0 to 799.0 seconds; minimum unit is 0.1 second.
● Setting accuracy of first-order lead time constant :
(±5.0% of set value) ±1 second
X3
X2
X
1+T[s]
X1+X2+ • • • • • X40
40 (Note)
X36
1
Y1=Y2=
X5 X
4
X35
MXS-D First-order Lag Computation
This computing unit provides a first-order lag computation on input (X)
with a time constant (T) and outputs the result (output-1 = Y1, output2 = Y2). Set the time constant (T) at % value in H01: CONST. The
value of 0 to 100% corresponds to that of 0 to 100 seconds.
● Setting range of first-order lag time constant:
1.0 to 799.0 seconds; minimum unit is 0.1 second.
● Setting accuracy of first-order lag time constant :
(±5.0% of set value) ±1 second
Set the first-order lag time constant (T) at % value in H01: CONST.
The value of 0 to 100% corresponds to that of 0 to 100 seconds.
● Setting range of first-order lag time constant:
1.0 to 799.0 seconds; minimum unit is 0.1 second.
However, when not using the first-order lag function, set 0 second.
● Setting accuracy of first-order lag time constant :
(±5.0% of set value) ±1 second
Moving average=
L
X1
Computation time
Y1=Y2= (1+
Time
T[s]
)X
1+T[s]
e.g. 0% → 50% step input
Note: For the moving-average times at 3, 2 and 1
second, the number of samplings is 30, 20 and
10, respectively (when the computation cycle
is 100 ms).
50%
Input 0%
68.4%
Output 0%
100%
50%
T
4
IM 77J04X11-01E
2nd Edition
Nov 30,2005-00
6.6
MXS-F Uniform-speed Response (Velocity
Limiter)
6.9
This computing unit limit the input (X) velocity at the ascending velocity limit for a positive change and the descending velocity limit for a
negative change, and outputs the limited value (output-1 = Y1, output2 = Y2). When the input velocity (slope) is no more than the limit
value, the unit outputs the input as is.
Set the ascending velocity limit at % value in H01:CONST, and the
descending velocity limit at % value in H02:CONST. The value of 0 to
100.0% corresponds to that of 0 to 100.0%/minute.
● Setting range of velocity limit:
0.1 to 699.9%/minute; minimum unit is 0.1%/minute.
Setting the limit at 700.0%/minute or above does not limit the input, so the unit simply outputs the input as is (i.e., works as an
open limit function).
● Setting accuracy of velocity limit:
(±5.0% of set value) ±0.1%/minute
This computing unit gives an optional relationship between the input
(X) and output (output-1 = Y1, ouput-2 = Y2) signals using an optionally-set line-segment function. The line-segment function has 21
breakpoints, which each gives an input-output relationship as a percentage (%).
Set the number of line segments by 1 to 20.
Set the input (X) at % value in H01:CONST to H21:CONST, and the
output (Y) at % value in H22:CONST to H42:CONST.
● Setting condition of breakpoints:
For input: −6.0X0 (H01) to X20 (H21)106.0%; with 4 significant
digits, minimum unit is 0.01%
X0<X1<X2< ····· <X20
For output: −6.0Y0 (H22) to Y20 (H42)106.0%; with 4 significant
digits, minimum unit is 0.01%
When input X0 (H01), Y0 (H22) is output.
When input final set value, the final set value of output is output.
Any number of line segments (1 to 20) can be set in H43.
The number of line segments 1 to 20 corresponds 100 to 2000%.
● Computation accuracy:
±0.1% (However, when line-segment gain is 1 or less.)
e.g. 0% → 100% → 0% step input
100%
Input 0%
100%
6.10 MXS-K Ratio Setter
Output 0%
Ascending velocity limit
(%/minute)
6.7
This computing unit sets the ratio by the following expression.
Y1 = Y2 = K1 · (X+A1)+A2
where Y1:
Output-1 signal (%)
Y2:
Output-2 signal (%)
X:
Input signal (%)
K1:
Ratio (no unit)
A1, A2: Bias (%)
Set the ratio (K1) in H01:CONST, and the bias (A1) at % value in
H02:CONST, and the bias (A2) at % value in H03:CONST.
● Setting range of ratio:
−320 to 320 with 4 significant digits; minimum unit is 0.00001.
● Setting range of bias:
−32000 to 32000% with 4 significant digits; minimum unit is
0.001%.
● Computation accuracy:
±0.1% (However, when the ratio is 1 or less.)
Descending velocity limit
(%/minute)
MXS-G Limiter
This computing unit serves as an ordinary computing unit as long as
the input (X) is within the upper and lower limits. When the input exceeds the limit, the unit outputs the signal that corresponds to the limit
value (output-1 = Y1, output-2 = Y2).
Set the upper limit at % value in H01:CONST, and the lower limit at %
value in H02:CONST.
● Setting range of upper and lower limits:
−6.0% to 106.0%; minimum unit is 0.01%.
However, if the setting is made so that the upper limit < lower limit,
the unit outputs the upper limit.
6.8
MXS-J Linearizer (Optionally-set Line-segment
Function)
MXS-H Velocity Computation
This computing unit calculates the input velocity by subtracting the input of the last velocity computation (XL) from the present input (X). The
unit then adds a 50% bias to one-half of the obtained velocity and outputs the result (output-1 = Y1, output-2 = Y2). The output results is
50% when the input is not changed, 50% or more when the input increases (100% for X−XL = 100%), and 50% or less when the input decreases (0% for X−XL = −100%). When using a first-order lag filter for
input (X), set the first-order lag time constant (T).
NOTE
Decide ratio or bias so as not to exceed ±3.41038% during
computation. Ratio, bias and computation results are 4
significant digits.
X–X L
+50%
2
Set the velocity computation time (L) at % value in H02: CONST. The
value of 0.0 to 100.0% corresponds to that of 0 to 1000 seconds. For
example, enter “6” in H02 to set 60 seconds.
● Setting range of velocity computation time:
0 to 320000 seconds (about 3.7 days) with 4 significant digits;
minimum unit is 1 second (however, 0.1 second for a setting of
4 seconds or shorter). 0.0 to 32000% can be set in H02.
( e.g. 12345% unacceptable, 12340% acceptable)
● Setting accuracy of velocity computation time: (±5.0%of set
value) ±1 second
Y1=Y2=
Set the first-order lag time constant (T) at % value in H01: CONST.
The value of 0 to 100% corresponds to that of 0 to 100 seconds.
● Setting range of first-order lag time constant:
1.0 to 799.0 seconds; minimum unit is 0.1 second.
However, when not using the first-order lag function, set 0 second.
● Setting accuracy of first-order lag time constant :
(±5.0% of set value) ±1 second
5
IM 77J04X11-01E
2nd Edition
Nov 30,2005-00
7.2 MXS (for the function suffix code “A”)
7. LIST OF PARAMETERS
Parameter Display
MODEL
TAG NO
7.1 MXS (except for the function suffix code “A”)
A
A01
A05
A06
A54
A56
A58
A60
B
B01
B05
B06
B60
D
D01
D02
D03
D04
D20
D22
D27
D28
D38
D39
D40
D41
D44
D60
H
H01
H02
•
•
•
H58
H59
H60
P
P08
P09
P26
P27
P28
P29
P60
Q
Q03
Q04
Q60
Parameter Display
MODEL
TAG NO
SELF CHK
DISPLAY1
INPUT1
OUTPUT1
OUTPUT2
STATUS
REV NO
MENU REV
SELF CHK
DISPLAY2
INPUT1
OUTPUT1
OUTPUT2
SELF CHK
SET (I/O)
TAG NO.1
TAG NO.2
COMMENT1
COMMENT2
INP TYPE
IN RESIST
INPUT1 L_RNG
INPUT1 H_RNG
OUT1 L_RNG
OUT1 H_RNG
OUT2 L_RNG
OUT2 H_RNG
PRGM SELECT
SELF CHK
CONST
Item
Model
Tag No.
Self-check result
Display 1
Input-1
Output-1
Output-2
Status*1
A05
A06
A11
A12
A13
A14
REV No.
MENU REV
Self-check result
Display 2
Input-1
Output-1
Output-2
Self-check result
Setting (I/O)
Tag No.-1
Tag No.-2
Comment-1
Comment-2
Input type*2
A16
A17
A54
A56
A58
A60
B
B01
B05
B06
*2
Input resistor
Input-1 low range
Input-1 high range
Output-1 low range
Output-1 high range
Output-2 low range*2
Output-2 high range*2
Program selection
Self-check result
Fixed Constant of Computing Unit
CONST
CONST
Fixed constant
Fixed constant
•
•
•
•
•
•
CONST
CONST
SELF CHK
ADJUST
IN1 ZERO ADJ
IN1 SPAN ADJ
OUT1ZERO ADJ
OUT1SPAN ADJ
OUT2ZERO ADJ
OUT2SPAN ADJ
SELF CHK
TEST
OUT1 TEST
OUT2 TEST
SELF CHK
A
A01
Fixed constant
Fixed constant
Self-check result
Adjustment
Input-1 zero adjustment
Input-1 span adjustment
Output-1 zero adjustment
Output-1 span adjustment
Output-2 zero adjustment
Output-2 span adjustment
Self-check result
Test
Forced output-1
Output-1
Output-2
Temporary memory-1
T2
T3
T4
Temporary memory-2
Temporary memory-3
Temporary memory-4
DO
LOAD
STATUS
Digital output
Load factor
Status*1
REV NO
MENU REV
SELF CHK
REV No.
MENU REV
DISPLAY2
INPUT1
OUTPUT1
OUTPUT2
T4
DO
LOAD
SELF CHK
SET (I/O)
TAG NO.1
TAG NO.2
COMMENT1
COMMENT2
INP TYPE
IN RESIST
INPUT1 L_RNG
INPUT1 H_RNG
OUT1 L_RNG
OUT1 H_RNG
OUT2 L_RNG
OUT2 H_RNG
PRGM SELECT
CYCLE TIME
SELF CHK
PROGRAM
Self-check result
Display 2
Input-1
Output-1
Output-2
Temporary memory-1
Temporary memory-2
Temporary memory-3
Temporary memory-4
Digital output
Load factor
Self-check result
Setting (I/O)
Tag No.-1
Tag No.-2
Comment-1
Comment-2
Input type*2
*2
Input resistor
Input-1 low range
Input-1 high range
Output-1 low range
Output-1 high range
Output-2 low range*2
*2
Output-2 high range
Program selection
Computation cycle
Self-check result
Program of Computing Unit
G02
PROGRAM
PROGRAM
Program
Program
•
•
•
•
•
•
•
•
•
G58
PROGRAM
PROGRAM
SELF CHK
CONST
CONST
CONST
•
•
•
•
•
•
H58
H59
H60
CONST
P
P08
P09
P26
P27
P28
P29
P60
Q
Q03
Q04
Q60
6
OUTPUT1
OUTPUT2
T1
B14
B16
B17
B60
D
D01
D02
D03
D04
D20
D22
D27
D28
D38
D39
D40
D41
D44
D47
H01
H02
*1: The displayed status is to let the service staff know the past records
of the product.
*2: The parameters are the items to be set at the factory.
Self-check result
Display 1
Input-1
T1
T2
T3
G59
G60
H
Forced output-2
Self-check result
SELF CHK
DISPLAY1
INPUT1
B11
B12
B13
D60
G
G01
Item
Model
Tag No.
CONST
SELF CHK
ADJUST
IN1 ZERO ADJ
IN1 SPAN ADJ
OUT1ZERO ADJ
OUT1SPAN ADJ
OUT2ZERO ADJ
OUT2SPAN ADJ
Program
Program
Self-check result
Fixed Constant of Computing Unit
Fixed constant
Fixed constant
•
•
•
Fixed constant
Fixed constant
Self-check result
Adjustment
Input-1 zero adjustment
Input-1 span adjustment
Output-1 zero adjustment
Output-1 span adjustment
Output-2 zero adjustment
SELF CHK
TEST
Output-2 span adjustment
Self-check result
Test
OUT1 TEST
OUT2 TEST
SELF CHK
Forced output-1
Forced output-2
Self-check result
IM 77J04X11-01E
2nd Edition
Nov 30,2005-00
8. MAINTENANCE
The product starts running immediately when the power is turned on;
however, it needs 10 to 15 minutes of warm-up before it meets the
specified performance.
8.1
●
●
●
●
8.2
Calibration Apparatus
A DC voltage/current standard (Yokogawa 7651 or the equivalent)
A digital multimeter (Yokogawa 7561 or the equivalent)
A precision resistor of 250 ±0.01%, 1 W
Setting tool for adjustment (Refer to “4.2 Connector for Communication” in this manual.)
Calibration Procedure
(1) Connect the instruments as shown below. First adjust the output-1
signal and then the output-2 signal.
(2) Use the DC voltage/current standard and apply input signals
equivalent to 0, 25, 50, 75, and 100% of input span to the computing unit.
(3) Check to see the output values obtained from the computation of
each input are within the specified accuracy rating. “R” is used for
current output.
● Use the setting tool (VJ77 Parameters Setting Tool or JHT200
Handy Terminal) or the switches on the front panel (selection
switch and adjustment switch) to adjust the input/output signals.
Input Adjustment Procedure
(1) Input the value equivalent to 0% value of input range.
(2) Call the display item (A: DISPLAY1) to check the input value in
A01: INPUT1.
(3) If the adjustment is necessary, call the adjustment item (P: ADJUST).
(4) Select P08: IN1 ZERO ADJ to enter the adjustment mode. Select
EXECUTE (adjustment) for adjustment. (If RESET is selected,
the adjusted value is reset to the factory-set default.)
(5) Input the value equivalent to 100% value of input range.
(6) Call the display item (A: DISPLAY1) to check the input value in
A01: INPUT1.
(7) If the adjustment is necessary, call the adjustment item (P: ADJUST).
(8) Select P09: IN1 SPAN ADJ to enter the adjustment mode. Select
EXECUTE (adjustment) for adjustment. (If RESET is selected,
the adjusted value is reset to the factory-set default.)
Output Adjustment Procedure
(1) When adjusting 0% value of output-1, call the adjustment item (P:
ADJUST) to select P26: OUT1ZERO ADJ.
(2) If there is a positive deviation, correct it by setting a negative
value to offset the deviation. If there is a negative deviation, correct it by setting a positive value.
*: The 100% value of output-1 and 0% / 100% values of output-2
can be adjusted by the same operation as the above.
For adjustment using a setting tool, refer to the User’s Manual for
each setting tool and “7. List of Parameters” in this manual.
For adjustment using the switches on the front panel, refer to “4.3
Selection Switch and Adjustment Switch.”
User’s Manual for VJ77 [Document No.: IM 77J01J77-01E]; however, use the VJ77 of version R1.04 or later.
User’s Manual for JHT200 [Document No.: IM JF81-02E]
Receiving resistor
( for current input)
Input
Power supply
L+
7
N–
8
8
7
6
GND
5
4
9
9
10 11
DC voltge/ +
current
standard −
R: Receiving resistor
for current input
3
1
2
Output-2
+
10
R
11
−
Output-1
+
1
DMM
R: 250 precision resistor
for current output
5
R
6
R
2
−
DMM
R: 250 precision resistor
for current output
7
IM 77J04X11-01E
2nd Edition
Nov 30,2005-00
8
IM 77J04X11-01E
2nd Edition
Nov 30,2005-00