1
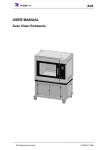
TDR-P ECO Models USER MANUAL TDR-P ECO SERIES EN (Original Instruction) 9123872 / 1205 TDR-P ECO Models KEEP THIS USER MANUAL FOR FUTURE USE © 2012 Fri-Jado BV, Etten-Leur, The Netherlands. We advise you to contact your supplier for the guarantee period and conditions. Further we refer to our General Terms and Conditions for Sales and Delivery that are available upon request. The manufacturer does not accept any liability for damage or injury caused by failing to adhere to these regulations or by not observing the usual caution or care in actions, operation, maintenance or repair activities, even if not explicitly described in this manual. As a result of constant commitment to improvement, it may happen that your unit deviates in detail from what is described in this manual. For this reason, the given instructions are only a guideline for the installation, use, maintenance and repair of the unit referred to in this manual. This manual has been composed with the utmost care. The manufacturer shall, however, not be held responsible for any mistakes in this manual nor for any consequences thereof. The user is allowed to copy this manual for own use. Further all rights are reserved and nothing in this manual may be reproduced and/or made public in any way. Modifications: In case of unauthorised modifications in or on the unit, every liability on the part of the manufacturer becomes null and void. EN / 2-48 9123872 / 1205 TDR-P ECO Models CONTENTS 1. INTRODUCTION ............................................................................................................ 5 1.1. General ........................................................................................................................... 5 1.2. Identification of the unit ................................................................................................ 5 1.3. Pictograms and symbols.............................................................................................. 5 1.4. Safety instructions ........................................................................................................ 6 1.4.1. General ....................................................................................................................... 6 1.4.2. Moving ........................................................................................................................ 7 1.4.3. Outdoor use restrictions ........................................................................................... 7 2. 3. 4. 1.5. Hygiene .......................................................................................................................... 8 1.6. Service and technical support ..................................................................................... 8 1.7. Storage ........................................................................................................................... 8 1.8. Disposal .......................................................................................................................... 8 DESCRIPTION OF THE UNIT ...................................................................................... 9 2.1. Technical description ................................................................................................... 9 2.2. Intended use .................................................................................................................. 9 2.3. Accessories ................................................................................................................... 9 INSTALLATION AND FIRST USE ............................................................................. 10 3.1. Unpacking the unit ...................................................................................................... 10 3.2. Dismantling the pallet ................................................................................................. 11 3.3. Installation and positioning ........................................................................................ 12 3.4. First use........................................................................................................................ 12 OPERATION AND USE .............................................................................................. 15 4.1. Control Panel ............................................................................................................... 15 4.2. Switching-on the unit .................................................................................................. 16 4.3. Loading the rotisserie ................................................................................................. 16 4.3.1. Loading the rotisserie using meat forks............................................................... 16 4.3.2. Loading the rotisserie using meat baskets (accessory) .................................... 18 4.3.3. Loading the rotisserie using chicken racks (accessory) ................................... 19 4.3.4. Loading the rotisserie using two different accessories. .................................... 19 4.4. Grilling time .................................................................................................................. 20 4.5. Taking out the products ............................................................................................. 20 4.5.1. Taking out the meat forks ...................................................................................... 20 4.5.2. Taking out the chicken racks (accessory). .......................................................... 20 4.5.3. Taking out the meat basket (accessory) ............................................................. 21 4.6. 5. Switching-off the unit .................................................................................................. 21 OPERATION ................................................................................................................ 22 EN / 3-48 9123872 / 1205 TDR-P ECO Models 5.1. Operation of the rotisserie ......................................................................................... 22 5.2. Operation options ....................................................................................................... 26 5.2.1. To end a running program. .................................................................................... 26 5.2.2. Check the actual temperature ............................................................................... 26 5.2.3. Check the remaining time in a program .............................................................. 27 5.2.4. Show all actual program information ................................................................... 27 5.2.5. Eco function ............................................................................................................. 28 5.2.6. Cook correction ....................................................................................................... 28 5.2.7. Display information ................................................................................................. 29 6. 7. 8. 9. MANAGER MENU ....................................................................................................... 30 6.1. Manager menu items ................................................................................................. 30 6.2. Programming the rotisserie ....................................................................................... 30 6.3. Options manager menu: USB ................................................................................... 36 6.4. Programming parameters .......................................................................................... 37 CLEANING AND MAINTENANCE ............................................................................. 39 7.1. Maintenance schedule ............................................................................................... 39 7.2. Daily Cleaning ............................................................................................................. 39 7.3. Weekly Cleaning ......................................................................................................... 40 7.4. Monthly Cleaning ........................................................................................................ 41 MALFUNCTIONS AND SERVICE .............................................................................. 42 8.1. Replace the mains cord ............................................................................................. 42 8.2. Replace a lamp ........................................................................................................... 43 TECHNICAL SPECIFICATIONS ................................................................................ 44 10. ACCESSORIES AND OPTIONS ................................................................................ 45 EN / 4-48 9123872 / 1205 TDR-P ECO Models 1. 1.1. INTRODUCTION General This manual is intended for the user of the TDR-P ECO. The features and controls are being described, along with directions for the safest and most efficient use, in order to guarantee a long life of the unit. All pictograms, symbols and drawings in this manual apply to all available TDR models. 1.2. Identification of the unit The identification plate can be found on the outside of the machine, and contains the following data: Name of the supplier or the manufacturer Model Serial number Year of construction Voltage Frequency Power consumption 1.3. Pictograms and symbols In this manual, the following pictograms and symbols are used: WARNING Possible physical injury or serious damage to the unit, if the instructions are not carefully followed. WARNING Hazardous electrical voltage. WARNING Danger of getting injured by hot surfaces. Suggestions and recommendations to simplify indicated actions. Recycling symbol. Direction of view symbol. EN / 5-48 9123872 / 1205 TDR-P ECO Models 1.4. Safety instructions WARNING The outside of the unit can be very hot. WARNING The maximum load on top of the unit may never exceed 50 kg. WARNING Always use the brakes on both front wheels: 1.4.1. General The user of the unit will be fully responsible for abiding the locally prevailing safety- rules and regulations. The unit may be operated by qualified and authorised persons only. Anyone working on or with this unit must be familiar with the contents of this manual and carefully follow all guidelines and instructions. Never change the order of the steps to be performed. The management must instruct the personnel on the basis of this manual and follow all instructions and regulations. The pictograms, labels, instructions and warning signs attached to the unit, are part of the safety measures. They may never be covered or removed, and have to be clearly visible during the entire lifetime of the unit. Immediately repair or replace damaged or illegible pictograms, warnings and instructions. To avoid short-circuiting, never clean the unit using a water hose. For cleaning instructions, see section 7. During the grill process, the unit can get very hot. When the door is opened the rotor stops and the heater is de-energised. The unit must be cleaned regularly to ensure proper functioning and prevent fire hazard (over heating). Especially the back of the fan plate. The fat collecting drawer must be empted regularly, to prevent overflow. This appliance is not intended for the use by persons (including children) with reduced physical, sensory or mental capabilities, or lack of experience and knowledge, unless they have been given supervision or instruction concerning use of the appliance by a person responsible for their safety. Children should be supervised to ensure that they do not play with the appliance. EN / 6-48 9123872 / 1205 TDR-P ECO Models 1.4.2. Moving When moving the unit: Before moving the unit, first switch off the mains voltage by pulling the plug from the wall socket and empty the fat collecting drawer. After that, cool-down the unit for at least ten minutes. The units equipped with wheels are not suited to pass ledges or obstacles higher than 10 mm. When moving the unit, always push at the centre of the unit. Never on top. Never at the bottom. Make sure that the wheels can move freely, so they never touch the power lead (see Figure 1). Figure 1 1.4.3. Outdoor use restrictions To avoid short-circuiting, the units may not be used outdoors unprotected. Placing under a screen is allowed. Figure 2 EN / 7-48 9123872 / 1205 TDR-P ECO Models 1.5. Hygiene The quality of a fresh product always depends on hygiene. Especially grilling products. With the risk of salmonella contamination – especially for chicken products – you must make sure that grilled products can never be mixed with uncooked products. Also contact between grilled products and hands or tools that have been in contact with raw chicken meat, must be avoided at all times. Hands or tools that have been in contact with raw chicken meat, must be cleaned thoroughly. 1.6. Service and technical support The electrical schematics of your unit is included. In case of malfunctions you can contact your dealer/service agent. Make sure you have the following data available: Model. Serial number. This data can be found on the identification plate. 1.7. Storage If the unit will not be used temporarily, and will be stored, follow these instructions: Clean the unit thoroughly. Wrap the unit from getting dusty. Store the unit in a dry, non condensing environment. 1.8. Disposal Dispose of the machine, any components or lubricants removed from it safely in accordance with all local and national safety and environment requirements. EN / 8-48 9123872 / 1205 TDR-P ECO Models 2. DESCRIPTION OF THE UNIT 2.1. Technical description The unit uses a combination of direct infra red radiation and convection heat. The rotor is being wheeled by a maintenance-free motor and gearbox. The fan ensures an equally divided heat. The glass panes are equipped with a heat reflecting layer to keep the heat inside the grill. The plating of the unit is made of stainless steel. The product contact parts are made of stainless steel AISI 304 (eventual with PTFE coating). The mains cable is provided with a plug. The unit control keeps the temperature inside the unit fixed to level set by the operator. During the entire process, the interior of the unit will be illuminated by halogen lamps. The control has a capability to store 99 different programs. 2.2. Intended use The TDR has been designed for grilling meat products. Any other use will not be regarded as intended use. The manufacturer accepts no liability whatsoever for loss or injury caused by failing to strictly adhere to the safety guidelines and instructions in this manual or due to carelessness during installation, use, maintenance and repair of the unit referred to in this manual and any of its accessories. Use the unit in perfect technical condition only. 2.3. Accessories Your unit contains the following standard accessories: Meat forks. User manual. For optional accessories refer to section 10. EN / 9-48 9123872 / 1205 TDR-P ECO Models 3. 3.1. INSTALLATION AND FIRST USE Unpacking the unit Your unit is packed in a plastic cover with protective corners, and a carton box around it. All units are placed on a wooden pallet. Around the box there are two tightening straps. Figure 3 Figure 4 Figure 5 Remarks Figure 5: 1. Cut the two transportation seals from both sides of the rotor 2. Remove the transportation block of the fat collecting drawer 3. Remove all remaining packing materials from the unit 4. Take off the standard accessories. EN / 10-48 9123872 / 1205 TDR-P ECO Models All packing materials used for this unit are suited for recycling. After unpacking, check the state of the unit. In case of damage, store the packing material, and contact the transporter within fifteen working days after receiving the goods. 3.2. Dismantling the pallet For proper unpacking the unit, the pallet must be taken apart. Use the instructions shown in Figure 6. Figure 6 EN / 11-48 9123872 / 1205 TDR-P ECO Models 3.3. Installation and positioning Figure 7 3.4. The user must have sufficient freedom of movement to properly operate the unit (see Figure 7). The minimum free distance must be at least 250 mm. During grilling, the glass panes will get very hot. While positioning, keep the unit out of children’s reach. In case of a wheeled unit, the floor must be flat and levelled. The unit has a mains plug, and must be connected to a wall socket with the proper mains voltage. The wall socket must be mounted by a certified electrician. First use When using the unit for the first time, clean the interior thoroughly with soap suds and heat up the unit. After commissioning discolouration of the cooking/grilling area can occur. EN / 12-48 9123872 / 1205 TDR-P ECO Models The cleaning remains will find its way to the fat collection drawer, so this drawer must be cleaned and emptied after cleaning the unit. Place the bottom plates in the grilling compartment (see Figure 8). Bottom Plates Figure 8 Place the meat forks in the rotor disks (see Figure 9). Hole for meat baskets Pins for meat baskets or chicken racks TDR 7/TDR 8 Holes for meat forks Figure 9 EN / 13-48 9123872 / 1205 TDR-P ECO Models Metal odour To remove the metal odour that will appear at first use, the unit must be heated at the maximum temperature for at least half an hour. EN / 14-48 9123872 / 1205 TDR-P ECO Models 4. 4.1. OPERATION AND USE Control Panel ON/OFF UNDO LIST FORWARD OK BACK ROTOR Figure 10 Functions of the controls Button ON / OFF UNDO LIST FORWARD ROTOR OK BACK Function Switching the unit on / off Go back to previous menu Receipt / Programming modus One step ahead in setting Switching the rotor on Acknowledge a function or change One step back in setting EN / 15-48 9123872 / 1205 TDR-P ECO Models 4.2. Switching-on the unit 4.3. Loading the rotisserie First select a program (see section 5). When the door is open press the rotor button to activate the rotor. This allow easy loading or unloading the products. Whilst loading the unit, make sure that the rotor gets evenly loaded, so that the mass of the products is evenly spread over de rotor, causing an equal balance. Do not allow empty meat forks, meat baskets and chicken racks etc. in the grilling process. 4.3.1. Loading the rotisserie using meat forks The unit will be equipped with a set of meat forks (see Figure 11). Figure 11 EN / 16-48 9123872 / 1205 TDR-P ECO Models For preparing chicken or any other poultry, you can work as follows (see Figure 12). Figure 12 1. Insert one point of the meat fork through the chest at the position of the wings. Insert the other point through the drum sticks. Don’t forget to include the wings. 2. Leave some space between the products, for an even exposure and browning. 3. Put the meat forks onto the rotor disks in such a way that during grilling the chicken breasts face the operator. 4. Put the points of the meat forks through the appropriate holes in the rotor disks (see Figure 13). 5. The other end of the meat forks must be put through the corresponding holes in the opposite rotor disk. Figure 13 6. To insert the remaining meat forks in the unit, act as follows: Switch-on the unit using the on/off button’. With the door opened, use the rotor button to move the rotor to easily insert the next meat fork. Keep the rotor button pressed until the rotor reaches the desired position. To load the next meat fork, press the rotor button to rotate the rotor to the next loading position. Repeat these steps, until all products are loaded. Whole uncut chickens should always be grilled using the meat forks. This way their natural fat will baste each other, giving a perfectly slender cooking result. Refer to the You-Tube movie: “Fri-Jado instruction for binding and loading chicken”. EN / 17-48 9123872 / 1205 TDR-P ECO Models 4.3.2. Loading the rotisserie using meat baskets (accessory) Figure 14 (type for TDR-5 is shown) If you are using meat baskets (see Figure 14), act as follows: With the TDR 5 you must stick the ends of the meat baskets through the appropriate holes of the rotor disks (see Figure 13). With the TDR 7 and TDR 8 you must attach the meat baskets to the appropriate pins (see Figure 9 and Figure 15). Whilst loading the unit with meat baskets, you must see to it, that the rotor gets evenly loaded, so that the mass of the products is evenly spread over de rotor, causing an equal balance. Also see to it that no meat parts are sticking out of the baskets. Figure 15 (type for TDR 7 / TDR 8 is shown) EN / 18-48 9123872 / 1205 TDR-P ECO Models 4.3.3. Loading the rotisserie using chicken racks (accessory) When using chicken racks, (see Figure 16), you can use the principle as described in section 4.3.2. Figure 16 For preparing chicken or any other poultry in the racks, you can use Picture 1 as an example. Picture 1 4.3.4. Loading the rotisserie using two different accessories. WARNING After loading the rotor, at least make ONE full rotation, and check whether the rotor can spin without obstructions. If you want to load the unit using two different accessories at the same time, always fill the rotor with ONE accessory fewer than the maximum allowed quantity. See to it that accessories of the same type are placed consecutively. Example For both TDR 5 and TDR 5 + 5: 1 meat fork + 2 meat baskets consecutively EN / 19-48 9123872 / 1205 TDR-P ECO Models 4.4. Grilling time Grilling time depends on a number of factors: The ambient temperature and draft in the direct vicinity of the unit. Grilling temperature. The initial product temperature. The sort of meat (fat or lean) and with or without additives. The mass and shape of the product. The total amount of meat to be grilled in one grilling cycle. The end result. 4.5. Taking out the products WARNING After the grilling, the interior of the unit and the glass panes are very hot. Always use oven gloves when taking out the meat forks or other accessories. 4.5.1. Taking out the meat forks When taking out the meat forks, it is best to act as follows (see Figure 17): Figure 17 1. Hold the meat fork firmly. 2. Slightly lift the end with the grips and shift the meat fork into the direction of its points. This releases the meat fork. 3. Take the meat fork at its other end and take it out of the unit. 4. Remove the products from the meat fork. 4.5.2. Taking out the chicken racks (accessory). When taking out the chicken racks from the TDR it is best to act as follows: 1. Slightly lift both ends of the chicken rack. 2. Move the rack towards either the left or right hand side of the unit. This action unlocks one end of the rack. 3. Move the unlocked end towards you, and take out the rack from the unit. Depending on the number of prepared products, you may have to empty the racks before they can be removed. EN / 20-48 9123872 / 1205 TDR-P ECO Models 4.5.3. Taking out the meat basket (accessory) For the TDR 5 you can use the same principal as described in section 4.5.2. For both the TDR 7 and TDR 8 it is preferred to act as follows: 1. Slightly lift both ends of the meat basket. 2. Move either one side towards you, and take out the basket from the unit. Depending on the number of prepared products, you may have to empty the baskets before they can be removed. 4.6. Switching-off the unit EN / 21-48 9123872 / 1205 TDR-P ECO Models 5. OPERATION For Quick Start refer to the Quick Reference Card supplied with the unit. Buttons are lit when functional. 5.1. Operation of the rotisserie 1. Press Start. 2. Display shows Fri-Jado logo. 3. Display shows software version. Interface P Electronic TDR Version x.x.x.x 4. Display shows latest cooking program. Drumstick 5 6 7 8 9 5. Use the arrow buttons for program selection. Chicken 98 99 1 2 3 6. Display shows selected program. EN / 22-48 9123872 / 1205 TDR-P ECO Models 7. Confirm the selected program. 180°C Preheat LOAD or START 8. Display shows pre-heat (when pre-heat is defined). 9. Pre-heat ready (unit returns a sound signal). Display shows the next step of the program. Note: Screen 9 and 11 alternate each 5 seconds. 10. When loading: press the rotor button to turn the rotor. Did you empty The fat tray? 11. After loading, close the door. A reminder to empty the fat tray appears. 12. Press OK to confirm. 180°C 0:59 13. Display show programmed temperature and time (Hr : Min). EN / 23-48 9123872 / 1205 TDR-P ECO Models 14. (Optional) Press OK button for the actual temperature and time (shows about 2 seconds). 1 Chicken 230° P123 1 Chicken 230° P123 15. During the last minute the time blinks. 0:60 1 16. Display show the remaining time, the interval is 5 seconds. 0:55 1 UNLOAD Measure Core Temp. 17. Open the door. 18. A reminder to measure the core temperature appears. Note: Screen 17 and 18 alternate every 5 seconds. 2 Chicken 0:00 Boost? 19. (Optional) request for additional time after opening the door. 20. (Optional) press right arrow for one minute increase, press left arrow for one minute decrease. When activated program continues at step 13. EN / 24-48 9123872 / 1205 TDR-P ECO Models UNLOAD 21. Program ready, open door. 22. Press the rotor button to rotate the rotor. 23. Close the door (if required clean the unit). 24. Display shows the last operated program. Chicken 98 99 1 2 3 EN / 25-48 9123872 / 1205 TDR-P ECO Models 5.2. 5.2.1. Operation options To end a running program. 1. Press and hold start for 3 seconds. Stop? NO 2. Make a choice with the arrow buttons. YES Note: Select NO to abort ending the program. 3. Confirm the selection. (Within 5 seconds). 4. Display shows the last operated program. Chicken 98 99 5.2.2. 1 2 3 Check the actual temperature 1 Chicken 230° P123 0:05 1 1. For example: Check the current temperature in program 1 Chicken, step 1. 2. Press the OK button. 1 Chicken 220° P123 0:05 1 3. The display shows during 3 seconds the actual temperature. EN / 26-48 9123872 / 1205 TDR-P ECO Models 5.2.3. Check the remaining time in a program 1 Chicken 230° P123 1 1 Chicken 230° P123 1 1 Chicken 230° P123 5.2.4. 0:05 0:01 0:05 1. Use the arrow buttons to show the remaining time pro step. 2. Time left at step 1 (first digit blinks). 3. Time left at step 2 (second digit blinks). 1 Show all actual program information 1 Chicken 180° P123 0:20 1 1. Display shows actual program. (step one is active). 2. Press List button. 3. Display shows the programmed temperature and time. 180°C 0:20 4. Press List button again for additional information. P 180 1 180 2 210 0:00 0:20 0:10 3 230 0:05 5. Display shows the programmed steps and remaining times in one overview. EN / 27-48 9123872 / 1205 TDR-P ECO Models 6. Press the OK button to go back. 1 Chicken 180° P123 5.2.5. 7. Display returns to the original operating display. Eco function 1 Chicken 180° P123 5.2.6. 0:20 1 Eco 10:20 Optional: only available when activated in the service menu. In the ECO mode the accumulated heat in the cavity will be used to cook the product. Depending on the settings, the product and program a energy saving of 5% can be achieved. Cook correction 180°C 0:20 Optional: only available when activated in the service menu. Cook correction: Depending on the load of products the cooking time will be automatically adjusted. The first cook is the reference cook and will be used to fix the correct parameters. The activation of the cook correction is NOT visible in the display. EN / 28-48 9123872 / 1205 TDR-P ECO Models 5.2.7. Display information 180°C 0:20 1. Display shows the programmed temperature and time. 2. Press the list button. 1 Chicken 180° P123 0:20 3. Display shows after 3 seconds cooking step + temperature + time. 1 Note: the current cooking step is underlined. 4. Use arrow button for next screen. 1 Chicken 210° P123 1 Chicken 230° P123 1 Chicken 220° P123 1 Chicken 220° P123 0:20 1 0:20 1 5. Cooking step 1 is finished, sound signal is returned. Display shows next cooking step + temperature + time. 6. Cooking step 2 is finished, sound signal is returned. Display shows next cooking step + temperature + time. 7. Display shows the actual temperature Note: the actual temperature blinks. 0:20 1 8. Display shows the remaining time. Note: the remaining time blinks, after 5 seconds the original display is shown again. 0:15 EN / 29-48 9123872 / 1205 TDR-P ECO Models 6. MANAGER MENU 6.1. Manager menu items Programming Parameters New Change Delete Copy 6.2. Change pin code Clock Store USB Language Large digits Pre-Heat Holding Preheat temperature Holding temperature Sound step 1 Sound step 2 Sound step 3 Reading recipes Store recipes Programming the rotisserie 1. Start the unit. 2. Logo appears. 3. Unit information appears. Interface P Electronic TDR Version x.x.x.x 4. Last used program appears. Drumstick 5 6 7 8 9 5. Press the list button. Pin 0 - - Give User PIN code 6. Enter the User PIN code. Note: the original PIN code is 1111. The operator can change the User PIN code. 7. Use the arrow button to enter the PIN EN / 30-48 9123872 / 1205 TDR-P ECO Models code. Pin 1 - - Give User PIN code 8. Press the arrow right button to change the first digit. 9. Press the OK button to confirm. Pin * 0 - Give User PIN code MANAGER MENU USB Programming 1Para. 10. The next digit is activated. Change as required using the arrow button. Confirm with the OK button. Repeat for the other digits. 11. Manager menu is activated. Use the arrow buttons to toggle between the sub menu’s. Note: The USB option is used to upor down load programs. 12. Select “Programming” and Press the OK button to confirm. Manager – Programming RECIPES NEW 1EDIT 13. Use the arrow buttons to select a new or existing recipe. 14. Press the OK button to confirm. 10 15. The first available number is shown. Choose new number Note: use the arrow right button to select the next available number. EN / 31-48 9123872 / 1205 TDR-P ECO Models 16. Press the OK button to confirm. 17. Enter the recipe name. 10 A-------------ABC for other Use the arrow button to change the character. Note: ABC can be changed with the use of the arrow buttons into lower / higher case or special characters. 18. Press the OK button to confirm. 10 TEST 19. The new recipe name is shown To change the name of the recipe use the back arrow button. 20. Press the OK button to confirm. 10 TEST Preheat YES Temp 180° C 21. Set the pre-heat temperature (default set on 180 °C). Use the arrow buttons to change. Note: Pre-heat is only available when activated in the parameter list. 22. Press the OK button to confirm. EN / 32-48 9123872 / 1205 TDR-P ECO Models 10 Step 1 Temp 1 - - ° C 23. Set the “step 1” temperature. Starting with the first digit. 24. Use the arrow buttons to increase/decrease the value of the selected digit. 25. Press the OK button to confirm. 10 Step 1 Temp 21 - ° C 26. Set the second digit. 27. Press the OK button to confirm. 10 Step 1 Temp 215 ° C 28. Set the third digit. 29. Press the OK button to confirm. 10 Step 1 Temp 215 ° C Time 1: - - 30. Set the “step 1” time. Starting with the first digit. 31. Use the arrow buttons to increase/decrease the value of the selected digit. EN / 33-48 9123872 / 1205 TDR-P ECO Models 32. Press the OK button to confirm. 10 Step 1 Temp 215 ° C Time 2:1 - 33. Set the second digit. 34. Press the OK button to confirm. 10 Step 1 Temp 215 ° C Time 2:10 35. Set the last digit. 36. Press the OK button to confirm. 37. The Step is now completed. 10 Step 1 Temp 215 ° C Time 2:10 Press the right arrow or OK button to go to the next step. Press the left arrow button to go back to the last setting. 38. Program the next steps (when required). See step 1 for the procedure. 10 Step 2 Temp 1 - - ° C 39. When ready programming press the OK button to confirm. 40. Save the finished programs. 10 TEST Opsl Note: if the program is not saved all changes are lost! 1Disc EN / 34-48 9123872 / 1205 TDR-P ECO Models 41. Press the OK button to confirm. RECIPES NEW 1EDIT 42. The screen returns to the RECIPES menu. 43. Press back to enter the manager menu. MANAGER MENU USB Programming 1Para. 44. Manager menu appears. 45. Press back to enter the user menu. 46. The last program used is shown. Drumstick 5 6 7 8 9 EN / 35-48 9123872 / 1205 TDR-P ECO Models 6.3. Options manager menu: USB MANAGER MENU USB Programming 1Para. 1. Manager menu. 2. Use the arrow buttons to select the USB function. MANAGER MENU USB Programming 1Para. 3. Screen shows the USB function. Place the USB stick into the USBslot. 4. Press the OK button to confirm. USB Read Store 5. Use the arrow buttons to select Read to exchange an existing program or STORE to save a program. 6. Press the OK button to confirm. EN / 36-48 9123872 / 1205 TDR-P ECO Models 6.4. Programming parameters 1. Press the list button. Pin * * * * Give User PIN code 2. Enter your user PIN code. 3. Press the OK button to confirm. MANAGER MENU Edit. Parameters 1Pin. 4. Use the arrow buttons to select Parameters. 5. Press the OK button to confirm. Language: Dutch Change Next 1Previous Language: Dutch Change Next 1Previous 6. Use the arrow buttons to select Change, Next or Previous. 7. To change the language, select Change. 8. Press the OK button to confirm. EN / 37-48 9123872 / 1205 TDR-P ECO Models Language: Dutch Language: English 9. Current value is shown 10. Use the arrow buttons to change the setting. 11. Press the OK button to confirm. Language: Dutch Change Next 1Previous 12. Use the arrow buttons to select Change, Next or Previous. Press back to enter the manager menu. 13. Press the OK button to confirm. 14. Use the arrow buttons to select Large digits: YES 15. Press the OK button to confirm. EN / 38-48 9123872 / 1205 TDR-P ECO Models 7. CLEANING AND MAINTENANCE WARNING Never use a water hose for cleaning. Water can seep into the unit through the ventilation holes of the unit. WARNING Do not touch the halogen lamps with bare hands. Protect hot lamps from cold water. Because of hygiene aspects and optimum condition of the unit it is of utmost importance to keep a daily cleaning pattern from first use onwards. 7.1. Maintenance schedule Item Interior Fat collection drawer Rotor and bottom plates Glass panes Exterior Action Clean, see section 7.2. Empty, see section 7.2. Frequency Daily Daily Clean, see section 7.2. Daily Weekly Weekly Fan blade Clean , see section 7.3. Clean , see section 7.3. Use Stainless Steel cleaning spray to remove stains, and restoring the gloss. Clean, see section 7.4. 7.2. Monthly Daily Cleaning The unit can be cleaned best shortly after use, when it is still lukewarm. Grilling residue and fat can be removed easily in this state. The best cleaning can be achieved by using special oven- or grill cleaner. Covering the bottom plates with aluminum foil before use, saves cleaning time The door has a magnetic lock. Regularly check the surfaces between the door and grill, and clean if necessary, to avoid air leaks. Rotor and bottom plates - Remove the rotor and bottom plates from the unit (no tools required). - Place the detachable parts in a wide rinsing container filled with hot water and an appropriate cleaning agent. - Soak these parts for one night and clean them the next day. Fat collecting drawer - Carefully take out the fat collection drawer partly. - Open the tap until the drawer is empty. - Clean the drawer with cleaning agent or hot water combined with an appropriate cleaning agent. EN / 39-48 9123872 / 1205 TDR-P ECO Models The interior - Clean the interior with cleaning agent or hot water combined with an appropriate cleaning agent. - Dry the interior thoroughly by using a dry cloth. Make sure no water or detergent stays behind in the unit. 7.3. Weekly Cleaning WARNING The control panel may only be cleaned using a damp cloth. Prior performing the weekly cleaning first execute the daily cleaning. Glass doors: - Open the outer glass doors - Unlock the inner glass doors (they are magnetically locked to the outer doors). - Clean the panes with cleaning agent or hot water combined with an appropriate cleaning agent. - Dry the doors thoroughly by using a dry cloth. - If possible, leave the glass doors open at night. The exterior: - Clean the exterior with cleaning agent or hot water combined with an appropriate cleaning agent. The use of steel wool is prohibited, because this will cause scratches that can hold dirt remains. - Dry the exterior thoroughly by using a dry cloth. EN / 40-48 9123872 / 1205 TDR-P ECO Models 7.4. Monthly Cleaning WARNING Remove the power plug from the wall socket. Prior performing the weekly cleaning first execute the daily and weekly cleaning. Clean the fan plate and the fan blade thoroughly as described below. Fan plate: - Remove the fan plate by loosening two winged nuts (see Figure 18). This plate hinges at two points at the sides. After pivoting, the plate can be removed from the unit. - Clean the fan plate with cleaning agent or hot water combined with an appropriate cleaning agent. - Dry the fan plate thoroughly by using a dry cloth. Figure 18 Fan blade: - Clean the fan blade with a cloth and grill cleaning agent (see Figure 19). - Dry the fan blade thoroughly by using a dry cloth. Figure 19 EN / 41-48 9123872 / 1205 TDR-P ECO Models 8. MALFUNCTIONS AND SERVICE Before you contact your supplier/dealer in case of a malfunction, there are some items you can check yourself: Is the power supply working properly? Check fuses and differential switch. Has the timer clock been properly set? Item Control Malfunction Program do not start Fan ONE fan not spinning Fan Fan ALL fans not spinning Noisy fan Lamp Does not light up Oven Product is not getting done equally Oven The oven does not heat up Mains cord Damaged 8.1. Possible action Check if both doors are closed correctly. Remove the plug from the socket. Open the door. Remove fan plate (see section 7.4) and check what's blocking the fan blade. Open and close door Fan polluted, clean (see section 7.4). Set OFF in manager menu. Defect, refer to section 8.2. Try a lower cooking temperature. Check fuses and/or the differential switch. Open and close door. Check fuses and/or the differential switch in the electricity board. Replace, see section 8.1 Replace the mains cord WARNING Hazardous electrical voltage. If the mains cord is damaged, it must be replaced by the manufacturer, his service agent or a similarly qualified person in order to avoid hazards EN / 42-48 9123872 / 1205 TDR-P ECO Models 8.2. Replace a lamp WARNING Remove the power plug from the wall socket. WARNING Do not touch the lamps with bare hands. Use a clean cloth or paper tissues when replacing the lamp. Remove any moisture with alcohol or methyl spirits after the lamp has cooled down. 3. Remove the broken lamp by moving it in the length-direction of the lamp holder (see Figure 20). Figure 20 4. Install the new lamp (230 V – 500 W). First press one side of the lamp into the lamp holder (A). Press lamp in its correct position (B) and use its spring pressure to make contact with the other terminal (see Figure 20). 5. Make sure the lamp is correctly clamped between the two terminals (C). If this is not the case, the lamp can move freely along its length-direction, until it is fixed into its terminals. EN / 43-48 9123872 / 1205 TDR-P ECO Models 9. TECHNICAL SPECIFICATIONS WARNING Consult the identification plate to get the proper specifications of the unit. The electrical data may vary from country to country. The technical specifications of the different models in the TDR-P ECO-series, are shown in the next tables. European Models Model Dimensions - Width - Depth - Height Weight - Gross - Nett Maximum ambient temperature Sound pressure Electrical installation - Voltage - Frequency - Required power - Max. nom. current Plug1 Length of power cable approx. TDR 5 TDR 8 TDR 5+5 TDR 8+8 835 mm 660 mm 895 mm 995 mm 830 mm 1050 mm 835 mm 660 mm 1775 mm 995 mm 830 mm 2080 mm 152 kg 130 kg 216 kg 185 kg 306 kg 266 kg 435 kg 375 kg 35 °C 35 °C < 70 dB(A) 35 °C 35 °C < 70 dB(A) < 70 dB(A) < 70 dB(A) 3N~ 400/230 V 50...60 Hz 6.6 kW 3N~ 400/230 V 50...60 Hz 10,5 kW 3N~ 400/230 V 50...60 Hz 13.2 kW 3N~ 400/230 V 50...60 Hz 21 kW 10.0 A CEE-form 16 A 15.5 A CEE-form 16 A 20 A CEE-form 32 A 31 A CEE-form 32 A 2,20 m 2,20 m 2,20 m 2,20 m TDR 5 TDR 7 TDR 5+5 TDR 7+7 32 7 8″ 26 ″ 35 1 4″ 39 3 16 ″ 32 5 8″ 41 5 16″ 32 7 8″ 26 ″ 69 7 8″ 39 3 16 ″ 32 5 8″ 81 7 8″ 335 lb 287 lb 476 lb 408 lb 675 lb 586 lb 959 lb 827 lb 95 °F 95 °F 95 °F 95 °F < 70 dB(A) < 70 dB(A) < 70 dB(A) < 70 dB(A) 3~ 208 V 50/60 Hz 6.6 kW 3~ 208 V 50/60 Hz 10.5 kW 3~ 208 V 50/60 Hz 2x 6.6 kW 3~ 208 V 50/60 Hz 2x 10.5 kW 2x 18.9 A 2x NEMA 15-30P 2x 30.8 A 2x NEMA 15-50P 2 x 75 ″ 2 x 75 ″ American Models Model Dimensions - Width - Depth - Height Weight - Gross - Nett Maximum ambient temperature Sound pressure Electrical installation - Voltage - Frequency - Required power - Max. nom. current Plug Length of power cable approx. 1 18.9 A NEMA15-30P 75 ″ 30.8 A 15-50P NEMA 75 ″ Depending on Country EN / 44-48 9123872 / 1205 TDR-P ECO Models 10. ACCESSORIES AND OPTIONS For all rotisserie models in the TDR-series mentioned in this manual, the following accessories are available: Figure 21 For the TDR 5 specifically: Figure 22 For the TDR 7 and TDR 8 specifically: Figure 23 EN / 45-48 9123872 / 1205 TDR-P ECO Models EN / 46-48 9123872 / 1205 TDR-P ECO Models EN / 47-48 9123872 / 1205 TDR-P ECO Models Fri-Jado BV Oude Kerkstraat 2 4878 AA Etten-Leur The Netherlands Tel: +31 (0) 76 50 85 400 Fax: +31 (0) 76 50 85 444 EN / 48-48 9123872 / 1205