1
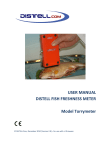
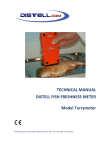
INFORMATION GUIDE DISTELL FISH FRESHNESS METER “TORRYMETER” ...the art of distell-ing... GENERAL DESCRIPTION This latest model of FISH FRESHNESS METER is compact, robust, fully portable and can be used in any situation likely to be found in the fish processing industry, such as, on the market, in the processing factory, or in the quality control laboratory. It provides rapid measurements, and is simple to use. The freshness of the fish is indicated on the LCD display. The meter can be set to measure from 1 - 16 Fish. The menu driven software provides the ability to sum the readings of SIXTEEN FISH SAMPLES, and then display the average value of the samples. The meter is most accurate in this mode. Generally the measurements can be taken without disturbing the fish in their containers, and the testing does not damage or mark the samples in any way. PRINCIPLE OF OPERATION The original research leading to the development of the Fish Freshness Meter was carried out at Torry Research Station, in Aberdeen, Scotland. It was found that certain dielectric properties of the fish skin and muscle alter in a systematic way during spoilage, as tissue components degrade. These alterations, occurring at microscopic level, are strongly associated with the gross changes in appearance, odour, texture, and flavour which take place during spoilage and which are normally used to judge freshness. Hence, determination of the appropriate dielectric properties give a measurement of the freshness of the fish. The base of the instrument (sensing head) has two pairs of concentrically arranged electrodes. This sensing head is applied directly on to the skin of the fish. An alternating current is passed through the fish, between the outer pairs of electrodes and the resulting voltage sensed by the inner pair. The phase angle between the current and voltage is measured and converted electronically to allow digital on a convenient scale in the range 0 - 18. The phase angle, and hence the meter reading decreases with spoilage. The current passed through the fish is approximately 1 milliamp, and so cannot harm the operator or affect the fish. Between the measuring electrodes are two auxilliary electrodes. These electrodes, in conjunction with one of the carbon electrodes, sense whether there is proper contact with the fish. The fish sensing device prevents readings being taken under inappropriate conditions e.g. in air, or in ice. Since the phase angle depends on temperature, as well as freshness, the reading displayed by the instrument must be corrected to the value it would show at a reference temperature of 0°C. The meter is powered by rechargeable batteries within the instrument. They have sufficient capacity to allow a full working days operation. User & Technical Manual Page 2 ...the art of distell-ing... Freshness Meter Kit – Contents • Meter Unit • • • International Power Supply / Charger USB Datacomms Cable CD Disks (USB Comms + Data Management Software) User Manual and Organoleptic Charts Carry Case • • PLEASE TAKE GOOD CARE OF THE METER. IT IS A MEASUREMENT INSTRUMENT AND SHOULD BE HANDLED WITH CARE. Freshness Meter – Front View The FISH FRESHNESS METER consists of a hand held sensing head with ON / OFF Button, READ & RESET buttons, CHARGE / COMMS Socket, and an LCD Display. The rechargeable batteries are incorporated within the unit. The casing enclosure is manufactured from ABS plastic, red in colour, and is waterproof to IP64. LCD Display This displays current calibration setting, instructions, Menu prompts, readings, and low battery condition. Download & Power / Charge Socket The 7-way socket on the side of the meter, serves THREE Functions… • Data download socket, for transferring data to PC, using cable supplied • External power • Charging internal batteries On / Off Button Used to switch instrument ON / OFF Sensor Head Sensor head is placed in contact with the fish sample, in order to take measurements. TWO outer carbon electrodes for measuring Freshness TWO inner metal electrodes for sensing contact with the skin of the fish Freshness Meter – Rear View Read Button (Yes) • Press to take readings. • Press to answer “Yes” when using Software Menu Reset Button (No) • Press to reset the measurement routine, or to abort an incomplete series of readings • Press to answer “No” when using Software Menu User & Technical Manual Page 3 ...the art of distell-ing... Battery Charger Unit Only the unit supplied with your kit should be used to charge the battery pack, or power the meter. This is connected to the 7-way outlet on the meter. The charger supply unit simply plugs into the mains socket, accepting input mains voltage from… 110v–250v AC, 50–60 Hz. The charger unit comes complete with various plug configurations for use around the world. A red LED will illuminate when charger / power supply is switched ON. The battery pack should be fully charged after a period of 12 hours. When charging is complete, first disconnect the charger from the mains and then from the meter. Power Supply The battery charger unit can also be used as a desktop power supply. This will power the meter + charge the internal batteries. Data Cable Always use the data cable supplied for downloading to computer. Connect the 7-way plug to outlet on meter, and the other end directly into a serial port on your computer. USB & CD Information Disk The CD contains the User manuals, Data management software, Measurements charts, and other useful information. User Manuals & Measurement Charts A Hard copy of… User Manuals, Measurement Charts & Calibration Certificate Carry Case The Freshness Meter Kit is supplied in a robust case, and comes complete with 2 keys for security of your Freshness Meter. User & Technical Manual Page 4 ...the art of distell-ing... STEP-BY-STEP GUIDE…Continued General Operation • Press the RESET Button to check the calibration setting you are on is correct. • Check the number of samples making the average is set to the correct number. We recommend setting the number of samples as follows… o Set to Samples = 1 for single fish o Set to Samples = 8 for batch sampling of a box of fish o Set to Samples = 16 for batch sampling of a box of fish, with blind measurements • The instrument will measure when the READ button is pressed. The circuit automatically checks that contact with the fish has been made, and if so, the meter will display the message “Contact”, and then message “Measuring” will indicate that meter is taking a measurement. After taking the sample readings, the meter will display the average of samples measured in the cycle. After ONE or EIGHT such readings (depending on setting), the average reading is then displayed until the RESET button is pressed. • Pressing the RESET button will clear the previous reading, ready for the next measurement. You can access the measurements taken by downloading themn into your computer. The date and time of the measurements should help you to locate measurements easily. Measurement Procedures… 1 In the great majority of instances the averaging mode 8, will be used. Under commercial conditions, or for best accuracy during fish inspection purposes, the 16 Sample Mode should be used. 2 Press the RESET button. readings. 3 Place the base of the meter firmly on the fish so that it lies flat against the surface and parallel to the lateral line at a thick, fleshy part of the fish. The best position is within the middle third, in the region of the lateral line. Avoid the head and belly cavity regions (see illustration). This ensures that the memory is cleared, ready for next set of Here is a quick check routine… • You have chosen the correct setting….”1” to “8” or “16” readings using the Samples Menu. • You have checked to ensure that you have prepared, or been supplied with, an Organoleptic Chart suitable for this fish species. • Select the fish samples at random from the batch. Where you are taking fish samples from a variable batch, the samples should be grouped according to size. • For best accuracy, always follow the measurement recommendations in your Handbook. • Temperature of the fish to be measured should be between 0 – 10oC, with no ice crystals present in the samples. • Ensure that the sensor is placed firmly against the skin of the fish, thus ensuring that there are no air pockets between the sensor and the sample to be measured. Press the Read button (at rear of meter) and a value will be displayed. • For best results…BE CONSISTENT. Always place the sensor on the same part of the fish, day-to-day, this will ensure that you achieve optimum, comparable results. It is normal to experience variability in the individual readings when taken at different parts of the fish. Please note…different parts of the fish will spoil at different rates, depending upon the level of bacteriological activity present within the fish. ONE reading should be taken from each fish, at recommended measurement sites. The results should be evaluated using your Organoleptic Charts. User & Technical Manual Page 5 ...the art of distell-ing... STEP-BY-STEP GUIDE…Continued Measurement Procedures…continued 4 Press the READ button. If this is the first reading after the meter has been in a warm place, hold the probe head against the fish for 10-20 seconds, to allow the sensor to cool down before pressing the READ button. The display will indicate the measurement routine as follows… a. Sample Number in the current measurement cycle will be shown b. When meters sensors are in contact with fish or not… “No Contact” or “Contact” (If meter sensors are in contact with the fish, and the message “No Contact” is displayed, check that there is no ice, or other material on the surface of the fish and that the skin of the fish is not dry) c. When meter indicates “Contact” press READ Button, and hold meter in place until measurement value is displayed, then you can release the READ Button (When measuring the fish (this takes about 1 second), “Measuring” message will be displayed until measurement has been taken. Meter then moves on to take the next sample reading in the cycle) d. Once all Sample readings in the cycle have been taken, the meter calculates, then displays the averaged value (The meter stores… the calibration setting + the individual readings + average + date and time… in memory) 5 4. To measure individual fish Select Samples=1 from the Samples Menu, and then follow the instructions given above in step The reading will then be displayed. Note the measurement on paper, if you wish to take immediate action (it will be stored in memory), and then press the RESET button before going on to the next fish. 6 Avoid pressing the READ button when the meter is not in contact with a fish. If there is a thick layer of slime on the probe head it may conduct enough current to act as if the electrodes were in contact with a fish and a measurement will be made. 9 Switch OFF after use. 10 When a “Low Battery” warning appears on the display, this indicates a low battery state and the meter should be charged without delay. Preparation of Product Samples, for sending to Laboratory… If you wish to compare the results achieved using the Freshness meter with a Laboratory Procedure, it is important that ALL of the fish carcass sample is packaged and sent to the laboratory for the analysis. The sample should be stored in a sealed polythene bag immediately after measurement and the temperature of the sample should be maintained as close to 0o C as possible. This will ensure that spoilage of the sample is reduced as far as possible. DO NOT ALLOW SAMPLE TO FREEZE User & Technical Manual Page 6 ...the art of distell-ing... STEP-BY-STEP GUIDE…Continued Preparation of Product Samples, for sending to Laboratory…continued Here is a quick checklist for the laboratory… • • Whole carcass of the fish / fillet should be received at the lab. properly packed and sealed. The current "age from death" of the sample should be ascertained using standard laboratory methods…eg TVBN, etc. If the results from the Laboratory do not compare favourably with your meter check freshness meter use as follows… • • • Is the operator proficient in the use of the Fatmeter? Is the fish species the same as that quoted on your Organoleptic Chart? Check the product for species identification, measurement technique, size, and preparation. check Laboratory procedure as follows… • • Analytical method being used Sample preparation is OK This is just a short Check List on how to use and compare the Freshness Meter with other methods. Remember that the primary purpose in using the Freshness Meter is to screen a lot of product for Uniformity, Specification, Shelf Life, and to identify Frozen Fish. During the measurement process, finite accuracy is not the objective…the object is to try and ensure that the bulk of the day's raw materials and processed production meets with your specifications time after time. Answers to commonly asked questions, are contained in the Appendix Section of... User & Technical Manual for your information. User & Technical Manual Page 7 ...the art of distell-ing... Sample of … ORGANOLEPTIC CHART COD (Gadus morhua) This Chart is for use with Cod categorized as…. BOXED FISH Relationship between objective sensory scores for Freshness, Torrymeter Readings, and approximate times of storage in ice, for Cod landed at European Ports Raw Odour Description Taste Panel Scor e Freshnes s Meter Score Days On Ice EC Grade State of Spoilage Watery, metallic, starchy. Initiallyno sweetness but meaty flavours with slight sweetness may develop 10 16 <2 E Very Fresh Shellfish odours and loss of fresh seaweediness Sweet, meaty, creamy, green plant characteristics 9 14 2–4 E No odours, odours Sweet and characteristic flavours but reduced in intensity 8 13 5–6 A Neutral 7 11 8–9 A Insipid, no flavours 6 10 ~ 11 B Trace of “off” flavours, some sourness but no bitterness 5 8 ~ 14 B Some “off” flavours, sourness and bitterness 4 7 ~ 16 Not Graded Strong bitter flavours, rubber, sulphide-like 3 5 ~ 18 Not Graded 2 <3 > 18 Fresh odours sea-weedy neutral Slightly musty, mousy, milky or caprylic, garlic, peppery Bread, Malt, beer, yeasty odours Lactic acid, sour milk, or oily odours Grass, “old boots”, slightly sweet, fruity or chloroform-like odours Stale cabbage water, turnip, sour sink, wet matches, phosphenelike odours Cooked Flavour Description Ammonia, strong “byre-like” odours Strong ammonia, bad eggs (hydrogen sulphide) Inedible 1 <3 > 18 Putrid, sulphides Inedible 0 <3 > 18 Decrease in Freshness Nearly Spoiled Not Graded Not Graded Not Graded Putrid * The influence of seasonal factors on freshness introduces a range of variation of ± 2 days in ice in the estimated values, for fish stored longer than 2 days in ice. User & Technical Manual Page 8 ...the art of distell-ing... GUIDANCE ON PREPARATION OF AN ORGANOLEPTIC CHART The Fish Freshness Meter “Torrymeter” is used around the world as an objective method of measurement of freshness of fish caught, processed and sold. The Torrymeter allows an objective method of assessing the relative freshness of the fish simply and easily. Also, the meter is exceptionally useful for identifying fish that have been previously frozen by displaying a value of "4 or less" - even although the fish looks very fresh and wholesome. Some basic advice … Step 1 Before using the Freshness meter on a fish species, ensure that you have a Freshness Chart / Organoleptic Chart for the fish species that you intend to measure. If the fish species is not already specified in the Handbook, then you need to prepare a new chart. Step 2 To prepare a chart please adopt the following procedure. This is quite easily done using the Torrymeter to measure one or two fish over a period of 1- 2 weeks…. • • • • • Step 3 Procure 1 or 2 fish from the local market or, better still, fish freshly caught at sea. Immediately store the fish in ice, and maintain at or just above 0o C. Do not allow the fish to become frozen…as this destroys the cellular structure. The meter will display a value of "4 or less", where fish have been allowed to freeze. Measure the fish as recommended in the Handbook, ensuring that you measure consistently at the same position on the fish each time. Measure the fish twice per day … in the morning and in the evening…and keep a note of the readings. Continue the process until the fish is spoiled. Using this information prepare your Freshness Chart and, if possible, have your new Freshness Chart checked by an experienced fisherman or fish expert who can help validate your results. When finished, your Freshness Chart should resemble the organoleptic chart attached. User & Technical Manual Page 9 ...the art of distell-ing... GUIDANCE FOR ANGLING CLUB COMPETITIONS The Fish Freshness Meter “Torrymeter” is used around the world as an objective measurement of freshness of fish caught at various angling competitions. With ever increasing prize money at stake, many competitors try to beat the system by having a suitable fish caught and stored in ice (or frozen) outwith the competition window. The fish is then presented as having been caught within the competition and the prize money claimed. The Torrymeter allows an objective method of assessing the relative freshness of the competition fish simply and easily. Also, the meter is exceptionally useful for identifying fish that have been previously frozen by displaying a value of "4 or less even although the fish looks very fresh and wholesome. Some basic advice … Step 1 Before the competition date, ensure that you have a Freshness Chart / Organoleptic Chart for the fish species that you intend to fish. If the fish species is not already specified in the Handbook, then you need to prepare a new chart. Step 2 If you require to prepare a chart then please adopt the following procedure. This is quite easily done using the Torrymeter to measure one or two fish over a period of 1- 2 weeks…. • • • • • Procure 1 or 2 fish from the local market, or better still, fish freshly caught at sea. Immediately store the fish in ice, and maintain at or just above 0o C. Do not allow the fish to become frozen…as this destroys the cellular structure. The meter will display a value of "4 or less" where fish have been allowed to freeze. Measure the fish as recommended in the Handbook, ensuring that you measure consistently at the same position on the fish each time. Measure the fish twice per day … in the morning, and in the evening…and keep a note of the readings. Continue the process until the fish is spoiled. Step 3 Using this information prepare your Freshness Chart, and if possible, have your new Freshness Chart checked by an experienced fisherman or fish expert who can help validate your results. Step 3 Arrange that ALL fish caught during the competition are measured using the Torrymeter. Relate the measurement to your Freshness Chart. Step 4 Any fish that show a significant difference in freshness value from the average should be further investigated. User & Technical Manual Page 10