1
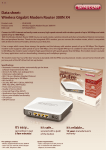
Package contents
About us
• World’s No 1 ADSL Router Vendor
(Gartner Group 2005)
• World’s No 1 SMB VPN & Firewall Vendor
(Infonetics 2003)
• Europes No 1 WLAN Equipment Vendor
(IDC 2005)
• World’s Top 3 IP DSLAM Vendor
(Gartner Group 2005)
• World’s No 1 VDSL Equipment Vendor
(Gartner Group 2005)
Prestige 660HW
Reasons to use ZyXEL
• UK Based Tech Support- by ZyXEL Employees
• Research, Manufacturer, Develop our own
products
• Leading Edge Technology
• Feature-rich Solution Portfolio
• Not just Networking......Solutions
Read me first!
Quick Setup Guide
version uk1.2
Prestige 660HW
ADSL Broadband
Gateway Bundle
G-202 Wireless USB client adapter
ZyXEL Communications UK Ltd
11 The Courtyard,
Eastern Road,
Bracknell
Berkshire RG12 2XB
United Kingdom
Power supply
ZyXEL installation CD
RJ11 ASDL Data cable
Ethernet cable
Tel:
Fax:
+44 (0)1344 303044
+44 (0)1344 303034
Should you have any queries regarding any ZyXEL
equipment, please don’t hesitate to contact our UK
helpdesk:
email [email protected]
Technical enquiries 08707 555779
1 Connections
If you wish to use the Wireless LAN for connectivity
instead of Ethernet LAN, please refer to the G-202 Quick
Start Guide and the Prestige User Manual located on the
supplied CD.
Step 1 To set up the Prestige, please run the supplied ZyXEL
installation CD. A menu screen will automatically
appear, click “setup” to continue. (If the CD does not
auto run, please go to Start Menu, Run,
<CD drive letter>:\autorun.exe and click ok).
2 Connecting to the Internet
If you haven’t already done so, please power up the
Prestige. Once that you have confirmed that the
PWR/SYS, LAN (if you are using an Ethernet connection),
WLAN and DSL indicators are illuminated, it’s time to
configure your Prestige.
Step 1 Please refer to section 1 Connections steps 1 and 2
before proceeding.
Step 2 Click on “Configuration Genie”.
Step 3 The configuration genie will start, click on “configure”
to continue.
Step 2 Click on “Multimedia Auto Provisioner (MAP)”.
Step 3 Click on “Installation Tutorial” for information on how
to connect your Prestige.
The Tutorial will clearly illustrate how to fit all the
connections together and power up your Prestige.
Please now continue to section 2.
Step 5 The genie will now check for a connection to your
Prestige. Once the process is complete, click
on the appropriate product (Prestige 660HW-T1
192.168.1.1) and click on “configure”.
Step 6 Enter the details of your Internet account username
and password into the corresponding boxes and
click “configure” to continue (your internet account
and username and password are provided by your
Internet Service Provider).
Step 7 Click “Save Settings” to complete your configuration.
Step 4 Please read the information in the white box before
proceeding. Click on the tick box before clicking on
“configure” to continue.
The prestige will now restart, this can take up to 2
minutes. Visual confirmation that your Prestige is
online can be determined by the INTERNET indicator
showing GREEN. (If the connection to the Internet
is still unavailable, please refer back to section 1
Connections and repeat the Quick Start process).
Congratulations, your installation is now complete!