1
MARSHALLTOWN MEDICAL & SURGICAL CENTER
Marshalltown, Iowa
CARE OF PATIENT POLICY & PROCEDURE
Policy Number: 4:10
Subject:
Glucose Monitoring (Accuchek)
Policy:
Nursing department staff and laboratory staff may perform glucose monitor testing after
competency confirmed.
Additional Information:
1. Use 2 patient identifiers prior to obtaining accucheck.
2. See Laboratory Policy (Attached)
Originated by: Care of Patient
Effective date: 6/88
Authorized by: Lab
8/08
Prof. Prac.
4/04
Authorized by: ________________________________________
COO/CNO
Date
Revision date: 12/91, 10/94, 7/98, 5/01, 3/04
Review date: 7/98, 8/08
Distribution: All Nursing Units, Lab
P:\CAREPT\cpt4.10r2.doc
Accucheck
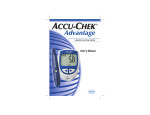
Advantage Blood Glucose Meter
Principle: The enzyme glucose dehydrogenase converts the glucose in the blood sample to
gluconolactone. This reaction liberates an electron that reacts with a coenzyme electron
acceptor, the oxidized form of the mediator, hexacyanoferrate (II). The test strip employs the
electrochemical principle of biamperometry. The meter applies a voltage between two identical
electrodes, which causes the reduced mediator formed during the incubation period to be
reconverted to an oxidized mediator. This generates a small current that is read by the meter.
The Accu-Chek Advantage meter with Accu-Chek Comfort Curve test strips, which are whole
blood referenced systems, have been calibrated to deliver plasma-like values.
Specimen:
1.
Capillary, venous, neonatal (including cord blood), and arterial whole blood
specimens may be used for testing on the Accu-Chck Advantage meter.
2.
The capillary sample must be tested immediately after collection.
3.
Blood glucose determinations using venous and arterial blood specimens should
be performed within 30 minutes of specimen collection to avoid glycolysis. Mix
samples thoroughly.
4.
For best results with arterial and venous blood, the following
anticoagulants/preservatives are recommended: heparin and EDTA.
5.
Serum separator tubes are acceptable if blood is used immediately.
6.
Iodoacetate and fluoride/oxalate should not be used as preservatives.
7.
Caution should be taken to clear arterial lines before blood is drawn and dosed on
the test strip.
8.
Sufficient sample size is required to ensure valid results. Refer to the test strip
package insert for the most current information.
Reagents:
The Accu-Chek GTS Plus/GTS includes an Accu-Chek Advantage Meter along with the
following:
1.
Accu-Chek Comfort Curve Test Strips (Accu-Chek Comfort Curve Glucose
Control Solutions.)
2.
Accu-Chek Comfort Curve Linearity Test Kit.
Storage and Handling:
1.
2.
3.
4.
Test strips must be stored at room temperature (14° and 40° C) and < 85%
humidity. Do not freeze.
Test strips are stored in the same tightly capped vial in which they are packaged.
The vial cap is immediately replaced after removal of a test strip.
Test strips are stable until the expiration date on the vial.
Be sure to write the date on the label when you open a new bottle of control
solution. A bottle is good for three months after opening or until the expiration
date printed on the label, whichever comes first.
Calibration:
1.
The Accu-Chek Advantage is to be calibrated each time a new lot number of
Advantage test strips is opened.
2.
The Code Key is to remain in the module until the lot of test strips in use is
changed. Place the new Code Key in the module and discard the old Code Key.
Gather the following items for calibration:
AccuData GTS Plus/GTS with Accu-Chek Advantage meter
Test strips with appropriate Code Key
1.
Remove the Code Key from the test strip box.
2.
Compare the 3-digit number on the Code Key with the number of the test strip
vial.
3.
Be sure the AccuData GTS Plus/GTS is turned OFF Remove old Code Key from
Accu-Chek Advantage module (located on the right side of the module), if
necessary.
4.
Snap the new Code Key (slots facing towards the meter) into the Code Key slot
with the printed side facing up.
5.
Leave the Code Key in the module.
6.
Press the BLUE power ON button.
7.
Verify that the code number on the meter display corresponds to the code number
on the vial of test strips being used.
Entering the Test Strip Code
The test strip code displayed by the Accu-Chek Advantage blood glucose meter and GTS
Plus/GTS must match the code of the test strips in use. If not, the meter must be recoded
(recalibrated) and the new code information must be entered in the GTS Plus. The test
strip code information must be verified and/or re-entered in the GTS Plus/GTS by the
operator whenever a patient or quality control test is performed.
A.
B.
C.
D.
E.
F.
G.
Press BLUE power ON button.
Select CTRLS. The code for the Accu-Chek Advantage is automatically read by
the GTS Plus/GTS.
Select YES if the code is correct.
Enter valid Operator ID.
Select NO to enter new information or check existing information.
• Enter the expiration date from the test strip vial label. Press ENTER.
• Enter the number of standard deviations you will be using to determine
acceptable ranges for control values. (Three standard deviations will be used
unless you enter a different number.) Press ENTER.
• Verify/enter the minimum and maximum values for each level of control
solution. Press ENTER after entering each value.
Enter valid operator ID.
Proceed with QC testing.
Quality Control:
Quality control records will be retained for a minimum of two years. The GTS Plus/GTS
is set up to store the following information about each quality control test:
Test Result
Operator ID
Control Level
Control Lot Information
Test Strip Code Information
Test Time and Date
Comment Code
Control tests are performed at the following times:
Each time a new vial of test strips is opened
When a vial of strips has been left opened
If the GTS Plus/GTS has been dropped
Each day
When the test strips have been exposed to extreme heat, humidity or cold
When test results contradict clinical symptoms
After the batteries I the GTS Plus/GTS or Accu-Chek Advantage have been
replaced or the Accu-Chek Advantage meter has been recoded
If a quality control test result falls within the acceptable control range, it is acceptable to
proceed with patient testing.
If a quality control test result falls outside of the acceptable control range, enter
appropriate comment in the comment code section. Rerun controls, if still having
problems then go to the troubleshooting section of the Accu-Chek Advantage User’s
Manual for help. The problem must be corrected before proceeding with patient testing.
Any quality control result that falls outside of the acceptable control range, along with
any corrective action to restore that result to acceptable range, must be documented.
In areas where the Accu-Chek Advantage meter is not being used daily, quality control
will be performed each day of patient testing.
Internal proficiency testing to verify meter accuracy and operator competency will be
performed during nursing competency fairs and laboratory annual competency testing.
The test strip lot number and the acceptable glucose control ranges are found on the label
of each vial of test strips. This information must be recorded according to facility policy.
Test strips must be stored at room temperature. Do not refrigerate. Test strips are stable
until the expiration date. Test strips must be stored in the same capped vial in which they
were packaged, and the vial cap must be immediately replaced after removal of a test
strip.
Quality Control Procedure:
The following equipment is needed for quality control testing:
Accu-Data GTS Plus/GTS with Accu-Chek Advantage meter
Accu-Chek Comfort Curve test strips Accu-Chek Comfort Curve Glucose
Control Solutions. Level 1 & 2.
1.
Press BLUE power ON button.
2.
Select CTRLS. Verify that the code number on the test strip vial
corresponds to the code number on the GTS Plus/GTS and on the meter.
3.
Select YES if the code numbers correspond.
4.
Enter valid operator ID, if enabled (GTS Plus only).
5.
Select NO if the code numbers do not correspond. Make sure it is the
right calibration number (pg 3).
6.
Enter your operator ID, Press ENTER.
7.
Select the desired control level: Level 1, Level 2
8.
Verify the lot number of control solution displayed on the GTS Plus/GTS.
9.
Select YES if the lot number is correct.
10.
Select NO if the lot number is incorrect. Enter lot number and expiration
date from control solution bottle.
11.
Remove a test strip from the vial and replace vial cap immediately.
12.
When the flashing strip icon appears on the meter display gently insert test
strip with the yellow target area or test window facing up. (Insert the end
with the silver bars.)
NOTE: Insert test strip BEFORE dosing.
13.
Touch and hold drop of glucose control solution to the edge of the curve
on the test strip.
14.
The solution is drawn into the test strip automatically.
15.
A small box will flash on the display. In 40 seconds the glucose control
value will appear. Verify result on both displays. Control ranges are on
the bottle of strips for the different levels.
16.
Enter comment code, if needed, then press ENTER. The Accu-Chek
Advantage will power down at this point.’
17.
Remove the test strip from the Accu-Chek Advantage meter.
18.
Select YES to do another control test. Verify the operator ID and continue
with step 5. Select NO to turn GTS Plus/GTS OFF.
19.
Discard the used test strip in a biohazard container.
20.
The quality control value will remain in the instrument and down loaded
for record keeping in the laboratory for two years.
Patient Test Procedure:
Patient Preparation
1.
The following items should be gathered and taken to the patients bedside:
a.
AccuData GTS Plus/GTS with Accu-Chek Advantage meter
b.
Accu-Chek Comfort Curve test strips
c.
Lancets
d.
Alcohol swab
e.
Gauze for wiping finger after stick
f.
Disposable latex gloves
2.
Explain the purpose of the test and the steps of the testing procedure to reassure
the patient.
3.
Wash your hands and put on disposable latex gloves prior to testing.
4.
If the patient is able, ask the patient to wash his/her hands with warm water and
soap, rinse and dry well prior to testing capillary samples. If the patient is unable,
cleanse the puncture site with an alcohol swab and allow it to thoroughly dry
(Alcohol at the puncture site must be dry or an error code/inaccurate result may
occur).
Patient Testing
1.
Press BLUE power ON button.
2.
Select PAT.
3.
Verify that the code number on the test strip vial corresponds to the code number
on the GTS Plus/GTS.
4.
Select YES if the code numbers correspond.
5.
Select NO if the code numbers do not correspond. See Entering Test Strip Codes.
6.
Enter your operator ID. Press ENTER.
7.
Enter the patient six digit medical record number. Press ENTER.
8.
Remove a test strip from the vial. Immediately replace the cap on the vial.
9.
When the flashing strip icon appears on the meter display; gently insert test strip
with the yellow target area or test strip window facing up. (Insert the end with the
silver bars.)
NOTE: Insert test trip BEFORE dosing.
10.
When the flashing drop icon appears on the meter display, obtain a blood sample.
Wipe off the first drop of blood and use the next drop for testing. You may
use a capillary whole blood, venous, or arterial blood sample. (Follow the
manufacturer’s instructions if using a lancet device.)
NOTE: You may remove the meter from the GTS Plus/GTS to make it easier to
insert the test strip or to dose the test strip. DO NOT remove the Accu-Chek
Advantage from the GTS Plus/GTS BEFORE the flashing strip icon appears on
the meter display Press the OFF button on the GTS Plus/GTS to help save GTS
Plus/GTS batteries while the Accu-Chek Advantage is removed from GTS
Plus/GTS-Advantage cradle.
11.
Touch and hold drop of blood to the edge of the curve on the test strip.
12.
The blood is drawn into the test strip automatically.
13.
A small box will flash on the display. In 40 seconds the blood glucose value will
appear. Verify result on both displays.
NOTE: The Accu-Chek Advantage may be turned off after the result appears
and before it is returned to the GTS Plus/GTS-Advantage cradle to help conserve
its batteries. Return the meter to the GTS Plus/GTS-Advantage cradle. (If the
GTS Plus/GTS has turned OFF, press BLUE power ON button. Verify the result
on both displays.)
14.
Enter a comment code, if necessary and press ENTER.
15.
The Accu-Chek Advantage will power down at this point.
16.
Remove the test strip from the meter.
17.
Select YES to do another test, verify the operator ID. Select NO to turn GTS
Plus/GTS OFF.
18.
Discard the used test strip and lancet in a biohazard container.
19.
Remove gloves and wash hands thoroughly with soap and water.
20.
Document the blood glucose result according to on the diabetic flow chart or in
the computer system.
Report Results:
Nursing Staff:
Record the results of your accuchek blood sugar on the nursing diabetic flow sheet along
with your initials, time and date of testing.
Laboratory Staff:
Enter results into the CPSI computer system using manual entry, following policy
manual.
The normal fasting blood glucose range for a non-diabetic adult is 74-99 mg/dL.
One to two hours after meals, normal blood glucose levels should be less than 140
mg/dL.
Any neonatal blood sugar less than 40 mg/dL must be repeated with a venous or capillary
sample performed on the chemistry analyzer.
The nursing staff must be notified if the patient results are below 80 mg/dl or above 200
mg/dl.
The instrument will give a reading from 20 to 600 mg/dl but he linearity range is between
40 and 500 mg/dl. Any result below 40 or above 500 must be repeated with a venous or
capillary sample performed on the chemistry analyzer.
Limitations of Procedure:
1.
If the Accu-Chek Advantage meter displays anything other than a numerical
blood glucose result, refer to the Accu-Chek Advantage User’s Manual.
2.
If HI is displayed, the blood glucose result may be higher than the reading range
of the meter. Refer to the test strip package insert for more information. If this
contradicts the patient’s condition, perform a quality control check with glucose
control solution and a new test strip. If the control result is within the acceptable
range, review proper testing procedure and repeat the blood glucose test with a
new test strip. If HI still appears on the patient test, contact the laboratory to
perform a venous blood glucose.
3.
If mg/dL and error appear on the display at the same time, the blood glucose
result may be extremely high and above the meters readable range. If this
contradicts the patient’s condition, perform a quality control check with glucose
control solution and a new test strip. If the control result is within the acceptable
range, review proper testing procedure and repeat the blood glucose test with a
new test strip. If mg/dL and error still appear on the patient test, contact the
laboratory to perform a venous blood glucose.
4.
If LO is displayed, the blood glucose result may be lower than the reading range
of the meter. Refer to the test strip package insert for more information. If this
contradicts the patient’s condition, perform a quality control check with glucose
control solution and a new test strip. If the control result is within the acceptable
range, review proper testing procedure and repeat the blood glucose test with a
new test strip. If LO still appears on the patient test, contact the laboratory to
perform a venous blood glucose. If the control result is not within the acceptable
range, refer to Understanding Control Results in the User’s Manual before
proceeding with patient testing.
5.
If code and error appear on the display at the same time, the Code Key is faulty,
or it was removed while the meter was on. Turn the GTS Plus/GTS off and
reinsert the Code Key. If this error display still appears, contact the Medical
Service Center at 1-800-440-3638.
6.
If a test strip symbol and error appear on the display at the same time, the test
strip may be damaged or the test was not performed correctly. If this display
appears before blood is placed on the strip, remove the test strip and reinsert. If
the error display remains, repeat the test with a new strip. If this display appears
after blood is applied to the strip, there is an incorrect amount of blood on the
strip. A second drop of blood may be applied to the target area within 15 seconds
of the first drop. If more than 15 seconds have passed, the test result may be
erroneous and you should discard the test strip and repeat the test.
7.
If the temperature symbol and a flashing test strip icon appear on the display at
the same time, the temperature is above or below operating range of the test strips.
Move to a testing area that is between 57° and 104° F (14° and 40° C) and wait 5
minutes before repeating the test. Do not artificially heat or cool the meter.
8.
If error appears on the display, the meter failed its series of electronic checks.
Turn the meter off, then on again. If this error display still appears, testing cannot
take place. Call Accu-Chek Customer Care at 1-800-440-3638.
9.
If the battery icon appears on the Accu-Chek Advantage display replace the AccuChek Advantage meter batteries.
Reference:
1.
Approved:
Accudata GTS Plus/GTS with Accuchek Advantage Blood Glucose Meter; Roche
Diagnostics Cooperation, 9115 Hague Road, Indianapolis, Indiana, 46236; 2000.
Reviewed:
_________________________________________ ___________________________________
Medical Director
Date Primary Operator
Date
___________________________________
___________________________________