1
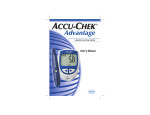
This product fulfills the requirements of Directive
98/79/EC on in vitro diagnostic medical devices.
Welcome
Thank you for selecting the Accu-Chek® Sensor
System. Designed for ease of use, this system was
produced in close association with diabetes healthcare professionals, hospitals and, most importantly,
people with diabetes.
The Accu-Chek Sensor System is intended for
self-testing of glucose in capillary whole blood by
persons with diabetes.
The lightweight, portable meter provides accurate
results in seconds. When you dose the test strip,
the meter measures your blood glucose level and
displays your result. It’s that simple.
Before using your Accu-Chek Sensor Meter or
Accu-Chek® Softclix Lancet Device for the first
time, please refer to the Quick Reference Guide
included in this pack. Should you require further
information, please study this user’s manual.
Please forward your completed warranty card
immediately to Roche Diagnostics.
If you have any questions or inquiries, please call
Roche Diagnostics.
i
ii
Contents
About the Accu-Chek Sensor Meter . . . . . .v
Special Features . . . . . . . . . . . . . . . . . . . .vii
About the Accu-Chek Sensor Comfort
Test Strip . . . . . . . . . . . . . . . . . . . . . . . . .viii
Inserting the Battery . . . . . . . . . . . . . . . . . .1
Battery Symbol on the Display . . . . . . . . . .2
Setting the Beeper, Time, Date, Year,
and Hypo Flag . . . . . . . . . . . . . . . . . . . . . . .4
Turning the Beeper On or Off . . . . . . . . . . .4
Setting the Time, Date and Year . . . . . . . . .6
Setting the Hypo Flag . . . . . . . . . . . . . . . .8
Coding/Calibrating Your Meter . . . . . . . . . .9
Testing . . . . . . . . . . . . . . . . . . . . . . . . . . .11
Gathering Supplies . . . . . . . . . . . . . . . . .11
Performing a Test . . . . . . . . . . . . . . . . . .11
Marking a Result with a Flag, Asterisk ( ) . .16
Understanding Your Test Results . . . . . . .17
Do’s and Don’ts . . . . . . . . . . . . . . . . . . . .18
Proper Test Strip Appearance . . . . . . . . . .19
Using Memory . . . . . . . . . . . . . . . . . . . . . .20
Quality Control Checks . . . . . . . . . . . . . . .22
Performing a Quality Control Check . . . . .24
Understanding Control Results . . . . . . . . .27
iii
Caring for Your Meter . . . . . . . . . . . . . . . .28
Display Check . . . . . . . . . . . . . . . . . . . . .28
Cleaning . . . . . . . . . . . . . . . . . . . . . . . . .28
Storage and Handling . . . . . . . . . . . . . . .29
Note to Healthcare Professionals . . . . . . .30
Transferring Data . . . . . . . . . . . . . . . . . . .31
Quick Reference Display Guide . . . . . . . . .32
Memory Displays . . . . . . . . . . . . . . . . . . .34
Display Messages . . . . . . . . . . . . . . . . . . .36
Battery Displays . . . . . . . . . . . . . . . . . . .36
Quality Control Check Displays . . . . . . . . .37
Error Messages . . . . . . . . . . . . . . . . . . . . .39
Technical Data . . . . . . . . . . . . . . . . . . . . .42
Product Specifications . . . . . . . . . . . . . . .43
Product Safety Information . . . . . . . . . . . .45
Warranty and Service Instructions . . . . . .46
Supplies and Accessories . . . . . . . . . . . . .47
Index . . . . . . . . . . . . . . . . . . . . . . . . . . . . .48
Any Questions . . . . . . . . . . . . . . . . . . . . . .51
iv
About the Accu-Chek® Sensor Meter
ON/OFF Button
Press to turn
meter ON or OFF.
Serial Port
Used to transfer
data.
Display
Shows blood
glucose result,
messages, and
glucose results
stored in
memory.
Right and Left
Buttons
Used for meter
setup and review
of memory.
Test Strip Slot
Insert test
strip here.
v
About the Accu-Chek Sensor Meter
Code Key
Battery Cover
Remove cover to
change battery.
Code Key Slot
Insert code key
here.
vi
446
731
For coding/
calibrating
your meter.
New code key
comes with every
vial of test strips.
Special Features
Your meter is designed to store information
important to you and your healthcare
professional. The memory will store 480
readings.
Along with these readings, the meter can store
additional important information. The hypo flag
allows you to define your hypoglycemic level
and receive a reminder whenever you obtain a
blood sugar result below this level. See page 8
for additional information.
The meter also has a flag, or asterisk (*), that
you can save in the memory with your blood
sugar result. See page 16 for additional
information on this feature.
The meter will also calculate 7, 14, and 30-day
averages. You do not have to set the time and
date for the meter to give you average calculations. See page 20 for specific information on
averages.
vii
About the Accu-Chek® Sensor Comfort
Test Strip
Electrodes
Insert strip with silver-coloured bars up
and toward the meter.
Yellow Window
Do not apply blood on the top of
the test strip.
Before Applying Blood –
This window should be completely
yellow.
After Applying Blood –
This window should be completely filled
with the blood drop.
Note: Any area of the strip can be
touched and the glucose reading will not
be affected.
Comfort Curve
Touch drop of blood here,
to the edge of the strip.
viii
Inserting the Battery
Your meter is shipped with one 3-volt battery type 2032
(CR 2032, DL 2032, or equivalent) that needs to be
inserted before testing. The battery that comes with your
meter can be found in the mesh pocket of your carrying
case. Battery life will vary depending on usage, so
always keep a spare on hand.
The meter saves battery power by automatically turning
off after 90 seconds of non-use or 5 seconds after
taking a strip out of the meter following a test. If the
meter does automatically shut off, all tests in memory
are saved.
Note: After changing the battery, your meter will
prompt you to verify the time and date immediately
after the battery is inserted. This occurs only if the
time and date had been set previously on your
meter.
1. Push the recessed plastic
tab of the battery
compartment forward
(toward the arrow) to flip
open the battery door.
1
2. Insert the 3-volt battery
(type 2032) into the
compartment with “+”
side facing you.
+
3. Snap battery cover back in
place. If time and date
feature was set previously,
the meter will turn on
automatically. Confirm that
the time and date are set
correctly. If time and date have not been set
previously, wait 5 seconds, then turn meter ON. The
meter beeps if the beeper is turned on.
Battery Symbol on the Display
When a battery symbol
appears on the display, your
battery is weak and has only
enough power to run a few
more tests. Although the meter
will still provide accurate
results, you need to replace
the battery as soon as possible.
2
Battery is low.
I II
IIII
IIIII
If a flashing battery symbol
appears on the display, the
battery is nearly dead.
IIII
Battery must be replaced
to continue testing.
After changing the battery, your meter will prompt you to
verify the time and date immediately after the battery is
inserted, if time and date had previously been set. See
Setting the Time, Date and Year on page 6.
Note: To retain the correct time and date settings, you
will need to replace the battery before it is completely
dead.
Please dispose of meter battery according to your local
ordinances.
3
Setting the Beeper, Time, Date, Year,
and Hypo Flag
Turning the Beeper On or Off
Does the beeper have to be turned on?
No, it is an optional feature. Turning the beeper on or
off does not affect the test results. If the beeper is
turned off, beeps that occur due to errors will still
sound.
The meter is set to beep when:
• A strip is inserted
• Blood or control solution is applied to strip
• A result is displayed
• An error occurs while testing
• Buttons are pushed
• Battery is installed
If you do not want the beeper on, turn it off by following
these steps:
1. Press and release the ON/OFF button to turn the
meter ON.
2. Wait until the strip icon
flashes or code and
“---” appear before
proceeding to step 3.
I
4
I
I
I I
I I
I
3. Press and hold down the ON/OFF button until “set”
appears at the bottom of the screen. Release the
ON/OFF button.
I
I I I
I I
“On,” “set,” and the
flashing beeper symbol
appear on the display.
The beeper is now on.
Note: You may leave the set mode at any time by
pressing and holding the ON/OFF button. The
settings you have entered will be saved.
4. Press and release the right
or left arrow button.
Sensor
I
I I I
I I
“OFF,” “set,” and the
beeper symbol appear on
the display. The beeper
is now off. To turn beeper
back on, simply press and
release the right or left
arrow button again.
5
5. Press and hold down the
ON/OFF button until strip
icon is seen flashing or
code and “---” appear to
leave this function.
Sensor
I
I
I I
I I
I
I
Setting the Time, Date and Year
Do I have to set the time and date?
Time and date should be set prior to testing if you plan
to download the results into software or if you plan to
review your memory to check when a test was done.
To set the time, date and year:
1. Press and release the
ON/OFF button to turn the
meter ON.
Sensor
2. Wait until the strip icon
flashes or code and “---”
appear before proceeding
to step 3.
I I
I I I
I I I
3. Press and hold down the
ON/OFF button until “set”
appears at the bottom of
the screen. Release the
ON/OFF button.
4. Press and release the
ON/OFF button to confirm beeper setting and move
to set the time.
6
5. Press and release the ON/OFF button. The hour
display flashes.
6. Press and release the right or left arrow button until
the correct hour is displayed.
7. Press and release the ON/OFF button. The minute
display flashes.
8. Press and release the right or left arrow button until
the correct minute is displayed.
9. Press and release the ON/OFF button. The month
display flashes.
10. Press and release the right or left arrow button until
the correct month is displayed.
11. Press and release the ON/OFF button. The day
display flashes.
12. Press and release the right or left arrow button until
the correct day is displayed.
13. Press and release the ON/OFF button. The year
display flashes.
14. Press and release the right or left arrow button until
the correct year is displayed.
15. To leave this function, press and hold down the
ON/OFF button until the flashing strip symbol or
code and “---” are displayed.
Note: You may leave the set mode at any time by
pressing and holding the ON/OFF button. The
settings you have entered will be saved.
7
Setting the Hypo Flag
The hypo flag allows you to define your hypoglycemic
level and receive a reminder whenever you obtain a
blood sugar result below this level. You can set the hypo
indicator level to any number between 60 and 80 mg/dL
(3,3 and 4,4 mmol/L).
Important Note: Consult with your healthcare professional
to set the hypo marker to compliment your therapy. Do not
use the hypo marker as the only indicator of hypoglycemia.
Rely upon your symptoms and directions from your
healthcare professional.
To set the hypo flag:
1. Press the ON/OFF button to turn the meter on.
2. Wait until the strip icon or code and “---” flash
before proceeding to step 3.
3. Press and hold down the ON/OFF button until “set”
appears at the bottom of the screen. Release the
ON/OFF button.
4. Repeatedly press and release the ON/OFF button
until “hypo” flashes and “OFF” and “set” appear on
the display.
Note: the meter is factory set with the hypo flag in
the off position.
5. Press and release the right or left arrow button to
turn ON the hypo flag.
6. Briefly press and release the ON/OFF button. “Hypo”
flashes, and the current hypo indicator setting, “set,”
“mg/dL” or “mmol/L” appear on the display.
8
7. Press and release the right or left arrow button to
adjust the hypo flag setting.
8. To leave this function, press and hold down the
ON/OFF button until the flashing strip symbol or
code and “---” are displayed.
Coding/Calibrating Your Meter
What is coding/calibrating, and when is it necessary?
Before you use your meter for the first time and
every time you open a new box of test strips, you
need to set the meter to “match” the strips. This is
called coding/calibrating.
To ensure accuracy of your blood glucose
monitoring system, you must change your code key
with each new box of test strips. Each code key
provides your meter with the specific information
that your meter needs to accurately measure your
blood glucose. Do not use code keys with your
Accu-Chek Sensor Meter from any test strip
manufacturer or system other than the Accu-Chek
Sensor System from Roche Diagnostics. Use of other
manufacturers’ code keys may result in erroneous
results with your system.
9
A code key is properly inserted when it snaps into place.
You will need to insert a new code key:
• Whenever you open a new box of strips.
• Whenever either one of these displays appear:
I
I
I
I
I I
I I
I
545
1. Make sure meter is turned off. Turn meter over so
you are looking at the back. Remove old code key if
one is installed.
2. Insert new code key until it snaps into place.
731
3. Turn meter ON. A 3-digit code number appears. This
number must match the code number on your vial
of test strips. If it does not, repeat steps 1–3.
Sensor
10
Co
de:
73 1
Testing
Gathering Supplies
To begin testing, you will need the following items:
• Accu-Chek® Sensor Meter
• Accu-Chek® Sensor Comfort Test Strips
• Accu-Chek® Softclix Lancet
• Accu-Chek® Softclix Lancing Device
Performing a Test
1. Wash your hands in warm, soapy water. Rinse well
and dry completely. Warming fingers can increase
blood flow.
2. Load lancet device according to manufacturer’s
instructions.
To reduce the risk of infection, change lancet
with each test.
11
3. Remove new test strip
from vial. Be sure to
tightly replace vial cap
after removing test strip.
4. Within 3 minutes, insert
test strip into test strip slot
with silver-coloured bars
facing up and toward the
meter.
The meter turns on
automatically.
Check that the code
number on the meter
matches the code on
the vial of test strips
you are using.
Co
Sensor
When the blood drop
symbol flashes, you are
ready to perform a test.
I I
I I I
I I I
I I
12
de:
73 1
5. Let your arm hang down at your side briefly to allow
blood to flow to your fingertips.
6. Grasp your finger just below the joint closest to the
fingertip, and squeeze for 3 seconds.
7. Obtain blood sample. Use the lancet to obtain a drop
on the side of your finger. Do not obtain the drop
from the pad of your finger. To perform the test,
obtain a small drop of blood resting on your finger.
8. Touch and hold drop of
blood to the edge of the
strip within the curve. Do
not place the blood drop
on top of the strip.
The blood will be drawn
into the strip automatically. If beeper is turned on,
meter will beep to let you know the test is beginning.
Hold your finger to the edge of the strip until the
yellow window is completely filled with blood.
What if I still see yellow on the test strip?
• If less than 15 seconds have passed, a second
drop of blood may be applied.
• If more than 15 seconds have passed, remove
the strip and repeat test with a new strip.
13
III III
I II I
IIIIII
III
9. When blood is applied
to strip, an hourglass
flashes on the display until
measurement is completed.
Result appears.
10. The blood glucose result is displayed in mg/dL or
mmol/L.
or
RESULTS
TIME
RESULTS
TIME
RESULTS
TIME
S
SULT
ST RE
D TE
BLOO
TIME
Your result is automatically
recorded in the meter’s
memory. You may also
want to record the glucose
value in your Record Book
or Diary.
Note: For instructions on how to store a result in
memory with a general flag (asterisk), refer to Marking
a Result with a Flag, Asterisk ( ) on page 16.
14
11. Remove test strip from meter. Discard the strip and
lancet in a puncture-proof container with a lid. If you
have completed your testing, turn the meter OFF, or
the meter will automatically turn off 5 seconds after
removing the strip.
If HI is displayed, your
blood glucose result may
be higher than 600 mg/dL
(33,3 mmol/L) (refer to your
test strip package insert or
the section Understanding
Your Test Results on page 17).
If LO is displayed, your blood
glucose result may be lower
than 10 mg/dL (0,6 mmol/L)
(refer to your test strip
package insert or the
section Understanding
Your Test Results on page 17).
15
Marking a Result with a Flag, Asterisk ( )
This feature allows you to perform a test and mark the
result with a flag (asterisk) to be stored in memory. Each
result flagged with the asterisk will have special meaning
only to you. For your healthcare professional, you should
record the meaning along with your reading in your
Record Book or Diary. An example includes using the
asterisk to mark a result taken immediately after a meal.
To mark a result with a flag (asterisk):
1. Perform blood glucose test and obtain result.
or
2. While the strip is still in the meter, press and
release the right or left arrow button. An asterisk will
appear on the lower right corner of the screen.
3. Remove the strip from the meter, turn the meter
OFF, or the meter will automatically turn off 5
seconds after removing the strip. The result will be
stored automatically with the asterisk in memory.
16
Understanding Your Test Results
If your blood glucose result seems unusually high, low,
or inconsistent with your previous results or glucose
trends and does not reflect the way you feel, check the
following:
• Does the test strip number on the vial match the code
number on the meter?
• Was the blood sample applied to the test strip within 3
minutes of removing it from the vial?
• Was the size of the blood sample sufficient?
• Was the test strip vial cap tightly sealed?
• Was the test strip used before the expiration date?
• Were the test strips stored at extreme temperatures
such as in the car during very cold or hot weather?
• Were the test strips stored in areas of high humidity
such as the kitchen or the bathroom?
Then run a quality control check with your glucose
control solutions and a new test strip. (See page 22,
Quality Control Checks.) If the control result is within
the acceptable range, review proper testing procedure
and repeat your blood glucose test with a new test strip.
If your blood glucose value is still inconsistent with your
previous results, glucose trends, or how you feel, please
contact your doctor. Follow the advice of your doctor
before you change your therapy.
17
Do’s and Don’ts
DO:
• TIGHTLY REPLACE VIAL LID IMMEDIATELY
AFTER REMOVING A TEST STRIP.
• Make sure code number on meter matches code
number on strip vial label.
• Keep meter clean.
• Store strips in the original vial.
DON’T:
• Store strips outside original vial.
• Use expired test strips.
• Use code key from another blood glucose system.
• Store meter or strips in extreme temperatures.
• Store meter in damp or humid areas.
• Insert any object other than a test strip into strip
slot.
• Remove or insert code key while meter is on.
• Test with meter placed on hot or cold surfaces.
18
Proper Test Strip Appearance
Although only a small amount of blood is needed, it is
very important that you put enough blood on your test
strip so that the entire yellow window is filled with
blood. This ensures that your meter can produce
accurate and reliable results.
This strip has the correct amount of
blood.
Notice that the left side of the yellow
window is not completely filled with
blood. This strip has too little blood
and may produce an error message
(or an inaccurate result).
I
I I
I
I I
I I
I
I
I
I
I
If this display remains after the
blood drop is applied, then your
drop was too small. Reapply a
larger drop of blood.
I I
I I
I I
Very small amounts of blood may give you an error
message or an inaccurate result (see Error Messages on
page 39). Repeat the test.
This error display may appear at the
end of the test and you will not get a
blood glucose result. Remove test
strip and retest with a new strip
using a larger drop of blood.
19
Using Memory
The meter automatically stores 480 glucose results, letting
you review them in order from the most recent to the
oldest. If you have set the time/date feature, the time and
date of the results are also displayed. If time and date are
not set, each result is marked with a number according to
how it falls in sequence.
If the memory is full and a new result is added, the meter
deletes the oldest result. Results stored in memory are not
lost when you replace the battery. However, to retain the
correct time and date settings, you must replace the
battery before it is completely dead.
The Accu-Chek Sensor Meter also calculates 7, 14, and
30-day averages. You do not have to set the time and date
for the meter to give you average calculations.
HI or LO results (results outside of the meter’s reading
range) and results marked as a control are not included in
averages. If a HI or LO result is detected in memory “7 day
ave,” “14 day ave,” or “30 day ave” flashes on the display.
If you perform a control test without marking it as a
control, it appears like a blood glucose result in memory. It
will also be included in the 7, 14, and 30-day averages.
To recall results and averages stored in memory:
1. Press and release the right or
left arrow button to enter
memory recall mode. If a code
key is installed, the code
number appears briefly,
20
followed by the most recent result stored in memory.
If no code key is installed, code and “---” appear.
Press and release the right or left arrow button again
to enter memory recall mode.
2. Once in the memory mode:
Press the left arrow button to view individual results
in memory,
or
Or
Press the right arrow button to review, in sequence
7, 14, and 30-day averages.
or
Note: Press and hold down the right or left arrow
button to quickly scroll through results.
3. Turn meter OFF.
21
Quality Control Checks
What are quality control checks?
They ensure that you are doing a test correctly and
that your system is working properly.
When should I check my meter?
•
If you leave the cap off the vial of test strips.
•
Before using your meter for the first time.
•
When you open a new vial of test strips.
•
If you drop the meter.
•
Whenever your result does not agree with the
way you feel.
•
If you have repeated a test, and the blood
glucose result is still lower or higher than
expected.
•
When you want to check the performance
of the meter and test strip.
22
To do a quality control check, you need:
• Accu-Chek® Sensor Comfort Glucose Control
Solutions (Level 1 and Level 2)
• Accu-Chek® Sensor Comfort Test Strips
Note: When you open a new bottle of glucose control
solution, write the date on the label. Opened bottles
of glucose control solution are good for three
months or until the expiration date, whichever
comes first.
DATE
:
Important: Make sure you use the proper control solution
for the test strips you have: Accu-Chek Sensor Comfort
Test Strips require Accu-Chek Sensor Comfort Glucose
Control Solutions.
23
Performing a Quality Control Check
1. Open test strip vial and remove test strip.
Replace vial cap.
2. Within 3 minutes, insert
test strip (yellow window
facing up) into test strip
slot. The meter turns on
automatically.
Check that the code
number on the meter
matches the code on the
vial of test strips you are
using. The test strip symbol
stops flashing and a blood
drop symbol appears on the display.
Co
Sensor
de:
73 1
3. Press and release the right arrow button once to
select a L1 (Level 1) control or twice to select a
L2 (Level 2) control.
Note: Results marked as L1 or L2 do not appear
in memory or averages.
Sensor
24
I I
I I I
I I I
I I
4. Hold the control bottle
horizontally with the tip
pointed directly at the right
edge of the strip.
III III
IIIIII
5. Gently squeeze the bottle to form one small drop.
6. Bring the drop to the edge of the strip within the curve,
and allow the strip to automatically draw the solution
into the yellow window until it is completely filled.
An hourglass flashes in the
display until the measurement
is complete.
I II I
7. Tightly replace the cap on
control solution.
III
8. The control result appears. If result is within the
acceptable range (which is found on the side of the
vial of strips), an icon of the control vial appears on
the screen while the control test result and time and
date (if set) alternate with “OK” and “L1” or “L2” on
the display.
Example of an acceptable Level 1 control result.
and
or
and
25
Note: Result must be marked with an L1 or L2 for
the meter to verify if control result is within range. If
result has not been marked with an L1 or L2, refer to
your test strip vial label for the glucose control ranges.
If result is not within the acceptable range, an icon of the
control vial appears on the screen while the control test
result, and time and date (if set), alternate with “Err” and
“L1” or “L2” on the display. See Understanding Control
Results on page 27 for more information.
Example of an unacceptable Level 1 control result.
and
or
and
9. Remove test strip from meter and discard.
Note: Marking a test as “L1” or “L2” prevents the quality
control result from taking up space in the meter’s memory. If you do not mark the test as a control, the control
result is stored in memory and included in averages.
26
Understanding Control Results
If your glucose control results are within the acceptable
range, you can feel confident that your test strips and
meter are working correctly.
If one or both of your glucose control results are outside
of the acceptable range, your system may not be
working properly. Check the following:
• Did you use control solutions or test strips that
were past their expiration date?
• Did you leave the cap off the vial of test strips or
glucose control solutions?
• Did the code in the meter match the code on the
test strip vial label?
• Did you follow the testing steps exactly?
• Did you use the proper glucose control solution for
the test strips you used?
• Did you select the appropriate control result level
(L1 or L2)?
Repeat the glucose control test. If the result still is not
acceptable, contact Roche Diagnostics during business
hours.
27
Caring For Your Meter
Display Check
This verifies that all parts of
the display are working. Make
sure the meter is off. Press and
hold down the ON/OFF button.
The display should look exactly
like the picture at right. If it
does not, call Roche Diagnostics.
Cleaning
Clean the outside of the meter, as needed, using a soft
cloth that has been slightly dampened with one of the
following:
• 70% alcohol
• a solution of mild dishwashing liquid and water
• 10% household bleach solution (1 part bleach in 9
parts water) made fresh daily
• Sekupoudre
• Super Sani-wipes (Ammonium Chloride with alcohol)
Do not get moisture into the code key slot, test strip slot,
or the serial port.
Note to Healthcare Professionals:
Follow the infection control procedures
appropriate for your facility.
28
Storage and Handling
Keep your meter free of dust. Protect it from extremes in
temperature and humidity, and handle it with care. If
meter is dropped, perform a quality control check with
the glucose control solutions before doing a blood
glucose test.
The travel case is designed to let you store a variety of
supplies you may need and helps to protect your meter.
29
Note to Healthcare Professionals:
Follow the infection control procedures appropriate for
your facility. A drop of fresh, whole blood is required to
perform a blood glucose test. Fresh venous, capillary,
arterial or neonatal blood may be used. Caution should be
taken to clear arterial lines before blood is drawn. Caution
should be exercised in the interpretation of neonate blood
glucose values below 50 mg/dL (2,8 mmol/L). Blood
glucose determination with venous or arterial blood must
be performed within 30 minutes of sample collection. Iced
arterial blood specimens must be tested at room
temperature. Avoid air bubbles with the use of pipettes.
Fresh venous blood specimens containing the
anticoagulants EDTA or heparin are acceptable.
lodoacetate or flouride/oxalate are not recommended.
30
Transferring Data
The meter allows you to transfer all the data that you
have stored in its memory to your computer so this
information can be printed. It allows you to transfer
data in two different ways:
• Directly to your computer using a specialized
software and interface cable
• Via specialized modems designed for remote
transfer
Consider the following when using accessory
equipment:
• DO NOT run a glucose test when the Accu-Chek
Sensor Meter is connected to accessory
equipment.
For more information please contact your doctor or
healthcare professional and your local distributor.
31
Quick Reference Display Guide
I
I
I
I
I
I I
I I
Meter needs to be coded/
calibrated, or code key is not
inserted completely; turn meter
OFF and insert code key
(see page 9).
I I I
I
I I
Meter is in the “set” function,
allowing you to set the beeper,
time, date, year, and hypo flag
(see page 4).
Meter is ready to accept a
test strip.
I
I
I
Blood drop can be applied to
test strip (see page 12).
32
I I I
I I
I I
I I I
I I
I I
I
Blood glucose result appears on display (see page 14).
or
Blood glucose result may be higher
than 600 mg/dL (33,3 mmol/L). If
this does not confirm the way you
feel, review proper testing procedure
and perform a quality control check
(page 22). Repeat test. If HI still appears, follow your
doctor’s instructions.
Blood glucose result may be lower
than 10 mg/dL (0,6 mmol/L). If this
does not confirm the way you feel,
review proper testing procedure and
perform a quality control check
(page 22). Repeat test. If LO still appears, follow your
doctor’s instructions.
Blood glucose result is lower than hypo flag level set on
meter (see page 8).
I I
or
I I I
I I
I I
I I I
I I
I I I
I I I
33
Temperature is above or below the operating range of
test strips (14° to 40°C). The result you have obtained
may not be accurate. Move to an area between 14° and
40°C, wait 5 minutes, and repeat the test. Do not
artificially heat or cool the meter.
or
Memory Displays
The meter is in the “memory” function, allowing you to
recall results from memory (see page 20).
or
34
If you are reviewing memory and a result appears with a
temperature symbol as shown, this result may not be
accurate because the test was performed outside the
operating range of the test strips (14° to 40°C ).
or
The meter is in the “memory” function, allowing you to
recall 7, 14, and 30-day averages.
or
This blood glucose result was marked with a result
marker flag (asterisk) (see page 16).
or
Do not use individual values stored in memory
to make therapy adjustments.
35
Display Messages
Battery Displays
Battery power is low.
Change battery soon.
(battery symbol not flashing)
I II
IIII
IIIII
Battery is dead. Change
battery now. Meter will
turn off after 3 seconds.
IIII
(flashing battery symbol)
36
Quality Control Check Displays
Meter is ready for a Level 1 or Level 2 glucose control
check. Apply a drop of Level 1 or Level 2 glucose control
solution.
and
I I
I I I
I I I
I I
I I
I I
I I I
I I I
37
Example of an acceptable control result.
and
or
and
Glucose control result is not acceptable. Repeat test.
Refer to Understanding Control Results (see page 27).
Example of an unacceptable control result.
and
or
and
38
Error Messages
The meter automatically performs a system check to
prevent inaccurate results. If the meter detects a
malfunction, it displays the “Err” message and an
appropriate symbol.
Do not make treatment decisions based on an error
message.
I
I
I I
I I
The code key is faulty, or the
code key was removed while
the meter was on. Turn meter
OFF and re-insert code key. If
this error display still appears,
contact Roche Diagnostics.
I I
I I
Your blood sugar may be
extremely low, an incorrect
amount of blood was applied, or
the test strip is damaged or
I
I
inserted improperly. If you see
I
this error message after you put
blood on the test strip refer to the section in the manual
titled Understanding Your Test Results (see page 17). If
you see this error message before you put blood on the
strip, remove test strip and reinsert, or insert a new test
strip. If the message reappears, call Roche Diagnostics.
I
39
Your blood sugar may be extremely high or a meter or
strip error has occurred. If this confirms how you feel,
contact your healthcare professional immediately. If it
does not confirm how you feel, repeat the test and refer
to the section in the manual titled Understanding Your
Test Results (see page 17).
or
If this does not confirm the way you feel, run a quality
control check with your glucose control solutions and a
new test strip. If the control result is within the
acceptable range, review the proper testing procedure
and repeat your blood glucose test with a new test strip.
If mg/dL error or mmol/L error still appears for your
blood glucose test, your blood glucose result may be
extremely high or low and above or below the system’s
reading range. Contact your doctor immediately.
If the control result is not within the acceptable range,
refer to Understanding Control Results (see page 27).
40
I I
I I
Meter has detected the
I I I
loss of all results in
memory. Turn meter
OFF and turn it back
ON again. You may not
be able to recall the
results previously stored in memory, although
your meter will store any future test results.
I I I
I I
I I I
I I I
Temperature is above or below
the operating range of the
meter. Move to an area
between 14° and 40°C, wait
5 minutes, and perform a
test. Do not artificially heat
or cool the meter.
Meter has failed its series of
electronic checks. Turn meter
OFF, then ON again. If this error
display still appears, testing
cannot take place. Call Roche
Diagnostics.
41
Technical Data
Please read information packaged with
test strips regarding up to date product
specifications and limitations.
Measuring Principle: The glucose dehydrogenase
converts the glucose in a blood sample to gluconolactone. This reaction liberates an electron that reacts with
a coenzyme electron acceptor, the oxidized form of the
mediator hexacyanoferrate (III), forming the reduced
form of the mediator, hexacyanoferrate (II). The test strip
employs the electromechanical principle of biamperometry. The monitor applies a voltage between two identical
electrodes, which causes the reduced mediator formed
during the incubation period to be reconverted to an
oxidized mediator. This generates a small current that is
read by the monitor. The meter detects electrical current
change and with the aid of the code key, converts the
signal obtained into a displayed reading.
42
Product Specifications
Meter Storage
Conditions
-25° to 70°C
<85% humidity
>53.3 kPa atmospheric pressure
System Operating
Conditions
Refer to your test strip package
insert for more information
Measuring Range
Refer to your test strip package
insert for more information
Memory Capacity
480 blood glucose results with
time and date
Display
LCD display
Blood Volume
Refer to your test strip package
insert for more information
Size
3.3” x 2.2” x .8”
(84 mm x 56 mm x 20 mm)
Weight
1.8 oz (57 g)
Accuracy
Refer to your test strip package
insert for more information
Precision
Refer to your test strip package
insert for more information
Sample Types
Capillary, venous, arterial, and
neonatal (including cord) blood
43
Power Supply
One 3-volt lithium battery type
2032 (CR 2032, DL 2032 or
equivalent)
Data Port
3-wire RS-232C Serial Port
Multiplexed TTL UART
Test Strip
Storage Conditions
Refer to your test strip package
insert for more information
Construction
Hand held
Protection Class
III
Rated Operation
Continuous operation
44
Product Safety Information
Explanation of symbols
CAUTION Refer to accompanying documents.
3V type 2032
Listed by Underwriter’s
Laboratories, Inc.® in
accordance with UL 61010A-1 and
CAN/CSA C22.2 No. 1010-1.
Laboratory Use
Electrical Equipment
8C79
This product fulfills the requirements of
Directive 98/79 EC on in vitro diagnostic
medical devices.
For in vitro diagnostic use
Manufactured by
This meter is suitable for continuous operation. Meter is
not protected against ingress of water. Meter is not
suitable for use in the presence of flammable anesthetic
mixture with air, oxygen, or nitrous oxide.
45
Warranty and Service Instructions
Roche Diagnostics warrants the meter against any
material and manufacturing defects that may arise
during proper use of the instrument. For precise terms
and conditions please see the Warranty Card in the box.
This warranty does not affect any statutory or other
rights.
The warranty ceases to apply if the instrument has
been misused or tampered with.
Roche undertakes to repair faulty components free of
charge or, at their discretion, to provide a fault-free
replacement meter.
Be sure to fill out the warranty form that came with
your system and return to Roche Diagnostics.
Statutory and other rights: This manufacturer’s
warranty is in addition to any statutory or other rights
which may be acquired by the customer through his
dealings with the instrument supplier.
The statutory guarantee provisions governing the sale of
consumer goods in the country of purchase shall prevail.
46
Supplies and Accessories
The following supplies and accessories are available
from pharmacies or your local surgical supplier.
Accu-Chek Sensor Comfort Test Strips
Accu-Chek Sensor Comfort Glucose Control Solutions
Accu-Chek Softclix Lancets
Accu-Chek Softclix Lancing Device
47
Index
About your Accu-Chek Sensor Meter .........................v
Accu-Chek Sensor Comfort Test Strip ....................viii, 11
Batteries ..............................................................1, 2, 3
Battery display .................................................... 2, 3, 36
Battery life..................................................................... 1
Battery cover ............................................................ vi, 1
Battery installation ........................................................ 1
Beeper, turning on or off ............................................... 4
Blood sample .............................................................. 11
Caring for your meter ............................................... 28
Cleaning...................................................................... 28
Checking the system .......................... 22, 24, 27, 28, 39
Checking the display....................................................28
Code key .................................................................. vi, 9
Code key slot................................................................ vi
Coding/calibrating your meter....................................... 9
Control results....................................................... 27, 37
Control solutions ......................................................... 22
Display messages ..................................................... 36
Display check.............................................................. 28
Do’s and don’ts ........................................................... 18
48
Error messages ..........................................................39
Flag (asterisk) ........................................................... 16
Gathering supplies for testing ................................. 11
Getting a good sample .................................................11
Glucose control solutions ............................................ 22
HI display..............................................................15, 33
Hypo flag........................................................................8
Inserting strip............................................................ 12
Level 1 glucose control solution...............................24
Level 2 glucose control solution...................................24
LO display ............................................................. 15, 33
Marking a result with a flag, asterisk ( ) ............. 16
Memory....................................................................... 20
ON/OFF button ............................................................. v
Quality control checks........................................ 22, 37
Quick reference display guide..................................... 32
Recalling stored values ............................................ 20
Right and left buttons .................................................... v
49
Specifications, product............................................. 43
Storage conditions ................................................ 29, 43
Storage and handling.................................................. 29
Supplies and accessories.............................................47
Testing, blood glucose.............................................. 11
Testing, quality control ......................................... 22, 27
Test strip slot................................................................. v
Test strip vial......................................................... 10, 12
Time, date, and year setting.......................................... 6
Transferring data..........................................................31
Troubleshooting..........................................17, 22, 27, 39
Understanding control results ................................. 27
Warranty .................................................................... 46
50
Any Questions
We want to give you the help you need for long and
reliable service of your meter.
Review your test procedure and make sure that you are
performing the steps correctly. If you still have questions,
please contact Roche Diagnostics. Please have your AccuChek Sensor Meter, Accu-Chek Comfort Test Strips and
Accu-Chek Sensor Comfort Glucose Control Solutions
available when you call.
IMPORTANT—READ CAREFULLY BEFORE USE.
GUARANTEE: The statutory guarantee provisions
governing the sale of consumer goods in the country of
purchase shall prevail.
This product may be covered by one or more of the
following patents: U.S. Patent Nos. 4,999,632;
4,999,582; 4,963,814; 5,508,171; 5,352,351;
5,405,511; 5,438,271; 5,627,075; 5,288,636;
4,891,319; 5,053,199; 5,366,609; 5,508,171;
5,997,817; 6,254,736; 6,270,637; 4,924,879; Re.
35,803 and Re. 36,268; and Austrian Patent Nos.
0229810 and 0406304. U.S. Patent No. 4,891,319 and
Austrian Patent No. 0229810 are licensed from Quadrant
Holdings Cambridge Limited.
© 2003 Roche Diagnostics. All rights reserved.
03654117001-0703
51
Roche Diagnostics GmbH
Sandhofer Strasse 116
D-68305 Mannheim, Germany
www.roche.com
ACCU-CHEK and SOFTCLIX are trademarks
of a Member of the Roche Group.
03654117001-0703
2003/06