1
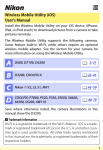
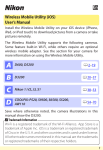
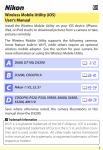
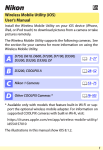
Speaker: Nico de Corato -‐ owner of DubaiBlog Network, professional speaker Beside being owner and founder of the network DubaiBlog, Nico de Corato is also a Professional Speaker and contributor of many magazines (in UAE, US and Italy) and videographer for Sport360. The professional speaking industry operates on two tracks: the celebrities, like Olympic medal winners or famous politicians, who can come in and immediately command top dollar because of their name recognition; and regular people, who have “built their clientele out over years of learning how to market themselves and provide good content. Nico has strong expertise and more than 15 years experience in the following areas: • computer science • professional blogging • social media • web marketing & web communication • web & media in general Nicola de Corato – Abu Dhabi Media Zone Authority License Number 640 PO Box 77804 Abu Dhabi, UAE Quick case history (some nice shoots) D3200 D610 -‐ SB700 AW110 Picture of a CD by Tony Tammaro (Italian singer) on the background of Souq al Bahar Picture of Jordanian band Autostrad on the stage, during MeetD3. It's the first official picture of the whole band on the stage. It got more than 700 Likes in few hours. Backstage picture before diving (first underwater test for Nikon D5500 with Housing by NiMar) Nicola de Corato – Abu Dhabi Media Zone Authority License Number 640 PO Box 77804 Abu Dhabi, UAE Equipment you may need There was a time when a blog without photos was acceptable…if the writing was good enough. Today, in a time of Instagram, Pinterest and rampant photo sharing, you need to be taking pictures for your blog. A picture speaks a 1000 words. Oh yes! Whether you are blogging for hobby or business, creating beautiful visuals will always help your blog stand out amongst the big sea of other blogs. One main difference between a professional photographer and a blogger is how to approach photography. A photographer is often highly focused on one specialty and he/she gets all the needed equipment to realize the best shots in occasions usual for him/her. Sometimes we not even speak about a "sport photographer" but we have specialization in this/that kind of sport: water sport, motor sport, and so on. A blogger often adapts his/her equipment to different situations, since he/she may cover different kind of events / situations. Of course to get a good DSLR will help a blogger in doing a god job, and in any case it depends on the main target, but a minimum equipment should include: -‐ a pocket camera (to be carried any time, just in case) -‐ a DSLR with a couple of lens (also en entry level camera, as well as the D3200 can be fine) -‐ a speedlight -‐ a tripod You don’t need a great camera or a lot of technical skill to take interesting, awe-‐inspiring photographs for your blog. You just need the right photography tips. Nicola de Corato – Abu Dhabi Media Zone Authority License Number 640 PO Box 77804 Abu Dhabi, UAE Camera setup The first time you try your digital SLR camera, use fully automatic settings. If you are a beginner to SLR photography, you should simply enjoy using it and get a good feel for how to handle it. The best way to do this is to set it on fully automatic. Look for a symbol on your camera's mode dial that looks like a rectangle. When your camera is on automatic, all important settings such as ISO, Aperture and exposure are made for you, taking out the guess work. When your camera is set on automatic, it's also recommended that your lens is set on automatic focus. That is if it has that option. If your lens has an option for automatic focus you will notice on the side of it letters AF. Beginner Tip for focusing: Always press your shutter button half way down, then once it focuses correctly press it the rest of the way down. ie focusing and taking the shot is always a two step process. Six automatic settings you will find on your digital SLR camera: The following DSLR settings are found on most camera models. However, depending on your camera brand, some may not be available. Portrait -‐ DSLR camera settings for portraits. Set your digital camera to portrait mode when your taking photographs of people. Portrait mode will set the image color for skin tone perfectly. Landscape -‐ Use this SLR camera setting when your taking photos of landscapes. For example if your photographing beach or mountain sceneries. Close Up -‐ Close up mode speaks for itself. For example, when you want to photograph small objects so they fill the whole frame as if to appear larger. Nicola de Corato – Abu Dhabi Media Zone Authority License Number 640 PO Box 77804 Abu Dhabi, UAE Sports -‐ Sports mode should be used when you want to photograph a moving object such as a child or dog running. Night Portrait -‐ Choose night portrait automatic mode when you want to shoot a person in low light such as night time. Flash Off -‐ This mode is useful for times when your not allowed to use a flash. For example, in an art gallery. For beginners, it's fine to leave the SLR on automatic or scene modes. For the most flexibility, think about changing your exposure mode to one of the semi-‐automatic or fully manual modes. In order to use a semi-‐automatic or fully automatic mode, you need to know how to set ISO, aperture, shutter speed and so on. Some times during event you quickly switch from one point to the other, from outdoor to indoor and then again outdoor. And so on. So you need to be very quick in finding the right setup. Sometimes can help you in taking some shoots in auto mode, after your manual setup, just to be safe to have in any case a "possible backup". Image Size Images can be recorded in any of the following three sizes: large (L), medium (M), and small (S). The large size for the D5100, for example, is equivalent to about 16 megapixels, the medium size to about 9 mega-‐pixels, and the small size to about 4 megapixels. Nicola de Corato – Abu Dhabi Media Zone Authority License Number 640 PO Box 77804 Abu Dhabi, UAE Printed on a typical inkjet printer with a resolution of around 300 dpi, the images are about 42 × 28, 31 × 21, and 21 × 14 cm, respectively. While images need not be taken at a large size if they are destined for use as 4 by 6 (10 × 15 cm) prints, the large size is recommended if the images will later be trimmed or enlarged. More details are visible in the large image than in the small image. As blogger we'll never asked for printing our images, or at the max they can ask to use some of our images for a magazine, so we don't need a high resolution. And storing images in medium or small resolution, will help us in saving space both on SD and on our laptop. But at the same time, Large resolution will give us chance to crop an image, to get a detail with a good resolution. Photo Composition and Perspective To compose your shot, you need to look through your viewfinder to see what your camera sees. Then you deliberately place your subject somewhere in the shot. It takes more thought than snapping the picture. While there are many composition rules (all of which may be broken), there is one rule that doesn’t take a huge amount of thought or planning. Rule of Thirds If you’re into art, you may have heard of The Rule of Thirds. Here is how it works: cut the canvas into thirds diagonally and horizontally. The intersecting sections are the “sweet spots” and ideally your subject will fall in or near one of the four intersections. Your goal is to place your subject in one of the red intersections. Nicola de Corato – Abu Dhabi Media Zone Authority License Number 640 PO Box 77804 Abu Dhabi, UAE There are many composition rules and guides, but the rule of thirds is the most basic and often the very first lesson when it comes to photography. The rule of thirds is applied by aligning a subject with the guide lines and their intersection points, placing the horizon on the top or bottom line, or allowing linear features in the image to flow from section to section. The main reason for observing the rule of thirds is to discourage placement of the subject at the center, or prevent a horizon from appearing to divide the picture in half. Michael Ryan and Melissa Lenos, authors of the book An Introduction to Film Analysis: Technique and Meaning in Narrative Film state that the use of rule of thirds is "favored by cinematographers in their effort to design balanced and unified images" (page 40). The Photography Rule Of Thirds Is Everywhere A person’s eye naturally goes to one of the thirds in the image. Look at famous artwork and you will see this time and time again. Take the Mona Lisa for example. Her eyes (focal point) are in the top third of the image. Had her eyes been in the center of the painting, it would not have been as interesting and may have even felt a little awkward. Nicola de Corato – Abu Dhabi Media Zone Authority License Number 640 PO Box 77804 Abu Dhabi, UAE Take time today when you watch television or a movie. You will notice that the subject is often placed in one of the thirds of the frame, mainly the right or left third. This is especially noticeable when you watch a documentary or any program where a single person is being interviewed alone on camera. Think of how boring if would be if the main character was in the center of the frame the entire show. Tell A Story 1. Shoot from many Different Locations You don’t want every single one of your images to be taken from the same location. You should be working up a sweat moving around your subject and capturing every possible angle you can think of to tell the story. You will be surprised how one angle may tell a bigger story than another angle. 2. Capture the Details What is the story you are telling? Think about what little details you could capture to help tell the story. If you are talking about a recent trip to the farmers market, capture the fruit, prices, scale, and the vendors. When put together, all these little details tell a pretty powerful story! Nicola de Corato – Abu Dhabi Media Zone Authority License Number 640 PO Box 77804 Abu Dhabi, UAE 3. From the Start to the End Don’t just start in the middle of your story. Capture the very beginning. If you are going on a road trip, capture everyone packing and loading the car. The middle is easy to capture, as that is normally where the bulk of the story is being told. And don’t forget the end. After your fun road trip, get everyone sleeping in the car or the pure exhaustion (kids crying is great!) of the fun day! 4. Get Everyone in the album Or at least as many people as possible during events.. Nicola de Corato – Abu Dhabi Media Zone Authority License Number 640 PO Box 77804 Abu Dhabi, UAE How Many Images..? There is not a rule about how many pictures, common sense can be a good starting point.. But an album should have at least 10 -‐ 15 pictures and not more of 100 (not to be boring). How To Watermark Images and Why You Should By watermarking images you are simply saying, “This is my photo.” There are so many ways for people to grab photos off of your blog and use them as their own. If you add a watermark, you may deter people from taking your precious images. But it also helps your branding. You can do that by PhotoShop, LightRoom or any other tools. Watch out also not to overbrand the pictures. Nicola de Corato – Abu Dhabi Media Zone Authority License Number 640 PO Box 77804 Abu Dhabi, UAE Nikon Wi-‐Fi Features Select Nikon DSLRs along with many COOLPIX compact digital cameras and some Nikon 1 models have Wi-‐Fi® built-‐in. Now, using any of these cameras, you can seamlessly transfer images from your Wi-‐Fi camera to your compatible smartphone or tablet± for easy sharing via email, text or uploading to an image sharing site. And a great feature of Nikon cameras that feature Wi-‐Fi connectability is that you don't need to be at a Wi-‐Fi hotspot. The camera and your smart device create the connection. Although your smartphone probably has the capability of shooting photos, your Nikon digital camera can likely take better photos. This is because digital cameras utilize larger image sensors, and powerful image processing engines. The camera’s sensor is designed to give you a higher resolution, wider dynamic range, and the ability to shoot in low light and use high ISOs—all of which allow for the generation of high quality image files. Nikon digital cameras also utilize great NIKKOR lenses, as well as many features that allow you to be creative with your photography. Images shot with Nikon cameras that feature built-‐in Wi-‐Fi can be uploaded to a compatible smartphone or tablet that has the Nikon Wireless Mobile Utility (WMU) app loaded on the device. The app is free and can be found on the iTunes Online Store® for iPhone®, iPad® and iPod touch® users and the Google Play™ Store for Android™-‐powered smart devices. Once on your smart device, you can upload images to image sharing or SNS websites, or send them to friends and family via email or text messaging. Your imaging needs and smart device will likely determine the file size/type that you shoot images with that are going to be transferred from the camera via Wi-‐Fi. Your high resolution camera creates large files and you probably won’t want to shoot using the maximum resolution of the camera if you’re planning on sending images to a smart device using Wi-‐Fi. This is because the larger the file size, the longer it will take to travel from the camera to the device, so it is suggested that you use JPG rather than NEF. JPG fine/large will also give you larger files than choosing JPG Basic/medium or small. If you're shooting images that will only be displayed digitally, you can go ahead and set your camera to record smaller size files. For folks who want to shoot using the higher resolutions available in your camera, set the app up so that it only downloads the recommended size or even smaller VGA size image while recording the high res. image to the media card in the camera. This can be accessed via the settings menu in the app. Nicola de Corato – Abu Dhabi Media Zone Authority License Number 640 PO Box 77804 Abu Dhabi, UAE Remote Control You can even use your Android™-‐powered smartphone or tablet, or iiPhone®, iPad® and iPod touch® as a remote to shoot photos with—allowing you to get into the shot along with your other subjects, or even place the camera in a location to capture wildlife while you snap the shutter from a remote spot far from the wild animals. What’s really fun is that you actually see the same image the camera sees on your smartphone or tablet’s LCD screen—allowing you to shoot at precisely the right moment that you want. (Check your Camera's User's Manual to see if your camera has this capability.) It’s easy to share still images with your friends and family using your Nikon digital camera with built-‐in Wi-‐Fi. You can also share video with Nikon DSLRs. Using the Compatible Camera's built-‐in Wi-‐Fi In order to use the Wi-‐Fi feature of Nikon cameras that have built-‐in Wi-‐Fi, you’ll need to download the free “Wireless Mobile Adapter Utility” app. For folks using Android™-‐powered devices, download the app from the Google Play™ Store and install it on your Android™-‐powered smart device. For folks using an iPhone®, iPad® and iPod touch®, download the app from the iTunes Online Store®. Insert a media card into the camera. You must have a media card in the camera for the Wi-‐Fi menus to be fully accessible. For COOLPIX cameras, the battery level must also have at least a 50% charge for the Wi-‐Fi to work. There are three different ways that an Android user can connect to their compatible camera and only one way for an iOS user to connect a camera to their iPhone®, iPad® and iPod touch®. The following instructions can be used by both Android™ and iOS users—connect by selecting the camera’s WI-‐FI NETWORK OR SSID on the smart device. Connecting this way is the quickest and easiest because it is an unencrypted connection. Android™ users also have the option of connecting via Push-‐button WPS (Wi-‐Fi Protected Setup) if their smart device supports push-‐button WPS, or PIN-‐entry WPS (Wi-‐Fi Protected Setup). For step-‐ by-‐step instructions on setting up those types of connections, please see your camera's User's Manual. Nicola de Corato – Abu Dhabi Media Zone Authority License Number 640 PO Box 77804 Abu Dhabi, UAE You can now access the camera from the app. Upon selecting the Take Pictures Remotely option in the app, Live View is started automatically, allowing you to now see what the camera sees. Connecting the compatible camera to the smart device 1. Enable the camera’s built-‐in Wi-‐Fi. Newer models will have an external Wi-‐Fi button, on older models, select Wi-‐Fi in the setup menu. 2. Go to the smartphone’s Wi-‐Fi settings and select the camera in the list of networks displayed by the smart device. It will begin with Nikon, followed by a string of letters and numbers. For Android smartphones, once you initially make this network connection, your device will automatically connect when you enbale the camera's Wi-‐Fi. For iPhone®, iPad® and iPod touch® users, you'll have to perform this step each time you wish to use the wireless feature of your Nikon camera with your smartphone. 3. Launch the Wireless Mobile Utility app on the smart device. Nicola de Corato – Abu Dhabi Media Zone Authority License Number 640 PO Box 77804 Abu Dhabi, UAE