1
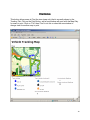
 RSI AVL User Manual
AUTOMATIC VEHICLE LOCATION
& MOBILE DATA SYSTEMS
Web-Based RSI AVL™
February 2010
Adapted for the City of Ann Arbor, Public Services
PUBLIC USER GUIDE, AVL SNOW PLOW TRACKING, DEC. 2011 1 Table of Contents
Homepage Layout...............................................................................................3
Tracking ..............................................................................................................6
Tracking: Tracking (Real Time)...........................................................................6
Tool Bar...............................................................................................................7
Print Button..........................................................................................................9
Find.....................................................................................................................10
How to Find a Vehicle: .......................................................................................11
How to Find an Address:.....................................................................................11
Bookmark............................................................................................................12
How to Go to a Bookmark...................................................................................13
Map Identify Tool ................................................................................................14
Measuring Tool ...................................................................................................15
How to Measure a Point......................................................................................15
How to Measure a Line........................................................................................15
How to Measure Area in a Polygon .....................................................................16
Map Back / Forward Extent..................................................................................18
Pan ......................................................................................................................19
Zoom In / Zoom Out.............................................................................................20
How to Zoom In ...................................................................................................20
How to Zoom Out.................................................................................................20
Full Extent............................................................................................................22
Magnifier .............................................................................................................23
Show/Hide Overview Map....................................................................................24 2 Homepage Layout
• A Tool Bar across the top of the map possesses all map manipulation and query
functionality for users:
3 • A Legend on the left hand side of the screen with three sub sections: The Vehicle
Tracking Table displays the tabular location and status of your vehicles (clicking on the
vehicle name in the table will zoom and center the map to that vehicle on the map); Map
Contents displays the different GIS layers of your map data; and Map Identify Results
displays the information identified and saved using the Map Identify tool:
4 • A Map Display (adjacent to the legend) of your service area including the most
recently reported location of all the vehicles in active City fleet.
5 Tracking
The Tracking function is where all the current vehicle data, will be displayed, viewed,
edited and manipulated by the user.
Tracking: Tracking (Real Time)
The first tab of the Tracking function is Real Time Tracking. The Tracking tab provides
current vehicle information in both geographical and tabular formats, along with a tool
bar for map manipulation. Vehicle direction is indicated by the orientation of the vehicle
symbol. The default map orientation is North to the top of the screen.
The major components of the Tracking tab below are:
• The Tool Bar for map manipulation and query functionality (Light blue bar across the
top of the map and legend
• The Map Legend with sub sections listing all vehicles, map contents, and other
data(left column of page)
• The Map Window of your service area
6 RSI AVL Starting Points
• When you click on a specific vehicle name in the Vehicle Tracking Table (within the
Legend on the left), the map view will automatically pan and center on that specific
vehicle.
• When you hover your mouse cursor over a vehicle icon in the map window display, the
vehicle icon will become highlighted/enlarged to signal which vehicle you have selected.
That specific vehicle’s label will also be highlighted. If you click on that vehicle label it
will expand to show you additional information about that vehicle including: address,
speed, heading, status, and age of the data.
7 Your specific color codes and iconology can be found in the Legend > Map Contents at
the left side of the screen. Typically black means ignition off and blue means ignition on.
Icons will gradually fade based on the age of the location fix.
The various map layers will adjust (become visible) dynamically with your zoom level.
8 Tool Bar
The Tool Bar possesses all map manipulation and query functionality for users.
Print Map
Find Address or Vehicle on map
Create Bookmark or Go To Existing Bookmark (used to save a map view)
Map Identify Tool – will identify any vehicle, landmark, address on the map
Measure Tool –measure the distance between any two points, vehicles,
locations, etc.
Map Back Extent (Go to Previous View) / Map Forward Extent (Go to Next
View)
Pan
Zoom In / Zoom Out – Can also be performed with the scroll wheel on the
mouse.
Full Extent – Shows map in its entirety
Magnifier – magnifies any point on the map in a new window. Select the tool and
center new window over area of interest and a zoomed view will appear.
Show/Hide Overview Map
9 Print Button
This button allows users to Print the view (map only) that is currently shown in the
Tracking Tab. Click on the Print Button, and a new window will open with the Map Only
for users to print. Click on “File” then ‘Print’ to do this or close the new window to
change view for another map to print.
10 Find
The Find Button gives users the ability to locate an address or vehicle, along with the
capability to identify the closest available vehicle(s) to any entered point, address, or
incident.
How to Find a Vehicle:
Scroll over the Find Drop Down Menu and a list of options will appear. To locate a
vehicle,
click on Find Vehicle.
The Find Vehicle menu will appear. Enter in the vehicle number you wish to find in the
blank space next to “Type to Search:” or search for the vehicle you wish to find by
clicking on the drop down menu labeled “Choose a vehicle.” The buttons below the
search menu are manipulation tools for users to find, zoom and pan to a particular
vehicle on the Map. To close this menu, click on the X in the upper right hand corner of
the menu.
11 How to Find an Address:
Scroll over the Find Drop Down Menu and a list of options will appear. To locate an
address,
click on Find Address.
A Find Address Pop-Up will appear. Enter in the address you wish to find in the blank
space beside “Street or Intersection” and then click the “Find” button. To close this
menu, click on the X in the upper right hand corner of the menu.
The search will find the possible addresses and display them up in the ‘Legend’ > “Map
Identify Results”. Select the best result and right click to bring up a context menu and
either “pan to” or “zoom to”. The Map will update and show a green star at the address. 12 Bookmark
The Bookmark Button gives users the ability to create and name a bookmark (aka
Predefined Map View/Zoom Level) of the current view of the map or view past
bookmarks for viewing.
How to Go to a Bookmark
To go to an existing bookmark or predefined map view, scroll over the bookmark tab
and select “Go To a Bookmark”
Enter in the name of the bookmark or click on the Drop Down Menu and select from the
options listed. Then click on the Go button. The Map will update to display the desired
bookmark. To close this menu, click on the X in the upper right hand corner of the
menu.
13 Map Identify Tool
The Map Identify Tool will identify any vehicle, landmark, address, or other map layer
element on the map display.
How to Use
Click on the Identify button. Then scroll to the point on the map to identify. Click ONCE
on that point. A side bar will pop up containing point information. To view more
information, click on the drop down menu next to the X.
The side bar will expand to contain attribute data for the specified point. To close this
menu, click on the X in the upper right hand corner of the menu. To add this point to
your map viewing legend, click on “Add to Results” in the bottom left hand corner of the
menu.
14 Measuring Tool
The Measuring Tool will measure any point (latitude, longitude), line segment (from one
vehicle or point to another), or polygon (total surface area) on the map display.
How to Measure a Point
Click on the measuring tool. A pop up will appear on the map that gives you the option
to measure a point, line or polygon. To find the latitude and longitude for any given point
of interest or vehicle, click on the red point on the left side of the pop up menu.
Once the red dot has a box around it, you know it’s in point mode. Click on the map at
the point you wish to measure. The measure pop up will update to display the
coordinates for the specified point on the Map. To close this menu, click on the X in the
upper right hand corner of the menu.
How to Measure a Line
Click on the measuring tool. A pop up will appear on the map that gives you the option
to measure a point, line or polygon. To find the distance from any one point on the map
to another, click on the middle button of the pop up menu.
15 Click once on the Map and move the cursor to the next point to measure. To add
another point, click the point once. When finished, double click on the last point to
calculate distance. Results for line measurements can be converted into miles, feet,
kilometers and meters. To close this menu, click on the X in the upper right hand corner
of the menu.
How to Measure Area in a Polygon
Click on the measuring tool. A pop up will appear on the map that gives you the option
to measure a point, line or polygon. To measure the perimeter and/or square miles for
any area of space, click on the third button of the pop up menu.
16 Click once on the Map and move the cursor to the next point to measure. To add
another point, click the point once. When finished, double click on the last point to
calculate distance. View options in the Polygon Measuring tool include measurements
in feet, kilometers, meters, miles, acres, etc. To close this menu, click on the X in the
upper right hand corner of the Measure menu.
17 Map Back / Forward Extent
Map Back Extent (Go to previous view) / Map Forward Extent (Go to next view)
How to Use
To go forward/back to a previous view of the Map, click on the associated arrow button
and the Map will adjust accordingly.
18 Pan
The Pan feature allows users to move the map with one click using a “Grab and Drag”
function with the hand tool.
How to Use
Click on the Pan icon. Click on the map at any point and hold down while you move the
map in the direction you want to pan to (grab and drag) You can also zoom in with the
Pan feature. To do this, double click on the point you wish to zoom into and the map will
adjust accordingly.
19 Zoom In / Zoom Out
Zoom feature allows users to zoom to any point, location or vehicle on the Map or zoom
out of any area.
How to Zoom In
Click on the Zoom In button. Select a point and hold down on the left clicker of your
mouse and drag the rectangle selection to create an area to zoom to. When you release
the left clicker, the display will zoom in to the designated area.
How to Zoom Out
Click on the Zoom Out button. Hold down on the left clicker on your mouse to select the
area you wish to zoom out of. When you let go of the left clicker, the display will zoom
20 out centered on the selected area. The smaller the area you select, the more the view
will zoom out. To zoom out just a little, select a larger area.
21 Full Extent
The Full Extent Icon returns the map to full extent
How to Use
Click on the Full Extent button in the menu. Map will update to display the full extent of
your area of operations.
22 Magnifier
The Magnifier Tool will zoom in to a point on map in new window.
How to Use
Click on the Magnifier button. Using the mouse, click on the Magnifier Box tool bar and
drag the box. The box will update to show a zoomed in view of the spot.
23 Show/Hide Overview Map
The Show/Hide Overview Map icon allows users to turn the Overview Map on and off.
The tool allows the user to see what part of the overall map they are currently
viewing/zoomed to.
How to Use
Click on the Show/Hide Overview icon to show the map overview in a small map
window. To hide this overview, click on the Show/Hide Overview again. 24