1
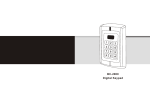
Setting Door Open Detection User Operation Mode SRK-6520 Reliable. Durable. Affordable There are 3 different options for user operation mode, card only, card and password, valid c ode. The optioned used is common to all users. Press: 6 0 0 # to disable this function (factory setting) Press: 6 0 1 # to enable this function. Press: Press: Press: In order for this feature to work, door contacts must be connected. There are 2 programming functions that work together in this mode. 3 0 0 # valid card only 3 0 1 # valid card and password 3 0 2 # valid card or password Setting Door Relay Strike Time Delete User Card or Cards SRK-6520 There are 3 options to delete a user card or cards, in engineering mode. a.) Press: 2 0 0 0 0 # to delete all user cards b.) Press: 2 read card # to delete individual user card c.) Press: 2 user identification number # to delete individual user card The door relay output can be operated as either normally opened or normally closed, a maximum current of 10 ampere can pass through the relay if used as normally opened or 5 ampere if normally closed. The door relay time can be set from 0 seconds to a maximum of 99 seconds. The factory default setting is 6 seconds and can be changed through the keypad. Press: 4 new time from 00-99 seconds a.) If door not closed after opening, keypad buzzer sounds. b.) If door forced open, keypad buzzer sounds and sends alarm signal. Press: 7 0 1 # entered 4 wrong passwords in succession, the keypad is locked for 1 0 minutes. Setting Alarm Signal Output Time Press: 5 new time from 00-99 minutes # Changing User Password Code S RK-6520 There are two levels of keypad security available for the SRK-6520 The factory default setting for each user password code 1234, this can be modified so that each user has a unique i ndividual 4 digit code. Press: 7 0 1 # to read 10 i nvalid cards or valid cards, then enter 4 wrong passwords in succession, the keypad is locked for 1 0 minutes. Press: 7 0 2 # to read 10 i nvalid cards or valid cards, then enter 4 wrong passwords in succession, the keypad activates and alarm signal. To disable this feature: Press: 7 0 0 # factory default setting. Setting Security A rrangement SRK-6520 There are two levels of keypad security available for the SRK-6520 # Setting Security Arrangement SRK-6520 Press: 7 0 2 # entered 4 wrong passwords in succession, the keypad activates and alarm signal. To disable this feature: Press: 7 0 0 # factory default setting. Resetting To Factory Default Setting To revert all settings to the factory default values then the Non Volatile Memory (Eeprom) must be reset. Reset Non Volatile Memory by switching of t he power and placing the jumper connector onto the pins 1 & 2 as per figure 2. A fter switching power on remove jumper, the SRK-6520 will give a b eep and is now reset to f actory default values. Changing User Password Code SRK-6520 Press: * user passoword # user identification number # new passoword # re-enter new password # .8. .9. .10. .11. Memory: Non volatile eeprom memory Operating Temperature: 0 C to 60 C (32F to 140F) Keypad Housing: ABS high impact plastic Dimensions: 120mm x 115mm x 23mm Weight: 175g Press: * read user card user passoword # new password # re-enter new password # Reliable. Durable. Affordable CFX-SR-6520 INDOOR STAND ALONE ACCESS CONTROLLER KEYPAD / READER Using Password Code to release the door Package Listing Press: user passoword # Technical Specification CFX-SRK-6520 DC Supply Voltage: Low voltage input 9-14Vdc unregulated Current Consumption: 100mA @ quiescent maximum Door Relay: 5Amp 12Vdc Tamper Protection: Negative loop, normally closed Codes SRK-6520 1 M aster, 100 codes . 1 M aster, 1000 cards and 1000 codes . Keypad: 12 keys, 1 bell push button, 3 LED status indicators Card Types: EM or EM compatible Card Frequency: 125KHz (SRK-6520) Induction Distance: 5-15cm (SRK-6520) Wiring Connections: Electric lock Remote door control Door open detection External door bell External Alarm .12. Name Digital Keypad UserManual Self Tapping Screws Quantity 1 1 Remark 4.5mm x 27 mm 4 Self Tapping Screws 2.6mmx7.5 mm 1 Pastern Stopper 6mmx27mm 4 Used for fixing Used for front case a nd b ack c ase Used for fixing 10 pin x 300mm 1 Cable Spec SRK-6520 SRK-6520 User manual .14. 1. Programmable Functions 12 keys, 1 Bell button 5. Programming memory: NOTE PLEASE READ THESE INSTRUCTIONS CAREFULLY BEFORE ATTEMPTING TO INSTALL THE SRK-6520 123 Mounting Tamper Switch 1. Attach the rear plate to a single or double gang electrical box or secure to the wall firmly with at least three flat head screws. NVM Reset Pins The front cover can be permanently secured by using the short screw supplied SRK-6520 Printed Circuit Board 2. When wiring has been completed, attach the front cover to the rear plate. Figure1 READY ACC EPT OPE N 1 2 4 5 7 8 * If holes are to be drilled before mounting onto a wall, BC -30 00 CO 0 NT RO 3 D_IN Yellow Brown 12V Red GND Black NO Blue 1. Unplug the cable harness and connect the nece ssary cables, (See Figure 3). 2. Tape any wires that are unused. 3. Plug the cable harness , (See Figure 2) 4. Attach the front cover, (See Figure 1). 6 9 Purple Door Strike Relay Com NC Orange Door Strike Relay N/C common power supply connection Green BELL2 White Grey OPEN D_IN COM NC .3. BELL2 White Grey OPEN D_IN +12V GND NO COM NC Annunciator Yellow Brown Red External Push Switch Door Status Inspector Diode 1N4007 Black Blue Purple Yellow Brown Red Black Blue Purple GND Annunciator External Push Switch Door Status Inspector Diode 1N4007 Electric Rim Lock Electric Door Bolt To change Master code Press: 0 new master code # re-enter new master code # Upon acceptance Open LED illuminates and stops flashing. Press * after changing the master code, otherwise unit will disregard the new code and revert back to the factory default code. Note: the master code must be 4-8 digit number. Electric Rim Lock Electric Door Bolt Orange Diode 1N4007 Adding User Codes SRK-6520 To Add User and User Codes SRK-6520 Power Supply BELL1 ALARM NO .2. Green Power Up After all wiring is complete and the unit face plate is attached to the back plate, apply 12Vdc power to the unit. Ready LED illuminated and accept LED flashing. Engineer Programming Mode SRK-6520 GND L S T Special Power Supply BELL1 ALARM In engineer programming mode: Power Input Door Strike Relay N/O COM +12V # special power connection (-) Negative Regulated Figure2 AT I .1. To Door Contact Then To Door In (+) 12Vdc sitive Regulated Power Input Do Not Plug Adaptor Our Transformer Into Mains UntilAll Wiring Has Been Completed And The Front Cover Secured. Wiring Non volatile Eeprom memory IMPORTANT INFORAMTION There are no user serviceable parts contained with in the SRK-6520 access control keypad. OPEN Bell Push Button Bell Push Button Alarm To Door Remote Control Button Then Negative GND2 3.Wiring Connections Electric Lock External Bell External Push Switch Magnetic Contacts Alarm 4. Keypad: ALARM Green White Grey +12V/3A Door relay time 00-99 seconds Alarm time 00-99 minutes BELL1 BELL2 L 2. Programmable Timers Changing Master & User Codes SRK-6520 Terminal Wire Connector 1 Function GND1 Door open detection Wiring Cable Hamess Figure2 +12V/1A Relay latching or momentary Relay activate independently or together Change Codes 1 master, 1000 users & prox cards SRK-6520 check for hidden cables and/or pipes before drilling. Use safety goggles when drilling or hammering in cables clips. Every effort has been made to provide accurate information, however slight variations can occur. We also reserve the right to make changes for product improvement at any time To enter programming mode +12V Press: * 9999 # within 5 seconds, Ready and Accept LED illuminated, Open LED flashing. Note Press: # to save changes and exit engineer programming, when all programming has been completed otherwise changes will not be saved. Press: 1 user code # user identification # Note: the user identification must be 3 digit number within 000-999 and the user door release must be 6 digit code. Adding User Codes & Cards SRK-6520 To Add User cards & codes SRK-6520 Press: 1 read card user identification # Note: the user identification must be 3 digit number, if adding more than 1 card, read the next card after inputting the 3 digit code for the previous card, when you have finished adding all cards press the # key. 1 st card must be 000 up to 999. Then the SRK-6520 control station added a user card. it was auto added a user code with 1234. Orange .4. Diode 1N4007 .5. .6.