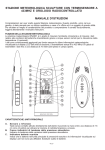
1
s SIMIT 7 Getting Started User Manual s Edition January 2013 Siemens offers simulation software to plan, simulate and optimize plants and machines. The simulation- and optimizationresults are only non-binding suggestions for the user. The quality of the simulation and optimizing results depend on the correctness and the completeness of the input data. Therefore, the input data and the results have to be validated by the user. Trademarks SIMIT® is a registered trademark of Siemens AG in Germany and in other countries. Other names used in this document can be trademarks, the use of which by third-parties for their own purposes could violate the rights of the owners. Copyright Siemens AG 2013 All rights reserved Exclusion of Liability The reproduction, transmission or use of this document or ist contents is not permitted without express written authority. Offenders will be liable for damages. All rights, including rights created by patent grant or registration of a utility model or design, are reserved. We have checked that the contents of this document correspond to the hardware and software described. However, deviations cannot be entirely excluded, and we do not guarantee complete conformance. The information contained in this document is, however, reviewed regularly and any necessary changes will be included in the next edition. We welcome suggestions for improvement. Siemens AG Industry Sector Industry Automation Division Process Automation Siemens AG 2013 SIMIT HB-V7ES-2013-01-en Subject to change withour prior notice. s Content 1 2 PREFACE 1 1.1 Target group 1 1.2 Content 1 1.3 Symbols 2 INTRODUCTION TO SIMIT 3 2.1 Starting SIMIT in demo mode 3 2.2 SIMITs graphical user interface 5 2.3 Simulation projects in SIMIT 2.3.1 Creating, retrieving and opening a project 6 8 2.4 9 Creating a simulation 2.5 Running the simulation 2.5.1 Editing diagrams while a simulation is running 3 4 10 11 EXAMPLE OF USE ’ELEVATOR’ 13 3.1 The Elevator 13 3.2 The elevator control 14 3.3 Connecting SIMIT to PLCs 3.3.1 Connecting via Profibus DP 3.3.1.1 The Profibus DP interface module 3.3.1.2 Configuring the Profibus DP interface module 3.3.1.3 Configuring the Profibus DP gateway 15 15 17 18 20 3.4 25 Connecting SIMIT to PLCSIM 3.5 Testing with signal simulation 3.5.1 Snapshots 3.5.2 A sample scenario 26 27 28 3.6 Testing with drive simulation 29 3.7 Testing with plant simulation 31 VISUALIZING THE SIMULATION 33 4.1 Visualization using controls 4.1.1 Visualizing gateway signals 4.1.1.1 Dragging gateway signals from a gateway 4.1.1.2 Dragging gateway signals from the Signals taskcard 4.1.1.3 Forcing gateway signals Copyright Siemens AG, 2013 Process Automation 33 33 33 34 36 SIMIT 7 – Getting Started Page I s 4.1.2 Visualizing signals 37 4.2 Visualization with graphics 4.2.1 Static graphics 4.2.2 Animated graphics 5 6 39 39 42 SIMULATION WITH MACRO COMPONENTS 48 5.1 Creating macro components 5.1.1 Separating connections of a macro component 5.1.2 Using topological connectors in the macro component 5.1.3 Default settings for macro component inputs 5.1.4 Parameters of macro components 5.1.5 Find and Replace in macro components 49 52 53 54 55 56 5.2 Using macro components 5.2.1 Properties of macro components 56 57 THE PROJECT MANAGER 6.1 59 The taskcard Projects 59 6.2 Project properties 6.2.1 Version tracking in the simulation project 6.2.2 Read-only attribute 7 8 61 62 63 AUTOMATISMS 65 7.1 Templates 7.1.1 The Templates taskcard 7.1.2 Creating a template 7.1.2.1 Finding and replacing in templates 7.1.3 Instanciating templates 7.1.3.1 Manually defining replacements 7.1.3.2 Using tables to define replacements 65 65 66 69 69 69 71 7.2 Parameter import 7.2.1 Table format 7.2.2 Copying parameter changes made while the simulation is running 79 82 83 7.3 XML interface 7.3.1 Import file syntax 7.3.2 Examples 7.3.2.1 Example: Single template instantiation 7.3.2.2 Example: Grouped template instantiation 7.3.2.3 Example: Diagram creation 84 85 90 90 91 91 FIND AND REPLACE, CONSISTENCY CHECK 8.1 Finding 8.1.1 Finding with the Find & Replace editor 8.1.2 Finding with signal properties Copyright Siemens AG, 2013 Process Automation 93 93 93 96 SIMIT 7 – Getting Started Page II s 8.1.3 Searching for fixed signals 98 8.2 Replacement 8.3 Updating components by type 101 8.4 Consistency check 102 Copyright Siemens AG, 2013 Process Automation 98 SIMIT 7 – Getting Started Page III s List of Figures Figure 2-1: Figure 2-2: Figure 2-3: Figure 2-4: Figure 2-5: Figure 2-6: Figure 2-7: Figure 2-8: Figure 2-9: Figure 3-1: Figure 3-2: Figure 3-3: Figure 3-4: Figure 3-5: Figure 3-6: Figure 3-7: Figure 3-8: Figure 3-9: Figure 3-10: Figure 3-11: Figure 3-12: Figure 3-13: Figure 3-14: Figure 3-15: Figure 3-16: Figure 3-17: Figure 3-18: Figure 3-19: Figure 3-20: Figure 3-21: Figure 3-22: Figure 3-23: Figure 3-24: Figure 3-25: Figure 3-26: Figure 3-27: Figure 3-28: Figure 3-29: Figure 3-30: Figure 4-1: Figure 4-2: Figure 4-3: Prompt to start in demo mode SIMITs graphical user interface Icons of an editor window Elements of a SIMIT project A diagrams context menu Dialog for opening projects A diagram with components and connectors SIMITs user interface when the simulation is running Switching the project navigation SIMITs license dialog State chart of the elevator control program Configuration with one single Profibus DP line Connecting SIMIT via Profibus DP Plugs of a Profibus DP interface module Browse for Ethernet Nodes Ethernet nodes found Assigning the IP configuration IM configuration in SIMIT Selecting a new Profibus DP gateway Import dialog in the Profibus DP gateway Profibus DP import preview Assigning a hardware channel Changing the Profibus PD gateways mnemonik Tree view of a Profibus DP gateway Properties of a slave Properties of a module Hardware interrupts of binary signals Process alarms of analog signals Inputs in the Profibus DP gateway Properties of an analog signal Selecting a new PLCSIM gateway Properties of a PLCSIM gateway Window of a PLCSIM gateway Snapshots in the project navigation Simulating the main drive Simulating door movement Signals in the gateway Simulating elevator movement Simulation the cabins sensors Tiling a window Work area tiled horizontally Dragging a signal from a gateway Copyright Siemens AG, 2013 Process Automation 4 6 6 7 8 9 10 11 12 13 15 16 16 17 18 18 19 19 20 20 21 21 22 22 22 23 23 23 24 24 26 26 27 28 29 30 30 31 32 33 34 35 SIMIT 7 – Getting Started Page IV s Figure 4-4: Figure 4-5: Figure 4-6: Figure 4-7: Figure 4-8: Figure 4-9: Figure 4-10: Figure 4-11: Figure 4-12: Figure 4-13: Figure 4-14: Figure 4-15: Figure 4-16: Figure 4-17: Figure 4-18: Figure 4-19: Figure 4-20: Figure 4-21: Figure 4-22: Figure 4-23: Figure 4-24: Figure 4-25: Figure 4-26: Figure 4-27: Figure 5-1: Figure 5-2: Figure 5-3: Figure 5-4: Figure 5-5: Figure 5-6: Figure 5-7: Figure 5-8: Figure 5-9: Figure 5-10: Figure 5-11: Figure 5-12: Figure 5-13: Figure 5-14: Figure 5-15: Figure 5-16: Figure 5-17: Figure 5-18: Figure 5-19: Figure 5-20: Dragging a signal from the signals taskcard Forcing signals with signal disconnectors on a diagram Forcing output signals on a diagram Visualization with controls Parameters in a connections properties Digital inputs with signal disconnector Controls taskcard Taskcard Graphic Graphic editing functions within the diagram editor Modifying a rectangle Modifying straight lines Modifying bent lines Drawing of a plant Examples for animation Animation properties of graphic elements Selecting a type of animation Creating a movement animation Properties of the Movement animation Movement properties of a group Defining a movement for a group Properties of the Scaling animation Defining a Scaling for a graphic object Animated text on the Animated diagram Animated text in the diagram Animated The Macros task card Creating a new macro component The macro editor Macro diagram in the macro editor Macro connections Macro diagram with connections Identifying macro components containing errors Diagnostics in the Properties dialog for macro components Placing a separator Separator in the macro editor Macro component with separated connections Definition of a macro component with topological connectors Use of a macro component with topological connectors Default settings for macro component inputs Setting component inputs using constants Component parameters in the macro editor Defining parameters for a maro component Parameters of a macro component Context menu for a macro component Macro component on a diagram Copyright Siemens AG, 2013 Process Automation 35 36 36 37 37 38 39 40 40 40 41 41 42 43 43 44 44 45 45 46 46 47 47 47 48 49 50 51 51 51 52 52 52 53 53 54 54 55 55 55 56 56 56 57 SIMIT 7 – Getting Started Page V s Figure 5-21: Figure 5-22: Figure 6-1: Figure 6-2: Figure 6-3: Figure 6-4: Figure 6-5: Figure 6-6: Figure 6-7: Figure 6-8: Figure 7-1: Figure 7-2: Figure 7-3: Figure 7-4: Figure 7-5: Figure 7-6: Figure 7-7: Figure 7-8: Figure 7-9: Figure 7-10: Figure 7-11: Figure 7-12: Figure 7-13: Figure 7-14: Figure 7-15: Figure 7-16: Figure 7-17: Figure 7-18: Figure 7-19: Figure 7-20: Figure 7-21: Figure 7-22: Figure 7-23: Figure 7-24: Figure 7-25: Figure 7-26: Figure 7-27: Figure 7-28: Figure 8-1: Figure 8-2: Figure 8-3: Figure 8-4: Figure 8-5: Figure 8-6: Connecting a macro component Properties of a macro component The project manager Project in the Projects taskcard. Copy using drag and drop from the Projects taskcard Version number in the Project Manager Version number in the Project Manager with indication of change Dialog to increment the project version Read-only attribute in the Properties dialog of the Project Manager Applying the read-only attribute Templates taskcard Template editor Properties view in a template Properties turned into placeholders Context menu for a template Replacement dialog when instanciating a template Providing replacements for placeholders Instanciated template Profile using predefined placeholders Profile defining placeholders in the first row Profile listing placeholders individually Dialog for table based import Preview in the Table import Import dialog for an IEA file Preview of IEA based import Template from PCS 7 Library and instance Exporting a template Automatically created import file Calling parameter import Import dialog for automatic parameter import Preview of automatic parameter import Diagram before the parameter import Diagram after the parameter import Example of a parameter table Reference to available list of changes Copying changes from the last simulation SMD function in the Project Manager Selecting an *.xml file Find & Replace in the project navigation Searching for a project element Search results Highlighted search result on a diagram Searching a connector via its properties Searching a connector Copyright Siemens AG, 2013 Process Automation 57 58 59 60 61 62 62 62 63 64 66 67 67 67 69 70 70 71 72 73 73 74 75 76 77 78 78 79 79 80 81 82 82 83 83 84 84 85 93 94 95 96 96 97 SIMIT 7 – Getting Started Page VI s Figure 8-7: Figure 8-8: Figure 8-9: Figure 8-10: Figure 8-11: Figure 8-12: Figure 8-13: Figure 8-14: Figure 8-15: Figure 8-16: Figure 8-17: Searching a connector on a diagram Searching for fixed signals Replacing in the Find & Replace editor Replacing components by type Assignments when replacing component types Updating components No hits found in the search Find & Replace in the context menu of macro components Dialog showing no formal inconsistencies Consistency Check Exporting inconsistencies Copyright Siemens AG, 2013 Process Automation 97 98 99 100 100 101 101 102 102 103 104 SIMIT 7 – Getting Started Page VII s List of Tables Table 3-1: Table 7-1: Table 7-2: Table 7-3: Symbol table of the elevator control Placeholders for controls Parameter value for the NC/NO contact type Parameter value for the Off/On default setting Copyright Siemens AG, 2013 Process Automation 25 68 68 68 SIMIT 7 – Getting Started Page VIII Preface s 1 1.1 PREFACE Target group This manual addresses you as a user of the SIMIT simulation system. Here you will get to know the basics of SIMIT. You will be guided through sample projects introducing you to essential on-screen dialogs and operating procedures. As a prerequisite you need to be familiar with general use of a personal computer and windows. Furthermore, basic knowledge of SIMATIC S7 is required. Depending on the provided gateways between SIMIT and SIMATIC S7 this concerns use of Profibus DP, Profinet IO, PRODAVE and PLCSIM respectively. 1.2 Content This manual instructs you how to work with SIMIT. Basic features of SIMIT and necessary steps are described so that you can use SIMIT efficiently. In this manual, examples are referenced which you find on the SIMIT software CD: The Folder Sample Projects\Elevator contains several archived SIMIT projects (Elevator01.simarc, Elevator-02.simarc, Elevator-03.simarc). The STEP7-Program Elevator_S7.zip of an elevator control for use with these examples can be found in the same folder. This example shows how to use SIMIT simulations for test and commissioning of a PLC control program. Please note that you need the SIMATIC STEP 7 software and a SIMATIC S7 CPU or S7PLCSIM to use these examples. This manual shows you how to use the examples in SIMIT. The individual chapters are arranged in such a way that you are always provided with sufficient background knowledge when reading the manual sequentially. Chapter 2 describes SIMITs graphical user interface. You learn how to retrieve and open a project. Also, an overview of how to build and run a simulation is provided. Detailed information about how to set up a simulation using components of SIMITs standard library can be found in the manual “Standard Library”. Reading the corresponding chapters in this manual is recommended. The example of use “Elevator“ is described in detail in Chapter 3. You learn how to connect SIMIT to PLCSIM or to your PLC using Profibus DP. Information about how to configure the Profibus DP gateway is provided and the example of use shows how you can, working with this gateway, use SIMIT for signal simulations and drive simulations as well as for entire plant simulations. Chapter 4 focuses on how to visualize your simulation. The example of use shows how to use controls from SIMITs standard library to visualize your simulation economically, how to use static graphics to enhance your simulations informational content and how to use animations to make your simulation appear close to reality. Chapter 5 shows how to assemble functional parts of your simulation into macro components so that you can easily reuse these parts. Creating and using macro components is shown using an example. Chapter 6 gives a description of SIMITs project manager. This chapter is a prerequisite for the following chapter 7. Copyright Siemens AG, 2013 Process Automation SIMIT 7 – Getting Started Page 1 s Preface Chapter 7 provides information about automatisms for creating diagrams. There is described how templates, i.e. simulation patterns can be instanciated in your project. Templates may be instanciated manually or by use of tables, especially when using a large amount of templates. You also learn how to use an IEA file from a PCS7 project to create instances in SIMIT. Furthermore, you learn how to import parameters and input default values into SIMIT. Finally, this chapter describes the XML-interface. You learn which XML syntax can be used to describe diagrams and how to insert diagrams into your simulation project by importing a description file. Chapter 8 concludes with a description of how to search for different sorts of objects in your SIMIT project, how to perform replacements and how to check your project for formal consistency. 1.3 Symbols Particularly important information is highlighted in the text as follows: NOTE Notes contain important supplementary information about the documentation contents. They also highlight those properties of the system or operator input to which we want to draw particular attention. CAUTION This means that the system will not respond as described if the specified precautionary measures are not applied. STOP WARNING This means that the system may suffer irreparable damage or that data may be lost if the relevant precautionary measures are not applied. Copyright Siemens AG, 2013 Process Automation SIMIT 7 – Getting Started Page 2 s Introduction to SIMIT 2 INTRODUCTION TO SIMIT SIMIT can be used for a wide range of applications starting with comfortable signal simulation to control and observe input and output signals of your PLC up to ambitious plant simulations. In any situation SIMIT provides a cost-effective and easy way for testing and commissioning of automation software. Even if – in the first step – you use SIMIT as a comfortable user interface for signal testing only, you can add simulation models at any time later. This allows you to simulate your plants behavior and thus perform dynamic tests to make maximum profit out of SIMITs abilities. When using SIMIT the following issues are of particular interest: Linking on signal level Just define the gateway SIMIT should use to communicate with your automation and define signals SIMIT should access. You can now set and read signals with SIMIT without any further effort! Visualizing You may automatically create diagrams with operating and display controls from given data – such as your gateways configuration – as well as manually build such diagrams. Graphic elements such as line, rectangle, ellipse etc. can be used statically as well as in conjunction with animation and thus allow you to efficiently build comprehensive twodimensional animations. These visualizations provide an ideal overview of all signals in your plant. Values belonging to the same part of your plant can also be shown in a grouped fashion, independent of the physical addresses they use. By simulating your plants behavior SIMIT provides maximum benefit: Simulation You do not need any expert knowledge in simulation in order to build a simulation model in SIMIT. Just use the graphical user interface to place components provided with SIMITs libraries and parametrize them appropriately. SIMITs standard library contains components that cover many features of simulation and thus cover a large field of applications ranging from simple arithmetic and logical functions up to complex drive simulations or even process simulations. A detailed description of all components and their use on a diagram can be found in the manual “Standard Library”. In folder Sample Projects/Examples on your SIMIT software CD you find the archived SIMIT project Examples.simarc. It contains examples of how to use library components. The remaining part of this chapter just provides a basic understanding of how to use SIMIT. 2.1 Starting SIMIT in demo mode If you start SIMIT without plugging a SIMIT dongle into your computer, you are asked whether you want to start SIMIT in demo mode (Figure 2-1). Copyright Siemens AG, 2013 Process Automation SIMIT 7 – Getting Started Page 3 Introduction to SIMIT s Figure 2-1: Prompt to start in demo mode If you have a valid SIMIT licence and therefore a SIMIT dongle, this demo mode does not apply. It is intended purely to give you a feel of what SIMIT can do before you buy a licence. In demo mode only the following SIMIT function modules are available, regardless of any licence keys you may have: • SIMIT BASIC, the basic SIMIT system • the macro component editor (MCE) • the graphics editor (DGE) • the message system and graphs (TME) • template editing and instantiating (SMD) • scenarios (ACI) In demo mode SIMIT offers only limited functionality with regard to the following elements: • Saving and archiving You can save projects, templates and macro components in demo mode, but you can only use the projects, templates and macro components created in demo mode on the computer on which they were created. In particular, the projects, templates and macro components created in demo mode are not compatible with the full version of SIMIT. CAUTION The projects, templates and macro components created in demo mode are not compatible with the full version of SIMIT! You cannot archive projects in demo mode. • Opening and dearchiving In demo mode you can only open projects that have been saved on this computer in demo mode. Projects created in a full version cannot be opened. You can dearchive projects that have been archived in a full version. But bear in mind that if you change the project in demo mode, it will no longer be able to be used in the full version. Copyright Siemens AG, 2013 Process Automation SIMIT 7 – Getting Started Page 4 Introduction to SIMIT s • Address range The addresses that can be used with the PLCSIM and PRODAVE gateway are limited to the following ranges: EB0 – EB7 and EB64 – EB85 AB0 – AB7 and AB64 – AB79 • Runtime You can use SIMIT in demo mode for as long as you want, but the runtime of a simulation is limited to 30 minutes. At the end of the 30 minutes, the simulation will end automatically. You can restart it once it has ended. • Number of gateways You can only create one gateway in a SIMIT project in demo mode. • Project folder In demo mode you can only store projects in a designated location in the SIMIT working area. • Libraries for macro components and templates In demo mode you can only store macro components and templates within the SIMIT working area. You cannot open other library folders. 2.2 SIMITs graphical user interface SIMITs user interface is divided into the following major sections as shown in Figure 2-2: The Menus along with the Toolbar provide easy access to the functions available in SIMIT. Additional features are available via context menus. The Project View shows the currently used project in form of a tree view. Editors are shown in the Work Area. Each editor has its own toolbar for easy access to editor-specific features. Library components, controls and graphic tools can be found in their own taskcards in the Tools window. A currently selected object shows its properties in the Property view. Use the Tab control on the lower left side to switch between currently open editors. The Status line on the lower right side shows information on SIMITs current status. Any editor is opened in the work area. The tools window will show only those taskcards available in the current editor. You can split the work area horizontally and vertically using the menu (Window | Tile Horizontally, Window | Tile Horizontally) so that two editors are visible in the work area. Using the window icons (Figure 2-3) an editors window can be • minimized ( ), i.e. reduced to its entry in the tab control, • reduced in size ( ) to occupy only part of the work area and • maximized ( ) to occupy the entire work area as well as • closed ( ). Copyright Siemens AG, 2013 Process Automation SIMIT 7 – Getting Started Page 5 Introduction to SIMIT s The icon allows you to unhinge an editor along with its tools window and property window as a standalone window. The icon hinges the editor back into the work area. An unhinged window can be pinned into always-on-top-mode using the icon. Menu and tool bar Project view 2.3 Work area Tab control and status line Figure 2-2: SIMITs graphical user interface Figure 2-3: Icons of an editor window Tools window Property view Simulation projects in SIMIT Simulation projects are handled in the project view. Any SIMIT project consists of elements as shown in figure Figure 2-4: Copyright Siemens AG, 2013 Process Automation SIMIT 7 – Getting Started Page 6 Introduction to SIMIT s Gateways ( ) establish a link between SIMIT and a PLC or other applications. A new ). gateway is created by double clicking New Gateway ( Diagrams ( ) can be found in the Diagrams Folder ( ) and contain the simulation model as built using library components and controls. A new diagram is created by double clicking New Diagram ( The Snapshots Folder ( ) contains simulation snapshots. Using Find & Replace ( and connectors in your project. The Consistency Check ( The Project Manager ( projects. ). ) you can search and replace signals, components ) checks your project for formal errors. ) enables you to copy elements from other A simulation project does not necessarily require all these entries. Figure 2-4: Elements of a SIMIT project Alternatively you find the features of any element in a SIMIT project in its context menu (right click the corresponding tree entry). In Figure 2-5 you find a diagrams context menu as an example. Copyright Siemens AG, 2013 Process Automation SIMIT 7 – Getting Started Page 7 Introduction to SIMIT s Figure 2-5: 2.3.1 A diagrams context menu Creating, retrieving and opening a project After starting SIMIT you see a dialog as shown in Figure 2-6. Here you can retrieve a project, create a new project, open an existing one or migrating a project from the previous version SIMIT V5. As file location you may specify any folder in your file system. Archived SIMIT projects have the suffix .simarc, SIMIT projects can be opened using files that have .simit as suffix. You can also start SIMIT by double-clicking the *.simit file in a project folder. The corresponding project is then already open once SIMIT starts. Copyright Siemens AG, 2013 Process Automation SIMIT 7 – Getting Started Page 8 Introduction to SIMIT s Figure 2-6: Dialog for opening projects The dialog as shown in Figure 2-6 can be opened at any time using the menu Project. You may archive a currently open project using Project | Archive. 2.4 Creating a simulation A simulation in SIMIT is built with the help of predefined components and controls that are placed on diagrams. Diagrams can be added to the project using New Diagram ) in the project tree and can be opened by double clicking them. The tools ( window will show components and controls that can be used on the diagram. Components are to be found in the Components taskcard. The STANDARD folder provides components for various logical and arithmetic functions. Additionally, you find components to simulate drives (folder DRIVES) and sensors (folder SENSORS). Controls can be found in the Controls taskcard and are used to operate and display values. Operating controls are used to set values while the simulation is running. Display controls show values dynamically. The simulation is built using controls and components on a diagram. The link to your PLC is established using connectors (Figure 2-7). Just drag and drop a component from the library onto a diagram, connect their connection points and parametrize the component. In order to connect connection points, i.e. a components or controls input and output, move the mouse over the connection point. When the mouse curser changes appearance, a connection can be established by left clicking. Now move the mouse over the connection Copyright Siemens AG, 2013 Process Automation SIMIT 7 – Getting Started Page 9 Introduction to SIMIT s point that is to be connected and click left again. A connection is now established and is shown as a connection line. Alternatively you may drag and drop one connection point on top of another to establish a connection. A components or controls parameters can be specified in the input fields or in the properties view. To enter a value in the input field, double click the field on the diagram and confirm your input by pressing ENTER. The properties view can be opened by left clicking a component or control. Your PLCs input and output signals are handled in gateways. On a diagram, these signals are shown as connectors: Output signals are shown as green output connectors (Output), input signals are shown as red input connectors (Input). Input and output connectors can be dragged and dropped from the gateway onto the diagram. Just split your work area via Window | Tile Horizontally and open both the gateway and the diagram. Drag the signal of interest from the gateway onto the diagram by grabbing it on the gateways left border and pressing the Shift key. Connect the connectors connection point with a components connection point. NOTE Please not that a gateways configuration must be saved first in order to drag and drop a signal from it. Alternatively you may also drag and drop input- and output connectors from the Signals taskcard onto a diagram. It is advisable to filter the signals according to their origin Gateway and according to their Signal Type Input or Output. Now drag the signals onto the diagram with the Shift key pressed. output connector component input connector Figure 2-7: 2.5 A diagram with components and connectors Running the simulation You can start the simulation using the toolbar ( ), the menu (Simulation | Start) or by double ) in the project view. When the simulation is running, SIMITs color clicking Start ( scheme will change from blue to orange (Figure 2-8). Copyright Siemens AG, 2013 Process Automation SIMIT 7 – Getting Started Page 10 s Introduction to SIMIT When the simulation is running you may open and close any diagram or gateway. Right click a component on a diagram to select it and open its properties view to observe input and output values of a selected component. Figure 2-8: SIMITs user interface when the simulation is running Use Simulation | Snapshot from the menu to store the current state of your simulation. You ) in the may also create a snapshot using the toolbar ( ) or New Snapshot ( ) and are project view. Snapshots will be saved in the Snapshots folder ( assigned the current date and time as filename. You may rename or delete snapshots or move them into a subfolder. When loading a snapshot via the context menu the simulation will be set into the same state as stored in the snapshot and will continue running from this state on. If the simulation is not running yet it will be started when you load a snapshot. Use the menu Simulation | Exit or the toolbar ( ) to close the simulation. 2.5.1 Editing diagrams while a simulation is running You can make changes to the simulation model while a simulation is running. These changes take effect the next time the simulation is started. To make changes while the simulation is running, simply switch between "Simulation" and "Project" in the project navigation (Figure 2-9). Copyright Siemens AG, 2013 Process Automation SIMIT 7 – Getting Started Page 11 Introduction to SIMIT s Figure 2-9: Switching the project navigation You can open diagrams in both views, but for different purposes: • If you are in the blue project tree, diagrams are opened for editing. The changes that you make take effect the next time the simulation is started. The window title bar is shown in blue. • If you are in the orange simulation tree, diagrams are opened for use. Their content corresponds to the simulation that is running and cannot be changed. The window title bar is shown in orange. You can open the same diagram in both modes at the same time. When the simulation ends, the diagram opened from the simulation tree closes automatically. When the simulation is running, there are some restrictions as to the actions that can be carried out in the project tree: • You cannot create PROFIBUS DP or PROFINET IO gateways. • The PROFIBUS DP and PROFINET IO gateways cannot be used for imports, and interface modules cannot be loaded. • The SMD, CDL and API functions are not available. Copyright Siemens AG, 2013 Process Automation SIMIT 7 – Getting Started Page 12 Example of use ’Elevator’ s 3 EXAMPLE OF USE ’ELEVATOR’ On the SIMIT software CD you find a folder Sample Projects\Elevator which contains three archived projects Elevator-01.simarc, Elevator-02.simarc and Elevator-03.simarc. These three examples emphasize different aspects of simulation based testing with SIMIT. The PLC program to be tested with these simulation projects is an elevator control. You find it in form of an archived STEP 7 program Elevator_S7.zip on the SIMIT software CD in the very same folder as the SIMIT projects. There you also find the control programs symbol table (Elevator.asc) The simulation projects contain a PLCSIM gateway, i.e. you can use these simulations right away provided you have licensed the additional SIMIT module PLCSIM gateway (order no. 9AP1433). If your SIMIT installation contains a Profibus DP or PRODAVE gateway, you may use these gateways instead of the PLCSIM gateway. Use the menu Help | License to get an overview of all modules licensed (Figure 3-1). Figure 3-1: SIMITs license dialog To use a Profibus DP gateway you just need to change the configuration within the SIMATIC project to match your hardware configuration. To use the PRODAVE gateway just delete the hardware configuration. Within the SIMIT project replace the PLCSIM gateway with either a Profibus DP or a PRODAVE gateway. In case you have assigned the gateway a name different to “PLCSIM”, you then need to use Find & Replace to change all signal sources to your new gateways name (Chapter 9). 3.1 The Elevator The example contains the simulation of an elevator that is located in a five level building. Each floor has a call button with feedback that is used to call the elevator. Inside the elevator the control panel can be used to select the destination floor. Furthermore here is a digital display to indicate the elevators position (floor) and the door can be opened and closed with a pushbutton. Copyright Siemens AG, 2013 Process Automation SIMIT 7 – Getting Started Page 13 s Example of use ’Elevator’ The elevator contains a drive and can operate with two different levels of speed in both directions. This drive has a dispenser that provides the elevators absolute position (increments) for use in the PLC. The elevator has a positioning within the range of the door using a sensor to reduce speed and a sensor to check if the elevator is level with the door. After connecting the main fuse the elevator control will start working. Failures during operation are indicated via a warning light. A pushbutton can be used to reset the machine after failure. After connection as well as after a reset the elevator will go to ground floor and open its doors. After this it is ready for regular operation. 3.2 The elevator control The elevator control is built as a simple sequential state control in STEP 7 with states as follows: Wait The elevator control remains in this state as long as there is no user request. The ‘Wait’state will be left as soon as there is a request for another floor. Close door In this state the correct closing of the door is monitored. After closing the door the state will be changed to ‘Fast Travel’. When the pushbutton “Open Door” is pressed inside the elevator the state will be changed to ‘Open Door’. Fast Travel The elevator will move in the direction computed until a floor is reached that has a request. Once the elevator enters the door range the state will change into ‘Slow Travel’. Slow travel In this state the elevator will be positioned precisely in a floor. The state ‘Open door’ will be entered only if the elevator is level with the door. Open door In this state the elevators door will be opened and state will change to ‘Wait’. There is an additional ‘Fault’ state. Once a failure is detected the ‘Fault’ state will be entered originating from any other state. After reset the PLC will go to state ‘Driving slowly’. A state chard of this elevator control is shown in Figure 3-2. Copyright Siemens AG, 2013 Process Automation SIMIT 7 – Getting Started Page 14 Example of use ’Elevator’ s Figure 3-2: State chart of the elevator control program After connecting the PLC as well as after a reset the elevator will drive slowly to the ground floor. 3.3 Connecting SIMIT to PLCs SIMIT can be connected to real PLCs like SIMATIC S7 automation devices via Profibus DP, via Profinet IO or via PRODAVE. To connect SIMIT via Profibus DP the additional module SIMIT ROFIBUS DP GATEWAY (order no. 9AP1434) and an interface module IM-PBDP-2, IM-PBDP-4 or IM-PBDP-8 (order no. 9AP2440) is required. The additional module SIMIT PROFINET IO GATEWAY (order no. 9AP1434) and an interface module IM-PNIO-128 (order no. 9AP2431) or IM-PNIO-256 (order no. 9AP2430) is required to connect SIMIT via Profinet IO. To connect SIMIT via PRODAVE the additional module PRODAVE GATEWAY (order no. 9AP1460) is required. On the SIMATIC side you need an automation device with either Profibus DP connection or the SIMATIC software PRODAVE MPI/IE V6.1. 3.3.1 Connecting via Profibus DP To visualize a connection via Profibus DP a non-redundant automation device with Profibus Master is assumed as depicted in Figure 3-3. Copyright Siemens AG, 2013 Process Automation SIMIT 7 – Getting Started Page 15 Example of use ’Elevator’ s Automation device with Profibus DP-Master Profibus Profibus DP-Slaves Figure 3-3: Configuration with one single Profibus DP line Connecting SIMIT to the PLC is then done using an interface module IM-PBDP. Instead of slaves it is this module that is connected to the Profibus DP master (Figure 3-4). Figure 3-4: Connecting SIMIT via Profibus DP The interface modules simulate the Profibus DP slaves as configured in the master, i.e. the interface module communicates with the master in the same way a Profibus DP slave does. Copyright Siemens AG, 2013 Process Automation SIMIT 7 – Getting Started Page 16 Example of use ’Elevator’ s 3.3.1.1 The Profibus DP interface module There are three different variants of the Profibus DP interface module: • IM-PBDP-2 Two-channel interface module for simulating a maximum of 125 Profibus slaves per channel. • IM-PBDP-4 Four-channel interface module for simulation a maximum of 125 Profibus slaves per channel. • IM-PBDP-8 Eight-channel interface module for simulation a maximum of 125 Profibus slaves per channel. The module itself is equipped with eight Profibus DP plugs always, four plugs on both sides of the box (Figure 3-5). Depending on the variant only the first two, the first four or all eight plugs are active (labeled as CH0 through CH7). Figure 3-5: Plugs of a Profibus DP interface module To link the interface module to your PC please use the RJ45-Plug labeled as Control Port 1. As cable you may use a crossover or non-crossover LAN cable (twisted pair) since the port on the IM-PBDP supports auto crossover. For operation you need a 24V – 1300mA DC power supply. This power supply is not included in the interface module. The module provides a plug (PS1) for a power supply with a standard circular connector. Alternatively you may use an appropriate power supply like Copyright Siemens AG, 2013 Process Automation SIMIT 7 – Getting Started Page 17 Example of use ’Elevator’ s the power supply of a SIMATIC S7-300 and connect it to the power supply plug PS2 using a 2-pin plug-in terminal block. 3.3.1.2 Configuring the Profibus DP interface module To access an IM-PBDP module with SIMIT via LAN you first need to assign an IP-address to the module. To do so you need a PC with SIMATIC Manager installed and plug the module to this PC – if only temporarily. To configure the module it does not matter if you are using a direct connection to the PC or a switch or hub. Configure the PG/PC-interface in SIMATIC Manager to use the LAN card connected to the module. Then choose PLC | Edit Ethernet Node from the menu. In the dialog shown in (Figure 3-6) click Browse below ‘Nodes accessible online’. Figure 3-6: Browse for Ethernet Nodes You get a dialog as shown in Figure 3-7 that displays all available nodes. Please select your modules entry, it will display SIMIT IM-PBDP-x as device name. When clicking Flash, the leds on the modules upper side will flash briefly. Figure 3-7: Ethernet nodes found Confirm this dialog by clicking OK. In the previous dialog you now see the modules data (Figure 3-8). You may adopt the settings for IP address and subnet mask and change them if necessary. In any case please confirm by clicking Assign IP configuration. Copyright Siemens AG, 2013 Process Automation SIMIT 7 – Getting Started Page 18 Example of use ’Elevator’ s Figure 3-8: Assigning the IP configuration Now connect the module to your SIMIT PC and copy the modules IP address into SIMITs IM configuration options dialog. Assign the module an arbitrary name so that it can be distinguished from other modules that may be available (Figure 3-9). When clicking Search the modules type and status are read. The interface module is now ready for use with SIMIT. Figure 3-9: Copyright Siemens AG, 2013 Process Automation IM configuration in SIMIT SIMIT 7 – Getting Started Page 19 Example of use ’Elevator’ s 3.3.1.3 Configuring the Profibus DP gateway To create a new Profibus DP gateway in SIMIT add a new tree entry by double clicking New ) and selecting Profibus DP in the selection dialog to follow (Figure Gateway ( 3-10). Figure 3-10: Selecting a new Profibus DP gateway As gateway name you may accept the default Profibus or assign a new name. In the import dialog to follow (Figure 3-11) please select the files containing your system data blocks and optionally choose a symbol table. Figure 3-11: Import dialog in the Profibus DP gateway Use the button Slaves>> to preview all slaves to be imported (Figure 3-12). In case there are slaves you do not want to simulate but rather connect them as real slaves just unselect them in the preview. Copyright Siemens AG, 2013 Process Automation SIMIT 7 – Getting Started Page 20 Example of use ’Elevator’ s Figure 3-12: Profibus DP import preview After import the gateway editor shows all imported signals in the work area. Save the gateways configuration using the menu . In the properties view you can assign this gateway an available channel of your Profibus DP interface module (Figure 3-13). All available channels are displayed using the interface modules name. Figure 3-13: Assigning a hardware channel In the properties view you can also toggle the mnemonic between I/Q and E/A (Figure 3-14). Copyright Siemens AG, 2013 Process Automation SIMIT 7 – Getting Started Page 21 Example of use ’Elevator’ s Figure 3-14: Changing the Profibus PD gateways mnemonik On the properties views left hand side all slaves including their modules are displayed in form of a tree view (Figure 3-15). Figure 3-15: Tree view of a Profibus DP gateway On the right hand side the properties of the currently selected slave are displayed (Figure 3-16). Use Deactivate Slave to deactivate a slave. In this case the slave will not be active when starting the simulation, i.e. it is not simulated. You may also deactivate a slave while the simulation is running. This puts you in a position to check the PLCs reaction when a slave fails or returns. Figure 3-16: Copyright Siemens AG, 2013 Process Automation Properties of a slave SIMIT 7 – Getting Started Page 22 Example of use ’Elevator’ s On the right hand side you also see the properties of a module (Figure 3-17). A module can be deactivated using Pull Module. You may use this feature when simulation is running to check a PLCs reaction to a pulled module. Figure 3-17: Properties of a module Certain digital and analog modules provide hardware interrupts. These interrupts can be configured on the modules properties. For a digital module you can define which edge is used to generate an interrupt (Figure 3-18), for an analog module the values for overrunning or underrunning the limit can be specified (Figure 3-19). Figure 3-18: Hardware interrupts of binary signals Figure 3-19: Process alarms of analog signals The gateway editor will display the signals of the gateway in two different groups, namely inputs and outputs. As usual in SIMIT an input signal is a PLCs input, an output signal is a Copyright Siemens AG, 2013 Process Automation SIMIT 7 – Getting Started Page 23 Example of use ’Elevator’ s PLCs output. The first column Default allows you to define a default value, i.e. set an input in the PLC (Figure 3-20). Figure 3-20: Inputs in the Profibus DP gateway When a signal is selected, its properties are shown in the properties view. Here you can edit standardization values for analog signals such as type of standardization, lower and upper value (Figure 3-21). Figure 3-21: Copyright Siemens AG, 2013 Process Automation Properties of an analog signal SIMIT 7 – Getting Started Page 24 Example of use ’Elevator’ s 3.4 Connecting SIMIT to PLCSIM SIMITs PLCSIM gateway defines which I/O signals are to be communicated between SIMIT and PLCSIM. The mapping between signal name and physical address in the PLCSIM gateway is done in the same way as usually done when programming a PLC, i.e. by use of a symbol table (Table 3-1). Hence it is sufficient to import the symbol table to configure the gateway. Signal name StaircaseIndicatorFloor0 StaircaseIndicatorFloor1 StaircaseIndicatorFloor2 StaircaseIndicatorFloor3 StaircaseIndicatorFloor4 InOperation Direction V0 CabinIndicatorFloor0 CabinIndicatorFloor1 CabinIndicatorFloor2 CabinIndicatorFloor3 CabinIndicatorFloor4 V1 CommandOpenDoor CommandCloseDoor CabinIndicatorUp CabinIndicatorDown FaultIndicator Display StaircaseButtonFloor0 StaircaseButtonFloor1 StaircaseButtonFloor2 StaircaseButtonFloor3 StaircaseButtonFloor4 Mainswitch Reset CabinButtonFloor0 CabinButtonFloor1 CabinButtonFloor2 CabinButtonFloor3 CabinButtonFloor4 FeedbackRun FeedbackStop DoorOpened DoorClosed OpenDoorManually CloseDoorManually CabinFlush CabinNearDoor Increments Table 3-1: Address A 32.0 A 32.1 A 32.2 A 32.3 A 32.4 A 32.5 A 32.6 A 32.7 A 33.0 A 33.1 A 33.2 A 33.3 A 33.4 A 33.5 A 33.6 A 33.7 A 34.0 A 34.1 A 34.2 AW 40 E 32.0 E 32.1 E 32.2 E 32.3 E 32.4 E 32.5 E 32.7 E 33.0 E 33.1 E 33.2 E 33.3 E 33.4 E 33.5 E 33.6 E 33.7 E 34.0 E 34.1 E 34.2 E 34.4 E 34.6 EW 40 Type BOOL BOOL BOOL BOOL BOOL BOOL BOOL BOOL BOOL BOOL BOOL BOOL BOOL BOOL BOOL BOOL BOOL BOOL BOOL WORD BOOL BOOL BOOL BOOL BOOL BOOL BOOL BOOL BOOL BOOL BOOL BOOL BOOL BOOL BOOL BOOL BOOL BOOL BOOL BOOL WORD Comment Rueckmeldung Treppenhaus Ruf EG Rueckmeldung Treppenhaus Ruf 1.OG Rueckmeldung Treppenhaus Ruf 2.OG Rueckmeldung Treppenhaus Ruf 3.OG Rueckmeldung Treppenhaus Ruf 4.OG Rueckmeldung Betrieb Antrieb Richtung 1= Auf, 0 = Ab Fahren mit langsamer Geschwindigkeit Rueckmeldung Anwahl EG Rueckmeldung Anwahl 1.OG Rueckmeldung Anwahl 2.OG Rueckmeldung Anwahl 3.OG Rueckmeldung Anwahl 4.OG Fahren mit schneller Geschwindigkeit Kommando Tuer auf Kommando Tuer zu Innenanzeige Auf Innenanzeige Ab Anzeige Betriebsstoerung Innenanzeige Stockwerk Ruf Treppenhaus EG Ruf Treppenhaus 1.OG Ruf Treppenhaus 2.OG Ruf Treppenhaus 3.OG Ruf Treppenhaus 4.OG Betrieb Ein Reset-Taster Anwahl Innenkabine EG Anwahl Innenkabine 1.OG Anwahl Innenkabine 2.OG Anwahl Innenkabine 3.OG Anwahl Innenkabine 4.OG Antrieb laeuft Antrieb steht Sensor Tuer auf Sensor Tuer zu Tuer Hand auf Tuer Hand zu Kabine buendig Kabine in Tuerbereich Schachtzaehler Symbol table of the elevator control Create a new PLCSIM gateway in SIMIT by double clicking New Gateway ( ) and selecting PLCSIM in the selection dialog to follow (Figure 3-22). After creating the gateway its editor will open. Import the symbol table using the Import menu ( ) and save the gateways signals using the menu. Copyright Siemens AG, 2013 Process Automation SIMIT 7 – Getting Started Page 25 Example of use ’Elevator’ s Figure 3-22: Selecting a new PLCSIM gateway In the properties view of a PLCSIM gateway (Figure 3-23) you can also toggle the mnemonic between I/Q and E/A. When using PLCSIM V5.4 SP3 or later in multiple instances, each instance needs to have their own matching PLCSIM gateway in SIMIT which needs to have its number configured according the PLCSIM instance it is connected to. If an older version of PLCSIM is used, the PLCSIM number needs to be set to ‘1’ always. In this case only one single PLCSIM gateway is to be used. Figure 3-23: Properties of a PLCSIM gateway From the symbol table only those signals are used that have a symbolic name. Additional input and output signals can be added in the gateway at any time and signals can be deleted. In order to connect the simulation to PLCSIM the following steps are required: • Launch PLCSIM and load the S7 program, • Turn PLCSIM in state RUN or RUN-P. Now a connection between SIMIT and PLCSIM for signal exchange will be established automatically when the simulation in SIMIT is started. 3.5 Testing with signal simulation To test your PLC program on signal level you can set input and output signals directly in the gateway. The current state can be stored at any time in a snapshot. Please note: The PLCs input signals (Ix.y) are output signals in SIMIT. They are cyclically computed in SIMIT and are communicated by the interface to your PLC, namely by the gateway. Vice versa, the PLCs output signals (Qx.y) are read by SIMIT, i.e. these are input signals in SIMIT. Basically, all gateways provide the same features for signal simulation in SIMIT. Copyright Siemens AG, 2013 Process Automation SIMIT 7 – Getting Started Page 26 Example of use ’Elevator’ s Start the simulation and open the gateway by double clicking its entry in the project navigation. The gateway window will be opened in a view as shown in Figure 3-24. Signals are split into input and output signals in the same way as they are shown when configuring the gateway. Additionally there are controls in the first column to set and observe signal values. Binary input signals can be set using buttons, analog and integer input signals can be set using digital inputs. Output signals cannot be set but can only be observed. Figure 3-24: Window of a PLCSIM gateway You can now perform signal test, i.e. set the PLCs input signals and observe the resulting output signals from the PLC. In order to put the elevator control into operation first set input signals FeedbackStop (I33.6) and DoorClosed (I34.0) to TRUE as well as Increments to a value of 1000. Then set Mainswitch (I32.5) to TRUE and observe the PLCs outputs. The output signal InOperation (Q32.5) should now be set to TRUE by the PLC. When finished, close the simulation using the menu Simulation | Exit or the toolbar 3.5.1 . Snapshots You can store the state of all signals and thus a certain configuration of your input signals in ) in the a snapshot at any time, e.g. by selecting the entry New Snapshot ( project navigation (Figure 3-25). The snapshot will be placed in the Snapshots folder. A snapshot can be renamed, deleted or loaded at any time using the context menu. When Copyright Siemens AG, 2013 Process Automation SIMIT 7 – Getting Started Page 27 Example of use ’Elevator’ s loading, the simulation may be started and input values will be set to the values as stored in the snapshot. Figure 3-25: 3.5.2 Snapshots in the project navigation A sample scenario The scenario shown in this section describes a series of signal settings and replies and assumes that SIMIT be configured with a single gateway only and be linked to the PLCs control program via this gateway. Activity on signal level is described in a step-by-step manner, beginning with putting the elevator into operation and ending with calling the elevator using the call button. When working your way through this example you may set signals in a wrong way. In this case the PLCs reaction may differ from the reaction as described, you may observe an error state (FaultIndicator, Q34.2). In this case please restart the PLC. Step 1: Before putting the elevator control into operation the PLCs input values need to be set to reasonable values. Set both signals FeedbackStop (I33.6) and DoorClosed (I34.0) to TRUE and set Increments (IW40) to a value of 1000. Step 2: You can now switch on the elevator. To do so, just set the signal Mainswitch (I32.5) to TRUE. The PLC will now set the signal InOperation (Q32.5). If the FaultIndicator (Q32.5) is set, you probably did not provide correct settings. Step 3: Now set position messages in the PLC. To do so, just set both CabinNearDoor (I34.6) and CabinFlush (I34.4) to TRUE. The PLC will react by issuing a command to open the door, i.e. the signal CommandOpenDoor (Q33.6) is set. Step 4: Open the door by setting DoorOpened (I1.7) to TRUE and DoorClosed (I2.0) to FALSE. You observe the PLC to reset the command to open the door, i.e. the signal CommandOpenDoor is reset. Copyright Siemens AG, 2013 Process Automation SIMIT 7 – Getting Started Page 28 Example of use ’Elevator’ s Step 5: You can now move the elevator. Just place a call for the first floor by setting input signal CabinButtonFloor1 (I33.1) to TRUE. The PLC will now issue a command to close the door and set signal CommandCloseDoor (Q33.7). Step 6: Close the door by setting DoorOpened (I1.7) to FALSE and DoorClosed (I2.0) to TRUE. The PLC will set the drive to fast mode, i.e. signal V1 (Q33.5) is set. Step 7: Now set the drives feedback in the PLC as follows: Set FeedbackStop (I33.6) to FALSE and FeedbackRun (I33.5) to TRUE. The PLC has now detected a failure – the failure indicator (signal I43.2) is set. What happened ? Let us sum up the last step: In order to set the drives feedback, you first set FeedbackStop to FALSE and then set FeedbackRun to TRUE or vice versa. In the first case there was a brief moment between setting the two signals when none of the feedbacks was set, in the latter case both feedbacks were set. In both cases the drives ‘exclusive or’-check was set to failure in the PLC. FeedbackRun and FeedbackStop must not both be set to TRUE, neither FALSE. This case will be interpreted as a faulty drive by the PLC. 3.6 Testing with drive simulation Provided that the PLC program is not to be changed, the PLCs reaction as described in the preceding chapter limits signal testing to the steps as described above. The reason is that it is virtually impossible to simultaneously toggle two signals manually. You can use drive simulation in SIMIT to overcome this limitation. Not only can you set signals simultaneously but also you are able to simulate a drives dynamic behavior. On the SIMIT software CD you find the archived sample project Elecator-01.simarc. It contains simulation of the drives for the elevator control as described above. Please see the diagram in folder Function/actuators for the main drives simulation model. Drive simulation (Figure 3-26) is based on an appropriate connection of I/O signals to the standard libraries DriveP1 component. The drive components Run output yields the feedback value FeedbackRun being the inverse of the feedback signal FeefbackStop. The drives direction is set using its input Dir which is connected to the Direction signal. Slow speed is defined as 30% of standard speed (100%) and is set using the components Speed input. During simulation the drive will start up when signal V0 or V1 is set and provides feedback required by the PLC. In particular both feedbacks FeedbackRun and FeedbackStop are now toggled simultaneously. Figure 3-26: Copyright Siemens AG, 2013 Process Automation Simulating the main drive SIMIT 7 – Getting Started Page 29 Example of use ’Elevator’ s The second diagram Doors contains the simulation model for moving the door (Figure 3-27). Details of movement to not need to be considered in the simulation. It is sufficient to provide the PLC with feedback DoorOpened as result of the CommandOpenDoor command and to provide feedback DoorClosed as result of the CommandCloseDoor command. The time required for opening and closing the door are of no importance with respect to the drive control and are thus set to 3 seconds at random. Figure 3-27: Simulating door movement The PLCs output signals are represented as green connectors on the diagram, input signals are shown as red connectors. When starting the simulation in order to rerun the steps as described in chapter 4.5.2 you see for instance that due to drive simulation the feedback signal FeedbackStop is set in the gateway. Accordingly due to door movement simulation the feedback DoorClosed is set (Figure 3-28). Figure 3-28: Signals in the gateway The signal disconnector that is operable for certain signals indicates that these signals are computed by the simulation model. Hence you find this disconnector active for any I/O signal that is used on a diagram. Using this signal disconnector allows you to detach an I/O signal from the simulation model and then set it manually. If the disconnector is not activated the button – in case of a binary signal – will only display the value as computed by the simulation model: The button on the right hand side is not operable unless the signal disconnector is activated ( ). Now the input signal can be set manually using the button: In order to test the elevator control with drive simulation just retrieve project Elevator01.simarc and start the simulation. Copyright Siemens AG, 2013 Process Automation SIMIT 7 – Getting Started Page 30 Example of use ’Elevator’ s As a first step you need to set the input signal Increments (IW512) to 1000 and as a second step turn on the main switch, i.e. set signal Mainswitch (E32.5). When setting both position indicators CabinNearDoor (I34.6) and CabinFlush (I34.4) to TRUE you see that feedback DoorClosed (I34.0) is set to FALSE and feedback DoorOpened (E33.7) is set to TRUE a few seconds later. Simulating the door now sets both sensor feedbacks. Accordingly both feedbacks FeedbackRun and FeedbackStop are set by simulating the main drive. Both feedbacks indicate that at first the drive is turned off. After activating the drive by means of a call like CabinButtonFloor1 feedbacks are set by the main drive simulation. Please note that in a real elevator the signal CabinButtonFloor1 is set by a pushbutton so you need to deactivate it as soon as the PLC has recognized the call. The scenario as described in paragraph 4.5.2 can now be executed much easier: You need to set fewer signals manually since simulation of the drive and the door generate appropriate feedback. 3.7 Testing with plant simulation The next step to reduce effort for testing the PLC program is not only to simulate drives but in this case of an elevator also to simulate movement of the elevator cabin together with the resulting sensor signals. The project Elevator-02 contains a simulation model that contains simulation of the elevators movement and the cabins sensors in addition to the drive simulation (Chapter 3.6). Figure 3-29 shows how elevator movement is simulated. A simple ramp (component Ramp) is used to compute the cabins position in a range from 900 through 5000 (4th floor) from the revolution speed SPEED with 1000 units matching one floor. Revolution speed SPEED is connected to the main drives simulation via the global connector SPEED. Figure 3-29: Simulating elevator movement Figure 3-30 shows how the simulation model of the cabins sensor uses simple interval checks to compute sensor feedback from the elevators position (Increments). These interval checks are performed using interval components and check if the cabin is level with a floor, a tolerance of ±10 increments being accepted in comparison to the ideal position. In contrast to this the range check of the cabins door is computed using the component Characteristic which is configured with an appropriate step curve. The door range is configured with a tolerance of ± 100 increments compared to the ideal position. Both ways are functionally equivalent. Different implementation shows that similar functions may be computed differently in the simulation model. Copyright Siemens AG, 2013 Process Automation SIMIT 7 – Getting Started Page 31 Example of use ’Elevator’ s Figure 3-30: Simulation the cabins sensors To perform the test just retrieve project Elevator-02.simarc. Then start the simulation and open the gateway. You now see that the simulation model also provides a value for the level counter: So the elevators position is initialized 100 units below ground floor level. After turning on the elevator by setting the signal Mainswitch in the gateway you see that the PLC will first position the elevator level to the ground floor. The Increments value will then be 1000 approx. You may now move the elevator, just issue an arbitrary call, e.g. call the first floor using signal CabinButtonFloor1. Please note again that in a real elevator this signal is set by a pushbutton so you need to deactivate it as soon as the elevator has started moving. You see that testing and commissioning the PLC program has become much easier using this simple but fully-fledged simulation. You can test not only basic functions within the PLC as shown in chapter 4.2 but also verify the entire strategy implemented in the PLC, especially when the plant is more complex than the elevator shown here. Copyright Siemens AG, 2013 Process Automation SIMIT 7 – Getting Started Page 32 Visualizing the simulation s 4 VISUALIZING THE SIMULATION SIMIT is also helpful if you need a more expressive visualization of the plant simulated. SIMIT allows you to use graphic functions to vividly display events within the plant simulation and also to interfere manually. A simple approach for visualizing the simulation is to drag and drop I/O signals from the gateway onto a diagram. Controls – i.e. operating and display controls from the standard library – provide access to all signals within the simulation. Static graphic may be used to make your simulation more descriptive. Animated graphics allow you to visualize movement within the simulated plant. This section shows various strategies using the elevator model as an example. The diagrams required are to be found in the project Elevator-03. 4.1 Visualization using controls SIMIT allows you to use controls on a diagram and use these controls to operate and display signal values. You may group controls on different diagrams arbitrarily so you can not only define which signals are to be used on which diagram but also how controls are to be arranged. 4.1.1 Visualizing gateway signals Any gateway provides a control along with a signal disconnector for all signals available. This control can be placed on a diagram for any gateway signal, along with the disconnector. You just need to drag and drop the signal from the gateway onto the diagram. You may drag either from the gateway of from the signal taskcard. 4.1.1.1 Dragging gateway signals from a gateway To drag a signal from a gateway onto a diagram you need both gateway and diagram to be opened in the work area. First tile your work area using the menu Window | Tile horizontally (Figure 4-1). Figure 4-1: Tiling a window Then create a new diagram and open it. If now you open the gateway you see both diagram and gateway arranged in the work area as shown in Figure 4-2. Copyright Siemens AG, 2013 Process Automation SIMIT 7 – Getting Started Page 33 Visualizing the simulation s Figure 4-2: Work area tiled horizontally To select I/O signals you may use an appropriate filter in the gateway window and select a signal by clicking left. You may select several signals using the Ctrl-Key (single selection) or the Shift-Key (range selection). Now drag the selected signals onto the diagram as shown in Figure 4-3. To do so you need to grab the selected signals in the leftmost column indicated with an arrow (see circle in Figure 4-3). As a copy of the controls shown in the gateway a button will be created for binary signals, a digital input will be created for all other signals. 4.1.1.2 Dragging gateway signals from the Signals taskcard You may also drag gateway signals from the Signals taskcard onto a diagram. Just open the diagram in your work area and open the Signals taskcard in the matching tools window. All signals of your project are shown in the Signals taskcard. Please note that a diagram or gateway needs to be saved before its signals show in the taskcard. To select a signal just enter the gateways name as filter value for the signals source, you may use an additional filter to further trim the result list. Then select signals from the list and drag and drop them onto the diagram (Figure 4-4). Copyright Siemens AG, 2013 Process Automation SIMIT 7 – Getting Started Page 34 s Visualizing the simulation Figure 4-3: Dragging a signal from a gateway Figure 4-4: Dragging a signal from the signals taskcard Copyright Siemens AG, 2013 Process Automation SIMIT 7 – Getting Started Page 35 Visualizing the simulation s 4.1.1.3 Forcing gateway signals It makes sense for I/O signals to place controls onto a diagram additionally to peripheral connectors. In Figure 4-5a on the diagram representing the drive simulation both feedbacks FeedbackRun and FeedbackStop additionally have controls. When the simulation is started both buttons show an overlay (Figure 4-5b). This indicates that the button will be operable only after the matching signal disconnector is activated. When activated the overlay vanishes (Figure 4-5c) and the signal can be operated using the button. In a sense the signal disconnector allows forcing of the signal: Any connection to the simulation is broken and the signal can be set manually. Figure 4-5: Forcing signals with signal disconnectors on a diagram You may use a signal disconnector and a control to force any input or output signal of a gateway. When forcing an output signal its connection to the PLC is broken and it can be set manually for further use in the simulation. In project Elecator-03 the output signals to open and close the door on the diagram Door have additional controls (Figure 4-6). Figure 4-6: Forcing output signals on a diagram Gateways already contain controls and signal disconnectors for all signals so that forcing any I/O signal is possible in a gateway. Copyright Siemens AG, 2013 Process Automation SIMIT 7 – Getting Started Page 36 Visualizing the simulation s You may place controls and signal disconnectors for a certain signal in multiple instances on the same diagram or on different diagrams and then use any of these controls to force the signal. 4.1.2 Visualizing signals In sample project Elecator-03 in folder Diagrams/Operating you find a diagram Simple that visualizes gateway signals. All controls shown within the dotted frame (Figure 4-7) can be dragged and dropped from the Signals taskcard or from the gateway without any further modification. Figure 4-7: Visualization with controls The output signal Display is shown using two controls: one digital display and one analog display. You get a digital display e.g. by dragging the signal from the gateway or the taskcard and deleting the signal disconnector. You also may create a new digital display as well as an analog display by dragging the control from the Controls taskcard onto the diagram and then entering the signal name in the controls properties (Figure 4-8). You may enter the signal name manually or drag and drop the signal from the taskcard into the properties view. Figure 4-8: Copyright Siemens AG, 2013 Process Automation Parameters in a connections properties SIMIT 7 – Getting Started Page 37 s Visualizing the simulation The signals for the doors closing and opening time show that not only gateway signals but also components input signals can be linked with controls. When dragging these two signals from the Signals taskcard you see that – as shown in Figure 4-9 – there is one control along with a signal disconnector is placed per signal. Since these are analog signals the Digital Input control is used. Figure 4-9: Digital inputs with signal disconnector Like this, controls can be placed for any input or output signal in the Signals taskcard, i.e. not only gateway signals but also any components input and output signals can be placed onto a diagram as control and signal disconnector. The above example uses not digital inputs but sliders to set the doors opening and closing time. Along with other controls sliders are made available in the Controls taskcard (Figure 4-10). There you find display controls • Binary Indicator, • Analog Display, • Digital Display and • Bar Indicator and operating controls • Pushbutton, • Switch, • Stepping Switch, • Digital Input and • Slider to set signal values. Copyright Siemens AG, 2013 Process Automation SIMIT 7 – Getting Started Page 38 Visualizing the simulation s Figure 4-10: Controls taskcard The controls Pushbutton, Switch and Stepping Switch exist in a variant with an image also. You can define the look of these controls on the diagram by assigning appropriate images like photographs and thus create a very realistic look. Controls can be associated with any signal from the Signals taskcard. On top of input and output signals originating from a gateway of a component you can also use controls to show states of a component and set parameters that are online changeable, i.e. changeable when the simulation is running already. Just play with different controls available, e.g. by adding a new diagram to the sample project Elevator-03. Then place some controls, connect them to a signal and parametrize them. 4.2 Visualization with graphics In order to create and modify graphics on a diagram the additional module DGE (Dynamic Graphics Editor, order no. 9AP1442) is required. All available graphical elements are provided within the Graphics taskcard. 4.2.1 Static graphics The Graphics taskcard provides various graphical elements (Figure 4-11). Just drag the required element from the taskcard onto a diagram and edit it using the diagram editors toolbar (Figure 4-12). Copyright Siemens AG, 2013 Process Automation SIMIT 7 – Getting Started Page 39 Visualizing the simulation s Figure 4-11: Taskcard Graphic Figure 4-12: Graphic editing functions within the diagram editor You can define font, font size and color of a text as well as fill color, line color and line thickness. Furthermore, you can flap and mirror graphic objects, and group or align multiple objects. Multi selection is done as usual via rubberband selection or by single selection with the Shift- or Ctrl-Key. Individual graphic objects as well as grouped objects can be placed in foreground or background. When a graphic object is selected a selection frame is shown (Figure 4-13a). The rectangular grippers are used to resize an object, just move the mouse over a gripper until the cursor changes as shown in Figure 4-13d and resize while holding the left mouse button pressed. The upper side circular gripper is used to rotate the object by an arbitrary angle, just move the mouse over the gripper until the cursor changes as sown in Figure 4-13b and rotate. The rotation center can also be moved (Figure 4-13c). Figure 4-13: Modifying a rectangle Any line can have its endpoints modified, be that a simple line or a line segment within a polygon. After selecting, both endpoints of a line show a small rectangle. Move the mouse cursor on top of an endpoint until the cursor changes as shown in Figure 4-14. You can now move the endpoint while the left mouse button is pressed. Copyright Siemens AG, 2013 Process Automation SIMIT 7 – Getting Started Page 40 Visualizing the simulation s Figure 4-14: Modifying straight lines An ellipses endpoint or a bezier patches control point is modified in a similar way (Figure 4-15). Figure 4-15: Modifying bent lines These graphic tools allow you not only to add additional text on your diagram but also include drawings of the simulated plant as shown for sample project Elevator-03 in Figure 4-16. Graphics are placed in a grid. Please press the Alt key when editing graphics without having a grid in place. Copyright Siemens AG, 2013 Process Automation SIMIT 7 – Getting Started Page 41 Visualizing the simulation s Figure 4-16: 4.2.2 Drawing of a plant Animated graphics The simple elevator simulation with visualization based on controls contains all information required for testing and commissioning the PLC program already as shown in Figure 4-7. Grouping the controls according to their function makes it easier to find any signal of the simulated plant. For a simple plant simulation this visualization is fully adequate. Moving objects within the plant – such as the elevator in this case – can be visualized more vividly by using animation and are thus easier to detect. The entire simulation becomes more realistic. In folder Diagrams\Operating of the Elevator-03 project you find the diagram Animated (Figure 4-17) that contains sample animations: • The cabins movement within the elevator shaft, • opening and closing the door, • commentarial text. Copyright Siemens AG, 2013 Process Automation SIMIT 7 – Getting Started Page 42 Visualizing the simulation s animated text animated cabin Figure 4-17: Examples for animation Any graphic element from the Graphics taskcard can be animated. When drawing e.g. a rectangle, its properties view shows Animations properties in addition to general properties (Figure 4-18). Figure 4-18: Animation properties of graphic elements You create a new animation for this graph element by double clicking New Animation. You get a selection dialog to choose between several types of animation (Figure 4-19): • Movement of the graphic object on the diagram, • Rotation of the graphic object around its rotation axis, • Scaling of the graphic element, i.e. changing its size, • Visibility to show or hide the graphic element, Copyright Siemens AG, 2013 Process Automation SIMIT 7 – Getting Started Page 43 Visualizing the simulation s • Image Alternation and Image Sequence to display images in the graphic object. Figure 4-19: Selecting a type of animation You may define several animations for a single graphic element and thus e.g. both move and scale it. Image alternation and image sequence are mutually exclusive, i.e. you cannot add both image alternation and sequence. When selecting Movement you get a copy of the graphic object that is shifted to the side. A red arrow links both original and copy (Figure 4-20a) and shows the objects movement. Now use the mouse to move the copy to its destination position as shown in Figure 4-20b for horizontal movement. Figure 4-20: Creating a movement animation In the properties view (Figure 4-21) enter the signal that produces values to control the movement. Just drag the signal from the Signals taskcard into the input field. Then define start value and end value. When starting the simulation and changing the signal value the rectangle will be moved horizontally. Given that signal values lie within the specified range movement will take place in accordance to the red arrow specified. Otherwise movement will be continued outside the range indicated by the arrow, i.e. the arrow indicates the moving direction only, start and end value only specify a measure for the movement on the diagram. Copyright Siemens AG, 2013 Process Automation SIMIT 7 – Getting Started Page 44 Visualizing the simulation s Figure 4-21: Properties of the Movement animation Several movement animations are superimposed and thus allow for the object to be moved along bent lines. Given a group of graphic objects you may animate both the group as a whole or each individual object within the group. The diagram Animated (Figure 4-17) has the elevator cabin built from multiple graphic objects: • A rectangle represents the empty cabin, • The SIMIT symbol shows when the door is open, • A color rectangle represents each door. The groups properties reveal that it is animated with the gateway signal Increments (Figure 4-22). Figure 4-22: Movement properties of a group On the diagram you now see the vertical movement of the cabin. If Increments has a value of 1000 (Initial value) the cabin is positioned at the lower position, a value of 5000 (Final value) will position the cabin at the top position. All grouped elements are moved fluently between these two positions. Copyright Siemens AG, 2013 Process Automation SIMIT 7 – Getting Started Page 45 Visualizing the simulation s Figure 4-23: Defining a movement for a group The empty cabin as well as the symbol have no individual animations configured, i.e. these elements only take part in the groups movement up and down. Opening and closing the doors is realized by means of a scaling animation (Figure 4-24). Figure 4-24: Properties of the Scaling animation On the diagram you see that the rectangle representing the left door has a width of zero in its final position (Figure 4-25). Depending on the signal value the rectangles width is modified. The right door is animated in a similar way using the same signal. Copyright Siemens AG, 2013 Process Automation SIMIT 7 – Getting Started Page 46 s Figure 4-25: Visualizing the simulation Defining a Scaling for a graphic object A further type of animation can be seen with the text above the elevator shaft (Figure 4-26). Figure 4-26: Animated text on the Animated diagram Four text elements • Motor, • slow, • fast, • off are assembled in a group named ’Text’ for clarity. The group itself and the text ‘Motor’ are not animated, the other elements are shown or hidden according to dedicated binary signals using the Visibility animation. E.g. the text ‘fast’ is animated using the gateway signal V1 (Command for fast movement). Once this signal is active the text is visible. Figure 4-27: Animated text in the diagram Animated Depending on the main drives state the commentatory text ‘Motor fast’, ‘Motor slow’ and ‘Motor off’ is shown. Copyright Siemens AG, 2013 Process Automation SIMIT 7 – Getting Started Page 47 s Simulation with Macro Components 5 SIMULATION WITH MACRO COMPONENTS A macro component allows you to merge repetitive functional parts of your simulation model, e.g. parts of a diagram. A macro then provides simple access to this function: you do not need to copy and paste that function from one diagram into another but rather use the macro component similar to a standard component and drag it from the taskcard, parametrize it and connect it to other components or macro components. Macro components are provided in the Macros taskcard in the diagram editor. The Macros task card is divided into the Basic Macros, User Macros and Project Macros palettes. The name, version, library and UID of a selected macro component are displayed under Info (Figure 5-1). Figure 5-1: The Macros task card The section Basic Macros contains five macros which may be used as signal generators. They can be parametrized with respect to cycle duration and amplitude and yield different signal patterns: • Random, Copyright Siemens AG, 2013 Process Automation SIMIT 7 – Getting Started Page 48 Simulation with Macro Components s • Sawtooth, • Sine, • Square, and • Triangle. You can create your own macro components in either the User Macros or the Project Macros palette. Macro components created in the User Macros palette are stored in the SIMIT working area and are therefore available for all projects. In User macros you can also open folders containing macro components using the folder, i.e. removes it from the palette again. button. The button closes a selected Macro components created in the Project Macros palette are stored in the project folder and are therefore only available while this project is open. All macro components stored in Project Macros are archived with the project. Therefore they are available in the project again if you retrieve the project. 5.1 Creating macro components To create a new macro component just double click in the palette User Macros or Project Macros. A new macro component will be created, and you may accept the suggested name or change it (Figure 5-2). Figure 5-2: Creating a new macro component Pressing the enter key the macro editor (Figure 5-3) opens. Copyright Siemens AG, 2013 Process Automation SIMIT 7 – Getting Started Page 49 Simulation with Macro Components s Figure 5-3: The macro editor A macro diagram differs from a standard diagram by the two border sections on the left and right hand side. The cells in left border represent inputs of the macro, the cells on the right border represent outputs. As with diagrams you may use components from the library to model certain behavior within the macro and you also may use static graphics. From all connector components you may use global connectors only, all other connectors are invalid within a macro. Controls and animation are also not applicable in macros since macros are supposed to model functional behavior of the simulation only. Furthermore macros cannot be hierarchical, i.e. a macro cannot contain another macro. If you have created a diagram already and wish to build a macro from it just copy the relevant parts from the diagram into the macro diagram. E.g. open the diagram Main Drive from the sample project Elevator-03 and copy its entire content using the menu Edit | Copy. Then open the macro diagram and insert a copy there using Edit | Paste. Only usable components will be pasted onto the macro diagram (Figure 5-4). Copyright Siemens AG, 2013 Process Automation SIMIT 7 – Getting Started Page 50 Simulation with Macro Components s Figure 5-4: Macro diagram in the macro editor Now you need to provide the macro with connections, i.e. inputs and outputs. Just double click a cell in the border section and it will be opened for input of a connection name (Figure 5-5a). Confirm your input using ENTER and connect the newly created macro connector to a components connector, e.g. by dragging the components connector onto the macro connector (Figure 5-5b). A connection is established and shown using a connection line (Figure 5-5c). Figure 5-5: Macro connections Alternatively, you may create a connection of a macro component by first clicking a components connector and then clicking the desired position in the input or output section. The name of the components connector will be used as default for the newly created connector in the inputs or outputs section. After performing the same steps for all other connections your macro should look as shown in Figure 5-6. Figure 5-6: Copyright Siemens AG, 2013 Process Automation Macro diagram with connections SIMIT 7 – Getting Started Page 51 Simulation with Macro Components s Now save and close the macro editor. Macro components containing errors are identified by means of the Figure 5-7: overlay (Figure 5-7). Identifying macro components containing errors You can open and edit these macro components in the editor, but you cannot use them on diagrams. You will find a description of the errors in the editor's Properties dialog on the Diagnostics tab (Figure 5-8). Figure 5-8: 5.1.1 Diagnostics in the Properties dialog for macro components Separating connections of a macro component As shown in Figure 5-21 all connections of a macro component are consecutively placed using the connection raster. You may use separators to create empty room between two connections. Just open the sample macro in the macro editor. In order to put a separator of raster size 1 between inputs Slow and Fast and input Dir, use the context menu to place a separator in any cell between (Figure 5-9). Figure 5-9: Placing a separator Separators are shown as horizontal lines in the cell (Figure 5-10). Copyright Siemens AG, 2013 Process Automation SIMIT 7 – Getting Started Page 52 s Figure 5-10: Simulation with Macro Components Separator in the macro editor The macro components symbol will now show the connections with appropriate room in between. Figure 5-11 shows that not only the inputs but also the outputs have been separated. Figure 5-11: Macro component with separated connections Separators can be deleted using the cells context menu. 5.1.2 Using topological connectors in the macro component You can use components from the FLOWNET and CONTEC supplementary libraries in macro components. Open topological connectors of a model created from FLOWNET or CONTEC components are mapped to topological connectors in the margin bars of the macro component. The topological connectors can be arranged on the right or left margin of the macro component as preferred (Figure 5-12). Copyright Siemens AG, 2013 Process Automation SIMIT 7 – Getting Started Page 53 s Figure 5-12: Simulation with Macro Components Definition of a macro component with topological connectors If macro components like this are used on diagrams, the topological connectors of the macro component (Figure 5-13) can be connected to topological connectors of other components or macro components. The topological structures defined in the macro components are then merely substructures of the complete topological structure of the flow or transport network. Figure 5-13: 5.1.3 Use of a macro component with topological connectors Default settings for macro component inputs Default settings can be applied to individual macro component inputs. Open the Input tab in the Properties dialog of the macro component editor and enter the corresponding values (Figure 5-14). Copyright Siemens AG, 2013 Process Automation SIMIT 7 – Getting Started Page 54 Simulation with Macro Components s Figure 5-14: 5.1.4 Default settings for macro component inputs Parameters of macro components Parameters of a macro component can be built from parameters of the components used within the macro only. In the above example the components within the macro do not have any parameters, hence the macro component MacroDrive itself cannot have any parameters. In order to define the slow speed (Low_speed) and the ramp up time and ramp down time of the drive (TUp, TDown), just use the Aconst component from the standard libraries misc folder as shown in Figure 5-15. The values of these analog constants can be set as parameters, hence the drives component inputs can now be set as parameters of the macro. Figure 5-15: Setting component inputs using constants As you can see in the components properties view, component parameters have an additional switch in the macro editor (Figure 5-16). Figure 5-16: Component parameters in the macro editor When activated for a certain parameter ( ), this parameter becomes a parameter of the macro component itself. It is in a way lifted from component level to macro level. The field on the left side of the switch allows you to enter a name the parameter should be assigned on macro level (Figure 5-17). Please also enter an appropriate default value for the macro component. Copyright Siemens AG, 2013 Process Automation SIMIT 7 – Getting Started Page 55 s Figure 5-17: Simulation with Macro Components Defining parameters for a maro component When used on a diagram the macro shows its parameters along with their default values in the properties view (Figure 5-18). Figure 5-18: 5.1.5 Parameters of a macro component Find and Replace in macro components In SIMIT V7.1 you can also replace components within a macro. The context menu for a macro includes the item Find & Replace. Figure 5-19: Context menu for a macro component This command opens the Find & Replace editor with a preset focus on the macro component. 5.2 Using macro components Like each component, macro components can now be dragged and dropped onto a diagram. A macro component will be displayed in rectangular form with a double frame. The macros Copyright Siemens AG, 2013 Process Automation SIMIT 7 – Getting Started Page 56 s Simulation with Macro Components name will be displayed in the top section, all inputs and outputs are shown on the left and right hand side of the macro respectively, maintaining their predefined order (Figure 5-20). Figure 5-20: Macro component on a diagram Once placed on a diagram you can use a macro component like any other component. It can be connected with components and controls as well as with other macro components. In the present example you can plug the corresponding connectors and use the resulting diagram instead of the diagram Main drive as provided in the elevator project (Figure 5-21). Figure 5-21: Connecting a macro component Double click the macro component to open the macro diagram in readonly mode, i.e. you cannot make any changes to the macro diagram, this is possible in the editable version only. 5.2.1 Properties of macro components Macro components have properties, which you can edit in the Properties dialog (Figure 5-22): • Name The name of a macro component corresponds to the file name under which a macro component is saved in the file system (working area or any directory in the file system). The macro component is displayed with this name in the Macros task card. • NOTE If macros have been copied over from an earlier SIMIT version, the file name may differ from the macro name to begin with. Abbreveation The abbreveation is displayed in the header in the instance of a macro component. • Version The version of a macro component can be freely assigned. It appears in the Info palette in the Macros task card and in the tooltip for the macro component on the diagram. Copyright Siemens AG, 2013 Process Automation SIMIT 7 – Getting Started Page 57 Simulation with Macro Components s • Library family The library family of a macro component can be freely assigned. It appears in the Info palette in the Macros task card and in the tooltip for the macro component on the diagram. • Password Macro components can be password protected. If a macro component is password protected, it can be used on diagrams but cannot be opened without entering the correct password. WARNING STOP • Keep the passwords for your macro components in a safe place, otherwise you will not be able to open even your own password-protected macro components. Width The width of the symbol. • Height The height of the symbol. Figure 5-22: Copyright Siemens AG, 2013 Process Automation Properties of a macro component SIMIT 7 – Getting Started Page 58 The Project Manager s 6 THE PROJECT MANAGER Use the first entry in the project navigation to open the project manager. The project manager shows an alternative view of the project compared to the standard project view (Figure 6-1). Figure 6-1: The project manager Just like the project view the project manager allows you to move diagrams and other items as well as entire folders via drag and drop or to use the context menu to copy, paste, rename or delete them. Double click an entry such as a diagram to open it in its editor. 6.1 The taskcard Projects The project manager provides a taskcard Projects. This taskcard allows you to open another project than the project you are currently working with in order to transfer elements into your project. E.g. you may retrieve projects Elevator-01 and Elevator-03 into two different folders and open Elevator-01 in SIMIT. Now open the project manager and click (Open Project) in the taskcard. In the file dialog to show just navigate to the folder Elevator-03 is saved in Copyright Siemens AG, 2013 Process Automation SIMIT 7 – Getting Started Page 59 The Project Manager s and choose file Elevator-03.simit. The project will now be opened in readonly mode in the Projects taskcard (Figure 6-2). Figure 6-2: Project in the Projects taskcard. You can now drag and drop single elements such as a diagram as well as entire folders from project Elevator-03 into the project manager and thus create a copy within the current project Elevator-01 (Figure 6-3). You may as well open a diagram from Elevator-03 in the diagram editor and copy parts from this diagram into diagrams contained in Elevator-01. Copyright Siemens AG, 2013 Process Automation SIMIT 7 – Getting Started Page 60 The Project Manager s Figure 6-3: Copy using drag and drop from the Projects taskcard The Projects taskcards allows for several projects to be open simultaneously. This provides an easy and efficient way to build a project from parts of several “standard projects”. Use to close a project in the Projects taskcard. The project manager along with projects that may be open in the Projects taskcard is available when the simulation is running, too. Then also you may open elements of a project from the project manager. 6.2 Project properties The properties view within the project manager provides the properties of your simulation project: • the Project Location, • the Project Version, • the property Readonly, • the Default Scale if and only if you use the CONTEC library and • the eight different cycle times (Cycle1 … Cycle 8). The property Project Location indicates, which folder your project is located in. The eight cycle times, which you assign to components, controls and gateways in your project, can be assigned any value in milliseconds, provided it is at least 10 ms. The property Default Scale is described in the manual for the SIMIT CONTEC library. Copyright Siemens AG, 2013 Process Automation SIMIT 7 – Getting Started Page 61 The Project Manager s The properties Project Version and Readonly are described in the following sections. 6.2.1 Version tracking in the simulation project The version number is automatically included in the simulation project. It consists of several elements: • Licence number (e.g. AB12345) • Time stamp (resolution is approx. 38 seconds) • Major version (0-127) • Minor version (0-999) If the simulation project is changed, the version number is updated automatically the next time the simulation is started. The version number is displayed in the Project Manager (Figure 6-4). Figure 6-4: Version number in the Project Manager If the simulation project has been changed but has not been started since then, an asterisk appears after the version number (Figure 6-5). Figure 6-5: Version number in the Project Manager with indication of change The minor version is incremented up to 999, then it returns to zero and the major version is increased by 1. If you want to increment the major version before then, to document a particular project status for example, click the button with the three dots. After a prompt (Figure 6-6), the project is compiled and the new version number entered. Figure 6-6: Copyright Siemens AG, 2013 Process Automation Dialog to increment the project version SIMIT 7 – Getting Started Page 62 The Project Manager s 6.2.2 NOTE When you create a new simulation project or you open or retrieve a simulation project that was created with SIMIT V7.0, the project is still unversioned. The version will be set automatically once the simulation is started. Read-only attribute In SIMIT it is possible to protect entire simulation projects or parts of them against accidental changes. All protectable elements of a project now have an additional "Read-only" attribute in the Project Manager (Figure 6-7). Figure 6-7: Read-only attribute in the Properties dialog of the Project Manager To set or reset the readonly property of an element within your simulation project just click this element. The properties view of the project manager allows you to define write protection as desired. The effect of the read-only attribute varies according to which element of a project it is applied to: • Diagram Read-only diagrams cannot be deleted or renamed. They can be opened in the editor but not modified. Diagram objects (components, controls and graphics) can be selected and copied to other diagrams. Diagrams can be opened while the simulation is running. • Diagram folders Read-only folders cannot be deleted or renamed. New diagrams or subfolders cannot be created in read-only folders, not even by moving or copying diagrams or folders. • Gateways Read-only gateways cannot be deleted or renamed. They can be opened in the editor but not modified. • Snapshots Read-only snapshots can be loaded when a simulation is running but not deleted or renamed. • Snapshot folders Read-only folders cannot be deleted or renamed. Subfolders or snapshots cannot be created in read-only folders, not even by moving or copying snapshots or folders. If the highest-order snapshot folder in the project tree is set to read-only, no more snapshots can be created as they are automatically stored in the highest-order snapshot folder. The corresponding icon in the toolbar is inactive. Copyright Siemens AG, 2013 Process Automation SIMIT 7 – Getting Started Page 63 The Project Manager s • Graph Read-only graphs cannot be deleted or renamed. They can be opened in the editor but not modified. • Archive A read-only archive can be opened in the editor but not modified. • Script Read-only scripts cannot be deleted or renamed. They can be opened in the editor but not modified. • Script folders Read-only folders cannot be deleted or renamed. New scripts or subfolders cannot be created in read-only folders, not even by moving or copying scripts or folders. • Project Manager If the Project Manager is set to read-only, project properties such as cycle times cannot be modified. However, all actions relating to project elements are available in both the Project Manager and the project tree, subject to any read-only settings. • Complete project Read-only projects cannot be renamed and gateways cannot be created. Note that setting the read-only attribute for a project does not automatically mean that all components of the project are protected from being changed. However, when you set the read-only attribute for a project, you can pass it on to all elements of the project. Read-only elements such as diagrams are opened in the editor with a white title bar to indicate their special status. When you set or remove the read-only attribute for a folder, you can choose per dialog (Figure 6-8) to apply this action recursively to all subfolders and the elements they contain. Note that the read-only attribute for individual objects such as diagrams in lower-level folders can still be changed subsequently on an individual basis, so it is not permanently tied to the folder status. Figure 6-8: Copyright Siemens AG, 2013 Process Automation Applying the read-only attribute SIMIT 7 – Getting Started Page 64 Automatisms s 7 AUTOMATISMS SIMIT provides several automatisms to create and edit diagrams. All these automatisms are based on files that contain information to create or modify diagrams. This information will automatically be converted into diagrams once the corresponding files are imported into SIMIT. The following automatisms are available: • Templates Templates are patterns of diagrams which contain placeholder definitions for parameters, defaults etc. By importing a table that contains values for these placeholders, diagrams are automatically created from the templates. • Parameter import Parameters and input default values can be defined in a table and can be imported into the simulation project by importing the table. • XML interface Diagrams can not only be created using the graphical user interface but also on basis of a description that is written in XML syntax. This description will be stored in a file. When importing this file the diagrams will automatically be created as specified. 7.1 Templates You may place repetitive parts of a simulation model in a template. This allows you to use e.g. parts of a diagram in such a way that they work as a pattern for new diagrams when creating a project. You may use any element in a template that can be used in a standard diagram: Components, macro components, controls and graphic objects. In contrast to a diagram a template will use placeholders for an elements properties. When instanciating a template a diagram will be created and placeholders will be replaced by values, signal names etc. SIMIT provides two ways to instanciate a template: you may manually drag and drop a template into your project or you may use a table-based import. 7.1.1 The Templates taskcard In the project manager templates are made available via the Templates taskcard (Figure 7-1). The Templates taskcard contains three sections: • Basic Templates, • User Templates and • Project Templates. Basic templates are templates provided by SIMIT. In the PCS 7 Library folder you find eight templates matching the process tag types (templates) within the PCS 7 library. Use User Templates and its folder Global Templates for your own templates that you wish to use within this SIMIT installation. Additional libraries may be loaded via and closed via . Templates placed in Project Templates will be stored and archived along with the project, hence are to be used in the currently open project. After opening or retrieving a project these templates are available. Copyright Siemens AG, 2013 Process Automation SIMIT 7 – Getting Started Page 65 Automatisms s You may use drag and drop to copy a basic template into user templates or project templates as well as move or copy templates between user templates and project templates. Figure 7-1: 7.1.2 Templates taskcard Creating a template To create a template open the Templates taskcard in the project manager. Use to open the templates editor and create a new template. For editing just double click the template in the Templates taskcard. Inside the template editor you have the taskcards Components, Controls, Macros and Graphics available as resources, i.e. the same elements as for editing a diagram. So you may edit a template in the same way as a diagram. Templates in the Basic palette can be opened directly via the context menu in the template editor. However, basic templates opened in this way can only be viewed, not edited. To indicate this the template is opened in the editor with a white title bar. If you wish to edit a basic template, copy it to the User templates palette. The use of placeholders within templates marks the major difference to a diagram. To learn more just create a new diagram, e.g. in the global templates folder. Then open the sample project Elevator from the Projects taskcard and the diagram Main drive within this project. Now copy the entire content of this diagram into the template (Figure 7-2). Copyright Siemens AG, 2013 Process Automation SIMIT 7 – Getting Started Page 66 Automatisms s Figure 7-2: Template editor When looking at the properties of output connector PLCSIM V0 you see that the input fields for both source (gateway) and signal name now contain an additional symbol to define placeholders (Figure 7-3). Figure 7-3: that is used Properties view in a template Now turn the signal into a placeholder by clicking both symbols and assign names for these placeholders, e.g. Gateway and Slow (Figure 7-4). Figure 7-4: Properties turned into placeholders Now set placeholders for the other input and output signals and for the global connector as well. Always use the same placeholder Gateway for input and output signals. Copyright Siemens AG, 2013 Process Automation SIMIT 7 – Getting Started Page 67 Automatisms s Using the placeholder symbol allows to define inputs and parameters of components and macro components as well as the signal of a control or an animation and the name of a component as placeholder. Close the template editor when finished. For some controls you can also define the type, default setting and scaling as placeholders. The list in Table 7-1 shows which properties can be used as placeholders for controls. Control Name Time slice Type Button X X X Button with image X X X Switch X X X X Switch with image X X X X Stepping switch X X X Stepping switch with image X X X Digital input X X X Slider X X X Bar indicator X X Binary indicator X X X Analog display X X X Digital display X X X Table 7-1: Default setting Scaling Connector X X X X Placeholders for controls In some cases the type and default setting of controls take the form of language-dependent lists in the user interface. If you define these properties as placeholders, you must specify the position of the corresponding term in the list for substitution (see Table 7-2 and Table 7-3). Type Value NC contact 0 NO contact 1 Table 7-2: Default setting Parameter value for the NC/NO contact type Value Off 0 On 1 Table 7-3: Copyright Siemens AG, 2013 Process Automation Parameter value for the Off/On default setting SIMIT 7 – Getting Started Page 68 Automatisms s 7.1.2.1 Finding and replacing in templates You can replace components and macros within a template. The context menu for a template includes the item Find & Replace. Figure 7-5: Context menu for a template This command will open the Find & Replace editor with predefined focus on the template. 7.1.3 Instanciating templates Templates are instanciated by replacing placeholders with appropriate values. When there is no placeholder defined for a components name the component will be instanciated as if it were dragged and dropped from the library, i.e. it will be assigned the name of its component type along with a consecutive number as a name. 7.1.3.1 Manually defining replacements You may instanciate a template by dragging and dropping it in the project manager from the taskcard into a project folder. Just open the project manager and select the Templates taskcard. When dragging the template as created above into a project folder a dialog is shown as in Figure 7-6. There is a two-column list containing all placeholders within this template. In the right hand column please enter the values these placeholders are to be replaced with. When checking the “Remove elements with empty replacement“-option, all elements will be removed which contain one or more placeholders you did not define a replacement for. E.g. global connectors and peripheral connectors will be deleted if there is no signal provided. In Figure 7-7 this is the case for placeholder Direction. You may use this feature to create a template that covers several use cases simultaneously. When instanciating the template you can easily choose between these use cases by just not defining a replacement for placeholders used for another use case. Copyright Siemens AG, 2013 Process Automation SIMIT 7 – Getting Started Page 69 Automatisms s Figure 7-6: Replacement dialog when instanciating a template Figure 7-7: Providing replacements for placeholders Copyright Siemens AG, 2013 Process Automation SIMIT 7 – Getting Started Page 70 Automatisms s After confirming the dialog you see a new diagram named like the template in the project manager. When opening the diagram you see the instanciated simulation which is identical to the original driver simulation apart from the missing output signal Direction (Figure 7-8). The output connector was not instanciated since it was lacking replacement. Had you not checked “Remove elements with empty replacement“ this connector would have been instanciated with no signal provided, i.e. an empty connector would have been placed. Figure 7-8: 7.1.3.2 Instanciated template Using tables to define replacements You may use tables as an alternative way to instanciate templates. These tables will mainly contain replacements for the placeholders. Depending on the profile the table contains additional information about which template to use and which instances to create. There is a profile provided for importing IEA files from PCS7 along with three profiles used to import CSV files. • Profile 1 using predefined placeholders „V1“, „V2“, ... • Profile 2 defining the placeholders used in the first line • Profile 3 listing the placeholders individually All tables are used to create one instance of a template per row. The following table formats are supported for import: • *.iea The table format used by the Import/Export wizards in PCS7 • *.xls Microsoft Office Excel (97-2003) format. Only the first sheet of the workbook is included. This file format is only available if Microsoft Excel is installed on your computer. • *.xlsx The current Microsoft Excel format. Only the first sheet of the workbook is included.This file format is available even if Microsoft Excel is not installed on your computer. • *.txt Tab-separated list in text format. Copyright Siemens AG, 2013 Process Automation SIMIT 7 – Getting Started Page 71 Automatisms s NOTE NOTE If you still want to use *.csv files from projects in earlier versions of SIMIT, you must convert them to this tab-separated *.txt format. When importing an .xls or .xlsx-file that is still opened in Excel, it is the last saved version of this file that will be imported, not the currently open version. 7.1.3.2.1 Profile using predefined placeholders A table used with this profile must not contain any headlines. Columns have a predefined meaning (Figure 7-9): • Column A defines the template to be used • Column B defines the folder to be created within the project • Column C defines the name of the diagram to be created • Column D through W contain values for placeholders V1 through V20 In the templates to be used with this profile placeholders V1 through V20 may be used only. The target folder may be defined hierarchically. The diagram will be instanciated in the specified folder. Figure 7-9: Profile using predefined placeholders 7.1.3.2.2 Profile defining placeholders in the first row In this profile the columns heading defines the columns meaning (Figure 7-10). The first three columns have a fixed meaning, hence need to provide predefined headers: • Column A (HIERARCHY) defines the folder hierarchy to be used • Column B (TEMPLATE) defines the template to be used • Column C (CHART) defines the name of the diagram to be instanciated Beginning with column D any number of columns can be used that contain replacements for a certain placeholder, the name of which is defined in the first row. This profile does not impose any limitations to either the number of placeholders used or to their names. Copyright Siemens AG, 2013 Process Automation SIMIT 7 – Getting Started Page 72 Automatisms s Figure 7-10: Profile defining placeholders in the first row NOTE In your tables you can specify which folder is to be searched for a template. For the TEMPLATE placeholder enter the complete folder hierarchy as shown in the Templates task card. Use the backslash '\' as the separator. To refer to a template that is not located in a subfolder, simply enter the name of the template preceded by a backslash. If the template name is entered without separators, all folders and subfolders are searched for a template of this name as before. In this case make sure that there are not two templates with the same name in different subfolders. In principle the three palettes of the Templates task card are searched in the following order: 1. Project templates 2. User templates 3. Basic templates 7.1.3.2.3 Profile listing placeholders individually A table used with this profile must not contain any headlines. Columns have a predefined meaning (Figure 7-11): • Column A defines the template to be used • Column B defines the folder to be created within the project • Column C defines the name of the diagram to be created The next 40 columns contain a maximum of 20 replacements. For each replacement one column contains the placeholders name and the next column contains the replacement value. A maximum of 20 replacements can be used in the template with no restrictions to the placeholders names. The target folder may be defined hierarchically. The diagram will be instanciated within the specified folder. Figure 7-11: Profile listing placeholders individually 7.1.3.2.4 Example for table-based instanciating On your SIMIT software CD in the folder Sample project/SMD you find an example of a table defined in profile 2 (placeholders defined in the first row). Use in the project Copyright Siemens AG, 2013 SIMIT 7 – Getting Started Process Automation Page 73 Automatisms s managers toolbar to start instanciating templates. First select the target folder you want to instanciate the templates into and then click the symbol. You get a file chooser, please select Example.csv. After confirming, the dialog for table based import will appear as shown in Figure 7-12. Figure 7-12: Dialog for table based import Now select profile „Placeholder names defined in 1st row”. If according to the table several instances of a template are to be placed within a single diagram, you need to specify how to arrange these instances and also how much room there is available. If you want to place the instances in a horizontal sequence just provide a maximum diagram width, in case you want a vertical sequence provide a maximum height. When opening a preview (Figure 7-13) via Preview>> you see the folder hierarchy to be created along with the diagrams to be instanciated on the left hand side. Just select a diagram and on the right hand side you will see all replacements to be performed for this diagram. This preview allows for you to verify all replacements according to the table before actually instanciating any diagrams. You can decide whether to copy all information from the table or whether to deselect certain substitutions. Copyright Siemens AG, 2013 Process Automation SIMIT 7 – Getting Started Page 74 Automatisms s Figure 7-13: Preview in the Table import If a diagram is deselected in the left-hand tree view, it is not instantiated. By selecting a folder you can also select or deselect multiple diagrams within it. You can tell from the checkbox whether a diagram or folder is selected ( ) or deselected ( ) or whether at least one checkbox in one of the lower-order folders is deselected ( ). In the right-hand table you can also select and deselect individual substitutions. Deselecting a substitution has the same effect as if the substitution were not present in the table. 7.1.3.2.5 Example for IEA based import When using PCS7 and working with process tag types SIMIT provides an easy way to create a diagram for any CFC chart based on a process tag type. There are several templates delivered with SIMIT that match the process tag types from PCS7 libraries. Find these templates in the Basic Templates palette (Figure 7-1): • PCS 7 Library contains templates compatible to the PCS 7 standard library. • PCS 7 AP Library contains templates compatible to the PCS 7 V7 AP Library, Copyright Siemens AG, 2013 Process Automation SIMIT 7 – Getting Started Page 75 Automatisms s • PCS 7 AP Library V80 contains templates compatible to the PCS 7 V8.0 AP Library. When using one of the standard templates from PCS7 in your project you can create a matching simulation with very little effort. In the following the procedure is explained with a motor drive (MOTOR) as an example. On the SIMIT software CD you find two IEA files in folder Sample projects/SMD. Select the appropriate template in the template’s task card and in the project manager select . In the file chooser to the diagram folder you want to create instances in and click follow please select IEA file MOTOR00_Exp.IEA. You then see an import dialog as shown in Figure 7-14. Figure 7-14: Import dialog for an IEA file Provide a name for the gateway to be used for I/O signals. Use the preview and see that one diagram will be instanciated per CFC chart. The diagram will have the same name as the CFC chart and will be placed in a folder hierarchy that matches the PCS7 project (Figure 7-15). You can decide whether to copy all information from the IEA file or whether to deselect certain substitutions. Copyright Siemens AG, 2013 Process Automation SIMIT 7 – Getting Started Page 76 Automatisms s Figure 7-15: Preview of IEA based import The instance as created from the template (Figure 7-16a) is shown in Figure 7-16b. Copyright Siemens AG, 2013 Process Automation SIMIT 7 – Getting Started Page 77 Automatisms s Figure 7-16: Template from PCS 7 Library and instance Then import the second file VALVE00_Exp.IEA matching the VALVE template. This will create additional diagrams within the folder hierarchy already created. When using modified or self-created process tag types from your PCS7 project you can of course use these IEA files too, along with matching SIMIT templates. Just create the template e.g. in the User templates folder or copy there and modify an appropriate basic template. 7.1.3.2.6 Creating tables from a template If you want to create a table for a template so as to then instantiate the template repeatedly, SIMIT now allows you to create a table with a title row matching the template. In the context menu for the template select Export to Excel. Figure 7-17: Exporting a template The next steps will depend on whether or not Microsoft Excel is installed on your computer. • Microsoft Excel installed A new workbook is opened in Excel, with the entries needed for the selected template already entered in the top row on the first sheet. Complete the table and save it in a location of your choice for use in the SMD import. • Microsoft Excel not installed An Excel file in *.xlsx format is created, with the entries needed for the selected template already entered in the top row on the first sheet. Save this file in a location of your choice for editing in Excel at a later date – possibly on another computer. Copyright Siemens AG, 2013 Process Automation SIMIT 7 – Getting Started Page 78 Automatisms s The first three columns of the table contain the terms HIERARCHY, TEMPLATE and CHART. The subsequent columns contain the names of the placeholders used in the template (Figure 7-18). The name of the template is already entered in the second row, but you must enter all other data yourself. Figure 7-18: 7.2 Automatically created import file NOTE Please note that when this table is imported, the profile is set to Placeholders defined in the first row. Parameter import Using parameter import (API) you can automatically copy values for the following variables from tables and insert them in existing diagrams: • Parameters (apart from parameters of the "dimension", "characteristic" and "text" type) • Default input settings • Default control settings (corresponds to input X of the control) The API function is activated by means of the icon in the Project Manager toolbar (Figure 7-19). Figure 7-19: Calling parameter import In the import dialog (Figure 7-20) that opens, select the file corresponding to the table you wish to import. You can also specify which variables (parameters, inputs, controls) are to be copied from the table. You can import an Excel file in *.xls or *.xlsx format or a tab-separated text file. Copyright Siemens AG, 2013 Process Automation SIMIT 7 – Getting Started Page 79 Automatisms s NOTE When importing an .xls or .xlsx-file that is still opened in Excel, it is the last saved version of this file that will be imported, not the currently open version. Figure 7-20: Import dialog for automatic parameter import In the import dialog preview (Figure 7-21) you can see which substitutions are to be made for the parameter table from Figure 7-24. You can decide whether to copy all information from the parameter table or whether to deselect certain substitutions. Copyright Siemens AG, 2013 Process Automation SIMIT 7 – Getting Started Page 80 Automatisms s Figure 7-21: Preview of automatic parameter import If a diagram is deselected in the left-hand tree view, no parameters or inputs are set in this diagram. By selecting a folder you can also select or deselect multiple diagrams within it. You can tell from the checkbox whether a diagram or folder is selected ( ) or deselected ( ) or whether at least one checkbox in one of the lower-order folders is deselected ( ). In the right-hand table you can also select and deselect individual substitutions. Deselecting a substitution has the same effect as if the substitution were not present in the table. Figure 7-22 shows the original diagram, while the changes resulting from automatic parameter import are shown in Figure 7-23. Copyright Siemens AG, 2013 Process Automation SIMIT 7 – Getting Started Page 81 Automatisms s Figure 7-22: Diagram before the parameter import Figure 7-23: Diagram after the parameter import 7.2.1 NOTE If you want to set enumeration type parameters, please enter a numerical value specifying the desired position of the term within the enumeration. The numbers start at 0. Table format The table for automatic parameter import must have three columns as follows: • The first column contains the name of the component to be modified • The second column contains the name of the connector or parameter, and Copyright Siemens AG, 2013 Process Automation SIMIT 7 – Getting Started Page 82 Automatisms s • The third column contains the value to be copied Each row of the table describes the substitution for a parameter. Figure 7-24 shows an example of a table opened in Excel. Figure 7-24: 7.2.2 Example of a parameter table Copying parameter changes made while the simulation is running Automatic parameter import also lets you copy parameter changes that were made while the simulation was running to the simulation project once the simulation has ended. During the simulation SIMIT records which default input settings and parameters are changed and which controls are used. Once the simulation has ended the latest settings are made available as a list and can be copied to the simulation project by automatic parameter import. When the simulation ends a corresponding message is displayed (Figure 7-25). If you do not need to see this message again, you can choose for it not to be displayed in future. Figure 7-25: Reference to available list of changes Each time the simulation is run, the list of changes is automatically stored in the SIMIT working area. If you select the Copy changes from the last simulation option in the import dialog (Figure 7-26), the corresponding file is selected. Copyright Siemens AG, 2013 Process Automation SIMIT 7 – Getting Started Page 83 Automatisms s Figure 7-26: 7.3 Copying changes from the last simulation XML interface SIMIT offers another option for creating diagrams automatically via external files. These files contain a description of diagrams based on a XML syntax. This can be used to instantiate existing templates but also to create custom diagrams without recourse to templates.. A valid *.xml file can be imported using the SMD function (Figure 7-27) in the Project Manager. Figure 7-27: SMD function in the Project Manager NOTE If you want to check that your data is syntactically correct you can validate your XML using suitable tools before you import it into SIMIT. In the import dialog simply select the *.xml file to be imported (Figure 7-28). Copyright Siemens AG, 2013 Process Automation SIMIT 7 – Getting Started Page 84 Automatisms s Figure 7-28: Selecting an *.xml file CAUTION Please note that when templates are instantiated using an XML file, elements of the template for which no placeholder substitutions have been defined are deleted in the instance. 7.3.1 Import file syntax The file for import must be provided as a text file in XML format and must correspond to the following Document Type Definition: <?xml version="1.0" encoding="ISO-8859-1" standalone="yes"?> <!DOCTYPE GENERIC [ <!ELEMENT GENERIC (FOLDER | DIAGRAM | TEMPLATE | BUILDUP)*> <!ATTLIST GENERIC VERSION CDATA #REQUIRED> <!ELEMENT FOLDER (FOLDER | DIAGRAM | TEMPLATE | BUILDUP)*> <!ATTLIST FOLDER NAME CDATA #REQUIRED> <!ELEMENT BUILDUP (TEMPLATE+)> <!ATTLIST BUILDUP INSTANCE CDATA #REQUIRED ALIGNMENT (HOR|VER) "HOR" Copyright Siemens AG, 2013 Process Automation SIMIT 7 – Getting Started Page 85 Automatisms s WIDTH CDATA #IMPLIED HEIGHT CDATA #IMPLIED> <!ELEMENT TEMPLATE (SUBST*)> <!ATTLIST TEMPLATE NAME CDATA #REQUIRED INSTANCE CDATA #IMPLIED> <!ELEMENT SUBST EMPTY> <!ATTLIST SUBST NAME CDATA #REQUIRED VALUE CDATA #REQUIRED> <!ELEMENT DIAGRAM (COMP)*> <!ATTLIST DIAGRAM NAME CDATA #REQUIRED WIDTH CDATA #IMPLIED HEIGHT CDATA #IMPLIED> <!ELEMENT COMP (POS+, TRANSFORM?, PROP*, DEFAULT*, PORT*)> <!ATTLIST COMP UID CDATA #REQUIRED NAME CDATA #REQUIRED REF CDATA #IMPLIED CYCLE CDATA #IMPLIED> <!ELEMENT TRANSFORM EMPTY> <!ATTLIST TRANSFORM SCALEX CDATA #IMPLIED SCALEY CDATA #IMPLIED ROTATION CDATA #IMPLIED> <!ELEMENT POS EMPTY> <!ATTLIST POS X CDATA #REQUIRED Y CDATA #REQUIRED> <!ELEMENT PROP EMPTY> <!ATTLIST PROP NAME CDATA #REQUIRED VALUE CDATA #REQUIRED> <!ELEMENT PORT (POS?, CONNECTION*)> <!ATTLIST PORT NAME CDATA #REQUIRED> <!ELEMENT DEFAULT EMPTY> <!ATTLIST DEFAULT NAME CDATA #REQUIRED VALUE CDATA #REQUIRED> <!ELEMENT CONNECTION EMPTY> <!ATTLIST CONNECTION TYPE (LINE|IMPLICIT) "LINE" SOURCE CDATA #REQUIRED NAME CDATA #REQUIRED> ]> This definition can be found in the Generic.dtd file in the DTD folder on your SIMIT installation CD. A valid XML file starts with the element GENERIC. The version number 7.1 should be entered as the attribute for this element. Element Attribute GENERIC Description Folder VERSION In the document form described here, "7.1" must be entered as the version. The generic import interface can also be used to create a nested folder hierarchy. When you call the SMD function you must select a folder in the Project Manager, in which the folder hierarchy specified in the import file is then created. If the import file contains no FOLDER elements, the templates are created directly in the selected folder. Copyright Siemens AG, 2013 Process Automation SIMIT 7 – Getting Started Page 86 Automatisms s Element Attribute FOLDER Description Generic import interface NAME The name of a folder to be created. A deeper folder hierarchy can be achieved by nesting several FOLDER tags. You can choose to instantiate individual templates (TEMPLATE) or combine several templates in a diagram (BUILDUP). In the template enter the name of the template (NAME) and the name of the diagram to be created (INSTANCE) as attributes. Element Attribute TEMPLATE Description Template NAME Template name INSTANCE Name of the diagram to be created If you want to combine several templates to create a single diagram, the template elements must be enclosed by a BUILDUP element. In this case the name of the diagram to be created should be entered in the BUILDUP element and not in each individual template element: Element Attribute BUILDUP Description Grouped templates INSTANCE Name of the diagram to be created ALIGNMENT HOR: Horizontal alignment (side by side) VER: Vertical alignment (one below the other) WIDTH Maximum width of the diagram in pixels (for horizontal alignment) HEIGHT Maximum height of the diagram in pixels (for vertical alignment) Within a template element any number of substitutions for placeholders can be specified using the SUBST element. Element Attribute SUBST Description Substitution NAME Name of the placeholder VALUE Value to be replaced Diagrams can also be created without using templates by means of the DIAGRAM element. Copyright Siemens AG, 2013 Process Automation SIMIT 7 – Getting Started Page 87 Automatisms s Element Attribute DIAGRAM Description Diagram NAME Name of the diagram to be created WIDTH Width of the diagram to be created in pixels HEIGHT Height of the diagram to be created in pixels Components on a diagram are described with the COMP element: c Attribute COMP Description Component UID The unique identifier of the component type NAME The instance name of the component REF A freely selectable reference name for the component CYCLE The time slice to which this component is to be assigned (1 to 8). The component type is identified by means of the unique UID. In order for the component type to be instantiated, it must be present in a library, i.e. in the Components task card. You also need to specify the name (NAME) to be given to the component on the diagram. If this name already exists when it is imported into the project, SIMIT automatically adds a sequential number to make it unique. A reference name (REF) only needs to be specified if the name of the component is not unique within the import file and a connection to this component needs to be specified. This can happen with connectors, for example, which occur repeatedly with the same name. The time slice to which this component is to be assigned can be specified with the CYCLE element. If this attribute is not specified, a value of 2 is entered. The position of a component is specified by the POS element and its attributes X and Y. The top left corner of the component is specified. The diagram's zero point is in the top left corner of the diagram. Positions must be positive and must be located within the dimensions of the diagram: Element Attribute POS Description Position X The X-position of the component in pixels Y The Y-position of the component in pixels A component can also be scaled and rotated with the TRANSFORM element: Copyright Siemens AG, 2013 Process Automation SIMIT 7 – Getting Started Page 88 Automatisms s Element Attribute TRANSFORM Description Transformation (scaling, rotation) SCALEX Scaling in the X-direction (default: 1). SCALEY Scaling in the Y-direction (default: 1). ROTATION Angle of rotation in degrees by which the component is to be rotated anticlockwise. The centre of rotation is the component's geometric centre. A component's parameters can be specified by means of the PROP element and its NAME and VALUE attributes: Element Attribute PROP Description Parameter NAME Parameter name VALUE Parameter value Component connectors can be joined together. In some cases this takes place automatically if they are superimposed on the diagram and have the same connection type. In other cases the connection has to be specified in the import file. Start by specifying the name of the connector using the PORT element: Element Attribute PORT Description Component connector NAME Connector name The connection is then described by the CONNECTION element: Element Attribute CONNECTION Description Connection TYPE SOURCE NAME LINE: Connection to signal line IMPLICIT: Implicit connection The name of the component with which a connection is to be established. If the component has the REF attribute, that value must be used here. The name of the connector with which the connection is to be established. The connection of directional signals should always be defined starting from the input, as the input can only be connected to one output of another component. Therefore the connector to be specified in the connection definition is always the output of a component. As topological connections are directionless, with this type of connection it makes no difference which of the two connectors to be connected is specified as the connector in the connection definition. Copyright Siemens AG, 2013 Process Automation SIMIT 7 – Getting Started Page 89 Automatisms s The SOURCE attribute contains the name of the component or gateway to be connected. Correspondingly, the NAME attribute contains the name of the connector or signal. In the case of connections of the IMPLICIT TYPE the name of the component must be entered in the SOURCE attribute. Reference names (REF) are not permitted here for implicit connections. Default connector settings are defined by means of the DEFAULT element and its NAME and VALUE attributes. Element Attribute DEFAULT Description Default NAME Connector name VALUE Default If no default settings are specified, then the values defined in the component type apply for the connectors. In accordance with XML conventions, comments are also permitted in the import file: <!-- Comment --> 7.3.2 Examples By way of example the next three sections illustrate diagrams generated from an XML file. These exaples can be found in the XML folder on your SIMIT installation CD. 7.3.2.1 Example: Single template instantiation XML file: <GENERIC VERSION="7.1"> <TEMPLATE NAME="MOTOR" INSTANCE="Motor1"> <SUBST NAME="GATEWAY" VALUE="PLCSIM"/> <SUBST NAME="Plan_ChName" VALUE="Motor1"/> <SUBST NAME="feedback run_SymbolName" VALUE="fbRunM1"/> <SUBST NAME="monitoring time on_Value" VALUE="2.5"/> <SUBST NAME="output_SymbolName" VALUE="runM1"/> </TEMPLATE> </GENERIC> Diagram: Copyright Siemens AG, 2013 Process Automation SIMIT 7 – Getting Started Page 90 s 7.3.2.2 Automatisms Example: Grouped template instantiation XML file: <GENERIC VERSION="7.1"> <BUILDUP INSTANCE="Motor1" DIR="VER" HEIGHT="1500"> <TEMPLATE NAME="MOTOR"> <SUBST NAME="GATEWAY" VALUE="PLCSIM"/> <SUBST NAME="Plan_ChName" VALUE="Motor1"/> <SUBST NAME="feedback run_SymbolName" VALUE="fbRunM1"/> <SUBST NAME="monitoring time on_Value" VALUE="2.5"/> <SUBST NAME="output_SymbolName" VALUE="runM1"/> </TEMPLATE> <TEMPLATE NAME="MOTOR"> <SUBST NAME="GATEWAY" VALUE="PLCSIM"/> <SUBST NAME="Plan_ChName" VALUE="Motor2"/> <SUBST NAME="feedback run_SymbolName" VALUE="fbRunM2"/> <SUBST NAME="monitoring time on_Value" VALUE="2.5"/> <SUBST NAME="output_SymbolName" VALUE="runM2"/> </TEMPLATE> </BUILDUP> </GENERIC> Diagram: 7.3.2.3 Example: Diagram creation XML file: <GENERIC VERSION="7.1"> <FOLDER NAME="Motors"> <DIAGRAM NAME="Diag1"> <COMP ID="f_000hsn_20cyz1u8" NAME="Drive1"> <POS X="230" Y="100"/> <PORT NAME="Run"> <CONNECTION SOURCE="PLCSIM/Command" NAME="Y"/> </PORT> </COMP> <COMP ID="f_000hsn_1zisln8r" NAME="PLCSIM/Feedback"> <POS X="400" Y="110"/> <TRANSFORM SCALEX="2"/> </COMP> <COMP ID="f_000hsn_1zislnd3" NAME="PLCSIM/Command"> <POS X="50" Y="110"/> Copyright Siemens AG, 2013 Process Automation SIMIT 7 – Getting Started Page 91 s Automatisms <TRANSFORM SCALEX="2"/> </COMP> <COMP ID="f_000hsn_21b4dv0t" NAME="Speed"> <POS X="400" Y="170"/> </COMP> </DIAGRAM> </FOLDER> </GENERIC> Diagram: Copyright Siemens AG, 2013 Process Automation SIMIT 7 – Getting Started Page 92 s 8 Find and Replace, Consistency Check FIND AND REPLACE, CONSISTENCY CHECK Use the Find & Replace entry in the project navigation (Figure 8-1) to find elements within your project and to perform replacements. Use the Consistency Check entry to verify that your project does not contain any formal errors. Simulation can only be launched if there are no formal errors in your project, hence a consistency check always will be performed before starting the simulation. Figure 8-1: Find & Replace in the project navigation Within the properties view of components and controls use the to a signal in the project. 8.1 symbol to find references Finding To make yourself familiar with the Find & Replace feature please open the project Elevator03 and open Find & Replace in the project navigation. 8.1.1 NOTE Please note that search operates on stored data only, i.e. a diagram or gateway needs to be saved before searching. Finding with the Find & Replace editor The Find & Replace editor is shown in the work area and provides the two taskcards Components and Signals. In your project you can find items as follows (Figure 8-2): • Signals, • connectors, Copyright Siemens AG, 2013 Process Automation SIMIT 7 – Getting Started Page 93 s Find and Replace, Consistency Check • instances of components and macro components, and • components and macro components by type. Select search for a signal and input “V” as signal name in the input field on the right hand side. Click the Search button to start the search. The Search Result section will show all signals contained in this project according to the search option “Part of the Content”, i.e. only the two signals V0 and V1 (Figure 8-3). Figure 8-2: Copyright Siemens AG, 2013 Process Automation Searching for a project element SIMIT 7 – Getting Started Page 94 Find and Replace, Consistency Check s Figure 8-3: Search results Click any search result and you get a tree view like in the project manager in the Project Elements section. This view shows all diagrams and gateways that contain the signal searched. E.g. click PLCSIM V0 and you will see the PLCSIM gateway and three diagrams. Double click the diagram Main drive and see the signal be highlighted in purple color (Figure 8-4). The signal will be highlighted in a similar manner in all other diagrams. If a search result corresponds to a single diagram you can open the diagram by double clicking on the search result. If there are several project elements corresponding to a search result, you need to double-click the desired project element to open it. Copyright Siemens AG, 2013 Process Automation SIMIT 7 – Getting Started Page 95 Find and Replace, Consistency Check s Figure 8-4: Highlighted search result on a diagram To search for a specific signal just drag and drop it from the Signals taskcard into either of the two input fields. When searching for a component type please enter its name and/or ID. You may also drag and drop a component type from the Components taskcard into the input field. To search for a component instance or connector please provide its name. 8.1.2 Finding with signal properties Another way to search for signals and connectors is to use the properties view of a diagram. If you e.g. want to search for input connectors that match the output connector SPEED according to Figure 8-4, open the output connectors properties view (Figure 8-5) and click the Search button ( ). Figure 8-5: Searching a connector via its properties As a result you get the Find & Replace editor containing search results (Figure 8-6). Copyright Siemens AG, 2013 Process Automation SIMIT 7 – Getting Started Page 96 s Figure 8-6: Find and Replace, Consistency Check Searching a connector Apart from the diagram Main drive the search was originating from the connector SPEED is contained only in the diagram Elevator movement. When opening this diagram you will find the connector highlighted (Figure 8-7). Figure 8-7: Copyright Siemens AG, 2013 Process Automation Searching a connector on a diagram SIMIT 7 – Getting Started Page 97 Find and Replace, Consistency Check s 8.1.3 Searching for fixed signals You can search specifically for fixed signals in the simulation project. In the search for signals dialog activate the search option Fixed signals only (see Figure 8-8). In this way you can get an overview at any time of which signals are currently fixed. Figure 8-8: Searching for fixed signals As signals can only be fixed when the simulation is running, this search option is only available once the simulation is running. 8.2 Replacement To replace search results switch the editor in replace mode using the navigation tab. You can replace • signals, • connectors, • instances of components and macro components, and • components and macro components by type. NOTE Please note that replacement operates on stored data only, i.e. a diagram or gateway needs to be saved before replacing. Again, please input the signal name V and e.g. input X as its replacement. After searching you will see the search results in the Search Results section again (Figure 8-9). Copyright Siemens AG, 2013 Process Automation SIMIT 7 – Getting Started Page 98 s Figure 8-9: Find and Replace, Consistency Check Replacing in the Find & Replace editor In the Search Results section you can now select which results you want to replace. According to the options selected you see the replacement for each search result. As with the search mode, the Project Elements section will show all diagrams containing the signals found. You can also replace a component or macro component of a specific type by a component or macro component of another type. E.g. you may be searching for component of type DriveP1 that simulates the main drive and you want to replace this component by type DriverP2 since the control logic was modified. To do so just drag and drop both component types from the library into the input fields for search and replace. As shown in Figure 8-10 both component types are handled using their UID. Copyright Siemens AG, 2013 Process Automation SIMIT 7 – Getting Started Page 99 s Figure 8-10: Find and Replace, Consistency Check Replacing components by type When clicking Replace a new dialog shows as in Figure 8-11. Here an assignment between inputs, outputs, parameters and states of both components is done. You may want to change these assignments. Figure 8-11: Copyright Siemens AG, 2013 Process Automation Assignments when replacing component types SIMIT 7 – Getting Started Page 100 s 8.3 Find and Replace, Consistency Check Updating components by type When replacing components by type, you can update components in your simulation project using the Update option (see Figure 8-12). If you choose this alternative, the system searches by component type for all components in the defined search area that have the same name and belong to the same library family but were created (saved) at a later date. The search for current component types takes place in all component libraries of the Components task card, in the following order of palettes: Project components, User components and Basic components. The most recently created component type is then suggested as the current type for replacement in the search result. Figure 8-12: Updating components The Update option works in the same way for all macro components contained in the defined search area, with the search for current macro components taking place in the libraries of the Macros task card. If all components and macro components in the chosen search area are already up to date, the message dialog shown in Figure 8-13 is displayed as the result. Figure 8-13: No hits found in the search The Update option is also available if you want to update components by type in macro components. Start the update via the context menu for the macro component (Figure 8-14). Copyright Siemens AG, 2013 Process Automation SIMIT 7 – Getting Started Page 101 Find and Replace, Consistency Check s Figure 8-14: Find & Replace in the context menu of macro components ). 8.4 Consistency check Use the consistency check to check your project for formal inconsistencies. In case an error is detected the simulation cannot be started. Just double click the Consistency Check entry to check your project. If there are no inconsistencies a dialog shows as in Figure 8-15. Figure 8-15: Dialog showing no formal inconsistencies If e.g. you rename the SPEED connector into Increments in project Elevator-03 on diagram Main drive you have created a formal error. Your project now contains two output connectors with identical names. When double clicking Consistency Check the editor will open in the work area (Figure 8-16). Since a consistency check is performed automatically when the simulation is started, the consistency check editor will also show when you try and launch the simulation. Copyright Siemens AG, 2013 Process Automation SIMIT 7 – Getting Started Page 102 s Figure 8-16: Find and Replace, Consistency Check Consistency Check , warnings are shown with the blue symbol A formal error is indicated with the red symbol . You may choose to show or not to show warnings. In the above example you have two inconsistencies: 1 There is no output connector that matches the input connector SPEED 2 The output connector Increment exists in several instances. The first message indicates a warning only, your project may just not yet be finished. A warning will not keep you from launching the simulation. The second message indicates an error that needs to be fixed before simulation can be launched. To fix an error or a warning select its entry in the list. Again the Project Elements section will show all diagrams that are in connection to this error or warning. Use this tree view to open the diagrams and fix the problem. You may recheck the project at any time using the Recheck button. NOTE Please note that consistency check operates on stored data only, i.e. a diagram or gateway needs to be saved before checking the project. The results of the consistency check can now also be exported in a tab-separated text file. To do so, activate the button in the consistency check editor as shown in Figure 8-17. Copyright Siemens AG, 2013 Process Automation SIMIT 7 – Getting Started Page 103 s Figure 8-17: Copyright Siemens AG, 2013 Process Automation Find and Replace, Consistency Check Exporting inconsistencies SIMIT 7 – Getting Started Page 104