1
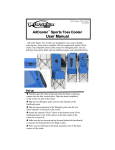
Factory Service Ad Inflatable displays have a one-year, limited warranty (see page 1) covering defective materials or workmanship. Should your display need service or maintenance performed at the factory, please contact your Pioneer® Line representative. UPIC: Pioneer / PPAI 113823 ASI 78200 SAGE 56460 A Return Authorization Number is required and can be obtained from your Pioneer Line representative. You must provide the serial number of your Ad Inflatable display (located on the inner part of the base). Trouble Shooting Ad Inflatable Display Ad Inflatable display is not standing upright: Œ Ensure the side support feet (located on the outside base of the unit) are securely attached. • Ensure tether lines are tied evenly. Ž Ensure there are not any objects under the base, causing it to tilt. User Manual Ad Inflatable display is not inflating: Œ Check for blockage by the air intake grill, which is on the bottom of your Ad Inflatable display base. • Ensure zipper(s) are completely closed. Ž Make sure you have turned on both the light switch and motor switch. Light does not turn on: Œ Ensure a fresh light bulb has been installed. • Make sure the motor is running. The light will not come on if the motor is not running. 7 USA 2006 PBC HK Most Ad Inflatable displays smaller than 15-ft. are packaged in one, easy-to-handle portable case, convenient for storage. Each comes complete with a built-in electric motor. (Some oversized Ad Inflatable displays require an external motor). Once inflated, the shape of the Ad Inflatable display is maintained with air from the motor’s continuously running blower. Some models are equipped with an internal light unit, and other features may vary depending on size and shape. (Patent pending). ! Handle Ad Inflatable displays with care to protect the motor and light unit. Please read entire manual carefully and follow instructions. Set Up Requirements Œ An electrical outlet. • Light bulb (not included). See page 6 for bulb information. Ž Display are free of sharp objects. • Flat surface area free of excessive water or dust. When setting up on plush carpet or grass, place a flat surface (i.e. a piece of plywood) between the Ad Inflatable display and the ground. • Locate attachment points for tether lines, if necessary. Tether lines are necessary if your Ad Inflatable display is taller than 17-ft., or if your Ad Inflatable display is be displayed outside. Warranty The Pioneer Line warrants this product against defects due to faulty material or workmanship for a period of one year from the original date of purchase. The Pioneer Line, at its discretion, will repair or replace the product covered by the warranty. This warranty does not cover damage to the product resulting from accident, misuse, improper care, or self-repairs. All returns must be authorized and a Return Authorization Number is required. Shipping costs on warranty repairs are the responsibility of the purchaser. This warranty gives you specific legal rights. You may also have other rights which vary from state to state. 1 Maintenance Storage Make sure the Ad Inflatable display is completely dry before storing. DO NOT STORE WET OR DAMP. Storing the inflatable wet or damp will cause odors and mildew, and may void the warranty. Cleaning If necessary, gentle cleaning can be done with a mild liquid soap and a clean cloth or sponge. DO NOT SCRUB FABRIC. Take special care when cleaning graphic areas. Light Bulb Change Some models may have more than one light unit. Light units for lower section of the display will be on the base. Light units for upper sections may be hanging from the top. Locate the zipper opening that will give access to each light unit. Ad Inflatable displays less than 17-ft. tall: Standard 150-watt bulb Location*: Interior of the display on the base. To change: Snap open the bulb protector and remove the bulb. Replace with a new bulb of the same specifications. Don’t forget to close the bulb protector when finished. Ad Inflatable displays more than 17-ft. tall: Halogen Lamp Location*: Interior of the display on the base. To change: Unscrew lamp to release the glass screen. Remove and replace the halogen lamp with the one of the same specifications. Don’t forget to replace glass screen when finished. * Depending on the size and shape of the Ad Inflatable display, there may be more than one light unit. Repair Patches Self-adhesive patches are provided in the pouch on the inside of the zipper flap. Cut a patch that is at least ½ larger than the size of the opening to be repaired. This allows the patch to overlap the opening. Peel the paper from the patch and carefully place it on the inside fabric of the Ad Inflatable display. Lay a piece of clean cloth on top of the fabric and iron using medium heat. For larger openings, repeat the procedure on the outside fabric. 6 Product Description Take Down Œ Turn off the light at least 10-15 minutes before turning off the motor. This will prevent the deflated fabric being damaged by the bulb’s heat. • Untie the tether lines. Turn off the motor and open the zipper(s) on the display to let the air out quickly. As it deflates, lightly support the display using the tether lines, making sure it does not drag on the floor. Remove light bulb if display is being shipped to another location. Ž Neatly roll and fold the inflatable fabric into the base. Fold the base up and hook the inner strap. Materials Ad Inflatable displays are skillfully crafted using high-quality fabric that is wrinkle-resistant and water-repellent. Graphics are created with a fabric-on-fabric (appliqué) method, silk-screen printing, airbrushing, or digital four-color process printing. The wooden base is upholstered with sturdy fabric and serves as a foundation for the Ad Inflatable display and as housing for the built-in motor and light unit (if included). Depending on size and complexity of the shape, the base may convert into a portable case for the entire display. All electric components are UL or CSA approved. • Unroll the zipper flap and carefully close the zippers without forde. (When the display is folded properly, the base will close and zip easily.) Location of Components Œ D-rings and tether lines • Zipper for air escape* Ž 8-ft. Electrical cord • On/Off switches • Electric blower ‘ Light bulb protector ’ Light unit* * Depending on size and shape, some displays may have more than one zipper and/or light unit. 5 2 Set Up Œ Unzip the case. Unhook the inner strap and unfold the base. Ad Inflatable displays have side support “feet”to ensure balance and stability. For larger displays, these side feet may be removable. (If they have been removed for shipping, locate them in the pouch on the inside of the zipper flap. Screw these feet into each side of the display’s base.) Roll up the top zipper flap. Tuck the rolled zipper flap under the base, making sure it doesn’t block the blower’s air intake grill. Install light bulb if required. See page 6 for light bulb instructions. Rolled Zipper Flap Zipper Flap Product Base Ž Locate the electrical cord and plug it into an electrical outlet. Turn on the switch for the motor (located on the bottom of the base). Inflation is fast and easy. Using the tether lines, lightly support the Ad Inflatable display as it fills the air. • If necessary, attach the tether lines to secured points at a distance of approximately 2/3 the height of the display. (For example, if your display is 20-ft. tall, locate secure attachment point about 13 feet from the base.) • Locate the D-rings and tether lines and find the front (or top) section of the inflatable. Situate the base of the display so it’s facing the desired direction • If your Ad Inflatable display contains a light unit, there will be two switches on the base. The right switch is for the motor; the left switch is for the light. The light will not turn on if the motor is not running. Turn on the light only after the display is completely set up. 3 4