1
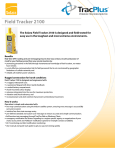
Field Tracker 2100
Patents Pending
Our Thanks…
Thank you for purchasing the Field Tracker 2100 (FT2100) text messaging and GPS position reporting
system.
We at Solara Remote Data Delivery Incorporated® (Solara®) appreciate your business and take pride in
providing a reliable, durable system for personnel tracking and text communications. Solara® knows
what it takes to build, operate and service the world’s leading professional personnel tracking tool.
Solara® has designed the FT2100 for durability and performance, and we and back it up with
comprehensive 1-year warranty. Dedicated Solara® personnel strive to ensure the experience of using
your new communications and tracking system is simple, reliable and effective. Our goal is to deliver
your information where you want it, when you want it, so you achieve your goals as smoothly and
efficiently as possible. Essentially, we believe our customers gain through “Better Data, Better
Decisions®.”
About This Manual
To get the most out of your new FT2100 system, we strongly recommend you read this User’s Manual
carefully and keep the guide nearby for future reference.
User’s Manual
Charging the internal battery .........................................................................................................32
Temperature and Battery Voltage .................................................................................................33
Care of the FT2100 .........................................................................................................34
Specifications .................................................................................................................35
Appendix.........................................................................................................................37
Product Support .................................................................................................................................37
Limited Warranty................................................................................................................................37
Limitation of Liability.........................................................................................................................38
Indemnity .............................................................................................................................................38
Contact Information ..............................................................................................................................40
Table of Contents
Introduction......................................................................................................................5
Getting Started.................................................................................................................6
How the tracker works ........................................................................................................................ 6
The Iridium Satellite System.............................................................................................................. 6
Field Tracker 2100 Overview............................................................................................................. 7
Basic Operation ................................................................................................................9
Turning On the FT2100....................................................................................................................... 8
Automatic Tracking with the FT2100............................................................................................10
Sending Text Messages ....................................................................................................................10
Reading Received Text Messages on the FT2100......................................................................12
Sending Alert Messages ...................................................................................................................13
FT2100 Tracking and Communications........................................................................14
Using the Solara Web Site Client Area..........................................................................................14
“Map” Tab.............................................................................................................................................15
“Text Message History” Tab.............................................................................................................17
“Alter Unit’s Transmit Interval” Tab ...............................................................................................17
“Alert” Tab ............................................................................................................................................17
“Set Up Alert Contact Info” Tab ......................................................................................................19
FT2100 Feature and Operation Reference ...................................................................21
Switches and Power/USB Connector............................................................................................21
Keypad Front Indicator Light Descriptions .................................................................................22
Screen Information ............................................................................................................................23
FT2100 Menus.....................................................................................................................................24
“Messages” Menu...............................................................................................................................25
“Send Txt Msg” Menu Option..........................................................................................................25
“Custom Msgs” Menu Option .........................................................................................................27
“Make Txt Msg” Menu Option.........................................................................................................27
“View Sent Msg” Menu Option .......................................................................................................28
“View Rcvd Msg” Menu Option.......................................................................................................28
“Settings” Menu..................................................................................................................................28
“Idle Mode” Feature...........................................................................................................................29
“Info” Menu..........................................................................................................................................30
Serial Number......................................................................................................................................31
Battery...................................................................................................................................................31
3
4
Introduction
Getting Started
Unpacking your Solara® Field Tracker 2100 (FT2100)
The shipping box provided is a durable re-closable container with a sized cushioning insert. This
format was chosen to provide convenient storage and re-shipping of your Field Tracker 2100.
How The Field Tracker 2100 Works
Check that the package contains the following before using your Solara® FT2100. If any item is
missing or damaged, please contact Solara® Remote Data Delivery Inc. Contact information is
provided at the end of this manual.
•
•
•
Field Tracker 2100 unit
User’s Manual
A username and password card to log in to the Solara® Remote Data Delivery Inc.’s Web Site
Subscriber Area
The following accessories are options and may be included in the Field Tracker 2100 shipping box:
•
•
•
•
•
•
Solara solar charger
Power input cord (two types available) with auto accessory plug
AC battery charge wall adapter (two types available)
External lithium battery case cold weather kit
USB data cable
Carrying case
The following optional services are available from Solara®:
•
Additional air time
•
24/7 monitoring of Alerts
Check the Solara® Web Site (http://www.solaradata.com) from time to time for new features and
offers.
Figure 1: Field Tracker 2100 communications system paths.
The Iridium Satellite ® System
Iridium Satellite ® is the only provider of truly global satellite voice and data communications with
complete coverage of the entire Earth including oceans, airways and even Polar Regions. There are 66
low-Earth orbit satellites that deliver data within seconds anywhere in the world with a clear view of the
5
6
sky. The Field Tracker 2100 uses the Short Burst Data system of Iridium Satellite®, meaning text
messages and position reports are transmitted in seconds as digital signals. Figure 1 shows how the
Field Tracker 2100 works with the Iridium Satellite® and Solara® systems.
Field Tracker 2100 Overview
The Solara® Field Tracker 2100 (FT2100) is a rugged tracking, text messaging and emergency alerting
device built to exacting standards. The FT2100 features a tough waterproof case with internal
components designed and built for the harshest field conditions. However, the FT2100 is more than a
portable device. It is a total system for text communications, remote GPS tracking and safety alerting.
GPS and Iridium
antennas
(protected inside
case)
FT2100. The FT2100 should be operated with the top facing toward the sky to ensure top satellite
communication performance. The case of the FT2100 is built from a tough engineered plastic with an
ergonomic shape that is designed to fit comfortably in the hand. The front of the FT2100 is raised and
curved to help prevent scratching of the display screen protective lens and accidentally pressing
keypad keys.
Figure 3 shows the FT2100 keypad. White keys are special function shortcut keys, yellow keys are
“navigation” keys, while the grey keys are for entering text. The tactile-feedback keypad features
waterproof construction with keys large enough to be used comfortably while wearing gloves.
Push for 1 Second to
Activate GPS
Information and
Iridium Signal Strength
Screen
Tether Eyelet
Tactile Keypad with
Integrated LEDs
Left Button
Navigation
Enter
Buttons
(Yellow)
Bottom Button
Alert Switch
Under
Activation
Pull Tab
(Shown in
OFF Position)
Power Indicator
Light (Green)
Message Received
Indicator Light (Yellow)
Battery Charging
Indicator Light (Blue)
Top Button
On/Off Switch
(Shown in ON Position)
Display Screen
Push to Activate
Main (First) Menu
Alert Switch On
Indicator Light (Red)
Right Button
Alphabet, Number and
Punctuation Keys
(Grey)
Power/Charger/USB
Connector
Press to Send Message
on Screen
Press to Open
Message Menu
Figure 2: Front view of the FT2100.
Figure 3. FT2100 keypad.
Figure 2 shows main components of the FT2100. Note that the antennas are located in the top of the
7
8
Basic Operation
Automatic Tracking with the FT2100
To use your Field Tracker 2100 (FT2100) for automatic tracking, push the On/Off toggle switch on the
right side of the unit upward to the "On" position. If you don’t need to operate any of the on-screen
menus, the FT2100 will automatically transmit a GPS position over the Iridium satellite communication
system then turn off the screen as it goes into power save sleep mode. The FT2100 will then
automatically wake, obtain a GPS postion, then attempt to transmit that position at each automatic
transmission interval.
Warning
The FT2100 emits radio frequency energy while transmitting. Ensure the On/Off
and Alert switches are in the “Off” position in areas where operating a Radio
Frequency Device is prohibited, such as hospitals, blasting areas, and commercial
aircraft (as required by regulations).
Turning On the FT2100
To turn on your FT2100, push the On/Off toggle switch on the right side of the unit upward to the "On"
position. Do not use the Alert toggle switch under the orange activation tab except in an emergency.
The FT2100 will show the Solara logo on the display, then the main screen. As the GPS is activated, a
line reporting the number of GPS satellites heard will appear.
As a safety feature, the Field Tracker 2100 will automatically send a GPS position report as soon as it has
a GPS fix of sufficient accuracy. There is about a 10 second delay between the time the GPS fix is made
and the start of the position report transmission. In this time, you can hold a key down to activate the
menus if you wish.
If no other front keys are used in the next few minutes, the FT2100 will turn off the screen automatically
and go into power save sleep mode. You will see the green light flash about every 3 seconds once it is
in this mode. The FT2100 will automatically wake up at the programmed time to send the next position
report. In order to save power, the FT2100 does not turn on the screen when doing routine position
reports. Rather than waiting for the timeout to turn off the screen, you may wish to turn it off manually
with the on-screen “Sleep” menu in order to save battery power. It is important, though, to ensure the
GPS has a fix after the FT2100 is turned on so that it will find GPS satellites quickly the next time it wakes
from power save sleep mode.
To wake up the FT2100 from power save mode and activate the display screen, hold down the square
yellow key in the middle of the top arrow keys for several seconds until the colour display appears.
Solara® Note
Holding down the Enter key for several seconds is a feature to preserve battery power by preventing
accidental activation of the display screen should a key be bumped while carried in a backpack or the
carrying pouch.
9
You can set the transmission interval with the on-screen menus, as outlined in the FT2100 Features and
Operation Reference section. A brief beep will sound when an Iridium satellite confirms the
transmission was successfully sent. If an Iridium satellite is not immediately in sight of the FT2100, it will
keep looking for a satellite for about a minute. If none are in sight, the FT2100 will go back into powersave mode and try again at the next regular automatic position transmit time interval.
Since the FT2100 depends on the confirmation from an Iridium satellite that the transmission was
successfully received, if the view of the satellites is blocked by hills or very heavy foliage, the
acknowledgement may not be heard by the FT2100. In that case, you may find there are more position
or message transmissions listed on the user web site than you would have expected by the number of
transmission confirmation beeps heard.
Sending Text Messages
All text message functions are chosen from the Messages menu. The menu system is described in detail
in the “FT2100 Feature and Operation Reference” section of this manual.
There are two types of text messages that can be sent from the FT2100; pre-formatted text messages
under the “Send Txt Msg”, “Custom Msgs” or “View Sent Msg” menus, or free-form text messages typed
in manually in the “Make Txt Msg” menu. Any custom messages or previously sent messages can also
be edited and sent if you choose.
In the Solara air time plan, up to 1,200 routine location reports (10 bytes in length) can be sent per
month at no additional charge. A pre-formatted message under the “Send Txt Msg” menu uses the
same air time as a routine automatic location message. Free-form typed messages and custom
messages use the same air time as 2 to 11 location reports, depending on the length of the message
sent or received. The longer the typed text message, the greater the air time used.
10
To send a text message, turn on the Field Tracker 2100 by pushing the toggle switch on the right side
of the unit upward to the “On” position. If the FT2100 is in power save mode, hold down the square
yellow “Enter” key to wake the FT2100. Once the screen is on, hold down one of the yellow front
navigation keys until a menu appears, then release the key. Hold down the Enter key to select “Send
Txt Msg” or “Make Txt Msg” then release the key.
To choose a message to send from the “Send Txt Msg” preformatted message menu, push down the
left or right yellow navigation keys to show each message on the screen. This is indicated by the
discrete arrowheads pointing left and right either side of the “MSG” number on the second line of the
screen. Some messages also come with an additional choice, like a number or a line of text. Once the
message you wish to send is displayed, push the Enter key. Answer “Yes” to the pop-up prompt by
holding down the top key, and then Enter to confirm, and the FT2100 connects to an Iridium satellite
as soon as one is in view in the sky and sends the message. The FT2100 will beep when the message is
confirmed sent.
To type a text message on the front keypad, choose “Make Txt Msg” from the Messages menu. Once
the blank screen opens, the message can be typed using the grey keys on the front keypad.
Each alphanumeric key provides multiple characters. When you press an alphanumeric key once, the
character typed to the screen is the first character on the key. If the same key is pressed again, the
second letter on the key is typed in the same place the first letter appeared., overwriting the first letter
typed. The third time the key is pressed types the next successive character, and so on. In order to
speed up typing, letters are provided as capitals as the first selection of each key, then numbers, then
punctuation marks (on applicable keys). They space key moves the cursor two spaces to the right,
where you can begin typing the next word.
The cursor on the screen is automatically advanced whenever different keys on the front keypads are
pressed. To type letters on the same key twice in succession (such as “B” then “A”), press the applicable
key until the desired character is on the screen, then press the yellow “right” navigation key shaped
like an arrow to the right to move the cursor one place to the right. Finally, press the same
alphanumeric key again to show the desired character. Finally, pressing on a different alphanumeric
key or the yellow “right” arrow navigation key will move the cursor to the right.
to change. The cursor can be moved left and right in the lines of text, as well as up and down using the
yellow “left”, “right”, “up” and “down” navigation keys. Once the cursor is positioned over the text to
edit, an alphanumeric key can be pressed to make the text change. The cursor can then be moved to
the next character to change using the yellow navigation keys.
Note that it is possible to edit messages previously sent and any custom text messages that may have
been programmed into the FT2100 by choosing “Edit” in the message display screen and pressing the
yellow “Enter” navigation key.
Reading Received Text Messages on the FT2100
Each time the Field Tracker 2100 connects to an Iridium satellite to send a message or position, it
checks to see if a message has been sent to you. In the Solara air time plan, up to 1200 location reports
can be sent per month at no additional charge. Received text messages are also part of the air time
included per month. Each text message received on the FT2100 uses the same air time as 1 to 10
location reports, depending on the length of the message received. The longer the typed text
message, the greater the air time used.
If a message is received by the Field Tracker 2100, it will beep 5 times in a row and turn on the yellow
light with the envelope icon on the front panel of the FT2100. If the graphic display is on, a prompt
will appear asking if you want to read the received message. Press the top front key to choose “YES”
then press the Enter key. The message is displayed on the screen. Messages received by the FT2100
can be up to 100 characters in length.
If the display screen of the FT2100 is off and the green light and yellow light is flashing once every few
seconds, it’s in a power-saving mode and a message is waiting to be read. To wake the FT2100 and
read your message, hold down one of the five keys on the front for several seconds until the display
screen lights up. The screen will show a question asking you if you want to read the message. Push
down the top key to highlight “YES” and then push down “Enter” key. Your message displays on the
screen.
To see messages already received, choose “View Msg Hist” from the first menu. Scroll through the
received messages using the left and right front keys.
To edit text already typed, use the yellow navigation keys to position the cursor over the desired text
11
12
Sending Alert Messages
To send an Alert message, reach under the toggle switch cover and turn on the Alert toggle switch. If
the FT2100 was not on, this will also turn on the FT2100. The FT2100 will then enter Alert Mode begin
the Alert sequence.
FT2100 Tracking and Communications
Using the Solara Web Site Client Area
The Solara web site client area is your main access to the
information sent from trackers in the field. It also is your interface for
sending messages to trackers, checking the status of tracker units,
reviewing archives of past position reports and messages, and
sending remote configuration and action commands to trackers
over the air.
Unlike with routine position reports or messages, the FT2100 will continuously search for an Iridium
satellite to receive the message and will not stop until the message is successfully sent. This way, if the
alert is being sent from an area with a limited view of the sky, it will still get the message away as soon
as a satellite appears in the visible sky area.
Solara® Note
In emergency Alert Mode, time is of the essence. Therefore, the FT2100 will briefly attempt to get a
good GPS fix, but will transmit the Alert message regardless of GPS accuracy in order to get the alert
message out. Even if no GPS position can be determined, rescuers can refer to previous positions on an
FT2100’s tracker trail. If there is no trail available, a rough position triangulation from Iridium can be
used as a last resort. It should be noted, that these “last resort” positions can be off by many kilometers.
After the initial Alert message is sent, a menu will be presented for you to choose the reason for the
Alert. As with other menus, use the top and bottom keys to choose an Alert cause, then press the
“Enter” key. The cause will be sent as soon as an Iridium satellite is in view.
Once an Alert cause is sent, the FT2100 will wait for an acknowledgement message from the
person/service monitoring the Alerts. Once a message is received, or the acknowledgement wait
period expires (about 5 minutes) you can leave the Alert switch on and continue text messaging with
the menus. The FT2100 will send position reports on the programmed interval, with each message
having an annotation stating the Alert switch is on.
If the front display is not functional, the acknowledgement message would also be indicated when the
yellow “message waiting” light illuminates.
If the FT2100 is turned off and on again, and the Alert switch is turned on, it will go through the Alert
transmission sequence again.
The user area looks best in the FireFox free web browser, but will
work in any web browser. To access your secure Web portal to the
Solara client area, go to http://www.solaradata.com on your Web
browser and click on “Customer Log In” (Figure 4).
Figure 4: Click on
"Customer Log In"
Using the User ID and Password provided as part of the package in which the Field Tracker 2100 was
delivered, type in the User ID beside “Login” and the Password beside “Password”.
Solara® Note
Login names are lower case.
A screen like Figure 5 then appears with the names of all the Trackers registered to the ClientID in the
“Field Tracker Information” widget and a Google Map showing the latest tracker trails for your units.
The map automatically zooms out so all units that have transmitted within the period covered by the
display interval are shown. There are menu tabs across the top of the page, where you can shift from
one page view to another by clicking on the tab. When you log in, you are placed in the Map tab.
There are a number of features available in your user area. Most notably, all the windows on the page
are “widgets”. This means the map can be stretched and resized by clicking and dragging on a corner
or edge with the mouse.
“Widgets” (as seen in Figure 6) can each be moved by clicking on the top o f the bar or in the blue area
of the widget and dragging anywhere on the screen. In the rectangular blue widget, click on the “+”
sign to expand the section of the widget you wish to see.
13
14
“Choose Unit”. Set calendar dates to choose the start day and end day of the interval by clicking in
the boxes beside “Start Date” and “End Date”. Click on “Submit” to display the table below the map,
on the Map page. Clicking on one of the blue underlined terms will produce a map trail to appear in
a new window, with up to the point that was clicked on. Clicking on the text for Google Maps will
automatically produce a Google Map Keyhole Markup Language (KML) file and launch Google Maps
(if installed on your computer) and show the trail in Google Maps. The KML file can also be saved by
choosing “Save” rather than “Open with Google Earth”.
Send messages to FT2100 units in the field. Using the “Send a Message to a Unit” widget by
choosing the unit name, or broadcast to all units, then typing the message into the window and
clicking on “submit”.
Figure 5: Solara client area web page on login.
“Map” Tab
Trails of units that have transmissions within the daily interval currently shown will display on the
map. At first log in, the period shown is for the last 2 days. The ID of each tracker is given in the “Field
Tracker Information” widget. Each trail colour on the map corresponds to an individual tracker ID’s
colour. To highlight a single trail, move the mouse over the line in the “Field Tracker Information”
widget containing the name of the unit trail you wish to highlight. In the Map tab, you can perform
the following tasks using the widgets.
“Alter Display Interval” - Adjust the daily interval in which tracker trails are displayed.
Choose a unit name or leave it on “All Units” , then click on the “Start Date” or “End Date” to bring
up a calendar display. Click on the day with the location messages to start the display interval, then
again on the “End Date” calendar to enter the “end date”. Click on “Submit” to set the display
interval.
Figure 6: Control “widgets” in the user area web page allow you to configure the
data displayed.
Check subscription stations. This gives the number of transmissions used by units registered to
your account. To see the current monthly use, choose an interval starting on the 1st of the month
“List Table Positions: - Display a table of tracker positions. Choose a unit to display under
15
16
and an end date of the current day. You can check this unit by unit, or for all the units as a whole
over any time scale you choose.
Incoming and outgoing messages display. The most recent received and transmitted messages
are displayed in the “Current Incoming/Outgoing Messages” window.
“Text Message History” Tab
The “Text Message History” tab (Figure 7) provides all text messages sent to, and received from, a
selected FT2100 unit or all the units of the user’s account. Choose a unit alias or all units in the pulldown menu, then click on “View Msg History” to show a table of all messages.
Figure 8. "Alter Unit's Transmit Interval" tab.
Figure 7. "Text Message History" tab.
“Alter Unit’s Transmit Interval” Tab
In this tab, choose a single unit or all units. Type in the duration in minutes to which you would like to
set the interval in minutes between routine position reports. Click on the “Alter” button. The next time
the indicated FT2100 unit(s) send a message, the command will be received by the unit and executed.
“Alert” Tab
The “Alert” tab (Figure 9) provides information on any Alerts received but not acted upon. This applies
to accounts where the owner has chosen not to subscribe to Solara 24/7 monitoring. When an Alert is
received, a window pops up that partially covers the screen. This popup window can be dragged
around the screen by clicking on the top of the window and holding down the left mouse button
while moving the mouse. Lift up the left mouse key when the popup Alert window is in the place you
wish to put it. Until the Alert is answered in the “Alert” tab window, this window will stay up.
17
In the “Alert” tab window, information on the Alert is displayed, including unit name, time in both
local and Greenwich Mean Time (GMT), the position in latitude and longitude (if this was an Alert
message that had a valid GPS fix), and the cause of the Alert (if this is a message that carried the
cause). There is also a response box where you type in a response message. A response must be
entered and sent in response to the Alert message. It is required for the FT2100 in the field to verify it’s
message was received. The FT2100 will keep checking for responses until it receives one. In the
meantime, the FT2100 will also continue sending position reports in order to maintain the GPS
position up-to-date. Once the response is sent, the FT2100 will have an acknowledgement that the
Alert message was received and understood. The user with the FT2100 will then be prompted for a
reason for the Alert. This “alert cause” message will be received and displayed in the “Alert” tab. The
user can then resume text messaging with the person in the field. If a response has already been sent,
the user may choose to click on the “Delete Row” button to clear the Alert line. A log of all Alert
messages are visible in the text message tab with all the other messages sent, under the “Text
Message History” tab.
It is the user’s responsibility to determine the best course of action in response to an Alert
unless they have subscribed to the optional Solara 24/7 monitoring service. If the person sending
the Alert is in need of immediate assistance, the user must take the appropriate action. Many
customers of Solara have their own dispatch centres and handle all calls within their respective
organization. Others would call the local police or search and rescue authority as required. If users are
handling the call themselves, they must have the numbers of who to call worked out in advance.
18
Figure 9. "Alert" tab.
If the optional 24/7 monitoring is subscribed to, our 24/7 monitoring partner will carry through on the
expected escalation protocol for the type of call. Contact Solara if you have any questions about Alert
handling.
Figure 10. "Set Up Alert Contact Info" tab.
“Set Up Alert Contact Info” Tab
The “Alert” tab (Figure 10) is where users set up telephone numbers and email addresses to call. Do not
enter the telephone number(s) and/or email address(es) of police or emergency services into the
telephone number and email address areas unless you have express permission from the
respective emergency service commander to do so. It is an offence in many areas to have system
auto-dial police and other emergency services. All telephone calls are tracked for billing purposes, as
there is a fee per telephone call. The automated telephone and email service is meant to be a
convenience to users who want to stay informed of FT2100 messages when away from a computer. It is
not intended to be used for alerting emergency services.
Once telephone and/or email information is entered, click on the “Save Contact information?” button
on the bottom of the page. If you wish to test the server to verify that all numbers and emails work, click
on the “Test Contact Information?” button at the top of the page.
Telephone numbers are entered into the phone list. Each number is called in succession when a
message of the type checked off below is received. An automated recorded message will then alert the
person who picks up the call of the purpose of the call, the GPS location of the FT2100 that sent the
message, and a request to confirm receipt of the call by pressing the “5” key on the telephone keypad.
Pre-formatted messages are read out, while free-form text messages are read using a “computer voice”
as best it can. The user may desire to log into the computer to see the message and send a reply.
For email messages, the desired email address is entered into the boxes provided. The user also checks
off the type of messages that trigger the email being sent. There is no fee for sending out emails.
19
20
FT2100 Feature and Operation Reference
Switches and Power/USB Connector
There are two toggle switches. Both toggle switches are waterproof and are recessed into the FT2100
body to prevent accidental changing of their position. The top toggle switch is the On/Off switch and it
is what is used to power the unit on and off. The other switch is the emergency Alert switch.
The Alert switch is only meant to be used in the event of an emergency. If the user has subscribed to
Solara’s 24/7 Emergency Monitoring Service, activating this switch will signal the call centre operator. If
the user has arranged for other monitoring, any emails or automated telephone calls predefined in the
Solara Client Log-in Area will be activated. An Alert Flag will also be activated in the Solara Client Log-in
Area and be visible to any user on the site.
The Alert switch is covered by an orange switch protector and activation tab to help remind the user
not to use this switch except for emergencies. This protector tab can slide along the alignment slot
toward the back of the device to activate the Alert switch. The Alert switch will operate at any time it is
activated – if the FT2100 is on, an Alert message will be built and sent; if the FT2100 is off, it will be
turned on and an Alert message will be built and sent. As with any transmission, the FT2100 must have
a good view of the sky in order to connect to Iridium satellites.
Charging/operating cable: This cable has an auto accessory (“12 volt cigarette ligher”)
plug at one end and the 7-pin connector at the other end. This cable provides power to
charge the internal Nickel Metal Hydride batteries and directly powers the FT2100
circuits from the 12V input power. The maximum voltage input is 16 volts.
-
Charging cable only: This cable has an auto accessory (“24 volt cigarette lighter”) plug at
one end and the 7-pin connector at the other end. This cable provides power to charge
the internal Nickel Metal Hydride batteries and is for use for charging only and when
using with 24 volt vehicle electrical systems. The maximum voltage input is 32 volts.
-
A flexible, foldable solar panel is available for charging the internal nickel metal hydride
batteries. This solar charger will charge up a dead battery in about 12 hours in direct
sunlight.
-
USB data cable: This cable is for performing unit firmware updates from the USB port of
an IBM-compatible Personal Computer.
Keypad Front Indicator Light Function Descriptions
Green “Power
Indicator” Light
The Alert switch is designed to be activated by using only one hand and the activation tab has a raised
end so it can be operated while wearing gloves or mitts. If the activation tab is damaged, the switch can
be directly pushed up to activate the Alert function.
•
•
There is a round 7-pin connector interface on the right side of the FT2100. This connector provides
power and USB data communications.
•
There are two optional covers for this connector available, a metal screw-on cover and a friction-fit
plastic cover. The metal cover provides a watertight seal for immersion to 3 foot depth for up to 1 hour,
while the lighter weight plastic cover provides protection from dust and immersion in water for a few
minutes.
•
All accessory cables have waterproof screw-in connectors. Four types of accessories for use with the
connector are available:
21
-
22
This illuminates until the display is on, when
the FT2100 is powered on with the ON/OFF
switch or the Alert switch.
When the FT2100 is in low power sleep mode,
this light flashes about every 3 seconds to
indicate power is on and the FT2100 is
operating in sleep mode.
This light turns on when transmitting a
message or position report to an Iridium
satellite. It remains on until an
acknowledgement is received from the
Iridium satellite.
When a transmission is confirmed to be
successful, this light flashes several times
quickly. If a transmission was not successful,
even after the maximum number of
transmission retries, this light flashes slowly
for a few seconds.
Yellow “Message
Received” Light
Blue “Battery
Charging” Light
Red “Alert Switch
On” Light
the battery is used. To ensure the battery is fully charged, leave the charger on until the blue charge
indicator light goes out on its own. Charging typically takes about 4 hours on a fully discharged battery.
The yellow light has two functions:
• This light flashes after the FT2100 is turned on
with the side On/Off toggle switch or Alert
switch as the FT2100 goes through the
startup sequence.
• When a text message is received, this light is
turned on. When the message is read, the
light will go out. If the FT2100 is in low power
mode, this light will flash at the same time the
green light flashes if there is an unread
message in the FT2100.
This light is on whenever the built-in battery
charger is charging the batteries. When the
batteries are nearly charged, this light may flash
on and off slowly as the charger enters a top-off
charge mode.
When the red light is on, this indicates the Alert
toggle switch has been turned on and the FT2100
is now in the emergency Alert mode.
After power-up is complete, latitude and longitude is provided in degrees, minutes, and decimal
minutes format. The accuracy is reported in meters. This is calculated by taking the PDOP, which means
“position dilution of precision”, and multiplying it by the GPS receiver’s precision. The SiRFStar III GPS
chipset in the Field Tracker 2100 is specified to have a precision of about 2 meters, so the PDOP number
times two roughly corresponds to accuracy in meters as reported by the GPS. Note this is
“approximate”, since GPS signal reflections off mountains, buildings, and other features reduce GPS
accuracy beyond what is reported on the screen.
“GPS Good” means the GPS is locked on at least 4 satellites, and the GPS is able to calculate a position.
GPS accuracy generally increases as it locks on to more GPS satellites. Note that in routine position
reporting, the FT2100 will transmit a position when the precision is about 14 meters or better.
Screen Information
The on-screen menus of the FT2100 gives you information on the status of
the unit, allow you to set custom parameters, receive text messages, send
pre-programmed and free-form typed text messages, and put the FT2100
into power save mode.
Figure 11 is the main screen. At the top left is the time in 24-hour format.
The time can be changed from Greenwich Mean Time to local time in the
“Settings -> Set Time Zone” menu.
Figure 11: Main
screen.
At the top right of the screen is a battery power indicator, showing a fullycharged battery. The amount of green shows how much battery power is
left; if half the battery icon is green, there is about half of the power left. If it
is completely empty, you should charge the FT2100 as soon as possible. Using the display screen as
little as possible and increasing the time between automatic position reports are two ways to save
power. When charging, the battery indicator will increase to full even if the battery is not fully charged
due to a “surface charge”. Therefore, if the charger is removed before the battery is completely charged,
the battery indicator level will settle to the actual capacity left after the remaining “surface charge” on
23
Solara Note
Why is the PDOP precision displayed on the main screen? Many customers said they want to know if
the GPS reading was accurate enough to actually trigger a position report. Since this has to be 14
meters or less (corresponding to a PDOP of 7 or less) to trigger a routine position report transmission,
we put that number on the main screen. When you send a message or an Alert, the current GPS reading
is used regardless of accuracy in order to save time in getting the message out.
FT2100 Menus
At the bottom of the each screen is a status bar. In the main screen, it says the menus can be entered
by holding down any of the yellow navigation keys (Figure 3).
Figure 12 shows how the menus are arranged. When the FT2100 is on, you can move from menu to
menu using the front yellow navigation keys. At the bottom of each menu is the name of the menu.
There are small arrowheads in some of the menus. This indicates which yellow navigation key is used to
trigger an action. For example, in the “Main Menu” the up and down keys scroll up and down the menu
screen to highlight a menu choice that is executed by pressing the middle “Enter” key. The left-facing
arrow on the bottom of the screen indicates you can go back to the initial screen.
On other screens an arrow pointing “up” means you use the top “up” yellow navigation key to go back
to the previous menu. From the first menu that comes up from the main screen, you can move to other
screens. Use the top and bottom keys to move up and down between choices. To make a choice, hold
24
down the square yellow “Enter” navigation key. The screen will then bring up the chosen menu item, as
indicated by the arrows from each choice in Figure 12.
Messages
Menus
“Messages” Menu
Figure 13 shows the “Messages” menu. The “Messages” menu provides the menu options to send preformatted messages, call up, edit and send custom messages, create and send a free-form text
message, view previously sent messages, and view received messages.
“Send Txt Msg” Menu Option
The “Messages” menu can be opened by pressing the “MSG” key on the bottom right of the keypad or
by choosing “Messages” from the main menu. The first choice in the Messages Menu is the “Send Txt
Msg” menu option, which gives a selection of pre-formatted messages (Figure 13). To choose a preformatted text message to send, press the right and left yellow navigation keys to see each message
choice. For messages with an extra parameter, such as a number or text description, press the top or
bottom yellow navigation keys to change the choice in the parameter menu. When the message to
send is in the window, press the “SEND” key (bottom left of the front keypad) or thesquare yellow
“Enter” navigation key. A prompt appears asking if you want to send the message. Press the top or
bottom key to change the choice between “Yes’ or “No”, then press the middle “Enter” key to send the
message.
Settings
Menus
Unit
Information
Menus
FT2100
Enters
Power-save
Sleep Mode
Figure 12: FT2100 Display screen menus.
25
26
front keypad as described in the “Sending Text Messages” section of the “Getting Started” chapter of
this manual.
To send the message, press the “SEND” key on the bottom left side of the front keypad, a prompt
appears asking if you want to send the message. Press the top or bottom key to change the choice
between “Yes’ or “No”, then press the middle “Enter” key to send the message. Choosing “No” returns
the screen to the main menu.
“View Sent Msg” Menu Option
The “View Sent Msg” is the forth option in the Messages menu. This will allow you to read though the
last 10 messages sent on the unit. This records “typed” messages rather than the “standard preformatted” messages in the first choice of the Messages screen. To scroll though the sent messages, use
the left and right navigation keys. The messages will appear on the bottom of the “View Sent Msg”
screen. On the top of the screen, the option “send” will allow you to resend the customized message
once “send” is selected. Highlighting the “edit” option will allow you to edit the selected message as
described in the “Make Txt Msg” Menu. The “cancel” option moves the view back to the initial screen.
“View Rcvd Msg” Menu Option
The “View Rcvd Msg” menu choice is the fifth option in the Messages menu. This screen allows you to
read though the last 10 received messages on the unit. Once the “View Rcvd Msg” menu is chosen,
scroll though the received messages using the left and right keys. This menu provides the messages
plus the date and time received. Use the up key to exit back to the message screen.
Figure 13: Message screen menus.
“Custom Msgs” Menu Uption
The second choice in the messages menu gives the option of selecting from a series of messages as
programmed over-the-air by the customer from the Client Login area of the Solara website. These
Messages can be selected, edited and sent by pressing the right or left selection keys, then hitting the
enter key while the desired option is highlighted. Messages can also be edited by selecting the “edit”
option (see Figure 13). Editing will bring a screen similar to the following “Make Txt Msg” option.
Settings Menu
Figure 14 shows the Settings menu choices and a brief description of each choice. The Settings menus
are items that you can set to customize the FT2100 to suit your needs. For example, there are two
choices for setting the position report transmission interval – one to set it in minutes, another to set it
to hours. Each of these menu items shows the current transmission interval in hours and minutes,
respectively. If you wish to set the interval to even hour increments, (for example, once every 6 hours)
you would use the hourly setting. If you wish to set the interval to an increment of minutes, (for
example, once every 10 minutes), you would use the minute setting menu.
“Make Txt Msg” Menu Option
“Make Txt Msg” is the third choice in the Messages Menu (Figure 13). Messages are typed using the
27
28
The “Idle Mode” feature ensures power conservation as the unit does not have to be turned off and on
again in order to save air time and power. Once the idle timer utility detects that the FT2100 has not
moved in the time specified in the menu, positions are transmitted at the interval specified in the
bottom of the idle menu.
For example, in the bottom menu screen of Figure 14, the idle option shows that it is enabled (“YES”
being displayed). If the FT2100 was set to transmit a routine position report once every 15 minutes, the
FT2100 would wake up every 15 minutes to check position and transmit a position report. If on a fourth
consecutive report interval it realizes it has not moved 100 meters, idle is started. Once idle starts, the
FT2100 will still wake up each 15 minutes as expected and check its location. If it has not moved more
than about 100 meters from the point where idle was started, it will only transmit if the time at the
bottom of the idle menu has expired. In our example, that would be once every fourth transmission
time, since the transmission interval is normally 15 minutes, and the idle interval is 50 minutes. If, at any
time the FT2100 wakes up and realizes it has moved more than about 100 meters from the original
position where idle was started, idle is then cancelled and it resumes transmitting at regular
transmission intervals. It will not enter idle mode again until there are another 50 minutes of readings
with the same location.
When idle starts, the fact idle has started is included in messages sent so anyone monitoring the
progress of the traveler from the user web portal would know they should not expect transmissions as
often.
When idle mode is stopped and it resumes transmitting on the normal timing schedule, the person
monitoring also will see that the Idle Mode is turned off in the messages.
“Info” Menu
The info menu is shown in Figure 15 with a brief explanation of the information in each screen.
Figure 14: Setting Menu choices.
“Idle Mode” Feature
A unique feature of the FT2100 is the Idle Mode. When enabled, this function reduces the number of
routine position transmissions made by the FT2100 if it detects that the unit has not moved more than
about 100 meters for the time specified in the middle of the menu. This saves power and air time usage
in situations where an FT2100 is carried by a traveler and the traveler stops for an extended period.
29
30
cannot be accidentally damaged. NiHM is a safe battery type that can be transported by any means
without restriction.
The battery is rated for operation to -20ºC, it will work to -30ºC at reduced capacity. For operation in
extreme cold, a cold weather kit with a lithium battery cell holder is recommended and available from
Solara as an optional accessory. An alternate method is to run the FT2100 directly from a vehicle
accessory plug using the accessory connector.
The waterproof Air Pressure Relief Vent is visible as a small hole in the back case to the left of the back
label. This vent uses advanced material technology to automatically equalize the air pressure balance
inside the sealed case when used at different altitudes, while keeping out water.
Solara® Note
When using lithium batteries, remember to plan ahead if the batteries must be shipped by air. Even
small quantities of lithium batteries are classified as a Class 19 dangerous good and subject to a
number of air transport restrictions, including special packing regulations and prohibition from carrying
on certain classes of flights. Be aware of the fire hazards posed by lithium batteries when operating in
safety-critical areas.
Charging the Internal Battery
The FT2100 has several options for charging the internal battery to ensure the FT2100 always has
power:
(1) To use 110V power mains, plug the 110V power adapter into a wall socket and then plug the
vehicle accessory connector into the socket in the power adapter and the other end of the cord
into power connector on the side of the FT2100. Charging takes about 3 hours for a low
battery.
(2) To charge in a vehicle, plug the vehicle accessory connector into the socket in your accessory
power connector. This can be from 8 to 32 Volts, so using the accessory socket in vehicles with
24 volt power systems is OK.
Figure 15: Info Menu choices.
Serial Number
Should you need to contact Solara® about your FT2100, you will need the serial number. The serial
number is located in the middle of the back label.
(3) To use solar charging, plug the solar panel plug into the power connector of the FT2100. Best
results are obtained in full sun with the face of the charger facing the sun. Charging takes about
14 hours in full sun. The solar panel can be fixed to a backpack with the Velcro fastener and can
be stored in the outside pocket of the FT2100 carrying pouch when not in use.
Battery
The nickel-metal hydride (NiMH) rechargeable battery is sealed in the waterproof case to ensure it
31
32
Temperature and Battery Voltage
Temperature and battery voltage ranges are also transmitted in each message. This way, anyone
monitoring your FT2100 would know if it is extremely cold or hot, and whether the batteries are getting
low. This could be important in an Alert situation. If the FT2100 has successfully transmitted it’s position
to people monitoring it and it is getting low on battery power, the transmit interval can be remotely
changed from the user web portal so that the interval is set to a longer interval in order to save power
in the unit. Then there will be power available later for text messaging. Note that the person
monitoring can also command the FT2100 remotely to beep for a full minute; this is for situations
where it is critical to get the attention of the person carrying it, such as if the FT2100 unexpectedly
stops moving for a long period.
Care of the FT2100
The Solara® Field Tracker 2100 is constructed of high quality materials and does not require user
maintenance other than cleaning. Clean the FT2100 on the outside using a damp cloth with a mild
detergent, then wipe dry.
Charge the battery before putting away for more than a couple of weeks.
If the battery should become so discharged that the charger will not start (blue light does not come
on when the charger cable is connected), connect the solar panel to the unit and let it charge in the
sun for an hour or so. This will bring the voltage up in the battery to the point the charger will be able
to charge the battery. Leaving the charger on the unit for a long period or plugging in the optional
USB programming cable will also bring the battery charge up.
The FT2100 is shipped with a thin layer of plastic film to prevent scratching during shipping. It is
recommeded that the plastic film be removed to improve the sharpness of the image on the screen.
To protect the clear acrylic covering over the display from scratching, the use of a sticky plastic cell
phone screen protector is recommended.
33
34
Specifications
Power
Internal 2.5 amp hour NiMH rechargeable battery
Approximately 5% of battery power is held in reserve for Alert switch operation only
Vehicle accessory or battery source, 10 to 32 Volts DC
110V mains , using the plug-in adapter
Connector wire plug fuse: 3 Amps
Battery life: with 20 minute position reporting intervals at 18 °C, a fully charged new NiMH 2.5 Amphour battery will last approximately 7 days with 10 minutes use of the display over that time.
Reducing use of the display saves power. Battery life will vary depending on battery age and
temperature.
Size: 15 cm high (plus 3 cm for top antenna) X 7.5 cm wide X 4.5 cm deep
Weight: 495 grams (without optional connector cover)
Operation Temperature range:
- using internal batteries only: -20 ºC to +60 ºC
- with Cold Weather Kit or external DC power: -40ºC to +60ºC
Water resistance with the optional IP68 metal connector cap: Submersible to 1 M depth for 1 hour
Water resistance with the standard rubber cap: waterproof, not rated for submersion
Unlike aerospace and automotive devices, there are no applicable standards for the design of portable
commercial satellite communication devices. Therefore, the closest standards that cover engineering
standards for tracking personnel in the field were found to be the standards for SARSAT 406 MHz
Personal Locator Beacons and Emergency Locator Transmitters, Survival type (ELT-S). Solara designed
the FT2100 to exceed the relevant physical standards given in the following documents:
1. NSS-PLB06 from the National Search and Rescue Secretariat (Canada), including applicable
physical test procedures of MIL-STD 810.
2. RTCA DO-204, for ELT-S devices.
3. Draft RTCM SC-128, for Satellite Emergency Notification Devices.
GPS Performance
GPS Receiver: SiRFStar III with12 independent tracking channels
Time to First GPS Position Fix:
• First Acquisition (cold acquisition): typically, 40 seconds
• Warm: typically, 30 seconds
• Hot: typically, 2 seconds
Best GPS Accuracy: less than 2 Meters typical
Sensitivity is among the best in the GPS industry:
• Acquisition: -143 dBm
• Navigation: -158 dBm
• Tracking: -158 dBm
Iridium Satellite Transceiver
Transmit and Receive Frequency Range: 1610 - 1625 MHz
Transmit Power: 2 Watts
Time to Transmit a message or position report: typically less than 1/10th of one second
35
36
Appendix
Product_Support
Use this space to record the Serial Number. The serial number is located on the back label of the
FT2100 unit. This number will be useful in when speaking with Solara Customer Service.
If you have any questions, Solara Remote Data Delivery Incorporated® Support may be reached Mon-Fri,
8AM-5PM CST at 1-204-975-4244 by email at support @solaradata.com or fax at (204) 452-7418.
Limited Warranty
(1) Solara Remote Data Delivery Incorporated® (Solara®) warrant that the Field Tracker 2100 is free
from defects in workmanship for a one year period from the date of shipment. In the event of a
warranty claim, you must send the defective product to:
Solara Remote Data Delivery Incorporated
PO Box 83, Station L
Winnipeg, Manitoba Canada
R3H 0Z4
for repair or replacement at Solara’s option. You shall prepay the shipment and insurance charges
for transporting the defective product to Solara® and prepay the return shipment and insurance
charges or provide a shipping account.
Limitation of Liability
In no circumstances shall Solara®, our distributors or suppliers, or any of our respective officers,
directors, employees or agents be liable to any person in respect of any damages arising out of or in
connection with the use of the supplied product and communication system. This is a comprehensive
limitation of liability that applies to all damages of any kind, including direct, indirect, compensatory,
consequential damages or exemplary damages, including, by way of illustration and not limitation,
personal injuries, loss of profits, loss of business, loss of opportunity, loss or damage to property, claims
of third party or legal fees.
Indemnity
You shall be solely responsible and liable for, and shall indemnify and hold harmless Solara Remote
Data Delivery Incorporated® and its officers, directors, employees, agents and contractors, from and
against all losses, damages, expense and costs, including reasonable legal fees, sustained by reason of
using the supplied product and communication system by any person. You also agree to indemnify and
save harmless Solara Remote Data Delivery Incorporated® from and against all claims, demands, suits,
damages, causes of action or liabilities arising out of or in connection with the use of the supplied
product and communication system.
(2) Use of the supplied product and communications system is at your own risk. It is your
responsibility to ensure that you follow the guidance and practices of the search, rescue and
safety authority of your area. You should not rely solely upon the supplied product as the only
means of communicating your needs for assistance. The supplied product is not intended or
designed to replace the use of a SARSAT Personal Locator Beacon.
(3) Solara® makes no warranty that (i) operation of the supplied product and communication system
will be accurate, timely, uninterrupted or error-free; (ii) the results that may be obtained from the
use of the supplied product and communication system will be reliable; (iii) the quality of any
products obtained or purchased through the use of the supplied product and communication
system will meet your expectations; or (iv) any errors in the supplied product and communication
system will be corrected.
37
38
For the latest information about this tracker or other products from Solara® Remote
Data Delivery Inc, visit the Solara website at
www.Solaradata.com
© Copyright 2010 Solara® Remote Data Delivery Inc.
Solara® Remote Data Delivery Incorporated
PO Box 83, Station L
Winnipeg, Manitoba Canada
R3H 0Z4
Phone: (204) 975-4240
Fax: (204) 452-7418
[email protected]
[email protected]
UM2001801
39
40