1
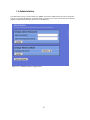
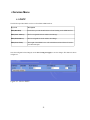
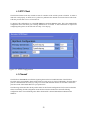
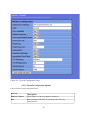
Firmware
USER MANUAL
SUPPLEMENT
Software Release 1.4
The information in this User Manual has been carefully reviewed and is believed to be accurate. The
vendor assumes no responsibility for any inaccuracies that may be contained in this document, makes no
commitment to update or to keep current the information in this manual, or to notify any person or
organization of the updates. For the most up-to-date version of this manual, please visit the AllCity
Wireless support website at http://www.allcity-wireless.com/support/. AllCity Wireless reserves the right
to make changes to the product described in this manual at any time and without notice. This product,
including software, if any, and documentation may not, in whole or in part, be copied, photocopied,
reproduced, translated or reduced to any medium without prior written consent.
IN NO EVENT WILL ALLCITY WIRELESS, LLC. BE LIABLE FOR DIRECT, INDIRECT,
SPECIAL, INCIDENTAL, OR CONSEQUENTIAL DAMAGES ARISING FROM THE USE OR
INABILITY TO USE THIS PRODUCT OR DOCUMENTATION, EVEN IF ADVISED OF THE
POSSIBILITY OR SUCH DAMAGES. IN PARTICULAR, THE VENDOR SHALL NOT HAVE
LIABILITY FOR ANY HARDWARE, SOFTWARE, OR DATA STORED OR USED WITH THE
PRODUCT, INCLUDING THE COSTS OF REPAIRING, REPLACING, INTEGRATING,
INSTALLING OR RECOVERING SUCH HARDWARE, SOFTWARE, OR DATA.
Any disputes arising between manufacturer and customer shall be governed by the laws of Anne Arundel
County in the State of Maryland, USA. The State of Maryland shall be the exclusive venue for the
resolution of any such disputes. AllCity Wireless’ total liability for all claims will not exceed the price
paid for the hardware product. Unless you request and receive written permission from AllCity
Wireless, you may not copy any part of this document. Information in this document is subject to change
without notice. Other products and companies referred to herein are trademarks or registered
trademarks of their respective companies or mark holders.
Copyright 2011 AllCity Wireless, LLC.
All rights reserved.
Printed in the United States of America
1 Revision History
Date
Editor Description
Rev
1.0
02/23/2011 JPB
Initial Draft
2
Table of Contents
PREFACE: ABOUT THIS MANUAL.........................................................................5
WICLIENT ADMINISTRATION INTERFACE .........................................................6
1 LOGGING IN...........................................................................................................6
2 SYSTEM STATUS MENU.......................................................................................6
2.1 Home............................................................................................................................................................... 7
2.2 System Check................................................................................................................................................. 7
2.3 Site Survey ..................................................................................................................................................... 8
2.4 Status Graph.................................................................................................................................................. 9
3 SYSTEM CONFIGURATION ................................................................................11
3.1 Network Configuration............................................................................................................................... 11
3.2 Gateway Subnet Protection ........................................................................................................................ 12
3.3 Wireless Configuration ............................................................................................................................... 13
3.4 Meshing Configuration ............................................................................................................................... 15
3.5 Time Zone .................................................................................................................................................... 16
3.6 Log Viewer ................................................................................................................................................... 17
3.7 License Key .................................................................................................................................................. 18
3.8 Restart .......................................................................................................................................................... 18
3.9 Administration............................................................................................................................................. 19
3.10 Firmware Upgrade .................................................................................................................................... 20
4 SERVICES MENU.................................................................................................21
4.1 DHCP ........................................................................................................................................................... 21
4.2 NTP Client ................................................................................................................................................... 22
4.3 Firewall......................................................................................................................................................... 22
3
4.4 Walled Garden............................................................................................................................................. 25
4.5 Preproxy....................................................................................................................................................... 26
5 TOOLS..................................................................................................................27
5.1 Ping ............................................................................................................................................................... 27
5.2 Trace route................................................................................................................................................... 27
5.3 DNS Query ................................................................................................................................................... 28
6 COMMAND LINE INTERFACE...........................................................................29
6.1 Secure Shell access....................................................................................................................................... 29
7 TECHNICAL SUPPORT .......................................................................................30
4
Preface: About This Manual
This manual is written for system administrators, system integrators, network administrators and others who use
the WiDirect appliance and WiClients. The WiDirect models span a broad spectrum of possible applications.
The product can be used to manage wire line and wireless networks. The smaller models are appropriate for
small office applications and local WISP applications. Larger models can manage common carrier network
environments. Each WiDirect unit contains the same software and most of the features are available for use in
each model. The feature set within the WiDirect appliance and WiClient is broad and is expected to continue to
grow over time. These features provide significant capabilities that create a network infrastructure, one that can
be used in numerous creative ways depending on the environment.
If you are installing a WiDirect or WiClient for the first time, you should read this entire supplement, as well as
the entire WiDirect user manual, to become familiar with the settings and tools. However, the steps to actually
install and configure a new WiDirect begin with Section 3: Installation, In the user manual located at
www.allcity-wireless.com/support.
5
WiClient Administration Interface
1 Logging In
In order to gain initial access to the WiClient’s web based GUI, plug the flashed WiClient access point into
power. After the WiClient is fully booted up ~ 1 minute, establish a wireless connection over WIFI to the SSID
“WiDirect” for initial configuration. Once connected, the WiClient provides the other connecting device with
an IP address in the 10.4.1.0/24 subnet via DHCP. (Be sure that the connecting computer is configured for
DHCP to receive the IP address.)
Once the IP address has been established, open a web browser such as Firefox, and open the following URL:
http://10.4.1.1/portal/admin
This URL opens the WiDirect Admin login page as shown in Figure 1-1. To login, use the preconfigured
username of admin and the password widirect.
Figure 1-1: WiDirect Login
Note: If the default gateway of SSID1 has changed from the default, use the new Gateway address instead of
10.4.1.1.
2 System Status Menu
The system status menu is the first menu that is located in the left hand navigation bar of the WiDirect web
GUI.
6
2.1 Home
The Home button, which is located in the top left hand corner of the administrator page, returns the user to the
home screen. This is the same page that is displayed upon first logging into the WiClient. The home page gives
a quick overview of the device role, if a license is present and if the WiClient is associated with a WiDirect
Authorization Server. WiDirect Authentication Server association and Licensing is discussed in greater detail
later in this manual supplement.
2.2 System Check
The System Check page under the System Status menu displays a snapshot of the current health of the WiClient
system, as show in Figure 2-2. This page analyzes important system functions, such as DHCP, Firewall,
NTPD, and PreProxy services by establishing if they are running.
Other information that can be found on this page is Interface Settings, Routing table, NTP status, and
Network statistics. When contacting ACW technical support, the data on this page will be used to troubleshoot
the health of the WiClient.
Changes to all the configurable services can be made by clicking the control link in the row across from the
specific service you wish to make changes to.
Figure 2-2: System Check
7
2.3 Site Survey
It is recommended to do a wireless survey prior to installing access points. Included in the WiClient firmware is
a “site survey” utility to list all of the local networks and their corresponding channels. Be sure to run the site
survey utility and refresh the screen 3 times to see all potential conflicting signals.
Figure 2-3: Site Survey
8
2.4 Status Graph
The WiClient Firmware includes a live status graph for reporting CPU Utilization as well as Network Interface
Utilization. This utility will be beneficial for troubleshooting network performance. Figure 2-4-1 shows the
CPU utilization graph and Figure 2-4-2 illustrates interface ath0 graph.
Figure 2-4-1: CPU Graph
9
Status Graph continued:
Figure 2-4-2: Interface ath0 Graph
10
3 System Configuration
3.1 Network Configuration
Accurate network configuration IP addressing is critical to the proper operation of the WiClient. All network
configuration and routing configuration is controlled via the Network Configuration page under the System
Configuration menu. Figure 3-1 shows the Network Configuration window.
This page allows configuration of the WiClient interfaces, the default route and the DNS servers. The first
section allows the administrator to set which interface is to be used as the WAN interface. By default the WAN
interface is ETH0. If DHCP is enabled the Default Route and DNS server fields will be disabled, because that
information will be retrieved via DHCP.
By default the ETH0 interface is configured for DHCP, while the SSID1 interface uses the standard 10.4.1.1 /24
subnet addressing scheme.
Figure 3-1: Network Configuration
11
3.2 Gateway Subnet Protection
To have the WiClient apply policies on a specific SSID, check the box “Intercept” and assign a valid profile to
the network interface. This is to allow for other SSIDs to be broadcast without WiDirect intervention on the
user experience.
You may also block all other “LAN Subnets” by selecting “Gateway Subnet Protection”. This is enabled or
disabled on a Per SSID Basis. Gateway Subnet Protection isolates all other internal routable subnets from
traffic coming from a specific SSID and forces that traffic to the internet gateway only. Use this feature to
protect systems sharing a common internet connection such as POS or other computers in the enterprise.
Figure 3-2: Subnet Protection
12
3.3 Wireless Configuration
The WiDirect allows for multiple SSID’s and various encryption and connectivity settings. The following
section describes all the possible items for the Wireless configuration.
Keyword
Description
Country
The country must be set to properly regulate the channel and transmit power
regulatory limitations.
Antenna
If the device is equipped with multiple antennas per radio you may select to
use diversity or assign the radio to use a single antenna.
Channel
Select the Channel that you wish the WiDirect to operate on. You may wish
to do a site-survey prior to selecting a new channel.
Transmit Power
Select the Transmit Power that the radio should operate with.
SSID (Enabled)
Enable the use of the Selected SSID
SSID (Encryption Mode) Select which Encryption method you would like to use. (NONE, WEP,
WPA-PSK, WPA2-PSK, WPA-PSK/WPA2-PSK Mixed)
Wep Key Length: (64bit / 5 Characters) (128bit / 13 Characters)
SSID (Encryption Key)
The encryption key is available when Encryption mode is not None.
SSID (Rate)
Select the DataRate that you would like the Radio to use. (Recommended
Auto)
Once the configuration is changed you would select “Save Config and Apply”. The wireless will reinitialize
with the new configuration.
13
Figure 3-3: Wireless Configuration
14
3.4 Meshing Configuration
The WiClient Firmware includes wireless meshing functionality in the event you wish to install another device
which does not currently have Ethernet connectivity. For the device with Ethernet connectivity you would
assign the “Mesh Mode” as a Gateway and “Repeater” on the standalone unit. If the device is equipped with a
second radio, you may assign the Meshing functionality to the Second Radio by “Mesh Radio” to separate the
wireless operations, improving throughput.
Figure 3-4: Meshing Configuration
15
3.5 Time Zone
Select Time Zone under the System Configuration menu. From the drop down menus, set the time zone. Don’t
forget to click the Update button next to the appropriate commands to implement your selections.
Figure 3-5: Date and Time
16
3.6 Log Viewer
With the Log Viewer page, located under the System Configuration menu, log files can be viewed in real-time.
Choose the appropriate log file by clicking on the link and a separate screen opens to view the log. This page
will update as new entries are being added to the log file.
Figure 3-6: Log Viewer
17
3.7 License Key
If needed, new license keys can be added to the WiClient. To add new licenses, select License Key under the
System Configuration menu. Browse to the directory where the license file is located on the local machine and
then click Upload.
Figure 3-7: License Key
Depending on usage of the system and the license that was originally purchased, a new license may need to be
purchased to support more features. Consult the AllCityWireless.com website to determine the type of license
required.
3.8 Restart
The Restart page, listed under the System Configuration menu, allows the Administrator to reboot the
WiClient unit.
18
3.9 Administration
The Administration page is used to change the “admin” password for administration from the web interface.
You may also change the WiDirect Operational mode by selecting a new mode from the drop down interface.
(Modes available are determined by the license on the WiDirect).
Figure 3-9: Administration Configuration
19
3.10 Firmware Upgrade
The WiClient Firmware allows for firmware upgrades through the Administration web interface. You may
retrieve firmware updates from http://www.allcitywireless.com. After uploading the firmware to the device
your device may become unresponsive for 2-5 minutes while applying the updates. You may also choose to
clear the device’s configuration by deselecting “Keep Configuration” prior to submitting the firmware.
Figure 3-10: Firmware Upgrade
20
4 Services Menu
4.1 DHCP
The WiClient provides DHCP services to all available SSID interfaces.
Keyword
Description
SSID (Disabled)
Check this to prevent the DHCP Server from listening on the SSID Interface.
SSID (Start Address)
The first assignable IP In the Address Pool Range.
SSID (End Address)
The last assignable IP In the Address Pool Range.
SSID (Lease Time)
The length of the DHCP Lease. After which the associated client will send a
new DHCP Request.
Once the configuration has changed, use the Save Config and Apply to save the changes. This button is shown
in Figure 4-1.
Figure 4-1: Service DHCP
21
4.2 NTP Client
The WiClient internal clock must remain accurate for a number of the critical systems to function. In order to
make this work properly, an NTP server is polled to synchronize the internal clock with a known NTP clock.
NTP also provides time services to local devices.
To edit the NTP configuration, go to the NTP Client page under the Services menu. This is the standard NTP
configuration and it will allow you to change NTPD servers as needed. If more information is required for
configuring NTP, please see the NTP web site: http:://www.ntp.org.
Figure 4-2: NTPD Configuration
4.3 Firewall
The WiClient’s Firewall filters traffic that is passing between the LAN and WAN sides of the WiClient.
Firewalls can be programmed to block traffic based on a wide variety of criteria. Traditionally, firewalls enforce
policies to maintain network security by using a set of rules that determine whether or not traffic is allowed to
pass between the LAN and the WAN on a per-packet basis.
The following section describes all the possible items for the Firewall configuration. The first section describes
all the Non-filtering firewall configuration items and the second section describes the traffic filtering
configuration times. Firewall filtering rules dictate which traffic is allowed inbound and outbound of the
WiDirect.
22
Figure 4-3: Firewall Configuration Page
4.3.1.1 Firewall Configuration Options
Table 4-3 lists the firewall configuration items.
Keyword
Description
AuthServer Address
The IP Address or URL of the WiDirect AuthServer
Path
Path to AuthServer Directory. Do not change unless advised by
AllCityWireless.
23
SSL Available
Enable if you would like the users to be sent to the AuthServer Login with
SSL.
GetMacFromArp
Retrieve the User’s Mac Address by means of querying the ARP Table.
PreProxy/WalledGarden Preproxy must be enabled to use the walled garden or landing page feature.
Set preproxy to Off to disable these features.
PreProxy Port
The Port that the PreProxy will listen for Requests on.
PostProxy
PostProxy must be enabled to use the Ad Insertion feature of the WiDirect.
PostProxy Port
The Port that the PostProxy will listen for Requests on.
AllowOnAuthDown
Allow users to maintain Internet Connectivity in the event the AuthServer is
unreachable.
Table 4-3: Firewall Configuration Items
24
4.4 Walled Garden
The WiDirect’s Walled Garden allows administrators to host local content (e.g., community website) that can
be integrated into the captive portal-landing page. For example, administrators might want their users to go to
google.com without network authentication. In order to allow this, only “.google.com” needs to be added to the
Walled Garden list. The Walled Garden list can be set to retrieve and synchronize the local Walled Garden List
with the Master list on the Authentication Server.
Figure 4-4: Walled Garden
25
4.5 Preproxy
When enabled in the firewall configuration file, the Preproxy service is responsible for redirecting users to
either the login page or the landing page. It also allows users to visit sites on the walled garden without logging
in. The configuration may be edited to change the number of processes that are running at any given time.
Typically the default settings are fine, but in a large network, or if a lot of content is being displayed to users
that are not signed on, it is then a good idea to increase the number of Preproxy processes.
Figure 4-5: Preproxy Configuration
26
5 Tools
The Tools section provides the WiDirect administrator with the basic network troubleshooting tools of ping,
trace route, and DNS query.
5.1 Ping
Ping allows an administrator to test network connectivity by sending a ping request to another machine on the
network. Enter in the target IP address of the remote machine to test and click the Ping button. The results of
the ping will be displayed.
This example is a successful ping of IP 192.168.20.248:
PING 192.168.20.248 (192.168.20.248) 56(84) bytes of data.
64 bytes from 192.168.20.248: icmp_seq=1 ttl=64 time=0.310 ms
64 bytes from 192.168.20.248: icmp_seq=2 ttl=64 time=0.264 ms
64 bytes from 192.168.20.248: icmp_seq=3 ttl=64 time=0.214 ms
--- 192.168.20.248 ping statistics --3 packets transmitted, 3 received, 0% packet loss, time 2000ms
rtt min/avg/max/mdev = 0.214/0.262/0.310/0.043 ms
5.2 Trace route
Like the Ping command, the Trace route command tests network connectivity by attempting to find the
network path between the WiDirect and another network device. Type in the target address and click the Trace
route button. The results of the Trace route will be displayed after the WiDirect executes the command.
Example output:
traceroute to 10.3.1.50 (10.3.1.50), 30 hops max, 40 byte packets
1 balance (192.168.200.1) 1.875 ms 2.286 ms 2.747 ms
2 73.135.120.1 (73.135.120.1) 81.174 ms 93.181 ms 93.600 ms
3 ge-1-20-ur01.annapolis.md.bad.comcast.net (68.87.136.205) 94.065 ms 94.535 ms 94.514 ms
4 te-9-3-ur02.gambrills.md.bad.comcast.net (68.87.128.150) 94.983 ms 94.957 ms 96.891 ms
5 te-9-1-ur01.gambrills.md.bad.comcast.net (68.87.129.17) 94.858 ms 97.319 ms 97.295 ms
6 te-7-1-ar01.capitolhghts.md.bad.comcast.net (68.87.129.22) 97.265 ms 79.813 ms 80.194 ms
7 12.86.111.5 (12.86.111.5) 81.152 ms 117.899 ms 141.375 ms
8 tbr2.wswdc.ip.att.net (12.122.113.78) 162.803 ms 163.262 ms 163.726 ms
9 cr1.wswdc.ip.att.net (12.122.16.89) 164.194 ms 164.173 ms 164.619 ms
10 cr2.phlpa.ip.att.net (12.122.4.53) 165.089 ms 165.062 ms 165.504 ms
11 tbr2.phlpa.ip.att.net (12.122.20.86) 167.469 ms 167.444 ms 167.894 ms
12 tbr2.cgcil.ip.att.net (12.122.10.93) 166.859 ms 171.816 ms 172.279 ms
13 12.122.99.93 (12.122.99.93) 113.359 ms 105.891 ms 183.838 ms
14 12-215-4-17.client.mchsi.com (12.215.4.17) 321.209 ms 321.622 ms 321.111 ms
15 12-215-8-163.client.mchsi.com (12.215.8.163) 328.543 ms * *
16 10.3.1.50 (10.3.1.50) 338.253 ms 267.762 ms *
27
5.3 DNS Query
The DNS Query command allows an administrator to test DNS connectivity. DNS is very important because
the captive portal uses it to detect a user's initial Internet request. DNS is also used in some services such as
FTP.
For Domain resolution check, go to the Tools menu and then DNS Query. Type in a domain to query, such as
www.google.com and click the Lookup button. The results will be displayed once the lookup completes.
DNS look up of www.google.com
Server:
192.168.200.1
Address:
192.168.200.1#53
Non-authoritative answer:
www.google.com canonical name = www.l.google.com.
Name: www.l.google.com
Address: 64.233.161.99
Name: www.l.google.com
Address: 64.233.161.104
Name: www.l.google.com
Address: 64.233.161.103
Name: www.l.google.com
Address: 64.233.161.147
28
6 Command Line Interface
6.1 Secure Shell access
An SSH client is required in order to access the command line interface of the WiDirect. AllCity Wireless
recommends using putty, which is a free download at this website:
http://www.chiark.greenend.org.uk/~sgtatham/putty/
By opening putty or another SSH client, connect to the IP address of the WiDirect machine. By default, this IP
address is 10.4.1.1 on the SSID1 interface. However, if the IP address of any of the WiDirect's interfaces has
changed, the new IP address should be the one that used in the SSH connection. If you are accessing from the
Internet, you'll want to use the public IP address of the WiDirect.
Once connected, the system will ask for a login and password. Administrators must use the root login to gain
access. If this is a new system, the password will be widirect.
Once connected, Administrators are free to use any of the standard Unix commands to navigate the system.
To exit the command line interface, use the logout command or CONTROL-D.
NOTE: If editing files, consult the VI quick reference guide located in the WiDirect user manual located on the
AllCity Wireless Support site.
29
7 Technical Support
Support Contact Details
Dedicated e-mail support: [email protected]
Self-support:
www.allcity-wireless.com/support
Corporate Address:
326 First Street Suite 23
Annapolis, MD 21403
30