1
Euro Quad Envelope User Guide
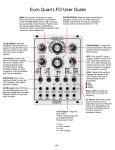
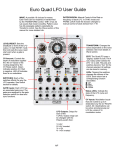
Attack Stage: Envelope attack
control range is 0.0003-20s
Decay Stage: Envelope decay
range 0.0003-20s.
CV AMT Led indicator: Brightness indicates CV
amount and colour indicates positive or negative
response. If GREEN positive voltage CV adds to
the stage duration and RED subtracts. If the CV
voltage is negative the opposite holds true. When
LED is off the CV Amount is 0 for that stage.
Edit Selector Switch: Selects
between the 4 envelopes
making them active to edit.
QUAD ENVELOPE
Delay Stage: Sets the delay
time duration relative to the
start of the gate pulse rising
edge. 0-10s range. The gate
must be longer than the delay
time or will be ignored.
DELAY
Envelope Curve selector:
Each of the 4 envelopes can
have a different shape as
indicated by the panel graphics.
The LED colours are:
=OFF
R
=RED
G
=GREEN
Y
=YELLOW
See page 2 for alternate function
ATTACK
ENV EDIT
DCY
D
HL
ATK
Y
DL
RE
L
Sustain: Sets the sustain
value between 0 and 8V
4
SUS
Hold Stage: Sets the time that
the envelope is at maximum
peak value between attack and
decay stages. Has an effect
similar to peak compression on
audio adding punch or
“presence” to fast envelopes.
0-10s range.
3
2
1
HOLD
DECAY
MOD
SUSTAIN
RELEASE
CV AMOUNT
0
CV Amount: Sets the depth of CV
modulation from each CV jack in
conjunction with MOD routing control
above. The CV amount is summed
with the stage pots. Positive values
add to the time duration of the stage
while negative values subtract. The
individual stage Bi-Color LEDS show
the amount and polarity of the CV.
Status LEDs: Indicate the state of
each of the 4 Envelopes
R
G
Y
CURVE
CV Modulation Routing: Assigns the
stage that CV modulation will be
applied to. Can be any or all stages.
Works in tandem with the CV AMOUNT
control below to set the amount and
polarity of the CV routed to each stage.
Each envelope only has one CV jack
so MOD control is used to distribute
CVs to each stage independently.
ENV1 CV ENV2 CV ENV3 CV ENV4 CV
GATE1
GATE2
GATE3
GATE4
ENV1
ENV2
ENV3
ENV4
SAVE
CV Inputs: Each envelope has 1 CV
input which is routed to the stages
using MOD selector and depth is set
with CV AMOUNT pot. Each envelope
stage (Attack, Decay, etc) can have
different CV amount and polarity per
envelope.
Gate Inputs: Gate Input for each of
the 4 Envelopes. Gate range should
be 2.5-10V (5V optimum)
Save: Button to store all settings
before power down.
See page 2 for alternate function
Envelope Outputs: Output for each of
the 4 Envelopes. Output range is 0-8V
Release Stage: Sets the
release value between 0.000320s
pg1
Button Switch Functions
Curve Switch: The Curve Switch has 4 options to change the shape of the envelope stages to various combinations of
linear, exponential and log curves. These can be useful for changing the way the sound fades to silence or when creating
percussive sounds that need snappy attacks etc. Each of the 4 Envelopes can have its own curve setting and the selection is
saved when SAVE is initiated. The Curve Button has a secondary function. ON powering up the module hold the Curve button
in for 2 seconds approx and the module will switch to POLY MODE (see below). If you want to stay in this mode as default then
do a SAVE. To revert back to Normal Mode do the same button depress on power up and it will switch back to Normal mode.
Again do a save to make this the default.
Normal Mode vs Poly Mode: In Normal mode each Envelope has independent settings for stage durations, CV routings
and envelope curves. In Poly Mode Channel 1 or Envelope 1 sets the values for all envelopes including stage durations,
curves and CV Routings. The CV input jack on channel 1 applies to all envelopes. The gates remain independent for each
envelope but all the envelope parameters are set by channel 1. The Poly Mode is for those occasions where the user wants to
have the same settings for all the envelopes in case of a polyphonic setup with 4 channels of gates and wants the envelopes to
respond in the same way. Typically the user will be in Normal mode for standard Monophonic use.
SAVE: A short tap on the SAVE button will store all settings of the Quad Envelope so that when powered off will retain those
values. The secondary function for this button is as a Factory Reset. ON powering up the module depress and hold the SAVE
button in for 2 seconds approx and the module will revert to factory settings with all modulation CV Amounts set to 0 and
envelope durations set to default values.
CV Modulation
CV Modulation Routing (MOD): Assigns the stage that CV modulation will be applied to. Can be any or all stages
simultaneously within one envelope. Works in tandem with the CV AMOUNT control that sets the amount and polarity of the
CV routed to each stage. Each envelope only has one CV jack so MOD control is used to distribute CVs to each stage
independently. Select the routing destination with the MOD control first (i.e. Attack, Decay, Sustain etc.) before adjusting the CV
Amount. The LEDs mounted next to each Envelope stage knob indicate the amount of modulation by their brightness and
colour. The brighter the LED the greater the CV amount. Green LED indicates a positive amount which will result in a
lengthening of the time duration of the stage or in the case of Sustain increase the level, while a RED Led indicates a negative
amount which will shorten or decrease the stage duration or reduce the Sustain level. The amount that the CV adds or
subtracts is added together with the stage knob setting so for example if the Attack knob is set to 0 subtracting (RED LED) will
have no effect as Attack is already set to it’s minimum value. Positive (GREEN LED) will make the Attack longer though in this
example. When modulation LEDs are OFF the CV Amount is zero or off for that stage. Start with modulating one stage at a
time till you get a handle on how this works as it can get quite complex with all stages having different modulation amounts and
polarities.
Envelope Stage Knobs
To maximize functions and save on panel space the Quad Envelope uses a “paging” style user interface.
Users familiar with the Modcan Quad LFO will easily grasp the similarities between the two modules.
The concept is that each of the 4 envelopes share common controls (knobs , switches) which become active for a given
envelope by selecting with the ENV EDIT Rotary Switch. Selecting the 1 position for example makes all the knobs and
switches become active for ENV1. The knobs use a “Jump” system where the value does not change until the knob is moved
and then the value updates to the position of the knob. Switching between envelopes during editing can mean that the position
of the knobs does not reflect the values for the active envelope but turning the knob will instantly change the value and override
the value that was stored in memory. Some designers prefer a “match” system where the value only changes when the knob
position is matched to the value stored in memory but I found that didn’t work well for an envelope with too much time spent
“hunting” for the match position and felt that an edit should be an immediate change.
pg2
Possible stages for the Envelope
Envelope Durations
Hold
Attack
Decay
Sustain
Delay
Release
Gate On
Gate Off
Gate State
A Typical Envelope setup
Envelope Durations
If the envelope is producing unwanted
clicking check that the attack and release
are not set to fast settings. Clicking can
be good though for percussion sounds.
Decay
Attack
Sustain
Release
Gate On
Gate Off
Gate State
Same settings as above with Hold added for punch
Envelope Durations
Hold
The Hold stage keeps the envelope at full scale for a period which
adds presence to the sound in the same way that compression
works on audio by clipping the peaks to make the overall sound
appear louder. Legend has it that the MiniMoog envelope had this
attribute resulting from a flaw in the envelope design but which
added to its “punchyness” intentional or not.
Decay
Attack
Sustain
Release
Gate On
Gate Off
Gate State
pg3
The following examples show the importance of picking the right gate length for the situation.
The length of the gate plays an important role in how the envelope responds.
If Gate is short with same setting from Typical example on previous page
Envelope Durations
Decay
Sustain is ignored because
decay
is longer than the gate time and
Attack
Release
Gate On
Gate Off
Gate State
Long gate with fast Decay
Envelope Durations
Sustain is set to 0 here so no sustain. Fast
decay goes to 0V so release is ignored.
These can be good settings if only an
Attack/Decay type envelope is wanted.
Shorten the gate to only the Attack duration
and it will become an Attack/ Release type
envelope.
Decay
Attack
Gate Off
Gate On
Gate State
Long Attack with short Gate
Envelope Durations
full scale
Attack time is longer than the
gate so envelope doesn’t
acheive full scale ON voltage as
release is triggered by gate off
before it has time to reach it.
Decay stage is ignored as never
Attack
Release
Gate On
Gate Off
Gate State
pg4
The following examples show the importance of picking the right gate length for the situation.
The length of the gate plays an important role in how the envelope responds.
Short Gate with long Delay
Envelope Durations
Attack
Decay is ignored as never
reaches that stage as gate cuts
off before hand. If the Delay time
is longer than the gate there will
be no envelope at all.
Release
Delay
Gate Off
Gate On
Gate State
If Hold is set to longer period than gate
Hold
Envelope Durations
Attack
Release
Gate On
Decay and Sustain are ignored.
When gate goes low it jumps to
release immediately. This setup
could also introduce clicks with
VCAs on mellower sounds. This
can be a good or bad thing
depending on the type of sound.
desired.
Gate Off
Gate State
pg5