1
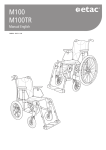
M100
M100TR
Manual English
74982J 2015-03-16
2
Contents
1. General – introduction
4. Readjustments
....................................................................................4
Brake, adjustment.......................................................19
Adjustment of drum brake..........................................19
Anti-tips, turnable.......................................................20
Adjustable upholstery (option)....................................20
Push handles, vertically adjustable (option)..................20
Bow handle (option)...................................................21
Positioning belt (accessory)..........................................21
2. Description
....................................................................................5
3. Settings
Seat height adjustment.................................................6
Seat height adjustment using the rear wheel position...6
Seat height adjustment with change of rear wheel........7
Seat height adjustment using the castor wheel position.... 8
Seat height adjustment using the front fork attachment... 8
Seat height adjustment with change of castor wheel/
front fork......................................................................9
Seat angle...................................................................10
Balance adjustment/amputee position.........................10
5. Accessories
.......................................................................... 22 – 23
8. Service and maintenance
Washing backrest and seat..........................................26
Rear wheel/castor wheel.............................................26
Brakes.........................................................................26
Washing the frame.....................................................26
Miscellaneous.............................................................26
User manual
M100 & M100TR...................................................11-18
Explanation of symbols...............................................11
Transportation in vehicles............................................12
Unfolding & folding....................................................12
Adjustments...............................................................13
Drum brake................................................................14
Maintenance & Fault-finding chart..............................14
Driving technique, maneuvering.............................15-18
6. M100....................................24
7. M100TR.................................25
3
7
1. General
Thank you for choosing a wheelchair from Etac. The manual
must be read thoroughly to avoid damage when handling
and using the chair.
In this manual the User is the person sitting in the chair.
The Care giver is the person helping the user.
This symbol appears in the manual together with
text. It highlights actions where the wheelchair’s,
the user’s or the care giver’s safety can be put at
risk.
M100 is a manual, cross-folded, allround wheelchair with
variation options that is intended for use both outdoors
and indoors. Seat and footplates are adjustable in height
and angle, and the backrest in height. M100 can be
supplemented and adjusted if needs change. In addition
there is a range of options and accessories such as seat
CE marking
cushions, anti-tips, various types of legrests and rear wheels
for example.
M100 has excellent prerequisites to create comfort, functionality and good manoeuvrability.
Etac regularly improves its products. We therefore reserve
the right to modify the products without prior notice. The
dimensions given on drawings or other material are solely
for guidance.
We are not responsible for printing errors or incomplete
information.
In the centre spread of this manual you will
find a removable section that contains user
information.
According to EN 12183
!
Read the operating instructions before use
To be sorted according to national regulations
Tests and Guarantees
Crash test:
Etac’s wheelchairs are tested in accordance with ISO
7176-19. They are crash tested at the Technical Research
Institute of Sweden. The tests were carried out with normal
settings on the wheelchairs (see manual for the respective
wheelchair) and with an UNWIN_WWR/ATF/K/R restraining
device and an UNWIN_WWR/HD/ATF/K/R 3-point seat belt.
Service life:
The product is tested and fulfils the demands stated in EN
12183. The main product’s durability and lifetime is at least
five years when used in accordance with intended use, the
safety instructions, the reconditioning manual and instructions for use in the user manual. The main product consists
of the chassis for seat and back support. Additional parts/
accessories are handled in accordance with the manual
and reconditioning manual. The actual lifetime can vary,
depending on how much and how intensively the product
is being used, but a maximum of 10 years. Thereafter the
product must be decommissioned.
The following methods of surface treatment have
been used:
Lacquered surfaces = Polyester powder coating
Non-lacquered aluminium parts = Anodized coating
Non-lacquered steel surfaces = Galvanized
CE marking:
The product has passed all tests and met all criteria set by
European standards for specific product groups. Combination agreements exist, see www.etac.com
Guarantee:
5 year guarantee against material and manufacturing
defects. For terms and conditions, see www.etac.com
Special adaptations:
comprise everything that falls outside the instructions and
settings in this Manual. Wheelchairs specially adapted by
customers are not eligible for Etac’s CE marking. Etac’s
guarantee no longer applies. If in the least doubt about the
validity of adjustments, please contact Etac for advice.
Explanation for list of points
Standard
Tools
Allen key
3, 5, 6 mm
Options
Socket spanner Torx key
19/24 mm
T20
4
2. Description
M100
M100TR
1
2
1
3
14
13
3
13
12
16
2
17
11
16
12
10
11
15
6
7
14
17
4
18
18
9
19
10
9
5
8
1. Back tube
2.Backrest
upholstery
3. Seat upholstery
4.Brake
5.Footrest
6.Footrest
locking knob
7.Legrest
15
6
8. Castor wheels
9. Front fork
10.Front fork
attachment
11. Nut cover
12.Armrest
attachment
13.Armrest
incl. lock
8
5
4
7
14.Quick release
hub
15.Handrim
16. Rear wheel
17. Side frame
18.Attachment
tube footrest
19. Serial number
1. Back tube
2.Backrest
upholstery
3. Seat upholstery
4.Footrest
5.Footrest
locking knob
6.Legrest
7. Castor wheel
5
8. Front fork
9.Front fork
attachment
10. Nut cover
11.Armrest
attachment
12.Armrest
incl. lock
13. Brake cable
14. Brake handle
drum brake/
Parking brake
15. Wheel 16"
16. Side frame
17.Attachment
tube footrest
18. Serial number
Seat height adjustment
Depending on model the seat height is
adjustable without changing rear wheels, front
forks or castor wheels.
Bear in mind the risk of tipping.
Seat height adjustment using the rear wheel position
1
5 mm
E–A
0 – 10 cm
2
4
3
5
6
M100TR
M100
3. Settings
Seat height adjustment with change of rear wheel
5 mm
E–A
0 – 14 cm
E = 36 cm
D = 38,5 cm
C = 41 cm
B = 43,5 cm
A = 46 cm
E = 38 cm
D = 40,5 cm
C = 43 cm
B = 45,5 cm
A = 48 cm
E = 40 cm
D = 42,5 cm
C = 45 cm
B = 47,5 cm
A = 50 cm
7
M100TR
M100
3. Settings
Seat height adjustment using the castor wheels’ position in the fork
5 mm
1–3
0 – 5 cm (0 – 3 cm)
Standard
Short
± 1.5 cm
± 2.5 cm
Seat height adjustment using the front fork attachment
6 mm
19 mm
0 – 2.5 cm
1. Remove the nut cover and loosen the front
fork as in the illustration.
Tighten the retaining nut until it cannot be turned
any more.
2. Loosen the front fork attachment and rotate 180°.
Loosen ½ – 1 turn. The spring washer then has
the correct tension and reduces the risk of the
castor wheels starting to ”wobble”.
3. Replace the front fork with castor wheels as in
the illustration.
NB: It is also important to ensure that the washers
in the attachment (under the retaining nut) are
placed in the right order, with the spring washer
on top.
1
2a
2b
3a
8
3b
M100TR
M100
3. Settings
Seat height adjustment with change of castor wheel/front fork
0 – 14,5 cm
6”
5”
150*30 mm
125*30 mm
Short
38 / 39,5 / 41 cm
40,5 / 42 cm
40,5 / 42 / 43,5 cm
43 / 44,5 cm
Standard
8”
200*30 mm
200*50 mm
42,5 / 45 / 47,5 cm
45 / 47,5 / 50 cm
45 / 47,5 / 50 cm
47,5 / 50 / 52,5 cm
Note!
Don’t forget the adjustment option of rotating
the front fork attachment.
9
M100TR
M100
3. Settings
Seat angle
The seat angle can be set at 0° or 3° (see previous illustrations).
Adjust the front fork mounting so that the front fork is perpendicular.
max 3°
1
2
3
min 0°
Bear in mind the risk of tipping.
Balance adjustment/amputee position (only with 24“ rear wheels)
1. Remove the rear wheel as shown in the
illustration on page 6.
2. Loosen the rear wheel attachments.
4. Mount them on the rear of the frame.
5. Mount the rear wheel according to the
illustration on page 6.
3. Change the sides of the attachments.
2
5 mm
3
4
After adjusting the seat height or centre
of balance, always ensure that you
check the function of the anti-tips.
10
M100TR
M100
3. Settings
1
User manual
74982J 2015-03-16
M100
M100TR
After adjusting the seat height, centre of
balance or backrest angle, always ensure
that you check the function of the anti-tips.
Explanation of symbols
Securing
Do not lift the chair
by the armrests
Risk of tipping: Always
have the anti-tips
down when in motion
1111
2
User manual
Transportation in vehicles
Mobility service bus
Etac’s wheelchairs are crash-tested and approved
according to ISO 7176-19 with restraint components and 3-point belt from Unwin.
Etac recommends in the following order:
1) The user transfers to one of the seats in the
vehicle and uses the vehicle’s 3-point belt while
travelling. The wheelchair is then placed in the
boot or safely in the back seat so that it cannot
overturn or roll.
2) The wheelchair is secured facing forwards in the
vehicle as per this manual, the user uses a separate 3-point belt that is secured in the vehicle.
3) According to directive 2001/85/EC, appendix VII,
point 3.8.3. there are specially marked wheelchair
locations in vehicles that permit transport with
a wheelchair facing in the opposite direction of
travel.
If this means of travel is used, the user/carer must
be aware while travelling, prepared for sudden
movements and have the capacity to maintain a
safe sitting position throughout the entire journey.
The user’s disabilities must not be of such an
extent that he/she is not able to hold onto the
handles fitted in the vehicle when there are
changes of speed or direction.
In conjunction with points 2 and 3:
• a correctly adjusted headrest should be used
• the backrest should be level with or above the
user’s shoulders
• the parking brake should be used
• the anti-tips should be lowered
• accessories/parts that can be removed without
tools, shall be removed and secured
• backrest brace must be used
• rear wheels must have handrims
Securing
Private car
Restraining device must not be put
through the wheels.
• The wheelchair should preferably be placed in
the car boot.
• If the wheelchair is placed in the back seat,
ensure that it cannot overturn or roll. If possible
secure the wheelchair
with the car’s safety
belt.
Unfolding
• Push down on one side of the seat frame, using the whole of the flat of the hand.
• Do not hold the seat frame while unfolding as there is a risk
of pinching your fingers.
• Flip down the footrests.
Folding
• If a bow handle and/or cross brace is mounted
they should be removed.
• Flip up the footrests.
• Lift the seat upwards.
1212
3
User manual
Rear wheel with
quick release hub
• When mounting, always check that
the quick release button in the hub
pops out completely.
Footrests
Never stand on the
footrests as there is
a risk of tipping!
Adjust the height so that you sense that your
feet are receiving support and your thighs are
resting against the cushion.
For outdoor use the footrests should be raised
4 – 5 cm above the ground.
Adjusting the angle
Adjusting the height
5 mm
Adjust the angle of the footrests so that your ankles are at
a 90° angle.
Fully loosen the locking knob on the legrest.
Remove the screw. Set the height. Replace the
screw and handle. Tighten securely.
Armrest (adjustment)
• Loosen the screws on the inside of the side
plate.
3 mm
• Move the armrest up or down to the desired
height and tighten the screws.
• If the armrests are set high they support and
relieve the pressure on the back better than if
they are set low.
Adjustment of backrest height and upholstery in standard model
5 mm
T20
1313
4
User manual
M100 TR Drum brake
M100 TR Drum brake
• Brake while in motion by pulling
the brake lever upwards.
• Activate the parking brake by pulling
the brake lever upwards and pressing in
button A.
Release by pressing the lever upwards.
Rear wheel:
Clean the quick release axles when necessary.
Castor wheels: Clean the castor wheel axles when necessary.
Frame:Clean the frame with a non-abrasive cleaning agent with a pH level between 5 and 9,
or with a 70% disinfectant solution. Rinse and dry.
Upholstery:
Wash, see label on upholstery.
For more severe problems, contact the Technical Aids Centre.
(!) When necessary, lubricate moving parts/joints with bicycle oil or similar.
Fault-finding chart
The wheelchair pulls to the side
• Adjust the front fork attachment’s angular setting
• Check that the front fork attachments are mounted at the same height.
• Rear wheel mountings are incorrectly fitted
• The user is distributing weight unevenly
• More strength being used on one side than the other
when moving the chair
The wheelchair feels ”heavy” to propel • Rear wheel attachments are incorrectly fitted
• Clean the castor wheel axles from hair and dirt
The wheelchair feels ”heavy” to turn
• Check that the front forks are not too tight
• Clean the castor wheel axles from hair and dirt
Brakes not effective
• Adjust the distance between brake and tyre
Rear wheels ”loose”
• Adjust the length of the axle shaft
Rear wheels hard to remove/replace
• Clean and lubricate quick release with cycle oil or similar
• Adjust the length of the axle shaft
• The front forks are not tight enough
• Check that the front fork attachments are mounted at the same
The castor wheels ”wobble”
height.
• Adjust the front fork attachment’s angular setting
• Too much weight over the castor wheels. Adjust the chair’s centre
of balance
The wheelchair is hard to fold/unfold
• The upholstery is too tight
• Clean and lubricate the cross-parts under the seat
The wheelchair feels ”awkward”
• Check that screws, nuts and bolts are properly tightened
1414
5
User manual – driving technique, maneuvering
Parking
Don’t lift the
chair by the
armrests.
Risk of tipping: Always
have the anti-tips
down when in
motion.
Transferring into/out of the wheelchair
Never stand on the
footrests as there is a
risk of tipping!
Sideways
From the front
Remove the armrest on the
side where transfer is to take
place.
Lifting the wheelchair
• Ensure that the vertically adjustable push handles are
properly tightened.
• Swing non-lockable legrests
in under the seat and lift the
wheelchair by the front upper
part of the frame.
1515
6
User manual – driving technique, maneuvering
i
The following figures show principles for propelling techniques and how to overcome obstacles like
steps and curbs.
User, up forwards:
This technique is recommended only for experienced wheelchair users.
– Ensure that the anti-tips are deactivated.
Activate the anti-tips
afterwards!
User, up forwards
This technique only works if there is a low kerb/threshold,
relative to the installed height of the footrests. – Ensure that the anti-tips are deactivated.
Activate the anti-tips
afterwards!
User, up forwards:
This technique is recommended only for experienced wheelchair users.
– Ensure that the anti-tips are deactivated.
Activate the anti-tips
afterwards!
User, down backwards:
This technique is recommended only for experienced wheelchair
users.
– Ensure that the anti-tips are deactivated.
There is a greater risk of
tipping during this
manoeuvre!
1616
Activate the anti-tips
afterwards!
7
User manual – driving technique, maneuvering
Care giver, up forwards:
– Ensure that the anti-tips are deactivated.
Activate the anti-tips
afterwards!
Care giver, up backwards:
Activate the anti-tips
afterwards!
– Ensure that the anti-tips are deactivated.
Care giver, down forwards:
– Ensure that the anti-tips are deactivated.
Activate the anti-tips
afterwards!
Care giver, down backwards:
Activate the anti-tips
afterwards!
– Ensure that the anti-tips are deactivated.
1717
8
User manual – driving technique, maneuvering
Stairs, up
– Ensure that the anti-tips are deactivated. Never use an escalator, even if a care giver
is available. Ensure that height adjustable push handles are tightened. We always
recommend using two carers for this transfer. One who walks behind and holds on
to the push handle and one who walks in front and holds on to the frame (or in the
legrests if these are lockable).
Activate the anti-tips
afterwards!
Stairs, down
– Ensure that the anti-tips are deactivated. Never use an escalator, even if a care
giver is available. We always recommend using two carers for this transfer. One
who walks behind and holds on to the push handle and one who walks in front
and holds on to the frame (or in the legrests if these are lockable).
Ascending/descending hills
Control your speed using the handrims, not the brakes!
Avoid turning round in the middle of a hill. Always drive as straight
up/down as possible. If uncertain, ask for assistance.
Uphill
Downhill
Lean forwards to correct
your centre of balance.
Lean backwards to correct
your centre of balance.
Etac
Box 203, 334 24 Anderstorp, Sweden
Tel +46 371 58 73 00
Fax +46 371 58 73 90
www.etac.com
1818
Activate the anti-tips
afterwards!
Activate the anti-tips
afterwards!
Depending on the model of chair you should
adjust the brakes and the position of the antitips after setting seat height and angle.
Brake, adjustment
5 mm
Adjustment of drum brake
When adjusting the drum brake loosen
the retaining nut (A) and adjust the brake
by moving the adjustment screw (B) up/
down. When the brake has a reasonable
effect tighten the retaining nut (A).
This adjustment should be carried
out when the brake is not functioning
satisfactorily.
19
M100TR
M100
4. Readjustments
Anti-tips, turnable
The anti-tips
are mounted
on the tilters.
1
3
2
5 mm
After adjusting the
seat height or centre
of balance, always
ensure that you check
the function of the
anti-tips.
4 - 6.5 cm
Adjustable upholstery (option)
The contour of the backrest upholstery is
individually adjustable by using the five Velcro
straps and the backrest cover.
– Allow the cover plenty of room between
seat and backrest, so that it is possible to
”sit in” against the backrest.
– Loosen all the straps and ensure that the
user is sitting as far back in the seat as
possible.
– Tighten the straps so that they follow the
contours of the back and give support for
the curve of the back.
Risk of tipping: Always check the positioning of the anti-tips after adjusting
the backrest upholstery.
(!) Do not overtighten the upper
straps as this
can prevent the
cross-brace from
unfolding properly,
i.e. the back tubes
do not sit flush in
the side-frames.
Push handles, vertically adjustable (option)
Only in combination with vertically adjustable
push handle attachments.
The push handles can be set at intervals
of 2 cm.
Loosen the knob (A) and press the plastic
washer inwards. Install desired height. Ensure
that the push handles are locked in the correct
position. Tighten the knob.
Ensure that the
knob is properly
tightened. This is
especially important
if the chair is to be
lifted with the user
sitting in it.
20
M100TR
M100
4. Readjustments
Bow handle (option)
The bow handle
must be removed
before the wheelchair can be folded.
The bow handle is height adjustable and
detachable.
It is mounted in the push handle attachment, and is adjusted in the same way as the
height-adjustable push handles.
It is also possible to mount a headrest on the
bow handle
Ensure that the knob is properly
tightened. This is especially important
if the chair is to be lifted with the user
sitting in it.
Positioning belt (accessory)
1
2
3
4
21
M100TR
M100
4. Readjustments
5. Accessories
Assembly instructions are provided with all accessories when they are supplied by Etac.
Instructions are also available on our website www.etac.com
M100
Brake lever extension
L egrests narrow angle,
lockable
only with 5“ / 6” Castor wheels
L egrests angle-adjustable
incl. calf support
Amputee legrests
Drum brake 20 – 24"
Castor wheels 6"
Castor wheels 5"
Backrest upholstery adjustable
Push handle height adjustable
Backrest upholstery fixed,
for height adjustable push handles
Backrest upholstery adjustable,
for height adjustable push handles
Bow handle
Backrest brace
22
M100TR
5. Accessories
M100
User brake
Armrest long
Anti-tips complete
Tray
Seat cushion
Calf strap
Heel strap
Positioning belt
Headrest
Spokeguard
Cane holder
Tool kit
Plaster legrest
23
M100TR
6. M100 standard model
Frame:
Aluminium and steel tubes. Foldable
Brake:
Standard brake
Push handles:
Fixed
Backrest:
37.5 cm – 47.5 cm (2.5 cm interval)
Backrest angle:
Fixed
Seat:
Adjustable 0 - +3°
Seat upholstery:
Fixed
Backrest upholstery: Fixed
Camber angle:
0°
Rear wheel:
24" quick release solid/aluminium handrims
Castor wheels:
200 x 35 mm
Front fork:
Standard
Legrests:
Lockable, detachable and turnable
Footrest:Angle adjustable (height adjustable with
1.5 cm intervals)
Armrests:Short
Tilter:Standard
Transport attachment: Standard
Max. user weight:
125 kg
24 cm
38 – 52,5 cm
37,5 – 47,5
Max 6°
(without anti-tip
Max >20°
Max >20°
in most disadvantageous setting)
13400103
short 40 cm
short 37.5 cm
15.7 kg
13400404
long 46 cm
long 37.5 cm
15.9 kg
13400105
short 40 cm
short 40 cm
15.8 kg
13400106
long 46 cm
long 40 cm
16.0 kg
13400107
short 40 cm
short 42.5 cm
15.9 kg
13400108
long 46 cm
long 42.5 cm
16.1 kg
13400109
short 40 cm
short 45 cm
16.0 kg
13400110
long 46 cm
long 45 cm
16.2 kg
13400111
short 40 cm
short 47.5 cm
16.1 kg
13400112
long 46 cm
long 47.5 cm
16.3 kg
13400113
short 40 cm
short 50 cm
16.2 kg
13400114
long 46 cm
long 50 cm
16.4 kg
M100: The dimensions and weights indicated apply to chairs with 24" rear wheel solid tyres/aluminium
handrims, legrests and tilter. Height at front is measured from the seat frame tubes upper side with the seat
tipped +3° backwards, the height at the back is measured from the seat frame tubes upper side and the
seat depth is measured from the back tubes.
Dimensions and tolerance +/- 2%.
24
7. M100TR standard model
Frame:
Aluminium and steel tubes. Foldable
Brake:
Standard brake
Push handles:
Fixed
Backrest:
37.5 cm – 47.5 cm (2.5 cm interval)
Backrest angle:
Fixed
Seat:
Adjustable 0 - +3°
Seat upholstery:
Fixed
Backrest upholstery: Fixed
Camber angle:
0°
Rear wheel:
16" solid with drum brake
Castor wheels:
200 x 50 mm
Front fork:
Standard
Legrests:
Lockable, detachable and turnable
Footrest:Angle adjustable (height adjustable with
1.5 cm intervals)
Armrests:Short
Tilter:Standard
Transport attachment: Standard
Max. user weight:
125 kg
24 cm
50 cm
37,5 – 47,5
Max 6°
(without anti-tip
Max >20°
Max >20°
in most disadvantageous setting)
13410103
short 40 cm
short 37.5 cm
16.5 kg
13410404
long 46 cm
long 37.5 cm
16.7 kg
13410105
short 40 cm
short 40 cm
16.6 kg
13410106
long 46 cm
long 40 cm
16.8 kg
13410107
short 40 cm
short 42.5 cm
16.7 kg
13410108
long 46 cm
long 42.5 cm
16.9 kg
13410109
short 40 cm
short 45 cm
16.8 kg
13410110
long 46 cm
long 45 cm
17.0 kg
13410111
short 40 cm
short 47.5 cm
16.8 kg
13410112
long 46 cm
long 47.5 cm
17.0 kg
13410113
short 40 cm
short 50 cm
16.9 kg
13410114
long 46 cm
long 50 cm
17.1 kg
M100TR: The dimensions and weights indicated apply to chairs with 16" rear wheel solid with drum brake,
legrests and tilter. Height at front is measured from the seat frame tubes upper side with the seat tipped
+3° backwards, the height at the back is measured from the seat frame tubes upper side and the seat depth
is measured from the back tubes.
Dimensions and tolerance +/- 2%.
25
8. Service and maintenance
Washing backrest and seat
The upholstery is made of two-ply polyester.
The seat upholstery is fastened lengthways to the
seat frame.
It can easily be removed from the frame by unscrewing the end caps.
The backrest upholstery is removed by undoing the
screws on the upholstery.
Then pull the upholstery upwards and wash according to the washing instructions on the product.
Rear wheel/castor wheel
Spokes: Loose spokes can make the wheels
wobble. Consult a cycle dealer or your Technical Aids Centre if it is necessary to
adjust the spokes.
Wheel axles:Clean the wheel axles from hair and dirt
as necessary.
Ball bearings:Require no maintenance.
Handrims:If a handrim has a scratch that may
cause injury to the hand when moving
the chair forwards, it must be replaced.
Brakes
Encrusted dirt can have a negative effect on the brake
mechanism.
In the event of adjustments, see section Brakes,
adjustment.
Washing the frame
It is important to keep the wheelchair clean, both for
your own comfort and the longevity of the chair. It is
equipped with drainage holes which ensures that it is
easy to wash and dry.
Clean the frame with a non-abrasive cleaning agent
with a pH level between 5 and 9, or with a 70%
disinfectant solution. Rinse and dry.
Miscellaneous
If there is a fault in your wheelchair you should
contact your dealer or Technical Aids Centre. Defective
wheelchairs should not be used.
Etac will not be held responsible for damage or injury
caused by use of non-original parts.
When necessary, lubricate moving parts/joints
with bicycle oil or similar.
If your chair needs reconditioning or repair, only
original parts from Etac or components with equal
quality should be used.
26
27
Etac Sverige AB
Box 203
334 24 Anderstorp
Sweden
Tel 0371-58 73 00
Fax 0371-58 73 90
[email protected]
www.etac.se
Etac GmbH
Bahnhofstraße 131,
45770 Marl,
Germany
Tel 02365-98710
Fax 02365-986115
[email protected]
www.etac.de
Etac AB (export)
Box 203
334 24 Anderstorp
Sweden
Tel 46 371-58 73 30
Fax 46 371-58 73 90
[email protected]
www.etac.com
Etac Holland BV
Fluorietweg 16a,
1812RR Alkmaar,
Nederland
Tel +31 72 547 04 39
Fax +31 72 547 13 05
[email protected]
www.etac.com
Etac AS
Pb 249,
1501 Moss,
Norway
Tel 815 69 469
Fax 69 27 09 11
[email protected]
www.etac.no
Etac UK Limited
29 Murrell Green Business Park
London Road, Hook, Hampshire
RG27 9GR, United Kingdom
Tel 01256 767 181
Fax 01256 768 887
[email protected]
www.etac.com
Etac A/S
Egeskovvej 12
8700 Horsens
Denmark
Tel 79 68 58 33
Fax 75 68 58 40
[email protected]
www.etac.dk
Tel 0121 561 2222
Fax 0121 559 5437
[email protected]
www.etac.com
Snug Seat, Inc.
12801 E. Independence Boulevard
P.O. Box 1739
Matthews, NC 28106, USA
Tel 800 336 7684
Fax 704 882 0751
[email protected]
www.etac.com
R82 UK Limited.
Unit D4A, Coombswood Business
Park East
Coombswood Way, Halesowen
West Midlands B62 8BH
United Kingdom
Etac Supply Center AB
Långgatan 12
SE-334 24 Anderstorp
7 320451 342133
74982
28