1
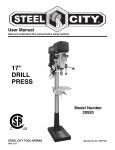
R ® User Manual Read and understand this manual before using machine. 17” VS DRILL PRESS Model Number 20530 STEEL CITY TOOL WORKS VER. 11.20.13 Manual Part No. OR20530M ® l City Drill Press. ee St w ne ur yo ng si ha rc THANK YOU for pu and inspected with you, , ed st te , ed gn si de en be This drill press has , used and mained bl m se as ly er op pr n he the customer, in mind. W ith years of trouble free w u yo e id ov pr ill w s es tained, your drill pr best machinery e th of e on by ed ck ba is service, which is why it ss. warranties in the busine oducts in the Steel City’s pr y an m of e on st ju is s This drill pres t proof of our commitmen is d an ry ne hi ac m ng ki family of woodwor ction. to total customer satisfa cellence each and every ex r fo e riv st to ue in nt At Steel City we co . For comments er om st cu r ou u, yo of n day and value the opinio eb Works, please visit our w ol To ity C l ee St or s es about your drill pr works.com . site at www.steelcitytool TABLE OF CONTENTS INTRODUCTION SECTION 1 Product Specifications ............................................................................................................................2 SECTION 2 Accessories and Attachments ................................................................................................................2 SECTION 3 Definition of Terms ..................................................................................................................................3 SECTION 4 Feature Identification ..............................................................................................................................4 SECTION 5 General Safety........................................................................................................................................5 SECTION 6 Product Safety ........................................................................................................................................8 SECTION 7 Electrical Requirements..........................................................................................................................9 SECTION 8 Grounding Instructions..........................................................................................................................10 SECTION 9 Unpacking & Inventory..........................................................................................................................11 SECTION 10 Assembly ..............................................................................................................................................13 SECTION 11 Adjustments ..........................................................................................................................................16 SECTION 12 Operations ............................................................................................................................................20 SECTION 13 Maintenance..........................................................................................................................................23 SECTION 14 Troubleshooting ....................................................................................................................................24 INTRODUCTION This user manual is intended for use by anyone working with this machine. It should be kept available for immediate reference so that all operations can be performed with maximum efficiency and safety. Do not attempt to perform maintenance or operate this machine until you have read and understand the information contained in this manual. The drawings, illustrations, photographs, and specifications in this user manual represent your machine at time of print. However, changes may be made to your machine or this manual at any time with no obligation to Steel City Tool Works. 1 PRODUCT SPECIFICATIONS (cont) MOTOR Type Induction Continuous duty HP 1-1/2 HP Amps 13 Volts 120 Phase Single Hertz 60 RPM 1725 (no- load) Handle Operation Motor control Table size Table tilt Table movement Table material Depth stop type Depth Column diameter PRODUCT SPECIFICATIONS Belt type Poly-V Pulley type Step Belt Tensioning Motor slide Number of speeds VS Drill speeds 500-2500 Spindle taper #2 Morse taper Chuck taper JT3 Chuck capacity 5/8" (3-16 mm) Chuck to table dimension maximum 23" Chuck to base dimension 43" Quill diameter 2" (52 mm) Quill travel Maximum 6" Quill lock Yes 360 degree rotation Industrial push button with OFF paddle 14" wide x 14" deep 45° left and right Rack and pinion Cast iron External Micro-Adjust with Quick Set Yes 3-1/8" (80mm) PRODUCT DIMENSIONS: Height Width Depth Weight 69" 14" 27" 218 lbs SHIPPING DIMENSIONS: Carton Type Length Depth Height Gross Weight Box 58" 26" 13" 240 lbs There are a variety of accessories available for your Steel City Product. For more information on any accessories associated with this and other machines, please contact your nearest Steel City distributor, or visit our website at: www.steelcitytoolworks.com. 2 DEFINITION OF TERMS Belt cover - Can be opened to provide access to belts, pulleys, and speed chart. Table - Holds work piece. Column - Used to support work table and drill press head. On/Off switch - Access power to drill press or turn power off. Base - Sits on floor, adds stability, and attaches to column. Feed handles - Used to lower chuck and apply pressure toward work piece. Depth scale - Keeps track of tool travel into work piece. Quill lock - Holds quill in predetermined position. Keyed chuck - Key is used to loosen or tighten drilling and sanding tools. Motor - Supplies power to drill press. Flexible lamp - Provides light source for all operations. 3 FEATURE IDENTIFICATION A B J I C K E A. Belt cover B. On/Off switch C. Feed handles D. Quill lock E. Keyed chuck F. Table G. Column H. Base I. Depth scale J. Motor K. Flexible lamp D F G H 4 GENERAL SAFETY ! ! WARNING WARNING TO AVOID serious injury and damage to the machine, read and follow all Safety and Operating Instructions before assembling and operating this machine. This manual is not totally comprehensive. It does not and can not convey every possible safety and operational problem which may arise while using this machine. The manual will cover many of the basic and specific safety procedures needed in an industrial environment. Exposure to the dust created by power sanding, sawing, grinding, drilling and other construction activities may cause serious and permanent respiratory or other injury, including silicosis (a serious lung disease), cancer, and death. Avoid breathing the dust, and avoid prolonged contact with dust. The dust may contain chemicals known to the State of California to cause cancer, birth defects or other reproductive harm. All federal and state laws and any regulations having jurisdiction covering the safety requirements for use of this machine take precedence over the statements in this manual. Users of this machine must adhere to all such regulations. Some examples of these chemicals are: Lead from lead-based paints. Crystalline silica from bricks, cement and other masonry products. Arsenic and chromium from chemically-treated lumber. Below is a list of symbols that are used to attract your attention to possible dangerous conditions. ! This is the international safety alert symbol. It is used to alert you to potential personal injury hazards. Obey all safety messages that follow this symbol to avoid possible injury or death. ! Always operate tool in well ventilated area and provide for proper dust removal. Use a dust collection system along with an air filtration system whenever possible. Always use properly fitting NIOSH/OSHA approved respiratory protection appropriate for the dust exposure, and wash exposed areas with soap and water. DANGER Indicates an imminently hazardous situation which, if not avoided, WILL result in death or serious injury. ! 1. To avoid serious injury and damage to the machine, read the entire User Manual before assembly and operation of this machine. WARNING Indicates a potentially hazardous situation which, if not avoided, COULD result in death or serious injury. ! CAUTION ! WARNING Indicates a potentially hazardous situation, if not avoided, MAY result in minor or moderate injury. It may also be used to alert against unsafe practices. ! 2. ALWAYS wear eye protection. Any machine can throw debris into the eyes during operations, which could cause severe and permanent eye damage. Everyday eyeglasses are NOT safety glasses. ALWAYS wear Safety Goggles (that comply with ANSI standard Z87.1) when operating power tools. CAUTION CAUTION used without the safety alert symbol indicates a potentially hazardous situation which, if not avoided, may result in property damage. NOTICE This symbol is used to alert the user to useful information about proper operation of the machine. 5 ! 11. DO NOT FORCE the machine to perform an operation for which it was not designed. It will do a safer and higher quality job by only performing operations for which the machine was intended. WARNING 12. DO NOT stand on a machine. Serious injury could result if it tips over or you accidentally contact any moving part. 3. ALWAYS wear hearing protection. Plain cotton is not an acceptable protective device. Hearing equipment should comply with ANSI S3.19 Standards. ! 13. DO NOT store anything above or near the machine. 14. DO NOT operate any machine or tool if under the influence of drugs, alcohol, or medication. WARNING 15. EACH AND EVERY time, check for damaged parts prior to using any machine. Carefully check all guards to see that they operate properly, are not damaged, and perform their intended functions. Check for alignment, binding or breakage of all moving parts. Any guard or other part that is damaged should be immediately repaired or replaced. 4. ALWAYS wear a NIOSH/OSHA approved dust mask to prevent inhaling dangerous dust or airborne particles. 16. Ground all machines. If any machine is supplied with a 3-prong plug, it must be plugged into a 3contact electrical receptacle. The third prong is used to ground the tool and provide protection against accidental electric shock. DO NOT remove the third prong. 5. ALWAYS keep the work area clean, well lit, and organized. DO NOT work in an area that has slippery floor surfaces from debris, grease, and wax. 6. ALWAYS unplug the machine from the electrical receptacle before making adjustments, changing parts or performing any maintenance. 17. Keep visitors and children away from any machine. DO NOT permit people to be in the immediate work area, especially when the machine is operating. 7. AVOID ACCIDENTAL STARTING. Make sure that the power switch is in the “OFF” position before plugging in the power cord to the electrical receptacle. ! 18. KEEP protective guards in place and in working order. 19. MAINTAIN your balance. DO NOT extend yourself over the tool. Wear oil resistant rubber soled shoes. Keep floor clear of debris, grease, and wax. WARNING 20. MAINTAIN all machines with care. ALWAYS KEEP machine clean and in good working order. KEEP all blades and tool bits sharp. 21. NEVER leave a machine running, unattended. Turn the power switch to the OFF position. DO NOT leave the machine until it has come to a complete stop. 8. AVOID a dangerous working environment. DO NOT use electrical tools in a damp environment or expose them to rain or moisture. ! 22. REMOVE ALL MAINTENANCE TOOLS from the immediate area prior to turning the machine ON. WARNING 23. SECURE all work. When it is possible, use clamps or jigs to secure the workpiece. This is safer than attempting to hold the workpiece with your hands. 9. CHILDPROOF THE WORKSHOP AREA by removing switch keys, unplugging tools from the electrical receptacles, and using padlocks. 24. STAY ALERT, watch what you are doing, and use common sense when operating any machine. DO NOT operate any machine tool while tired or under the influence of drugs, alcohol, or medication. A moment of inattention while operating power tools may result in serious personal injury. 10. DO NOT use electrical tools in the presence of flammable liquids or gasses. 6 29. Information regarding the safe and proper operation of this tool is also available from the following sources: 25. USE ONLY recommended accessories. Use of incorrect or improper accessories could cause serious injury to the operator and cause damage to the machine. If in doubt, DO NOT use it. Power Tool Institute 1300 Summer Avenue Cleveland, OH 44115-2851 www.powertoolinstitute.org 26. If an extension cord is necessary, refer to the chart in the Grounding Instructions section to determine the minimum gauge for the extension cord. The extension cord must also contain a ground wire and plug pin. National Safety Council 1121 Spring Lake Drive Itasca, IL 60143-3201 27. Wear proper clothing, DO NOT wear loose clothing, gloves, neckties, or jewelry. These items can get caught in the machine during operations and pull the operator into the moving parts. Users must wear a protective cover on their hair, if the hair is long, to prevent it from contacting any moving parts. American National Standards Institute 25West 43rd. St, 4th Floor New York, NY. 10036 ANSI 01.1 Safety Requirements For Woodworking Machines WWW.ANSI.ORG 28. SAVE these instructions and refer to them frequently and use them to instruct other users. U.S. Department of Labor Regulations OSHA 1910.213 Regulations WWW.OSHA.GOV 7 PRODUCT SAFETY 10. USE accessories only recommended by Steel City. 1. Serious personal injury may occur if normal safety precautions are overlooked or ignored. Accidents are frequently caused by lack of familiarity or failure to pay attention. Obtain advice from supervisor, instructor, or another qualified individual who is familiar with this machine and its operations. 11. DO NOT pull the drill press by the power cord. NEVER allow the power cord to come in contact with sharp edges, hot surfaces, oil or grease. 12. DO NOT unplug the drill press by pulling on the power cord. ALWAYS grasp the plug, not the cord. 2. Every work area is different. Always consider safety first, as it applies to your work area. Use this machine with respect and caution. Failure to do so could result in serious personal injury and damage to the machine. 13. REPLACE a damaged cord immediately. DO NOT use a damaged cord or plug. DO NOT USE if the drill press is not operating properly, or has been damaged, left outdoors or has been in contact with water. 3. Prevent electrical shock. Follow all electrical and safety codes, including the National Electrical Code (NEC) and the Occupational Safety and Health Regulations (OSHA). All electrical connections and wiring should be made by qualified personnel only. ! 14. DO NOT use the drill press as a toy. DO NOT use near or around children. 15. CHECK all drill bits, cutting tools, sanding drums, or other accessories for damage before installing in the drill press chuck. Damaged items can cause damage to the drill press and or serious injury. WARNING 16. Before leaving the drill press, LOCK the ON/OFF switch with a padlock (not included) to prevent unauthorized use. 4. TO REDUCE the risk of electrical shock. DO NOT use this machine outdoors. DO NOT expose to rain or moisture. Store indoors in a dry area. 17. DO NOT install or use any drill bit that exceeds 7-inches in length or that extends 6-inches below the chuck jaws. The drill bit can suddenly bend or break. 18. DO NOT try to drill a workpiece that is too small to be securely held to the table or in a vise. 5. STOP using this machine, if at any time you experience difficulties in performing any operation. Contact your supervisor, instructor or machine service center immediately. 19. DO NOT operate this drill press until it is assembled and installed according to the instruction manual. 6. Safety decals are on this machine to warn and direct you to how to protect yourself or visitors from personal injury. These decals MUST be maintained so that they are legible. REPLACE decals that are not legible. 20. DO NOT leave the drill press plugged into the electrical outlet. Unplug the drill press from the outlet when not in use and before servicing, changing bits and cleaning. 21. DO NOT USE router bits, shaper cutters, circle (fly) cutters, rotary planers or wire wheels in this drill press. 7. DO NOT leave the unit plugged into the electrical outlet. Unplug the unit from the outlet when not in use and before servicing, performing maintenance tasks, or cleaning. 22. FOLLOW all electrical and safety codes, including the National Electric Code (NEC) and the Occupational Safety and Health Regulations (OSHA). All electrical connections and wiring should be made by qualified personnel only. 8. ALWAYS turn the power switch “OFF” before unplugging the drill press. ! WARNING 23. LET THE CHUCK REACH FULL SPEED before starting drill operations. 24. MAKE SURE there are no foreign objects, nails, stones in the workpiece. 9. DO NOT handle the plug or drill press with wet hands. 25. NEVER PERFORM LAYOUT, ASSEMBLY OR SETUP WORK on the table/work area when the drill press is running. 8 secured by a vise. Prevent the workpiece from rotating by clamping it to the table or by securing it against the drill press column. Loss of control of the workpiece can cause serious injury. 26. NEVER START THE DRILL PRESS BEFORE CLEARING THE TABLE OF ALL OBJECTS (tools, scrap pieces, etc.). Debris can be thrown at high speed. 34. SECURELY LOCK the head and table support to the column, and the table to the table support before operating the drill press. 27. NEVER START THE DRILL PRESS with the drill bit, cutting tool, or sanding drum against the workpiece. Loss of control of the workpiece can cause serious injury. 35. The drill press is designed for home use or light commercial duty ONLY. 28. OBTAIN ADVICE FROM YOUR SUPERVISOR, instructor, or another qualified person if you are not familiar with the operation of this drill press. 36. TO REDUCE THE RISK OF ELECTRICAL SHOCK, do not use outdoors. Do not expose to rain. Store indoors in a dry area. 29. PROPERLY SUPPORT long or wide workpiece and clamp to the table. 37. TURN THE DRILL PRESS OFF and unplug from power source. Wait for the drill bit, cutting tool, or sanding drum to come to a complete STOP before cleaning off the table/work area, removing or securing workpiece, or changing setup. 30. PROPERLY SECURE the drill bit, cutting tool, or sanding drum in the chuck before operating the drill press. 31. REPLACE a damaged cord immediately. DO NOT use a damaged cord or plug. 38. USE only drill bits, cutting tools, sanding drums, or other accessories with proper shank size recommended in this instruction manual. The wrong size shank can cause damage to the drill press and/or serious injury. 32. SECURE the drill press to the floor or work bench. Vibration can cause the drill press to slide, walk or tip over. Do not attach the drill press to a mobile base. 39. USE RECOMMENDED SPEEDS for all operations. Improper speeds may cause the machine to malfunction causing damage to the drill press and or serious injury. 33. SECURE the workpiece firmly against the table. Do not attempt to drill a workpiece that does not have a flat surface against the table, or that is not ELECTRICAL REQUIREMENTS TO PREVENT electrical shock, follow all electrical and safety codes, including the National Electrical Code (NEC) and the Occupational Safety and Health Regulations (OSHA). All electrical connections and wiring should be made by qualified personnel only. DO NOT connect the machine to the power source before you have completed the set up process. DO NOT connect the machine to the power source until instructed to do so. The motor supplied with the drill press is a 115 volt, single phase motor. The motor is wired from the factory for 115-volt operation. TO REDUCE the risk of electrical shock, DO NOT use machine outdoors. DO NOT expose to rain or moisture. Store indoors in a dry area. 9 GROUNDING INSTRUCTIONS ! EXTENSION CORDS WARNING ! WARNING This machine MUST BE GROUNDED while in use to protect the operator from electric shock. To reduce the risk of fire or electrical shock, use the proper gauge of extension cord. When using an extension cord, be sure to use one heavy enough to carry the current your machine will draw. In the event of a malfunction or breakdown, GROUNDING provides the path of least resistance for electric current and reduces the risk of electric shock. The plug MUST be plugged into a matching electrical receptacle that is properly installed and grounded in accordance with ALL local codes and ordinances. The smaller the gauge-number, the larger the diameter of the extension cord is. If in doubt of the proper size of an extension cord, use a shorter and thicker cord. An undersized cord will cause a drop in line voltage resulting in a loss of power and overheating. If a plug is provided with your machine DO NOT modify the plug. If it will not fit your electrical receptacle, have a qualified electrician install the proper connections to meet all electrical codes local and state. All connections must also adhere to all of OSHA mandates. ! IMPROPER ELECTRICAL CONNECTION of the equipment-grounding conductor can result in risk of electric shock. The conductor with the green insulation (with or without yellow stripes) is the equipment-grounding conductor. DO NOT connect the equipment-grounding conductor to a live terminal. USE ONLY a 3-wire extension cord that has a 3-prong grounding plug and a 3-pole receptacle that accepts the machine’s plug. If you are using an extension cord outdoors, be sure it is marked with the suffix “W-A” (“W” in Canada) to indicate that it is acceptable for outdoor use. Check with a qualified electrician or service personnel if you do not completely understand the grounding instructions, or if you are not sure the tool is properly grounded. Make certain the extension cord is properly sized, and in good electrical condition. Always replace a worn or damaged extension cord immediately or have it repaired by a qualified person before using it. PLUGS/RECEPTACLES ! CAUTION Protect your extension cords from sharp objects, excessive heat, and damp or wet areas. WARNING MINIMUM RECOMMENDED GAUGE FOR EXTENSION CORDS (AWG) 115 VOLT OPERATION ONLY 25’ LONG Electrocution or fire could result if this machine is not grounded properly or if the electrical configuration does not comply with local and state electrical codes. MAKE CERTAIN the machine is disconnected from power source before starting any electrical work. MAKE SURE the circuit breaker does not exceed the rating of the plug and receptacle. The motor supplied with your machine is a 115 volt motor. Never connect the green or ground wire to a live terminal. The machine should only be connected to an outlet having the same configuration as the plug. 10 50’ LONG 100’ LONG 0 to 6 Amps 18 AWG 16 AWG 16 AWG 6 to 10 Amps 18 AWG 16 AWG 14 AWG 10 to 12 Amps 16 AWG 16 AWG 14 AWG 12 to 15 Amps 14 AWG 12 AWG Not recommended B A E C D A. Drill press head and motor assembly B. Base C. Table D. Table bracket assembly E. Column 11 E D B A C F G H J I K A. Keyed chuck B. Chuck key C. Spindle adapter remover D. Hex head screws (4), flat washer (8), hex nuts (4) (accessory hardware) E. Table raise/lower handle F. Hand wheel spokes (3) G. Chuck arbor (#2 MT) H. Hex head screws (4) I. Hex wrenches (2) J. Speed adjusting handle K. Fixed wrench 12 ASSEMBLY ! 2. Loosen set screw (E) and remove ring (D) from the column. SEE FIG 7A. WARNING The drill press is a heavy machine; two people may be required for certain assembly operations. 3. Place Table Bracket Assembly (F) over top of column making sure the notch in the side of the bracket matches up with the rack (G). DO NOT assemble the drill press until you are sure the tool is unplugged from the power source. 4. Replace ring (D) and retighten set screw (E). DO NOT assemble the drill press until you are sure the power switch is in the “OFF” position. Fig. 8 For your own safety, DO NOT connect the drill press to the power source until the machine is completely assembled and you read and understand the entire User Manual. J COLUMN, BASE AND TABLE ASSEMBLY Fig. 7 I A H 5. Attach the table raising and lowering handle (H) on the worm gear shaft (I) and tighten the set screw (J) against the flat on the worm gear shaft. SEE FIG. 8. C B Fig. 9 1. Attach the column (A) to the base (B) using the four M10 x 40mm hex head screws (C). SEE FIG. 7. Fig. 7A L D E K F G 6. Thread the stud of the table lock handle (K) into the hole (L) in the rear of the table bracket. SEE FIG. 9. NOTE: On the table bracket, one hole is threaded and one is not. Insert the stud through the unthreaded hole and screw into the threaded hole. 13 C 2. 3. Align the drill press head with the table and base and tighten the two set screws (C) (with supplied Allen key). SEE FIG.12 . Install speed change handle (S) into hub (T). SEE FIG.11 FIG.13 X 4. A T S B 14 D Install the three handles (D) by screwing them clockwise into the hand wheel hub. Tighten flat part of shaft (X) with an open end wrench (not supplied). FASTENING DRILL PRESS 4. Before chuck and spindle installation, make certain that the spindle taper (E) and the tapered hole in the chuck (F) are clean and free of grease, lacquer, or rust preventive coating. SEE FIG. 14, page 14. Fig.17 Fig.15 H G I 5. Open the chuck jaws completely. Make sure the jaws are completely recessed inside the chuck. 6. Seat the chuck onto the drill press spindle as far as it will go by placing a wooden block (G) under the chuck (H) and tap the block up with a hammer (I). SEE FIG. 15. Important: DO NOT tap the chuck directly with a metal hammer. A A A A To keep the drill press from tipping, sliding, or walking, it can be fastened to the floor surface. The machine base has four holes (A) at the center of the base where it can be fastened to the floor. SEE FIG. 17. NOTE: Bolts, nuts and washers supplied. SEE page 12 (D). 15 ADJUSTMENTS ! 4. The table (E) can be rotated 360 degrees by loosening the table rotation lock handle (D) and rotating the table to the desired position, then tighten the handle. WARNING MAKE CERTAIN that the drill press is disconnected from the power source. NOTE: For thru-drilling operations, make sure the table center hole is aligned with the drill bit. ADJUSTING TABLE Fig. 20 1. To raise or lower work table on the column (A), loosen lock handle (B). SEE FIG. 18. Fig. 18 A F G B 5. The table can be tilted right or left by loosening the 5/8-11 x 1-1/2" table locking bolt (F), then removing the table alignment pin (G). SEE FIG. 20. 6. The table can now be tilted to the desired angle. Retighten the table locking bolt. 2. Turn the table raising/lowering handle (C) clockwise to raise the table and counter-clockwise to lower the table. SEE FIG. 19. Fig. 21 3. After the table is at the desired height, tighten the table height lock handle (B) in Fig. 18. Fig. 19 H E I D 7. A tilt scale (H) is provided on the table bracket casting to indicate the degree of tilt. A witness line (I) is provided on the table to align with the tilt scale. SEE FIG. 21. C 8. NOTE: When the table is returned to the level position, replace the table alignment pin. This will position the table surface 90 degrees to the spindle. The table locking bolt then must be tightened. NOTE: Always raise (rather than lower) the table to the final position to allow the gears to mesh and prevent slippage. 16 DRILLING HOLES TO DEPTH ADJUSTING RETURN SPRING MAKE CERTAIN the drill press is disconnected from the power source. The drill chuck will automatically return slowly to its original position when the handle is released. The return spring was properly adjusted at the factory. However, to adjust, if necessary: Fig.22 NOTE: Use hand on handle to return to position. Failure to do so may break spring. C MAKE CERTAIN the drill press is disconnected from the power source. B Fig.23 A E 1. Insert the drill bit into chuck, using the chuck key provided, and tighten. D 2. Place the workpiece on the drill press table. Raise the drill press table until the workpiece is 1/8-in.from the drill bit. C B NOTE: Make sure the workpiece is secured to the table properly. A 1. Loosen both nuts (A) and (B). Make sure that the spring housing (C) remains engaged with head casting (D). SEE FIG. 23. 3. Turn the depth stop (C) on the threaded depth scale (B) until the bottom of the stop is aligned with the dimension you want to drill on the scale. SEE FIG. 22. 2. While firmly holding the spring housing (C) pull the spring housing out and rotate it (counter-clockwise to increase or clockwise to decrease the spring tension) until the tab (E) is engaged with the next notch on the spring housing. 4. To quickly move the depth stop, press in on the quick release button (A) and move the depth stop up or down the depth scale. When at desired depth, release button (A). IMPORTANT: Because the return spring is under tension, it will want to unwind (clockwise). Make sure you have a firm hold of the spring housing before pulling it out. 5. Drill a test hole to check the depth. 3. Turn the nut (B) until it contacts the spring housing (C), then back the nut (B) out 1/4 turn from the spring housing (C). Tighten the nut (A) against the nut (B) to lock the nuts from turning. IMPORTANT: The inside nut should not contact spring housing when tightened. 17 INSTALLING AND REMOVING DRILL BITS REMOVING THE CHUCK AND SPINDLE MAKE CERTAIN the drill press is disconnected from the power source. MAKE CERTAIN the drill press is disconnected from the power source. Fig.24 1. Remove drill bit from the chuck. 2. Lower the quill and lock it in place using the quill locking handle. 3. Rotate the chuck and spindle assembly by hand until the two holes in the side of the quill and the spindle align. SEE FIG. 24A. A Fig.24A B A 1. Turn the upper barrel (A) to open the chuck jaws slightly larger than the diameter of the drill bit. SEE FIG. 24. 2. Insert the smooth end of drill bit in the chuck as far as it will go, then back the bit out 1/16” (or up to the beginning of the drill bit flutes). 3. Center the drill bit in the chuck before tightening the chuck. Using the supplied chuck key, insert key into one of the holes on lower barrel (B), securely tighten the bit in chuck and remove chuck key. Repeat on other 2 holes. B NEVER run drill press to install or tighten a drill bit or cutter in the keyed chuck. 4. Place flat piece of wood 1” under chuck to prevent damage. Make sure that the drill bit or accessory is properly secured and chuck key is removed before starting the Drill press. 5. Insert the tapered end of the spindle adapter remover (B) into the hole (A) with the flat part towards the top. 6. Using a mallet or hammer drive the spindle adapter remover into the quill. NOTE: The chuck will drop out of the quill; be prepared to catch it. 18 DRILL SPEED ADJUSTING THE SPLIT HEAD CASTING Make certain the drill press is turned on when shifting speeds. Fig 24C (A) using the speed handle. MAKE CERTAIN the drill press is disconnected from the power source. Your drill press has 5 reference speed locations, (500, 1000, 1500, 2000 and 2500 RPM). SEE FIG.24C (B). These are not fixed speeds and all selections must be locked in place using lock handle on opposite side of the head. SEE FIG 24D (C). NOTE: The Head Casting and quill have been adjusted at the factory to give the quill the proper sliding fit in the head casting. However over time “play” between the quill and head casting may develop. To adjust: 1. Loosen the lock nut (A) on the left side of the head casting. SEE FIG 24B. Fig.24C Fig.24B B B A Fig.24D A B C 2. Using a hex wrench slightly tighten the adjusting screw (B) on the right side of the head casting. 3. Rise and lower the quill several times to make sure that the quill does not bind. 4. Retighten the lock nut (A). 19 OPERATIONS ! SUPPORTING WORKPIECE WARNING DO NOT expose the drill press to rain or operate the in damp locations. ! WARNING CHILDPROOF THE WORKSHOP AREA by removing switch keys, unplugging tools from the electrical receptacles, and using padlocks to lock out the switch. IMPORTANT: When the workpiece (A) is long enough, position it on the table with one end against the left side of the column (B) to prevent the workpiece from rotating. If it is not possible to support the workpiece against the column, clamp the workpiece to the table. A vise can be used to secure a small workpiece that is too small to be clamped to the table. The vise must be secured to the table to keep it from rotating. If you are using a backup board, it must also be properly supported or clamped. SEE FIG. 27. Fig. 25 Fig. 27 MAKE SURE all parts have been assembled correctly and are in working order. SWITCH OPERATION ! WARNING A B B B A B 1. The ON/OFF switch is located on the front of the drill press head. CORRECT DRILLING SPEEDS 2. To turn the Drill Press “ON”, press the green START button (A) in one-half inch. Note: There is a safety feature on the switch to insure that the switch must be completely pressed before the motor will start. SEE FIG. 25. Factors that determine the correct drilling speed are: the type and density of the workpiece, the size of the hole, the type and size of drill bit or other cutter, and the quality of cut desired. 3. To turn the Drill Press “OFF”, press the large red OFF paddle (B) or lift the paddle and press directly on the red “OFF” button. NOTE: Refer to recommended drill press speeds on page 22. 4. When the Drill Press is not in use, the “START” button should be locked so that it cannot be started. 5. A padlock with a long hasp can be purchased. It then can be placed through the holes in the sides of the “START” button and locked, thus preventing unauthorized use. 6. To use the Drill Press, unlock and remove the padlock from the “START” button. 20 ! DRILLING METAL WARNING ALWAYS use the recommended speed for the drill bit and workpiece. ! WARNING NEVER hold the workpiece in your bare hands. ALWAYS use clamps or vises to hold your workpiece. DRILLING WOOD Twist drill bits should only be used in drilling metals. Never hold the workpiece in your bare hands; always use clamps or vises. The drill bit may seize the work at any time, especially when breaking through the workpiece. If the workpiece is whirled out of the operator’s hand, the operator may be injured. The drill bit can also be broken if the workpiece strikes the column. Twist drill bits, usually intended for metal drilling, can also be used for boring holes in wood. However, Brad point or Forstner bits are generally preferred for working in wood. These bits cut a flat bottom hole and are designed for removal of wood chips. Do not use hand bits which have a screw tip or auger bits. At drill press speeds, they can lift and rotate the workpiece. The workpiece must be clamped or securely held in a vise while drilling. Any tilting, twisting, or shifting results not only in a rough hole, but also increases the likelihood of drill bit breakage. For flat work, lay the workpiece on a wooden base and clamp it firmly down against the table to prevent it from turning. If the workpiece is of irregular shape and cannot be laid flat on the table, it should be securely blocked and clamped. For through boring, align the table so that the bit will go through the center hole. Scribe a vertical line on the front of the column and a matching mark on the table bracket and the drill press head, so that the table and drill press head can be clamped in the center position at any height. Feed the bit slowly when it is close to cutting through the wood to prevent splintering the bottom face. Use a scrap piece of wood as backup under the workpiece. This helps to reduce splintering and protects the point of the bit. When drilling metal, it will be necessary to lubricate the tip of the drill bit with oil to prevent it from overheating. DRILLING OPERATION Use a center punch to dent the workpiece where you want the hole. This will keep the bit from walking when you start the drill operation. Make sure the workpiece is properly supported or secured to the table. For thrudrilling, make sure the table center hole is aligned with the drill bit. Turn the drill press ON and start to feed the drill chuck down with the feed handles. FEEDING TOO RAPIDLY may cause the belt or drill bit to slip or break, the motor to stall, the workpiece to pull loose from the table. Never try to rush your work; allow the drill press to work smoothly. See Drill Speed Chart on page 22. 21 22 MAINTENANCE LUBRICATION CLEANING Turn the power switch OFF and unplug the power cord from its power source. With the drill press unplugged, blow off motor with lowpressure air to remove dust or dirt. Air pressure above 50 P. S. I. should not be used as high-pressured air may damage insulation. The operator should always wear eye protection when using compressed air. The drill press has sealed lubricated bearings in the motor housing that do not require any additional lubrication from the operator. Do not use a shop vacuum to clean metal shavings. The metal shavings can cause an explosion or fire. ! WARNING Do not allow chips and dust to accumulate under drill press. Keep area clean and in safe order. The quill and spindle assemblies should be periodically lubricated. Lower the quill assembly and squirt or wipe a thin film of lightweight machine oil on the entire surface. Place a few drops of light machine oil down the spindle assembly. Raise and lower the quill several times to distribute the oil evenly. ! WARNING DO NOT USE FLAMMABLE MATERIALS to clean the drill press. After cleaning, apply a good quality paste wax to any unpainted surfaces. Make sure to buff out the wax before operation. ! WARNING ONLY trained personnel should perform repairs to the drill press. Unauthorized repairs or replacement with non-factory parts could cause serious injury to the operator and damage to the drill press. 23 TROUBLESHOOTING GUIDE TO PREVENT INJURY TO YOURSELF or damage to the drill press, turn the switch to the OFF position and unplug the power cord from the electrical receptacle before making any adjustments. PROBLEM Motor does not start or does not come up to full speed LIKELY CAUSE(S) SOLUTION 1. START button not completely depressed. 1. Push green START button in fully (1/2 inch). 2. Defective switch. 2. Have switch replaced. 3. Defective capacitor. 3. Have capacitor replaced. 4. Low line voltage. 4. Correct low line voltage condition. If machine is plugged into an extension cord, disconnect and plug directly into wall outlet. 5. Defective motor. 5. Have motor replaced. NOTE: #2, #3, #4, and #5 must be done by a qualified service technician. Motor stalls or circuit breakers open frequently 1. Circuit overload. 1. Reduce circuit load (turn off other appliances). 2. Low line voltage. 2. Correct low line voltage condition. Check line voltage with a multi-meter. If the machine is plugged into an extension cord, unplug it from the extension cord and plug directly to the wall outlet. 3. Motor overload. 3. Reduce load on motor, slow down feed rate. 4. Incorrect fuses on circuit breakers. 4. Have correct fuses on circuit breakers installed by a qualified electrician. 5. Short circuit in motor; loose connections 5. Inspect terminals in motor for damaged insulation and or worn insulation on lead wires. shorted wires and have them replaced. Check all power lead connections. Motor running too hot 1. Restricted air circulation due to dust accumulation. 1. Clean dust and restore normal air circulation around motor. 2. Motor overload. 2. Reduce load on motor, slow down feed rate. 1. Belt is incorrectly tensioned. 1. Adjust belt tension. See changing speeds and adjusting belt tension in “OPERATIONS AND ADJUSTMENTS”. 2. Drill bit is not securely tightened in chuck. 2. Install drill bit properly. See installing and removing drill bit in “OPERATIONS AND ADJUSTMENTS”. 1. Incorrect spindle speed. 1. Reduce spindle speed. See speed diagram on the underside of the belt cover. 2. Chips not exiting out of drill hole. 2. Retract drill bit frequently during drilling operation to clear chips from hole. 3. Dull drill bit. 3. Replace or sharpen drill bit. Excessive drill bit runout or wobble 1. Bent drill bit. 1. Replace with a straight or new drill bit. 2. Drill bit not properly installed in chuck. 2. Install drill bit properly. See installing and removing drill bit in “OPERATIONS AND ADJUSTMENTS”. Spindle returns too slow or too fast 1. Return spring has incorrect tension. 1. Adjust spring tension. See adjusting spindle return spring in “OPERATIONS AND ADJUSTMENTS”. Chuck will not stay onto spindle 1. Grease, dirt or oil on spindle taper or in chuck taper. 1. Clean grease, dirt or oil off of spindle taper and chuck taper. See drill press head and motor assembly in “ASSEMBLY INSTRUCTIONS”. Drill bit stalls or slips Drill bit or material smokes or burns 24 DATE MAINTENANCE PERFORMED REPLACEMENT COMPONENTS REQUIRED DATE MAINTENANCE PERFORMED REPLACEMENT COMPONENTS REQUIRED ® STEEL CITY TOOL WORKS www.steelcitytoolworks.com 1-877-SC4-TOOL (1-877-724-8665) NOTES www.steelcitytoolworks.com Steel City Tool Works, LLC Bolingbrook, IL. USA 60440 Tech Service: 1.877.724.8665