1
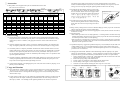
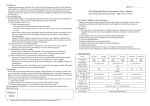
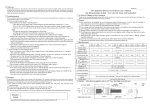
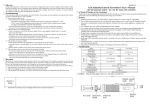
□ Accessories not indicate torque output. Actual torque can only be determined with a torque testing machine or hand-held spanner torque tester.) If you have difficulty removing screws (reverse setting), increase torque by turning the regulating handle clockwise into the casing. This product comes supplied with a pair off carbon brushes and two bits. Bits (one set per screwdriver) 1/4" hex double end shank 1/4" hex shank Bit specifications ψ4.0 ψ5.0 Tip No Tip diameter D P# Tip diameter D #00 ψ1.7 #00 ψ2.0 #0 #1 1/4" Hex shank 1/4Hex double end shank Tip diameter D P# 7W1202 #00 ψ1.7 7W6204 AS-1631 7W1402 #00 ψ2.0 7W6404 AS-1632 ψ2.5 7W1522 #0 ψ2.5 7W6524 AS-2631 ψ4.0 7W1742 #1 ψ3.0 7W6644 P# Tip No. Tip diameter D Available Screwdriver Model Tip No. Tip No. P# AS-2632 #1 ψ3.0 7W3644 #1 ψ3.0 7W6644 #1 ψ6.35 7W7147 AS-3631 #2 ψ5.0 7W3864 #2 ψ4.5 7W6764 #2 ψ6.35 7W7167 AS-3632 #1 ψ3.0 7W3644 #1 ψ3.0 7W6644 #1 ψ6.35 7W7147 AS-4631 #2 ψ5.0 7W3864 #2 ψ6.0 7W6964 #2 ψ6.35 7W7167 AS-4632/S #1 ψ5.0 7W3844 #1 ψ4.5 7W6744 #2 ψ6.35 7W7167 AS-6631 #2 ψ5.0 7W3864 #2 ψ6.0 7W6964 #2 ψ6.35 7W7167 AS-6632 □ Before Using Check voltage: Please read the label on the product exterior and the manual thoroughly before using the screwdriver, and make especially sure to correctly determine the screwdriver’s voltage requirement (115VAC or 230VAC). Only plug the screwdriver into an outlet with the correct voltage. Check for suitable torque range: Choose a screwdriver model that matches your required torque range. To lengthen product life, avoid using screwdrivers at maximum torque over long periods. Check that product is completely assembled: Check that the carbon maintance bonnet is closed tightly. If the bonnet or spring connector have com loose, the motor will automatically cut off-the screwdriver will operate only after the have been correctly reassembled. If the power cord is in any way damaged, unplug the screwdriver immediately and exchange it for a new product in order to protect against short circuit. Check the workplace: Although this product features dual insulation, to ensure safety do not use it in damp or high-temperature environments, or near flammable materials. Keep the power cord away from tools and equipment that might damage or melt it. Caution: When plugging in or unplugging the power cord, make sure to hold it by the plug. Never pull the power cord forcibly. □ Usage and Cautions Inserting the bit: Push the bit slide sleeve down with your finger and insert a suitable bit. When the bit slide sleeve is released, the bit will become engaged. If the bit slide sleeve can not homing, please pull out the bit .Count!-please change the 3 band switch( forward & reverse switch) to middle band, and don't beat or force to pull out when inserting bit. Inserting and removing single-or double-ended 1/4" hex bits: Inserting the bit and arrive bottom, then push the bit slide sleeve down with your finger, the will be flip out. Hang securely: During use the screwdriver should be hung up securely to prevent it from failing, and also to protect the power cord from sudden pulls. Starting and stopping the motor: Press the trigger(power switch) down to start the screwdriver, And release it to stop. Important points: If the clutch slips when screws are fully tightened (i.c. Clicking sound is not heard when torque is reached) immediately release the trigger (power switch) to prevent the motor from burning out (due to continued power flow while it is not operating). If the screwdriver is operating for a long period, or if excessive current surges are experienced, the screwdriver may overheat. In this case it will switch off automatically. When the heat has dispersed, normal operation can resume. Operational frequency: suggest the operational frequency 1/4”(ON/OFF)second, the total screws 7000pcs/8hours, don’t over our operational frequency suggest, and avoid the inside part of screwdriver serious damage. If everyday work 8hours upward, please use two screwdriver by turns, protect the life of screwdrivers. Changing the carbon brush: When the carbon brush change indicator lights up (red), please Change it as described below. (Caution!-Always unplug the screwdriver before changing the brush. Only use the factory-specification brushes provided with the screwdriver as replacements.) 1. Insert a slotted bit with a 3.0mm wide, 1.0mm thick head in the slot on the side of the carbon maintance bonnet and lever it up. Open the bonnet. 2. Remove the spring resting on the carbon brush. 3. Lift the copper wire attached to carbon brush, and pull the brush out. 4. Pull out the tip of the copper wire and complete the removal. 5. Insert the new carbon brush, following the above steps in reverse order. Guide for carbon brush replacement STEP 1 Screw and unscrew settings: To drive a screw, set the forward/reverse switch to the FWD position. To remove a screw, set the switch to the REV position (Caution! --- Never change the switch position when the motor is running! Release the trigger (power switch) and change the position after the motor stops.) Lever up Torque setting: Set the torque level by rotating the regulating handle. Turning it clockwise into the Position A casing will increase the torque, and turning it counterclockwise out of the casing will decrease the torque. (Caution!-The markings on the regulating handle are for reference only and do Push bit slide sleeve in STEP 2 STEP 3 Pull out remove VIEW OF POSITION A Guide for 3P plug-in STEP 4 Pull out guide notch convex point 3P plug receptacle (screwdriver side)