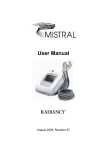
Download Mistral (4T) User Manual
Transcript
Mistral (4T) User Manual August 2011, Revision A08 Mistral (4T) User Manual August 2011, Revision A08 © 2007-2011 Radiancy Inc. All right reserved. Mistral(4T) User Manual, August 2011. Part Number: 2011580. Revision A08 Note: The information in this document is confidential and proprietary. It is provided to customers and authorized representatives of Radiancy only. The content of this manual is furnished for informational use only, is subject to change without notice and should not be construed as a commitment by Radiancy Inc. ® LHE is a registered trademark of Radiancy Inc. in the United States and/or in other countries. The Quality Management System of Radiancy Ltd. complies with the Quality Management Standard ISO 13485-2003. Manufacturer: 40 Ramland Road, Orangeburg, NY 10962 www.radiancy.com Authorized European Representative: Obelis S.A,, Av. de Tervuren 34 Bte .44, B-1040 Brussels, Belgium. Tel: 32 (0) 2 732 5954, Fax: 32 (0) 2 732 6003, GSM 07545 4660, e-mail: [email protected] DEKRA Notified Body. Contact Information Customer satisfaction is a Radiancy priority. To help us in providing you with the best possible product and support, please send us your comments and suggestions. Contact us at the addresses and telephone numbers below: US Radiancy Inc. 40 Ramland Road South, Suite 200 Orangeburg, NY 10962 USA Toll Free: 888 661-2220 Tel: +1 845 398-1647 Fax: +1 845 398-1648 E-mail: [email protected] ii Table of Contents 1 INTRODUCTION TO THE SYSTEM 1. 2 SYSTEM DESCRIPTION 2. 2.1. SYSTEM COMPONENTS AND CONTROLS: ............................................................ 2 2.2. MAJOR PRECAUTIONS & WARNINGS .................................................................. 7 14 INITIAL SET UP 3. 3.1. UNPACKING M ISTRAL(4T) ................................................................................. 14 3.2. E LECTRICAL REQUIREMENTS ............................................................................. 14 ................................ 15 .... ................................................................ 17 4.1. 3.3. OPERATION AND TREATMENT PROTOCOLS 4. GENERAL GUIDELINES FOR THE OPERATION OF M ISTRAL(4T) .......................... 17 .............................. 21................................ USING THE TOUCH SCREEN COMPUTER 4.2. PRE-TREATMENT CONSIDERATIONS 4.3. PRE-TREATMENT PREPARATIONS 4.4. SKIN PHOTO REJUVENATION 4.5. HAIR REMOVAL 4.6. ACNE TREATMENT 4.7. ................................ 39 ... ................................ ................................ ....... 40 ................................ ................................ .............. 44 ................................ ................................ 51.. ................................................................ ............................. 60 ................................................................ 65 5.1. INSTALLATION MAINTENANCE 5. CLEANING INSTRUCTIONS .................................................................................. 65 .................... ................................ 67 ................................ PARTS & ATTACHMENTS 5.2. 69 ADVERSE EVENTS REPORT FORM 6. 72 TROUBLESHOOTING 7. 73 MISTRAL(4T) SERVICE 8. 74 WARRANTY 9. iii List of Figures Figure 1: Mistral(4T) Main System ........................................................ 2 Figure 2: Front Panel ............................................................................. 3 Figure 3: Back Panel ............................................................................. 3 Figure 4: Right Side Panel .................................................................... 4 Figure 5: Handpiece .............................................................................. 4 Table 1: Handpiece Color Identification ................................................ 5 Figure 6: Footswitch .............................................................................. 5 Table 2: Technical Specifications ......................................................... 6 Table 3: International Standards Labels ............................................. 10 Table 4: Additional Labels ................................................................ 11 ........................ ................................ 16 Figure 7: Handpiece Connection ................................ 20 ... ................................ Figure 8 - Pulse Counters ................................ 22 .... ................................ Figure 9: Password Entry ................................ ........ 22 ................................ ............................. 23 ................................ ................................ ..... 23 ................................ Figure 10: Home Page Figure 11: Tutorial/Help Page Figure 12: Settings Page ................................ ....... 26 ................................ Figure 13: Test Mode 1 ................................ ....... 26 ................................ Figure 14: Test Mode 2 ................................ ....... 27 ................................ Figure 15: Test Mode 3 ................................ ....... 27 ................................ Figure 16: Test Mode 4 ........................ ................................ 28 ........................... ................................ 29 ..................... ................................ 31 Figure 17: DT Select Application Figure 18: DT Treatment Page Figure 19: HR DT Treatment Page ............................. 32 ................................ Figure 20: DB Patient Search .............................. 33................................ Figure 21: DB Patient Details ............................. 34 ................................ Figure 22: DB Clinical History ............................. 35 ................................ Figure 23: DB Treatment Log ................................ 36.. ................................ iv Figure 24: DB Edit Record ........................ ................................ 37 Figure 25: DB Select Application ................................ .......... 37 Table 5: Data Base Application Selection .......................... ................................ 38 Figure 26: DB Treatment Mode .................. ................................ 39 Figure 27: DB Save Treatment Data .................... ................................ 47 Table 6: Energy Level Setting - SR ................ 48 Table 7: Required Results for Appropriate Energy Setting .................... ................................ 54 ............................... 58. Table 8: Energy Level Setting - HR Table 9: Treatment Course Recommendations .................. ................................ 63 Table 10: Energy Level Setting - AC .............................. 65................................ Figure 29: The cleaning tool ................ ................................ 66 Figure 30: Preparing the cleaning tool .............................. 66................................ Figure 31: Cleaning the lamp ........................ ................................ 66 Figure 32: Cleaning the reflector ................................ ...... 67 ................................ ................................ 68 .... ................................ Figure 33: Area Adaptor Figure 34: Fuse Location List of Tables Table 1: Handpiece Color Identification ................................................ 5 Table 2: Technical Specifications ......................................................... 6 Table 3: International Standards Labels ............................................. 10 Table 4: Additional Labels ................................................................ 11 ................................ .......... 37 Table 5: Data Base Application Selection .................... ................................ 47 ................ 48 Table 6: Energy Level Setting - SR Table 7: Required Results for Appropriate Energy Setting .................... ................................ 54 ............................... 58. .................. ................................ 63 Table 8: Energy Level Setting - HR Table 9: Treatment Course Recommendations Table 10: Energy Level Setting - AC v 1. INTRODUCTION TO THE SYSTEM Mistral(4T) is a Light and Heat Energy (LHE®) based multi-application device for the treatment of: Hair Removal (HR) Skin Photo Rejuvenation (SR) (skin texture, fine lines) Acne Clearance (AC) Mistral(4T) consists of a console, a Footswitch, and up to 8 interchangeable Handpieces. Each Handpiece contains a pulse switch, a ready indicator light and an application specific lamp. The Handpiece is held by the operator and placed directly upon the treatment area. In this manual, the term operator applies to all qualified personnel trained to operate the Mistral(4T) system. Important Note – The Mistral user manual is meant as a starting point for treatment, a reference guide of general recommendations. As you gain more experience with the device, you may use your personal expertise to better individualize treatment parameters. 1Mistral User Manual 2. SYSTEM DESCRIPTION This chapter provides a detailed description of the Mistral(4T) system; its main components, controls, and technical specifications. Please review this material to familiarize yourself with controls, ports and connectors, as well as the consumable items used during treatment. 2.1. System Components and Controls: The Mistral(4T) system consists of the following main components (Figure 1): System console (main unit) Interchangeable handpieces Footswitch Handpieces Console Figure 1: Mistral(4T) Main System 2 Revision A08, August 2011 CHAPTER 2 2.1.1. Main Unit (System Console) The main unit controls the operation of the entire system. Front Panel: The front panel includes: Computer Interface / LCD Touch Screen USB Ports On/Off Switch Emergency Stop Switch Emergency Stop Button LCD Touchscreen USB Ports Power Switch Figure 2: Front Panel Back Panel: Power inlet Main power switch Fuse drawer Handpiece cradle Footswitch port System fan Air exhaust port System Fan Handpiece Cradle Power Switch Air Exhaust Port Fuse Drawer Figure 3: Back Panel Power Inlet 3Mistral User Manual SYSTEM DESCRIPTION Right Side Panel: The Handpiece power and air connections. Connected Handpiece Handpiece Connections Figure 4: Right Side Panel 2.1.2. Handpieces The Handpieces are connected to the main unit by a spiral cable containing electrical wiring and an air suction hose. The Handpiece consists of an application specific lamp, pulse switch and pulse counter. When not in use, the Handpiece should be stored in its cradle on the right side of the main unit. The main unit will automatically detect the type of handpieces attached to the unit and configure itself to conform to the attached handpieces. Warning: Always make sure the handpiece is secure. Do not Pulse Switch drop. This may cause damage to the lamp and handpiece. Green Ready Indicator Lights Pulse Switch LHE Lamp Figure 5: Handpiece 4 Revision A08, August 2011 CHAPTER 2 Each handpiece is color coded for easy identifications. Please refer to Table 1. Table 1: Handpiece Color Identification Handpiece Color Hair Removal Hair Removal V-VI Hair Removal (XL Spot Size) Hair Removal V-VI (XL Spot Size) Skin Photo Rejuvenation Acne Clearance When handpieces are not in use or attached to the device, store them in their cases to prevent damage. 2.1.3. Footswitch The footswitch arrives connected to the main unit. The system will emit a pulse only if the footswitch and handpiece buttons are pressed simultaneously. Figure 6: Footswitch 5Mistral User Manual SYSTEM DESCRIPTION 2.1.4. Technical Information Table 2: Technical Specifications Technical Specifications Light Source Technology Light & Heat Energy (LHE ®) Wavelength Range Hair Removal 400-1200 nm Hair Removal V-VI (optional) 550-1200 nm Skin Photo Rejuvenation 400-1200 nm Acne Clearance (optional) 430-1100 nm Fluence 4-25 J/cm2 Pulse Duration Up to 75 secs. Spot Size Basic 25 x 50 mm Adaptor Sizes 13 x 50 mm 13 x 35 mm 13 x 12 mm XL HR (optional) 35 x 50 mm Pulse Generation Method Capacitor bank electrical discharge switch Physical Dimensions 40 x 47 x 32 cm (w/d/h) 15.8 x 18.5 x 12.6 in. (w/d/h) 16.8 kg./37 lbs. Single phase 100-120 VAC ±10%, 10A, 50-60 Hz Single phase 220-240 VAC ±10%, 8A, 50-60 Hz Weight Electrical Requirements Operation Conditions Temperature 5º-30º C Humidity 30%-80% RH Transport & Storage Temperature -20º- 80º C Humidity 0%-95% RH; 0.1-1.5 atm. 2.1.5. Safety Features Many of the Mistral(4T) features were built-in to help insure the safety of the user and patient. The following are a few examples: 6 Revision A08, August 2011 CHAPTER 2 “Ready” indicator lights on the console and handpiece advice the user when the system is charging or ready to emit a pulse. Emergency Stop Button The Footswitch prevents accidental pulses. An internal and independent safety electronic circuit shuts down pulse flashing ability in the event of a disabled blower. 2.2. Major Precautions & Warnings 2.2.1. Precautions Verify that Mistral(4T)'s nominal voltage (see label at the bottom of the system console) conforms to the electrical voltage of your electrical outlet. Make sure that the electrical outlet has proper grounding. Do not open Mistral(4T)’s outer case as dangerous voltages are present inside the system. Only Radiancy certified personnel are authorized to perform service within the protective covers of Mistral(4T). To perform routine maintenance always shut down the system, disconnect power and wait a minimum of 5 minutes. Performing maintenance procedures while the system is connected, or less than 5 minutes from disconnection may be hazardous to the operator and destructive to the system. Never use any flammable substance such as acetone or alcohol on the skin prior to treatment. Never use flammable substances or harsh chemicals to clean or disinfect any part of the Mistral(4T) system. 7Mistral User Manual SYSTEM DESCRIPTION Always make sure to completely lift the Handpiece off the patient’s skin between pulses in order to avoid excessive heating of the handpiece or skin. When the Handpiece is replaced, repeat testing procedures for each patient during the first 500 pulses. 2.2.2. Warnings Verify that all safety measures are working properly to ensure proper safety. Delivering excessive energy to the treatment site may cause thermal damage to the skin, resulting in burns, crusting, or abnormal pigmentation. As a safety precaution, always have a first aid kit equipped to treat burns at your disposal. Operator should wear safety goggles when operating the device. Although Mistral(4T) is considered an “eye-safe” device when operated according to instructions, supplying patients with protective eyewear during facial treatment will provide extra protection against discomfort from light exposure. Never look directly at the light coming from the handpiece as this may cause temporary eye discomfort. The ST application emits infrared light which is invisible to the naked eye. Do not allow the lamp to emit a pulse into free-space or look into it as it is emitting a pulse sequence. Looking away during the flash will further prevent discomfort. Never allow the Handpiece to emit a pulse into ‘free space’. Always make sure that the Handpiece is pointed at and in full contact with the skin during treatment. 8 Revision A08, August 2011 CHAPTER 2 Even when the Energy level on touch screen is set at “0”, the system can still trigger a pulse. Therefore be aware of the position of the Handpiece at all times to avoid accidental flashing. Always remain in visual contact with the computer screen to ensure that the established energy is the correct "working energy" setting. Pigmented moles and beauty spots and any suspicious (abnormal) pigmented lesion should be covered with a nonflammable white sticker. 2.2.3. Labels This section describes the labels affixed to Mistral(4T). It is recommended that users review the meaning of these labels for everyday use and in case any details are needed for service. The table below briefly reviews a number of the internationally recognized symbols that are found on the Mistral(4T) main unit and it’s external 9Mistral User Manual SYSTEM DESCRIPTION Table 3: International Standards Labels Symbol Meaning Comments Attention, consult accompanying documents before use Attention, consult accompanying documents before use Manufacturer Authorized representative in the European community Degree of protection against electric shock: Type BF applied part CE mark represents the compliance to the European Medical Device Directive 93/42/EEC, Class IIa device. The number (0344) is of the notifying body, DEKRA Notified Body. Protect the environment by not disposing of this product with household waste (2002/96/E). Check your local authority for recycling advice and facilities (Europe only). Voltage sticker Appears on outer package The C-Tick mark represents compliance to Australian EMC Regulations. Additional stickers found on the main unit and the handpieces include serial numbers of system parts and usage warnings. 10 Revision A08, August 2011 CHAPTER 2 Table 4: Additional Labels Label Location and Comments Located on the back of the system this label includes manufacturer details, voltage information, and the system’s serial number. Located on Mistral(4T) Handpieces HR Handpieces: Basic and optional XL HR V-VI Handpiece (optional): Basic and XL SR Handpiece AC Handpiece (optional) PSOR Handpiece (optional) ST Handpiece (optional) 11Mistral User Manual SYSTEM DESCRIPTION Label Location and Comments On rear panel, above power inlet. On 100120V systems, and on 220-240V systems, respectively. On rear panel. This warning appears on all handpieces, next to opening. 12 Revision A08, August 2011 CHAPTER 2 2.2.4. International Standards Compliance The Mistral(4T) complies with the following international standards and directives: EMC Standards: IEC 60601-1-2:2001 + A1:2004 Clause 36.201 (Emission); Clause 36.202 (Immunity); Harmonized Standards: Medical Electrical Equipment – Part 1: General Requirements for Safety: IEC60601-1:1988 + A1:1991 + A2: 1995 EU Directives: - Low Voltage Directive 2006/95/EC - Electromagnetic Compatibility Directive 2004/108/EC - Medical Device Directive 93/42/EEC – Class IIa device marked as CE 0344 of the DEKRA Notified Body (only for the Acne Clearance Care applications) 13Mistral User Manual 3. INITIAL SET UP 3.1. Unpacking Mistral(4T) The Mistral(4T) system is supplied with the following components: Main Unit (console) 1 HR Standard Handpiece 1 SR Standard Handpiece Optional Handpieces AC Handpiece HR XL Handpiece HR Sensitive Handpiece HR Sensitive XL Handpiece Client Safety Goggles 3 Area Adaptors 2 Packs of Hygienic Rings (10 hygienic rings per pack) Footswitch Power Cable User Manual 2 Fuses Treatment Coat Touch Screen Stylus 3.2. Electrical Requirements Before unpacking Mistral(4T), make sure the work site meets the following electrical requirements. Mistral(4T) requires a separate single phase supply line with nominal voltage (according to the local line voltage): 14 Single phase 100-120 VAC ±10%, 10A, 50-60 Hz; or Single phase 220-240 VAC ±10%, 8A, 50-60 Hz Revision A08, August 2011 INITIAL SET UP Mistral(4T) is grounded via the grounding conductor in the power cable that is plugged into the wall power outlet. Good grounding is essential for safe operation of the device. It is recommended that the system’s power cable not be placed on the same circuit as devices with heavy variable loads, such as air conditioning units. The fuses located within the unit are rated: 5x20T, 250V 10A for 100-120VAC and 5X20T, 250V 8A for 220-240 VAC. Be sure to use the appropriate fuse for your region's electrical requirements. When a fault in the system occurs, the fuse will burn out and the system will not run. 3.3. Installation Mistral(4T) is designed for easy installation and does not require any site preparation. Installation is carried out as follows: Unpack the system and place it in a designated location. It should be placed on a flat, stable surface, such as table, counter or sturdy cart. Verify that the system is intact and that all its components are present. Verify that the nominal voltage, recorded on the underside of the unit, conforms to the electrical voltage of your country (100-120V/220-240V). 3.3.1. Handpiece Connection If necessary, connect the Handpiece according to the following instructions (Figure 7): a. Align the Handpiece power and air connectors with its power outlet and air suction inlet. Use the metal prongs as a guide. b. Snap into place. 15Mistral User Manual CHAPTER 3 Figure 7: Handpiece Connection To remove handpiece: a. Push button on back of connector b. Gently pull and pop out connection. Note: Turn the system off when replacing or exchanging handpieces. After the handpiece/s are connected: Plug the system into a designated electrical outlet. Test the system for proper operation. Again, always make sure the handpiece is secure. Do not drop. This may cause damage to the lamp and handpiece. 16 Revision A08, August 2011 4. OPERATION AND TREATMENT PROTOCOLS 4.1. General Guidelines for the Operation of Mistral(4T) The general guidelines below are relevant for all Mistral(4T) applications. To insure patient safety, attain optimal clinical results and protect device performance, operators should adhere to the following protocols: 1. Activation – To turn the system on; toggle the power switch on the back of the unit to the on position. Then press the On/Off button located on the front of the system. You will be directed to the introductory screen. 2. Choosing Treatment Mode – Mistral(4T) automatically detects from the connected handpiece the proper treatment mode. Make sure the handpiece/s you have connected are appropriate to the application/s you will be treating. 3. Test Energy Levels – Always use the test energy settings defined in the application specific tables as a starting point. 4. Proper Handpiece Positioning – Always position the Handpiece in full contact with the skin with minimal to no overlapping. After the pulse is administered, immediately and completely remove the handpiece from the skin. 5. Pulse Generation –When the “Ready” indicator is activated on the LCD screen and Handpiece, trigger the pulse by pressing the footswitch then the pulse switch. 6. Between Pulses – Remove the handpiece completely away from the skin. WARNING To avoid eye discomfort, never look directly at the light coming from the Handpiece. 17 Revision A08, August 2011 CHAPTER 4 7. Overlapping – No overlapping is necessary. If unavoidable, keep overlapping to a minimum of 5%. Stacking and/or excessive overlapping can cause crusting or blisters which can lead to transient pigmentary changes. 8. Additional Pulses – To trigger the next pulse, wait until charging is completed and the “Ready” indicator is activated again. Place the Handpiece on the treatment spot and repeat. 9. Hygienic Rings – Use a new hygienic ring for each client. 10. Area Adaptors – The Area Adapters should be used when treating small or narrow areas. No energy level adjustments are necessary when using the small area adaptors. 11. New Handpiece Retest – Each time an old Handpiece is replaced with a new one, the testing procedure for all existing patients should be repeated for the first 500 pulses. The system recognizes when a handpiece is first used and will automatically direct the operator to the appropriate testing screen. 12. Excessive Energy Level – Stop treatment if overall redness of the treated area is observed. Full redness of the area may indicate use of an excessive energy level. It is recommended to treat with caution, especially during the initial treatment. 13. Post Treatment – Mild redness and regional pain may be noticed in the treatment area and can last from a few hours up to a few days. Most patients will feel some discomfort for up to an hour or two after treatment. A post treatment preparation (e.g., Biafine or Aloe) can be used to help soothe the area but should not be used on skin with open wounds. Cold packs alternately applied for 10-15 minutes on the affected area are another post treatment option. If 18 Revision L09, APRIL 2012 OPERATION AND TREATMENT PROTOCOLS blistering or burns occur, aggressive wound treatment should be administered. If skin crusting occurs, do not continue treatment until the crusting has resolved and completely healed. 14. Sun Exposure – The patient should be advised to avoid sun exposure and/or artificial tanning devices for a minimum of 21 days before and after treatment. If hypo or hyper pigmentation occurs, the patient should continue to be diligent about sun or light exposure until it resolves. Pigmentary changes generally resolve within a few months and may be treated with daily application of sunscreen and bleaching creams. 15. Emergency Stop Button – When it is necessary to immediately stop treatment, push the red Emergency Stop button located on top of the system. 16. Pulse Counter – Counts the total number of delivered pulses for that treatment. (Figure 8) 17. Total Handpiece Pulses – Counts the total number of delivered pulses from that handpiece. You will receive alerts when the pulses approach and/or exceed the maximum pulse allowance. (Figure 8) 19 Mistral User Manual CHAPTER 4 Treatment Pulse Counter Handpiece Pulse Counter Figure 8 - Pulse Counters 20 Revision L09, APRIL 2012 OPERATION AND TREATMENT PROTOCOLS 4.2. Using the Touch Screen Computer Mistral(4T)'s touch screen is designed to guide you through the entire treatment process. It is recommended to read this section carefully and to completely familiarize with the computer interface before beginning treatment. You may use the stylus or your finger to gently tap and activate the touch screen pad. Using the stylus is recommended. When treating patients, the operator may choose either direct or data base treatment protocols. For instance, this may be a onetime procedure and there will be no need to save the information. Or, the patient may be returning for repeat sessions and having patient history will streamline future treatment sessions. This section will describe both forms of treatment protocols. 4.2.1. System Startup 1. After initiating start-up, the system will automatically begin with a short introductory loading page. 2. When the introduction is finished the user will be automatically directed to the logon screen. Using the numbers on the LCD screen, enter your password and press enter. (Figure 9) Enter Password Here Backspace Enter Key Turn Off System 21 Mistral User Manual CHAPTER 4 Figure 9: Password Entry 3. You will be directed to the Home Page (Figure 10). On the home page you may navigate to training, personalize your settings or choose the mode of treatment. Gently tap the screen where you wish to go next. Enter Password Figure 10: Home Page 4. Training (Figure 11) - The tutorial page allows access to a Mistral(4T) training video and the help file. 22 Revision L09, APRIL 2012 OPERATION AND TREATMENT PROTOCOLS Figure 11: Tutorial/Help Page 5. Settings (Figure 12) – For first time users, it is recommended to set the language preference and system parameters before beginning the first treatment. Figure 12: Settings Page a. Export/Import Data Base – using the USB ports found on the front bottom right of Mistral(4T), you may export or import either data base or treatment files from or to an outside source. b. Screen Calibration – Calibration should be performed once every 6 months. i. Carefully press or touch stylus on center point of target. Using the stylus for calibration is highly recommended. ii. Hold in place until target moves. iii. Follow the target around the screen until calibration is complete. 23 Mistral User Manual CHAPTER 4 iv. After calibration, tap the screen once to save data or wait 30 seconds to keep old data. You will be automatically directed to the settings page. c. Technical Information – This section is password protected and only accessible by a certified technician. 6. Once your settings have been entered, they will be automatically saved and available the next time you use the system. Select "Exit" to return to the home page. 4.2.2. Test Mode Before beginning any treatment, each patient should be tested to determine the safest and most effective treatment parameters. When testing in the Data Base mode, all results will be saved and added to the patient’s profile. When testing in the Direct Treatment mode, results will not be saved and should be noted for that treatment only. 1. To access Test Mode from Direct Treatment a. Select Direct Treatment > select Application > select Test Mode 2. To access test Mode from Data Base Treatment a. Select Data Base Treatment (new patient)> select new patient and enter patient details> select Application > select Test Mode. b. Select Data Base Treatment (previous patient)> select patient > select Application > select Test Mode. After entering Test Mode(Figure 13 and 14), an orange frame will blink around the buttons to guide you through each step. Simply follow it as you make your selections. a. Select between Caucasian and Asian Skin Type. b. Select Skin Type. c. Press the first pulse button when it starts to blink. 24 Revision L09, APRIL 2012 OPERATION AND TREATMENT PROTOCOLS d. Confirm the preset energy level by selecting the green checkmark. Further fine tuning can be done by the arrows on both sides of the energy level. i. The energy level is confirmed when the checkmark is replaced by a small orange sun. e. Trigger the first pulse on the tested area. Apply the pulse by pressing on the footswitch followed by simultaneously pressing the handpiece pulse button. The pulse will not trigger unless the footswitch is depressed. f. Lift the handpiece completely away from direct contact with the skin between pulses. g. Release footswitch between pulses. h. The next sequence begins after the pulse has been emitted. i. Repeat steps d-f for the second and third pulse. j. Place test pulses next to each other to aid in comparison and observation. k. The proper setting is the test area that produced the required result according to treatment application. Refer to the section of the user manual that explains these parameters. l. If further adjustments are necessary to achieve the required results, they should be applied at the next session to insure that no adverse effects are reported. 25 Mistral User Manual CHAPTER 4 Data Base Treatments: After determining proper parameters, save data. The data will be available for your next treatment session. Verify energy level Skin Type Skin Photo Type Figure 13: Test Mode 1 Figure 14: Test Mode 2 3. Direct Treatment: After testing, note results. 4. Data Base: After testing, confirm and save energy levels.(Figure 15) 26 Revision L09, APRIL 2012 OPERATION AND TREATMENT PROTOCOLS Figure 15: Test Mode 3 5. If the test session must be cancelled early, you have the option to save results already obtained. Figure 16: Test Mode 4 4.2.3. Direct Treatment 1. Select application. Only applications that are related to the attached handpieces will be accessible, all other applications will be greyed out. 27 Mistral User Manual CHAPTER 4 Non-activated treatment mode Activated Treatment mode Figure 17: DT Select Application 2. After determining proper treatment parameters, return to treatment mode and begin treatments. a. Enter energy level: use arrows or number pad b. Confirm choice; after confirming choice, the green check mark will be replaced by an orange sun. c. Apply pulse: wait for the audible ready signal, press the foot switch then the one of the handpiece pulse switches. d. Continue treatment using determined protocols from the section of the user manual relevant to the application being used. Set Energy Level here Confirmed Energy Level Confirm Choice here Mute Button Return to Home Page 28 Revision L09, APRIL 2012 OPERATION AND TREATMENT PROTOCOLS Figure 18: DT Treatment Page 29 Mistral User Manual CHAPTER 4 3. Optimal Pulse Train (OPT) Settings OPT is used during HR and ST treatments. During hair removal, OPT takes advantage of the skin's thermal relaxation time. A pulse train of 3 short bursts with 2 rest periods is delivered. The rest period is optimized to the skin type's thermal relaxation time, allowing the skin to cool as heat is built up inside the follicle, bringing it comfortably to the coagulation point. As the deeper layers of the dermis reach optimal treatment temperature, OPT technology keeps the outer layers of the skin cool and safe. Hair Removal treatments should follow the following protocol: a. Select OPT pulse pattern. The default is the medium pulse width and testing should always begin there. If the results are below unsatisfactory and there is no pain, select the short pulse width. If the patient experience discomfort or pain, select the long pulse width. After the initial pulse, you may use the guide below to help determine the OPT pattern to use. Refer to Table 8 for HR and Error! Reference source not found. for ST for initial pulse width and energy settings. b. Enter energy level: use arrows or number pad c. Confirm choice; after confirming choice, the green check mark will be replaced by an orange sun. d. Apply pulse: wait for the audible ready signal, press the foot switch then the one of the handpiece pulse switches. 30 Revision L09, APRIL 2012 OPERATION AND TREATMENT PROTOCOLS Handpiece Spot Size Pulse Width Figure 19: HR DT Treatment Page Note: The pulse width patterns are graphically represented by short, medium and large plateaus. When editing or entering treatment details on the patient display, these patterns are represented numerically; 10 (short), 20 (medium) and 30 (large). Note: All other treatment modes use the same protocols as mentioned above. 4.2.4. Data Base Treatments The Keyboard o The keyboard has 3 modes, upper case letters, lower case letters and numeric. The standard keyboard contains all lower case letters and a limited number of commonly used characters. The upper case keyboard includes all upper case letters and a limited number of commonly used characters. The numeric keyboard includes all numbers and other commonly used characters not visible on the standard keyboard. o To toggle between them, tap the or key once. This will allow you to enter 1 number or character. o To keep the keyboard visible, tap the or key twice. 31 Mistral User Manual CHAPTER 4 o To return to the standard keyboard, tap the or key once. 1. From the Home Page, select Data Base Treatment. 2. From this page, you may search for previously entered patients or create a new profile. (Figure 20) 3. Patient Search – Mistral(4T) uses a 'smart search' system to help find your patient quickly and easily. Enter the first few letters or digits into one of the search fields. Once you have found your patient, select 'Patient Details' to bring up their data base. Patient Search Fields Figure 20: DB Patient Search 1. To enter a new patient, select New Patient from the patient search page. (Figure 20) Enter patient details using the LCD keyboard. (Figure 21) 32 Revision L09, APRIL 2012 OPERATION AND TREATMENT PROTOCOLS Figure 21: DB Patient Details 33 Mistral User Manual CHAPTER 4 2. Enter all relevant pre-treatment clinical history (Figure 22). Figure 22: DB Clinical History Side Effects: This refers to any side effects your patient may have experienced with other devices or treatments prior to using Mistral(4T). Pigmentation: This refers to the degree of any previous pigmentation changes that your patient may have experienced with other devices or treatments prior to using Mistral(4T). History: This refers to your patients medical history prior to using Mistral(4T). 3. Treatment details will be automatically saved and recorded under patient history. (Figure 23) 34 Revision L09, APRIL 2012 OPERATION AND TREATMENT PROTOCOLS Figure 23: DB Treatment Log 35 Mistral User Manual CHAPTER 4 4. To edit a patient's profile, select Edit Record and change any details as needed. From here you may save changes or remove the patient completely from your data base. Caution: Any changes made to the patients record are permanent. No history will be saved. Be certain of changes before implementing them. It is recommended to save hard copies of all patient files and details. Figure 24: DB Edit Record 5. Select your application. A drop down menu will appear to give you a more focused treatment selection. All treatment details will be saved to the data base. 6. Only applications that are related to the attached handpieces will be accessible, all other applications will be greyed out. 36 Revision L09, APRIL 2012 OPERATION AND TREATMENT PROTOCOLS Figure 25: DB Select Application 7. Each application has a drop-down menu for a more focused treatment target. The treatment area will be saved to the data base. Refer to the table below for complete treatment area selection options. Table 5: Data Base Application Selection Hair Removal Skin Photo Rejuvenation Acne Clearance 8. For repeat clients, you will be automatically directed to the treatment mode with all the details from the last treatment. You will be able to immediately begin treatment. (Figure 26) 37 Mistral User Manual CHAPTER 4 9. When treating your patients, especially for first time, confirm patient details with the treatment log. 10. To switch applications, press the select application button and you will be directed once again to the Data Base application selection page. (Figure 25) Figure 26: DB Treatment Mode 11. Administer Treatment a. Use the preprogrammed energy level or adjust using the arrows or number pad b. Confirm choice; after confirming choice, the green check mark will be replaced by an orange sun. c. Apply pulse: wait for the audible ready signal, press the foot switch then the one of the handpiece pulse switches. d. Continue treatment using determined protocols from the section of the user manual relevant to the application being used. 12. At the end of each session, you will be prompted to save treatment details. 38 Revision L09, APRIL 2012 OPERATION AND TREATMENT PROTOCOLS Figure 27: DB Save Treatment Data 13. Select "Select Application" to administer another type of treatment to your patient. 14. Return to the home page to begin treatment on a new patient. 4.3. Pre-Treatment Considerations During the first visit examine the areas intended for treatment, take patient medical history, and determine skin photo type and sensitivity. A complete patient history should be given and include all information regarding previous treatments for the same condition, previous hair removal habits and any information as to whether the patient is; easily irritated by shaving, has had any reactions to waxing or if their skin is generally sensitive to creams and lotions. It is also necessary to determine if the patient has a history of keloids or hypertrophic scarring. Patients with a history of these conditions should be treated less aggressively. Thoroughly explain to the patient the treatment procedure, expected results, possibility of potential side effects, and the importance of completing a full treatment course. Advise the 39 Mistral User Manual CHAPTER 4 patient that there may be some discomfort, erythema, edema or blistering associated with the treatment and that there is a minimal risk of adverse side effects such as changes in texture, and hypo or hyperpigmentation. Adverse effects, should they occur, are usually transient and should resolve themselves within a few months. In case any serious side effects occur, refer to Adverse Effects Report (6). If the effects match any of the criteria found there, copy then fill out the form and send it by FAX or email to your Radiancy Distributor and to Radiancy Ltd. within 48 hours of noticing the effects. Topical or general anesthesia is not required. Should the patient feel discomfort, however, it may be recommended (e.g.: EMLA, Elamax, Topicaine). If a topical anesthesia is applied, carefully follow the instructions found in chapter 4.4.4. 4.4. Pre-Treatment Preparations 4.4.1. Prior to Treatment: Have the patient sign an Informed Consent Form (ICF) indicating that they consent and agree to the treatment and that they understand and agree to the procedure and its potential side effects. o It is very important to keep on file a hard copy of all patient records, including pre-treatment photographs. Thoroughly clean the area to degrease the skin and remove any remains of cream, makeup, or topical anesthesia. Do not use any flammable solutions, such as alcohol or acetone to clean the treatment area. 40 Revision L09, APRIL 2012 OPERATION AND TREATMENT PROTOCOLS Ensure that the skin surface is completely dry. Cover moles and pigmented spots with non-flammable white sticker or sceptic pencil. When treating the face o o Draw back the hair and cover it. Provide protective eyewear for client. WARNING Pigmented moles and beauty spots should be covered with a white sticker. Do not use flammable material. 4.4.2. Determining the Patient’s Skin Type To evaluate patient’s skin type, use the Fitzpatrick Skin Type Classification scale found below. Take into consideration whether or not the patient heals darker in the area of an injury or scratch or whether they have a history of keloids or hypertrophic scarring. This can reveal a potential for pigmentary changes. Also, keep in mind that the patient's skin tone may appear darker during the summer when there is greater sun exposure. If there is any doubt regarding actual skin photo type, always treat the patient according to the higher option. For example, if there is a question as to whether a patient is skin Type III or IV treat them as a Type IV and set the energy level to the appropriate level for the application you are using. Then gradually increase energy levels as necessary. 41 Mistral User Manual CHAPTER 4 FITZPATRICK SKIN TYPE CLASSIFICATION I Always burns, never tans II Always burns, tans less than average III Sometimes burns, tans average IV Rarely burns, tans with ease V Moderately pigmented, always tans VI Deeply pigmented, never burns 4.4.3. Pre-Treatment Test Caution: As some patients may have a delayed reaction to the light flash, do not perform more than 3 test pulses during the first test session. Wait at least 24 hours before administering the first treatment. For patients with Fitzpatrick Skin Types IV-VI, it is recommended to wait at least 48 hours to evaluate test results. The purpose of testing is to get to know the patient’s individual skin, to understand its sensitivities and special differences and to establish the pulse energy level for the patient's first complete session. Optimal energy level settings differ from patient to patient, from skin type to skin type, from treatment area to treatment area and from application to application. Therefore, for each of the procedures listed below, the energy level should be optimized for that application according to both the individual patient and the specific area being treated. The energy levels in the test tables are intentionally conservative and are meant as a starting point. Refer to the appropriate table under each application for your initial settings. From this starting point, you should be able to pin-point the 42 Revision L09, APRIL 2012 OPERATION AND TREATMENT PROTOCOLS highest and safest energy level for your patient. Stay in constant verbal contact with your patient to learn exactly how the treatment is affecting them, what they are feeling and if they are comfortable. This will help you decide whether or not to use a higher energy level. It is important to take into consideration what you learn about the patient's skin during the pre-treatment test to determine how to best proceed with the treatment and to aid in attaining optimal settings and results for each individual patient. 4.4.4. Using Topical Anesthesia Note and follow the manufacturer's instructions, contraindications and warnings. Topical anesthesia (e.g.: EMLA, L.M.X.4, Topicaine) may be applied prior to treatment for patients who might feel discomfort during treatment. Apply as follows: At least one hour prior to treatment, apply the topical anesthesia directly onto the skin. The total effect time is 3 hours. However after 2 hours it begins to lose peak effectiveness. Apply liberally, but do not rub it into the skin. Cover with an occlusive (adhesive, clear plastic or nylon) dressing. Immediately before treatment (at least 60 minutes after it has been applied), remove the dressing. Using a damp cloth or hygienic wipe, remove any residual anesthesia., then thoroughly clean and dry the entire area before beginning any procedure. 43 Mistral User Manual CHAPTER 4 The above are general guidelines. With any specific topical anesthesia, always follow the manufacturer's instructions. Warning: Make sure you have the proper handpiece for SR treaments 4.5. Skin Photo Rejuvenation (SR) 4.5.1. Indications Mistral(4T) SR treatments are indicated for patients in good general health, 18 years of age or older, who suffer from the following skin conditions: Pigmented lesions related to sun damage and aging Superficial vascular lesions Erythema related to rosacea Fine lines and wrinkles (rhytides) Skin aging in the form of overall tone and texture Mistral(4T) may be used to treat the face, neck, décolleté, arms and the back of hands. 4.5.2. Contraindications Mistral(4T) should not be used on patients who: Are pregnant or lactating. Have tanned by sun or artificial tanning machine within the last 21 days. Have a tattoo or permanent makeup in the treatment area. Have abnormal skin conditions due to different diseases, conditions (e.g. diabetes) or medicinal intake. 44 Revision L09, APRIL 2012 OPERATION AND TREATMENT PROTOCOLS Have a history of local skin infections. Have been treated with isotretinoin (Accutane) within the past 6 months. Have used any medications, herbal preparations or chemicals that cause photosensitivity, within the past 6 weeks. These include but are not limited to gold therapy, tetracycline or sulfa drugs, and certain psychiatric medications. In case of uncertainty regarding photosensitizing sideeffects, have the patient consult their physician. Suffer from epilepsy. Have diseases related to photosensitivity, such as Porphyria, Polymorphic Light Eruption, Solar Urticaria, Lupus and other autoimmune diseases. Have a history of herpes outbreaks in the treatment area, unless the patient has consulted their physician and received prophylaxis treatment prior to treatment. Have a history of skin cancer or patients who have areas of potential skin malignancies. Have received chemotherapy or radiotherapy treatments within the past 5 years should not be treated without their acting physician's consent. Have been on a steroid regimen (i.e. for asthma) over the last 3 months. Have an active implant, such as a pacemaker, incontinence device, insulin pump, etc. Have any other condition which in the practitioner’s opinion would make it unsafe for them to be treated. 45 Mistral User Manual CHAPTER 4 46 Revision L09, APRIL 2012 OPERATION AND TREATMENT PROTOCOLS Pre-Treatment Test – Skin Rejuvenation Applications 4.5.3. Caution: As some patients may have a delayed reaction to the light flash, do not perform more than 3 test pulses during the first test session. Wait at least 24 hours before administering the first treatment. For patients with Fitzpatrick Skin Types IV-VI, it is recommended to wait at least 48 hours to evaluate test results. Table 6: Energy Level Setting - SR I II III IV V VI 55 50 40 20 10 0 Pulse 65 60 50 25 18 10 3 Pulse 75 70 60 30 25 18 st 1 Pulse 2 nd rd Set the energy level for the first pulse according to the table above. For example, if the patient has skin Type III, the energy level for the first test pulse should be set at 40. Next, refer to Table 7 for the required reaction. If the required reaction in the target area is observed, this is the appropriate energy level to begin treatment. If the required results do not appear, increase the energy level according to Table 6 until the required results are observed. Wait a minimum of 30 seconds between test pulses to determine the skin’s reaction. When testing and treating a single spot, a pigmented lesion for example, wait a minimum of 1-2 minutes before retesting the same spot. Be careful to treat only the target areas (e.g. pigmented lesions), and not the surrounding tissue. 47 Mistral User Manual CHAPTER 4 Table 7: Required Results for Appropriate Energy Setting Application Required Results Adverse Reaction Redness that lasts Pigmented If redness* or darkening of the Lesions lesion is observed, but not more than 20 minutes redness of the surrounding after the pulse. Fine Lines tissue, then the energy level is Blistering appropriate. Burning sensation that If mild redness appears on the lasts more than an skin and quickly disappears hour or two after the test, the energy level Crusting of skin tissue is appropriate for treatment. beyond the lesion itself Redness that lasts more than 20 minutes after the pulse. Blistering Burning sensation that lasts more than an hour or two * Redness should be subtle and diffuse, not reflecting the shape of the lamp opening. If the required result is not observed immediately following or within 24 hours after the test, you have not yet reached the optimum level for the treatment area. There is no need for further testing. As you begin treatment, continue to raise the energy level by increments of 5 until the required results are observed. This often means raising the level above those recommended in the table. If at any point there is an adverse reaction, lower the energy level to the next highest level that did not cause an adverse effect. Resume treatment only after the skin has completely healed. 48 Revision L09, APRIL 2012 OPERATION AND TREATMENT PROTOCOLS 4.5.4. Treatment Principles: Pigmentary Lesions (Sun Spots, Age Spots, etc.) Before administering treatment, refer to section 4.1. Carefully follow the guidelines presented there. Should there be any doubt as to the nature or origin of a pigmentary lesion or spot, have the patient consult their dermatologist before beginning treatment. Set the initial energy level according to test results. As treatment progresses and the lesion become lighter in color, you may need to use higher energy levels to maintain clinical efficacy. A full treatment course generally consists of 2-4 sessions spaced 1-3 weeks apart. When skin crusting occurs, do not perform further treatments until the skin has completely healed. When treating a well defined pigmented spot, treat only the spots, not the surrounding skin. The surrounding skin may be covered with a white nonflammable sticker. For proper treatment, redness or change in pigmentation color should appear on the spot, but not the surrounding skin. When using Area Adaptors, make sure to use the smallest adaptor that completely covers the treatment area. No energy changes are required when using adaptors. Up to two (2) to four (4) crisscrossed pulses may be administered on the same spot in each treatment session, based on the practitioner’s best judgment. Wait a minimum of 1-2 minutes between each pulse. The removal of the treated pigmented lesion does not prevent a new one from appearing. 49 Mistral User Manual CHAPTER 4 4.5.5. Treatment Principles: Skin Texture Treatment Before administering treatment, refer to section 4.1. Carefully follow the guidelines presented there. Set the energy level according to test results. A full treatment course generally consists of 5-6 sessions spaced 2-3 weeks apart. When treating fine lines, wrinkles, and skin texture treat the entire face. The appropriate energy level for treatment is one that causes only mild redness and disappears quickly after the pulse. Perform two passes in a crisscross pattern over the entire face. Wait a minimum of 3-5 minutes between the passes to prevent over heating the skin. During the second pass the handpiece orientation should be rotated 45-90 degrees. Use extra caution when treating the neck and, due to bone proximity, the back of hands and décolleté. Lower the energy level by 5-10 points. Maintenance treatments should be performed as needed. 4.5.6. Post Treatment Care In addition to post treatment care described in section 4.1, advise the patient to avoid bathing in hot water, facial peeling creams or preparations that may irritate the skin for 24 hours following treatment. The patient should also understand that avoiding sun exposure and artificial tanning devices for a period of not less than one month following treatment is particularly important for the success of skin rejuvenation treatments. 50 Revision L09, APRIL 2012 OPERATION AND TREATMENT PROTOCOLS Warning: Make sure you have the proper handpiece for HR treaments 4.6. Hair Removal 4.6.1. Clinical Background A clinical study was conducted on 21 patients for 18 months to assess the efficacy, side effects and long-term results of LHE® devices. Subjects underwent 4-9 treatments, depending on the area treated, and were followed up 3-6 months after the last treatment. Results were: Average percentage of hair reduction at completion of treatment was 71% for males (back, chest, legs) and 80% for females (axilla, bikini line). Significant hair reduction was also observed 3-6 months after the last treatment session in both females (71%) and males (58%). Average number of sessions for females 5.5, for males 7.5 Side effects were all minor and transient 4.6.2. Indications The Mistral(4T) HR treatment is indicated for patients in good general health, 18 years of age or older with skin types I-VI according to the Fitzpatrick skin type classification. 4.6.3. Contraindications The Mistral(4T) HR should not be used on patients who: Used any method of epilation other than shaving in the treatment area within the past 30 days. Have inflammatory skin conditions or open sores. 51 Mistral User Manual CHAPTER 4 Are pregnant or lactating. Have tanned by sun or artificial tanning machine within the last 21 days. Have a tattoo or permanent makeup in the treatment area. Have abnormal skin conditions due to different diseases, conditions (e.g. diabetes) or medicinal intake. Have a history of skin disorders such as vitiligo or psoriasis in the treatment area. Have a history of local skin infections. Have been treated with isotretinoin (Accutane) within the past 6 months. Have used chemicals any medications, within the past herbal 6 preparations weeks that or cause photosensitivity. These include but are not limited to gold therapy, tetracycline or sulfa drugs, and certain psychiatric medications. In case of uncertainty regarding photosensitizing side-effects, have the patient consult their physician. Suffer from epilepsy. Have diseases related to photosensitivity, such as Porphyria, Polymorphic Light Eruption, Solar Urticaria, Lupus and other autoimmune diseases. Have a history of herpes outbreaks in the treatment area, unless the patient has consulted their physician and received prophylaxis treatment prior to treatment. Have a history of skin cancer or patients who have areas of potential skin malignancies. 52 Revision L09, APRIL 2012 OPERATION AND TREATMENT PROTOCOLS Have received chemotherapy or radiotherapy treatments within the past 5 years should not be treated without their acting physician's consent. Have been on a steroid regimen (i.e., asthma) over the last 3 months. Have an active implant, such as a pacemaker, incontinence device, insulin pump, etc. Have any other condition which in the practitioner’s opinion would make it unsafe for them to be treated. 4.6.4. Pre-Treatment Test - Hair Removal Trim - Prior to testing or treatment, the hair should be trimmed to a length of 1-2 mm or shaved 3-6 days before treatment and left to regrow to the desired length of 1-2 mm. After trimming, clean dry and cover spots as outlined in section 4.4.1. Be sure there are no unattached hairs left on the skin surface before beginning treatment. Pre-treatment test settings – Caution: As some patients may have a delayed reaction to the light flash, do not perform more than 3 test pulses during the first test session. Wait at least 24 hours before administering the first treatment. For patients with Fitzpatrick Skin Types IV-VI, it is recommended to wait at least 48 hours to evaluate test results. After choosing the HR application and patient’s skin type, the system will be set automatically to the recommended test energy level. See Table 8 for reference. 53 Mistral User Manual CHAPTER 4 Table 8: Energy Level Setting - HR I II III IV V VI 25 25 15 10 0 0 Pulse 30 30 20 20 5 2 3 Pulse 35 35 25 25 10 5 st 1 Pulse 2 nd rd The appropriate energy level has been reached if any of the following required reactions are observed immediately following the pulse: Darkening/burning of the hair Skin redness around the hair (Perifollicular erythema) immediately or within 10-15 minutes after pulsing. Note for advanced users: The optimal result is achieved when the hair in the majority of the pulse area has completely disintegrated. If the energy level you're using provides good results but still not optimal, you may attempt to raise the energy level in increments of 2-5 levels with each pulse until most of the hair in the pulse zone is disintegrated. If you do not observe any of the required results in the test area, increase the energy level according to the table until the required results are achieved. Typically, it is advisable to wait a minimum of 30 seconds between each test pulse to determine the skin’s reaction. Pulses should be applied on adjacent test spots, include test spots on the intended treatment area. If the required result is not observed immediately following or within 24 hours after the test, you have not yet reached the optimum level for the treatment area. As you begin treatment, continue to raise the energy level by increments of 5 until the required results are 54 Revision L09, APRIL 2012 OPERATION AND TREATMENT PROTOCOLS observed. This may mean raising the level above those recommended in the tables. If at any point there is an adverse reaction, lower the energy level to the highest level that did not cause this adverse effect. Resume treatment only after the skin has fully healed. 4.6.5. Treatment Principles Before administering treatment, refer to section 4.1. Carefully follow the guidelines presented there. Before treating patients with excessive facial hair growth, see section 4.6.6. Treatment courses for hair removal vary and are dependent upon the reactions of individual patient and area being treated. However, they typically consist of 6-10 sessions performed every 4-8 weeks. Treat the area again only when at least 30% regrowth has occurred. As treatment progresses, sessions may be spaced further apart. Set the initial energy level according to test results. Energy levels should be reevaluated during each treatment and for each treatment area. There are 2 handpiece options, basic and extra large. The extra large handpiece is recommended to treat large treatment areas such as; legs, back and chest. Perform one complete pass of the treatment site during each session. Apply ice (non-humid), such as an ice pack, to the site of the next pulse before applying the pulse. 55 Mistral User Manual CHAPTER 4 As treatment progresses, the remaining hair will turn lighter in color and texture. Raise the energy levels accordingly. Energy Adjustment for Fine Hair – If the chosen energy level provides expected results on most treated areas, but is not sufficiently effective on fine hair, energy may be increased to reach required results on those treatment areas. In all cases, hair must be darker than the skin (even slightly) for successful treatment. The Area Adaptors can be used when treating small areas such as the toes, fingers or upper lip. They may only be used on the basic handpiece. Perform maintenance treatments as needed. 4.6.6. Considerations for Feminine Facial Hair Facial hair is generally obstinate and one of the hardest conditions to treat for successful long term removal. Often caused by chronic or life stage hormonal imbalances, it is important to understand that light based treatments do not treat the underlying causes of these imbalances and can at best offer temporary cosmetic relief. Therefore when treating unwanted facial hair it is crucial to correctly set the patient’s expectations and be very clear about anticipated outcomes. The purpose of this section is to share additional protocols that may help improve treatment results and client satisfaction. Keep in mind that in most cases, the underlying cause is unclear. This hair removal treatment is cosmetic only and not a permanent solution. Assessing the Client – Some symptoms that may indicate if a woman's hair growth is related to a hormonal imbalance are: 56 Irregular menstruation Revision L09, APRIL 2012 OPERATION AND TREATMENT PROTOCOLS Obesity Deepening of the voice Small breast size Baldness or sparse hair Menopause or post pregnancy Buffalo hump (Cushing’s Syndrome) Clients with excessive facial hair combined with any of the above symptoms should undergo an endocrine exam. If hormonal imbalances are present, the client should be advised to pursue medical treatment for their condition, if possible. If there is no indication of hormonal imbalances or if the physician has decided not to treat the condition, you may attempt to provide relief from symptoms with LHE® treatment. However, accepting patients with the following diagnosed medical conditions should be done with extreme caution and with clear warnings about expectations. Hirsutism Hypertrichosis Medication or any physical conditions (such as polycystic ovaries) that might influence hair growth Setting Expectations – The patient should be informed that; the number of treatments needed for acceptable hair removal cannot be pre defined, additional maintenance treatments may be required, and due to their medical condition, acceptable results may not be achievable at all. The Treatment Course – The recommended treatment course should be determined based on what type of hair removal method the patient used before beginning LHE ® treatments and how often they applied it. Refer to Table 9 for treatment course recommendations. 57 Mistral User Manual CHAPTER 4 Note: Since it is strongly recommended that patients do not use any other method of hair removal while undergoing LHE® treatments, the initial frequency of each treatment course takes into consideration the patients desire to be hair-free, previous methods of removal and hair growth cycles. Table 9: Treatment Course Recommendations ® Method Used Before LHE® Treatment LHE Treatment Course Waxed once in 3 weeks Every 3-4 weeks, then gradually lengthen the interval as needed (after 30% regrowth occurs) Every 1-2 weeks for the first 1-2 months, then gradually lengthen the interval to 3-4 weeks and longer as needed (after 30% regrowth occurs) Tweezed every week Tweezed every day 1-2 times per week for the first 1-2 months and , then gradually lengthen the interval to 2-3 weeks and longer as needed (after 30% regrowth occurs) Maintenance – Performed every 6 months as necessary. Early Termination – Interim treatment results should be evaluated after 4-7 treatments, depending on the case. If the practitioner does not observe at least 30% reduction of hair they should consider, together with the patient, the possibility of early termination. Special Note About Vellus Facial Hair – Do not attempt to remove vellus facial hair as induced hair growth may result. Photo History – It is highly recommended that base line pictures be taken before the first treatment and periodically throughout the treatment course. This photo history may be presented as part of the consent form . 4.6.7. Post-Treatment Care Observations - mild redness in the treatment area is normal and can last anywhere from a few hours to a few days. Although some hairs 58 Revision L09, APRIL 2012 OPERATION AND TREATMENT PROTOCOLS remain intact, most bleached and/or burned hairs usually fall out within two weeks of treatment. On the night following treatment, patients should avoid bathing in hot water, or applying any harsh topical that might irritate the skin, such as skin peels. They should be instructed to cleanse skin with lukewarm water and gentle soap, and hydrate it with a suitable moisturizer. 59 Mistral User Manual CHAPTER 4 4.7. Acne Treatment Warning: Make sure you have the proper handpiece for AC treaments 4.7.1. Clinical Background LHE® Acne phototherapy is based on the process of destruction of the Propionibacterium acnes (P. acnes). P.acnes are slow growing anaerobic bacteria which develop in blocked follicles, and produce porphyrins as part of their normal metabolism. Exposure of porphyrins to visible light results in a photodynamic reaction of these compounds, and destruction of the P. acnes. Fifty subjects with mild and moderate inflammatory acne, including pustular inflammatory acne, participated in a multicenter blinded controlled study of LHE® acne clearance. The subjects were Fitzpatrick skin Types I-IV. Based upon a pre-treatment test on each subject, the highest energy level that showed no side effects in that patient was used for treatment. Results: A mean decrease of 23.1 lesions (60.2%) was achieved between the baseline and the end of the follow-up period compared to a mean increase of 6.2 lesions (32.4%) for the control. All side effects were minor and transient. In another study, good clearance (over 60%) of non-inflammatory and inflammatory lesions was observed. This clearance continued to improve 2 months following the last treatment, reaching a 90% decrease in lesion count from baseline. 4.7.2. The Mistral(4T) Indications AC handpiece is intended to provide phototherapeutic light to the body. The Mistral(4T) AC handpiece is generally 60 indicated to Revision L09, APRIL 2012 treat dermatological conditions. The OPERATION AND TREATMENT PROTOCOLS Mistral(4T) AC handpiece is specifically indicated to treat mild and moderate inflammatory acne which includes treatment of pustular inflammatory acne in patients with Fitzpatrick skin types I-VI. 4.7.3. Contraindications Mistral(4T) should not be used for acne treatments on patients who: Are under 12 years of age. Are pregnant or lactating. Have tanned by sun or artificial tanning machine within the last 21 days. Have a tattoo or permanent makeup in the treatment area. Have abnormal skin conditions due to different diseases, conditions (e.g. diabetes) or medicinal intake. Have a history of skin disorders such as vitiligo or psoriasis in the treatment area. Have a history of local skin infections. Have been treated with isotretinoin (Accutane) within the past 6 months. Have used any medications, herbal preparations or chemicals that cause photosensitivity within the past 6 weeks. These include but are not limited to gold therapy, tetracycline or sulfa drugs, and certain psychiatric medications. In case of uncertainty regarding photosensitizing side-effects, have the patient consult their physician. Suffer from epilepsy. 61 Mistral User Manual CHAPTER 4 Have diseases related to photosensitivity, such as Porphyria, Polymorphic Light Eruption, Solar Urticaria, Lupus and other autoimmune diseases. Have a history of herpes outbreaks in the treatment area, unless the patient has consulted their physician and received prophylaxis treatment prior to treatment. Have a history of skin cancer or patients who have areas of potential skin malignancies. Have received chemotherapy or radiotherapy treatments within the past 5 years should not be treated without their acting physician's consent. Have been on a steroid regimen (i.e. asthma) for the last 3 months. Have an active implant, such as a pacemaker, incontinence device, insulin pump, etc. Have any other condition which in the practitioner’s opinion would make it unsafe for the patient to be treated. 4.7.4. Pre-Treatment Test – Acne Clearance Set the energy level for the first pulse according to the table below. For example, if the patient is skin Type II, the energy level for the first test pulse should be set at 20. Caution: 62 As some patients may have a delayed reaction to the light flash, do not perform more than 3 test pulses during the first test session. Wait at least 24 hours before administering the first treatment. For patients with Fitzpatrick Skin Types IV-VI, it is recommended to wait at least 48 hours to evaluate test results. Revision L09, APRIL 2012 OPERATION AND TREATMENT PROTOCOLS Table 10: Energy Level Setting - AC I II III IV V VI 1st Pulse 25 20 15 10 3 0 2nd Pulse 30 25 20 15 5 3 3rd Pulse 35 30 25 20 8 5 The appropriate energy setting is the highest possible energy level that causes mild redness to the skin and disappears within a few hours after test. If the required reaction in the target area is observed, this is the appropriate energy level for treatment. If this required result does not appear increase the energy level according to Table 10 until the required result is observed. Typically, it is advisable to wait a minimum of 30 seconds between test pulses to determine the skin’s reaction. Test pulses should be administered on adjacent spots. If the required result is not observed immediately following or within 24 hours after the test, you have not yet reached the optimum level for the treatment area. There is no need for further testing. As you begin treatment, continue to raise the energy level by increments of 3 units until the required results are observed. This often means raising the level above those recommended in the table. If at any point there is an adverse reaction, lower the energy level to the next highest level that did not cause an adverse effect. Resume treatment only after the skin has completely healed. 4.7.5. Treatment Principles Before administering treatment, refer to section 4.1. Carefully follow the guidelines presented there. The patient should be advised not to use retinoids or medicated topicals during the treatment course. Set energy according to test results. 63 Mistral User Manual CHAPTER 4 Treatment Intervals – for optimal results patients should complete a full treatment course of at least eight (8) sessions. Treatments should be administered twice a week for a period of at least four (4) weeks. Please note, during the treatment course that due to a response to treatment, slight aggravation of symptoms may occur due to inflammatory response after 3-4 treatments. This is a natural part of the healing process and will resolve itself within days. Adaptors –The Mistral(4T) handpiece has 3 optional adaptors: 2 Medium size-(13x50/13x35mm) and a Small area- (13x12mm). You may wish to use the small adaptor on single lesions. No energy adjustment is required while changing the adaptors Post treatment care – Refer to section 4.1 for recommendations for post treatment observations and interventions. 64 Perform maintenance treatments as needed. Revision L09, APRIL 2012 OPERATION AND TREATMENT PROTOCOLS 5. 5.1. MAINTENANCE Cleaning Instructions CAUTION Before cleaning the handpiece and main unit, always turn the unit off, disconnect it from energy and wait a minimum of 5 minutes. 5.1.1. Main Unit Cleaning of the main unit (system console) should be done with a soft nonabrasive cloth, moistened with mild detergent or soap suitable for external cleaning of electrical equipment. Avoid getting cleaning solution into the machine. Spray directly into the cloth and not onto the unit itself. Do not use cleaning solutions that contain ingredients that may harm plastic, such as ammonia, acetone, hydrochloric acid (HCI), chlorine bleach etc. 5.1.2. Handpiece During treatment, especially for hair removal, debris accumulates on the lamp. This may affect performance and the life of the lamp. Use the supplied cleaning tool to clean the lamp after each treatment (Figure 28). Tip B Use this end to clean between the lamps Tip A Use this end to clean between the lamps and reflector. Figure 28: The cleaning tool 65 Mistral User Manual CHAPTER 4 1. Put 2 drops of alcohol on the sponge part of the cleaning tool (Figure 29) Figure 29: Preparing the cleaning tool 2. Use Tip B to gently rub along the length of the lamps between the two lamps until the debris is removed (Figure 30). Figure 30: Cleaning the lamp 3. Use Tip A to gently rub along the length of the lamps between the lamp and reflector until the debris is removed (Figure 31) IMPORTANT: Do not let the sponge part of the cleaning tool touch the reflector. The black part will automatically clean the reflector as you clean the lamp (Figure 31). Figure 31: Cleaning the reflector 4. Gently remove the remaining debris with a clean, damp lint-free cloth or a cleaning wipe. 66 Revision L09, APRIL 2012 OPERATION AND TREATMENT PROTOCOLS 5. Make sure the lamp and reflector are completely dry before the next treatment. 5.2. Parts & Attachments 5.2.1. Handpiece Replacement The handpiece must be replaced every 50,000 pulses. Remove the handpiece from the system and return it to your Radiancy representative for a replacement. 5.2.2. Hygienic Rings Use a new hygienic ring for each client. Simply place the hygienic ring over the lamp opening and push gently into place. 5.2.3. Area Adaptors The Area Adaptors are used when treating different size and shape areas.. For hygienic reasons, clean the area adaptor between each patient with a soft, damp cloth, as you would the handpiece. Figure 32: Area Adaptor To install the Area Adaptor: Hold the adaptor in one hand and the handpiece in the other. Place the adaptor on the handpiece as shown in Figure 32. Align the two tabs with the openings on the small ends of light unit. Gently press until you hear a clicking sound signaling that the adaptor is firmly in place. To remove the Area Adaptor: 67 Mistral User Manual CHAPTER 4 Hold the adaptor in one hand and the handpiece in the other and gently pull off the adaptor 5.2.4. Fuse Replacement To replace the fuse and restore the energy after a fuse is blown, turn off the unit and disconnect the system from the electrical outlet. Wait 5 minutes. Pull out the fuse drawer located in the back panel. Replace the fuse and push the drawer back into position. Fuse panel Power Cord Inlet Figure 33: Fuse Location 68 Revision L09, APRIL 2012 6. ADVERSE EVENTS REPORT FORM Date of the report ________________ In the case of any of the adverse events listed below, please complete this form and send a copy to your distributor and Radiancy Ltd. no longer than 24-48 hours after you learn of the occurrence. Retain a copy for your own records. 40 Ramland Road Orangeburg, NY 10962 USA FAX: (845) 398-1647 [email protected] Adverse Event - Any unwanted medical occurrence in a subject whether or not it is device related. Outcomes attributed to the adverse event : Hospitalization (mm/dd/yy) _______ / _______ / _______ Required intervention to prevent permanent impairment/damage Disability or permanent damage Death (mm/dd/yy) _______ / _______ / _______ Other serious (important medical events) Submission of a report does not constitute an admission of fault or that the medical personnel, facility, importer, manufacturer or product caused or contributed to the event Patient Information : First Name: ____________________ Last Name: ____________________ Age:_____ Gender : Female Male 69Mistral User Manual Treatment Administration : Date of event: (mm/dd/yy) _______ / _______ / _______ Please specify device used: Device Name: _____________________ Company: _________________________ Serial Number: _____________________ Where was the treatment done? Name of Facility: __________________ Address: ________________________ ________________________ ________________________ Who performed the treatment? Full Name: _______________________ Title: ________________________ Who is preparing and submitting this report? Full Name: _______________________ Title: ________________________ What sort of treatment was performed ?_______________________ What was the treatment area: ___________________ First time the adverse effect was observed: (mm/dd/yy) _____ / _____ / ___ Date the adverse effect resolved: (mm/dd/yy) _______ / _______ / _______ Please describe in detail the event or problem. If there is not enough room, continue on other paper and attach to report. ____________________________________________________________ ____________________________________________________________ ____________________________________________________________ ____________________________________________________________ ____________________________________________________________ ____________________________________________________________ 70 Revision L09, APRIL 2012 Treatment discontinued? Yes No If yes, provide an explanation for discontinuation: ____________________________________________________________ ____________________________________________________________ ____________________________________________________________ ____________________________________________________________ Please attach and list all relevant documentation (patient file ,discharge report etc.): ____________________________________________________________ ____________________________________________________________ ____________________________________________________________ Please include any other relevant patient history , including any preexisting medical condition(s): ____________________________________________________________ ____________________________________________________________ ____________________________________________________________ Relation to the Treatment: Event Outcome: Probable Resolved Possible Improved Probably not Unchanged Not related Worsened 71 Mistral User Manual 7. TROUBLESHOOTING Situation/Symptom The system does not turn on (Numbers are not shown on the display and the lights are off) Possible Cause Solution The “On/Off” switch on the front panel of the system is in the Off position Toggle the “On/Off” switch to the On position. Power disconnected The Emergency Stop button is pushed. Blown fuse The system starts but the system’s cooling unit has not turned on The cooling unit was on but later stopped working The “Ready” beep is not heard when the system is ready A pulse is not triggered when pressing on one of the Handpiece pulse switches The Footswitch has not been pressed to activate the system’s cooling unit The Footswitch is not connected or is connected incorrectly The Footswitch was not pressed for the past 60 seconds Press the Footswitch to activate the system’s cooling unit Connect the Footswitch Press the Footswitch to start the system again The “Mute” switch on the LCD screen is On Press the “Mute” button to turn it Off The Footswitch was not pressed Simultaneously press the Footswitch and one of the Handpiece pulse switches The main unit has not completed the recharging cycle One of the Handpiece pulse switches was pressed down before pressing the Footswitch The handpiece is worn out Improper locking of lamp into Handpiece caused darkening of contact points 72 Toggle the “On/Off” switch to the Off position. Check that the power cable is plugged into the electrical outlet and connected to the main unit power inlet. Turn towards the right, in the direction of the arrows. Check the fuse inside the fuse drawer. Replace fuse if blown. Revision A08, August 2011 Wait for the Ready indicator to be activated on the LCD screen Release the pulse switch on the Handpiece. Then simultaneously press and hold the Footswitch and one of the Handpiece pulse switches Check the number of pulses that were performed with the handpiece. Replace If over 50,000 pulses. Stop system operation. Call Radiancy service immediately TROUBLESHOOTING Situation/Symptom Possible Cause Solution Darkened plastic near the lamp on the Handpiece The Handpiece was not lifted from the treatment area after each pulse After each pulse, make sure to lift the Handpiece away from the treatment area. Hold the Handpiece so that air can freely enter the lamp for at least 10 seconds before applying the next pulse The patient feels that the handpiece placed on the treatment site is hot prior to triggering a pulse The cooling airflow is blocked because hair has accumulated in the filter Replace the filter The cooling air-flow is weak Rupture in the Handpiece spiral tube Replace the Handpiece 8. MISTRAL(4T) SERVICE Radiancy North America Radiancy Inc. 40 Ramland Road South, Suite 200 Orangeburg, NY 10962, USA Toll Free number: 888-661-2220 Tel: 1-845-398-1647 Fax: 1-845-398-1648 [email protected] 73 Mistral User Manual 9. WARRANTY After receiving Mistral(4T) and operating it for the first time, please fill out this Warranty Card and send to: 40 Ramland Road Orangeburg, NY 10962 (845) 398-1647 Mistral(4T)™ Warranty Card: User Information: Name: Street: City: System Details: Serial Number: Purchase Date: Comments: State: Zip Code: Tel: Fax: Mobile: E-mail: Was the system received without visible external damage? Yes No. Please describe: Did the system operate properly immediately after installation? Yes No. Please describe: RADIANCY INC. 40 Ramland Road South, Orangeburg, Suite 200, New York 10962, USA Tel: +1 845 398 1647 Fax: +1 845 398 1648 Toll Free: +1 888-661-2220 www.radiancy.com RADIANCY INC ▪ RADIANCY LTD © 2007-2011 Radiancy Inc. All Rights Reserved. 2011580 / Rev. A08 / August 2011


