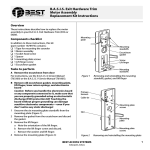
1
ROBOT CONTROLLER SRC-320 Rev.7 EM01OC898F ROBOT CONTROLLER SRC-320 Rev. 7 Copyright © 1995-2001 SEIKO EPSON CORPORATION. All rights reserved. i WARRANTY The robot and its optional parts are shipped to our customers only after being subjected to the strictest quality controls, tests and inspections to certify its compliance with our high performance standards. Product malfunctions resulting from normal handling or operation will be repaired free of charge during the normal warranty period. (Please ask your Regional Sales Office for warranty period information.) However, customers will be charged for repairs in the following cases (even if they occur during the warranty period): 1. Damage or malfunction caused by improper use which is not described in the manual, or careless use. 2. Malfunctions caused by customers’ unauthorized disassembly. 3. Damage due to improper adjustments or unauthorized repair attempts. 4. Damage caused by natural disasters such as earthquake, flood, etc. Warnings, Cautions, Usage: 1. If the robot or associated equipment is used outside of the usage conditions and product specifications described in the manuals, this warranty is void. 2. If you do not follow the WARNINGS and CAUTIONS in this manual, we cannot be responsible for any malfunction or accident, even if the result is injury or death. 3. We cannot foresee all possible dangers and consequences. Therefore, this manual cannot warn the user of all possible hazards. SERVICE CENTER Contact the following service center for robot repairs, inspections or adjustments. Please have the model name, “Serial No.” or “M.CODE”, software version and a description of the problem ready when you call. If service center information is not indicated here, please contact the supplier office for your region as listed in the following SUPPLIERS section. ii SUPPLIERS Japan & Others SEIKO EPSON CORPORATION Okaya Plant No. 2 1-16-15, Daiei-cho Okaya-shi, Nagano-ken, 394-0025 Japan TEL: FAX: 81-266-23-0020 (switchboard) 81-266-24-2004 (direct) 81-266-24-2017 North & South EPSON AMERICA, INC. America Factory Automation/Robotics 18300 Central Avenue Carson, CA 90746 TEL: (562) 290-5900 FAX: (562) 290-5999 E-MAIL: [email protected] Europe EPSON DEUTSCHLAND GmbH Factory Automation Division Zuelpicher Str. 6 D-40546 Duesseldorf TEL: (++) 49 - 211 - 5603 391 (Inside Sales) FAX: (++) 49 - 211 - 5603 444 E-MAIL: NOTICE [email protected] No part of this manual may be copied or reproduced without authorization. The content of this manual is subject to change without notice. We ask that you please notify us if you should find any errors in this manual or if you have any comments regarding its content. TRADEMARKS Microsoft is a registered trademark and Windows and Windows logo are registered trademarks of the Microsoft Corporation. Other brand and product names are trade- marks or registered trademarks of the respective holders. Please direct any inquiries about the use of this manual to: SRC-320 controller manual SEIKO EPSON CORPORATION. Sales Engineering Group TEL:81-266-24-2004 FAX:81-266-24-2017 iii Safety Precautions Please carefully read this manual and any other manuals before installing this robot system (and definitely before connecting cables). Keep this manual in a handy location for easy access at all times. WARNING This sign indicates that a danger of serious injury or death will exist if the instruction thereunder is not followed. CAUTION This sign indicates that ignoring the instruction there under may cause harm to people or physical damage to equipment and facilities. WARNING The robot system manufacturer/supplier must design and construct robot systems in accordance with the principles described in "Safety section" of the User’s manual. Please read user’s manual first. This robot has been designed and manufactured strictly for use in a normal indoor environment. Do not use the robot in an environment that exceeds the conditions set forth in the manuals for the manipulator and controller. Do not use the robot outside of the usage conditions and product specifications described in the manuals. Doing so will not only adversely affect the life of the product, but may also present a serious safety problem. Only trained personnel should be allowed to design, install, operate, perform function testing, and maintain this robot and the robot system. Trained personnel are those who have taken a robot training course (held by the dealer on a regular basis) or those who have carefully read the manuals and have equivalent knowledge or skill. Be certain that the power has been turned off controller power before you plug or unplug any of the cables linking the manipulator and controller. Failure to do so could cause electric shock and malfunction. Do not touch the parts in the controller carelessly to avoid an electric shock and damage the controller. The controller has the high-voltage parts. When you maintenance the controller, refer to the maintenance volume and follow the description. Do not operate the robot system when either of the following symptoms appears; the light stays lit even after you take your hand off the CANCEL switch, or the light does not turn on when you push the CANCEL switch even though the robot is not in the emergency stop condition. Either of these conditions indicates the possibility that the emergency stop switch connected to TEACH port is inoperable. Use PC cable with the label “SRC-300” or PC cable with an enable switch. Cables without the label have a “normally open” emergency stop switch that does not function properly, exposing you to dangers. iv CAUTION Connect the interlock switch circuit to the “normally closed” safety door input terminal of the REMOTE1 connector on the rear panel of the controller. Failure to do so will result in improper robot operation. Connect the cable firmly. extremely. Do not put a heavy thing on the cable or bend it This may damage the cable. If abnormality occurs in the signal cable, a robot may malfunction. When installing the cable between the manipulator and the controller, make sure the M. CODEs (matching codes) match. The M. CODEs are written on the yellow labels which appear on the back sides of both the manipulator and the controller. Also, make sure that the length of the power cable and signal cable correspond to the length which appear on the yellow labels mentioned above. NOTE ) The appearance of the controller is the same for all, however, the various settings and the specifications are different depend on the manipulator models. Refer to the table on the page 2 for the details of the various combinations of controller settings and specification. v Manuals 1. User’s manual A manual that gives a general description of robots. It describes such things as safety precautions, operating methods, teaching methods, programming methods, and file management. Please read user's manual first. 2. Manipulator manual A manual for the manipulator itself. The basic volume describes safety tips to be observed by the user prior to/in setting up the equipment. The maintenance volume describes the maintenance procedure and part replacement. 3. Robot controller manual A manual that describes the robot controller who executes an operating software and controls I/O and the servo-mechanism. The functions volume describes connecting the robot to the peripheral equipment and basic robot settings. The maintenance volume describes the such things as a power supply circuit schematics, parts replacement, trouble shooting, etc. 4. Reference manual A manual that describes the commands for the SPEL III robot language. 5. Operating unit manual (option) A manual for the operating unit that describes such things as operating methods. 6. Programming support software manual (option) A manual for the program development support software. It describes such things as operating environment and operating methods of SPEL Editor or SPEL for Windows. We provide two kinds of software, SPEL Editor (for MS-DOS) and SPEL for Windows (for Microsoft Windows). We also provide Vision Guide, the integrated ro- bot vision system, as an option of SPEL for Windows. 7. Teaching pendant manual (option) A manual for the teaching pendant. teaching pendant. vi It describes such things as how to operate the FOREWORD This manual specifies matters that you need to know to use the controller SRC-320. Please thoroughly read this and other related manuals before using the equipment. In this manual for the controller, some of the functional features are listed separately according to each model of manipulator it may be connected to. Please refer to the de- scription of the relevant model as specified with the initials as follows: ES/EC If your manipulator model is either ES or EC series, refer to this section. EL/EH If your manipulator model is either EL or EH series, refer to this section. BN/BNA If your manipulator model is either BN or BNA(-CL) type, refer to this section. BL If your manipulator model is either BL or BL(-CL) type, refer to this section. XM3000 If your manipulator model is XM3000 series, refer to this section. RT3300 If your manipulator model is RT3300 series, refer to this section. The improvements at Rev.4: zThe MPU board facilitates easier installation of the Lithium battery. The improvements at Rev.5: zThe mistakes of the circuit diagram on page 34 ware corrected. The improvements at Rev.6: zThe wrong pin assignment of X12 in the circuit diagram on page 88 is corrected. vii TABLE OF CONTENTS Functions Volume Various combinations of controller settings and specifications ............. 2 1. Part Names and Functions ........................................................... 3 1.1 1.2 1.3 1.4 Front panel............................................................................................. 3 Rear panel ............................................................................................. 5 Controller interior ................................................................................... 7 Safety features....................................................................................... 9 2. Installation ............................................................................................. 11 2.1 2.2 2.3 2.4 2.5 2.6 Unpacking............................................................................................ 11 Environmental requirements ............................................................... 12 Vertical placement ............................................................................... 13 Power .................................................................................................. 14 Cable connections ............................................................................... 16 Noise countermeasures ...................................................................... 19 3. TEACH Port ......................................................................................... 21 3.1 3.2 3.3 3.4 3.5 Personal computer connection ........................................................... 22 Teaching pendant TP-320 connection ................................................ 23 TEACH port connector (E. STOP CANCEL connector)...................... 23 E. STOP CANCEL switch use............................................................. 24 Pin assignment of TEACH port ........................................................... 25 4. REMOTE1 ............................................................................................. 26 4.1 4.2 4.3 4.4 4.5 4.6 Connecting to REMOTE1 the safeguard switch and emergency stop switch .......................................................................................... 27 Safeguard input functions ................................................................... 29 Pin assignment of REMOTE1 (PNP type)........................................... 32 Circuit diagram and example wiring of REMOTE1 (PNP type) ........... 34 Pin assignment of REMOTE1 (NPN type) .......................................... 35 Circuit diagram and example wiring of REMOTE1 (NPN type)........... 37 5. When Not Using the Operating Unit ..................................... 38 5.1 5.2 Operating unit disconnected (REMOTE2) .......................................... 38 When not using the operating unit as a console ................................. 40 6. I/O .............................................................................................................. 41 6.1 6.2 6.3 6.4 6.5 6.6 6.7 6.8 Input circuit (PNP type) ....................................................................... 42 Output circuit (PNP type) .................................................................... 43 Customer use power supply................................................................ 44 Pin assignment of I/O (PNP type) ....................................................... 44 Input circuit (NPN type) ....................................................................... 45 Output circuit (NPN type) .................................................................... 46 Customer use power supply................................................................ 47 Pin assignment of I/O (NPN type) ....................................................... 47 7. I/O Remote Set Up (REMOTE3) ............................................. 48 7.1 7.2 7.3 7.4 Remote set up..................................................................................... 48 REMOTE3 input/output signals........................................................... 49 Valid/invalid input signals .................................................................... 52 Timing charts ...................................................................................... 55 8. RS-232C ................................................................................................ 62 8.1 8.2 viii Communications cable........................................................................ 62 Communicatin preparations ................................................................ 64 9. Switch Types and Jumper Pin Set Up ..................................65 9.1 9.2 9.3 9.4 MPU board DIP switches.....................................................................65 Software switches ...............................................................................66 MPU board jumper pins.......................................................................67 Locations of DIP switches and jumper pins on MPU board ................68 10. Options ................................................................................................ 69 10.1 10.2 10.3 10.4 Option types and board current consumption .................................. 69 Additional I/O board.......................................................................... 70 Additional RAM................................................................................. 71 Additional RS-232C board................................................................ 73 11. Specifications ................................................................................... 74 11.1 11.2 Standard specifications .................................................................... 74 Outer dimensions ............................................................................. 75 Maintenance Volume 1. Outline of Maintenance................................................................. 78 1.1 1.2 Safety precautions on maintenance.................................................... 78 Maintenance schedule and inspections .............................................. 79 2. Outline of Structure ......................................................................... 81 2.1 2.2 2.3 2.4 2.5 Fixing screws of panels ...................................................................... 81 Location of parts ................................................................................. 82 Diagram of cable connections ............................................................ 83 Connector pin assignment .................................................................. 85 Main power supply circuits.................................................................. 88 3. PSU .......................................................................................................... 89 3.1 3.2 3.3 3.4 PSU layout .......................................................................................... 89 Power supplies from PSU................................................................... 90 PSU inspection ................................................................................... 91 PSU replacement................................................................................ 96 4. PSU Board ......................................................................................... 100 4.1 4.2 4.3 4.4 Layout and function of PSU board parts........................................... 100 Errors related to the PSU board ....................................................... 101 PSU board inspection and replacement ........................................... 101 ENC+5V (encoder 5V) power supply adjustment ............................. 102 5. Motor Power Unit............................................................................ 103 5.1 5.2 5.3 Layout and function of motor power unit parts.................................. 103 Motor power unit inspection.............................................................. 105 Motor power unit replacement .......................................................... 108 6. AC Servo Driver............................................................................... 111 6.1 6.2 6.3 Layout and function of AC servo driver parts.................................... 111 AC servo driver inspection................................................................ 112 AC servo driver replacement ............................................................ 113 7. MPU Board......................................................................................... 117 7.1 7.2 7.3 Layout and function of MPU board parts .......................................... 117 Lithium battery inspetion and replacement ....................................... 119 MPU board and/or ROM replacement .............................................. 121 8. REMOTE Board .............................................................................. 124 8.1 8.2 Layout and function of REMOTE board parts................................... 124 REMOTE board and parts replacement ........................................... 125 ix 9. I/O Board .............................................................................................126 9.1 9.2 Layout and function of I/O board parts..............................................126 I/O board and parts replacement ......................................................128 10. Regenerative Brake Unit (for EL, EH, BL, XM series) ... 129 11. Manipulator Operation Check............................................... 131 12. Cooling Fan ..................................................................................... 134 12.1 12.2 Fan inspection .............................................................................. 134 Fan replacement........................................................................... 135 13. Front Board...................................................................................... 136 13.1 13.2 Front board inspection.................................................................. 136 Front board replacement .............................................................. 137 14. Option Boards ................................................................................ 138 14.1 14.2 Additional RS-232C board replacement ....................................... 138 Protected I/O board replacement ................................................. 139 15. Trouble Shooting .......................................................................... 140 15.1 15.2 15.3 Error code table ............................................................................ 140 Troubles whose error codes are not displayed............................. 157 Check list during inquiry................................................................ 167 16. Maintenance Parts List............................................................. 169 x 1.各部の名称 Functions The Functions volume describes the basic functions of the controller. Please refer to sections in this volume for safety features, connection to the other peripheral equipment and standard settings. 1 Functions Various combinations of controller settings and specifications Various combinations of controller settings and specifications The various settings and the specifications of the controller are different depend on the manipulator models. Therefore, be sure to connect the controller to the manipulator with the same M. CODE. See the following table of the specifications and settings for each manipulator models. Controller name device for absolute motor specification BN type BNA(-CL) type BL(-CL) type XM3000 series RT series SRC-320 SRC-320 ABS SRC-320 not exist exist not exist MPUUasMPULasDSP@as- ROM name MPU board Setting of the jumper pins XP3 Driver capacity MPUUaxMPULaxDSP@axshort open axis #1 200W 200W (ABS) 400W 400W 400W axis #2 100W 100W (ABS) 200W 200W 400W axis #3 100W 100W (ABS) 200W 200W 400W axis #4 50W 50W (ABS) 100W 100W 50W not exist not exist exist exist not exist short short open open short Regenerative brake unit Setting of the jumper pins XP1 on the motor power unit ES series Controller name EL series EC series exist MPUUaeMPULaeDSP@as- ROM name Setting of the jumper pins XP3 Driver capacity short axis #1 200W (ABS) 400W (ABS) 100W (ABS) 400W (ABS) axis #2 100W (ABS) 200W (ABS) 100W (ABS) 200W (ABS) axis #3 100W (ABS) 100W (ABS) 100W (ABS) 200W (ABS) axis #4 100W (ABS) 100W (ABS) 50W (ABS) 100W (ABS) not exist exist not exist exist short open short open Regenerative brake unit Setting of the jumper pins XP1 on the motor power unit NOTE The controller settings are different depend on the arm length or the stroke even if the manipulators are the same types or series. Refer to the settings of the dip switch SD1 written in the “ Specifications” in the manipulator manual for details. NOTE Also, the controller settings are different depend on the length of the power cable and signal cable. Be sure to connect the controller and the manipulator with the cables corresponds to the length appear on the M. CODE label. ) ) 2 EH series SRC-320 ABS device for absolute motor specification MPU board MPUUarMPULarDSP@ar- Functions 1. Part Names and Functions 1. Part Names and Functions 1.1 Front panel ⑦ ③ ④ ⑤ ⑦ ⑥ ⑧ ⑧ ⑦ ② ① ⑦ ① POWER switch Controller power switch. There are a leakage indication button (yellow) and a test button (red) at right of the controller power switch. ② TEACH port RS-232C connector for connecting a programming unit such as a personal computer. can be used when in the TEACH Mode. This The baud rate is 9600bps (bits per second). For safety, the robot stops functioning if this connector is disconnected. During operation, please connect any of the following devices: TP-320 (option) TEACH port connector (attached to the TEACH port when shipped) PC cable for SPEL Editor or SPEL for Windows (option) WARNING SPEL Editor and SPEL for Windows are designed so that the robot is operated from outside the safeguarded space for program development. Be sure to use the teaching pendant with an enable switch and emergency stop switch when performing the teaching operation within the safeguard space. Use PC cable with the label “SRC-300” or PC cable with an enable switch. Cables without the label have a “normally open” emergency stop switch that does not function properly, exposing you to dangers. ③ E. STOP CANCEL switch (with light) Pushing the E. STOP CANCEL switch when replacing the TEACH port connector mentioned above, prevents emergency stop. 3 Functions 1. Part Names and Functions WARNING It is dangerous to operate the robot when either of the following symptoms appears: The light stays lit even after you take your hand off the CANCEL switch. The light does not turn on when you push the CANCEL switch even though the robot is not in the emergency stop condition. Either of these conditions indicates the possibility that the emergency stop switch connected to TEACH port is inoperable and needs repair. ④ PRG. No. LED This is a 7-segment 2-digit LED that shows the program number under normal conditions. When an error occurs, the LED will alternately show the following information. Error axis number first digit (axis 0 to 4)* Error task number two digits * 0 indicates that the error is not related to an axis. ⑤ LINE NO./STATUS LED When a program is being executed, this shows the line number of the program being executed. When an error occurs, the error number is shown. ⑥ Indicator panel LED The individual LEDs show the following information. Symbol NOTE ) Meaning Function E. STOP Emergency stop Lights under emergency stop SAFE GUARD Safeguard Lights when safeguard is open TEACH Teach Lights when in TEACH mode AUTO Automatic Lights when in AUTO mode S. ERR System error Lights when CPU is inoperable When a system error has occurred, please be careful since LEDs other than S. ERR and E. STOP may not function properly. ⑦ Front panel mounting screws Removing these four screws allows front panel removal. The front panel has a circuit board and cooling fan attached by cables. When removing the front panel, please do not pull hard. ⑧ Mounting bracket These are brackets for mounting the controller. Use these brackets to mount the controller to a post of a base table, stand or other suitable location. port the controller. 4 The brackets alone cannot sup- Functions 1.2 1. Part Names and Functions Rear panel ⑩ ⑨ ④ ⑥ ⑫ ⑦ ⑬ ⑭ ⑪ ⑧ ① ⑤ ③ ② ① POWER cable Cable for controller AC power. It is composed of two power leads (brown, blue) and a ground wire (green/yellow). ② PSU board Circuit board for controller, manipulator, and peripheral units’ power. ③ REMOTE board Interface board having four connectors for REMOTE1&2 and RS-232C #20/#21. ④ REMOTE1 Connector for safeguard and emergency stop inputs. The safeguard input has safety fea- tures such as temporary program stop and low power mode. The emergency stop input achieves robot emergency stop. This input terminal is “nor- mally closed” so that if no cable is connected, the robot is in the emergency stop condition and will not operate. Connect a “normally closed” emergency stop switch with the cable connector that came as a standard accessory. ⑤ REMOTE2 Connector specifically for the operating unit (option: OPU-300 or OPU-320). It can be used in the AUTO mode. If there is no cable connected, the robot is in the emergency stop condition. If you do not use the operating unit, connect a “normally closed” emergency stop switch with the cable connector that came as a standard accessory. Further, it will be necessary to make a mode switching circuit or similar modification. ⑥ RS-232C #20, #21 Connector for the RS-232C serial interface. It is used for communication between robots, peripheral units, or host computers. 5 Functions 1. Part Names and Functions ⑦ M/C SIGNAL This is a connector for signals from such things as the robot motor encoder or calibration sensor. Connect the signal cable attached to the manipulator. ⑧ M/C POWER Connector for robot power source. Connect the power cable attached to the manipulator. ⑨ I/O-1 50-pin D-sub input/output connector (16 inputs, 16 outputs). The cable connector is a standard attachment. ⑩ Option slot Seven slots which can accommodate boards for such things as additional I/O and additional RS-232C boards. Any slot can be used. ⑪ PE(F-GND) terminal A terminal for ground wire connection (frame ground). Please use this terminal if another ground wire is used in addition to the one included with the power cable. ⑫ M. CODE label A label on which the M. CODE (matching code) with the manipulator is shown. Also, the length of the power cable and signal cable is shown on this label. CAUTION The manipulator has the same M. CODE label affixed to it. When connect- ing the manipulator and the controller, make sure the M. CODEs correspond. When installing the cable between manipulator and controller, make sure that the length of the power cable and signal cable corresponds to the length written on the M. CODE label. ⑬ Serial No. label A label on which the serial number is shown. ⑭ MT label Labels that carry a special specification number. robots. Robots having this label have special maintenance requirements. forming maintenance, please confirm with us. 6 These are affixed to special specification When per- Functions 1.3 1. Part Names and Functions Controller interior The interior of the controller as it appears after removal of the front panel is shown in the figure below. Please do not pull hard when removing the front panel. A cooling fan and the indicator panel are attached to the front panel and connected to the interior by cables. ④Axis #1 ② SD1 ④Axis #2 ④Axis #3 ④Axis #4 ② SD2 ⑤ ③ ⑦ ⑥ Back side of front panel Î 7 Functions 1. Part Names and Functions ① MPU board and mounting bracket This board, containing the CPU, forms the nucleus of the controller and controls the various interfaces and executes the programs. It has DIP switches SD1 and SD2. The MPU board and the mounting bracket are one piece, and the main body is fixed by the mounting bracket. You can remove the MPU board by pulling on the bracket. ② MPU board mounting screws These screws affix the MPU board mounting bracket to the main body. MPU board, loosen the screws and then pull on the mounting bracket. To remove the Please do not pull the screws. ③ Safety cover This safety cover prevents tools and such from being inserted or dropped into the interior of the controller. ④ AC servo driver Unit to control the motors. Each servo-driver controls one motor. ⑤ Motor power unit Contains the power circuit for the servo-drivers and motors as well as the dynamic brake circuit. ⑥ Cooling fan The cooling fan is to fan out the heat generated from the servo-drivers to the outside the controller. Attached to the back of the front panel. ⑦ Front board The board for indicator. 8 Attached to the back of the front panel. Functions 1.4 1. Part Names and Functions Safety features The robot is equipped with safety features that protect it and peripheral equipment. However, these features are strictly to guard against unforeseen circumstances. To ensure safety, it is very important that you implement the maintenance inspections described in Maintenance volume of this manual and manipulator manual, and that you use the robot correctly. The robot is equipped with the following safety features. If these features do not function properly, refer to “15. Trouble Shooting” in Maintenance volume herein and eliminate the cause of trouble. zEmergency stop switch The optional PC cable (for SPEL Editor or SPEL for Windows), OPU-300/OPU-320, and TP-320 are all equipped with emergency stop switch. The REMOTE1 connector of the controller has an emergency stop input terminal that allows you to connect an add-on emergency stop switch. All the emergency stop switches are connected normally closed. When any of the emergency stop switches is pushed, the relay for the dynamic brake is activated to shut down the motor power for the robot (the emergency status). zTemporary stop through input from the safeguard The robot temporarily stops operating when you open and close the safeguard. Be sure to connect the safeguard switch to the REMOTE1 connector of the controller. zLow power mode This mode suppresses motor output. The robot automatically enters Low power mode and operates at a controlled, slower speed when it is in TEACH mode, a mode in which teaching and other operations are performed. When the safeguard is opened while the robot is in AUTO mode, the robot temporarily stops operating and enters Low power mode. zEnable switch The optional PC cable (for SPEL Editor or SPEL for Windows) is equipped with enable switch. The robot temporarily stops operating when both the safeguard and the enable switch are open, making it safe to perform teaching operations. zMode switch with key The operating unit is equipped with a mode switch that can only be operated with the use of a key. Removing the key when the robot is in TEACH mode prevents the robot from switching to AUTO mode, making it safe to perform teaching operations. (See the operating unit manual.) zDynamic brake Dynamic brake circuit consists of a relay that switches the connection of motor power line to make a short-circuit on the motor side or to connect to the AC servo driver. When emergency stop is input, or the following malfunction is detected, the dynamic brake activates and stops the rotation of motor. 9 Functions 1. Part Names and Functions zOverheating detection A thermostat inside the controller detects overheating. zEncoder discontinuity detection Detects discontinuity of the signal wire from the motor encoder to the controller. zOverload detection Detects loads that exceed the capacity of the motor. zTorque irregularity detection Detects irregular motor output. zSpeed irregularity detection Detects irregularities in motor speed. zServo overflow detection Detects the difference between the position reference and the current position of the manipulator. zMotor lock detection Detects failure of the motor to respond to motion commands. zControl power source irregularity detection Detects voltage irregularity of control power source of +5V, ±12V and +24V. zPrimary power source irregularity detection Detects dropped voltage of AC200V motor main power. zCPU irregularity detection Detects CPU’s irregularity that controls system with a watchdog timer. trolling CPU and motor controlling CPU always watches over each other. zMemory irregularity detection Detects check sum error of memory. 10 System con- Functions 2. Installation 2. Installation NOTE ) 2.1 The controller SRC-320 is not designed for the use in clean room environments. use the controller in the clean room, take an adequate countermeasure. If you As an example, place the controller in a box having a cooling or an exhausting mechanism. Unpacking CAUTION The controller weighs 24kg (standard). hand cart. When moving the controller, use a If unavoidable to move it by hand, be sure to hold by two persons. Do not hold the pulls on the front panel of the controller when moving. Box contents SRC-320 main unit 1 unit 50-pin D-sub I/O connector + clamp hood 1 set Jumper socket 5 pieces REMOTE1 connector 1 set REMOTE2 connector 1 set TEACH Port connector (attached to controller main unit) 1 piece 11 Functions 2.2 2. Installation Environmental requirements In order to maximize the functions of the SRC-320 controller and to use it in a safe manner, an appropriate environment is necessary. Please place the controller in an environment which satisfies the following conditions. Ambient temperature 5 to 40°C (with minimal variation) Ambient relative humidity 10 to 80% (with no condensation) Fast transient burst noise less than 2000V Electrostatic noise less than 6kV Momentary power inter10 ms (maximum) rupt Environment zInstall indoors. zPlace in a well-ventilated area. zKeep away from direct sunlight. zKeep away from dust, oil, salinity, metal powder or other contaminants. zKeep away from flammable or corrosive solvents and gases. zKeep away from water. zKeep away from shocks or vibrations. zKeep away from sources of electronic noise. If it’s not avoidable to use the controller in the environment that does not fulfill the above mentioned conditions, take an adequate countermeasure for the actual environment. As an example, cover the controller with a box having a cooling mechanism. In addition, the controller is not designed for the use in clean room environments. If the controller is used in the clean room, place the controller in a box having a cooling or an exhausting mechanism. Base table Use a base table that is at least 100 mm off the floor. Placing the controller directly on the floor could allow dust penetration leading to malfunction. Space Allow at least 50 mm on each side. There must be room in front of the controller so that the entire controller can be pulled outward. There must also be room behind the controller so that one can attach and remove cables and boards. Other 12 Do not remove the legs on the underside of the controller. Functions 2.3 2. Installation Vertical placement Standard controller placement is horizontal. In the event that vertical placement is un- avoidable, please do so following the points below. 1) Use the left side as the new bottom (see figure below). 2) Remove the four legs mounted on the original bottom. Remove them by inserting a flat screwdriver between the bottom and the legs. 3) Insert the legs into the four holes on the left side. the controller directly on the floor. Be sure to use the legs and not set You may remove the bottom-side mounting bracket if it is in the way. 4) The top surface (corresponding to the right side when the controller is placed horizontally) has two holes. Using some type of lid, be sure to cover the holes to prevent wa- ter or metal shaving penetration. 5) Placing the controller vertically is inherently unstable. Use the mounting bracket to mount the controller to prevent it from tipping over. Mounting bracket Leg holes (4) The mounting bracket can be removed by removing these four screws. Mounting bracket Left side face Legs (4) Mount to base table beam or similar location. Be sure to use legs. Vertical placement 13 Functions 2.4 2. Installation Power Power specifications Please be sure available power meets the following specifications. Voltage Phase Frequency Power consumption AC 200 to 230V ±10% Single phase 50/60Hz The controller itself consumes a maximum of approximately 200W, but actual consumption depends on the manipulator motors. Please refer to the manipulator manual for manipulator power consumption and then use the following equation to calculate total consumption: Rated consumption =200W+ total manipulator consumption ×1.5 When power is turned on: approximately 130A (1msec.) Peak current When motor is on: approximately 90A (5msec.) Leakage current 3mA typical Earth leakage breaker in the controller Ground NOTE ) Rated current 10A Sensitivity 15mA Be sure to use a grounded power source. If you install an earth leakage breaker in the AC line, please use one that does not induce more than 10kHz (inverter type). If you install a circuit breaker, please select one that is bearable against the above mentioned peak current. Power plug To lockout the power supply, unplug the power plug. WARNING Never directly connect the robot to a factory power supply without using the power plug, as this will disable power lockout. Be sure to attach the ground wire (yellow/green) of AC power cable to the plug so that it shall be connected to the earth terminal of factory power supply. The AC power cable is not equipped with a plug. the power outlets in your area. The following table shows color of the wire of the power cable. 14 Please attach a plug that is suitable for Wire Color AC power Brown Open - AC power Blue Ground wire Green/yellow Functions 2. Installation For reference, specifications of the AC power cable included with the controller appear below. Item Specification Components 41 wires/ 0.26 mm (AWG #14) Outer diameter 1.9 mm (typical) Color Brown, blue (AC power), green/yellow (ground) Outer diameter 3.5 mm (typical) UL. Style No. 1015 Braid density 70 % Color Black Diameter 10.5 mm (typical) Conductor Insulator Braided shield Sheath Cable length 3.5 m 15 Functions 2.5 2. Installation Cable connections WARNING Be certain that the power has been turned off controller power before you plug or unplug any of the cables linking the manipulator and controller. Failure to do so could cause electrification and malfunction. CAUTION When installing the cable between the manipulator and the controller, make sure the M. CODEs (matching codes) match. The M. CODEs are written on the yellow labels which appear on the back sides of both the manipulator and the controller. Also, make sure that the length of the power cable and signal cable correspond to the length which appear on the yellow labels mentioned above. It is necessary to connect the various cables as shown in the figure below in order for the robot to operate. ① M/C power cable Manipulator ② M/C signal cable Power ③ REMOTE1 ④ REMOTE2 Controller ⑤ PE (F-GND) ⑥ TEACH port ⑦ I/O-1 (REMOTE3) ⑧ RS-232C #20, #21 Safeguard, etc. Operating unit or REMOTE2 connector Ground Programming unit (PC) or Teaching pendant or TEACH port connector Input/output unit Peripheral unit, host computer, etc. ① M/C power cable Cables with 17-pin, round connectors on both ends. Connect the female connector to the manipulator POWER connector and the male connector to the controller M/C POWER connector. Insert the connectors and rotate clockwise until you hear a “click.” 16 Functions 2. Installation ② M/C signal cable Cables with 68-pin, square connectors on both ends. Connect the signal cable to the manipulator SIGNAL connector and controller M/C SIGNAL, respectively. Using the two fitting screws attached to the connectors, tighten down the connectors so that they will not come loose. ③ Safeguard switch connection (REMOTE1) Please be absolutely certain to erect a safety enclosure around the robot area. Connect that safeguard switch to the input terminal of the REMOTE1 safeguard. Since this input terminal is “normally closed,” the robot will not operate normally if the safeguard switch is not installed. Details of the connector are included in “4. REMOTE1” in this volume. ④ REMOTE2 Connect the optional operating unit (OPU-300 or OPU-320) to REMOTE2. Please refer to the separate manual for the operating unit for details. If the operating unit is not being used, connect a “normally closed” emergency stop switch with the REMOTE2 connector that came as a standard accessory. If nothing is connected, the robot will be in the Emergency Stop mode and will not function. Details concerning necessary procedures when the operating unit is not being used appear in “5. When not using the operating unit” in this volume. ⑤ PE(F-GND) terminal connections The PE terminal is for connection to the ground (frame ground). We recommend connecting the PE terminal when several robots are used in a line or when a peripheral control unit such as a sequencer is used in the system. Use wiring having a diameter equal to or greater than AWG #16 to connect to the PE terminal. ⑥ TEACH port Connect any one of the following units. If nothing is connected, the robot will be in the Emergency Stop mode and will not function. The details of these connectors are included in “3. Teach Port” in this volume. zPC cable for SPEL Editor or SPEL for Windows (option) zTeaching zTEACH WARNING pendant TP-320 (option) port connector SPEL Editor and SPEL for Windows are designed so that the robot is operated from outside the safeguarded space for program development. Be sure to use the teaching pendant with an enable switch and emergency stop switch when performing the teaching operation within the safeguard space. Use PC cable with the label “SRC-300” or PC cable with an enable switch. Cables without the label have a “normally open” emergency stop switch that does not function properly, exposing you to dangers. 17 Functions 2. Installation ⑦ I/O-1 If you have input/output units, connect them to this connector. The details regarding I/Os appear in “6. I/Os” in this volume, and details regarding REMOTE3 appear in “7. I/O Remote Set Up” in this volume. ⑧ RS-232C #20/#21 If you have communications units, connect them to this connector. Details of this connector appear in “8. RS-232C” in this volume. 18 Functions 2.6 2. Installation Noise countermeasures Please pay attention to the following points when wiring the system. zTo ground the controller chassis is very important not only for prevention from electric shock, but also for reducing the electric noise influence around the controller. There- fore, be sure to connect the yellow/green wire in the power cable of the controller to the earth terminal of the factory power supply. (See the section “Power Plug” in “2.4 Power” in this chapter.) zDo not tap into a power source which is supplying power to a piece of equipment which may cause noise. zUse a twisted pair motor power line. zDo not run AC power lines and DC power lines in the same wiring duct, and separate them by at least 200 mm. For example, separate the AC motor power line and the controller power line by at least 200 mm from the sensor or valve I/O lines; and do not bundle both sets of wiring with the same cable tie. Also, it is preferable to cross the different lines as shown below. AC line duct 200 mm or more DC line duct zFor I/O lines, use a shield and clamp the shield to the attached I/O connector interior. Shield Cable clamp Twisted pair line Shield (to FG) zUse a shielded wire for REMOTE1 and REMOTE2, and clamp the shield to the interior of the connectors. 19 Functions 2. Installation zFor such induction elements as relays and solenoid valves connected to an I/O, be sure to use elements which have surge suppressors. If surge suppressors are not used, in- sert an element such as a rectifying diode as close as possible to the inductors, as shown below. Choose rectifying diodes adequate to the inductors. - + Inductor Diode zFor AC motors (induction motor, 3-phase induction units, etc.) in such things as conveyors which start, go forward and backwards regularly, install a spark killer between the lines. The spark killer is more efficient the closer it is to the motor. 20 Functions 3. TEACH Port 3. TEACH Port This port is used for such tasks as programming, teaching, and debugging, and is connected to a personal computer or teaching pendant TP-320 (option). This port becomes a con- sole port when in the TEACH mode. If nothing is connected to the TEACH port, the robot will enter the emergency stop condition. If you are not using a personal computer or TP-320, connect the TEACH port con- nector. The TEACH port connector is connected to the TEACH port prior to shipping. When changing connectors, do so while pushing E. STOP CANCEL switch to the left of the TEACH port to avoid the emergency stop condition. WARNING It is dangerous to operate the robot when either of the following symptoms appears: The light stays lit even after you take your hand off the CANCEL switch. The light does not turn on when you push the CANCEL switch even though the robot is not in the emergency stop condition. Either of these conditions indicates the possibility that the emergency stop switch connected to TEACH port is inoperable and needs repair. 21 Functions 3.1 3. TEACH Port Personal computer connection WARNING SPEL Editor and SPEL for Windows are designed so that the robot is operated from outside the safeguarded space for program development. Be sure to use the teaching pendant with an enable switch and emergency stop switch when performing the teaching operation within the safeguard space. Use PC cable with the label “SRC-300” or PC cable with an enable switch. Cables without the label have a “normally open” emergency stop switch that does not function properly, exposing you to dangers. The following is information on connecting a personal computer. Programming is done by a personal computer running the SPEL Editor or SPEL for Windows. There is a special cable (PC cable) for use between the TEACH port and the personal computer attached to the SPEL Editor or SPEL for Windows. Connect it to the TEACH port. This cable has a “normally closed” emergency stop switch. Please set up the configuration of the personal computer’s RS-232C port to match the following protocol for the TEACH port: 9600bps, 8 bit, Even, 2 stop TEACH port Personal computer (SPEL Editor or SPEL for Windows) Controller RS-232C port PC cable SRC-300 Emergency stop switch (normally closed) 22 Manipulator Use cable with correct label! Functions 3.2 3. TEACH Port Teaching pendant TP-320 connection Teaching operation is possible to be done with a handy teaching pendant TP-320 instead with a personal computer. TP-320 is employing both of an emergency stop switch (nor- mally closed) and an enable switch (normally open). ler is attached to TP-320. The dedicated cable for the control- Connect this cable to the TEACH port. In TEACH mode, the enable switch has to be pressed for robot operation. If it is not pressed, pause condition will occur as soon as a program or motion command is executed. If the enable switch is set free during motion, the robot will quickly pause and a message will be issued. To resume robot operation from the condition, press the enable switch and [RESUME] key. Refer to TP-320 manual for details. In AUTO mode, a program or motion command can be executed even if the enable switch is not pressed. The condition that a robot can be operated is called the enable condition. REMOTE1 and REMOTE3 have Enable condition output terminal. Make sure that the enable switch functions properly by the following procedure before a teaching operation. 1) Switch to TEACH mode. 2) Execute a program or motion command while pressing the enable switch. 3) Set the enable switch free during motion. 4) Make sure that the robot will quickly pause. 3.3 TEACH port connector (E. STOP CANCEL connector) The TEACH port has “normally closed” emergency stop input terminals so that if the terminals are not closed, the unit will enter the emergency stop condition. If TP-320 or per- sonal computer is not connected, install the TEACH port connector that came standard with the controller. The internal wiring of the TEACH port connector is as shown below. TEACH port TEACH port connector Emergency stop input 10 Emergency stop input 11 * Compatible connector : 25-pin D-sub connector 23 Functions 3.4 3. TEACH Port E. STOP CANCEL switch use WARNING Never perform teaching or other operations while holding down the E. STOP CANCEL switch. Never use robot when the light is off while pushing E. STOP CANCEL switch and when not in the emergency stop condition. Do not use robot when the light does not return off though you release the E. STOP CANCEL switch, either. The E. STOP CANCEL switch invalidates emergency stop input from the TEACH port. Pushing this switch when changing connectors on the TEACH port prevents the emergency stop condition. Release the switch after the connector is in place. Never perform teaching or other operations while holding down the E. STOP CANCEL switch. It is very dangerous because Emergency stop input may not work in this case. Before performing teaching operations, make certain that the E. STOP CANCEL switch and associated circuits are working properly. If they are not working properly, do not use the robot. Please check them as follows. This switch has an attached light. When not in the emergency stop condition (when E. STOP LED on the indicator panel of the controller is off), pushing the switch turns on the light. Removing your hand from the switch turns off the light. This is the normal oper- ating condition of the switch, so please check that it acts accordingly before use. If it is not normal, the controller needs repair. In normal condition Switch pressed Switch released Lit Unlit When in the emergency stop condition (when E. STOP LED on the indicator panel of the controller is on), there are cases in which pushing the switch turns on the light and does not turn on the light. When the light does turn on, the cause of the emergency stop is on the TEACH port side. When the light does not turn on, the cause of the emergency stop is in either REMOTE1 or REMOTE2 on the rear panel of the controller. Switch pressed Switch released Lit Unlit The emergency stop is pressed on the TEACH port side, or the connector is not connected properly. Unlit The emergency stop is pressed in either REMOTE1 or REMOTE2, or emergency stop input terminals are not wired. In emergency stop condition Unlit 24 Emergency stop cause Functions 3.5 3. TEACH Port Pin assignment of TEACH port The pin assignment for the TEACH port is as shown below. Pin number Signal name 1 FG 2 SD 3 RD 4 RS 5 CS 6 - 7 SG 8 CD 10 TEACH 13 25 1 14 E. STOP input (normally closed) 11 14 15 DMSW input (normally open) (enable switch input) 20 ER If you prefer to use your own connection cable, please use a shielded cable and use the following example wiring diagram as a reference for wiring your cable. Since the pin numbers on the personal computer side may differ depending on the type of computer, please refer to the computer manual. Also, in order to ensure safe operation, be sure include an emergency stop switch and an enable switch. Wiring example [TEACH port] Signal name [RS-232C port of PC] Pin number Pin number Signal name FG 1 1 FG SD 2 2 SD RD 3 3 RD SG 7 7 SG RS 4 4 RS CS 5 5 CS - 6 6 DR CD 8 8 CD ER 20 20 ER E. STOP 10 E. STOP 11 DMSW 14 DMSW 15 E. STOP switch (normally closed) Enable switch (normally open) 25 Functions 4. REMOTE1 4. REMOTE1 WARNING Be sure to operate the system with a functional interlock switch on the safeguard. It is dangerous to operate the system with the switch wound in tape, or without the on/off conditions since the safeguard input functions will not operate. REMOTE1 has input terminals for the safeguard and the emergency stop. In order to maintain a safe working zone, it is necessary to erect a safety enclosure around the manipulator. MOTE1. The interlock switch of this safeguard should be connected to RE- Safety functions such as momentary interruption of the program and switch to low power mode are activated when the safeguard is opened. Further, the extended emergency stop input terminals are used when additional emergency stop switches are added or the operating unit is not used. NOTE ) PNP type or NPN type remote board is available. tween each type remote boards. The pin assignments are different be- Confirm which type you select and refer to appropriate section of this manual when wiring. Although NPN type remote board is not labeled, PNP type remote board is labeled as the drawing below. “P TYPE” label P TYPE REMOTE PNP type REMOTE board Refer to 4.3 - 4.4 26 REMOTE NPN type REMOTE board Refer to 4.5 - 4.6 Functions 4. REMOTE1 4.1 Connecting to REMOTE1 the safeguard switch and emergency stop switch CAUTION Use emergency stop switch conformed to the related safety standards (EN418, EN60204-1). The interlock switch must be designed and installed such as the contacts are opened by force when the safeguard opens, not by spring of the switch itself. (See EN1088 and EN954.) Wire the interlock switch dual-redundantly to the double safeguard inputs to prevent malfunction of the safeguard circuits. The safeguard must be designed and installed such as it does not close without operator's intention. The Latch release switch must be installed at a place where the hazardous area can be looked out. Safeguard switch An interlock switch of the safeguard, safeguard switch, should be connected with the cable connector that came as a standard accessory. When wiring, in case of PNP type, refer to “4.3 Pin assignment of REMOTE1 (PNP type)” and “4.4 Circuit diagram and example wiring of REMOTE1 (PNP type).” In case of NPN type, refer to “4.5 Pin assignment of REMOTE1 (NPN type)” and “4.6 Circuit diagram and example wiring of REMOTE1 (NPN type).” The safeguard input circuit is dual-redundant. if one of the circuits fails. An open safeguard is always detected even An error is displayed in the event of a failure. Therefore, we recommend dual-redundant wiring for the safety gate interlock switch. If an open safeguard is detected by the safeguard input circuit, the signal will be latched, and even after the door is closed, it will not be recognized as such until the latch release signal is input. This has been provided as a means of preventing the kind of confusion that can easily arise during the construction of a robot system when operator and the robot system itself perceive the state of the safeguard differently; that is, when one believes the door is open, while the other perceives it as being closed. (For example, when faulty ad- justment causes a difference in the state of the door and the state of the interlock switch; or when the door closes without the operator intending for it to be closed; etc.) If the REMOTE board jumper pins XP4 and XP5 are set between “1 - 2,” the safeguard open signal will be latched. (This is the standard factory setting.) a normally open type switch between pin #9 and #22. For releasing it, wire If the jumper pins XP4 and XP5 are set between “2 - 3,” the signal will not be latched. 27 Functions 4. REMOTE1 Use an interlock switch that opens when the safeguard opens. The safeguard input func- tions when the safeguard input terminals open, and activates the low power state. A power source should be connected to pin #10 (or #11) and #23 (or #24) for the interlock switch. Connect additional emergency stop switches between pin #6 and #19. If you do not need additional emergency stop switches, shorten pin #6 and #19. After connecting switches, make sure that each switch functions properly by the following procedure. For your safety these checks are recommended to be done at first of all. 1) Close the safeguard and push the latch release switch (when the REMOTE board jumper pins XP4 and XP5 are set between 1 and 2). 2) Open the safeguard. 3) Make sure that “SAFE GUARD” LED on the front panel will light. If a personal computer, on which SPEL Editor or SPEL for Windows is running, is connected to the TEACH port, the message to show the safeguard is open is displayed on the screen. (Refer to the SPEL Editor or SPEL for Windows manual for details.) 4) Close the safeguard. a) If the jumper pins XP4 and XP5 on remote board are set between 1 and 2 : “SAFE GUARD” LED still lights. b) If the jumper pins XP4 and XP5 on remote board are set between 2 and 3 : “SAFE GUARD” LED will go off. 5) In case of 4)-a), press a latch release switch, then “SAFE GUARD” LED will go off. Emergency stop switch When wiring, in case of PNP type, refer to “4.3 Pin assignment of REMOTE1 (PNP type),” “4.4 Circuit diagram and example wiring of REMOTE1 (PNP type).” In case of NPN type, refer to “4.5 Pin assignment of REMOTE1 (NPN type),” “4.6 Circuit diagram and example wiring of REMOTE1 (NPN type).” 1) Turn on the controller and press the emergency stop switch. 2) Make sure that “E. STOP” LED on the front panel will light. 3) Execute MOTOR ON command from a personal computer, or TP-320, or OPU-300/OPU-320 while “E. STOP” LED lights. 4) Error 121 will be issued. 5) Execute RESET command, then “E. STOP” LED will go off. 28 Functions 4.2 4. REMOTE1 Safeguard input functions The basic function of the safeguard input is to increase safety by stopping the robot and regulating the motor output when the safeguard is opened. When the safeguard is opened/closed while the robot is running a program or is in the direct command condition, it will quickly pause and turn into the Low Power state. It is not possible to operate the manipulator at high speeds in this state. The methods to resume normal operation after quick pause are as follows. zPush the start switch on operating unit. zPress RESUME key if you use teaching pendant TP-320. zInput a START signal to REMOTE3 when console is REMOTE3. Remote Set Up (REMOTE3)” in this volume. See section “7. I/O There are differences in robot operation when in the TEACH or AUTO modes. The safeguard input functions for each mode are explained below. In addition, refer to the Operating unit, SPEL Editor or SPEL for Windows manuals for details on the operating methods. AUTO mode In AUTO mode the safeguard must be closed for the robot to operate. When the safe- guard is opened during operation, there is a quick pause and the robot switches to Low Power state. Additionally, attempting to start a program with the safeguard open results in a quick pause, and the robot does not move. To continue normal operation from the PAUSE condition, follow the procedure below. 1) Close the safeguard after confirming that there is no person in the safeguard. 2) Push the latch release switch. Low power mode High power mode (by executing POWER LOW) (by executing POWER HIGH) Low power state PAUSE RESET Low power state POWER HIGH RESET Close and "open" signal unlatched POWER LOW, MOTOR ON PAUSE START PAUSE Open RESET RESET START Open PAUSE Open START START Close and "open" signal unlatched RESET START Open RESET PAUSE Close and "open" signal unlatched Safeguard CLOSE and “safeguard open” signal unlatched Safeguard OPEN or “safeguard open” signal latched 3) Push the “START” switch. (Input a START signal when REMOTE3 is the console.) Open PAUSE High power state 29 Functions 4. REMOTE1 In case of S. NET mode, commands execution (direct commands) except for motion commands is not affected by the safeguard. TEACH mode In TEACH mode it is possible to operate the robot regardless of whether the safeguard is opened or closed. However, the robot operation speed and torque are limited when the safeguard is opened. The robot operation speed cannot be increased beyond the fixed value which depends on the type of robot when the safeguard is opened. In addition, although the robot can operate by executing a program or command regardless of whether the safeguard is open or closed, it will quickly pause in either state if the safeguard is opened or closed during operation. To operate the robot at high speed, close the safeguard and change the power mode to high by using POWER HIGH command. POWER command. Refer to the SPEL III reference manual for details on For your reference, POWER LOW equals LP ON, and POWER HIGH equals LP OFF. When power is applied to the controller, the initial start up corresponds to POWER LOW High power mode (by executing POWER HIGH) STOP PAUSE POWER LOW, MOTOR ON RESET RESET POWER HIGH XQT END STOP POWER LOW, MOTOR ON POWER HIGH STOP Low power state START Close and "open" signal unlatched POWER HIGH Open Close and "open" signal unlatched Open XQT START END XQT END RESET RESET RESUME (P) or (E) Open Open START END STOP START Open POWER LOW, MOTOR ON XQT PAUSE (P) or (E) RESUME POWER LOW, MOTOR ON POWER HIGH Open Low power state STOP RESUME (P) or (E) PAUSE Close and "open" signal unlatched Close and "open" signal unlatched Low power mode (by executing POWER LOW) (P) or (E) RESUME Close and "open" signal unlatched Close and "open" signal unlatched Safeguard CLOSE and “safeguard open” signal unlatched Safeguard OPEN or “safeguard open” signal latched so that the robot is always in low power state. PAUSE High power state (P): PAUSE code input from TEACH port/PAUSE command (E): ENABLE switch input from TEACH port Command execution (direct commands) except for motion commands is not affected the enable switch and safeguard. 30 Functions 4. REMOTE1 The Low Power/High Power state selection differs as shown below based on the combination of the safeguard status (open/closed) and power mode set by POWER command. POWER LOW (LP ON) POWER HIGH (LP OFF) Safeguard open Safeguard closed Low power state Low power state High power state In order to achieve high power state, follow the procedure below. 1) Close the safeguard after confirming that there is no person in the safeguard. 2) Push the latch release switch. (In case that the jumper pins XP4 and XP5 on remote board are set between 1 and 2.) 3) Enter the POWER HIGH (or LP OFF) command. Any of the following conditions causes cancellation of the POWER HIGH (LP OFF) command and selection of the low power state: zSwitching between TEACH and AUTO modes zExecution of the POWER LOW (LP ON) command zExecution of the RESET command (for an error requiring reset or turning on the power again) zExecution of the MOTOR ON command zPushing the [STOP] key zPushing the [Ctrl] + [C] keys 31 Functions 4.3 4. REMOTE1 Pin assignment of REMOTE1 (PNP type) The pin assignment of the REMOTE1 connector for PNP type is as shown below. Pins #12, 13 and #25, 26 are for user’s +24V power. CAUTION This is the same as the power on I/O, so please be careful of the power capacity. The pins for an emergency stop circuit are both connected to the internal +24V power from the controller. Please follow the wiring examples to con- nect your emergency stop circuit. Any other wiring than sampled should be avoided. Pin No. 1 14 2 15 3 16 4 17 Signal name Abnormal occurrence relay contact output *1 Relay contact output upon occurrence of sysAbnormal occurrence relay tem error contact output *1 System error output Output from system error (CPU inoperable) Emergency stop output Output from emergency stop condition Safeguard output Output from safeguard when open Enable condition output Output from enable condition High power output Output from high power condition Motor power on output Output from motor power condition 5 18 6 - - - Emergency stop input For connection to normally closed emergency stop switch Safeguard input 1 *2 7 20 Safeguard input 1 *2 Safeguard input 2 *2 8 21 9 10 Latch release input Common (GND) 23 11 Common (+DC) Common (GND) 24 12 Common (+DC) +24V output 25 13 +24V GND output +24V output 26 For connection to safeguard input Safeguard input 2 *2 Latch release input 22 32 - Emergency stop input 19 Function +24V GND output For connection to normally open switch that release the latch of “safeguard open” For supply power for REMOTE1 internal circuit For supply power for REMOTE1 internal circuit +24V power output terminals for controller interior +24V power output terminals for controller interior Functions 4. REMOTE1 *1 These are “normally closed” contacts which open upon the occurrence of a system error. By using the jumper pins on the REMOTE board, it is possible to output other conditions. Jumper pin Function when shorted XP2 outputs for emergency stop occurrence XP3 also outputs for error occurrence There is a possibility that there will be no output if the internal controller +24V power is abnormal. *2 There are two safeguard inputs provided for REMOTE1. When the status of two in- puts is different, CPU will take the safeguard input circuit as malfunction, and will issue an error. Therefore, it’s recommendable to use a two-contacts switch. If it’s not avoidable to use a one-contact switch, be sure to short the jumper pin XP6 on the REMOTE board, so that the other input to which a switch is not connected will be connected internally. 25 26 13 14 1 26 12 2 14 15 REMOTE1 connector Controller side 13 1 REMOTE1 connector Cable side (details for wiring) 33 Functions 4.4 4. REMOTE1 Circuit diagram and example wiring of REMOTE1 (PNP type) Input circuit Emergency stop input current Safeguard input current 100mA 2mA Output circuit Rated output voltage DC 12 to 24V ±10% 250mA/1 output Power MOS FET 1.0V Maximum output current Output driver Saturation voltage typical typical/for 24V input Example wiring REMOTE1 +24 V TEACH REMOTE2 Dynamic brake relay 6 VCC 7 Latch circuit Emergency stop input 19 VCC Safeguard input 1 20 XP6 8 Latch circuit VCC 3 21 9 1 Safeguard input 2 Latch release input 22 XP4 XP5 1-2: Latched 2-3: Unlatched GND +DC 2 System error output Inductor 15 E. stop condition output (Same circuit as above) 3 Safeguard output (Same circuit as above) 16 Enable condition output (Same circuit as above) 4 High power condition output 17 Motor power condition output (Same circuit as above) (Same circuit as above) 10, 11 Common (GND) 23, 24 Common (+DC) +24 V 1 14 Contact rating: AC 250 V 1 A DC 30 V 1 A +24 V 12, 13 +24 V output System error Emergency stop Error CAUTION 34 Abnormal occurrence relay contact output XP2 XP3 GND (Caution) 25, 26 +24 V GND output Internal +24 V power Current capacity: 1 A (max.) Do not use internal controller power and external power simultaneously as it can result in damage. Functions 4.5 4. REMOTE1 Pin assignment of REMOTE1 (NPN type) The pin assignment of the REMOTE1 connector for NPN type is as shown below. Pins #12, 13 and #25, 26 are for user’s +24V power. CAUTION This is the same as the power on I/O, so please be careful of the power capacity. The pins for an emergency stop circuit are both connected to the internal +24V power from the controller. Please follow the wiring examples to con- nect your emergency stop circuit. Any other wiring than sampled should be avoided. Pin No. 1 14 2 15 3 16 4 17 Signal name Abnormal occurrence relay contact output *1 Relay contact output upon occurrence of sysAbnormal occurrence relay tem error contact output *1 System error output Output from system error (CPU inoperable) Emergency stop output Output from emergency stop condition Safeguard output Output from safeguard when open Enable condition output Output from enable condition High power output Output from high power condition Motor power on output Output from motor power condition 5 18 6 - - - - Emergency stop input 19 Function Emergency stop input For connection to normally closed emergency stop switch Safeguard input 1 *2 7 20 Safeguard input 1 *2 Safeguard input 2 *2 8 21 9 Safeguard input 2 *2 Latch release input 22 10 Latch release input Common (+DC) 23 11 Common (GND) Common (+DC) 24 12 Common (GND) +24V output 25 13 +24V GND output +24V output 26 For connection to safeguard input +24V GND output For connection to normally open switch that release the latch of “safeguard open” For supply power for REMOTE1 internal circuit For supply power for REMOTE1 internal circuit +24V power output terminals for controller interior +24V power output terminals for controller interior 35 Functions 4. REMOTE1 *1 These are “normally closed” contacts which open upon the occurrence of a system error. By using the jumper pins on the REMOTE board, it is possible to output other conditions. Jumper pin Function when shorted XP2 outputs for emergency stop occurrence XP3 also outputs for error occurrence There is a possibility that there will be no output if the internal controller +24V power is abnormal. *2 There are two safeguard inputs provided for REMOTE1. When the status of two in- puts is different, CPU will take the safeguard input circuit as malfunction, and will issue an error. Therefore, it’s recommendable to use a two-contacts switch. If it’s not avoidable to use a one-contact switch, be sure to short the jumper pin XP6 on the REMOTE board, so that the other input to which a switch is not connected will be connected internally. 25 26 13 14 1 26 12 2 14 15 REMOTE1 connector Controller side 36 13 1 REMOTE1 connector Cable side (details for wiring) Functions 4.6 4. REMOTE1 Circuit diagram and example wiring of REMOTE1 (NPN type) Input circuit Output circuit Emergency stop input current 100mA typical Safeguard input current 2mA typical/for 24V input Rated output voltage DC12 to 24V ±10% Maximum output current 250mA/1 output Output driver Power MOS FET Saturation voltage 1.0V Example wiring REMOTE1 +24 V TEACH REMOTE2 Dynamic brake relay 6 VCC 7 Latch circuit Emergency stop input 19 VCC Safeguard input 1 20 XP6 8 Latch circuit VCC 9 XP4 XP5 1-2: Latched 2-3: Unlatched Safeguard input 2 21 Latch release input 22 GND +DC 2 System error output Inductor (Same circuit as above) (Same circuit as above) (Same circuit as above) (Same circuit as above) (Same circuit as above) 15 3 16 E. stop condition output Safeguard output Enable condition output 4 High power condition output 17 Motor power condition output 10, 11 Common (+DC) 23, 24 Common (GND) +24 V Error CAUTION Abnormal occurrence relay contact output 14 Contact rating: AC 250 V 1 A DC 30 V 1 A +24 V 12, 13 +24 V output System error Emergency stop 1 XP2 XP3 GND (Caution) 25, 26 +24 V GND output Internal +24 V power Current capacity: 1 A (max.) Do not use internal controller power and external power simultaneously as it can result in damage. 37 Functions 5. When Not Using the Operating Unit 5. When Not Using the Operating Unit Connect the optional operating unit OPU-300 or OPU-320 to the REMOTE2 connector. If you do not connect the operating unit, then you need to connect the REMOTE2 connector that came standard with the controller and take the following additional steps. zMake a TEACH/AUTO mode switching circuit. zConnect an emergency stop switch. Or, if you connect the operating unit to the REMOTE2 connector but only use the output function (such as a display) rather than using it as a console, it is necessary to assign the console to another device. 5.1 Operating unit disconnected (REMOTE2) Make a TEACH/AUTO mode switching circuit Connector REMOTE2, to which you connect the operating unit, has a mode switching terminal. Switching of the TEACH/AUTO mode can only be done from the REMOTE2 connector. So, if you do not connect the operating unit, make a mode switching circuit using the pin assignment and wiring example for reference. For safety reasons, a key switch shall be used. If nothing is connected to the mode switching terminal, TEACH mode will be assumed. Connecting an emergency stop switch Pins #5 and #15 of REMOTE2 are for an emergency stop input terminal. is not connected to REMOTE2, connect emergency stop switch. the following page. Emergency stop input is normally closed. If operating unit Refer to the figures on If nothing is connected, the emergency stop condition will be assumed. Both REMOTE1 and REMOTE2 have an emergency stop input terminal. Use an emergency stop switch conformed to the related safety standards (EN418, EN60204-1). After connecting emergency stop switch, make sure that the switch functions properly by the following procedure. 1) Turn on the controller and press the emergency stop switch. 2) Make sure that “E. STOP” LED on the front panel will light. 3) Execute MOTOR ON command from a personal computer, or TP-320, or OPU-300/OPU-320 while “E. STOP” LED lights. 4) Error 121 will be issued. 5) Execute RESET command, then “E. STOP” LED will go off. 38 Functions 5. When Not Using the Operating Unit Pin assignment REMOTE2 is a 20-pin connector, but only the pins in the table below can be used for wiring. Do not use any other pins under any circumstances, as they have not been freed for use. Pin No. Signal name Pin. No. Signal name 5 Emergency stop input 15 Emergency stop input 8 Teach mode input 18 Auto mode input 10 +24V GND 20 +24V GND 20 9 10 20 10 19 REMOTE2 connector Cable side (details for wiring) REMOTE2 connector Controller side 11 2 1 11 12 1 Wiring example The controller has an internal power supply of +24V. thing other than the emergency stop switch. CAUTION Do not connect any- Emergency stop input current 100mA Typical TEACH/AUTO mode input current 5mA Typical/for 24V input REMOTE2 Internal +24 V current Power source capacitance: 1 A (max.) +24 V REMOTE2 REMOTE1 TEACH 5 Emergency stop input (Caution) 15 Dynamic brake relay 8 TEACH mode input 18 AUTO mode input 10 +24 V GND 20 +24 V GND 39 Functions 5.2 5. When Not Using the Operating Unit When not using the operating unit as the console The input port for controlling robot or the device connected to it is collectively referred to as the console. In many cases, operating unit is used as the console in AUTO mode. when operating unit is not used, it is necessary to set up a console elsewhere. But The input ports at which you can set up the console are as follows: zI/O-1(REMOTE3) zRS-232C #20/#21 I/O-1 (REMOTE3) You can set up all functions except the display of operating unit at I/O-1 and use it as the console. The general procedures for doing so are explained below. For details, refer to “7. I/O Remote Set Up (REMOTE3)” in this volume. 1) Set up bits 1 & 2 of software switch SS1 2) Set up I/Os as the remote (REMOTE3) 3) Wire the REMOTE3 connector RS-232C When you assign RS-232C as the console, use the CONSOLE command. Refer to the SPEL III reference manual for details on the CONSOLE command. In the case that RS-232C is assigned as the console a personal computer may be used and you will have to send all commands from it. 40 Functions 6. I/O 6. I/O I/O links your input/output equipment. The controller comes standard with one I/O port on the rear panel, enabling you to use 16 inputs and 16 outputs. The cable connector for user cable is a standard accessory. If you install additional I/O boards, you can use 16 inputs and 16 outputs multiplied by the number of I/O boards. NOTE ) The maximum number of input and output point is 128. When you are connecting wires, see “2.6 Noise countermeasures” in this volume. PNP type or NPN type I/O board is available. each type I/O boards. The pin assignments are different between Confirm which type you select and refer to appropriate section of this manual when wiring. Although NPN type I/O board is not labeled, PNP type I/O board is labeled as the drawing below. “P TYPE” label P TYPE PNP type I/O board Refer to 6.1 - 6.4 NOTE ) NPN type I/O board Refer to 6.5 - 6.8 All output bits will be turned off when an emergency stop switch is pressed and reset process such as by RESET command is done. In case of emergency stop condition, output status can be held by the setting of software switch SS1. (Refer to “9.2 Software switches” in this volume.) 41 Functions 6.1 6. I/O Input circuit (PNP type) Input voltage range DC 12 to 24V ±10% ON voltage DC 10.8V (min.) OFF voltage DC 4V (max.) Input current 5mA typical with input of DC 24V Input circuit diagram and wiring example I/O-1 (Same circuit as above) ~ ~ 42 GND +DC 1 Input No. 0 - 7 common (GND) 2 Input No. 0 3 Input No. 1 4 Input No. 2 5 Input No. 3 6 Input No. 4 7 Input No. 5 8 Input No. 6 9 Input No. 7 10 Input No. 8 - 15 common (GND) 11 Input No. 8 12 Input No.9 ~ ~ ~ (Abbreviated) ~ ~ ~ Functions 6.2 6. I/O Output circuit (PNP type) Rated output voltage DC 12 to 24V ±10% Maximum output current 250mA/1 output Output driver P channel power MOS FET Saturation voltage 1.0V Output circuit diagram and example of connections I/O-1 GND +DC 19 Output No. 0 L Inductor 20 Output No. 1 (Same circuit as above) ~ ~ L 21 Output No. 2 22 Output No. 3 23 Output No. 4 24 Output No. 5 25 Output No. 6 26 Output No. 7 28 Output No. 8 29 Output No. 9 ~ ~~ ~ (Abbreviated) ~ ~~ ~ 43 Output common (GND) 44 Output common (+DC) 45 Output common (+DC) 46 Output common (+DC) 43 Functions 6.3 6. I/O Customer use power supply A power supply for customer use is supplied to each I/O connector. used for all I/Os as well as for REMOTE1 and REMOTE2. 1A. This power supply is The current capacitance is Do not use this internal power supply together with an external power source, as do- ing so causes controller failure. Pin number of each I/O connector 47 48 Output voltage: DC 24 V Current capacitance: 1 A (max.) 49 50 6.4 Pin assignment of I/O (PNP type) Only I/O-1 is standard, but the pin assignment of I/O-2 and other optional I/Os are shown in the table below. See “10.2 Additional I/O board” in this volume for information on how to install additional I/O ports. Pin No. 1 2 3 4 5 6 7 8 9 10 Pin Signal name No. I/O-1 2 3 4 5 6 7 8 I/O-1 0 16 32 48 64 80 96 112 Input to to to to to to to to 26 Output 7 common 7 23 39 55 71 87 103 119 Input 0 16 32 48 64 80 96 112 27 1 17 33 49 65 81 97 113 28 Output 8 2 18 34 50 66 82 98 114 29 Output 9 3 19 35 51 67 83 99 115 30 4 20 36 52 68 84 100 116 31 Output 10 5 21 37 53 69 85 101 117 32 Output 11 6 22 38 54 70 86 102 118 33 7 23 39 55 71 87 103 119 34 Output 12 8 24 40 56 72 88 104 120 Input to to to to to to to to 35 common 15 31 47 63 79 95 111 127 11 Input 12 13 14 15 16 17 18 19 Output 20 21 22 23 24 25 44 8 9 10 11 12 13 14 15 0 1 2 3 4 5 6 24 25 26 27 28 29 30 31 16 17 18 19 20 21 22 40 41 42 43 44 45 46 47 32 33 34 35 36 37 38 56 57 58 59 60 61 62 63 48 49 50 51 52 53 54 72 73 74 75 76 77 78 79 64 65 66 67 68 69 70 88 89 90 91 92 93 94 95 80 81 82 83 84 85 86 104 105 106 107 108 109 110 111 96 97 98 99 100 101 102 120 121 122 123 124 125 126 127 112 113 114 115 116 117 118 36 37 38 39 40 41 42 43 44 45 46 47 48 49 50 Signal name 2 3 4 5 6 7 8 23 39 55 71 87 103 119 24 40 56 72 88 104 120 25 41 57 73 89 105 121 26 42 58 74 90 106 122 27 43 59 75 91 107 123 28 44 60 76 92 108 124 - Output 13 29 45 61 77 93 109 125 Output 14 30 46 62 78 94 110 126 Output 15 31 47 63 79 95 111 125 Output common (GND) Output common (+DC) Output common (+DC) Output common (+DC) +24 V output +24 V output +24 V GND output +24 V GND output Functions 6.5 6. I/O Input circuit (NPN type) Input voltage range DC 12 to 24V ±10% ON voltage DC 10.8V (min.) OFF voltage DC 4V (max.) Input current 5mA typical with input of DC 24V Input circuit diagram and wiring example I/O-1 (Same circuit as above) ~ ~ GND +DC 1 Input No. 0 - 7 common (+DC) 2 Input No. 0 3 Input No. 1 4 Input No. 2 5 Input No. 3 6 Input No. 4 7 Input No. 5 8 Input No. 6 9 Input No. 7 10 Input No. 8 - 15 common (+DC) 11 Input No. 8 12 Input No.9 ~ ~ ~ (Abbreviated) ~ ~ ~ 45 Functions 6.6 6. I/O Output circuit (NPN type) Rated output voltage DC12 to 24V ±10% Maximum output current 250mA/1 output Output driver N channel power MOS FET Saturation voltage 1.0V Output circuit diagram and example of connections I/O-1 GND +DC 19 Output No.0 L Inductor 20 Output No.1 (Same circuit as above) ~ ~ 46 L 21 Output No.2 22 Output No.3 23 Output No.4 24 Output No.5 25 Output No.6 26 Output No.7 28 Output No.8 29 Output No.9 ~~~ ~ (Abbreviated) ~~~ ~ 43 Output common (+DC) 44 Output common (GND) 45 Output common (GND) 46 Output common (GND) Functions 6.7 6. I/O Customer use power supply A power supply for customer use is supplied to each I/O connector. used for all I/Os as well as for REMOTE1 and REMOTE2. 1A. This power supply is The current capacitance is Do not use this internal power supply together with an external power source, as do- ing so causes controller failure. Pin number of each I/O connector 47 48 Output voltage: DC 24 V Current capacitance: 1 A (max.) 49 50 6.8 Pin assignment of I/O (NPN type) Only I/O-1 is standard, but the pin assignment of I/O-2 and other optional I/Os are shown in the table below. See “10.2 Additional I/O board” in this volume for information on how to install additional I/O ports. Pin No. 1 2 3 4 5 6 7 8 9 10 Pin Signal name No. I/O-1 2 3 4 5 6 7 8 I/O-1 0 16 32 48 64 80 96 112 Input to to to to to to to to 26 Output 7 common 7 23 39 55 71 87 103 119 Input 0 16 32 48 64 80 96 112 27 1 17 33 49 65 81 97 113 28 Output 8 2 18 34 50 66 82 98 114 29 Output 9 3 19 35 51 67 83 99 115 30 4 20 36 52 68 84 100 116 31 Output 10 5 21 37 53 69 85 101 117 32 Output 11 6 22 38 54 70 86 102 118 33 7 23 39 55 71 87 103 119 34 Output 12 8 24 40 56 72 88 104 120 Input to to to to to to to to 35 common 15 31 47 63 79 95 111 127 11 Input 12 13 14 15 16 17 18 19 Output 20 21 22 23 24 25 8 9 10 11 12 13 14 15 0 1 2 3 4 5 6 24 25 26 27 28 29 30 31 16 17 18 19 20 21 22 40 41 42 43 44 45 46 47 32 33 34 35 36 37 38 56 57 58 59 60 61 62 63 48 49 50 51 52 53 54 72 73 74 75 76 77 78 79 64 65 66 67 68 69 70 88 89 90 91 92 93 94 95 80 81 82 83 84 85 86 104 105 106 107 108 109 110 111 96 97 98 99 100 101 102 120 121 122 123 124 125 126 127 112 113 114 115 116 117 118 36 37 38 39 40 41 42 43 44 45 46 47 48 49 50 Signal name 2 3 4 5 6 7 8 23 39 55 71 87 103 119 24 40 56 72 88 104 120 25 41 57 73 89 105 121 26 42 58 74 90 106 122 27 43 59 75 91 107 123 28 44 60 76 92 108 124 - Output 13 29 45 61 77 93 109 125 Output 14 30 46 62 78 94 110 126 Output 15 31 47 63 79 95 111 125 Output common (+DC) Output common (GND) Output common (GND) Output common (GND) +24 V output +24 V output +24 V GND output +24 V GND output 47 Functions 7. I/O Remote Set Up (REMOTE3) 7. I/O Remote Set Up (REMOTE3) You can set up a remote function in I/O-1 and use it as REMOTE3. You can use this as the console when in AUTO mode in place of operating unit OPU-300 or OPU-320 to implement various controls. 7.1 Remote set up The input/output number and functions of I/O-1 that can be set up as REMOTE3 are as shown in the pin assignment chart on the next page. dividually. You can select and use functions in- Input/output for which you have not set up a remote function can be used as a normal I/O. You can easily set them up using the “Remote Set Up” of SPEL Editor or SPEL for Windows. WARNING See those manuals for details. Before setting up a remote, always confirm that connections match remote functions. An output function at which you have set up a remote automati- cally outputs in accordance with the state of the controller. Connections that differ from the setting can lead to failure of peripheral equipment. CAUTION After setting up the I/O remote, either keep a written record of the setup or use the MKVER command to keep the information as a file. If system initialization is performed using bit 1 of the MPU board's DIP switch SD1, the I/O remote setting is also canceled and it will revert to a normal I/O. It will be necessary to accurately reset the remote on the basis of the data you have kept on record. Output performs its function with only the remote setup described above, but if an input function is desired, it is necessary to set up such that REMOTE3 is the console. the remote by using bit 1 of software switch SS1. Select See SPEL Editor or SPEL for Windows manual for instructions on setting the software switch. The function of SS1 is as follows. Refer to “7.3 Valid/Invalid input signals” of this chapter for details. Bit No. Function ON OFF SS1-1 Selection of the remote REMOTE3 (I/O) REMOTE2 (OPU-300/OPU-320) :Factory settings (standard specification) 48 Functions 7.2 7. I/O Remote Set Up (REMOTE3) REMOTE3 input/output signals The arrangement of signals that can be set up as REMOTE3 is shown in the table below. Input/output number has also been included in the table since you may also use them. Refer to the wiring examples in “6. I/O” in this volume when you connect wires. Pin assignment Pin Pin Signal No. I/O No. No. Signal I/O No. 3 1 Input common 0 to 7 26 Program No. selection output 2 Output 7 2 RESET input 3 PAUSE input 1 28 MCAL output 4 START input 2 29 Motor power on output 5 HOME input Input 0 27 - 3 30 9 - Program No. selection input 2 0 7 Program No. selection input 2 1 8 Program No. selection input 22 6 33 9 Program No. selection input 23 7 34 Safeguard output 6 Output 8 4 31 ERROR output Output 10 5 32 Emergency stop output 10 Input common 8 to 15 35 11 MCAL input Output 12 - Input 8 36 AUTO mode output 12 Motor power on input 11 - 9 37 Output 13 - 13 Motor power off input 10 38 TEACH mode output Output 14 14 - 11 39 - 15 - 12 40 - 16 - 13 41 Enable condition output 17 - 14 42 18 - 15 43 Output common (+DC) or (GND)*1 Output 15 - 19 RESET output Output 0 44 Output common (GND) or (+DC) *1 20 PAUSE output 1 45 Output common (GND) or (+DC) *1 21 START output 2 46 Output common (GND) or (+DC) *1 22 HOME output 3 47 +24V output 23 Program No. selection output 2 0 4 48 +24V output 24 Program No. selection output 2 1 5 49 +24V GND output 25 Program No. selection output 2 2 6 50 +24V GND output *1: the case of PNP I/O 50 17 33 I/O connector controller side 18 34 1 49 Functions 7. I/O Remote Set Up (REMOTE3) REMOTE3 Input Signal Functions Signal Name Functions This signal is used for (1) initializing an error state; (2) interrupting a program. The robot controller will be reset at the input of this signal. RESET If the robot controller needs to be reset during execution of a program, make sure that the signals are input as follows: 1) Input PAUSE. 2) Make sure that the PAUSE output signal is out. 3) Input RESET. This signal is used to stop program for the moment. This signal temporarily stops the program from being executed. PAUSE In order to resume the operation or to finish the pro- gram: 1) Wait to receive PAUSE output from the robot controller. 2) Input START(to resume operation) or RESET(to finish the program) signal. This signal is used to (1) initiate execution of program; (2) resume operation from the pause state. START In order to have the program executed from the very beginning, the robot controller must have been reset (in the state where RESET out is being output.) HOME Input of this signal moves the manipulator to the home position. Input of this signal specifies the program to load at input of Program No. selection START (to execute a program). (20, 21, 22 and 23) (For further details, refer to SPEL III Reference manual for “PRGNO command.”) MCAL Input of this signal executes calibration. Motor Power ON Input of this signal turns the motor power ON. Motor Power OFF Input of this signal turns the motor power OFF. * The validity of the input signal depends on the console settings or the selected mode. Refer to “7.3 Valid/invalid input signals” in this chapter. 50 Functions 7. I/O Remote Set Up (REMOTE3) REMOTE3 Output Signal Functions Signal name Functions This signal is output when the robot controller is in the reset state. Make sure that this signal is being output and that the START RESET output signal is NOT being output when the following signals input to the REMOTE3: START, HOME, MOTOR ON, MOTOR OFF, MCAL and Program No. This signal is output while execution of a program is on hold. Execution of a program will be put on hold at the input of PAUSE PAUSE input signal and, the robot will stop operating. When the pause process completes, this PAUSE output signal will be output. This signal is output when the robot controller is either executing a program or undertaking a command. Make sure that this signal is NOT being output and that the START RESET output signal is being output when the following signals input to the REMOTE3: START, HOME, MOTOR ON, MOTOR OFF, MCAL and Program No. HOME This signal is output when the manipulator is in the home (standby) position. Program No. selection This signal outputs the program number loaded in the main memory. (20, 21, 22, 23) MCAL Motor Power ON This signal is being output during calibration (while MCAL is being executed.) This signal is output when the motor power is ON. This signal is output when an error occurs. Error This signal turns OFF at the input of RESET when the error is canceled. Emergency Stop This signal is output in the emergency stop state. Safety Door This signal is output when the Safety Door is open. AUTO Mode This signal is output when AUTO mode is selected. TEACH Mode This signal is output when TEACH mode is selected. * The console settings or mode selection is irrelevant to output of any of the above output signals. 51 Functions 7.3 7. I/O Remote Set Up (REMOTE3) Valid/Invalid input signals The validity of input from REMOTE3 and operating unit OPU-300 or OPU-320 in each mode changes as shown below depending on such conditions as the setup of software switch SS1 and the console selection. In the case of REMOTE3, input is invalid if the remote has not been set up. Functions of bits 1 and 2 of software switch SS1. Bit No. Function ON OFF SS1-1 Selection of the remote REMOTE3 (I/O) REMOTE2 (OPU-300/OPU-320) :Factory settings (standard specification) TEACH mode Console is TEACH port In TEACH mode the console is the teaching pendant TP-320 or a personal computer connected to TEACH port. In this case all inputs from the remotes are invalid regardless of the setting of SS1. SS1-1 software switch setting Input from REMOTE3 Input from REMOTE2 (Input from OPU-300/OPU-320) - : Invalid 52 OFF ON RESET input - - PAUSE input - - START input - - HOME input - - Program number input - - MCAL input - - Motor power on input - - Motor power off input - - RESET input - - PAUSE input - - START input - - HOME input - - Program number input - - MCAL input - - Motor power on input - - Motor power off input - - Functions 7. I/O Remote Set Up (REMOTE3) AUTO mode In AUTO mode, when you use the CONSOLE command to select “OP” as the console, the Console is REMOTE3 or operating unit remote which was specified by software switch SS1-1 is the console. All input from the remote that was selected as the console is valid. SS1-1 software switch setting Input from REMOTE3 Input from REMOTE2 (Input from OPU-300/OPU-320) OFF ON RESET input - V PAUSE input - V START input - V HOME input - V Program number input - V MCAL input - V Motor power on input - V Motor power off input - V RESET input V - PAUSE input V - START input V - HOME input V - Program number input - - MCAL input V - Motor power on input V - Motor power off input V - V : Valid * : Only restart after a pause is valid - : Invalid 53 Functions 7. I/O Remote Set Up (REMOTE3) AUTO mode In AUTO mode, when you used the CONSOLE command to select either “#20” or “#21” Console is RS-232C of RS-232C as the console, the device connected to the port that you selected is the console. In this case nearly all input from the remote is invalid. Only PAUSE and START input signals can be made valid by software switch SS1. SS1-1 software switch setting Input from REMOTE3 Input from REMOTE2 (Input from OPU-300/OPU-320) OFF ON RESET input - - PAUSE input - V START input - * HOME input - - Program number input - - MCAL input - - Motor power on input - - Motor power off input - - RESET input - - PAUSE input V - START input * - HOME input - - Program number input - - MCAL input - - Motor power on input - - Motor power off input - - V : Valid * : Only restart after a pause is valid except when the [Esc] key was used to initiate a pause. - : Invalid RESET, PAUSE and START input RESET, PAUSE, and START input is possible as shown in the table below depending on the implementation of the program. Other signals can only be input when the program is not being executed. 54 When program is not being executed During execution of program During pause RESET input ○ × ○ (interrupt) PAUSE input × ○ × START input ○ × ○ (continue) Functions 7.4 7. I/O Remote Set Up (REMOTE3) Timing charts Response timing for REMOTE3 input signals is basically as follows. Signals input from REMOTE1 and REMOTE2 are also shown. Input signal Input remote Safeguard input REMOTE1 AUTO mode input REMOTE2 TEACH mode input REMOTE2 Notes regarding input signals zThe timing charts and the times referred to in the explanation of the timing charts should be considered guidelines. Actual times differ depending on such things as the number of tasks started up and the commands being executed. Do not input signals until after you have checked the output condition of the remotes and determined that the signals can be input. The time figures and wavelengths in the timing charts are not proportional. zUse pulse input for all input signals except those using switches, such as the AUTO/TEACH mode switch, emergency stop input and safeguard input. troller detects the rise of input signals. The con- Set the pulse width of input signals to 10ms or more. ON OFF 10 ms or more zAvoid overlapping remote input whenever possible. Input 1 Input 2 Avoid overlapping zAvoid chattering input whenever possible. 55 Functions 7. I/O Remote Set Up (REMOTE3) The timing chart when power is turned ON Initialization inside the controller is finished and RESET output is turned ON 4.3 seconds after power is turned ON. From this point on, output from each remote is possible. Just before completion of initialization, RESET/START output turns ON/OFF momentarily. When you switch modes in the RESET state, the new mode’s output is turned ON and the earlier mode’s output is turned OFF after 30ms. When mode output switches, START output turns ON momentarily. In the example below is of switching from TEACH to AUTO. The signals below can be input regardless of the mode, but other signals can be input only in AUTO mode. zMode Input it only after you have confirmed that it is in AUTO mode. switch zSafeguard zEmergency zRestart stop from pause (except when pause was initiated by using the [Esc] key) ON Power OFF 4.3 s RESET output 5 ms START output AUTO input TEACH input AUTO output TEACH output 56 30 ms Functions 7. I/O Remote Set Up (REMOTE3) Timing chart for motor power ON, etc. When RESET output is ON and the signals shown in the chart below are input, START output turns ON and RESET output turns OFF. After this input is executed, START out- put turns OFF and RESET output turns ON. When Motor Power ON is input, Motor Power output turns ON after 530ms. After this it is possible to input MCAL and HOME, which command the robot to operate. If these are input when the motor power is OFF, an error occurs. When MCAL is input, MCAL output turns ON in 40ms. After MCAL operations are completed, MCAL output turns OFF. When HOME is input, the robot moves to the set standby position. While the robot is po- sitioning itself in the standby position, HOME output is ON. When Motor Power OFF is input, Motor Power output turns OFF in 330ms. 5 ms 5 ms 5 ms 5 ms START output RESET output 10 ms 10 ms 10 ms 10 ms Motor Power ON input 530 ms Motor Power OFF input Motor Power output 40 ms 330 ms MCAL input MCAL output HOME input HOME output 57 Functions 7. I/O Remote Set Up (REMOTE3) Timing chart for program execution START input RESET output turns OFF and START output turns ON 5ms after the input of START while at the RESET state. In case of specifying the program No. by binary code: Turn ON the Program No. within 5ms before START input and hold it while the program is executed. (The Controller must be at the RESET state.) The program No. input will be ignored if entered when the Controller is not at RESET state. If the binary code specifies zero (0), that means to designate the program and the position data already in the main memory. START input 5 ms START output RESET output 5 ms Hold the data to the program end. Program No. input PAUSE input and RESET input PAUSE output turns ON and START output turns OFF 230ms after input of PAUSE, but only when the QP command is ON. When the QP command is OFF, PAUSE output will not turn ON until the arms are stopped. Once there is PAUSE input, it requires at least 230ms before input of START. START output will be ON 15ms after the START input (for restarting) and, the PAUSE output will turn OFF. When RESET is input during the PAUSE state, it takes 800ms for RESET output to turn ON and PAUSE output to turn OFF. There is a brief output of START immediately be- fore the RESET operations are to be completed. In order to turn OFF the Program No. input, it would have to be at least 10ms past after RESET output is turned OFF. 5 ms 15 ms START input START output 230 ms 230 ms 5 ms PAUSE input PAUSE output 800 ms RESET input RESET output Program No. input 58 10 ms or more Functions 7. I/O Remote Set Up (REMOTE3) Timing chart for safeguard input Safeguard output turns ON 5ms after the input of Safeguard while at the START state. After 320ms, PAUSE output turns ON and START output turns OFF. The PAUSE state is maintained while the Safeguard input is ON (the “Safeguard open” is latched). Safeguard output turns OFF 5ms after the Safeguard input turns OFF (when the safety door is closed). Close the safety door (to turn OFF the input of Safeguard) and turn ON the Latch Release input to restart. While PAUSE output is ON, RESET can be input. Safeguard input 5 ms 5 ms Safeguard output START output 320 ms PAUSE output 59 Functions 7. I/O Remote Set Up (REMOTE3) Timing chart for TEACH mode and AUTO mode Regardless of whether operating in TEACH mode or AUTO mode, if you switch modes during execution, there will be a pause and then the controller will be reset. The charts below show a switch to TEACH mode when AUTO mode was operating. Switching modes in the START state It takes 230ms for mode output to switch when you switch modes in the START state. Timing for RESET output to come ON differs depending on what is being executed at the time. Immediately prior to completion of RESET operations, START/RESET output turns ON/OFF momentarily. AUTO input TEACH input 230 ms AUTO output TEACH output START output Differs depending on what is being executed RESET output Mode switching in the PAUSE condition When there is a mode switch in the PAUSE state, mode output switches after 230ms and RESET output turns ON after 1100ms. Immediately prior to completion of RESET op- erations, START/RESET output turns ON/OFF momentarily. AUTO input TEACH input 230 ms AUTO output TEACH output START output RESET output 60 1100 ms Functions 7. I/O Remote Set Up (REMOTE3) Emergency Stop input can be input at any time. During the emergency stop state only Timing chart for emergency stop RESET input for canceling the emergency stop can be input. Emergency Stop output turns ON 5ms after Emergency Stop is input. In 270ms, START output turns OFF and RESET output turns ON. Emergency Stop output turns ON 5ms after RESET is input when in the emergency stop condition. START output turns ON momentarily just before completion of RESET op- erations. After RESET input, at least 630ms are necessary before other input can be made. In the chart below, Motor Power ON input is used as an example. Emergency Stop input 5 ms Emergency Stop output 5 ms START output 270 ms RESET output Motor Power output 20 ms 15 ms RESET input 630 ms Motor Power ON input Timing chart for errors RESET output turns ON and START output turns OFF 300ms after an error occurs in the START state. Relevant output also turns off depending on what is being executed and what kind of error occurred. RESET input is sometimes necessary to cancel the error state. 5ms after RESET is input. of RESET operations. Error output turns OFF START output turns ON momentarily just before completion At least 630ms are necessary after PAUSE input before other input can be made. Error output 300 ms 5 ms START output RESET output 20 ms RESET input 630 ms 61 Functions 8. RS-232C 8. RS-232C The standard controller is equipped with 2-channel RS-232C so that you can connect peripheral equipment or a host computer to the robot and perform data communications and centralized control. 8.1 Communications cable A communications cable is not supplied. Use 9-pin D-sub connector for the communications cable. Use shielded twisted-pair leads for the cable. countermeasure. Clamp the shield to the hood as a noise (See “2.6 Noise countermeasures” in this volume.) Pin assignments The pin assignments of the RS-232C connectors are as follows: 62 Pin No. Notation Signal Signal direction 1 CD Carrier detection Input 2 RD Receive data Input 3 SD Send data Output 4 ER Data terminal ready Output 5 SG Signal ground 6 - 7 RS Required send Output 8 CS Clear to send Input 9 - Functions 8. RS-232C Wiring example A common wiring example is shown below. [Controller] [Connected equipment connector] Signal Pin No. Pin No. Signal SD 3 2 SD RD 2 3 RD SG 5 7 SG RS 7 4 RS CS 8 5 CS - - 6 DR CD 1 8 CD ER 4 20 ER 1 FG Clamp hood The following example is for CS control. Because the controller does not perform RS control, it cannot control transmissions from the connected equipment. [Controller] [Connected equipment connector] Signal Pin No. Pin No. Signal SD 3 2 SD RD 2 3 RD SG 5 7 SG RS 7 4 RS CS 8 5 CS - - 6 DR CD 1 8 CD ER 4 20 ER 1 FG Clamp hood * In this example, controller-side CS input uses RS output of the connected equipment. Wire as appropriate in accordance with the specifications of the connected equipment. 63 Functions 8.2 8. RS-232C Communication preparations To communicate using the controller and connected equipment, it is necessary to make the communication method (configuration) of both RS-232C ports the same. You must use the CONFIG command to set the following: zTransmission zCharacter speed (baud rate) bit number zParity zStop bit number zCommunication zXON/XOFF zCS protocol control control The standard controller has two RS-232 ports, #20 and #21. figuration of both ports. number (#20 or #21). You can determine the con- Which channel you use is determined by specifying that port See the manuals that came with the equipment that you connect for information on configuration settings. There are two basic commands that you use for communication: PRINT # and INPUT #. PRINT # data output from the controller INPUT # data input from the connected equipment See the SPEL III reference manual for details about commands. 64 Functions 9. Switch Types and Jumper Pin Set Up 9. Switch Types and Jumper Pin Set Up Many settings are necessary to use the robot’s functions correctly. Here, we explain the settings of the MPU board's jumper pins and DIP switches as well as of software switches. You do not need to change the settings, as they have been correctly set at the factory on the basis of your specifications. Careless changes to these settings could cause system failure. Only when specification changes occur after the robot was delivered you should attempt to reset the switches, only in strict adherence to the instructions below. After you set up the DIP switches and software switches, turn on the controller power. Turning on the controller power activates the settings. You can display the current settings of the DIP switches and software switches using SPEL Editor or SPEL for Windows. See those manuals for details. The shaded cells in the tables below are standard factory settings. Please be careful not to change the settings of bits which are shown as “(Reserved for system).” 9.1 MPU board DIP switches DIP switches SD1 to 3 are located on the MPU board. Their functions are shown below. SD1 Bit No. Function 1 System initialization 2 (Reserved for system) ON OFF Initializes control data of CPU when power is Does not initialize turned on - (Always OFF) 3 to 8 Setting of model of Please do not change these settings (A to E) manipulator SD2 Bit No. Function ON OFF 1(M) Use of additional RAM Exists Does not exist 2(V) Sets capacity of main memory and file mem- Main memory : 374KB ory when additional File memory : 900KB RAM is installed Main memory : 174KB File memory : 1.1MB 3 (Reserved for system) - (Always OFF) 4 (Reserved for system) - (Always OFF) 5(X) Use of axis #1 Yes No 6(Y) Use of axis #2 Yes No 7(U) Use of axis #3 Yes No 8(Z) Use of axis #4 Yes No Bit No. Function ON OFF 1 to 4 (Reserved for system) - (Always OFF) SD3 65 Functions 9.2 9. Switch Types and Jumper Pin Set Up Software switches SD1 to 3 are hardware switches. switches.” Switches that you set using software are called “software Controller has six such software switches, SS1 to 6. personal computer. You set them from a The functions of these software switches are shown below. See the programming support software manual for details on setting software switches. The setting of bits that are labeled “(Reserved for system)” cannot be changed. Software switch settings are saved even when power is turned off, but they are initialized at the system initialization by MPU board DIP switch SD1-1 and all assume the OFF state. SS1 Bit No. Function ON 1 Selection of the remote REMOTE3 (I/O) 2 (Reserved for system) - (Always OFF) 3 (Reserved for system) - (Always OFF) 4 (Reserved for system) - (Always OFF) 5 Execution of ON/OFF commands when safeguard is open in AUTO mode Disabled Enabled 6 Processing of output port during emergency stop Save Reset 7 8 OFF REMOTE2 (operating unit) ON OFF ON Message lan- OFF guage selection OFF Japanese OFF English ON German ON SS2 Bit No. Function 1 to 8 (Reserved for system) ON OFF ON OFF ON OFF SS3 Bit No. Function 1 to 8 (Reserved for system) SS4 66 Bit No. Function 1 to 8 (Reserved for system) - Functions 9. Switch Types and Jumper Pin Set Up SS5 Bit No. ON OFF Not performed Performed Function 1 Range check of HOFS value 2 U coordinate conversion of LOCAL Teaching command dependent coordinate data XY value dependent 3 (Reserved for system) - (Always OFF) 4 (Reserved for system) - (Always OFF) 5 (Reserved for system) - (Always OFF) 6 CMOVE, CARC command operation 7 (Reserved for system) - (Always OFF) 8 (Reserved for system) - (Always OFF) Bit No. Function ON OFF 1 Execution of SFREE command to axis #4 Disabled Enabled 2 Execution of SFREE command to axis #3 Disabled Enabled 3 Execution of SFREE command to axis #2 Disabled Enabled 4 Execution of SFREE command to axis #1 Disabled Enabled 5 Execution of operation command when there is a non-excitation axis Enabled Disabled 6 (Reserved for system) - (Always OFF) 7 (Reserved for system) - (Always OFF) 8 (Reserved for system) - (Always OFF) Passes near the Passes through the specified point specified point SS6 9.3 MPU board jumper pins There are seven jumper pins on the MPU board. However, only XP6 can be set by such things as specification changes. NOTE ) Never change the settings of other jumper pins, as doing so may interfere with the functions of the robot. Pin No. Function XP1 to 4 (Reserved for system) Setting (Differs by model) XP5 Backup power supply XP6 Backup power supply for addiJump when there is additional RAM tional RAM XP7 (Reserved for system) Jump Normally, jump between 2 - 3 67 Functions 9.4 9. Switch Types and Jumper Pin Set Up Locations of DIP switches and jumper pins on MPU board The position of the DIP switches and jumper pins (XP) on the MPU board are shown in the figure below. ↓1 2 3 4 5 6 7 8 ON Each DIP switch has bit levers. Flipping a bit lever to the ON position gives them an "on" setting. Bit lever (ON side) NOTE ) 68 Follow the steps described in “7. MPU board” in Maintenance volume herein when you pull out the MPU board. Functions 10. Options 10. Options The following options have their own manuals. zOperating zTeaching unit unit zProgramming Please see the each manual for details. : OPU-300 or OPU-320 : TP-320 support software : SPEL Editor : SPEL for Windows zPulse generating board (be installed in controller) Here, we explain the options that can be installed in the controller except above items. Please adhere closely to the following instructions and install options correctly if you want to change the specifications of your robot controller by yourself. 10.1 Option types and board current consumption The table below lists the options that can be installed inside the controller. You can install any of the options, with the exception of additional RAM, by inserting a board into the option slot (OP slot) on the rear panel. Option Additional I/O board Additional RAM Additional RS-232C board Board current consumption 250mA 250mA The combined current capacitance of all option slots is approximately 3A (+5V). The total board current consumption of options must not exceed this value. power supply at each input/output of I/Os is 24V. The required This is different from the board power supply of option slots. The steps to install a board in option slot is as follows. 1) Turn the controller off. 2) Loosen the two fixing screw of a plate which covers option slot and remove the plate. You can use any board with any of the available option slots. 3) Firmly insert the option board until the mounting bracket touches the rear panel. 4) Fasten the mounting bracket with the two screws. Be sure to tighten the two screws. Option slot 1 to 7 69 Functions 10.2 10. Options Additional I/O board The standard controller has 16 I/Os, but you can increase this number up to 128 I/Os. Additional I/Os come in units of 16 (16 inputs/16 outputs). The following parts are re- quired for additional I/Os. Please make certain that you get all parts at the time of purchase. zI/O board z50-pin zLabel 1 D-sub I/O connector sheet 1 set 1 Please follow the steps below to install additional I/Os. 1) Turn off the controller. 2) Peel the connector number label from the label sheet and affix it to the handle of the I/O board. 3) Set the I/O board’s DIP switches. To identify I/O boards, set DIP switch SD1 on each board in accordance with the following table. Connector No. I/O number ON bits I/O-1 0 to 15 None I/O-2 16 to 31 1 I/O-3 32 to 47 2 I/O-4 48 to 63 1,2 I/O-5 64 to 79 3 I/O-6 80 to 95 1,3 I/O-7 96 to 111 2,3 I/O-8 112 to 127 1,2,3 4) Insert the board into the option slot and secure it. See the “6.4 Pin assignment of I/O (PNP type)” or “6.8 Pin assignment of I/O (NPN type)” in this volume for information on setting up connector signals. 70 Functions 10.3 10. Options Additional RAM Standard file memory is 100KByte. two RAM modules. You can expand file memory to 1.1MByte by adding You can also set DIP switches to expand main memory if you are unable to run a long program on the standard main memory alone. Follow the steps below when installing additional RAM. 1) Before installation: Back up all files in file memory before attempting to install additional RAM. To use the additional RAM, you must perform a formatting operation which erases all files in the controller’s file memory. Make backups of files from the personal computer. See SPEL Editor or SPEL for Windows manual for details. 2) Turn off the controller power, and then unplug the power plug from power source so that the controller is locked out. 3) Remove the four front panel mounting screws and take off the front panel. On the inside of the front panel, there is a cooling fan. Do not pull hard when taking off the front panel, as it is connected to the inside by a cable. 4) The MPU board is fastened with a screw on the right and left. Loosen the two screws. Do not pull out the screws because it will drop the nuts into the controller. 5) Hook your finger on the board bracket and pull the board out. 6) Install two RAMs on the MPU board into sockets U11 and U12. try to keep from touching any of the components. RAM. Be careful to always Be careful with the direction of See the drawing below. MPU board U11 U12 4) 4) MPU board bracket SRAM type × 2 pcs. 71 Functions 10. Options 7) Plug the jumper socket into jumper pin XP6. shipped with controller.) (Use one of 5 jumper sockets which are By this jumper socket, the additional RAM module will be backed up by battery. NOTE ) Do not disassemble other jumper pins. 8) Setting DIP switches Flip bit 1 of DIP switch SD2 on the MPU board to the ON position. Also flip bit 2 to the ON position when you want to expand main memory. SD2 Bit No. Function ON OFF 1 Use of additional RAM Used Not used 2 Sets capacity of main memory and file mem- Main memory : 374KB Main memory : 174KB ory when additional File memory : 900KB File memory : 1.1MB RAM is installed 9) Once DIP switches are set, reinsert the MPU board to the controller. Insert MPU board in the specified slot horizontally and push it in firmly. Tighten fixing screws of mounting bracket of MPU board. 10) Attach the front panel to the controller and turn the controller on. 11) Formatting Execute FORMAT/A. memory contents. The file memory is formatted without erasing the current file When/A is specified, you will be prompted as follows. >FORMAT/A RAM disk size adjust OK (Y/N)? ? Then, if Y is entered, the file memory is formatted and contents size increases. NOTE ) When FORMAT is executed, the message may be displayed “Memory error !! address $xxxxxxxx”. If the address number, which starts with $, is $00080003 or $00099001, it means the dip switch SD2 on MPU board is set so that additional RAM is installed while it is not installed actually. FORMAT/A again. Check if RAMs are installed correctly and execute If other address is displayed, please contact the authorized dis- tributor of our robot. When you want to increase the size of main memory (when you set the bit 1 and 2 of SD2 to the on position), initialize memory by SYSINIT command. Executing SYS- INIT clears all data in main memory; object program, backup variables, point data, and source program. Restore all of backed up data to main memory. >SYSINIT Program,Point,Backup Variable,Object all clear -> Ok? ?Y See the SPEL III reference manual for details on these commands. 72 Functions 10. Options 12) Restoring files Return the files that you backed up earlier to the controller. See SPEL Editor or SPEL for Windows manual for details. 10.4 Additional RS-232C board Two channels of RS-232C are on one board. Install the RS-232C simply by plugging the board into an option slot. (Refer to “10.1 Option types and board current consumption” in this chapter.) The board has DIP switch SD1 and jumper pin XP1. These have been correctly set at the factory, so please do not change them. The addresses of the additional RS-232C are #22/#23. Connector pin assignments and compatible connector are the same as those for #20/#21. See “8. RS-232C” in this vol- ume for details. The additional addresses, #22/#23, are for general communications. You cannot use the CONSOLE command to specify them as the console in AUTO mode. Please use either #20 or #21 when you want to make the RS-232C the console. For your reference, settings of DIP switch SD1 and jumper pin SP1 are shown DIP switch SD1 : All bits off Jumper pins XP1-A to H : see the table below Number Setting XP1-A Jump 2 and 3 XP1-B Jump 2 and 3 XP1-C Jump 2 and 3 XP1-D Jump 2 and 3 XP1-E Jump 2 and 3 XP1-F Open XP1-G Open XP1-H Open 73 Functions 11. Specifications 11. Specifications 11.1 Standard specifications Model name SRC-320 4 axis simultaneous software, AC servo control Control method Speed control 1 to 100 % programmable Acceleration/Decel-eration control 1 to 100 % programmable Automatic acceleration Positioning control Point-to-point control, Continuous path control CPU 32 bits (68EC020) Memory media RAM disk Memory capacity Programming language Teaching method (Backed up by lithium battery) (Battery life: 5 years in normal temperatures) Program area 64KByte Point data area 200 points File memory 100KByte Multi-task robot language SPEL III Ver. 6 Remote teaching Teaching by jog key Direct teaching Teaching by moving robot arm directly by operators MDI (Manual Data Teaching with numerical position data Input) teaching Input 16 inputs (photo coupler) Output 16 outputs (power MOS FET) Connector 50-pin D-Sub 1 pcs. Interface RS-232C 2 channels (#20, #21) Weight 24kg (standard) Dimensions Refer to “11.2 Outer dimensions” on next page Power requirement AC 200 to 230V ±10% Single phase, 50/60Hz Max. power consumption 1400W max. (differ with manipulator models) Safety functions Emergency stop switch CPU irregularity detection Enable switch Servo overflow detection Dynamic brake Overheating detection Overload detection Encoder discontinuity detection Motor lock detection Speed irregularity detection Mode switch with key Torque irregularity detection Low power mode Memory irregularity detection Control power source irregularity detection Primary power source irregularity detection Temporary stop through input form safeguard Insulation resistance 20MΩ or more (between line and ground) I/O Momentary power interrupt 10 ms max. Fast transient burst noise less than 2000V Electrostatic noise less than 6kV Temperature 5 to 40°C (with minimal variation) Relative humidity 10 to 80 % (with no condensation) Environmental requirements 74 Functions Outer dimensions (unit: mm) 43 230 or more 11.2 11. Specifications 460 10 3 55 430 25 200 30 55 40 445 480 60 20 120 70 26 25 4-φ30 15 55 19 50 100 219 50 6 10 23.5 17 75 Functions 76 11. Specifications Maintenance 1. Outline of Maintenance Maintenance The maintenance volume describes the maintenance procedure for each part in controller SRC-320. 77 Maintenance 1. Outline of Maintenance 1. Outline of Maintenance 1.1 Safety precautions on maintenance Please carefully read this manual and other related manuals before performing any routine maintenance. WARNING Only trained personnel should be allowed to operate, perform function testing, and maintain this robot and the robot system. Trained personnel are those who have taken a robot training course (held by the dealer on a regular basics) or those who have carefully read the manuals and have equivalent knowledge or skill. When you execute the maintenance work or the inspection of the controller, be sure to take the specified locking procedure for each robot system before starting the work. tric shock. Do not touch the high voltage dangerous part to avoid an elec- Be sure to turn the power of the controller off, pull out the power plug from the power source and wait 2 minutes or more to discharge the capacitors before starting maintenance. Do not test the manipulator within the safeguard after replacing parts. Use proper maintenance parts for the robot controller. If incorrect parts such as for other controllers are used severe difficulties could be caused. All outer covers (panels) of the controller, the front panel, the rear panel and the upper cover, are connected to the protective bonding circuit with a yellow/green wire (grounding). If you need to open those covers (panels) and disconnect the wire to the protective bonding circuit during maintenance, be sure to reconnect it after the maintenance work. CAUTION Temperature of AC servo driver unit and PSU (and regenerative brake unit) may rise depending on operation. Check the surface temperature before handling and use protective gloves if necessary. Do not take off any parts and units not described in this manual. Do not per- form maintenance using different procedures that are described in this manual. NOTE ) 78 Backup all necessary programs, point data and robot system data before you start maintenance. Maintenance 1.2 1. Outline of Maintenance Maintenance schedule and inspections Proper inspection steps are essential to prevent troubles and to maintain safety. This section describes maintenance inspection schedule and procedure, so be sure to do inspection as follows: Maintenance Inspection schedule Inspection procedure is divided into such five stages as daily, monthly, quarterly, biannually and annually as each one is added. However, if the robot is operated for 250 hours or longer per month, inspection schedule is different. In this case, each step of inspection should be added in every 250 hours, 750 Daily inspection hours, 1500 hours, and 3000 hours operation. Monthly/250 H + inspection Monthly/250 H + inspection Monthly/250 H + inspection Quarterly/750 H + inspection Monthly/250 H + inspection Monthly/250 H + inspection Monthly/250 H + inspection Quarterly/750 H + inspection Biannual/1500 H + inspection Monthly/250 H + inspection Monthly/250 H + inspection Monthly/250 H + inspection Quarterly/750 H + inspection Monthly/250 H + inspection Monthly/250 H + inspection Monthly/250 H + inspection Quarterly/750 H + inspection Biannual/1500 H + inspection Annual/3000 H + inspection Monthly/250 H + inspection . . . 79 Maintenance 1. Outline of Maintenance Inspections Inspection while the power is OFF (Be sure to turn off the power.) Inspection item Point of inspection Check looseness of connectors. If looseness is found, plug it in securely, or tighten. External connectors on controller. Daily Monthly Quarterly Biannual Annual ○ ○ Connectors on boards inside controller. ○ ○ Visually check for Boards inside controlexternal defect. ler. Clean if necessary. Check clogging of Refer to “12. Cooling controller filter. Fan” in this volume. ○ ○ Storage condition of Inside controller. boards in controller. ○ ○ ○ ○ ○ ○ Inspection while the power is ON, or while manipulator is moving Inspection item Point of inspection Emergency stop switch on operating unit Check if each switch External emergency for stopping robot stop switch movement works PAUSE switch on opproperly or not. erating unit Expanded pause switch Daily Monthly Quarterly Biannual Annual ○ ○ ○ ○ ○ ○ ○ ○ ○ ○ ○ ○ ○ ○ ○ ○ ○ ○ ○ ○ ○ ○ Check if those Other switches on opswitches function erating unit properly. Check if interlock Interlock with periphfunction properly. eral equipment ○ ○ ○ ○ ○ Check if safeguard switch functions Safeguard properly. ○ ○ ○ ○ ○ Check motion range. Motion range of each axis ○ Check disconnection External cables by swinging cables. Check if any mal- Strange sound and vifunctions occur or bration during robot not. motion 80 ○ ○ ○ ○ ○ ○ ○ Maintenance 2. Outline of Structure 2. Outline of Structure 2.1 Fixing screws of panels Covers of a controller can be taken off by loosening the following screws: (1) Screws for upper cover : 4 pieces (2) Screws for front panel : 4 pieces (3) Screws for rear panel : 8 pieces (1) (1) Upper cover (1) (1) (2) (2) Front panel (2) (2) (3) (3) (3) (3) (3) (3) (3) Rear panel (3) 81 Maintenance 2.2 2. Outline of Structure Location of parts PSU1, PSU2 Regenerative brake unit (for EL, EH, BL, XM3000 series) PSU3 Motor power unit MPU board Top view of interior AC servo driver for axis #2 AC servo driver for axis #3 AC servo driver for axis #1 I/O board AC servo driver for axis #4 Driver safety cover Power switch REMOTE board Option slot Power cable M/C signal PSU board M/C power Rear panel Front view of interior PRG. No. LED E. Stop cancel switch LINE No./STATUS LED Front board Cooling fan TEACH port Front panel 82 Back side of front panel Filter Maintenance 2.3 2. Outline of Structure Diagram of cable connections ES/EC BN/BNA RT3300 83 Maintenance EL/EH 84 2. Outline of Structure BL XM3000 Maintenance 2.4 2. Outline of Structure Connector pin assignment Rear panel M/C POWER (X2) M/C SIGNAL (X3) TEACH (X70) DX30A-68P DB-25PF-N DX20A-68S DB-25ST-N-S1 Cable side JL05-6A20-29PC-A66F0 connector Controller side JL05-2A20-29SC-F0 connector Pin Front panel 1 1U 1 EG 35 2Z 1 FG 2 4V 2 EG 36 2Z 2 SD 3 1V 3 4A 37 2S 3 RD 4 4U 4 4A 38 2S 4 RS 5 FG 5 4B 39 2HOME 5 CS 6 1W 6 4B 40 NC 6 NC 7 4W 7 4Z 41 ENC+5V 7 SG 8 NC 8 4Z 42 ENC+5V 8 CD 9 3W 9 4S 43 EG 9 NC 10 2U 10 4S 44 EG 10 E.STOP+ 11 NC 11 4HOME 45 1A 11 E.STOP- 12 NC 12 NC 46 1A 12 NC 13 3V 13 ENC+5V 47 1B 13 DG 14 2V 14 ENC+5V 48 1B 14 DMSW+ 15 3U 15 EG 49 1Z 15 DMSW- 16 2W 16 EG 50 1Z 16 TP+ 17 3A 51 1S 17 TP- 18 3A 52 1S 18 NC 19 3B 53 1HOME 19 NC 20 3B 54 HCOM 20 ER 21 3Z 55 ENC+5V 21 NC 22 3Z 56 ENC+5V 22 NC 23 3S 57 NC 23 NC 24 3S 58 THS 24 NC 25 3HOME 59 NC 25 +7V 26 NC 60 NC 27 ENC+5V 61 NC 28 ENC+5V 62 MP 29 EG 63 EMB1 30 EG 64 EMB2 31 2A 65 +24V 32 2A 66 +24V 33 2B 67 RG 34 2B 68 RG 85 Maintenance 2. Outline of Structure PNP type REMOTE board Cable side connector Controller side connector Pin 86 I/O board REMOTE1 REMOTE2 RS-232C #20 RS-232C #21 I/O-1 10126-3000VE 10120-3000VE DE-9SF-N DE-9SF-N DB-50PF-N 10226-52A2JL 10220-52A2JL DESP-JB9P DESP-JB9P DB-50ST-N-S1 1 RLY 1 DG 1 CD 1 CD 1 IN COM 0 26 OUT 7 2 S.ERR 2 +7V 2 RD 2 RD 2 IN 0 27 NC 3 SAFE 3 SD 3 SD 3 SD 3 IN 1 28 OUT 8 4 HP 4 NC 4 ER 4 ER 4 IN 2 29 OUT 9 5 NC 5 E.STOP+ 5 SG 5 SG 5 IN 3 30 NC 6 E.STOP+ 6 NC 6 NC 6 NC 6 IN 4 31 OUT 10 7 SAFE11 7 S.ERR 7 RS 7 RS 7 IN 5 32 OUT 11 8 SAFE21 8 TEACH 8 CS 8 CS 8 IN 6 33 NC 9 CLR1 9 +24V 9 NC 9 NC 9 IN 7 34 OUT 12 10 COM- 10 RG 10 IN COM 1 35 NC 11 COM- 11 DG 11 IN 8 36 OUT 13 12 +24V 12 +7V 12 IN 9 37 NC 13 +24V 13 RD 13 IN 10 38 OUT 14 14 RLY 14 NC 14 IN 11 39 NC 15 E.STOP 15 E.STOP- 15 IN 12 40 NC 16 DMSW 16 NC 16 IN 13 41 OUT 15 17 MPON 17 E.STOP 17 IN 14 42 NC 18 NC 18 AUTO 18 IN 15 43 OUT COM- 19 E.STOP- 19 +24V 19 OUT 0 44 OUT COM+ 20 SAFE12 20 RG 20 OUT 1 45 OUT COM+ 21 SAFE22 21 OUT 2 46 OUT COM+ 22 CLR2 22 OUT 3 47 +24V 23 COM+ 23 OUT 4 48 +24V 24 COM+ 24 OUT 5 49 RG 25 RGND 25 OUT 6 50 RG 26 RGND Maintenance 2. Outline of Structure NPN type REMOTE board Cable side connector Controller side connector Pin I/O board REMOTE1 REMOTE2 RS-232C #20 RS-232C #21 I/O-1 10126-3000VE 10120-3000VE DE-9SF-N DE-9SF-N DB-50PF-N 10226-52A2JL 10220-52A2JL DESP-JB9P DESP-JB9P DB-50ST-N-S1 1 RLY 1 DG 1 CD 1 CD 1 IN COM 0 26 OUT 7 2 S.ERR 2 +7V 2 RD 2 RD 2 IN 0 27 NC 3 SAFE 3 SD 3 SD 3 SD 3 IN 1 28 OUT 8 4 HP 4 NC 4 ER 4 ER 4 IN 2 29 OUT 9 5 NC 5 E.STOP+ 5 SG 5 SG 5 IN 3 30 NC 6 E.STOP+ 6 NC 6 NC 6 NC 6 IN 4 31 OUT 10 7 SAFE11 7 S.ERR 7 RS 7 RS 7 IN 5 32 OUT 11 8 SAFE21 8 TEACH 8 CS 8 CS 8 IN 6 33 NC 9 CLR1 9 +24V 9 NC 9 NC 9 IN 7 34 OUT 12 10 COM+ 10 RG 10 IN COM 1 35 NC 11 COM+ 11 DG 11 IN 8 36 OUT 13 12 +24V 12 +7V 12 IN 9 37 NC 13 +24V 13 RD 13 IN 10 38 OUT 14 14 RLY 14 NC 14 IN 11 39 NC 15 E.STOP 15 E.STOP- 15 IN 12 40 NC 16 DMSW 16 NC 16 IN 13 41 OUT 15 17 MPON 17 E.STOP 17 IN 14 42 NC 18 NC 18 AUTO 18 IN 15 43 OUT COM+ 19 E.STOP- 19 +24V 19 OUT 0 44 OUT COM- 20 SAFE12 20 RG 20 OUT 1 45 OUT COM- 21 SAFE22 21 OUT 2 46 OUT COM- 22 CLR2 22 OUT 3 47 +24V 23 COM- 23 OUT 4 48 +24V 24 COM- 24 OUT 5 49 RG 25 RGND 25 OUT 6 50 RG 26 RGND 87 Maintenance 2.5 2. Outline of Structure Main power supply circuits The main power supply circuit is comprised of an earth leakage circuit breaker, a noise filter, a circuit that supplies 200 volts AC to the motor power unit and three PSUs (switching power supply unit) that supply +5V/±12V, +24V and user +24V power to the mother board. The controller's main power supply circuit 88 Maintenance 3. PSU 3. PSU 3.1 PSU layout PSU2 PSU1 Regenerative brake unit (for EL, EH, BL, XM3000 series) PSU3 MPU board Motor power unit PSU comprises three switching power supplies (PSU1, PSU2, PSU3) that output the various voltages used inside the controller. The voltages output by each power supply are shown below. Model Input voltage Output voltage PSU1 LWT50H-522 AC 200 to 230V (X11) +5V/±12V PSU2 RWS30A-24/B AC 200 to 230V (X14) Internal +24V (X13 to X32) PSU3 RWS30A-24/B AC 200 to 230V (X15) +24V for user (X16 to X33) (X12 to X31) 89 Maintenance 3.2 3. PSU Power supplies from PSU PSU1 PSU2 PSU3 5V ±12V Internal User To be disconnected at: ENC VCC +7V -5V ±12V +24V +24V +5V Internal Parts PSU board ○ MPU board ○ REMOTE board ○ I/O board Additional RS-232C board ○ Front board ○ AC servo driver ○ ○ ○ ○ ○ ○ ○ ○ ○ ○ ○ ○ Board Board ○ Board ○ Board ○ Board ○ X71 ○ Driver X3A~X3D Motor power unit ○ X28 Cooling fan ○ X73 ○ Signal connector ○ ○ M/C signals Connectors REMOTE1 for External REMOTE2 Equipment I/O TEACH 90 ○ ○ ○ ○ ○ ○ REMOTE1 connector ○ REMOTE2 connector ○ I/O connector TEACH connector Maintenance 3.3 3. PSU PSU inspection Only trained personnel should be allowed to perform the following operations. WARNING Trained personnel are those who have taken a robot training course (held by the dealer) or those who have carefully read the manuals and have equivalent knowledge or skill. To avoid an electric shock, do not touch the dangerous high-voltage parts marked with the orange label. For safety, be sure to remove M/C POWER cable from the M/C POWER connector at the rear panel of controller so that the manipulator should not move accidentally. 1) Loosen the four screws that fasten the upper cover and remove the upper cover from the controller. As the earth line is connected to the upper cover, do not pull it unnecessar- ily. 2) Check the button of two circuit protectors on the side surface of PSU1. Proceed to the step 4) if both buttons have not come out. Button of circuit protector (Not-activated status) 3) If the button should come out, it means that the power supply circuit connected with PSU1 is short-circuited somewhere. Turn OFF the power to the controller and depress the circuit protector button. Then turn ON the power again, and recheck whether the circuit protectors will activate or not. NOTE If the short-circuit current is small, a circuit protector may not activate immediately. ) Please watch the status for a while. If the circuit protector is activated again, proceed to the next section “Check for PSU1 and the related devices.” 4) If the circuit protectors are not activated, check the output voltage from each PSU. Measure the DC voltage of each of the parts shown below. Check that they are within the specified normal voltage range. WARNING Be careful not to touch the dangerous high-voltage parts marked with the orange label when checking the voltage. 91 Maintenance 3. PSU + side - side standard (V) name from at 31c and 32c 4.95 to 5.15 +5V PSU1 at 30c and 29c 11.4 to 12.6 +12V at 28c and 29c -11.4 to -12.6 -12V connector X73 at 1 (red) and 2 (black) 22.8 to 25.2 +24V PSU2 I/O board I/O connector at 47 or 48 and 49 or 50 22.8 to 25.2 +24V PSU3 Where measured : MPU board Fan connector X42 (see drawing below) Variable resistor (VR1) adjustment hole X42 28c 29c 30c 31c 32c You can adjust the +5V using the variable resistor VR1 on the PSU1. To make ad- justments, insert a cross-head screwdriver through the variable resistor adjustment hole on the PSU cover. WARNING PSU has the high-voltage parts. When you adjust the +5V, if a screwdriver touches around the variable resistor, you may get an electric shock. Insert the screwdriver straight to the variable resistor, and be careful not to touch anything else. 5) If all the tested data are within the proper range, inspection of PSU is now completed. Install the upper cover of the controller and connect the M/C POWER cable. If the measured voltage of PSU1 is not proper, replace PSU1 referring “3.4 replacement” in this chapter. PSU unit Still, when the voltage does not return normally, pro- ceed to the next section “Check for PSU1 and the related devices.” If the measured voltage of PSU2 and/or PSU3 is not proper, proceed to the section “Check for PSU2, PSU3 and the related devices” below. 92 Maintenance 3. PSU Check for PSU1 and the related devices If there is malfunction (short-circuit) somewhere in the +5V power circuit that is output from PSU1, the upper circuit protector will activate, and the “8A” button should come out. If there is malfunction (short-circuit) somewhere in the +12V power circuit, the lower circuit protector will activate, and the “1A” button should come out. 1) Turn OFF power to the controller and check that the orange LED (M. P) on the front of the motor power unit is faded out completely. WARNING Controller has the capacitors charged high voltage. To avoid an electric shock, do not touch the dangerous high-voltage parts marked with the orange label until the orange LED of motor power unit is faded out completely. When the orange LED is faded out, the high-voltage capacitors are discharged. Orange LED (M.P) 2) Detach one of the device whose power is supplied from PSU1 as shown in the previous table, “3.2 Power supplies from PSU.” Refer to the described method of disconnect- ing for replacing each part. WARNING Temperature of PSU may rise depending on the operating condition. Check the surface temperature before handling and use the protective gloves if necessary. 3) Turn ON the controller’s power and check whether the circuit protector activates. 4) Measure the voltages from PSU1 listed in the previous table. WARNING Do not touch the inside the controller while the controller power is ON. When connecting or disconnecting boards or connectors, be sure to turn OFF the power of controller. 5) Repeat step 2) to 4) for each device whose power is supplied by PSU1. Find and re- place the device that the circuit protector does not activate or the voltage from PSU1 returns normally while the device is disconnected. 6) Turn ON the controller’s power. Confirm that the circuit protectors are not activated and the measured voltages are within the normal voltage range. 7) Install the upper cover of the controller and connect the M/C POWER cable. Now the procedure is completed. 93 Maintenance 3. PSU Check for PSU2, PSU3 and the related devices EL/EH BL 1) Disconnect the X80 connector on regenerative brake unit and remove the regenerative brake unit from the controller referring to “10. Regenerative Brake Unit” of this volume XM3000 when the manipulator is EL, EH, BL or XM3000 series. 2) Remove the X32 and X33 connectors from the mother board. Disconnect the X65 connector first if these connectors are difficult to disconnect. 3) Turn ON the controller’s power and measure the voltage listed in the table below. WARNING Be careful not to touch the dangerous high-voltage parts marked with the orange label when checking the voltage. + side Where measured : - side standard (V) name PSU2 connector X32 at 1 (red) and 2 (black) 22.8 to 25.2 +24V PSU3 connector X33 at 1 (red) and 2 (black) 22.8 to 25.2 +24V X33 X32 X65 Mother board If the measured voltage from PSU2 or PSU3 is not proper, replace the PSU referring the replacement procedure in the next section 3.4. If there is an error feedback despite the normal voltages at the PSUs, suspect the device connected to PSU2 or PSU3 for causing that error. Follow the steps below to define the device that is causing the error. 4) Turn OFF the power of controller and pull out the power plug from the power source. And check that the orange LED (M. P) on the front of the motor power unit is faded out completely. WARNING Controller has the capacitors charged high voltage. To avoid an electric shock, do not touch the dangerous high-voltage parts marked with the orange label until the orange LED of motor power unit is faded out completely. When the orange LED is faded out, the high-voltage capacitors are discharged. Orange LED (M.P) 94 Maintenance 3. PSU 5) If the Error #110 (“the error at PSU2”) occurs, disconnect all the parts/equipment whose power is supplied from PSU2. PSU,” list all such parts. The previous table, “Power supplies from Refer to the described method of disconnecting for replac- ing each part. WARNING Temperature of PSU may rise depending on the operating condition. Check the surface temperature before handling and use the protective gloves if necessary. 6) Once all the parts are disconnected, reconnect each part back to PSU2 one by one. Each time a part is reconnected, turn ON the Controller to measure the voltage at the +24V terminal using the X73 (cooling fan) connector. The problematic part can be defined by measuring this voltage each time the part is reconnected. (The problem- atic part should indicate the out-of-spec voltage when reconnected and measured.) WARNING Do not touch the inside the controller while the controller power is ON. When connecting or disconnecting boards or connectors, be sure to turn OFF the power of controller. 7) If the Error #46 (“the error at PSU3”) occurs, disconnect the following connectors and boards one by one to determine the cause. Test by turning ON the Controller each time a connector/board is disconnected if the error will be canceled.: the REMOTE1 connector, REMOTE2 connector, I/O connectors and I/O boards. 8) If the error cannot be canceled in above 7), it is most likely that the PSU board or REMOTE board is causing the error. board. Replace each board one by one with a new The problematic board can be determined if the error state should disappear when replaced with the new board. 9) Once the problematic device is determined and replaced with the good one, reconnect all the parts. However, the M/C POWER connector must be left unconnected. 10) When all the parts (except for the M/C POWER connector) are reconnected, check and be sure that they are connected properly. Turn ON the Controller. Check that there should be no error indication. EL/EH XM3000 BL 11) Attach the regenerative brake unit to the controller and connect X80 referring to “10. Regenerative Brake Unit” of this volume when the manipulator is EL, EH, BL or XM3000 series. 12) Install the upper cover of the controller and, connect the M/C POWER cable to the M/C POWER connector. Now the procedure is completed. 95 Maintenance 3.4 3. PSU PSU replacement If the AC input voltage is normal while the DC output voltage is out of the normal range, replace the PSU in question by following the steps below. WARNING Only trained personnel should be allowed to perform the following operations. Trained personnel are those who have taken a robot training course (held by the dealer) or those who have carefully read the manuals and have equivalent knowledge or skill. Controller has the capacitors charged high voltage. To avoid an electric shock, do not touch the dangerous high-voltage parts marked with the orange label until the orange LED of motor power unit is faded out completely. When the orange LED is faded out, the high-voltage capacitors are discharged. Orange LED (M.P) For safety, be sure to remove M/C POWER cable from the M/C POWER connector at the rear panel of controller so that the manipulator should not move accidentally. CAUTION Temperature of PSU may rise depending on the operating condition. the surface temperature before handling and use the protective gloves if necessary. 96 Check Maintenance 3. PSU PSU1, PSU2 replacement 1) Turn OFF the controller, unplug the controller’s power cord and wait about two minutes. 2) Remove the controller’s upper cover. As the earth line is connected to the upper cover, do not pull the cover unnecessarily. 3) Cut off the cable clamp which fastens the cable to PSU cover. 5) 6) PSU fixing plate 5) PSU cover X11 X12 X13 X14 X31 6) 5) 3) Cable clamp 4) Disconnect the four connectors (X11, X13, X14 and X31) from the PSU. 5) Loosen the three screws and remove the PSU fixing plate (with PSU1, PSU2 and PSU cover) from the board rack. 6) Loosen the two screws at the each side of PSU cover and remove the cover from the PSU fixing plate. 7) Remove the fixing screw of the PSU to be replaced. the fixing plate with two screws from underneath. or PSU2 can be removed. Each PSU1 and PSU2 is fixed to If you loosen those screws, PSU1 Then replace it with a new one. If you replace PSU1, remove the X12 connector, and connect the cable of the X12 connector to a new PSU1. 8) Fix the new PSU and attach the PSU cover to the PSU fixing plate. 9) Connect X31 and mount the PSU fixing plate to the controller as it was before. Pay attention not to pinch the cable. 10) Connect X11, X13 and X14 to PSU. 11) Fasten the cables to the PSU cover with a cable clamp. Handle the cables carefully so that no load or weight is applied. 12) Fix the upper cover. 97 Maintenance 3. PSU PSU3 replacement 1) Turn OFF the controller, unplug the controller’s power cord and wait about two minutes. 2) Remove the controller’s front panel. As various cables are connected to the front panel, do not pull the panel unnecessarily. 3) Disconnect the earth line and the two connectors X71 and X73 from the back side of the front panel. 4) Remove the driver safety cover by taking out the three screws. Driver safety cover 4) 4) 4) 5) Remove the AC servo driver unit of axis #4. Disconnect the connectors X1D and X3D from the AC servo driver for the axis #4. z Remove the four screws that hold the driver unit in place. z Pull the driver unit forward and out from the controller. z 5) X1D X3D AC servo driver unit for axis #4 6) Disconnect the connectors X15 and X16 from PSU3. 98 5) Maintenance 3. PSU 7) Loosen two screws fixing PSU3 at the left panel of the controller and pull out PSU3 from the controller. 7) PSU3 8) Insert a new PSU3 in the controller, and install it on the left panel of the controller. 9) Connect the connector X15 and X16 to PSU3. The connector shape of X15 and X16 is same, so be careful not to misconnect. 10) Insert the AC servo driver for the axis #4 again, and secure it with four screws. Be sure not to bend the connected cables forcibly or not to pinch. 11) Connect the connectors X1D and X3D to the AC servo driver for the axis #4. X1D X3D 11) 11) 12) Fix the driver safety cover. Driver safety cover 12) 12) 12) 13) Reconnect the earth line, connectors X71 and X73 to the front panel and fix the front panel to the controller. WARNING Be sure to reconnect the earth line to front panel. 99 Maintenance 4. PSU Board 4. PSU board 4.1 Layout and function of PSU board parts The PSU board outputs and monitors the power supplies that are used by the controller, manipulator and other peripheral equipment. (2) (1) (2) XJ1 (4) XJ3 RV1 F1 XJ2 (2) SKP327 PSU BOARD Handle XP2 XP1 (3) (1) Fuse (F1) A 2A fuse for over-current protection and protection against abnormalities in the internal +24 voltage supplied to the servo driver and so on. (2) Test pins (XJ1, XJ2, XJ3) Test pins for measuring the power supply voltages. Notation Function XJ1 DGND XJ2 ENC +5V check XJ3 -5V check (3) Jumper pins (XP1, XP2) Jumper pins are set in accordance with the specification for the manipulator’s electromagnetic brake. Do not change the settings. (4) Variable resistor (RV1) Variable resistor RV1 is used to regulate the 5V power supply voltage of the servo motor’s encoder. 100 Voltage increases when you turn the variable resistor clockwise. Maintenance 4.2 4. PSU Board Errors related to the PSU board PSU board error numbers and causes are shown in the following table. Error No. S.ERR 4.3 Cause VCC power supply voltage deterioration 46 User’s +24V power supply voltage deterioration 48 Momentary AC power service interruption 95 ENC +5V power supply voltage deterioration 102 +7V power supply voltage deterioration 104 ±12V power supply voltage deterioration 118 -5V power supply voltage deterioration 110 +24V power supply voltage deterioration 115 Motor main power supply voltage deterioration PSU board inspection and replacement WARNING CAUTION Make sure the power is turned OFF when connecting or disconnecting the PSU board to avoid an electric shock. Mount circuit boards of a controller in fixed slots. 1) Turn OFF the controller and position it so that you can remove the board. 2) After loosening the PSU board’s upper and lower set screws, pull the board forward by the handle. 2) 2) PSU board Handle 3) Check that the fuse (F1) is still good and that the wires inside the fuse are straight. 4) If PSU board has a malfunction, it is necessary to replace it. After replacing the board, set the new PSU board’s jumper pins (XP1 and XP2) in the same way as the original board. 5) Firmly insert the new PSU board all the way into the designated slot (labeled “PSU”) and re-tighten the screws. 101 Maintenance 4.4 4. PSU Board ENC+5V (encoder 5V) power supply adjustment WARNING Only trained personnel should be allowed to perform the following operations. Trained personnel are those who have taken a robot training course (held by the dealer) or those who have carefully read the manuals and have equivalent knowledge or skill. 1) Turn the controller OFF. 2) Disconnect the power connector X131 of the axis #3 motor of the manipulator. (Refer to the chapter of “Replacing the Motors” in the manipulator manual.) 3) For safety reasons, set the controller in TEACH mode, then turn ON the controller. 4) Pull the X31 connector closest to the servo-motor’s encoder of the manipulator to the outside. Refer to the wiring schematics (“Outline of connection” and “Block dia- gram”) in the manipulator manual. There is no need to disconnect the X31 connector. 5) Measure the voltage at “EGND” and “ENC+5V” of the X31 connector that you pulled out. (without disconnecting) Check that the voltage is between 4.80V and 5.05V. Manipulator EGND ENC+5V BN, BL(-CL), XM3000, RT3300 pin No. 8 pin No. 7 ES, EL, EC, EH, BNA(-CL) pin No. 13 pin No. 12 Standard 4.80V to 5.05V 6) If the voltage is not within the specified range, turn the controller OFF, then pull out the PSU board and adjust its variable resistor (RV1) as follows: When the voltage is low : turn “RV1” clockwise 1/2 graduation. When the voltage is high : turn “RV1” counterclockwise 1/2 graduation. After adjusting the variable resistor, firmly insert the PSU board back into the designated slot (labeled “PSU”) and repeat steps 4) to 6). 7) If the voltage value is within the specified range, turn the controller OFF and attach the X131 connector to the axis #3 motor. 8) Return the connectors X31 and X131 to its original position referring the chapter of “Replacing the Motors” in the manipulator manual. 9) If you pulled out the PSU board, be sure to re-tighten its upper and lower set-screws. 102 Maintenance 5. Motor Power Unit 5. Motor Power Unit 5.1 Layout and function of motor power unit parts The motor power unit consists of the motor main power supply circuit to the AC servo driver and the dynamic brake circuit. XP1 (1) X24 HL1 M.P HL2 ACF HL3 MPC X23 X22 X21 X25 X26 X29 For EL, EH, BL, XM3000 series X28 X20 (1) LED (HL1, HL2, HL3) A description of the monitoring performed by the LED in the motor power unit is shown in table. Notation Name Color Description of display when on HL1 M.P Orange Motor main power supply is being output HL2 ACF Green AC power supply is being input HL3 MPC Green Motor is on (2) Jumper pins (XP1) Manipulator Setting ES, EC, BN, BNA(-CL), RT3300 Short EL, EH, BL(-CL), XM3000 Open 103 Maintenance 5. Motor Power Unit Block diagram ES/EC FG AC 200V X28 X20 BN/BNA FG 15A F1 RT3300 LED LED (A.FL) (MPC) Motor power control SSR THS Voltage monitoring circuit Rectifier circuit LED (M.P) DC250V X21-X24 Rectifier circuit Dynamic brake control DC0V Dynamic brake circuit U/V/W AC servo driver U/V/W X25, X26 AC servo motor EL/EH FG AC 200V X28 X20 BL XM3000 FG 15A F1 LED LED (A.FL) (MPC) X29 Regenerative brake unit Motor power control Voltage monitoring circuit SSR THS Rectifier circuit LED (M.P) DC250V Rectifier circuit Dynamic brake control DC0V U/V/W Dynamic brake circuit U/V/W X25, X26 AC servo motor 104 X21-X24 AC servo driver Maintenance 5.2 5. Motor Power Unit Motor power unit inspection Inspect the motor power unit by following the steps below. WARNING Only trained personnel should be allowed to perform the following operations. Trained personnel are those who have taken a robot training course (held by the dealer) or those who have carefully read the manuals and have equivalent knowledge or skill. To avoid an electric shock, do not touch the dangerous high-voltage parts marked with the orange label when the power is ON. 1) Turn the controller OFF and pull out the power plug from the power source. 2) Remove the front panel. Do not disconnect the connectors that are attached to the back of the front panel. 3) Wait until the orange LED (M. P) on the front of the motor power unit is faded out completely. 4) Remove the driver safety cover by taking out the three screws. Driver safety cover 4) 4) 4) 5) Check that the connectors X20 to 26 and X28 (, X29) attached to the motor power unit are securely attached. If the connection is loose, reconnect it securely. 6) With the front panel off, plug the power cord and turn the controller ON. 7) Check that the green LED (ACF) on the front of the motor power unit is lit. (The or- ange LED is dimly lit.) Orange LED (M.P) Green LED (ACF) Green LED (MPC) 8) Execute the MOTOR ON command. If the motor power unit’s LEDs are all on and no error code is issued, inspection is completed. Attach the driver safety cover and the front panel. 105 Maintenance 5. Motor Power Unit NOTE ) If all LEDs of the motor power unit are not on, there is a possibility of malfunction of the motor power unit or PSU board. If an error code is issued, take corrective action by following the troubleshooting steps. (Refer to “15.1 Error code table” in this volume.) However, if a driver error (error 180 to 189) occurs, cause of the problem will be found by taking the following steps. Refer to these. 1) Turn the controller OFF. 2) Make a note of the setting of the DIP switch SD2 on the MPU board, and set bits 5 to 8 of the SD2 to the off position which means the setting of a non-use of axis. SD1 Note : SD2 When a driver error occurs, the motor main power supply is shut down and you cannot check the voltage in step 4). That is the reason you have to switch to the non-use of axis setting. 3) Turn ON the controller and execute the MOTOR ON command. 4) Use a tester to check that the motor power unit is outputting correctly to each AC servo driver. This cannot be checked at the motor power unit; it must be checked at the AC servo driver’s power connector (X1A, X1B, X1C and X1D; see the figure below). this case, be sure not to make a short-circuit. voltage. at 6 and 5 (yellow) (black) AC source power voltage √ 2 ±10 % (In case of AC 230 V: approx. DC 320 V) X1D Standard (V) X1C Pin number + side - side X1A Measuring point (connector) X1A X1B X1C X1D 106 The voltage is as follows: In order to avoid electric shock, use an insulating glove when you measure the X1B WARNING In Maintenance 5. Motor Power Unit 5) If the above voltage is not outputted, there is a possibility of malfunction of the motor power unit or the PSU board. 6) After checking the voltage, turn off the controller, and set bits 5 ~ 8 of the MPU board’s DIP switch SD2 as they were before. 7) Fix the driver safety cover. Driver safety cover 7) 7) 7) 8) Attach the front panel. 107 Maintenance 5.3 5. Motor Power Unit Motor power unit replacement When there is something wrong with the motor power unit, replace it by following the steps below. WARNING Only trained personnel should be allowed to perform the following operations. Trained personnel are those who have taken a robot training course (held by the dealer) or those who have carefully read the manuals and have equivalent knowledge or skill. Controller has the capacitors charged high voltage. To avoid an electric shock, do not touch the dangerous high-voltage parts marked with the orange label until the orange LED of motor power unit is faded out completely. When the orange LED is faded out, the high-voltage capacitors are discharged. Orange LED (M.P) CAUTION Temperature of the AC servo driver, PSU and regenerative brake unit may rise depending on the operating condition. Check the surface temperature before handling and use the protective gloves if necessary. 1) Turn the controller OFF and pull out the power plug from the power source. 2) Remove the front panel. 3) Disconnect the earth line and connectors X71 and X73 from the back side of front panel. 4) Remove the upper cover from the controller. As the earth line is connected to the up- per cover, do not pull the cover unnecessarily. 5) Remove the upper safety cover of the motor power unit by taking out the two set-screws. Upper safety cover of the motor power unit 5) 5) 108 Maintenance 5. Motor Power Unit 6) Remove the driver safety cover by taking out the three screws. Driver safety cover 6) 6) 6) 7) Remove the AC servo driver unit of axis #1 (to facilitate replacement of the motor power unit.) • Remove the connectors X1A and X3A. • Remove the four screws that hold the driver unit in place. • Pull the driver unit forward and out from the controller. AC servo driver unit of axis #1 X1A X3A 7) 7) 8) Remove the connectors X20 to X26 (and X29) of the motor power unit. 9) Remove the screws from two places on the right side of the controller. 9) 10) Gently pull the motor power unit forward and disconnect the X28 connector. 11) Attach the X28 connector to a new motor power unit. 12) Be careful not to pinch the X73 connector cable while mounting the motor power unit in the controller, and connect the connectors X20 to X26 (and X29). 13) Tighten the motor power unit with two screws. (Refer to the figure above.) Be sure not to bend the connected cables forcibly or not to pinch. 109 Maintenance 5. Motor Power Unit 14) Attach the upper safety cover of the motor power unit. Upper safety cover of the motor power unit 14) 14) 15) Return the AC servo driver unit of axis #1. the connectors X1A and X3A. Mount it with the four screws and attach Be sure not to bend the connected cables forcibly or not to pinch. 16) Attach the driver safety cover. Driver safety cover 16) 15) 16) 15) 16) 17) Attach the upper cover of the controller. 18) After connecting the earth line, connectors X71 and X73 to the front panel, attach the panel to the controller. WARNING Be sure to reconnect the earth line (yellow/green) to front panel. 19) Refer to “11. Manipulator operation check” in this volume for the remaining steps. 110 Maintenance 6. AC Servo Driver 6. AC Servo Driver 6.1 Layout and function of AC servo driver parts ABS label (for ES, EL, EC, EH, BNA, BNA-CL) ABS Signal connector (1) Green (3) (1) Red (2) (1) LED The LED on the front of the AC servo driver shows the following conditions. Name Color Display when lit POWER Green 5V power supply being input ALARM Red Being in error condition (2) Power connectors (X1A ~ X1D) Pin assignments for the power connectors are shown below. Pin No. Wire color Signal name Content 1 Brown 2 Red Motor; V-phase Connect to V-phase of motor 3 Orange Motor; U-phase Connect to U-phase of motor 4 - - 5 Black DC0V 6 Yellow DC300V Motor main circuit power supply 7 Green/yellow F. GND Frame ground Motor; W-phase Connect to W-phase of motor N. C. Main circuit power supply common (0 volts DC) (3) Fuse The AC servo driver is equipped with a fuse to protect against over-current from the motor main power supply. 111 Maintenance 6.2 6. AC Servo Driver AC servo driver inspection Inspect the AC servo driver by following the steps below. WARNING Only trained personnel should be allowed to perform the following operations. Trained personnel are those who have taken a robot training course (held by the dealer) or those who have carefully read the manuals and have equivalent knowledge or skill. Controller has the capacitors charged high voltage. To avoid an electric shock, do not touch the dangerous high-voltage parts marked with the orange label until the orange LED of motor power unit is faded out completely. When the orange LED is faded out, the high-voltage capacitors are discharged. Orange LED (M.P) CAUTION Temperature of AC servo driver unit may rise depending on the operating condition. Check the surface temperature before handling and use the pro- tective gloves if necessary. 1) Turn OFF the controller and remove the front panel. (Do not disconnect the connec- tors from the back of front panel.) 2) Check that the connectors attached to the AC servo driver units are securely attached. If the connection is loose, reconnect it securely. 3) With the front panel off, turn the controller ON and execute the MOTOR ON command. If the state of the LED lamps located on the front of the AC servo drivers is as shown below, the AC servo drivers have no problem. The green LED is lit. The red LED is off. If the green LED is off, power is not supplied to the AC servo driver. There are pos- sibilities that power connector’s connection is not correct, or the AC servo driver’s malfunction. If the red LED is lit, control power supply (±5V, +24V) is improper. Find the part of malfunction referring the section of PSU inspection, and eliminate the cause. 4) If the state of the LED lamps has no problem, execute the MOTOR ON command and the motion command. If the robot moves properly, the inspection is now completed. If an error occurs and the red LED on the AC servo driver turns ON when using the MOTOR ON or motion command, refer to “15. Error Code Table” in this volume and eliminate the cause of error. 112 Maintenance 6.3 6. AC Servo Driver AC servo driver replacement If the AC servo driver is not functioning properly, replace it by following the steps below. The steps are same for each driver. WARNING Only trained personnel should be allowed to perform the following operations. Trained personnel are those who have taken a robot training course (held by the dealer) or those who have carefully read the manuals and have equivalent knowledge or skill. Controller has the capacitors charged high voltage. To avoid an electric shock, do not touch the dangerous high-voltage parts marked with the orange label until the orange LED of motor power unit is faded out completely. When the orange LED is faded out, the high-voltage capacitors are discharged. Orange LED (M.P) CAUTION Temperature of AC servo driver unit may rise depending on the operating condition. Check the surface temperature before handling and use the pro- tective gloves if necessary. Check the model name and mount it on proper location when replace the AC servo driver. 1) Turn OFF the controller, pull out the power plug from the power source. 2) Remove the front panel and disconnect the earth line, the connectors X71 and X73 from the back side of the front panel. 3) Remove the driver’s safety cover by taking out the three set-screws. Driver safety cover 3) 3) 3) 113 Maintenance 6. AC Servo Driver 4) Disconnect the driver’s power connector (X1A, X1B, X1C or X1D) and signal connector (X3A, X3B, X3C or X3D). AC servo driver of axis #2 X1D X3C X1C X3B X1B X1A AC servo driver of axis #4 X3D AC servo driver of axis #3 X3A AC servo driver of axis #1 5) Remove the four upper and lower screws that hold the driver in place, then pull the driver out. 6) Use a tester to check whether the fuse of the driver that you removed is blown. blown fuse may indicate a short-circuited motor power line. A Therefore, before re- placing the driver, inspect the motor and the motor power line. 5) Signal connector Fuse Power connector 5) 7) Attach the power connector and signal connector to a new driver. The capacitance is different depending on the manipulator model and the axis. Make sure of the driver model which is indicated on the label attached to the side surface. The corresponding driver to each manipulator is listed in the following table. 114 Maintenance Manipulator EC ES EL EH BN BNA(-CL) BL(-CL) XM3000 RT3300 NOTE ) 6. AC Servo Driver Axis Capacitance Old code New code Driver model 1, 2, 3 100 W ZA007109 R13ZA00710900 CACR-01-SU23GC ABS 4 50 W ZA007108 R13ZA00710800 CACR-A5-SU23GC ABS 1 200 W ZA007110 R13ZA00711000 CACR-02-SU23GC ABS 2, 3, 4 100 W ZA007109 R13ZA00710900 CACR-01-SU23GC ABS 1 400 W ZA007111 R13ZA00711100 CACR-04-SU23GC ABS 2 200 W ZA007110 R13ZA00711000 CACR-02-SU23GC ABS 3, 4 100 W ZA007109 R13ZA00710900 CACR-01-SU23GC ABS 1 400 W ZA007111 R13ZA00711100 CACR-04-SU23GC ABS 2, 3 200 W ZA007110 R13ZA00711000 CACR-02-SU23GC ABS 4 100 W ZA007109 R13ZA00710900 CACR-01-SU23GC ABS 1 200 W ZA007104 R13ZA00710400 CACR-02-SU23GC 2, 3 100 W ZA007103 R13ZA00710300 CACR-01-SU23GC 4 50 W ZA007102 R13ZA00710200 CACR-A5-SU23GC 1 200 W ZA007110 R13ZA00711000 CACR-02-SU23GC ABS 2, 3 100 W ZA007109 R13ZA00710900 CACR-01-SU23GC ABS 4 50 W ZA007108 R13ZA00710800 CACR-A5-SU23GC ABS 1 400 W ZA007105 R13ZA00710500 CACR-04-SU23GC 2, 3 200 W ZA007104 R13ZA00710400 CACR-02-SU23GC 4 100 W ZA007103 R13ZA00710300 CACR-01-SU23GC J1 700 W ZA007106 R13ZA00710600 CACR-08-SU23GC J2 400 W ZA007105 R13ZA00710500 CACR-04-SU23GC J3 100 W ZA007103 R13ZA00710300 CACR-01-SU23GC J4 50 W ZA007102 R13ZA00710200 CACR-A5-SU23GC 1, 2, 3 400 W ZA007105 R13ZA00710500 CACR-04-SU23GC 4 50 W ZA007102 R13ZA00710200 CACR-A5-SU23GC Attach the power connector correctly. If connected pins are in different position, the earth leakage breaker of your factory may trip, and the controller may be damaged. 8) Mount the driver to the controller and secure it with the four set-screws. Be sure not to bend the connected cables forcibly or not to pinch. 8) Signal connector Power connector 8) 115 Maintenance 6. AC Servo Driver 9) Connect the power connector and the signal connector to the driver. 10) Attach the driver safety cover. Driver safety cover 10) 10) 10) 11) After connecting the earth line, the connectors X71 and X73 to the front panel, install the front panel to the controller. WARNING Be sure to reconnect the earth line (yellow/green) to front panel. 12) Refer to “11. Manipulator operation check” in this volume for the remaining steps. 116 Maintenance 7. MPU Board 7. MPU board 7.1 Layout and function of MPU board parts The MPU board executes programs and controls the manipulator. ② ② ① ② ② ① ③ ③ ① DIP switches The DIP switches are used to set various software functions. The functions are as fol- lows. SD1 Bit No. Function 1 System initialization 2 (Reserved for system) 3 to 8 Setting of manipulator (A∼E) model ON OFF Initializes CPU control data Does not initialize when power is turned on (Always off) (Do not change these settings) SD2 Bit No. Function ON OFF 1 (M) Use of additional RAM Yes No 2 (V) Sets capacity of main memory Main memory : 374KB and file memory when you File memory : 900KB add additional RAM Main memory : 174KB File memory : 1.1MB 3 (Reserved for system) - (Always off) 4 (Reserved for system) - (Always off) 5 (X) Use of axis #1 Yes No 6 (Y) Use of axis #2 Yes No 7 (Z) Use of axis #3 Yes No 8 (U) Use of axis #4 Yes No SD3 Bit No. Function ON OFF 1 to 4 (Reserved for system) - (Always off) 117 Maintenance 7. MPU Board DIP switches have been correctly set at the factory on the basis of your specifications. Careless changes to these settings could cause system failure. Please be careful not to change the setting of bits which are shown as “(Reserved for system).” When replacing the MPU board, DIP switches of a new board have to be set the same way as the current board. You can display the current settings of the DIP switches us- ing the SPEL Editor or SPEL for Windows. Before replacement, it is better to display and record the current settings just in case. See the SPEL Editor manual or SPEL for Windows manual for information on how to display the settings. The shaded cells in the tables above are standard factory settings. ② Jumper pins Jumper pins are used to set various hardware functions. Notation Function Setting XP1 to 4 (Reserved for system) (Differs by model) XP5 Backup power supply Jump XP6 Backup power supply for additional Jump when there is additional RAM RAM (Reserved for system) (Differs by model) XP8 Jumper pins have been correctly set at the factory on the basis of your specification. Careless changes to these settings could cause system failure. Be careful not to change the setting of jumper pins which are shown as “(Reserved for system).” When replacing the MPU board, jumper pins of a new board have to be set as same as the current board. ③ LED The functions of the LED on the MPU board are shown below. Notation Name Color Functions HL1 RES Red Comes on when the CPU is reset HL2 HALT Red Comes on when the CPU is the halt state HL3 WDT Red Comes on when the watchdog timer is operating HL4 - Yellow Displays the status of CPU operations HL5 - Yellow Blinks at regular intervals when MPU is operating normally You can change the functions of HL 6 ~ 9 as follows by resetting SD3-1. (SD3-1 is set to the off position at the factory.) Notation Name Color 118 Functions Bit 1 of SD3 is Off Bit 1 of SD3 is On HL6 X Green Comes on in low power mode Axis #1 servo end HL7 Y Green Comes on when manipulator stops Axis #2 servo end HL8 Z Green Comes on when MCAL and Axis #3 servo end MCORG commands are executed HL9 U Green Comes on when a servo-related Axis #4 servo end error occurs Maintenance 7.2 7. MPU Board Lithium battery inspection and replacement The data such as programs, point data, and settings are stored in RAM on the MPU board. Lithium battery supplies DC power to the RAM to maintain this data when controller power off. NOTE ) When the voltage of the lithium battery on the MPU board falls, error 49 occurs. When the error occurs, back up all of the data immediately before it is lost. Refer to SPEL Editor manual or SPEL for Windows manual for how to back up . NOTE ) When replacing lithium battery, follow the steps below after backing up data. WARNING Only trained personnel should be allowed to perform the following operations. Trained personnel are those who have taken a robot training course (held by the dealer) or those who have carefully read the manuals and have equivalent knowledge or skill. Controller has the capacitors charged high voltage. To avoid an electric shock, do not touch the dangerous high-voltage parts marked with the orange label until the orange LED of motor power unit is faded out completely. When the orange LED is faded out, the high-voltage capacitors are discharged. Orange LED (M.P) 1) Turn OFF the controller and remove the front panel. (Do not disconnect the connec- tors from the back side of front panel.) 2) Loosen the two screws that fasten the MPU board’s mounting bracket, then pull out the mounting bracket forward horizontally. Be careful not to pull the screws, or they will be removed from the mounting bracket. Fixing screw Mounting bracket of MPU board Fixing screw NOTE ) MPU board should be placed on an insulator. 3) Use a tester to measure the voltage between the pins of the lithium battery’s connector 119 Maintenance 7. MPU Board on the board. If the measured voltage is below 3.4V*, the battery is dead or flat. Replace it with a new one. When removing the old battery, cut off the clamp that is holding the battery and, disconnect the connector. Connect the new battery to the connector and, secure it with clamp. Connector Lithium battery Cable clamp * When the error 49 (low battery voltage) is issued, if a voltage is 3.4V or more, it could mean a failure of the voltage detection circuit. Mount the MPU board in the controller, fix it securely, and turn on the power, then check again whether an error is displayed. If an error occurs, replace the MPU board. See the next section to re- place the MPU board. 4) Insert the MPU board in the specified slot and push it in firmly. Tighten fixing screws of mounting bracket of MPU board. 5) Turn on bit 1 of the MPU board’s DIP switch (SD1), then turn ON the controller. The controller is initialized by this step. SD1 Look at the controller’s front panel and check that: • The E.STOP LED and S.ERR LED are off. • Error No. is not displayed. • The TEACH LED or AUTO LED is lit. 6) Turn OFF the controller. Then, after setting bit 1 of the DIP switch (SD1) to the off position, install the front panel on the controller. 7) Turn ON the controller again, execute the following commands: NEW Deletes the source program CLEAR Clears the position data VERINIT Initializes the system parameters FORMAT Formats the file memory 8) Restore all of backed-up data. dows for how to restore. 120 Refer to the SPEL Editor manual or SPEL for Win- Maintenance 7.3 7. MPU Board MPU board and/or ROM replacement The data such as programs, point data and settings are stored in RAM on the MPU board. When replace ROM chips or MPU board the data have to be backed up before replacement. NOTE ) Before replacing ROM chips or MPU board, back up all of the data. Refer to SPEL Editor manual or SPEL for Windows manual for how to back up. Replace MPU board or the parts in question by following the steps below. WARNING Only trained personnel should be allowed to perform the following operations. Trained personnel are those who have taken a robot training course (held by the dealer) or those who have carefully read the manuals and have equivalent knowledge or skill. Controller has the capacitors charged high voltage. To avoid an electric shock, do not touch the dangerous high-voltage parts marked with the orange label until the orange LED of motor power unit is faded out completely. When the orange LED is faded out, the high-voltage capacitors are discharged. Orange LED (M.P) 1) Turn OFF the controller and remove the front panel. (Do not disconnect the connec- tors from the back side of front panel.) 2) Loosen the two screws that fasten the MPU board’s mounting bracket, then pull out the mounting bracket forward horizontally. Be careful not to pull the screws, or they will be removed from the mounting bracket. Fixing screw Mounting bracket of MPU board Fixing screw NOTE ) MPU board should be placed on an insulator. 121 Maintenance 7. MPU Board 3) ROM replacement: When replacing the ROM, be careful not to touch any other devices on the board and not to damage the board. The MPU board has three ROM chips. Names of ROM such as MPU-L, MPU-U and DSP are printed beside ROM sockets. ROM chips have labels on which ROM names and versions are written. Refer to the following. Check the version of the new ROM chips and the position to which it is to be mounted, then mount it on to the board. Be certain to attach the ROM chips in the correct direc- tion by aligning the hollows of the ROM chips and sockets. When replacing the MPU board: Transfer the ROM from the old board to the new. Set the new board’s DIP switches and jumper pins to the same position as those on the old board. 4) Insert MPU board in the specified slot and push it in firmly. Tighten fixing screws of mounting bracket of MPU board. 5) Turn on bit 1 of the MPU board’s DIP switch (SD1), then turn ON the controller. controller is initialized by this step. SD1 Look at the controller’s front panel and check that: • The E.STOP LED and S.ERR LED are off. • Error No. is not displayed. • The TEACH LED or AUTO LED is lit. 122 The Maintenance 6) Turn OFF the controller. 7. MPU Board Then, after setting bit 1 of the DIP switch (SD1) to the off position, install the front panel on the controller. 7) Turn ON the controller again, execute the following commands: NEW Deletes the source program CLEAR Clears the position data VERINIT Initializes the system parameters FORMAT Formats the file memory 8) Restore all of backed-up data. Refer to the SPEL Editor manual or SPEL for Win- dows for how to restore. 123 Maintenance 8. REMOTE Board 8. REMOTE Board 8.1 Layout and function of REMOTE board parts The REMOTE board controls 7-segment display of the front panel as well as REMOTE1, REMOTE2 and RS-232C #20 and #21. ② ② ① ① ② Handle ① Jumper pins (XP2 to 8) The functions of the jumper pins are described in the table below. Do not change the setting of XP1. Pin No. Function when shorted Setting XP2 Also outputs for emergency stop occurrence Open XP3 Also outputs for error occurrence Open XP4 1 - 2 : Latches the state of “safeguard open” XP5 2 - 3 : Does not latch the state of “safeguard open” XP6 Uses one-contact safeguard switch XP7 Jump 1 and 2 Open 1 - 2 : Outputs the safeguard status that CPU recognized 2 - 3 : Outputs the actual safeguard status Jump 1 and 2 XP8 (Reserved for system) Open XP9 Factory-set and fixed Jump 2 and 3 ② RS-232C driver IC (U10 to 13) IC No. Name U10 U11 124 Used for TEACH interface MC145406P RS-232C #21 interface U12 RS-232C #20 interface U13 REMOTE2 (OPU) interface Maintenance 8.2 8. REMOTE Board REMOTE board and parts replacement CAUTION When connecting or disconnecting the REMOTE board make sure the power is turned OFF. Mount REMOTE board in fixed slot (labeled “REMOTE”). If the REMOTE board is not functioning properly, replace it or the parts in question by following the steps below. 1) Turn OFF the controller and disconnect all the connectors that are attached to the REMOTE board. 2) After loosening the remote board’s upper and lower set-screws, pull the board out by the handle. REMOTE board 2) 2) Handle 3) If you are replacing the entire board, set the jumper pins of the new board in the same way as those on the old board. If you are replacing the RS-232C driver, pull it out of the IC socket, being careful not to touch the surrounding devices. Mount the new IC, being sure to place it in the proper direction. 4) Insert the REMOTE board in the specified slot (labeled “REMOTE”) and push it in firmly. Tighten the upper and lower set-screws. 5) Reconnect the connectors. 125 Maintenance 9. I/O board 9. I/O Board 9.1 Layout and functions of I/O board parts Each I/O board controls 16 inputs and 16 outputs. (3) (2) (1) Handle (3) (1) DIP switch (SD1) Assign the bit numbers of each I/O board by setting the bits of DIP switch SD1 as shown in the table below. I/O No. Bit No. DIP switch Slot assignment Board 1 I/O-1 0 to 15 Turn all off I/O slot Board 2 I/O-2 16 to 31 Turn 1 on OP1 slot Board 3 I/O-3 32 to 47 Turn 2 on OP2 slot Board 4 I/O-4 48 to 63 Turn 1 & 2 on OP3 slot Board 5 I/O-5 64 to 79 Turn 3 on OP4 slot Board 6 I/O-6 80 to 95 Turn 1 & 3 on OP5 slot Board 7 I/O-7 96 to 111 Turn 2 & 3 on OP6 slot Board 8 I/O-8 112 to 127 Turn 1, 2 & 3 on OP7 slot (2) Output transistor array (U8 to 11) A transistor array that drives output ports. is mounted in the IC socket. The transistor array is replaceable since it Table below shows the I/O bit numbers and their corre- spondence to the IC No. 126 U8 U9 U10 U11 Board 1 0 to 3 4 to 7 8 to 11 12 to 15 Board 2 16 to 19 20 to 23 24 to 27 28 to 31 Board 3 32 to 35 36 to 39 40 to 43 44 to 47 Board 4 48 to 51 52 to 55 56 to 59 60 to 63 Board 5 64 to 67 68 to 71 72 to 75 76 to 79 Board 6 80 to 83 84 to 87 88 to 91 92 to 95 Board 7 96 to 99 100 to 103 104 to 107 108 to 111 Board 8 112 to 115 116 to 119 120 to 123 124 to 127 Maintenance 9. I/O Board (3) Fuses (F1, F2) The fuses protect the internal circuitry from output port misconnections. Please use the following fuse. Standard: ULCS-61M-2 (2A) The following table shows I/O bit numbers which the fuses protect. F1 F2 Board 1 0 to 7 8 to 15 Board 2 16 to 23 24 to 31 Board 3 32 to 39 40 to 47 Board 4 48 to 55 56 to 63 Board 5 64 to 71 72 to 79 Board 6 80 to 87 88 to 95 Board 7 96 to 103 104 to 111 Board 8 112 to 119 120 to 127 127 Maintenance 9.2 9. I/O board I/O board and parts replacement When connecting or disconnecting the I/O board make sure the power is turned CAUTION OFF. Mount I/O boards in fixed slots. If the I/O board is not functioning properly, replace it or its parts by following the steps below. 1) Turn OFF the controller and disconnect the I/O connectors that are attached to the I/O board. 2) After loosening the I/O board’s upper and lower set-screws, pull the board out by the handle. I/O board 2) OP1 slot OP2 slot OP3 slot OP4 slot OP5 slot OP6 slot OP7 slot 2) Handle 3) If you are replacing the entire board, set the DIP switch (SD1) in the same way as on the original board and affix the attached I/O number label to the designated spot on the handle. When you are replacing a fuse or the transistor array, simply replace the part in question without changing the settings on the DIP switch. 4) Firmly insert the I/O board into the original slot and tighten the upper and lower set-screws. 5) Connect the I/O connectors. 128 Maintenance 10. Regenerative Brake Unit 10. Regenerative Brake Unit (for EL, EH, BL, XM3000 series) The controller for EL, EH, BL and XM3000 series has a regenerative brake unit. If the regenerative brake unit is not operating properly, replace it by following the steps below. WARNING Only trained personnel should be allowed to perform the following operations. Trained personnel are those who have taken a robot training course (held by the dealer) or those who have carefully read the manuals and have equivalent knowledge or skill. Controller has the capacitors charged high voltage. To avoid an electric shock, do not touch the dangerous high-voltage parts marked with the orange label until the orange LED of motor power unit is faded out completely. When the orange LED is faded out, the high-voltage capacitors are discharged. Orange LED (M.P) CAUTION Temperature of the regenerative brake unit, PSU unit and AC servo driver may rise depending on the operating condition. Check the surface temperature before handling and use the protective gloves if necessary. 1) Remove the controller’s upper cover and rear panel. As the ground wire is connected to the upper cover and rear panel, do not pull them unnecessary. 2) Turn OFF power to the controller and check the orange LED (M. P) on the front of the motor power unit is faded out completely. X80 3) Disconnect the X80 connector on the regenerative brake unit. Regenerative brake unit 129 Maintenance 10. Regenerative Brake Unit 4) Remove the two screws that fasten the regenerative brake unit on the right side of the controller, and take out the regenerative brake unit backward. 4) 5) Mount the new regenerative brake unit in the controller with the two screws. Be sure not to bend the cables forcibly or not to pinch. 6) Connect the X80 connector to the regenerative brake unit. 7) Attach the upper cover and rear panel of the controller. 8) For the operation confirmation after replacement, see the following chapter “11. Manipulator Operation Check.” 130 Maintenance 11. Manipulator Operation Check 11. Manipulator Operation Check WARNING Only trained personnel should be allowed to perform the following operations. Trained personnel are those who have taken a robot training course (held by the dealer) or those who have carefully read the manuals and have equivalent knowledge or skill. Here we explain how to check the operation of the manipulator after you have replaced boards, units or other items. If an abnormality occurs during the check, reinspect the part that was replaced. 1) Recheck the cables and connectors to or in the vicinity of the parts that you replaced. Turn off the controller and remove the front panel. 2) Turn off bits 5 to 8 of the MPU board’s DIP switch SD2. (Nonuse of axis setting. Refer to the table of step 5.) SD2 3) Turn on the controller and check the LED status in the following table. Check point Color Status Front panel S.ERR Red Off (Indicator panel) E.STOP Red MPU board AC servo driver SAFE GUARD Orange Off (when E. STOP is not input) Off (when SAFE is not input) TEACH/AUTO Green Either TEACH or AUTO is lit 7-segment display Green All display “0” HL1(RES) Red Off HL2(HALT) Red Off HL3(WDT) Red Off HL4 Yellow lit HL5 Yellow Blinking HL6(X) Green lit HL7(Y) Green lit HL8(Z) HL9(U) Green Off Green Off POWER Green lit ALARM Red Off Motor power unit M.P Orange Dimly lit ACF Green lit MPC Green Off 131 Maintenance 11. Manipulator Operation Check SAFE GUARD 7-segment display E. STOP S. ERR TEACH Indicator panel AUTO MPU board HL3, 1, 2, 4, 5 HL6, 7, 8, 9 MPC ACP M.P POWER POWER ALARM ALARM 4) Turn OFF the controller. 5) Use bits 5 to 8 of the MPU board’s DIP switch (SD2) to set only the axis whose operation you are to check to “exists.” bit The setting of “exists” of each axis is shown below. 5 6 7 8 Axis #1 only “exists” ON OFF OFF OFF Axis #2 only “exists” OFF ON OFF OFF Axis #3 only “exists” * OFF OFF ON ON Axis #4 only “exists” * OFF OFF ON ON * Always set as both axis #3 and axis #4 exist even if you only check the operation of one of them. 132 Maintenance NOTE ) 11. Manipulator Operation Check Perform the following check steps from a position in which you can immediately press the emergency stop button. 6) Turn ON the controller. Execute the MOTOR ON command and check that: • No error is displayed. • Click sound (when it’s relayed) of the motor power unit in the controller is heard. • No unexpected motion occurs. Manipulator is excited normally. 7) Perform the steps 4) to 6) for the other axes and check that they magnetize normally. 8) After confirming that all axes excite normally, set all the bits 5 to 8 of the DIP switch (SD2) to on and install the front panel on the controller. 9) Input TSPEED to confirm the specified value. For the safety reasons, set TSPEED 1. 10) For BN, BL, BL-CL, XM3000 and RT3300 series, execute MCAL command and check the robot operates normally. If the error 237 occur when you execute the MCAL command, turn the controller off, turn the axis #4 between 180° and 360° and perform steps 6) to 9) again. 11) Execute JUMP and other operation commands to check whether the manipulator stops in the correct position. 12) If the position is correct, set TSPEED as you confirmed in the step 9). 133 Maintenance 12. Cooling Fan 12. Cooling Fan 12.1 Fan inspection Inspect the fan (clean the filter) by following the steps below. 1) Turn OFF the controller and remove the front panel. Do not disconnect the cables from the back side of the front panel. 2) Pull out the fan’s filter. It is attached to the back of the front panel. Clean it by vac- uum cleaner or wash and dry. Filter Fan safety cover 3) Turn ON the controller, with the front panel off. Check that the fan runs properly. 4) Install fan’s filter to its original position, and install the front panel on the controller. 134 Maintenance 12.2 12. Cooling Fan Fan replacement If the fan is not operating properly, replace it by following the steps below. 1) Turn OFF the controller and remove the front panel. 2) Disconnect the X73 connector from the fan. Do not disconnect the earth line and X71 connector. 3) Unscrew the four screws that hold the fan in place. cover. Remove the fan and fan safety Spring washer and flat washer are used with the screw, do not lose them. 3) 3) 3) 3) 4) Install a new fan together with the fan safety cover. Attach the fan safety cover to the side of the fan’s motor cable, and connect the X73 connector. 5) With the front panel off, turn ON the controller and check to see that the fan runs properly. 6) Reattach the front panel. 135 Maintenance 13. Front Board 13. Front board 13.1 Front board inspection 1) Check that the following displays on the front panel function properly. Checkpoint Notation Color What to check 7-segment display HL1 to 7 Green The line numbers are correctly displayed when the program is executed. S.ERR LED HL8 Red AUTO LED HL 9 Green The LED is lit during AUTO mode. TEACH LED HL10 Green The LED is lit during TEACH mode. E.STOP LED HL11 Red The LED is lit by the emergency stop input from either the REMOTE1, REMOTE2 or TEACH connectors. SAFE GUARD LED HL12 Orange The LED is lit by the safeguard open signal input. Off 2) Check whether the E. STOP CANCEL switch works by checking the following: • While pressing the E. STOP CANCEL switch when the manipulator is not in the emergency stop state, unplug the connector from the TEACH port. should not enter the emergency stop state. The manipulator The E. STOP CANCEL LED should come on. • In this state, when you remove your finger from the E. STOP CANCEL switch, it should be in the emergency stop state. 7-segment LED SAFE GUARD LED E. STOP LED S. ERR LED E. STOP CANCEL LED TEACH LED AUTO LED TEACH port E. STOP CANCEL switch 136 Maintenance 13.2 13. Front Board Front board replacement If the front board is not operating properly, replace it by following the steps below. 1) Turn the controller OFF and remove the front panel. 2) Disconnect the connectors X71 and X72 from the front board. (Do not disconnect the ground wire attached to the front panel and the X73 connector.) 3) Unscrew the four screws that hold the board in place, then the acrylic plate and mounting bracket come off at the same time. One of the four screws has a crown washer to- gether, do not lose it. 3) 3) 3) 3) A crown washer is inserted into this screw. 4) Make sure that HL8 to 12 LED lamps on a new board are not bent. If they are bent, return to the straight position. 5) Install the acrylic plate, mounting bracket and the new front board to the front panel in this order and fix them with screws. marked screw in above figure. the noise. Be sure to insert the crown washer into the This screw connects the to the frame ground to avoid The crown washer makes this connection securely. 6) Attach the connectors X71 and X72 to the new front board. 7) Attach the front panel to the controller. 137 Maintenance 14. Option Boards 14. Option Boards CAUTION When connecting or disconnecting the option boards make sure the power is turned OFF. Mount the option boards in the fixed slots (OP1 to 7). OP1 slot OP2 slot OP3 slot OP4 slot OP5 slot OP6 slot OP7 slot NOTE ) 14.1 See the pulse generating board manual for detail of the pulse generating board. Additional RS-232C board replacement 1) Turn OFF the controller. 2) Loosen the additional RS-232C board’s upper and lower set screws and pull the board out by the handle. (The handle is labeled “RS-232C.”) 3) Set the DIP switch (SD1) and jumper pins (XP1-A ~ H) of the new board to the same settings as those of the old board. Handle 4) Insert the board firmly into the original slot and tighten the upper and lower set-screws. 138 Maintenance 14.2 14. Option Boards Protected I/O board replacement The protected I/O board is an I/O board that is equipped with a function that protects the internal circuitry from output port misconnections. Replace the protected I/O board or its parts by following the steps described below. 1) Turn off the controller. 2) Loosen the upper and lower set-screws of the protected I/O board and pull the board out by its handle. Handle 3) If you are replacing the entire board, set the DIP switch (SD1) to the same settings as the original board and affix the attached I/O number label to the handle. (DIP switch settings are the same as for a standard I/O board.) I/O board I/O No. Bit No. DIP switch Slot assignment Board 1 I/O-1 0 to 15 Turn all off I/O slot Board 2 I/O-2 16 to 31 Turn 1 on OP1 slot Board 3 I/O-3 32 to 47 Turn 2 on OP2 slot Board 4 I/O-4 48 to 63 Turn 1 & 2 on OP3 slot Board 5 I/O-5 64 to 79 Turn 3 on OP4 slot Board 6 I/O-6 80 to 95 Turn 1 & 3 on OP5 slot Board 7 I/O-7 96 to 111 Turn 2 & 3 on OP6 slot Board 8 I/O-8 112 to 127 Turn 1, 2 & 3 on OP7 slot To replace the hybrid IC (SEP007 for NPN, SEP008 for PNP), lift it straight upward and insert a new IC into the socket, making sure to place it in the correct direction. After inserting the IC, push it down diagonally like the original. 4) Insert the board firmly into the original slot and tighten the upper and lower set-screws. 139 Maintenance 15. Trouble Shooting 15. Trouble Shooting This chapter describes causes and remedies of trouble. Refer to section 15.1 when error code is displayed. Refer to section 15.2 for troubles which error code is not displayed. When a trouble occurs, refer to this chapter and find the cause and remedy. If the trouble is not described in this chapter, contact the service center with the Communication list for failure and trouble described in section 15.3. 15.1 Error code table There are three major categories of errors. In this table, they are indicated as follows: 123 : Errors that do not require RESET to be executed to recover. 123 (italic) : Errors that RESET command should be executed to recover. 123 (italic with underline) : Errors that the power should be turned off once and on again to recover. Code Meaning 0 No errors. 1 1) FOR statement corresponding to NEXT statement is missing. Remedy 1) Make FOR statement. 2) WHILE statement corresponding to WEND state- 2) Make WHILE statement. ment is missing. 3) SELECT statement corresponding to SEND state- 3) Make SELECT statement. ment is missing. 2 4) IF statement corresponding to ELSE, ENDIF statement is missing. 4) Make IF statement. 1) Syntax error. 1) Correct syntax. 2) Undefined variable is used in command. 2) Use the variables which were already compiled and registered. 3) Undefined array is used as an array. 3) Use the variables which were already compiled and registered. 4) Batch file is attempted to execute without specify- 4) Make path for the batch file. ing path. 3 GOSUB statement is absent, while RETURN state- Make GOSUB statement or delete RETURN ment is present. statement. 4 1) Program contains 851 or more GOTO and GOSUB statements in total. 1) Reduce GOTO or GOSUB statement. 2) Program contains 410 or more labels. 2) Reduce label. 5 1) Too large parameter is entered. 2) Numeral beyond specified range is entered. 3) Argument is abnormal. 4) Undefined parameter is used. 5) Undefined PALET is used. 6) Null string is specified. 6 1) Numeral or variable is overflowed. 2) Undefined address is specified. 140 1) Reduce numeral or variable. Maintenance Code 7 Meaning 8 Line called by GOTO or GOSUB does not exist. 9 Subscription of array variable is beyond specified size. 11 Remedy 1) GOSUB...RETURN program has too many nesting 1) Reduce nesting levels. Maximum number levels. of GOSUB...RETURN nesting levels is 10. 2) Too large source program is saved. 10 15. Trouble Shooting 2) Correct program. (Refer to PRGSIZE command of reference manual.) 1) Same names of variable, label or function exist. 1) Do not specify the same name. 2) Reserved words are used for variable, label or function. 2) Reserved words are not allowed to use. 3) Name of variable, label or function starts with P. 3) First letter should be other than P. 1) Division by 0 (zero) is attempted. Correct program. 2) Undefined PALET function is used. 12 Command is used as a statement, or statement is used as a command. 13 Number of parentheses on the left “ ( “ and on the right “ ) “ are not equal. Correct program. 14 Number of parameters does not match. Correct the number of parameters of executed command. 16 Program line is not within FUNCTION...FEND. Include program lines between FUNCTION ... FEND. 17 FUNCTION declaration exists between FUNC- Describe FEND so that FUNCTION correTION ... FEND. sponds to FEND. 18 Variable declaration is not at a head of statement line. Variable declaration is not allowed after multi-statements. When variable type is different, be sure to change statement line. 19 Number of characters on one line is 80 and over. Number of characters on one line is up to 79. 20 Structured program has too many nesting loops. Reduce nesting loops. Maximum total number of nesting loops is 40. 21 Overflow occurred in converting variable. Change the value to allowable variable type. 22 Parameter specification table exceeds allowable range. Subscription of PALET is 0 to 15. 23 Too many characters are on one line. (intermediate code) 24 1) Mixed operation of character and numerical value is attempted. 15 2) Data tag error of object program. 25 1) Numerical variable error. its is attempted. Entry of too many dig- 2) ASCII character in INPUT statement cannot be converted to numeral. 26 27 1) Specified address does not exist. 1) Maximum address is 19. 2) Robot operation command is executed as Task 2 to 16, without SELRB declaration. 2) Set robot operation task with SELRB command. 1) Specified I/O bit number does not exist. 1) Confirm I/O board address setting. 2) File not opened is attempted to access. 2) Open the file. Confirm the file name. 141 Maintenance Code 28 15. Trouble Shooting Meaning Remedy 1) NEXT statement corresponding to FOR statement 1) Make NEXT statement. is missing. 2) WEND statement corresponding to WHILE state- 2) Make WEND statement. ment is missing. 3) SEND statement corresponding to SELECT state- 3) Make SEND statement. ment is missing. 4) ENDIF statement corresponding to IF statement is 4) Make ENDIF statement. missing. 5) #endif statement corresponding to #ifdef is missing. 5) Make #endif statement. 29 DMERGE, DLOAD commands are executed as Task 2 Execute DMERGE and/or DLOAD commands to 16. as Task 1. 30 Number of received data and that of variable for INPUT is not equal 31 1) Communication from a personal computer con- 1) Check the cable connection, and change to nected to TEACH port is not possible. TEACH mode. 2) Devices connected to RS-232C port cannot com- 2) Check the cable connection, and configuramunicate. tion of RS-232C. 32 33 Buffer memory overflow (receiving buffer is filled up and data continues to be transferred to RS-232C.) 34 Parity, overrun, or framing error due to RS-232C communication. 35 36 Data over 80 characters is transferred to RS-232C port. 37 Overtime error of RS-232C communication. Number of characters per line is up to 79. 38 39 The number of FUNCTION...FEND is more than 70. 40 Specified task does not exist. 41 Cannot begin a task that has already begun. 42 Command cannot be executed due to either insufficient memory, or memory malfunction. Reduce the number of FUNCTION... FEND up to 70. 43 44 45 46 1) Prohibited command is executed during task execu- 1) Press [BREAK (or STOP)] key or RESET tion. switch. 2) Edit mode is selected. 2) Exit Edit mode. (Refer to EDIT command in the reference manual.) Improper voltage of DC24V for customer use. Check +24V output at PSU. (Refer to the section 3.3 in the maintenance volume.) 47 48 Instantaneous power loss or power failure. 49 Warning - Low battery voltage. 142 Backup all of the data immediately before they are lost. Then, replace the lithium battery on MPU board with new one. (Refer to the section 7.2 in the maintenance volume.) Maintenance Code 50 Meaning 15. Trouble Shooting Remedy Optional designation of command is invalid. 51 52 53 Specified file does not exist. 1) Check the file name. 2) Check whether the specified file exists or not in file memory. 54 55 56 57 File with same name already exists. 58 1) Filename is incorrect. Change file name, or delete existed file in file memory, and save it. 2) Filename cannot be changed by NAME command. (Same name already exists.) 59 60 No available space in file memory. Backup the files on disk if necessary, delete the unnecessary files. (Refer to the SPEL for Windows manual or SPEL Editor manual for detail of backup operation.) 61 62 1) Filename is more than 8 characters. 2) File cannot be opened. 63 64 65 Disk reading error. The file cannot be loaded. erroneous file. Delete (DEL) the If same error occurs in other files reformat the file memory by FORMAT command. 66 Disk writing error. The file cannot be saved. Reformat the file memory with FORMAT command. 67 Improper disk drive is selected. Omit the drive name or specify drive “A:”. 68 69 70 Invalid file format. 71 72 Check sum error of position data. 73 Check sum error of source program. 74 Check sum error of object program. 75 1) Undeclared or undefined Function or variable is used. 2) Specified function is not supported. 76 Invalid commands executed. 143 Maintenance Code 15. Trouble Shooting Meaning Remedy 77 Point number is improper. 78 Use of undefined position data is attempted. Define point. (Refer to PNTSIZE command in reference manual.) System error of internal process. 1) Eliminate external noise source. (Refer to the section 2.6 in the functions volume.) 79 80 81 82 2) Check storage condition of the MPU board and looseness of connectors on the board. If this error frequently occurs, replace or repair the MPU board. (Refer to the section 7.3 in the maintenance volume.) 83 1) Program contains 400 or more variables. 1) Number of variables is up to 399. 2) Registration of backup variables is too many. 2) Refer to LIBSIZE command in the reference manual. 84 Compiled object program is too long. Reduce size of program. 85 Restored file by RESTORE command is too long. 86 Memory check error in system work area. Initialize MPU board by SYSINIT commend. 87 Check sum error of file. Delete (DEL) the erroneous file. If this error frequently occurs, replace or repair the MPU board. (Refer to the section 7.3 in the maintenance volume.) 88 The I/O bit is assigned as REMOTE3. 89 I/O board communication error. 90 Use of invalid statements in parallel processing is attempted. 91 No D parameter is returned from internal process. 92 Safeguard circuit malfunction. 93 Number of parameters for command is improper. 94 In WAIT SW command, specified condition is not satisfied within specified period of time. 95 5V for encoder is improper. 96 I/F board communication error. 97 Memory error of system control parameter. Input RESET command. D parameters should be 5 or less. Check the +12V output at PSU. (Refer to the section 3.3 in the maintenance volume.) 1) Eliminate external noise source and execute VERINIT command. (Refer to the section 2.6 in the functions volume.) 2) Check the voltage of the lithium battery on MPU board. Replace it if the voltage is less than 3.4V. (Refer to the section 7.2 in the maintenance volume.) 3) If this error frequently occurs, replace or repair the MPU board. (Refer to the section 7.3 in the maintenance volume.) 144 Maintenance Code Meaning 15. Trouble Shooting Remedy 98 Parameter check sum error of RAIOC. 99 Memory check error of ROM. Replace the ROM chips on the MPU board. 100 Device communication error. Check device address, connections, or MAXDEV setting. 101 MPU error by malfunction of hardware. 1) Eliminate external noise source and execute VERINIT command. (Refer to the section 2.6 in the functions volume.) 2) If this error frequently occurs, replace or repair MPU board. (Refer to the section 7.3 in the maintenance volume.) 102 Incorrect voltage of the DC7V or DC12V. Check the ±12V output at PSU. (Refer to the section 3.3 in the maintenance volume.) 103 Malfunction of robot control. Same as error 101. 104 Improper voltage of the DC12V. Check the ±12V output at PSU. (Refer to the section 3.3 in the maintenance volume.) 105 Communication error in internal process. Same as error 101. 106 Communication buffer overflow of internal process. Same as error 101. 107 Check sum error of robot model data. 1) Check the setting of the DIP switch SD1 on the MPU board. (Refer to the specifications table in the manipulator manual.) 2) If the setting is correct, replace the MPU board. (Refer to the section 7.3 in the maintenance volume.) 108 Memory check error of internal process. 1) If you replaced the ROM, initialize the MPU board. (Refer to the section 7.3 in the maintenance volume.) 2) Check the voltage of the lithium battery on the MPU board. Replace it if the voltage is less than 3.4V. (Refer to the section 7.2 in the maintenance volume.) 3) Replace or repair the MPU board. (Refer to the section 7.3 in the maintenance volume.) 109 Parameter is abnormal, cannot display. 1) Turn off and on the controller, execute VERINIT command. 2) If this error still exists, replace the MPU board. (Refer to the section 7.3 in the maintenance volume.) 110 Improper voltage of the DC24V. Check the +24V output at PSU. (Refer to the section 3.3 in the maintenance volume.) 111 Coprocessor error. (code error) Same as error 109. 112 Coprocessor error. (overflow) Same as error 109. 113 Coprocessor error. (underflow) Same as error 109. 114 Coprocessor error. (division by zero) Same as error 109. 145 Maintenance 15. Trouble Shooting Code 115 Meaning Remedy Improper voltage or temperature of motor power sup- 1) Clean the filter of cooling fan and inspect ply unit. the cooling fan, replace it if necessary. (Refer to the chapter 12 of the maintenance volume.) 2) If ambient temperature of the controller is over 40°C, cool the place where the controller is. 3) Check the motor power unit and replace if necessary. (Refer to the section 5.3 in the maintenance volume.) 116 Malfunction of Servo CPU dual port RAM. 1) Eliminate external noise source and execute VERINIT command. (Refer to the section 2.6 in the functions volume.) 2) If this error frequently occurs, replace or repair MPU board. (Refer to the section 7.3 in the maintenance volume.) 117 118 Improper voltage of DC5V. 119 Arm is moved too much after switching off the power 1) If you moved the arm manually after of controller. switching off the power, turn off and on the controller or input RESET. Check the -12V output at PSU. (Refer to the section 3.3 in the maintenance volume.) 2) Check arm position data. Move the arms to a taught point manually and display the numbers of pulse of this point. If the values of current are different too much from the numbers of pulse of taught point, calibrate the manipulator. (Refer to the section “Calibration” in manipulator manual.) 120 Invalid commands is executed. 121 Executed invalid command under emergency stop condition. 122 Improper type of data is used. 123 Specified command is not supported. 124 Numeric value is out of allowable range. 125 Arm reached the limit of motion range. 126 Arm reached the limit of motion range specified by XYLIM command. 127 Specified ARM is not defined. Release emergency stop status. (One of TEACH, REMOTE1 or REMOTE2.) 1) Use already defined arm number. 2) Define Arm by ARMSET. 128 Specified TOOL is not defined. 1) Use already defined tool number. 2) Define Tool by TLSET. 129 LIMZ error. 1) Z axis value of target position with JUMP com- 1) Set Z axis value of target position lower mand is higher than specified LIMZ value. than LIMZ value or set LIMZ value higher than Z axis value of target position. 2) Z axis value of current position with JUMP com- 2) Set Z axis value of current position lower mand is higher than specified LIMZ value. than LIMZ value or set LIMZ value higher than Z axis value of current position. 146 Maintenance Code Meaning 15. Trouble Shooting Remedy 130 Different LOCAL attribute is specified. Define LOCAL by LOCAL command. 131 Specified LOCAL is not defined. 1) Specify already defined LOCAL number. 2) Define LOCAL by LOCAL command. 132 HOFS value is out of allowable range. 133 HOME command is attempted even though certain Engage all axes by SLOCK command before axes are not engaged. HOME operation. 134 Change of arm attribute in CP control. 135 SFREE is attempted for axis that cannot be disengaged Check the setting of software switch SS6. by SFREE. (Refer to the section 9.2 of the functions volume.) 136 Improper number (many or few) of point data is speci- Refer to CURVE command of the reference fied by CURVE. manual. 137 Point data specified by CURVE contain point which Refer to CURVE command of the reference has different arm attribute. manual. 138 Free curve cannot be made by CURVE. 139 Restart of CVMOVE motion after quick pause is at- Restarting CVMOVE motion after quick pause tempted. is impossible. 140 Only axis #4 movement is attempted in CP control. 141 Improper point data for ARC command. In ARC command, specified points are too close, or points are on straight line. (Refer to ARC command in reference manual.) 143 HOME position is not defined. Define home position by HOMESET command. 144 Improper number of parameters for command. 145 Malfunction of CVMOVE command file. 146 Motion command is executed under SFREE condition. 147 The value of 4th and 6th parameter in BASE 0 com- Refer to BASE 0 command in reference manmand is different. ual. 148 Function not supported for this manipulator. 149 The command can not be used in MOTOR ON condition. 150 Motion command is executed under MOTOR OFF condition. HOFS should be in the range of -40960 to 40960. Arm attribute cannot be changed in CP control. Verify that no two successive points overlap one another. 142 Engage all axes by SLOCK. 147 Maintenance Code 151 15. Trouble Shooting Meaning Positioning cannot be completed by specified FINE. Remedy 1) Check disconnection of motor power circuit, or loose connection. Then, check the motor power unit and the voltage of AC servo driver. (Refer to the section 5.2 of the maintenance volume.) 2) Eliminate binding factor such as an obstacle if arm is bound. 3) Check each axis motion moving by hand. Secure the arm locking bolts tightly if looseness of them are found. Also, check each reduction gear. Verify appropriate lubrication or replace if necessary. (Refer to the manipulator manual.) 4) In other case than the above, replace motor, AC servo driver and/or MPU board. (Refer to the section “Motor replacement” of the manipulator manual, the section 6.3 and/or 7.3 in the maintenance volume of this manual.) 152 Arm motion exceeds maximum speed or acceleration. 153 CP motion cannot decelerate and stop in specified 1) Prepare enough deceleration distance. distance. 2) Don’t finish operation with CP motion without deceleration. 154 The axis #4 movement exceeds limit of its movement. 155 Communication error with Servo CPU at internal process. 156 Malfunction of Servo CPU. 157 Robot moved in improper speed. There is limit for axis #4 movement of the robot which has ball-screw spline unit. 1) Turn off and on the controller. 2) Check arm position data. Move the arms to a taught point manually and display the numbers of pulse of this point. If the values of current are different too much from the numbers of pulse of taught point, calibrate the manipulator. (Refer to the section “Calibration” in manipulator manual.) 3) If this error frequently occurs, replace or repair the MPU board. (Refer to the section 7.3 in the maintenance volume.) 158 148 Maintenance Code 159 Meaning 15. Trouble Shooting Remedy Reading error of encoder revolution data. 1) External noise exists. 1) Eliminate external noise source. (Refer to the section 2.6 in the functions volume.) 2) Disconnection of encoder signal line. 2) Check disconnection or miscontact of the signal line between the controller’s rear panel and mother board, and AC servo driver. (Refer to “2.3 Diagram of cable connection” in the maintenance volume.) If the red ALARM LED on AC servo driver is lit, check signal line shown below also. • in manipulator. • signal cable. 3) Voltage of encoder power source is abnormal. 3) Check the ENC+5V voltage at signal connector of motor. If voltage is not proper, inspect PSU board and wiring. (Refer to the section 4.4 of the maintenance volume.) If the green POWER LED on AC servo driver is off, check the connection of signal connector of the servo driver. (Refer to the section 6.2 of the maintenance volume.) 4) Other than the above. 4) Consider the following. • Connection of the MPU board. • Replace U15 and U16 (SCC) on the MPU board. • Replace the MPU board. • Replace the AC servo driver. • Replace the motor. 160 Encoder signal disconnection of A phase. Same as error 159. 161 Encoder signal disconnection of B phase. Same as error 159. 162 Encoder signal disconnection of Z phase. Same as error 159. 163 Encoder signal disconnection of S phase. Same as error 159. 164 Character error of absolute encoder. 165 < NOTICE > Encoder is initialized. 1) This error is displayed when encoder is initialized and controller power is switched on. Repeat turning the power off and on twice. 2) In other case than the above, check whether RES wire of encoder shorted with other line or not. 166 Servo calculation overflow. 167 Malfunction of Servo CPU hardware. 168 Servo CPU’s communication error with Sub CPU. Replace or repair the MPU board. (Refer to the section 7.3 in the maintenance volume.) 149 Maintenance 15. Trouble Shooting Code 169 Meaning Servo overspeed. Remedy 1) Check whether the M/C signal cable is surely connected. 2) Check disconnection or miscontact of the encoder line in manipulator. (Refer to the manipulator manual.) 3) Check cable damage or loose connection between the controller’s rear panel and mother board, and AC servo driver. (Refer to “2.3 Diagram of cable connection” in the maintenance volume.) 4) Eliminate external noise source. (Refer to the section 2.6 in the functions volume.) 5) In other case than the above, replace the MPU board. (Refer to the section 7.3 in the maintenance volume.) 170 Servo overflow. Try the following remedies 1) to 11). 1) Motor power line has problem. 1) Check disconnection of the motor power line in manipulator and controller. (Refer to the manipulator manual and “2.3 Diagram of cable connection” in the maintenance volume of this manual.) 2) Encoder signal line has problem. 2) If the red ALARM LED on AC servo driver is lit, check disconnection or miscontact of signal line in the following : • in manipulator. • signal cable. • between the controller’s rear panel and mother board, and AC servo driver. 3) Motor power unit is not outputting cor- 3) Inspect the motor power unit. (Refer to the section 5.2 in the maintenance volume.) rectly to servo driver. 4) Check each axis motion moving by the hand. Ver4) Mechanical load is added on axis. ify appropriate lubrication or replace the reduction gear. (Refer to the manipulator manual.) 150 5) Tension of timing belt is not proper. 5) Check tension of the timing belt. Tighten or replace if necessary. (Refer to the section “Replacing the timing belt” of manipulator manual.) 6) Arm is bound. 6) Eliminate binding factor such as an obstacle. 7) Axis #3 brake cannot be released. 7) If the brake cannot be released with the brake release button at MOTOR OFF, check the wire of brake. If the brake does not release at MOTOR ON, inspect the brake control signal circuit. (Refer to the section “Re-placing the brake” of manipulator manual.) 8) Arm hit an obstacle. 8) Prevent arm from hitting. 9) Manipulator moved unexpectedly. 9) Take the same remedy as 2). If there is no problem in 2), replace AC servo driver and/or MPU board. (Refer to the section 6.3 and/or 7.3 of the maintenance volume.) 10) External noise source exists. 10) Eliminate external noise source. (Refer to the section 2.6 in the functions volume.) 11) Other than the above. 11) Replace the AC servo driver and/or MPU board. (Refer to the section 6.3 and/or 7.3 of the maintenance volume.) Maintenance Code 171 Meaning 15. Trouble Shooting Remedy Communication check sum error of 1) Eliminate external noise source and execute VERINIT comServo CPU. mand. (Refer to the section 2.6 in the functions volume.) 2) If this error frequently occurs, replace or repair the MPU board. (Refer to the section 7.3 in the maintenance volume.) 172 Instructive motor torque is abnormal. 173 Robot is in low power state. output power is limited. 174 Motor torque overload. 175 Hardware malfunction related Servo CPU. Check disconnection of the motor power line in manipulator and controller. (Refer to the manipulator manual and “2.3 Diagram of cable connections” in the maintenance volume of this manual.) Motor 176 177 178 179 Servo adjustment mode is selected. 180 Driver overheat/overcurrent. • When the red LED on the front of the AC servo driver is off. 1) External noise source exists. • When the red LED on the front of the AC servo driver is lit. 1) Eliminate external noise source and execute VERINIT command. (Refer to the section 2.6 in the functions volume.) If no external noise source exists, replace MPU board. (Refer to the section 7.3 in the maintenance volume.) 2) Weight of the end effector and 2) Check actual weight, and set proper WEIGHT. (Refer to the section “Load weight and the WEIGHT setting” of mawork piece exceeds rated paynipulator manual.) load. 3) Motion duty of manipulator is too 3) Reduce operation speed of robot. (Refer to ACCEL, SPEED and WEIGHT command of the reference manual.) much. 4) Mechanical load is added on axis. 4) Check each axis motion moving by the hand. Verify appropriate lubrication or replace reduction gear. (Refer to the manipulator manual.) 5) Tension of the timing belt is not 5) Check the tension of timing belt. Tighten or replace if necessary. (Refer to the section “Replacing the timing belt” of proper. manipulator manual.) 6) The cooling fan is not function- 6) Inspect the cooling fan. Replace it if necessary. (Refer to the section 12.2 of the maintenance volume.) ing. 7) Clean the filter of cooling fan. (Refer to the section 12.1 of 7) The filter is clogged. the maintenance volume.) 8) Ambient temperature around con- 8) Cool the place where the controller is. troller is over 40°C. 9) The motor power line is shorted or grounded. 9) Check disconnection of the motor power line in manipulator and controller. (Refer to the manipulator manual and “2.3 Diagram of cable connection” in the maintenance volume of this manual.) 10) Other than the above. 10) Replace the AC servo driver. the maintenance volume.) (Refer to the section 6.3 of 151 Maintenance 15. Trouble Shooting Code 181 Meaning Remedy Driver overload. • When the red LED on the front of the AC servo driver is off. 1) External noise source exists. • When the red LED on the front of the AC servo driver is lit. 1) Eliminate external noise source and execute VERINIT command. (Refer to the section 2.6 in the functions volume.) If no external noise source exists, replace the MPU board. (Refer to the section 7.3 in the maintenance volume.) 2) Weight of the end effector and work piece 2) Check actual weight, and set proper WEIGHT. (Refer to the section “Load weight and the exceeds rated payload. WEIGHT setting” of manipulator manual.) 182 152 3) Motion duty of manipulator is too much. 3) Reduce operation speed of the robot. (Refer to ACCEL, SPEED and WEIGHT command of the reference manual.) 4) Mechanical load is added on axis. 4) Check each axis motion moving by the hand. Verify appropriate lubrication or replace the reduction gear. (Refer to the manipulator manual.) 5) Tension of the timing belt is not proper. 5) Check tension of the timing belt. Tighten or replace if necessary. (Refer to the section “Replacing the timing belt” of manipulator manual.) 6) Arm is bound. 6) Eliminate binding factor such as an obstacle. 7) Arm hit an obstacle. 7) Prevent arm from hitting. 8) Axis #3 brake cannot be released. 8) If the brake cannot be released with the brake release button at MOTOR OFF, check the wire of brake. If brake does not release at MOTOR ON, inspect the brake control signal circuit. (Refer to the section “Re-placing the brake” of manipulator manual.) 9) The motor power line is shorted or grounded. 9) Check disconnection of the motor power line in manipulator and controller. (Refer to the manipulator manual and “2.3 Diagram of cable connection” in the maintenance volume of this manual.) 10) Other than the above. 10) Replace the AC servo driver. (Refer to the section 6.3 of the maintenance volume.) Driver detected overspeed. Maintenance Code Meaning 183 Driver detected locked motor. 15. Trouble Shooting Remedy • When the red LED on the front of the AC servo driver is off. 1) External noise source exists. • When the red LED on the front of the AC servo driver is lit. 1) Eliminate external noise source and execute VERINIT command. (Refer to the section 2.6 in the functions volume.) If no external noise source exists, replace the MPU board. (Refer to the section 7.3 in the maintenance volume.) 2) The motor power line is shorted or grounded. 2) Check disconnection of the motor power line in manipulator and controller. (Refer to the manipulator manual and “2.3 Diagram of cable connection” in the maintenance volume of this manual.) 3) Mechanical load is added on axis. 3) Check each axis motion moving by the hand. Verify appropriate lubrication or replace the reduction gear. (Refer to the manipulator manual.) 4) Tension of the timing belt is not proper. 4) Check tension of the timing belt. Tighten or replace if necessary. (Refer to the section “Replacing the timing belt” of manipulator manual.) 5) Eliminate binding factor such as an obstacle. 5) Arm is bound. 6) Axis #3 brake cannot be released. 6) If the brake cannot be released with the brake release button at MOTOR OFF, check the wire of brake. If brake does not release at MOTOR ON, inspect the brake control signal circuit. (Refer to the section “Replacing the brake” of manipulator manual.) 7) Prevent arm from hitting. 7) Arm hit an obstacle. 8) Other than the above. 184 8) Replace the AC servo driver. (Refer to the section 6.3 of the maintenance volume.) Driver detected improper motion. • When the red LED on the front of the AC servo driver is off. 1) External noise source exists. • When the red LED on the front of the AC servo driver is lit. 2) Encoder signal line has problem. 1) Eliminate external noise source and execute VERINIT command. (Refer to the section 2.6 in the functions volume.) If no external noise source exists, replace MPU board. (Refer to the section 7.3 in the maintenance volume.) 2) Check disconnection or miscontact of the signal line in the following : • in manipulator. • signal cable. • between the controller’s rear panel and mother board, and AC servo driver. 3) Other than the above. 3) Replace the motor and/or AC servo driver. (Refer to the section “Motor replacement” of the manipulator manual and/or the section 6.3 in the maintenance volume of this manual.) 153 Maintenance 15. Trouble Shooting Code Meaning 185 Encoder signal disconnection. 186 Malfunction of driver’s CPU. Remedy Same as error 184. • When the red LED on the front of the AC servo driver is off. 1) External noise source exists. • When the red LED on the front of the AC servo driver is lit. 1) Eliminate external noise source and execute VERINIT command. (Refer to the section 2.6 in the functions volume.) If no external noise source exists, replace the MPU board. (Refer to the section 7.3 in the maintenance volume.) 2) The cable between AC servo driver and mother board has problem. 2) Check disconnection of line or looseness of the connectors between AC servo driver and mother board. (Refer to the section 2.3 in the maintenance manual.) 3) +24V output at PSU is improper. 3) Check whether POWER LED (green) on the front of AC servo driver is lit or not. If the LED is off, check the +24V output at PSU. (Refer to the section 3.3 in the maintenance volume.) 4) Other than the above. 4) Replace the AC servo driver. (Refer to the section 6.3 in the maintenance volume.) 187 188 Driver detected improper torque/speed. 189 Encoder S phase signal is not transmitted within predetermined period of time. 190 Encoder overheat. 191 Encoder overspeed. 192 Encoder data error. 193 Encoder battery error. Confirm whether any axis moved at power on. If axis #3 moved, inspect the axis #3 brake. (Refer to the section “Replacing the brake” of manipulator manual.) 1) Check the voltage of the battery on the signal relay board. Replace it if the voltage is less than 2.8V. (Refer to the section “Replacing the signal relay board” of the manipulator manual.) 2) Check disconnection of line between the motor encoder and signal relay board. (Refer to the manipulator manual.) 194 Encoder check sum error. Calibrate the axis. (Refer to the section “Calibration” of manipulator manual.) If this problem still exists, replace the motor. (Refer to the section “Motor replacement” of manipulator manual.) 154 Maintenance Code 195 Meaning 15. Trouble Shooting Remedy Encoder backup error. 1) This is the error shown after replacing motor with 1) Refer to the section “Calibration” of the absolute encoder. manipulator manual. 2) The battery voltage on signal relay board is im- 2) Check the voltage of the battery on signal proper. relay board. If the voltage is less than 2.8 V, replace the battery. 3) The voltage of encoder power (ENC+5V) is im- 3) Check the ENC+5V voltage at signal conproper. nector of motor. If voltage is not proper, inspect PSU board and wiring. (Refer to the section 4.4 of the maintenance volume.) 4) Other than the above. 4) Replace the motor. (Refer to the section “Motor replacement” of the manipulator manual.) 196 197 Framing error of encoder data. 1) This is the error shown after replacing motor with 1) Refer to the section “Calibration” of the absolute encoder. manipulator manual. 2) Strong external noise source exists. 2) Eliminate external noise source and execute VERINIT command. (Refer to the section 2.6 in the functions volume.) 3) Other than the above. 3) In other case than the above, take the following procedures: • Check inserted condition of MPU board. • Replace the MPU board. (Refer to the section 7.3 in the maintenance volume.) • Replace the motor. (Refer to the section “Motor replacement” of the manipulator manual.) 198 Overrun error of encoder data. Same as error 197. 199 Parity error of encoder data. Same as error 197. 200 ... 230 MCORG command has not executed. 231 MCAL command has not executed. 232 Home sensor detection error. Check whether home sensor LED of manipulator lights or not while moving the arm by hand. If the LED does not light, execute MCORG command. If the LED lights, check disconnection of signal cable. 233 Encoder Z phase signal detection error. 1) Check signal line of Z phase. 2) If the line has no problem, replace motor. (Refer to the section “Motor replacement” of the manipulator manual.) 234 Quick pause interrupted MCORG execution. 235 Incorrect ball-screw spline axis setting. Set the bit 7 and 8 of SD2 on the MPU board to ON. (Refer to the section 9.1 of the functions volume.) 155 Maintenance 15. Trouble Shooting Code 236 Meaning Remedy Current position calculated by the sensor and encoder 1) Connect the manipulator and the controller Z phase is out of the default RANGE value. with the same M. CODE. 2) If the arm has been hit an obstacle, there is a possibility of mechanical position deviation. Execute MCORG command. (Refer to MCORG command in reference manual.) 3) Other than the above, contact authorized dealer with its VER data. 237 HTEST data is improper. 1) Confirm the M. CODE of manipulator and controller. If they are different, connect the ones with same M. CODE. 2) If axis #4 has rotated more than 180° while the power is off, turn off the controller power once, and return axis #4 around the previous position. 3) If the arm has been hit an obstacle, there is a possibility of mechanical position deviation. Execute MCORG command. (Refer to MCORG command in reference manual.) 238 239 240 ... 300 Specified directory does not exist. 301 1) Cannot delete specified directory because does not exist. 2) Cannot delete specified directory because includes files. 302 Unable to create directory. 1) Specified directory already exist. the name. Change 2) The disk is full. 303 Specified file or directory does not exist. 304 Date designation method is incorrect. 305 Time designation method is incorrect. 306 Specified drive does not exist. 307 Memory shortage for environment string. Maximum memory for environment string is 512 bytes. 308 Batch file is too large. Maximum memory for batch file is 4KB. 309 File cannot be copied onto itself. 310 156 Maintenance 15.2 15. Trouble Shooting Troubles whose error codes are not displayed The troubles whose error codes are not displayed are as described below. Send the communication list in the following section 15.3 to the service center when these troubles cannot be restored even if they are diagnosed and treated by the methods described in this section. The power cannot be turned on even if the power switch is turned on. The SYS. ERROR lamp lights, but no error code is displayed. The emergency stop cannot be canceled. The system does not operate at a set speed. The operation speed is low. The motor is turned on (excited), but it does not operate. No precision is obtained (during installation and operation). The arm vibrates (during positioning completion and low-speed operation). An abnormal sound is generated (during operation and stop). There is an axis that does not operate. The I/O port does not operate or another I/O port operates. The operating unit does not operate. The REMOTE3 connector does not operate. 157 Maintenance 15. Trouble Shooting The power cannot be turned on even if the power switch is turned on. Diagnosis Correction See 1) Is the power plug not 1) Check that the power plug is disconnected? inserted properly. 2) Is the switching power 2) Check that PSU1 is output Section 3.3 in Main(PSU1) output normally? normally. tenance volume The SYS. ERROR lamp lights, but no error code is displayed. Diagnosis Correction See 1) Turn on the power again 1) If the system operates normally, the trouble is caused and confirm that the sysby an instantaneously power tem operates normally. failure. 2) Do the three red LEDs 2) Check that the ROM on the Section 7.3 in Main(RES, HSLT, WDT) on MPU board is mounted tenance volume the MPU board light? properly and insert the MPU board securely. If the three LEDs (red) often light, replace the MPU board. 3) Check that a switching 3) If the output value does not Section 3.3 and 3.4 power (PSU1) of 5V is satisfy the specifications, in Maintenance voloutput properly. adjust VR2 to satisfy the re- ume quired specifications. If the adjustment is impossible, replace the PSU. 158 Maintenance 15. Trouble Shooting The emergency stop cannot be canceled. Diagnosis Correction See 1) Is the REMOTE1 con- 1) Insert the connector securely and Chapter 4 in nector not disconnected? tighten it with two fixing screws. Functions volume 2) Is the emergency stop 2) Connect the normally closed Section 4.1 in emergency stop switch. Functions volume input pin of the REMOTE1 connector not open? 3) Is the REMOTE2 con- 3) Connect the supplied REMOTE2 Chapter 5 in nector not disconnected? connector when an operating unit Functions volume is not connected. 4) Is the TEACH port not 4) Connect the supplied TEACH Section 3.3 in open? port connector when a PC cable Functions volume (personal computer) or teaching pendant is not connected to the TEACH port. 5) Is the emergency stop 5) For a supplied emergency stop switch, turn the switch clockwise switch of the connected and unlock it. equipment not pressed? zPC cable zOperating unit zTeaching pendant zEquipment to be connected to REMOTE1 6) Was the resetting per- 6)-1 For TEACH mode, execute formed? the RESET command. 6)-2 If the operating unit is in the AUTO mode of the console, press the RESET switch. 6)-3 If the REMOTE3 connector is in the AUTO mode of the console, input a RESET signal. 6)-4 For S. NET mode, execute the RESET command. 7) Is the emergency stop 7) If the circuit is disconnected, recircuit not disconnected? pair it. 159 Maintenance 15. Trouble Shooting The system does not operate at a set speed. Diagnosis Correction See 1) Does the SAFE- 1)-1 Close the safeguard. GUARD LED on in1)-2 Check that the safeguard dicator panel not light? switch circuit is not disconnected and adjust so that the safeguard input terminal is closed. (LP) 2) Is the POWER com- 2) Change the power mode to high POWER by using POWER HIGH (or LP com-mand in Refermand set to HIGH? OFF) command. ence manual (Is the LP command set to OFF?) and/or 3) Are TSPEED and/or 3) Set them to high speed as re- TSPEED quired. The operation speed is TSPEEDS command TSPEEDS not set to in Reference manual low. low speed? The operation speed is low. Diagnosis Correction 1) Is the WEIGHT pa- 1) Measure the weight of the end rameter set correeffector and conveyed object sponding to the load? and set the measured value in the parameter of a WEIGHT command. See “The end effector and operation acceleration/deceleration speed” section in Manipulator manual 2) Is LIMZ set to less 2) When the axis #3 stroke is than -150 mm in the lower than -150 mm during model with an axis #3 horizontal movement, the autostroke of more than matic acceleration function is 150 mm? activated and the operation speed becomes low. The motor is turned on (excited), but it does not operate. Diagnosis Correction See 1) Does the SAFE- 1)-1 Connect the normally closed Chapter 4 in Funcsafeguard switch to the safe- tions volume GUARD LED on the guard input terminal of the indicator panel not REMOTE1 connector. light? 1)-2 Close the safeguard. 1)-3 Check that the safeguard switch circuit is not disconnected and adjust so that the safeguard input terminal is closed. 2) Does the PAUSE LED 2) Cancel the PAUSE input of the not light? REMOTE3 (I/O-1) connector. 160 Maintenance 15. Trouble Shooting No precision is obtained (during installation). Diagnosis Correction See 1) Is the bolt that in- 1) Confirm that the manipulator is “Installation method” stalls a manipulator firmly fixed to the frame. section in the Matightened firmly? nipulator manual 2) Does the arm not 2) Take care that the arm does not touch the peripheral touch the peripheral equipment. equipment? 3) Does no play exist 3) Check the rigidity and horizon- “Base table” section in the base table tally of the base table (frame) and in the Manipulator (frame)? reinforce it as required. manual 4) Is vibration not 4) Install the manipulator away from “Base table” section propagated from pethe vibration source or take vibra- in the Manipulator ripheral equipment? tion isolating measures against the manual base table (frame). 5) Does no overload 5) Set the weight, speed, and accel- “The end effector occur? eration corresponding to the load. and operation acceleration/deceleration speed” section in Manipulator manual 6) Is the fixing screw 6) Confirm the fixing screw of the of the end effector end effector. not loosened? 7) Is the tension of a 7) Push the timing belt and tighten “Replacing the timtiming belt proper? the belt again or replace if it is ing belt” section in Manipulator manual loose. 161 Maintenance 15. Trouble Shooting No precision is obtained (during operation), the position is shifted, and the shifted position cannot be corrected. Diagnosis Correction See 1) Is the bolt that installs a 1) Confirm that the manipula- “Base table” section tor is firmly fixed to the in Manipulator manmanipulator tightened ual base table (frame). firmly? 2) Is the tension of a timing 2) Push the timing belt and “Replacing the timbelt proper? tighten the belt again or re- ing belt” section in place if it is loosen. Manipulator manual 3) Does a remarkable play 3) Check the main fastening bolt of the arm and confirm occur when the power is that the bolt is not loosened. turned off and when the arm is moved manually? 4) Does the operating time of 4) Examine the replacement of a robot exceed 8,000 hours reduction gears in each axis. in all? 5) Does the operating time of 5) Examine the replacement of a robot exceed 15,000 an axis #3 ball-screw spline hours in all? unit. 6) Is there no strong noise 6) Take measures against the Section 2.6 in Funcsource in the neighbornoise. tions volume hood? 7) For except the above. 7)-1 Replace the MPU board. Section 7.3 in Maintenance volume 7)-2 Replace the AC servo Section 6.3 in Maindriver. tenance volume 7)-3 Replace the motor. “Motor replacement” section in Manipulator manual The positioning point is shifted, but the shifted point can be corrected. Diagnosis Correction 1) Is the position of periph- 1) Confirm the fixing screws of eral equipment not the peripheral equipment. shifted? 2) Do a play and catch occur 2) Check the main fastening bolt of the arm and confirm when the power is turned that the bolt is not loosened. off and when the arm is moved manually? 162 See Maintenance 15. Trouble Shooting The arm vibrates. (The residual vibration during positioning completion is high.) Diagnosis 1) Does no overload occur? Correction See 1) Set the weight, speed, and “The end effector acceleration corresponding and operation accelto the load. eration/deceleration speed” section in Manipulator manual 2) Is the bolt that install a 2) Confirm that the manipula- “Base table” section tor is firmly fixed to the in Manipulator manmanipulator tightened ual base plate (frame). firmly? 3) Is the tension of a timing 3) Push the timing belt and “Replacing the timbelt proper? tighten the belt again or re- ing belt” section in place if it is loose. Manipulator manual 4) Does a remarkable play 4) Check the main fastening bolt of the arm and confirm occur when the power is that the bolt is not loosened. turned off and when the arm is moved manually? 5) Does the operating time 5) Examine the replacement of of a robot exceed 8,000 reduction gears in each axis. hours in all? 6) Does the operating time 6) Examine the replacement of of a robot exceed 15,000 an axis #3 ball-screw spline hours in all? unit. 7) Does vibration occur in 7) Decrease the acceleration ACCEL command in value. Reference manual subtle movement (within 10 mm) with the arm spread? 8) Is the operation that coin- 8) Change the speed acceleration slightly. cides with the characteristic vibration frequency of the arm not performed? and SPEED, ACCEL command in Reference manual The arm vibrates (during low-speed operation). Diagnosis Correction See 1) Does vibration occur in 1) If vibration occurs in a high-speed area, see only a low-speed area? “No precision cannot be obtained (during installation)” and “The arm vibrates (The residual vibration during positioning completion is high)” described previously. 2) Does the vibration 2) This phenomenon is not abnormal because the level vary with the arm input rotation of reduction gears resonates with position? respect to the characteristic vibration frequency determined by the arm position. Change the speed before use. 163 Maintenance 15. Trouble Shooting An abnormal sound is generated (during operation). Diagnosis Correction See Assign the generation source by operating the system via a single shaft or operating it manually. 1) Is the tension of a 1) Push the timing belt and tighten “Replacing the timing timing belt proper? the belt again or replace if it is belt” section in Maloose. nipulator manual 2) Does the axis #3 brake 2) Press the axis #3 brake release “Replacing the brake” operate normally? button in the MOTOR OFF section in Manipulacondition and confirm that the tor manual axis #3 operates normally. Confirm that the brake works when the button is not pressed. If abnormality is found, replace the brake. 3) Does the cover or ca- 3) Be careful not to touch anyble not strike against thing else. anything else? 4) Is the fixing screw of 4) Check the fixing screw of the “Cover removal” secthe cover not loose? cover and tighten the screw tion in Manipulator again if it is loose. manual 5) Is an abnormal sound 5) Replace the grease on the regenerated from reducduction gears. tion gears? If the abnormal sound is generated still more, replace the reduction gears. 6) Is an abnormal sound 6) Apply grease to the ball-screw “Lubrication” section in Manipulator manspline shaft. generated from around If the abnormal sound is gener- ual the ball-screw spline ated still more, replace the shaft of axis #3? ball-screw spline unit. An abnormal sound is generated (during stop). Diagnosis Correction See The abnormal sound generated during stop is almost the oscillation of a motor owing to the play in a mechanical system. 1) Is the tension of a timing belt 1) Push the timing belt and proper? tighten the belt again or replace if it is loose. 2) Does the operating time of a 2) Examine the replacerobot exceed 8,000 hours in ment of reduction gears all? in each axis. 3) Does the operating time of a 3) Examine the replacerobot exceed 15,000 hours in ment of an axis #3 all? ball-screw spline unit. 164 “Replacing the timing belt” section in Manipulator manual Maintenance 15. Trouble Shooting There is an axis that does not operate. Diagnosis Correction 1) Are DIP switches SD2 1) Confirm that DIP switches SD2 on bit 5 to bit 8 on the MPU the MPU board are set properly. board set properly? See Section 9.1 in Functions volume The I/O port does not operate or another I/O port operates. Diagnosis Correction See 1) Is the I/O port wired 1) Check the wiring on the I/O connec- Section 6 in properly? tor and load sides. Functions volume 2) Is the I/O connector 2) Check the position of the connector connected properly? to be connected, the disconnection, and the slackness. Section 6 in Functions volume 3) Is the board inserted 3) Insert the board as far as it will go Section 9.2 in properly? and tighten it with two upper and Maintenance lower screws. volume 4) Is the power supplied? 4) Check the wiring in which +24V is Section 6 in input to the common terminal of the Functions I/O connector and confirm that the volume power is supplied. 5) Are DIP switches on the 5) Confirm that DIP switches SD1 on I/O board set properly? the I/O board are set properly. Section 9.1 in Maintenance volume The REMOTE3 connector does not operate. Diagnosis Correction See 1) Is the REMOTE3 con- 1) Set the I/O remote connector prop- SPEL Editor nector set properly? erly from the SPEL Editor or SPEL or SPEL for for Windows. Windows manual 2) Is the REMOTE3 con- 2) Check the wiring on the REMOTE3 nector wired properly? connector and load sides. Section 7 in Functions volume 3) Is the REMOTE3 3) Check the disconnection and slack- Section 6 in (I/O-1) connector conness of the connector and cable and Functions nected properly? connect them firmly. volume 4) Is the board inserted 4) Insert the board as far as it will go Section 9.2 in properly? and tighten it with two upper and Maintenance lower screws. volume 5) Is the power supplied? 5) Check the wiring in which +24V is Section 6 in input to the common terminal of the Functions REMOTE3 (I/O-1) connector and volume confirm that the power is supplied. 165 Maintenance 15. Trouble Shooting The operating unit does not operate. Diagnosis Correction See 1) Is the cable connected 1) Check the connection cable of the operproperly? ating unit. 2) Does the operating 2) Turn off the power of the controller, then turn on the power of the controller again unit switch operate normally? while pressing the three keys ([←], [↑], and [→]) of the operating unit at the same time. The switch state is displayed on the screen. Confirm that the display changes every time each switch is pressed. If the display does not change, the operating unit is considered to be defective. 3) Is the operation mode 3) Check the parameter of OPUNIT comof operating unit semand. Some of the functions of operatlected properly? ing unit are restricted depend on the parameter of OPUNIT. 166 OPUNIT command in Reference manual Maintenance 15.3 15. Trouble Shooting Communication list for failure and trouble If a trouble that does not apply to the description on the preceding pages occurs, please copy the communication list on next page, enter necessary items, and send it to service center by facsimile. as required. Send the version data, program list, and position data simultaneously After confirming the contents of the trouble, we examine the countermea- sures to be taken and contact you. 167 Maintenance 15. Trouble Shooting Communication list for failure and trouble Company name: Name: Department name: Phone: Facsimile: Manipulator name: Controller name: SRC-320 (Described in the signature/serial No. label of a manipulator.) M. CODE : Total current conduction duration: (Described in the M. CODE label of a manipulator or controller.) (Displayed when the HOUR command is executed.) Trouble occurrence date: Contents (Enter in full detail as far as possible.) 1. Which type is the trouble? (Error code, abnormal sound, vibration, generation frequency, reproducibility, etc.) 2. When does the trouble occur? (When the power is turned on, during MOTOR ON, MCAL, and during operation, etc.) 3. Display on the panels Enter the number. Paint out the LED that lights. 4. LED displays inside controller (Remove the front panel.) Paint out the LED that lights. LED on MPU board: W.D.T, RES, HALT LED of motor power unit: 168 M.P ACP MPC axis 1 LED of AC servo driver: axis 2 axis 3 axis 4 POWER POWER POWER POWER ALARM ALARM ALARM ALARM ENC+5V The sensor monitor of a manipulator The indicator panel of a controller Maintenance 16. Maintenance Parts List 16. Maintenance Parts List Parts name Old code New Code Specification MPU board for ABS ZA004014 R13ZA00401400 SKP326-3 MPU board for INC ZA004004 R13ZA00400400 SKP326-3 PSU board ZA004400 R13ZA00440000 SKP327 Notes attached a ABS label : for ES, EL, EC, EH, BNA and BNA-CL for BN, BL, BL-CL, XM3000 and RT3300 REMOTE board (NPN) ZA004602 R13ZA00460200 SKP345-2 NPN REMOTE board (PNP) ZA004604 R13ZA00460400 SKP345-2 PNP Standard I/O board (NPN) ZA004301 R13ZA00430100 SKP329-2 Protected I/O board (NPN) ZA004310 R13ZA00431000 SKP338-1 NPN Protected I/O board (PNP) ZA004320 R13ZA00432000 SKP338-1 PNP Additional RS-232C board ZA004711 R13ZA00471100 SKP335-1 Pulse generating board ZA004800 R13ZA00480000 Front board ZA004B02 R13ZA004B0200 PSU1 ZA006607 R13ZA00660700 +5V/±12V PSU2, PSU3 ZA006606 R13ZA00660600 +24V Motor power unit ZA007C01 R13ZA007C0100 SKP334-2 Regenerative brake unit ZA007A01 R13ZA007A0100 SKP342-2 AC servo driver for ABS (50 W) ZA007108 R13ZA00710800 CACR-A5-SU23 attached an ABS label GC ABS AC servo driver for ABS (100 W) ZA007109 R13ZA00710900 CACR-01-SU23 attached an ABS label GC ABS AC servo driver for ABS (200 W) ZA007110 R13ZA00711000 CACR-02-SU23 attached an ABS label GC ABS AC servo driver for ABS (400 W) ZA007111 R13ZA00711100 CACR-04-SU23 attached an ABS label GC ABS AC servo driver for INC (50 W) ZA007102 R13ZA00710200 CACR-A5-SU23 GC AC servo driver for INC (100 W) ZA007103 R13ZA00710300 CACR-01-SU23 GC AC servo driver for INC (200 W) ZA007104 R13ZA00710400 CACR-02-SU23 GC AC servo driver for INC (400 W) ZA007105 R13ZA00710500 CACR-04-SU23 GC AC servo driver for INC (750 W) ZA007106 R13ZA00710600 CACR-08-SU23 GC Lithium battery (solder type) ZI526001 R13ZI52600100 Lithium battery (connector type) ZA006002 R13ZA00600200 SKP343-2 with an E. STOP CANCEL switch for MPU board for MPU board 169 Maintenance 16. Maintenance Parts List Parts name Old Code New Code RS-232C driver ZI526301 R13ZI52630100 Cooling fan ZA006501 R13ZA00650100 Hybrid IC for input ZI526303 R13ZI52630300 SEP005A Hybrid IC for output (NPN) ZI526304 R13ZI52630400 SEP007 Hybrid IC for output (PNP) ZI526305 R13ZI52630500 SEP008 Transistor array ZI062620 R13ZI06262000 Fuse ZA006401 R13ZA00640100 PC cable with emergency stop switch ZA002102 R13ZA00210200 with E. STOP switch ZA002101 R13ZA00210100 with switch PC cable adaptor (25-25 pins) ZA002103 R13ZA00210300 PC cable adaptor (25-9 pins) ZA002104 R13ZA00210400 M/C power cable (3 m) ZA002002 R13ZA00200200 M/C power cable (5 m) ZA002033 R13ZA00203300 M/C power cable (10 m) ZA002034 R13ZA00203400 M/C power cable L type (3m) ZA002037 R13ZA00203700 M/C power cable L type (5m) ZA002038 R13ZA00203800 M/C power cable L type (10m) ZA002039 R13ZA00203900 M/C signal cable (3m) ZA002003 R13ZA00200300 M/C signal cable (5m) ZA002035 R13ZA00203500 M/C signal cable (10m) ZA002036 R13ZA00203600 OPU-320 ZA007905 R13ZA00790500 TP-320 ZA007B04 R13ZA007B0400 PC cable with enable switch 170 Specification Notes for REMOTE board for I/O and REMOTE board for protected I/O board or REMOTE board for standard I/O board Standard Standard enable