1
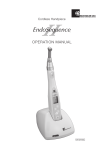
Clinical Electric
OPERATION MANUAL
Electric Micromotor
Standard
Electric Micromotor
Miniature
OM-ER206E
Please Read this operation manual carefully before use and keep for future reference.
Autoclavable
Classification of equipment
• Type of protection against electric shock : Class II equipment :
• Degree of protection against electric shock :Type B applied part :
• Method of sterilization or disinfection recommended by the manufacture : See 7. STERILIZATION
• Degree of safety of application in the presence of a flammable anesthetic mixture with air or with oxygen or
nitrous oxide : EQUIPMENT not suitable for use in the presence of a flammable anaesthetic mixture with air or
with oxygen or nitrous oxide.
• Mode of operation : Continuous operation
Cautions for Handling and Operation
• Read this manual thoroughly before use and operate the device properly.
• These instructions will show you how to operate the product safety and prevent danger to your or
others. They are classified by the degree and/or severity of danger. All contents relating to safety should
be oberserved.
Classification of precaution
Degree and severity of danger or damage
Warning
Explains an instruction where personal injury or physical damage may
occur.
Caution
Explains an instruction where minor to medium injury or physical
damage may occur.
Notice
Explains an instruction that should be observed for safety reasons.
Warning
• Do not insert or remove power cord with wet hands, electric shock may occur.
• Be sure not to expose the unit to water. It may result in a short or electric shock.
• Do not use this device near combustibles, or in a place where explosion may occur.
• Do not disassemble, as no user serviceable parts inside control unit.
• Do not hit / drop the unit or handpiece. Place unit in a stable place.
• Use the fuse of specified rating. (T1.6A 250V (Ref No. FU100, FU101) )
2
Caution
• Forza ELS system can be used with the hose connector that is manufactured in accordance with ISO 9168,
type B or type C.
• Forza ELS system is to be used by qualified personnel for dental treatment only, and it is used in dental
office only.
• Place the most priority on patient safety.
• Rotate before using to check for vibration, noise, or overheating. If any abnormalities occur, stop using
immediately and contact Brasseler USA.
• Grasp cord by plug to remove from outlet. DO NOT pull or yank on the cord itself.
• Do not connect / disconnect the handpiece during operation.
• Verify that the Speed Control Switch is adjusted within the allowable speed before use.
• When you install Control Box or Motor, DO NOT bend or twist the tubing or the cord. No unnatural force is
needed to do the installation.
• Never use the AC adapter for other than the control box of this product.
• Connect only 4-hole, 5-hole or 6-pin tubing.
• Air Requirements: dry, free from contamination and oil. Use a compressor with a dry air system. Install an air filter
if necessary. Blow out the lines before installation.
• Do not Autoclave (or any other high temperature Sterilization) Control Box, AC Adapter, Motor Cord.
• If you are using corrosive or harsh solutions please clean the control box etc. immediately after use. Failure to
quickly clean the control box etc. can result in damage to the equipment or color changes of the case.
• The system functions normally in the environment where the temperature is at 0-40°C (32-104°F), humidity at
10-85% RH, atmospheric pressure at 500-1060hPa, and no moisture condensation in the Control Unit. Use at
outside of these limits may cause malfunction.
Notice
• During vibration, the motor and the motor cord may affect computer and LAN cable. Noise could be heard
during operation near a radio receiver.
• Turn off the Power Switch after each use. If unit is to be stored for long periods of time, drain water from
unit and hose.
• Responsibility for operating and maintaining Medical Devices belongs to the user.
• Store the system in the place where the temperature is at -10-60°C (14-140°F), humidity at 10-85%RH,
atmospheric pressure at 500-1060 hPa, and the system is not subject to air with dust, sulfur, or salinity.
• When trouble is found, send to Brasseler USA.
1. Set-Up Diagram
Power Cord
Power Switch
AC Adapter
Motor Cord
Motor
AC Adapter
Connector
Control Box
Motor Cap
3
Protection
Plug
Motor Code
Connector
Turbine Hose
Connector
Fig. 1
2. Specifications
<Control Box>
Model
Rated Input
Drive Air Pressure
Dimensions
Weight
Forza ELSU
AC28V 50/60Hz
57psi (4bar) or less
W127 x D149 x H54 mm
517g
<Motor>
Model
Forza ELS
Speed
2,000 - 40,000min-1 (rpm)
Dimensions
Weight
Ø22.5× L81 mm
76g
<AC Adapter>
Model
Rated Input
Output
Fuse
Dimensions
Weight
NE180
AC120V 50/60Hz 41VA
AC28V 1.3A
FU100 : T1.6A 250V
FU101 : T1.6A 250V
W100 × D178 × H64 mm
1.4kg
4
3. Operating Control Box
Caution
Turbine Hose
Connector
• Please be sure that there is no air or water coming
from Turbine Hose when attaching to control box.
• Screw the Nut properly without unnatural force, when
you plug into Turbine Hose Connector and Motor
Cord Connector. Avoid cross threading
Turbine Hose
Fig.1
1) Connect the handpiece turbine tubing from the delivery
unit you are using. Fit the turbine hose plug of the delivery
unit to the turbine hose connector piping and tighten
completely. (Fig. 2)
Caution
• Connect only 4-hole, 5-hole or 6-pin tubing.
• Air Requirements: dry, free from contamination and
oil. Use a compressor with a dry air system. Install an
air filter if necessary. Blow out the lines before
installation.
Motor Cord Plug
Fig.2
2) Connect the motor by aligning the motor cord plug and
motor connector piping, and insert firmly. Tighten
completely. (Fig. 3)
AC Adaptor
3) Connecting the AC adapter
Insert the AC adapter plug into the AC adapter connector
before plugging into wall outlet. (Fig. 4)
Fig.3
Caution
Only use the AC adapter with control unit of this
product.
Inlet
AC Cord
4) Connecting the power cord
Insert power cord into the inlet of AC Adapter. (Fig. 5)
Fig.4
5
4. Handling the Motor
Caution
Ensure that the motor has completely stopped before handling the motor.
(1) Connecting / disconnecting
the motor and the motor cord
Motor
• Connecting
Motor Cord
Connector
Motor Cord Nut
To connect, align and insert carefully and firmly
the pins of the connector into the pin holes of the
motor, and fasten the motor cord nut securely.
Motor Cord
• Disconnecting
Fig. 6
To disconnect the motor cord from the motor,
unscrew and detach the motor cord nut, and
gently pull out the motor cord connector.
(1) Connecting / disconnecting
the motor and the handpiece
Handpiece
Motor
• Connecting
Insert the E-type handpiece in the motor insert,
and turn until it clicks and positioning mark are
aligned.
Motor Insert
• Disconnecting
Simply pull out the handpiece from the motor.
Fig. 7
Caution
Lubricated Handpiece should stand and allow oil to drain prior to autoclave cycle. Attach to the Motor after
excess oil has been completely drained. If the oil enters the Motor, it may cause malfunction of the Motor
6
5. Operation Section
1) Insert the power cord plug into an outlet and turn the
power switch on. When you turn on the power switch, lamps
and speed indicator will light.
Power Switch
Symbol Mark
Function
OFF
ON
2) Before using this product, make sure to do the Foot Air
Calibration function. (See 6. (1) Foot Air Calibration)
Notice
Do this adjustment function after your purchase. Once it is adjusted, it will be memorized, and there is no need
to do this everytime.
Light indicates speed range selected
3) Push the handpiece selector to indicate the speed
of the attachment you will use. (Fig. 8)
Handpiece
Indicator
Gear Ratio
16:1
~
1:1
~
1:5
~
speed (min-1(rpm))
100~2,500
2,000~40,000
10,000~200,000
4) Set the maximum speed using the speed control
switches. (Fig. 9)
Fig. 8
Set maximum speed
Speed U
p
5) Select FWD/REV rotation using the FWD/REV
Select switch. (Fig. 10)
Speed D
own
Fig. 9
Lamp light at only REV rotation
Push
6) The micromotor operation will be controlled by
the air switch/foot pedal of the delivery unit.
7
Fig. 10
6. Convenient Functions
a Foot Air Calibration
By using this function, it enables you to use the maximum speed, 40,000 min-1(rpm), even though the air pressure of
the delivery system is not high enough, by setting upper and lower limit of the air pressure.
Notice
Do this adjustment function after your purchase.
1) Press both
key and
key at the same time for more than 3 seconds.
2) With alarm sound, Speed Indicator will change to "
" (Lower air pressure limit setting mode).
3) By pressing the
" and "
key, Speed Indicator shows "
" simultaneously.
4) By stepping the foot pedal of the delivery system, Speed Indicator shows the present air pressure.
(Unit is kgf/cm2)
Notice
• The displayed air pressure is only a guideline. Please measure the correct air pressure with the air meter.
• The unit of displayed air pressure is "kgf/cm2". For other unit, please refer the bellow.
ex) 0.1kgf/cm2 = 1.422psi = 0.098bar 1.0kgf/cm2 = 14.22psi = 0.98bar 3.0kgf/cm2 = 42.67psi = 2.94bar
5) Using the foot pedal of the delivery system, maintain the air pressure between "
Press
" - "
".
key for more than 3 seconds to memorize the lower limit of the air pressure.
Notice
· Default value is set to "
" (kgf/cm2).
· When the air pressure is not between "
6) After setting lower limit, press
7) By pressing the
"-"
", it is displayed "
key. Speed Indicator will change to "
key, Speed Indicator shows "
" and "
", and will not be memorized.
" (Upper air pressure limit setting mode).
" simultaneously.
8) By stepping the foot pedal of the delivery system, Speed Indicator shows the present air pressure.
(Unit is kgf/cm2)
Notice
• The displayed air pressure is only a guideline. Please measure the correct air pressure with the air meter.
NOTICE
• The unit of displayed air pressure is "kgf/cm2". For other unit, please refer to the
described in 4 .
9) Using the foot pedal of the delivery system, maintain the air pressure between "
Press
"-"
".
key for more than 3 seconds to memorize the upper limit of the air pressure.
Notice
• Default value is set to "
" (kgf/cm2).
• When the air pressure is not between "
"-"
", it is displayed "
8
", and will not be memorized.
10) Press both
key and
key at the same time for more than 3 seconds, once again. When the alarm sounds,
the setting is complete. By setting Speed Indicator by pressing
key to "
", and now it is ready to use at the
maximum speed, 40,000 min-1(rpm).
Light Brightness Adjusting function
Brightness of the Fiber Optic can be adjusted using this function.
1) Press both
key and
key at the same time for more than 3 seconds.
2) With alarm sound, Speed Indicator will change to "
(Light Brightness adjusting mode). Press
3) When Speed Indicator changed to "
". By pressing
key, change the Speed Indicator to "
"
key to proceed.
"(Default value), press
,
and adjust the brightness.
Notice
• Default value is set to "
• Adjustable between "
" (V).
"-"
".
4) Press
key for more than 2 seconds to set the brightness.
5) Press both
key and
key at the same time for more than 3 seconds, once again. When the alarm sounds,
the setting is complete.
Program Function
It is possible to memorize settings (Speed, Gear Ratio, Forward/Reverse Direction).
1) Set the values for Speed, Gear Ratio, Forward/Reverse Direction.
2) Press
key or
key for more than 2 second. When the alarm sounds, the setting is complete.
3) You can use your settings (Speed, Gear Ratio, Forward/Reverse) by pressing
,
Key.
7. Sterilization
Sterilize the motor only.
For the sterilization method, we recommend the steam autoclave sterilization method.
Sterilization is required first time you use and after each patient as noted below.
Autoclaving
Tighten
1) Turn off the Power
2) Detach the motor from the Motor Cord. (Refer to4. (1)
Connecting / disconnecting the Motor and the Motor Cord)
Motor Cap
Protection Plug
3) Clean the surface of the motor with brush etc. (Do not use the metal brush).
Fig.10
and wipe it with the cotton moistened with disinfecting alcohol.
4) Screw the Motor Cap to the Motor. Put the protection plug to the motor insert. (Fig. 10)
5) Insert into an autoclave pouch. Seal the pouch.
6) Autoclavable up to max. 135°C. (275ºF) ex.) Autoclave for 20 min. at 121°C (250ºF), or 15 min. at 132°C (270ºF).
7) Keep the Motor in the autoclave pouch to keep it clean until you use it.
Sterilization at 121°C (250ºF) for more than 15 minutes is recommended by EN13060 or EN ISO17665-1.
Caution
• Do not Autoclave (or any other high temperature Sterilization) Control Box, AC Adapter, Motor Cord.
• Do not lubricate the motor.
• Do not wipe nor immerse the system in acidic water or acidic solutions.
• Do not sterilize with dirt on the surface. It might cause rust.
• Do not use Protection Plug without the mounting O-Ring. It may cause a malfunction. If O-Ring had damaged,
replace it immediately. *O-Ring (Protection Plug): Order Code 0312457102
• You can hang Protection Plug on the anywhere to prevent loosing it.
• Do not hung the Protection Plug with motor. It may drop the motor and cause damage.
9
Autoclave Procedure
1) Turn off the power.
2) Detach the motor from the motor cord. (See 2. Connecting / disconnecting the motor cord)
3) Clean the surface of the motor with brush etc. (Do not use the metal brush), and wipe it with the cotton moistened
with disinfecting alcohol.
4) Screw the Motor Cap to the Motor. (Fig. 11) Put the Autoclave
Motor
Motor Cap
plug to the motor insert. (Fig. 12)
5) Insert into an autoclave pouch. Seal the pouch.
6) Autoclavable up to a max. 135°C (275ºF ).
ex.) Autoclave for 20 min. at 121°C (250ºF),
or 15 min. at 132°C (270ºF).
6) Keep the handpiece in the autoclave pouch to keep it clean
until you use it.
Fig. 11
Caution
• Do not lubricate the motor.
• In case the sterilizer chamber temperature could
exceed 135°C(275ºF) during the dry cycle, skip the dry cycle.
• Always place the handpiece in the center or upper
shelf of the chamber, as the local temperature at the bottom
of chamber could rise beyond the set value.
• Do not wipe with, or clean or immerse in, high acid
water or sterilizing solutions.
Autoclave Plug
Motor Insert
Fig. 12
8. Maintenance
How to replace the O-rings at the insert.
1) Remove the worn O-rings with a pointed tool like a needle.
2) Insert new O-rings the O-ring grooves.
*Optional O-ring (Blue) : Order No. 5011004 UO
Optional O-ring :
Order No. 5011005 UO
Fig. 13
Caution
O-rings are total 4 pieces. Recognize a blue one; it is
thinner than other 3 pieces. Refer to Fig. and make
sure the order.
O-ring (Blue)
O-ring
10
Replacing Bulb
1) Loosen Motor Housing and detach from the motor, and remove the old light bulb using the small pin, like a screw
driver. (Fig. 14)
2) Align and insert the connector of the new bulb into the socket hole securely. Screw the motor housing securely to
the motor.
Socket Hole
*Optional Bulb :TA Bulb (Pack of 3)
Order No. Y900-132
A
Caution
Connector Bulb
Motor Housing
Bulb
View from A
• Make sure to turn off the power.
• Do not touch the glass section of new bulb.
Fig. 14
9. Error Code
If the motor stops due to an abnormality such as a malfunction, overload, breakage or wrong use, it automatically
checks the state of the control unit and detects the cause of the abnormality and displays an error code on the Speed
Indicator. If an error code is displayed, turn on the power again and check whether the same error cord is displayed. If
the same error code is displayed, take action by referring to the instructions provided in the “Check/Remedy” column
in the following table.
Error Code
Trouble
Cause
Check/Remedy
Overcurrent error: (In circuit)
Detected overcurrent in the circuit.
Contact Brasseler USA.
Overcurrent error: (In software)
Detected overcurrent in the software.
Contact Brasseler USA.
Retry Error
Motor stopped by the overload, and not
able to restart.
Contact Brasseler USA.
ITRIP Error
Faulty Motor or Internal circuit.
Contact Brasseler USA.
Overvoltage Input Error
Overvoltage is given to the Control Box.
Contact Brasseler USA.
Bulb voltage Error
Overvoltage is given (more than 3.7V) from
Contact Brasseler USA.
the Internal circuit.
Overheat Error
High temperature safe system is
functioning, due to long-time use at a high Allow unit to cool, then try again
load.
Motor Start Error
• Motor didn’t reach the preset speed in a
prescribed period of time.
• Break down of a motor cord wire, or
internal circuit malfunction.
Contact Brasseler USA.
Bulb voltage Error
Voltage for the Bulb didn’t reach the preset
Contact Brasseler USA.
speed in a prescribed period of time.
Air Offset Error
Lower than preset “Lower limit of the air
pressure.”
Displayed by Foot Air Calibration
function. Not a malfunction.
Air Full Scale Error
• Higher than preset “Upper limit of the air
pressure”.
• Air pressure higher than 57psi (4bar) is
given.
Displayed by Foot Air Calibration
function. Not a malfunction.
EEPROM Error
Malfunction of the memory for the setting
values.
Contact Brasseler USA.
11
10. Troubleshooting
If the motor stops due to an abnormality such as a malfunction, overload, breakage or wrong use, it automatically
checks the state of the control unit and detects the cause of the abnormality and displays an error code on the Speed
Indicator. If an error code is displayed, turn on the power again and check whether the same error cord is displayed. If
the same error code is displayed, take action by referring to the instructions provided in the “Check/Remedy” column
in the following table.
Check/Remedy
Pilot Lamp does not light.
Motor does not run.
The rotation speed does not rise.
It beeps when turning on the switch.
Light Bulb does not light.
Motor heats up abnormally during
rotation.
Water leakage.
When turned on, the setting values are
different from what used to be when
turned off.
Cause
Solution
Power Switch is OFF.
Turn ON the switch.
AC Adapter is not connected correctly.
Check the connection.
Internal Fuse is blown, due to some reason.
Contact Brasseler USA
Tubing, Motor Cord, AC Adapter is not connected
correctly.
Check the connection.
Air pressure is not given, or not proper from the
delivery unit.
Check the air pressure of the delivery system.
Check the ERROR CODE in the Speed Indicator.
See 9. ERROR CODE
Air pressure is not given, or not proper from the
delivery unit.
Check the air pressure of the delivery system.
Air pressure of the delivery unit is lower than the
“Lower limit of the air pressure”.
Do “6. (1) Foot Air Calibration”.
You are stepping on the foot pedal when turning on Do not step the foot pedal, and turn
on the power switch.
the power switch. (Safety function)
Light Bulb is not connected correctly.
Insert the Light Bulb correctly and firmly.
(See 8. (2) Replacing Bulb)
Light Bulb is burnt-out, because of the life.
Please replace the Bulb.
(See 8. (2) Replacing Bulb)
Coolant air is not given, or not proper from the
delivery unit.
Check the air pressure of the delivery system.
Tubing, Motor Cord is not connected correctly.
Check the connection.
If it is from Control Box, something is wrong within
the Control Box.
Contact Brasseler USA.
Turned off the motor while rotating.
Turn off after the Motor has stopped.
11. Warranty
Brasseler USA warrants the handpiece against defects in manufacturing, workmanship and materials. Brasseler USA
reserves the right to analyze and determine the cause of any problem. Warranty is voided should the handpiece not be
used in accordance with this manual. Bulb etc. are expendable components, and are not covered by this warranty.
12. Disposing Product
Please consult with Brasseler USA about waste disposal.
12
Autoclavable
Classification of Equipment
Type of protection against electric shock :
- Class II equipment :
Degree of protection against electric shock :
- Type B applied part :
Method of sterilization or disinfection recommended by the manufacture :
- See 7. STERILIZATION
Degree of safety of application in the presence of a flammable anesthetic mixture with air or with oxygen or
nitrous oxide: EQUIPMENT not suitable for use in the presence of a flammable anaesthetic mixture with air or
with oxygen or nitrousoxide.
Mode of operation :
- Continuous operation
Cautions for Handling and Operation
• Read these safety cautions thoroughly before use and operate the product properly.
• These instructions will show you how to operate the product safely and prevent danger to you or others.
They are classified by the degree and/or severity of danger. All contents relating to safety should be observed.
Classification
Degree and severity of danger or damage
WARNING
Provides an instruction where personal injury or physical damage may occur.
CAUTION
Provides an instruction where minor to medium injury or physical damage may occur.
NOTICE
Provides an instruction that should be observed for safety reasons.
Warning
• TO PREVENT ELECTRIC SHOCK Do not unplug the power cord with wet hands.
• TO PREVENT ELECTRIC SHOCK Be sure to prevent water on the Control Box.
• TO PREVENT ELECTRIC SHOCK Do not unplug the power cord roughly.
• TO PREVENT ELECTRIC SHOCK Use an electrical outlet that is grounded.
• If you feel any abnormality such as vibration, heat generation, abnormal noise, etc., prior or during use
of the unit, stop using it immediately.
• Use the fuse of specified rating. [AC120V: T1.6A 250V (Ref No.FU100, FU101), AC230V:
T800mA 250V (Ref No. FU100, FU101)
13
Caution
• When operating this system always consider the safety of the patient.
• The product is designed only for clinical use by qualified personnel.
• Every connection must be firmly connected.
• Do not allow any impact on the Product. Do not drop the Product.
• This system can be used with ISO 9168, type B or type C type hose connector.
• The system functions normally in the environment where the temperature is at 0-40°C (32-104°F), humidity at
10-85% RH, atmospheric pressure at 700-1060hPa, and no moisture condensation in the Control Unit.
Operating outside of these limits may cause malfunction.
• When you install Control Box or Motor, DO NOT bend or twist the tubing or the cord. No unnatural force is
needed for the installation.
• Do not use contaminated air (by dust or moisture). If the air contains water or dust, it might cause a
malfunction or overheat.
• Do not connect the Forza ELM micromotor to the Forza ELS. It may prevent the LED light from working.
Unit
• Grasp cord by plug to remove from outlet. DO NOT pull or yank on the cord itself.It may cause a wire
disconnection or malfunction.
• Care should be taken not to place the AC Cord near a gas burner. Never attempt to repair a burned motor cord.
Always replace it with a new cord.
• Prior to use, always check for vibration, noise and overheatin, If any abnormalities are detected, stop using
immediately and contact Brasseler USA.
• Be careful not to spill water onto the Unit as this may result in fire or an electric shock dur to a short-circuit.
Motor, Handpiece (Option)
• Do not use this product under heavy load for long time. It can cause the product to overheat.
• Do not connect or disconnect the cord until the drive motor has completely stopped.
• Do not connect / disconnect the handpiece during operation.
• Verify that the Speed Control Switch is adjusted within the allowable speed before use.
• Connect only 4-hole, 5-hole or 6-pin tubing.
• Air Requirements: dry, free from contamination and oil. Use a compressor with a dry air system. Install an air
filter if necessary. Blow out the lines before installation.
• Do not Autoclave (or any other high temperature Sterilization) Control Box, AC Adapter, Motor Cord.
• The operator is responsible for correct operational control, maintenance and inspection.
Notice
• During rotation, the motor and the motor cord may affect computer and LAN cable.
Noise could be heard during operation near a radio receiver.
• After treatment, immediately turn off the power switch and shut off the air supply.
Remove the power cord if the unit box is not to be used for a long time.
• Responsibility for operating and maintaining Medical Devices belongs to the user.
• Store the system in the place where the temperature is at -10-60°C (14-140°F), humidity at 10-85%RH,
atmospheric pressure at 500-1060 hPa, and the system is not subject to air with dust, sulfur, or salinity.
14
1. Specifications
AC Adaptor
Control Box
Model
Rated input
Drive Air Pressure
Dimensions
Model
Forza ELMU
AC28V 50/60 Hz
0.4MPa (4.0kgf/cm 2)
W127 x D149 x H54 mm
Rated input
Output
Fuse
Motor
Model
Rotation Speed
Dimensions
Forza ELM
2,000 - 40,000 min
DØ22 x H70 mm
-1
Dimensions
AC Adaptor (NE180)
AC120V 50/60Hz 41VA
AC230V 50/60Hz 41VA
AC28V 1.3A
AC120V TR5-T C1 250V
19372 T1.6A
AC230V TR5-T C1 250V
800mA
W100 x D178 x H64 mm
2. Component Names
13
1
15
2
14
3
4
5
6
16
7
8
9
18
10
11
1
2
3
4
5
6
7
8
9
17
12
Control Box
Speed Indicator
Gear Ratio Lamp
Gear Ratio Select Key
FWD/REV Select Key
Rotation Speed Adjustment Key
M1 Key
M2 Key
Power Switch
10
11
12
13
14
15
16
15
17
18
AC Adapter Connector
Motor Cord Connector
Turbine Hose Connector
Motor
Protection Plug
Motor Cap
Motor Cord (Unshielded 2.2m)
AC Cord (Unshielded 2.0m )
AC Adaptor (Unshielded cord 5.0m )
3. Operating Control Box
Caution
· Be sure that there is no air or water coming from Turbine Hose when connecting to control box.
· Hand tighten the Nut properly without unnatural force, when you plug into Turbine Hose Connector and
Motor Cord Connector.
(1) Connect the handpiece tubing from the delivery
unit you are using.
Turbine Hose
Connector
Fit the Turbine Hose Plug of the delivery unit to the Turbine Hose
Connector piping and tighten completely. (Fig. 1)
Caution
Turbine Hose Plug
Motor Cord Connector
• Do not use wet or contaminated air.
• Install an air filter if necessary. Blow out the lines
before installation.
Fig.1
(2) Connecting the Motor
Connect the motor by aligning the Motor Cord Plug and
insert firmly. Tighten it completely. (Fig. 2)
Motor Cord Plug
(3) Connecting the AC Adapter
Fig.2
Insert the AC adapter plug into the AC adapter connector
before plugging into wall outlet. (Fig. 3)
Caution
Only use the AC adapter with control unit of this product.
AC Adaptor
Fig.3
(4) Connecting the Power Cord
Insert the Power Cord into the Inlet of AC Adapter. (Fig. 4)
Inlet
AC Cord
Fig.4
16
4. Handling the Motor
(1) Connecting / disconnecting the motor and the motor cord
Align and insert firmly the Motor Pin into the pin holes of the Motor
Cord Connector, and fasten the Motor Cord Nut securely. (Fig. 5)
Motor
Motor Cord
Connector
Motor Cord Nut
To remove the Motor Cord from the Motor, unscrew and detach the
motor cord nut, and gently pull out the motor cord connector.
Motor Cord
Fig.5
(2) Connecting / disconnecting the motor and the handpiece
To insert the E-type handpiece on the Motor Insert, align handpiece
and motor, then turn those until its click. (Positioning pins are
aligned)
To remove the handpiece, simply pull out the handpiece from the
motor.
Positioning Pin
Handpiece (Option)
Motor Insert
*
Handpiece (not included in Forza ELM set.)
Fig.6
Caution
• Care should be taken when using any handpiece attachment which requires lubrication. Following lubrication,
stand the handpiece attachment vertically until the excess solution drains. Wipe the handpiece then attach
it to the Micromotor.
• Do not connect or disconnect the handpiece until the motor has completely stopped.
5. Operation Section
(1) Insert the power Cord Plug in AC outlet and turn the Power Switch on. When you turn
on the Power Switch, lamps and speed indicator will come on.
Power Switch
Symbol Mark
Function
OFF
ON
(2) Before using this system, make sure to use the Foot Air Calibration function.
(See 6. (1) Foot Air Calibration)
(3) Push the Gear Ratio Select Key to indicate the speed of the
attachment you will use. (Fig. 7)
*
During Speed Setting, Indicator display "Speed".
For detail display, check table below.
PUSH
Handpiece
Gear Ratio
16:1
1:1
1:5
Indicator
Speed (min -1(r pm ))
1 - 25
2 - 40
1 - 20
100 - 2,500
2,000 - 40,000
10,000 - 200,000
Gear Ratio Lamp
17
Fig.7
(4) Set the maximum speed using the Rotation Speed
). (Fig.8)
Adjustment Key (
Rotation Speed Display
Increase
Decrease
Fig.8
(5) Select FWD/REV rotation using the FWD/REV Select Key. (Fig. 9)
Lamp ON REV
Lamp OFF FWD
(6) The micromotor operation will be controlled by the air switch/Foot
Pedal of the delivery unit.
PUSH
FWD/REV Lamp
Fig.9
6. Convenient Functions
(1) Foot Air Calibration
By using this function, it enables you to use the maximum speed, 40,000 min-1(rpm), even though the air
pressure of the delivery system is not high enough, by setting upper and lower limit of the air pressure.
Notice
Do this adjustment function after your purchase. Once it is adjusted, it will be memorized, and there is
no need to do this everytime.
1) Press M2 key and Rotation Speed Adjustment Key ( ) at the same time for more than 3 seconds.
2) When alarm sounds, Speed Indicator will change to "C1" (Lower air pressure limit setting mode).
3) By pressing the FWD/REV Rotation key, Speed Indicator shows " 0.0" and "Eb" simultaneously.
4) By stepping the Foot Pedal of the delivery unit, Speed Indicator shows the present air pressure. (Unit is kgf/cm2)
Notice
• The displayed air pressure is only a guideline. Measure the correct air pressure with the air gauge.
• The unit of displayed air pressure is “kgf/cm2”. For other unit, refer to the below.
ex) 0.1kgf/cm2 = 0.01MPa
1.0kgf/cm2 = 0.1MPa
3.0kgf/cm2 = 0.3MPa
5) Using the Foot Pedal of the delivery unit, maintain the air pressure between "0.3 " - "1.0". Press M2 key for
more than 3 seconds to memorize the lower limit of the air pressure.
18
Notice
• Default value is set to "0.5" (kgf/cm2)
• When the air pressure is not between "0.3" - "1.0", it is displayed "Eb", and will not be memorized
6) After setting lower limit, press Gear Ratio Select Key. Speed Indicator will change to "C2" (Upper air pressure limit
setting mode).
7) By pressing the FWD/REV Rotaion Key, Speed Indicator shows " 0.0" and "Ec" simultaneously.
2
8) By stepping the Foot Pedal of the delivery system, Speed Indicator shows the current air pressure. (Unit is kgf/cm )
• The displayed air pressure is only a guideline. Measure the correct air pressure with the air meter.
• The unit of displayed air pressure is "kgf/cm2” For other unit, refer to the NOTICE described in 4).
9) Using the Foot Pedal of the delivery system, maintain the air pressure between "2.0" - "4.0". Press M2 key
until it beep (more than 3 seconds) to memorize the upper limit of the air pressure.
Notice
• Default value is set to "3.0" (kgf/cm2)
When the air pressure is not between "2.0" - "4.0", it is displayed "Ec", and will not be memorized
10) Press both M2 key and Speed Adjustment Key ( ) at the same time until it beep (more than 3 seconds),
once again. When the alarm sounds, this setting is completed. By setting Speed Indicator by pressing
Rotation Speed Key to "40", and now it is ready to use at the maximum speed, 40,000 min-1 (rpm).
(2) Light Brightness Adjusting Function
Brightness of the Fiber Optic can be adjusted from this function.
1) Press M2 Key and Speed Adjustment Key ( ) at the same time until it beep (more than 3 seconds).
2) When the alarm sounds, Speed Indicator will change to "C1". Pressing the Gear Ratio Select key can change the
Speed Indicator and Gear Ratio Lamp (C1 C2 C3 C1.....) Set indicator in C3 (Light Brightness adjustment mode)
Press FWD/REV Rotation Key to proceed.
3) When Speed Indicator changed to "3.5" ( Default value), press Speed Adjustment Key ( ) and adjust the brightness.
Notice
• Default value is set to "3.5" (V).
• Adjustable between "1.6" - "3.6".
4) Press M2 key until it beep (more than 3 seconds) to set the brightness.
5) Press M2 key and Speed Adjustment Key ( ) at the same time for more than 3 seconds, once again.
When the alarm sounds, this setting has completed.
(3) Memory Function
It is possible to memorize settings (Speed, Gear Ratio, Forward/Reverse Direction)
After the setting, you can use your settings by pressing M1, M2 Key.
1) Set the values for Speed, Gear Ratio, Forward/Reverse Direction.
2) Press M1 Key or M2 Key until it beep (more than 3 seconds). The alarm indicates the setting is complete.
19
7. Sterilization
Sterilize the motor only.
For the sterilization method, we recommend the steam autoclave
sterilization method.
Sterilization is required first time you use and after each patient as
noted below.
Tighten
Autoclaving
1) Turn off the Power
Protection Plug
Motor Cap
2) Detach the motor from the Motor Cord. (Refer to4. (1)
Connecting / disconnecting the Motor and the Motor Cord)
Fig.10
3) Clean the surface of the motor with brush etc. (Do not use the
metal brush). and wipe it with the cotton moistened with
disinfecting alcohol.
4) Screw the Motor Cap to the Motor. Put the Protection plug to the motor insert. (Fig. 10)
5) Insert into an autoclave pouch. Seal the pouch.
6) Autoclavable up to max. 135°C (275ºF).
ex.) Autoclave for 20 min. at 121°C (250ºF), or 15 min. at 132°C (270ºF).
7) Keep the Motor in the autoclave pouch to keep it clean until you use it.
Sterilization at 121°C (250ºF) for more than 15 minutes is recommended by EN13060 or EN ISO17665-1.
Caution
• Do not Autoclave (or any other high temperature Sterilization) Control Box, AC Adapter, Motor Cord.
• Do not lubricate the motor.
• Do not wipe nor immerse the system in acidic water or acidic solutions.
• Do not sterilize with dirt on the surface. It might cause rust.
• Do not use Protection Plug without the mounting O-Ring. It may cause a malfunction. If O-Ring had damaged,
replace it immediately.
*O-Ring (Protection Plug): Order Code 0312457102
• You can hang Protection Plug on the anywhere to prevent loosing it.
• Do not hung the Protection Plug with motor. It may drop the motor and cause damage.
8. Mainentance
Replace the O-Ring if it becomes worn and makes it difficult to
connect the handpiece or if the air or water leak.
(1) Changing the O-Ring
Remove the O-Ring at the Motor Insert with a pointed tool, and
mount the new O-Rings into the groove.
Fig.11
Caution
There are 4 O-Rings on the Motor Insert. Blue one is thinner than other 3 pieces.
Make sure to order it.
O-Ring (Blue)
O-Ring (Black)
20
Caution
It might happen if the O-Ring becomes depleted.
• Air/Water leak
• Air/Water does not come off
• Vibration
• Difficult to connect/disconnect the handpiece
9. Error Code
If the motor stops due to an abnormality such as a malfunction, overload, break or incorrect usage, it automatically
checks the state of the Control Box and detects the cause of the abnormality and displays an error code on the
Speed Indicator. If an error code is displayed, turn on the power again and check whether the same error code is
displayed. If the same error code is displayed, take action by referring to the instructions provided in the
"Check/Remedy" column in the following table.
Error
Code
E0
Trouble
E2
Overcurrent error.
(In circuit)
Overcurrent error.
(In software)
Retry Error
E3
E5
E6
ITRIP Error
Overvoltage Input Error
LED voltage Error
E8
Overheat Error
E9
Motor Start Error
EA
LED voltage Error
Eb
Air Offset Error
Ec
Air Full Scale Error
EE
EEPROM Error
E1
Cause
Check/Remedy
Detected overcurrent in the circuit.
Contact Brasseler USA.
Detected overcurrent in the software.
Contact Brasseler USA.
Motor stopped by the overload, and not
able to restart.
Faulty Motor or Internal circuit.
Overvoltage is given to the Control Box.
Overvoltage is given (more than 3.7V)
from the Internal circuit.
High temperature safe system is
functioning, due to long-time use at a
high load.
- Motor didn't reach the preset speed
in a prescribed period of time.
- Break down of a motor cord wire, or
internal circuit malfunction.
Voltage for the LED didin't reach the
preset speed in a prescribed period of
time.
Lower than preset " Lower limit of the air
pressure"
- Higher than preset "Upper limit of the
air pressure".
- Air pressure higher than 0.4MPa
(4.0kgf/cm2) is given
Malfunction of the memory for the
setting values.
Contact Brasseler USA.
21
Contact Brasseler USA.
Contact Brasseler USA.
Contact Brasseler USA.
Allow unit to cool, and try again.
Contact Brasseler USA.
Contact Brasseler USA.
Displayed by Foot Air Calibration
function. Not a malfunction.
Displayed by Foot Air Calibration
function. Not a malfunction.
Contact Brasseler USA.
10. Troubleshooting
When trouble is found, check the following again before contacting Brasseler USA. If none of these is applicable or the
trouble is not remedied even after action has been taken, a failure of this product is suspected.
Check/Remedy
Pilot Lamp does not light.
Cause
Power Switch is OFF.
AC Adapter is not connected correctly.
Internal Fuse is blown, due to some reason.
Motor does not run
Tubing, Motor Cord, AC Adapter is not
connected correctly.
Air pressure is not given, or not proper from the
delivery unit.
Check the ERROR CODE in the Speed Indicator.
The rotation speed does not Air pressure is not given, or not proper from the
rise.
delivery unit.
Air pressure of the delivery unit is lower than the
“Lower limit of the air pressure”.
It beeps when turn on the You are stepping on the Foot Pedal when
switch.
turning on the power switch. (Safety function)
LED does not light.
Reached the end of life expectancy.
Motor heats up abnormally Coolant air is not given, or not proper from the
during rotation.
delivery unit.
Water leakage
Tubing, Motor Cord is not connected correctly.
If it is from Control Box, something is wrong
within the Control Box.
When turned on, the
Turn off the Motor while rotating.
setting values are different
from what used to be
when turned off.
Solution
Turn ON the switch.
Check the connection.
Contact Brasseler USA.
Check the connection.
Check the air pressure of the delivery
system.
Refer to 9. ERROR CODE.
Check the air pressure of the delivery
system.
Do "6. (1) Foot Air Calibration".
Do not step the Foot Pedal, and turn
on the power switch.
Contact Brasseler USA.
Check the air pressure of the delivery
system.
Contact Brasseler USA.
Check the connection.
Turn off after the Motor has stopped.
11. Warranty
Brasseler USA warrants the handpiece against defects in manufacturing, workmanship and
materials. Brasseler USA reserves the right to analyze and determine the cause of any problem.
Warranty is voided should the handpiece not be used in accordance with this manual.
12. Disposing of Product
Consult with Brasseler USA about waste disposal.
22
Symbols
TUV Rhineland of North America is a Nationally Recognized Testing Laboratory (NRTL) in the United States and is
accredited by the Standards Council of Canada to certify electro-medical products with Canadian National Standards.
Follow the waste of electric and electronic equipment (WEEE) Directive (2002/96/EC) to dispose of the product and
accessories.
Consult operation instructions.
Manufacturer.
Class II Equipment.
This conforms to CE European Directive of “Medical equipment directive 93/42/EEC.”
Autoclavable up to Max.135°C. *for detail see Sterilization.
Type B applied part.
Marking on the outside of Equipment or Equipment parts that include RF transmitters or that apply RF electromagnetic
energy for diagnosis or treatment.
Guidance and manufacturer's declaration - electromagnetic emissions
The Forza ELM is intended for use in the electromagnetic environment specified below. The customer or the user of the Forza ELM and manual should assure that is
used in such an environment.
Emissions test
Emissions test
Electromagnetic environment - guidance
RF emissions CISPR11
Group 1
The Forza ELM uses RF energy only for its internal function. Therefore, its RF emissions are very low
and are not likely to cause any interference in nearby electronic equipment.
RF emmissions CISPR11
class B
The Forza ELM is suitable for use in all establishments, including domestic estabilishments and those
directly connected to the public low-voltage power supply network that supplynetwork that spplies
Harmonic emissions
class A
buidings used for domestic purposes.
IEC61000-3-2
(*)This applies to the AC230V system. For AC120V system, this is “Not applicable”.
Voltage Fluctuations/flicker
Complies
emissions IEC61000-3-3
Guidance and manufacturer's declaration - electromagnetic immunity
The Forza ELM is intended for use in the electromagnetic environment specified below. The customer or the user of the Forza ELM and manual should assure that it is
used in such an environment.
Immunity test
IEC60601 test level
Compliance level
Electromagnetic environment - guidance
Electrostatic discharge (ESD) ±6kV contact
±6kV contact
Floors should be wood, concrete or ceramic tile. If floors are covered
IEC61000-4-2
±8kV air
±8kV air
with synthetic material, the relative humidity should be at least 30%.
Electrical fast transient/burst
±2kV for power supply
±2kV for power supply lines
Mains power quality should be that of a typical commercial or hospital
IEC61000-4-4
lines
No input/output line
environment.
±1kV for input/output
Surge IEC61000-4-5
±1kV line(s) to line(s)
±1kV line to line
Mains power quality should be that of a typical commercial or hospital
±2kV line(s) to earth
±2kV lines to earth
environment.
Voltage dips, short
<5% Ut
<5% Ut
Mains power quality should be that of a typical commercial or hospital
interruptions and voltage
(>95% dip in Ut) for 0.5
(>95% dip in Ut) for 0.5 cycle
environment. If the user of the Forza ELM requires continued
variations on power supply
cycle 40% Ut
40% Ut
operation during power mains interruptions, it is recommended that
input lines IEC61000-4-11
(60% dip in Ut) for 5 cycles
the Forza ELM be powered from an uninterruptible power supply
70% Ut
or a battery.
(30% dip in Ut) for 25 cycles
<5% Ut
(>95% dip in Ut) for 5 sec
Power frequency (50/60Hz)
3 A/m
3 A/m
Power frequency magnetic fields should be at levels characteristic
magnetic field IEC61000-4-8
of a typical location in a typical commercial or hospital environment.
NOTE: Ut is the a.c. mains voltage prior to application of the test level.
23
Guidance and manufacturer's declaration - electromagnetic immunity
The Forza ELM is intended for use in the electromagnetic environment specified below. The customer or the user of the Forza ELM and manual should assure that it is
used in such an environment.
Immunity test
IEC60601 test level
Compliance level
Electromagnetic environment - guidance
Conducted RF
3Vrms
3Vrms
Portable and mobile RF communications equipment should be used no closer
IEC61000-4-6
150 kHz to 80MHz
to any part of the Forza ELM, including cables, than the recommended
separation distancecalculated from the equation applicable to the frequency
Radiated RF
3V/m
3V/m
of the transmitter.
IEC61000-4-3
80MHz to 2.5 GHz
Recommended separation distance
d = 1.2 P
d = 1.2 P 80MHz to 800MHz
d = 2.3 P 800MHz to 2.5GHz
Where P is the maximum output power rating of the transmitter in watts
(W)according to the transmitter manufacturer and d is the recommended
separationdistance in meters (m).
Field strengths from fixed RF transmitters as determined by an electromagnetic
site survey a, should be less than the compliance level in each frequency range b,
Interference may occur in the vicinity of equipment marked with the following
symbol:
NOTE 1 At 80MHz and 800MHz, the higher frequency range applies.
NOTE 2 These guidelines may not apply in all situations. Electromagnetic propagation is affected by absorption and reflection from structures, objects and people.
a) Field Strengths from fiixed transmitters, such as base stations for radio (cellular/cordless) telephones and land mobiles, amateur radio, AM and FM radio broadcast and TV
broadcast cannot be predicted theoretically with accuracy. To assess the electromagnetic environment due to fixed RF transmitters, an electromagnetic site survey
should be considered. If the measured field strength in the location in which the Forza ELM is used exceeds the applicable RF compliance level above, the Forza ELM
should be observed to verity normal operation. If abnormal performance is observed, additional measures may be necessary, such as reorienting or relocating the
Forza ELM.
b) Over the frequency range 150kHz to 80MHz, field strengths should be less than 3V/m.
Recommended separation distances between portable and mobile RF communications equipment and the nano400
The Forza ELM is intended for use in an electromagnetic environment in which radiated RF disturbances are controlled. The customer or the user of the Forza ELM
can help prevent electromagnetic interference by maintaining a minimum distance between portable and mobile RF communications equipment (transmitters) and
as recommended below, according to the maximum output power of the communications equipment.
Separation distance according to frequency of transmitter
Rated maximum output power of transmitter
150kHz to 80MHz
80MHz to 800MHz
800MHz to 2.5GHz
W
d=1.2 P
d=1.2 P
d=2.3 P
0.01
0.12
0.12
0.23
0.1
0.38
0.38
0.73
1
1.2
1.2
2.3
10
3.8
3.8
7.3
100
12
12
23
For transmitters rated at a maximum output power not listed above, the recommended separation distance d in meters (m) can be estimated using the equation
applicable to the frequency of the transmitter, where P is the maximum output power rating of the transmitter in watts (W) according to the transmitter manufacturer.
NOTE 1 At 80 MHz and 800 MHz, the separation distance for the higher frequency range applies.
NOTE 2 These guidelines may not apply in all situations. Electromagnetic propagation is affected by absorption and reflection from structures, objects and people.
*Specifications may be changed without notice.
By Your Side
in Dentistry
One Brasseler Boulevard, Savannah, GA 31419
To order call 800.841.4522
or fax 888.610.1937.
Visit our website: www.BrasselerUSA.com
'11.02.005
S