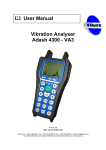
Download Vibration Analyser Adash 4300 - VA3 fflfflfflffl User Manual
Transcript
! User Manual
Vibration Analyser
Adash 4300 - VA3
Quick Start
Ref: 24112004 RS
ADASH Ltd., Czech republic, tel.: +420 596 232 670, fax: +420 596 232 671, email: [email protected]
For next technical and contact information visit www.adash.net, www.adash.cz
Adash Ltd.
Adash 4300 - VA3 – Quick Start
Contents:
Before Switching On the Analyser ..................................................................................... 3
Procedure of Supply Cells Replacement........................................................................... 4
Indication of Weak Batteries (re-chargeables)................................................................... 4
References........................................................................................................................... 5
How to switch instrument on/off ........................................................................................ 6
How to select and to run menu item .................................................................................. 7
Location of Keys and Lights on the Instrument Keyboard ................................................. 7
How to select and to modify setting screen item .............................................................. 8
How to download a route from the computer to the instrument ...................................... 9
Route preparation in DDS 2000 software.......................................................................... 9
Connection of the instrument to PC and route download .................................................12
How to measure in route mode .........................................................................................14
How to change route sensor parameters .........................................................................15
How to recognise that measurement has been done .......................................................16
How to repeat the measurement ......................................................................................16
How to see measured data ..............................................................................................17
How to upload data from instrument to PC ......................................................................18
Preparation of DDS2000 software for data upload ...........................................................18
Connection of the instrument to PC and route upload ......................................................20
How to connect vibration sensor ......................................................................................23
Do first simple measurement ............................................................................................24
Measure your first spectrum .............................................................................................25
How to create DDS2000 tree item......................................................................................28
Preparation of DDS2000..................................................................................................28
New tree creation.............................................................................................................28
Creating new tree items ...................................................................................................30
Data cell creation .............................................................................................................32
How to look at data.............................................................................................................34
Preparation of DDS2000..................................................................................................34
Fast view .........................................................................................................................36
Graph chart......................................................................................................................37
2
ADASH Ltd., Czech republic, tel.: +420 596 232 670, fax: +420 596 232 671, email: [email protected]
For next technical and contact information visit www.adash.net, www.adash.cz
Adash Ltd.
Adash 4300 - VA3 – Quick Start
Before Switching On the Analyser
Ignoring any recommendations mentioned below may cause failure of the instrument.
Operating with a power higher then 24 V can cause an accident.
1. Connect into the ICP input only:
- ICP powered sensor
- AC voltage max. 12 V peak-peak
- DC voltage max. +/- 24 V.
If you are not sure, contact your dealer or directly our website.
2. Never connect the analyser to a line voltage 230 V (110 V).
3. Only use batteries with a nominal voltage of max. 1.5 V.
Warning!
Be careful of battery orientation!
Fig. Correct polarity of the supply cells
1. To supply the analyser the following can be used:
− batteries with a nominal voltage of 1.2 V
− alkaline cells (not a different type) with a nominal voltage of 1.5 V.
2. Do not combine various types of supply cells; always mount four identical cells.
3. Check the polarity of the mounted cells carefully. By inversing polarity of one cell, the supply cells
would be damaged.
3
ADASH Ltd., Czech republic, tel.: +420 596 232 670, fax: +420 596 232 671, email: [email protected]
For next technical and contact information visit www.adash.net, www.adash.cz
Adash Ltd.
Adash 4300 - VA3 – Quick Start
Procedure of Supply Cells Replacement
-
Switch off the analyser by pressing the combination of the START + ESC keys.
Release the screw of the supply cells cover.
Replace the discharged cells by charged ones; pay attention to the correct polarity of each
cell.
Fix the cover and tighten the screw.
Switch on the analyser by pressing the START key.
Activate the Instrument Info screen from the Main Menu and check the condition of the installed
batteries.
Indication of Weak Batteries (re-chargeables)
When you select the Instrument info from main menu, then information on the current condition of the
batteries appears.
While the instrument is switched on, the battery condition is checked every 30 sec.
1. When a warning low battery level is detected (insufficient to enable correct and safe work with
instrument), the yellow ERR light is on (on the top of keyboard). Finish your current
measurement and then change the batteries.
2. When the alert low battery level is detected, all three lights on the top of the keyboard blink
three times and instrument switches itself off. You have to change the batteries immediately. If
the instrument switches itself off after switch-on, then you also have to change the batteries
immediately.
Attention!
When the instrument is switched off for several
minutes, weak batteries can be regenerated and for
a limited time can seem to be in good condition.
Do not try repeatedly switching on, when the
instrument itself switches off immediately! You may
cause instrument failure and data in memory can be
corrupted.
4
ADASH Ltd., Czech republic, tel.: +420 596 232 670, fax: +420 596 232 671, email: [email protected]
For next technical and contact information visit www.adash.net, www.adash.cz
Adash Ltd.
Adash 4300 - VA3 – Quick Start
References
This user manual helps you to get familiar with basic features of Adash 4300 – VA3 instrument.
The Vibration Analyser Adash 4300-VA3 - User manual is an integral part of this manual.
References:
[1]
Vibration Analyser Adash 4300-VA3, User manual
The basic manual is often mentioned in this one as see [1].
We recommend reading of introductory chapters References and Terminology in the basic user
manual [1] at first.
This manual is registered in the list of references as the [2] item.
5
ADASH Ltd., Czech republic, tel.: +420 596 232 670, fax: +420 596 232 671, email: [email protected]
For next technical and contact information visit www.adash.net, www.adash.cz
Adash Ltd.
Adash 4300 - VA3 – Quick Start
How to switch instrument on/off
1. Push the START button and the analyser switches on. The Logo and the base analyser
information appear. The battery condition is checked too. The main menu appears in a few seconds.
2. Push and hold the ESC+START buttons and the analyser switches off.
3. If the disc logo or A4300 Loader title appears after switching on, then the instrument is waiting for
upload of firmware. Individual steps are described in [1], Instrument Firmware Update chapter.
The floppy disk logo
or A4300 Loader title
on the display means
a firmware failure.
6
ADASH Ltd., Czech republic, tel.: +420 596 232 670, fax: +420 596 232 671, email: [email protected]
For next technical and contact information visit www.adash.net, www.adash.cz
Adash Ltd.
Adash 4300 - VA3 – Quick Start
How to select and to run menu item
1. Use the arrow keys up/down for selection of menu item.
2. Push the Right arrow, ENTER or START for function run.
3. Push the Left arrow or ESC for return back.
+
Location of Keys and Lights on the Instrument Keyboard
ERR
ERR
STAT
M EAS
Sh if t
START
STAT
M EAS
START
+
+
ENTER
ESC
0
SPACE
C o py
1
GHI
Sa ve
4
PQRS
Delete
7
ESC
0
ABC
Cursor
2
JKL
M od e
5
TUV
Se t up
8
DEF
SPACE
P gU p
C o py
3
1
MNO
GHI
P gD n
Sa ve
6
4
WXYZ
PQRS
M en u
Delete
9
7
A keypad design (version 1)
ABC
Cursor
2
JKL
Zo o m
5
TUV
Se t up
8
DEF
P gU p
3
MNO
P gD n
6
WXYZ
Menu
9
B keypad design (version 2)
7
ADASH Ltd., Czech republic, tel.: +420 596 232 670, fax: +420 596 232 671, email: [email protected]
For next technical and contact information visit www.adash.net, www.adash.cz
Adash Ltd.
Adash 4300 - VA3 – Quick Start
How to select and to modify setting screen item
1. Use the arrow keys up/down for selection of screen item.
2. Push Right arrow or ENTER and a list of possible values will be displayed. At some places you
may be required to manually enter a value or text.
3. Select or enter value.
4. Push Left arrow or ESC for return back. All defined values are stored in a buffer and will only be
used until you switch off of instrument. If you wish to make a permanent change you must save it.
5. Push Save and all configuration data of instrument is saved to permanent memory.
+
8
ADASH Ltd., Czech republic, tel.: +420 596 232 670, fax: +420 596 232 671, email: [email protected]
For next technical and contact information visit www.adash.net, www.adash.cz
Adash Ltd.
Adash 4300 - VA3 – Quick Start
How to download a route from the computer to
the instrument
Route preparation in DDS 2000 software
1. Run DDS2000 software system.
2. Select Database /Select and open item in main menu. The list of databases appears.
3. Select the database you require (for illustration only this manual refers to the DDS2000 database
which includes demo data and it is installed with DDS2000 automatically) and click to Open database
button (this database can be opened automatically with DDS2000 start, then this button is not active grey, in this case only close Database List window).
9
ADASH Ltd., Czech republic, tel.: +420 596 232 670, fax: +420 596 232 671, email: [email protected]
For next technical and contact information visit www.adash.net, www.adash.cz
Adash Ltd.
Adash 4300 - VA3 – Quick Start
4. Select Trees item in main menu. The list of all trees in this database appears.
5. Select the tree you require for example the A4300_VA3 Data tree and click the Open tree button. A
new window with the tree structure appears. By double clicking again you can open the next tree
paths.
10
ADASH Ltd., Czech republic, tel.: +420 596 232 670, fax: +420 596 232 671, email: [email protected]
For next technical and contact information visit www.adash.net, www.adash.cz
Adash Ltd.
Adash 4300 - VA3 – Quick Start
6. Select Tools / Connect Instrument / A4300 item in main menu. A new empty transfer window for
data with the instrument appears.
7. In the window on the right containing the data tree, open the tree to show those items which you
want to measure in your route. By drag and drop move these items to the A4300 window on the left of
the screen. In this window the list of all measurement points appears. By double click or Enter button it
is possible to open each item in the list to show all the sub-items. This is very similar to the DDS2000
tree.
11
ADASH Ltd., Czech republic, tel.: +420 596 232 670, fax: +420 596 232 671, email: [email protected]
For next technical and contact information visit www.adash.net, www.adash.cz
Adash Ltd.
Adash 4300 - VA3 – Quick Start
Connection of the instrument to PC and route download
1. Switch on the instrument, the main menu appears.
2. Connect the instrument via serial cable, which you receive with instrument. On the instrument use
the connector RS232 on the bottom. On the computer use any free serial port.
3. In transfer window A4300 push Find button (ATTENTION - the instrument has to be in main menu!).
When the connection is created, the Instrument found report appears.
In the case of problems check the correct selection of COM port first and correct cable connection in
both side.
12
ADASH Ltd., Czech republic, tel.: +420 596 232 670, fax: +420 596 232 671, email: [email protected]
For next technical and contact information visit www.adash.net, www.adash.cz
Adash Ltd.
Adash 4300 - VA3 – Quick Start
4. In transfer window A4300-VA3 click Transfer to A4300 button. A new window with a list of routes in
the instrument appears (instrument can include max. 30 routes). Click the New route button and enter
the name.
Click the OK button, now the route is downloaded to the instrument. In case of success the OK report
appears.
5. Disconnect the cable and now you can take route measurements with the A4300-VA3.
13
ADASH Ltd., Czech republic, tel.: +420 596 232 670, fax: +420 596 232 671, email: [email protected]
For next technical and contact information visit www.adash.net, www.adash.cz
Adash Ltd.
Adash 4300 - VA3 – Quick Start
How to measure in route mode
1. Select Datacollector-route item and open it. The list of routes in instrument memory appears on the
display (e.g. DEMO Route).
+
2. Select by arrows the required route and open it by pushing Right arrow. The information about
default route sensor (set in the instrument for a route) appears.
+
E SC
3. Push START and the list of machines in the route appears.
START
14
ADASH Ltd., Czech republic, tel.: +420 596 232 670, fax: +420 596 232 671, email: [email protected]
For next technical and contact information visit www.adash.net, www.adash.cz
Adash Ltd.
Adash 4300 - VA3 – Quick Start
4. By Up/Down arrows select required machine and open it by pushing Right arrow. The list of
measurement points appears.
+
5. By Up/Down arrows select required point, connect your sensor to the appropriate location and by
pushing START run the measurements which are defined for this point. The list of all measurements is
displayed and the pointer indicates the current measurement.
START
6. When all measurements are finished, the individual results appear step by step.
How to change route sensor parameters
Push Setup in some route display and the Route sensor menu appears. Now select required item
and change the set value (e.g. sensitivity from 100 mV/g to 50 mV/g).
TUV
Se tup
8
+
15
ADASH Ltd., Czech republic, tel.: +420 596 232 670, fax: +420 596 232 671, email: [email protected]
For next technical and contact information visit www.adash.net, www.adash.cz
Adash Ltd.
Adash 4300 - VA3 – Quick Start
How to recognise that measurement has been done
A measurement which is not yet done, does not show a time stamp in the list (e.g. ISO is done,
Bearing is not).
How to repeat the measurement
It is an important feature of the VA3 that all measurements associated with one measurement point
are measured in one go. It is also possible to make each individual measurement alone.
The new measurement erases the old value.
1. Select required point and push Right arrow (pushing START starts series measurement). The list
of measurements appears.
+
2. Select required measurement and push START.
START
ESC
3. Push ESC or Left arrow for return.
16
ADASH Ltd., Czech republic, tel.: +420 596 232 670, fax: +420 596 232 671, email: [email protected]
For next technical and contact information visit www.adash.net, www.adash.cz
Adash Ltd.
Adash 4300 - VA3 – Quick Start
How to see measured data
1. In the list of measurements select required item.
2. If the time stamp is not displayed, then no data exists.
3. Where a time stamp is displayed open a new screen by pressing the Right arrow, where the
measured value or graph is displayed.
+
ESC
4. Return by pushing ESC or Left arrow.
17
ADASH Ltd., Czech republic, tel.: +420 596 232 670, fax: +420 596 232 671, email: [email protected]
For next technical and contact information visit www.adash.net, www.adash.cz
Adash Ltd.
Adash 4300 - VA3 – Quick Start
How to upload data from instrument to PC
Preparation of DDS2000 software for data upload
1. Run the DDS2000 software.
2. Select Database / Select and Open item in main menu. The list of databases appears.
18
ADASH Ltd., Czech republic, tel.: +420 596 232 670, fax: +420 596 232 671, email: [email protected]
For next technical and contact information visit www.adash.net, www.adash.cz
Adash Ltd.
Adash 4300 - VA3 – Quick Start
3. Select the database you require and click the Open database button.
4. Select Trees item in main menu. The list of all available trees in this database appears.
5. Select the required tree and click the Open Tree button. The new window with tree structure
appears.
19
ADASH Ltd., Czech republic, tel.: +420 596 232 670, fax: +420 596 232 671, email: [email protected]
For next technical and contact information visit www.adash.net, www.adash.cz
Adash Ltd.
Adash 4300 - VA3 – Quick Start
6. Select Tools / Connect Instrument / A4300 item in main menu. A new empty transfer window
appears.
Connection of the instrument to PC and route upload
1. Switch on the instrument, the main menu appears.
20
ADASH Ltd., Czech republic, tel.: +420 596 232 670, fax: +420 596 232 671, email: [email protected]
For next technical and contact information visit www.adash.net, www.adash.cz
Adash Ltd.
Adash 4300 - VA3 – Quick Start
2. Connect the instrument via serial cable, which you receive with instrument. On the instrument use
the connector RS232 on the bottom. On the computer use any free serial port.
3. In transfer window A4300 push Find button (ATTENTION - the instrument has to be in main menu!).
When the connection is created, the Instrument found report appears.
In the case of problems check the correct selection of COM port first and correct cable connection in
both side.
21
ADASH Ltd., Czech republic, tel.: +420 596 232 670, fax: +420 596 232 671, email: [email protected]
For next technical and contact information visit www.adash.net, www.adash.cz
Adash Ltd.
Adash 4300 - VA3 – Quick Start
4. In transfer window A4300-VA3 click Transfer from A4300 button. Select your route from the list of
routes in the instrument. Click the OK button, now the route is uploaded to the computer.
5. Click to the Store To Database button. All measured data will be saved to relevant data cells.
IMPORTANT: IF YOU DO NOT PRESS STORE TO DATABASE BUT SIMPLY CLOSE THE SCREEN
THE DATA WILL NOT BE STORED TO THE DATABASE AND YOU MUST REPEAT THE
UNLOADING PROCESS.
6. Disconnect the cable and now you can make next data acquisition in DDS2000 software.
22
ADASH Ltd., Czech republic, tel.: +420 596 232 670, fax: +420 596 232 671, email: [email protected]
For next technical and contact information visit www.adash.net, www.adash.cz
Adash Ltd.
Adash 4300 - VA3 – Quick Start
How to connect vibration sensor
1. The analyser has a connector on its upper side for the connection of the vibration sensor with the
ICP supply. Connected sensor to this input is labelled CH1 (channel 1) in all menus.
2. The connector on left side is also determined for the connection of the vibration sensor with the
ICP supply. Connected sensor to this input is labelled CH2 (channel 2) in all menus.
3. The default would be to connect sensor via supplied cable to upper input (CH1). All the following
descriptions will be assume this configuration.
23
ADASH Ltd., Czech republic, tel.: +420 596 232 670, fax: +420 596 232 671, email: [email protected]
For next technical and contact information visit www.adash.net, www.adash.cz
Adash Ltd.
Adash 4300 - VA3 – Quick Start
Do first simple measurement
1. Select by arrows the Default Measurements item in main menu. Push Right arrow. The list of
possible measurements appears.
+
2. Push Right arrow (or START) for running of ISO 10-1000 measurement (RMS velocity in 101000Hz frequency band).
3. The bar at the bottom of the screen indicates:
- ICP accelerometer power is switched on
- the VA3 is waiting for stability of the signal .
The Meas light on the keyboard top lights yellow and indicates preparation of measurement.
4. When the signal is stable, the Meas lights green and the measurement is running.
5. Measured value is continuously displayed.
6. Finish the measurement by pushing and holding the ESC button.
24
ADASH Ltd., Czech republic, tel.: +420 596 232 670, fax: +420 596 232 671, email: [email protected]
For next technical and contact information visit www.adash.net, www.adash.cz
Adash Ltd.
Adash 4300 - VA3 – Quick Start
Measure your first spectrum
1. Select by arrows the Analyser item in main menu. Push the Right arrow. The list of possible
functions appears.
+
2. Select Dynamic measurements item and push the Right arrow. The setting screen appears.
+
3. Different data evaluation can be set (e.g. Time signal [TIME] from acceleration [g] from channel 1).
Select EVALUATION item, push arrow Right and select SPEC.
+
25
ADASH Ltd., Czech republic, tel.: +420 596 232 670, fax: +420 596 232 671, email: [email protected]
For next technical and contact information visit www.adash.net, www.adash.cz
Adash Ltd.
Adash 4300 - VA3 – Quick Start
4. Push Setup button, the setting screen Spectrum appears.
TUV
S e t up
8
5. Select BASE-BAND item and set frequency range (e.g. 3200 Hz).
+
6. Select and set LINES item (e.g. 800 spectrum lines).
+
7. Escape from setting screen by Left arrow to the Dynamic measurements screen.
26
ADASH Ltd., Czech republic, tel.: +420 596 232 670, fax: +420 596 232 671, email: [email protected]
For next technical and contact information visit www.adash.net, www.adash.cz
Adash Ltd.
Adash 4300 - VA3 – Quick Start
8. Push START button for measurement. The measured spectrum appears.
STAR T
9. Use Right/ Left arrows for cursor cross movement. You will see the frequency and amplitude values
changing at the top of the screen (e.g. 524 Hz and amplitude 0.23 g on Figure).
10. Return back by means of ESC button.
ESC
27
ADASH Ltd., Czech republic, tel.: +420 596 232 670, fax: +420 596 232 671, email: [email protected]
For next technical and contact information visit www.adash.net, www.adash.cz
Adash Ltd.
Adash 4300 - VA3 – Quick Start
How to create DDS2000 tree item
Preparation of DDS2000
1. Run DDS2000 software system.
2. Select Database /Select and open item in main menu. The list of databases appears.
3. Select the database you require (for illustration only this manual refers to the DDS2000 database
which includes demo data and it is installed with DDS2000 automatically) and click to Open database
button ( this database can be opened automatically with DDS2000 start, then this button is not active grey, in this case only close Database List window).
New tree creation
4. Select Trees item in main menu. The list of all trees in this database appears.
28
ADASH Ltd., Czech republic, tel.: +420 596 232 670, fax: +420 596 232 671, email: [email protected]
For next technical and contact information visit www.adash.net, www.adash.cz
Adash Ltd.
Adash 4300 - VA3 – Quick Start
5. Click the New button and in new window dialog enter new name of tree.
6.In the Tree Item window click OK and the new tree is done. Also the parent item with the same
name is created (New tree).
29
ADASH Ltd., Czech republic, tel.: +420 596 232 670, fax: +420 596 232 671, email: [email protected]
For next technical and contact information visit www.adash.net, www.adash.cz
Adash Ltd.
Adash 4300 - VA3 – Quick Start
Creating new tree items
7. Click the Right button of your mouse on an item in a tree structure and the following menu appears:
8. Select Add Item and a new window for creation of the item appears.
30
ADASH Ltd., Czech republic, tel.: +420 596 232 670, fax: +420 596 232 671, email: [email protected]
For next technical and contact information visit www.adash.net, www.adash.cz
Adash Ltd.
Adash 4300 - VA3 – Quick Start
9. Enter a name for the item, select the bitmap (option) and click OK. The new item is created under
its parent active item. By repeating this process you can develop a complete tree with required
structure. The number of levels is not limited.
You can simply create new structure by means of copying existing items either from another tree or
even from another database. For a detailed description please refer to the DDS2000 guide.
31
ADASH Ltd., Czech republic, tel.: +420 596 232 670, fax: +420 596 232 671, email: [email protected]
For next technical and contact information visit www.adash.net, www.adash.cz
Adash Ltd.
Adash 4300 - VA3 – Quick Start
Data cell creation
10. The tree structure is used to define the logical layout of the database and allows you to manage
and define a structure. Measurements can take place at any level in the tree. Measured data are
saved into data cells. Open the window with the tree. Move your mouse over the item into which you
want save data. Click Right button of mouse and the next menu appears.
8. Select Add Data Cell function. A new window with configuration parameters appears.
32
ADASH Ltd., Czech republic, tel.: +420 596 232 670, fax: +420 596 232 671, email: [email protected]
For next technical and contact information visit www.adash.net, www.adash.cz
Adash Ltd.
Adash 4300 - VA3 – Quick Start
9. Enter new name, select instrument type A4300, select Data type Static value or ABS spec or
Time, depending upon whether you wish to add an overall trend measurement or a new spectrum
measurement.
If you select Static value there are several standard sub-types which hare pre-defined for use in the
VA3 such as ISO velocity. These sub-types will automatically set the correct measurement unit
required.
If you select ABS Spec or Time the Meas conditions button will become active. Click on this button
and a further set-up screen appears where you can set up frequency range, number of lines, number
of averages, etc for spectrum measurement or the sample time and frequency window for time
waveforms are defined.
10.Now click to button OK and the new data cell will be created. For a more detailed description read
in DDS2000 guide.
33
ADASH Ltd., Czech republic, tel.: +420 596 232 670, fax: +420 596 232 671, email: [email protected]
For next technical and contact information visit www.adash.net, www.adash.cz
Adash Ltd.
Adash 4300 - VA3 – Quick Start
How to look at data
Preparation of DDS2000
1. Run DDS2000 software system.
2. Select Database /Select and open item in main menu. The list of databases appears.
3. Select the database you require (for illustration only this manual refers to the DDS2000 database
which includes demo data and is installed with DDS2000 automatically) and click to Open database
button ( this database can be opened automatically with DDS2000 start, then this button is not active grey, in this case only close Database List window).
4. Select Trees item in main menu. The list of all trees in this database appears.
34
ADASH Ltd., Czech republic, tel.: +420 596 232 670, fax: +420 596 232 671, email: [email protected]
For next technical and contact information visit www.adash.net, www.adash.cz
Adash Ltd.
Adash 4300 - VA3 – Quick Start
5. Select the tree you require (for example the Demo Data tree) and click the Open tree button. A new
window with the tree structure appears.
6.By double click open the structure with data.
35
ADASH Ltd., Czech republic, tel.: +420 596 232 670, fax: +420 596 232 671, email: [email protected]
For next technical and contact information visit www.adash.net, www.adash.cz
Adash Ltd.
Adash 4300 - VA3 – Quick Start
Fast view
1. Highlight one item ( tree item or data cell)
2. Click the
in Tool bar or Space button on keyboard. The related data appears ( text
information, graph, value, bitmap).
3. Change the active item by mouse or arrows.
36
ADASH Ltd., Czech republic, tel.: +420 596 232 670, fax: +420 596 232 671, email: [email protected]
For next technical and contact information visit www.adash.net, www.adash.cz
Adash Ltd.
Adash 4300 - VA3 – Quick Start
Graph chart
1. Highlight required data cell by mouse. By double click open new window with graphics
representation of data. The base graphics data types are:
-
Trend
-
Spectrum
-
Time signal
-
Order analysis
37
ADASH Ltd., Czech republic, tel.: +420 596 232 670, fax: +420 596 232 671, email: [email protected]
For next technical and contact information visit www.adash.net, www.adash.cz
Adash Ltd.
Adash 4300 - VA3 – Quick Start
2. When you open several data windows and then use Tiles function, the similar window organisation
appears. Number of graphs is not limited.
3. Move the mouse cursor to any graph. Click the Right button. The menu with all possible functions
appears. See DDS2000 manual for detailed description of each function.
38
ADASH Ltd., Czech republic, tel.: +420 596 232 670, fax: +420 596 232 671, email: [email protected]
For next technical and contact information visit www.adash.net, www.adash.cz


