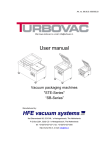
Download Turbovac User manual
Transcript
Manufactured by:
Het Sterrenbeeld 36, 5215 ML ‘s-Hertogenbosch The Netherlands
P.O.Box 2261, 5202 CG ’s-Hertogenbosch The Netherlands
tel: +31(0)73-6271271, fax: +31(0)73-6271200
http://www.hfe.nl, e-mail: [email protected]
Englisch
2004 HFE Vacuum Systems BV
All rights reserved.
No part of this document may be reproduced and/or published by means of printing, photocopy, microfilm or any other method, without
the prior written permission of the manufacturer. This also applies for the accompanying illustrations and/or diagrams and schematics.
The information in this document is based on the general data associated with the construction, material qualities and working methods,
known at the moment of publication, so that we reserve the right to make changes without giving prior notice.
This document is applicable to the indicated models of the Turbovac packing machine in the version supplied. The manufacturer
therefore does accept any liability for any form of damage or injury resulting from deviating from the specifications of these machines as
supplied to you.
All possible care was taken when creating this document, but the manufacturer accepts no liability for mistakes or any consequences
thereof.
TAKE THE TIME TO READ THIS DOCUMENT THOROUGHLY TO ACQUAINT YOURSELF WITH THE
CORRECT AND APPROPRIATE USE OF THE VACUUM PACKING MACHINES.
2004-01
II
User manual ECONOMY-range
Contents
CONTENTS
SAFETY AND WARNING NOTICES................................................................................................ 4
1 INSTALLATION ........................................................................................................................... 5
2 OPERATION ................................................................................................................................ 6
2.1
2.2
2.3
2.4
Warm up position ................................................................................................................................. 6
Vacuuming and Sealing ....................................................................................................................... 6
Vacuuming ........................................................................................................................................... 6
Sealing ................................................................................................................................................. 6
3 LOOKING AFTER YOUR MACHINE........................................................................................... 8
3.1
3.2
3.3
3.4
3.5
3.6
Warnings.............................................................................................................................................. 8
Clean Daily........................................................................................................................................... 8
Weekly maintenance (See Section below “Seal bar Check list”) ......................................................... 8
Monthly maintenance........................................................................................................................... 8
Annual maintenance ............................................................................................................................ 8
Oil ........................................................................................................................................................ 8
4 SEAL BAR CHECK LIST............................................................................................................. 9
4.1
4.2
4.3
4.4
4.5
4.6
4.7
Replacing the sealing wire and Teflon tape ....................................................................................... 10
Replacing the sealing wires ............................................................................................................... 10
Replacing the Teflon tape .................................................................................................................. 10
Reinstalling a new sealing bar ........................................................................................................... 10
Replacing the silicone in the counter bar ........................................................................................... 10
Maintenance of the silicone gasket in the lid .................................................................................... 10
Replacing silicone gasket in the lid ................................................................................................... 10
5 TECHNICAL DATA .................................................................................................................... 11
6 PROBLEMS AND SOLUTIONS................................................................................................. 13
User manual ECONOMY-range
III
Safety and warning notices
SAFETY AND WARNING NOTICES
Warning
Read the User Instructions thoroughly before starting to install and operate this machine.
To avoid risk of electric shock or damage to the machine, always switch off the machines and isolate from
the power supply before carrying out any maintenance or cleaning.
Make sure at all times that this manual is within easy reach to refer to.
CAUTION:
Never use the machine without the seal bar installed.
Before vacuum packing any sauces, soups or other liquids refer to the relevant section in the Operating
chapter for correct and safe setting up of the machine.
4
User manual ECONOMY-range
Installation
1 INSTALLATION
•
•
•
•
•
•
•
•
•
Make sure the machine is level and has been placed on a solid level .surface.
To ensure easy access for maintenance and sufficient ventilation, the machine must not be closed
in and is easily accessed from all sides.
The main cable must be routed in such a manner to minimize any tripping hazard or that will cause
damage to it.
Before connecting the machine to the mains make sure that the voltage stated on the specifications
plate is the same as that of the mains supply and that the connection is properly earthen.
The standard machine must be connected to 230 Volt - 1 phase - 50 Hertz (depending on the
country).
Check the oil level. It is crucial that there is enough oil in the machine. If the machine has been
supplied without oil, (see chapter “Looking After Your Machine” section entitled “Oil”).
The temperature in the workspace should not be lower than 10°C, as the oil in the vacuum pump
will thicken and prevent the smooth operation of the pump.
Before you start with the vacuum process, familiarize yourself with the procedure.
Don’t just start vacuuming sauces or other liquid products. When vacuuming sauces or soups, the
pressure in the vacuum chamber must be carefully monitored, because the boiling point of liquids
is lower as the vacuum percentage goes up. As soon as the boiling point has been reached, you
can see the gas bubbles in the product.
User manual ECONOMY-range
5
Operation
2 OPERATION
The models Economy MINI, MAXI, Gastrovac, Gastrovac PRO and SUPER are machines that functions
automatically, When the filled vacuum pouch has been put in the vacuum chamber and the lid is closed
the operation will start automatically. The machine will automatically follow the entered program from
vacuuming to sealing. After the sealing has been completed the vacuum pump will turn off and the lid
will automatically open.
2.1
Warm up position
After the machine has been switched off for a period of time we recommend that the machine is
“warmed up”. Set the On/Off switch in the position WARM UP (B). Allow the pump to run (10 minutes
max.). the main switch can then be reset to ON. The machine is ready to be used.
2.2
Vacuuming and Sealing
Set the On/Off Switch (B) to position ON. The red light will light up, (adjacent to the switch) to indicate
that the machine is ready to be used.
The vacuum chamber contains filler plates. When the vacuum pouches are filled, a number of the filler
plates must be removed (or not for smaller packs) so that the vacuum pouch lies directly on the
sealing bar, ensure that the pouch lies half above the bar and half below it. The vacuum pouches
should never stick out of the machine to stop the lid closing, NEVER TRY TO FORCE THE LID
CLOSED.
2.3
Vacuuming
Depending on the desired vacuum, the vacuum dial (C) on the control panel can be set. A red light (D)
serves as a control indicator of the vacuum time. Start with position 3. If there is insufficient vacuum,
set the dial to a higher value. The attained vacuum can be seen on the vacuum gauge (G) on the right
side of the control panel. It is important that the vacuum time for products with enclosed air is
extended.
2.4
Sealing
The seal time is set by the seal dial (E), The red light (F) serves as a control indicator of the sealing
time. Starting with position 3, if the sealing time is too long (scorching the bag), set the dial to a lower
value; if the sealing time is too short (the sealed product easily opens), set the dial to a higher value.
6
User manual ECONOMY-range
Operation
A
B
C
D
E
F
G
-0.6
-0.4
-0.2
-0.8
-1
bar
-0
acc.1.6
Fig. 2-1
A.
B.
C.
D.
E.
F.
G.
On/Off indicator
On/Off Switch
Vacuum dial
Vacuum indicator
Seal dial
Seal indicator
Vacuum gauge
User manual ECONOMY-range
7
Looking after your machine
3 LOOKING AFTER YOUR MACHINE
Regular and thorough maintenance prevents breakdowns, prolongs the machine’s operational life and
guarantees optimum hygiene.
3.1
Warnings
•
•
•
•
3.2
Clean Daily
•
•
•
•
•
3.3
•
Check the condition of the oil. (See “Oil” section below for correct specification)
Note: Replace the oil after 160 hours of operation.
If the machine is not used frequently, change the oil every 6 months.
Annual maintenance
•
•
•
3.6
Check the oil, add oil if necessary. (Section below correct oil specifications)
Check the condition.
Check the silicone gasket in the lid; replace if damaged.
Check the silicone strip in the counter bar; replace if damaged.
Monthly maintenance
•
3.5
Clean the lid, insert plates, bottom and walls of the vacuum chamber with a damp clothe.
Pay particular attention to the silicon strip in the lid.
Do not clean the transparent lid with synthetic cleaning agent as this weakens the acrylic material.
Clean the control panel with a dry cloth.
In order to prevent oxidation in the pump, the vacuum pump must run for about 5 minutes after
cleaning, (see “Warm up” procedure) to allow the condensed water in the oil can evaporate.
Weekly maintenance (See Section below “Seal bar Check list”)
•
•
•
•
3.4
Always unplug the machine when carrying out maintenance or repairs.
To prevent accidents always replace damaged or oxidized gas or torsion springs in the lid.
Never use high-pressure water to clean the machine as this can cause irreparable damage to the
machine and to the electronics.
An authorized service representative must carry out repairs.
Check the condition of the vacuum hoses and pipes and replace them if necessary.
Check the condition of the silicone strip of the counter bar and replace if necessary.
Check the condition of the gas springs in the lid and replace them if necessary.
Oil
The oil in the vacuum pump must be checked and replaced on a regular basis.
8
User manual ECONOMY-range
Seal bar check list
4 SEAL BAR CHECK LIST
•
•
•
•
•
Clean the sealing and counter bars daily to ensure optimum sealing of the packaging material. Use
a dry cloth for this purpose.
Check the condition of the sealing wires regularly. They should be free of kinks and should be
tightly strung on the sealing bar. For flawless operation the Teflon tape must be free of damage.
If the sealing wires or the Teflon tape are damaged, replace them immediately.
Check the counter bar. This is made of silicone, which generally has a long operational life and
therefore does not need replacing often. However, if parts of the beam are scorched, replace the
silicone strip immediately.
Ensure that spare sealing wires and Teflon tape are always kept in stock.
(1) 12.15.0.0030
120-ST:
140-ST:
160-ST:
180-ST:
220-ST:
(6) 12.03.0.0140
(6) 12.03.0.0140
(6) 12.03.0.0110
(6) 12.03.0.0120
(6) 12.03.0.0120
(2) 11.09.0.0020
(3) 06.03.1.0020
120-ST:
140-ST:
160-ST:
180-ST:
220-ST:
94.01.0.0355
94.01.0.0355
94.01.0.0375
94.01.0.0385
94.01.0.0385
(4) 01.09.1.0100
(5) 01.05.2.5016
Fig. 4-1
1.
2.
3.
4.
5.
6.
Teflon tape
Sealwire
Spring
Screw
Hexagon nut
Beam
User manual ECONOMY-range
9
Looking after your machine
4.1
Replacing the sealing wire and Teflon tape
Remove the sealing bar from the chamber.
Remove the damaged Teflon tape from the seal bar.
Unlock and remove the two (M6) grub screws (that retain the seal wire) from the underside of the seal
bar using a 4mm-hexagon key.
Remove the damaged seal wire.
Carefully clean the sealing bar.
4.2
Replacing the sealing wires
1. Ensure that the two tension spring and screw assembly are in place in either end of the seal bar.
2. Fold over 50mm of the end of the new seal wire, push this end into the slot (underneath the seal
bar) so that it extends beyond the (hole) position where the electrical pin contacts in the chamber
fit. Clamp this end of the wire into place with the (M6) grub screw.
3. Run the remaining length of the wire along the top of the bar, fold over the end and fit similarly at
this opposite end as the first, ensure that both (M6) grub screws are tightly secured.
4.3
Replacing the Teflon tape
Remove the protective paper backing strip (from the new Teflon tape strip) and stick the tape onto the
bar. Ensure that the tape overlaps the ends of the seal bar.
4.4
Reinstalling a new sealing bar
Put the repaired sealing bar back into the chamber over the plug pins. On machines with the sealing
bar in the lid the contact points must be reconnected.
4.5
Replacing the silicone in the counter bar
Pull the silicone strip out of the groove, clean the groove and fit the new strip.
4.6
Maintenance of the silicone gasket in the lid
Clean the silicone gasket with a damp cloth. Never use synthetic cleaning agents. If the gasket is
damaged replace immediately as this will reduce the efficiency of the machine.
4.7
Replacing silicone gasket in the lid
Remove the damaged gasket. Cut a length of new silicone gasket to match the old strip clean the
groove and press the new gasket into place. Make sure the ends of the strip are pressed evenly
together. No leakage should occur!
10
User manual ECONOMY-range
Technical data
5 TECHNICAL DATA
Data per machine
Type
120-ST
Height
Width
Depth
Weight
Length
Width
Depth
Weight
Length
Width
Depth
Sealing configuration
1 x sealing beam
Capacity
50 Hz
60 Hz
140-ST
ECONOMY
160-ST
Size and weight of the machine
mm
380
380
415
mm
330
330
415
mm
460
460
520
Kg
31
41
55
Size and weight of the packed machine
mm
500
580
700
mm
540
540
540
mm
630
630
630
Kg
36
46
65
Size of the vacuum chamber
mm
365
365
340
mm
280
280
320
mm
130
130
135
Net sealing length
mm
270
270
320
Final pressure
Oil quantity
Weight vacuum pump
Noise
50 Hz
60 Hz
m³/h
m³/h
mBar
Ltr
Kg
Db(A)
Db(A)
Maximum leakage
0.1 mbar/s
Vacuum pump
3
8
3.6
9.6
15
2
0,06
0,25
5.1
10.3
59
59
59
59
16
19
2
0,3
18
60
64
180-ST
220-ST
470
550
580
68
990
535
655
700
650
630
83
370
420
170
530
455
110
420
420
16
19
2
0,3
18
60
64
21
24
2
0,5
19
62
62
General data
Recommend kinds of oil
VM 068
VM 100
VS 100 or VC 101
Tension, power, frequency
Maximum permissible voltage variance
Ambient temperature
Transportation temperature
Humidity
Positioning
With a surrounding temperature of
5 - 12º C
12 - 30º C
30 - 40º C
Electrical connections
See the identification
- 10% to + 10%
Ambient conditions
+ 5 to + 30º C
- 25 to + 55º C
30 % to 95 % (without condensation)
Inside, level, free of walls, ect,
• Voltage data was not included in this summary because these are dependent on the electricity
supply of the country that the machine is intended for. The voltage data are given on the machine
indentification plate.
• The useful space in the vacuum chamber depends on the number of sealing trays ant their
positioning. Each tray lessnes the useful space by about 50 mm.
• Sizes and weights are for the standard (simples) model machines.
User manual ECONOMY-range
11
Problems and solutions
6 PROBLEMS AND SOLUTIONS
Problem
Cause
Solution
Machine does not work.
• The plug is not inserted in the
socket correctly
• Push the plug into the socket correctly
• The On/Off switch is in the
‘OFF’ position.
• Put the switch in the ‘ON’ position.
• A fuse in the machine is
ruptured.
• Contact your authorized service
representative
The machine does not
• The lid micro switch is
work, but the lights are on.
damaged
• Contact your authorized service
represetatived
• The thermal safeguard has
• Check if the ventilation openings are
switched the machine off due to
free from obstructions.
overheating.
-Let the machine cool down and
switch. on again
Contact your authorised service
representative if the fault persists
• A fuse could have.ruptured
• Contact your authorized service
representative
• There is an internal
malfunction.
• Contact your authorized service
representative
The vacuum pump is not
functioning correctly
• The oil is too thick, the
temperature is too low.
• Let the pump warm up. (see “Warm
up” procedure)
There is insufficient
vacuum.
• The value entered for the
vacuum function is too low.
• Increase the value of the vacuum
function
• There is not enough oil in the
pump.
12
Replenish the oil.
• The oil is dirty.
• Change the oil.
• The suction filter is blocked
• Contact your authorized service
representative
• The pump’s spray filter is
blocked
• Contact your authorized service
representative
• The lid’s silicone gasket is
damaged.
• Replace the silicone gasket
User manual ECONOMY-range
Problems and solutions
Problems
Cause
Solution
Insufficient vacuum in the
bag
• The vacuum pouch is of
inferior quality.
• Select vacuum pouches of a better
quality.
• The product has damaged the
pouch.
• Use a new pouch.
• There is insufficient room
between the sealing bar and
the counter bar
• Check the position of the sealing bar
• The vacuum pouch is
incorrectly placed on the
sealing bar.
• Place the opening of the vacuum
pouch over the sealing bar correctly.
• The sealing time is not set
correctly.
• Adjust the sealing time value.
• There is a break in the sealing
wire.
• Replace the sealing wire.
• The sealing bars are dirty.
• Clean the sealing bars.
• The Teflon tape is worn.
• Replace the Teflon strip
• The counter bar is damaged.
• Replace the silicon strip.
• The vacuum pouches are of
inferior quality.
• Select better quality vacuum pouches.
• The opening of the vacuum
pouch is contaminated.
• Remove any obstructions from the
opening of the pouch. Make sure the
opening of the package remains clean
while filling. or replace the bag
The vacuum pouch is
incorrectly sealed.
User manual ECONOMY-range
13
14
User manual ECONOMY-range


