1
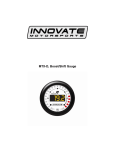
MTX-A Vacuum/Boost Gauge
User Manual
1. Installation ................................................................................................ 2 1.1 Gauge Mounting .............................................................................. 2 1.2 Changing the MTX-A’s Gauge Bezel .............................................. 2 1.3 MAP Sensor Mounting .................................................................... 2 1.4 Main Gauge Wiring .......................................................................... 3 1.4.1 Single Innovate Device Relay Wiring Instructions....................... 4 1.5 MAP Sensor Wiring ......................................................................... 4 2 Download the Logworks 3 software package .......................................... 4 2.1 Installing software ............................................................................ 5 2.2 Connecting to LM Programmer ....................................................... 5 2.3 Overboost Warning ......................................................................... 5 2.4 Altitude Compensation .................................................................... 6 2.4.1 Updating the Firmware ................................................................ 6 2.5 Logging data from your MTX-A with LogWorks .............................. 7 2.5.1 Adding and Logging MTS channels ............................................ 7 Appendix A: Limited Warranty ......................................................................... 8 11-0150
1. Installation
1.1
Gauge Mounting
The MTX-A gauge fits in any standard 2 1/16” (52mm) gauge pod.
Mounting of the gauge should be done in such a manner that the cables are
not being forcefully pulled and strained from the gauge itself. Route the
sensor cable avoiding contact with sharp and hot sources that could damage
the cable. Also avoid routing the cables near ignition components or other
sources of RF (radio frequency) and EMI (Electromagnetic interference)
noise.
The MTX-A gauge is splash resistant (not water proof) and can be
mounted so that it is exposed to the outdoor elements. The MTX-A should
not be submerged and special consideration should be taken to protect the
gauge from direct water spray (water coming from a pressurized source.)
When replacing the bezel and/or gauge face verify that the o-ring is properly
seated. When replacing the bezel and/or gauge face verify that the o-ring is
properly seated.
1.2
Changing the MTX-A’s Gauge Bezel
1. Lay the MTX-A face down and remove the three #2 phillips screws
from the outside rim of the back plate.
2. Carefully lift out the bezel from the gauge cup.
3. Configure the gauge as desired making sure not to disturb the
needle.
4. Make sure every piece is positioned correctly using the locating tab
and reassemble the gauge.
5. Reinstall the 3 #2 phillips screws.
1.3
1
MAP Sensor Mounting
The MAP sensor MUST be installed with the hose fitting facing
down. It is very important that the sensor be isolated from heat sources,
mounted away from all ignition and/or other potential RF emitting
sources, and protected against excessive vibration.
The MAP sensor has two 1/8” holes that can be used to secure the
sensor. Another viable option to mount the sensor is to use a high temp
safe double-sided mounting tape.
2
Locate a vacuum source on the intake manifold, it must be after the
throttle body. Connect it to the hose fitting on the sensor. Use the
provided “T” and hose to make this connection if needed. To secure the
hose, use tie-wraps or hose clamps.
2
1.4
1
Main Gauge Wiring
Connect the RED wire to an isolated switched 12V source in your
vehicle. A switched 12V source goes ON as soon as “key on” power is
active. The circuit to which you will pull power from should be able to
support a 2 amp draw. Make sure this connection is protected with a 5A
fuse.
Circuits that share power with the vehicle’s stereo, ignition system,
ECU, lighting, or fuel pump should not be used. When in doubt, create an
additional circuit using an automotive relay available at any automotive parts
supplier. See the next section for a relay installation diagram.
2
The BLACK wire should be grounded to a solid ground source. The
best possible ground source would be the battery ground (-) post.
If other Innovate Motorsports devices are going to be daisy-chained
along with the MTX-A, it is recommended that all devices be connected to a
single ground point, ideally the battery ground (-) post.
3
Connect the WHITE wire to a headlight power wire (a wire that supplies
current to the headlights). This enables the display to dim for better
nighttime viewing. DO NOT CONNECT THIS WIRE TO THE
HEADLIGHT DIMMING WIRE. Connection to this rheostat type of
switch will cause the gauge to malfunction. If you chose not to utilize the
dimming feature, connect the WHITE wire to ground.
3
1.4.1
Single Innovate Device Relay Wiring Instructions
1.5 MAP Sensor Wiring
1
Fish the MAP sensor’s three pin connector through the firewall and to
the MTX Boost/Shift gauge.
2
Connect the sensor’s male three pin connector to the female 3 pin
connector on the gauge.
3
Coming out of the female three pin connector you will find a black wire
with a stripped end. Connect this black wire to the same ground source
as the gauge.
2
Download the Logworks 3 software package
1. Open your web browser and go to:
http://www.innovatemotorsports.com/support.php
2. The LogWorks 3 software download will be the very first thing on the
page, click the link to download the software.
4
2.1 Installing software
1. Double click on the Logworks 3 installer previously downloaded.
2. The installer will start, follow the prompts to install the software.
3. Once the software has been installed the LogWorks software, LM
Programmer and MTX-A manual can then be located by navigating
through Start->Programs->LogWorks3.
2.2 Connecting to LM Programmer
LM Programmer is used to update firmware, change fuel types, and program
the two analog outputs.
1. Connect the OUT port of the MTX-A to the provided serial
programming cable. Connect the other end of the serial
programming cable to your computer. If your computer does not
have a serial port, you can purchase a USB to Serial adapter from
Innovate Motorsports (P/N 3733) or use any USB to serial adaptor
that includes drivers. Make sure that nothing is connected to the IN
port of the MTX-A
2. Power up the MTX-A.
3. Launch LM Programmer. The LM Programmer application can be
launched from Start->Programs->LogWorks3->LM Programmer from
the Windows task bar.
2.3 Overboost Warning
The overboost alarm setting can be configured in the Pressure tab in LM
Programmer. When the pressure threshold has been exceeded the entire
gauge’s backlight will flash. To enable this feature, the “Enabled” option must
be checked.
5
Whenever a change is made to the programming of the gauge click the
Program button for the change to take effect. Once the gauge has been
programmed the Program button will grey out.
To set the gauge back to the factory settings click the Set to Defaults button
and then click the Program button
2.4 Altitude Compensation
The MTX-A comes programmed from the factory an atmospheric pressure
setting for sea level. As altitude rises, atmospheric pressure will drop which
will effect the gauge’s reading.
1. To accurately measure atmospheric pressure, the MAP sensor must
be connected to the gauge and the vacuum/pressure line should be
disconnected from the MAP sensor’s nipple.
2. Connect the MTX-A to your computer and launch LM Programmer
3. Go to the Pressure tab in the software.
4. Click “Set Altitude Comp”. You will be prompted to verify that the
MAP sensor is connected, click “Yes”.
5. Finally, click the “Program” button for the setting to take effect.
2.4.1
Updating the Firmware
Do not update the firmware if the versions are the same. A
firmware update should only be necessary if there has been a new
release that specifically fixes a problem that you are experiencing with
the controller.
1. Connect the MTX-A to the computer and launch LM Programmer.
2. Once connected, LM Programmer will display the current version of
the firmware that is installed in the MTX-A. Do not update the
firmware if the versions are the same. A firmware update should
only be necessary if there has been a new release.
3. On the very first tab of LM Programmer you will see a button labeled
“Update Firmware,” click this button.
4. Select the firmware file with the dld extension. If there have been
revisions to the firmware, you will find them available for download
from the Support section of the Innovate Motorsports web site.
5. The software will now prompt you to confirm that you wish to
overwrite the firmware currently on your MTX-A.
6. Click OK, DO NOT power off or disconnect the MTX-A from the
computer until the firmware progress screen completely disappears.
Once finished, you may disconnect the unit from the computer and
exit out of the software.
6
2.5
Logging data from your MTX-A with LogWorks
1. Connect the OUT port of the MTX-A to the provided serial
programming cable. Connect the other end of the serial
programming cable to your computer. If your computer does not
have a serial port, you can purchase a USB to Serial adapter from
Innovate Motorsports (P/N 3733) or use any USB to serial adaptor
that includes drivers. Make sure that nothing is connected to the IN
port of the MTX-A. Power up the MTX-A
2. Launch LogWorks. The LogWorks application can be launched from
Start->Programs->LogWorks3->Logworks3 from the Windows task
bar.
3. Once LogWorks launches go to File->Connect. You will be prompted
to connect to the serial COM port. Select the COM port the device is
connected to and then click Connect.
4. To start recording go to File->New Realtime Log or, in the Toolbar,
click on the
Tool.
2.5.1 Adding and Logging MTS channels
The Innovate Motorsports’ MTS (Modular Tuning System) allows you to
daisy chain multiple devices together via the serial IN and OUT connectors to
form one single synchronous log. MTS log chains can consist of a single unit
connected directly to a laptop (connect your MTX-A directly to a computer,)
two units, or multiple devices connected together, up to 32 channels
Innovate Motorsports’ MTS devices have two types of serial interface
connectors, the legacy 2.5mm stereo and the 4 pin Molex. The following
patch cables are available to interface your devices together:
4 Pin Molex to 4 Pin Molex - 4ft
p/n 3846
2.5mm to 2.5mm Stereo - 4ft
p/n 3760
2.5mm to 2.5mm Stereo - 6in
p/n 3789
4 Pin Molex to 2.5mm Stereo - 4ft
p/n 3812
7
Appendix A: Limited Warranty
LIMITED WARRANTY
Innovate stands behind the quality of its products. Innovate makes the following
warranty to purchasers of its products: All new Innovate products carry a one year
warranty from the date of purchase. If proof of purchase cannot be provided, warranty
will be determined by date of manufacture.
When Warranty Void
This warranty shall terminate and Innovate shall have no obligation pursuant to it if (i)
your Innovate product has been modified or repaired in a manner not previously
authorized by Innovate in writing, (ii) the identification markings on your Innovate
product have been removed, defaced, or altered; (iii) your Innovate product was
subjected to accident, abuse, shipping damage, or improper use; (iv) your Innovate
product was not used or configured as specified in the product manual; or (v) your
Innovate product was subjected to operating conditions more severe than those
specified in the product manual.
Exclusions From This Warranty
Oxygen Sensors are excluded from this warranty.
Repairs Under This Warranty
In the unlikely event that your Innovate hardware product should prove defective
during the warranty period, contact Innovate Customer Support at
www.innovatemotorsports.com for a return material authorization (RMA). Products
returned for service must be securely packed to prevent damage and shipped
charges pre paid, along with proof of purchase and the return material authorization
number, to the Innovate repair location as instructed by Customer Service. Innovate
within a reasonable amount of time from its receipt of your product so shipped, will
ship to you, at its option, the repaired product or a new or reconditioned product of
comparable or greater specified functionality. All repaired or replacement products
shall be warranted for the remainder of the original product warranty.
Disclaimer
INNOVATE MAKES NO OTHER EXPRESS OR IMPLIED WARRANTY WITH RESPECT TO
YOUR INNOVATE PRODUCT OTHER THAN THE LIMITED WARRANTY SET FORTH
ABOVE. No Innovate dealer, agent, or employee is authorized to make any modification,
extension, or addition to this warranty, unless enforceable or unlawful under applicable law,
INNOVATE DISCLAIMS ALL IMPLIED WARRANTIES, INCLUDING THE IMPLIED
WARRANTIES OF MERCHANTABILITY, NONINFRINGEMENT, AND FITNESS FOR A
PARTICULAR PURPOSE, AND THE LIABILITY OF INNOVATE, IF ANY, FOR DAMAGES
RELATING TO ANY ALLEGEDLY DEFECTIVE PRODUCT SHALL UNDER ANY TORT,
CONTRACT, OR OTHER LEGAL THEORY BE LIMITED TO THE ACTUAL PRICE PAID FOR
SUCH PRODUCT AND SHALL IN NO EVENT INCLUDE INCIDENTAL, CONSEQUENTIAL,
SPECIAL, OR INDIRECT DAMAGES OF ANY KIND EVEN IF INNOVATE IS AWARE OF THE
POSSIBILITY OF SUCH DAMAGES. Some states do not allow limitations on how long an
implied warranty lasts or the exclusion or limitation of incidental or consequential damages, so
the above limitations or exclusions may not apply to you.
8