1
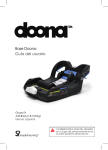
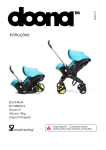
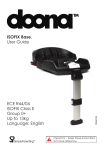
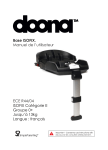
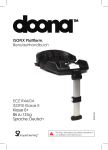
Doona Base User Guide Group 0+ 4-35 lbs (1.8-15.8 kg) Language: English KEEP THIS USER GUIDE in its storage position at the back of the product. 4 Table of contents. 01/ Safety Warnings ..........................................................................7 02/ Certifications ..............................................................................8 03/ Registration & Recall .................................................................9 04/ Use Requirements ...................................................................10 05/ Product Overview ...................................................................11 06/ Use in the Vehicle ...................................................................12 6.1. Vehicle Compatibility ............................................................12 6.2 Vehicle Seating Positions .....................................................13 6.3 Incompatible Vehicle Seat Belts .........................................15 07/Installing the Doona Base .......................................................16 7.1 Recline Angle and Leveling ..................................................16 7.2 LATCH Connectors ................................................................17 7.3 LATCH Installation .................................................................16 7.4 Lap-Shoulder Belt Installation ...............................................18 7.5 Lap Belt Installation ................................................................21 7.6 Uninstalling the Base ..............................................................26 T H E N E X T G EN ER ATI O N CAR SEA T / DOONA BASE 5 08/ Installing the Doona Infant Car Seat with a Base ................26 09/ Removing the Doona Infant Car Seat from the Doona Base ....................................................................28 10/ Care Instructions ......................................................................32 11/ Two-Year Warranty .................................................................34 12/ Warranty Card .........................................................................36 T ABLE OF C ON TEN TS 6 Congratulations for choosing Simple Parenting’s Doona Infant Car Seat and Doona Base for your child’s safety. In order to protect your child, the Doona Infant Car Seat must always be used and installed as described in this user guide. IMPORTANT! Keep instructions for future use. Read carefully before use. Your child’s safety may be affected if you do not follow these instructions and the instructions provided on the car seat and the base. Keep this user guide in the compartment located at the bottom of the Doona Base T H E N E X T G EN ER ATI O N CAR SEA T / DOONA BASE 7 01 / Safety Warnings. WARNING • Read all instructions in this user guide and the instructions in your vehicle manual before installing the Doona Base. • Do not make any alterations or additions to the Doona Base. Only the manufacturer is permitted to make modifications to the Doona Base. • In case of a car accident violent stresses may occur. If the product is involved in a car accident we recommend to stop using the product. • Do not use this product if any components are broken or missing. • Do not leave loose objects (e.g. books, bags, etc.) in the back of a vehicle. In the event of a sudden stop, loose objects will keep moving, potentially causing serious injuries. • Never leave your child unattended. • NEVER use on a passenger seat with an active frontal airbag! • It is recommended to cover up the Doona Base when the car is parked in the sun, as plastic and metal parts may become extremely hot. S AF E T Y WA RN IN GS 8 02 / Certifications. The Doona Base conforms to all applicable Federal Motor Vehicle Safety Standards. This Restraint is certified for Use in Motor Vehicles. The Doona Base has been designed, tested and certified according to US safety standards and regulations. T H E N E X T G EN ER ATI O N CAR SEA T / DOONA BASE 9 03 / Registration & Recall. Child restraints could be recalled for safety reasons. You must register this product in order to allow the manufacturer to reach you in case of a recall. Fill in the attached Registration Card with your name, address, the product’s serial number and manufacturing date and mail it to: HAPPY KIDZ, LLC 168 East Main Street Prospect Park, NJ 07508 Or call Customer Service at: (862) 240 1755. Or register this product on-line at: www.simpleparenting.co/register For recall information, call the US Government’s Vehicle Safety Hotline 1-888-327-4236 (TTY: 1-800-424-9153), or go to www.NHTSA.gov Also check the Simple Parenting website at: www.simpleparenting.co US E RE Q U IREMEN TS 10 04 / Use Requirements. The Doona Base has been tested and certified in combination with the Doona Infant Car Seat. • Use the Doona Base only with the Doona Infant Car Seat. • For Rear-Facing use only. • For use with children weighing 4-35 lbs (1.8-15.8 kg). T H E N E X T G EN ER ATI O N CAR SEA T / DOONA BASE 11 05/ Product Overview. 1 2 3 4 10 9 1. Base anchor points 2. Recliner knob 3. Vehicle belt guides 4. Belt lock-offs 5. LATCH adjuster strap 8 7 6 5 7. LATCH connector release button 8. LATCH connector 9. Recline level indicator 10. Base release button 6. LATCH adjuster strap release button PRODUC T OVERVIEW 12 06 / Use in the Vehicle. 6.1. Vehicle Compatibility WARNING E • NEVER place a rear-facing child restraint in the front seat of a vehicle with an active frontal air bag. An airbag hitting the child restraint can cause serious injuries to your child, possibly resulting in death. For vehicle seats with side airbags, please observe the instructions in your vehicle manual. WARNING! Read all instructions in this user guide and the child restraint installation instructions in your vehicle manual before using the Doona Base. Incorrect installation can cause DEATH or SERIOUS INJURY. T H E N E X T G EN ER ATI O N CAR SEA T / DOONA BASE 13 • NEVER allow others to use or install the Doona Base before they have read all instructions in this user guide and the child restraint installation instructions in your vehicle manual. • The Doona Base may only be used on forward facing seats, either on the passenger seat or on the back seats. • NEVER use a different installation method than the one described in this user guide. 6.2. Vehicle Seating Positions WARNING • Secure your child in an infant car seat for every journey! • NEVER install the Doona Infant Car Seat, with or without the Doona Base, on a rear-facing vehicle seat or on a side-facing vehicle seat. US E IN TH E VEH IC LE 14 Forward facing yes Seat with active frontal airbag no Seat with lap/shoulder belt yes Seat with lap belt only yes Rear-facing seat no Side-facing seats no NEVER place a rear-facing child restraint in the front seat of a vehicle with an active frontal air bag. An airbag hitting the child restraint can cause serious injuries to your child, possibly resulting in death. For vehicle seats with side airbags, please observe the instructions in your vehicle manual. T H E N E X T G EN ER ATI O N CAR SEA T / DOONA BASE 15 6.3. Incompatible Vehicle Seat Belts WARNING NEVER install the Doona Infant Car Seat with the Doona Base in a vehicle with the following types of vehicle belts. Check your vehicle manual for information about the vehicle’s seat belt type. 1. Vehicle belts that are attached to the door in any way, or that move along a track automatically to restrain the passenger when the door is closed. 2. A lap belt with a motorized shoulder belt. 3. Lap belts with an Emergency Locking Retractor (ELR). These lap belts stay loose and can move until locking in a crash or sudden stop. 4. Inflatable seat belts or seat belt airbags. 5. Lap belts forward of the seat crease, or bight. 6. Combination Lap-shoulder belt with two ELRs. Lap-shoulder belts that have a separate non-locking retractor each for the lap section and the shoulder section. 1 2 3 4 5 6 US E IN TH E VEH IC LE 16 07 / Installing the Doona Base. 7.1. Recline Angle and Leveling • Before you install the Doona Base, park the car on a level surface. a. • To adjust the level of the base, use the recliner knob (#2). • For leveling the Doona Base, turn the recliner knob (#2) clockwise or counterclockwise, as needed (a). • The base is leveled when the white markers on the recline level indicators (#9) on both sides are completely within the green area (b). b. • If you cannot level the base properly, please follow these steps: – Try installing the Doona Base on a different seat. OR – Place a rolled soft object (e.g. towel or pool noodle) in the vehicle seat bight and place the base on the rolled soft object to level the base (c). IMPORTANT: If a rolled soft object is required, ensure that the recliner knob (#2) on the base remains on its lowest position (turned all the way clockwise). T H E N E X T G EN ER ATI O N CAR SEA T / DOONA BASE c. 17 7.2. LATCH Connectors The Doona Base can be installed in the vehicle either with the LATCH system or with the vehicle’s belt. LATCH stands for Lower Anchors and Tethers for Children; these anchors are specifically designed for car seats installation. Since 2002, LATCH connectors are required by law in the USA for all vehicles. Check your vehicle manual to ensure that the vehicle is equipped with LATCH anchor points. To release the LATCH connector (#8) from its storage slot in the Doona Base or from the LATCH anchor points in the vehicle, press and hold the red LATCH connector release button (#7) and pull it out. To store the LATCH connectors (#8), push them into the storage slots in the base until they click into place. WARNING! LATCH connectors should always be stored in their storage slots in the base when not in use. INS T ALLING T HE D OON A BA SE 18 7.3. LATCH Installation WARNING • The Doona Base must be properly secured in the vehicle before installing the Doona Infant Car Seat on it. • Before using the Doona Base in the vehicle, you must first adjust its level. The base’s level can be adjusted only as described in this user guide. • Ensure that the Doona Base is not raised from the front edge of the vehicle seat. In the event of an accident, it might disrupt the correct functioning of the base. • The Doona Base can be installed in the vehicle either with the LATCH system or with the vehicle’s belt. DO NOT attempt to install the Doona Base using both the LATCH system and the vehicle’s belt, as it is not approved, and it might disrupt the correct functioning of the Doona Infant Car Seat and the Doona Base. • The Doona Base can be installed with the LATCH system only in vehicles equipped with LATCH anchor points. • Before attempting to install the Doona Base in the vehicle using the LATCH system, ensure that the vehicle is equipped with LATCH anchor points. T H E N E X T G EN ER ATI O N CAR SEA T / DOONA BASE 19 Step 1: Release the LATCH connectors (#8) from their storage slots in the Doona Base - press and hold the red LATCH connector release buttons (#7) and pull the LATCH connectors out (a). Step 2: Lengthen the LATCH adjuster strap (#5) - press and hold the LATCH adjuster strap release button (#6), then pull the strap (b). Step 3: Place the Doona Base in the desired location on the vehicle seat. Insert the base’s LATCH connectors into the vehicle’s LATCH anchor points, then press them until you hear a click sound (c). Step 4: Tighten the LATCH adjuster strap (#5) - while pressing the Doona Base down into the seat and pulling the LATCH adjuster straps up (d). a. b. c. d. INS T ALLING T HE D OON A BA SE 20 Ensure proper installation of the Doona Base: • Ensure that the LATCH straps are tight and the base is secure. The base is secure when it moves less than 1 inch (2.5 cm) side to side or back to front. • The base is leveled when the white markers on the recline level indicators (#9) on both sides are completely within the green area. T H E N E X T G EN ER ATI O N CAR SEA T / DOONA BASE 21 7.4. Lap-Shoulder Belt Installation WARNING • Before installing the Doona Base in the vehicle, ensure that the vehicle seat belts are compatible. • The Doona Base must be secured in the vehicle before installing the Doona Infant Car Seat in it. • Before using the Doona Base in the vehicle, you must first adjust its level. The base’s level can be adjusted only as described in this user guide. • Ensure that the base is not raised from the front edge of the vehicle seat. In the event of an accident it might disrupt the correct functioning of the base. • The Doona Base can be installed in the vehicle either with the LATCH system or with the vehicle’s belt. DO NOT attempt to install the Doona Base using both the LATCH system and the vehicle’s belt, as it is not approved, and it might disrupt the correct functioning of the Doona Infant Car Seat and the Doona Base. • When installing the Doona Base with a lap-Shoulder belt, ensure LATCH connectors are always stored in their storage slots in the base. INS T ALLING T HE D OON A BA SE 22 Step 1: Place the Doona Base in the desired location on the vehicle seat. Step 2: Pull the vehicle’s Lap-Shoulder belt. Ensure it is not twisted. Step 3: Route the vehicle seat belt under and through the first vehicle belt guide (#3), then through the second vehicle belt guide (#3) (a). Step 4: Engage the vehicle seat belt buckle tongue in the vehicle seat buckle (b). Step 5: Tighten the lap belt section by pulling up the shoulder section of the vehicle seat belt (c). Step 6: Once the vehicle seat belt has been tightened, lock the blue lock-off clip to prevent the shoulder sliding (d). Make sure to only use the lock-off placed opposite from the side where the vehicle belt is engaged into the vehicle seat buckle. Note: The blue lock-off will not make a click sound when locked. WARNING! DO NOT lock both of the blue lock-offs onto the vehicle seat belt! T H E N E X T G EN ER ATI O N CAR SEA T / DOONA BASE 23 a. b. c. d. Ensure proper installation of the Doona Base: • Ensure that the seat belt strap is tight and the base is secured. The base is secured when it moves less than 1 inch (2.5 cm) side to side or back to front. • The base is leveled when the white markers on the recline level indicators (#9) on both sides are completely within the green area. INS T ALLING T HE D OON A BA SE 24 7.5. Lap Belt Installation WARNING • Before installing the Doona Base in the vehicle, ensure that the vehicle seat belts are compatible (see chapter 6.3.). • For lap belt installation, check your vehicle manual for information on how to lock your vehicle seat belt system. • The Doona Base must be secured in the vehicle before installing the Doona Infant Car Seat on it. • Before using the Doona Base in the vehicle, you must first adjust its level. The base’s level can be adjusted only as described in this user guide. • Ensure that the base is not raised from the front edge of the vehicle seat. In the event of an accident it might disrupt the correct functioning of the base. • The Doona Base can be installed in the vehicle either with the LATCH system or with the vehicle’s belt. DO NOT attempt to install the Doona Base using both the LATCH system and the vehicle’s belt, it is not approved and might disrupt the correct functioning of the Doona Infant Car Seat and the Doona Base. • When installing the Doona Base with a lap belt, ensure LATCH connectors are always stored in their storage slots in the base. T H E N E X T G EN ER ATI O N CAR SEA T / DOONA BASE 25 Step 1: Place the Doona Base in the desired location on the vehicle seat. Step 2: Lock BOTH belt lock-offs (#4) on both sides of the Doona Base (a). The lock-offs are NOT in use when installing Doona Base with a lap belt. Step 3: Pull the vehicle’s lap belt. Ensure it is not twisted. Step 4: Route the vehicle seat belt under and through the first vehicle belt guide (#3), and through the second vehicle belt guide (#3) (b). Step 5: Engage the vehicle seat belt buckle tongue in the vehicle seat buckle (c). Step 6: Tighten the lap belt (d). a. b. c. d. INS T ALLING T HE D OON A BA SE 26 WARNING! DO NOT use the blue lock-offs to lock the vehicle seat belt straps when installing the Doona Base with a lap belt. Ensure proper installation of the Doona Base: • Ensure that the seat belt strap is tight and the base is secured. The base is secured when it moves less than 1 inch (2.5 cm) side to side or back to front. • The base is leveled when the white markers on the recline level indicators (#9) on both sides are completely within the green area. 7.6. Uninstalling the Base Uninstalling the base when installed with a LATCH connection: Step 1: release the LATCH connectors (#8) from the LATCH anchor points in the vehicle (a). Step 2: Press and hold the red LATCH connector release buttons (#7) and pull them off (b). Step 3: Store the LATCH connectors by pushing them into their storage slots in the base until they click into place (c). Uninstalling the base when installed with a Lap-Shoulder or Lap belt connection: Step 1: open the belt lock-offs (#4) (in case of lap-shoulder connection only) to release the vehicle belt (d). Step 2 Unbuckle the vehicle belt (e) and pull it through and out of the vehicle belt guides (f). T H E N E X T G EN ER ATI O N CAR SEA T / DOONA BASE 27 a. b. c. d. e. f. INS T ALLING T HE D OON A BA SE 28 08 / Installing the Doona Infant Car Seat with a Base. WARNING • The Doona Base must be secured in the vehicle before installing the Doona Infant Car Seat in it. • Before you install the Doona Infant Car Seat in the Doona Base, make sure it is in car seat mode and the handle is in its upright position. IMPORTANT! For further information on the Doona Infant Car Seat use modes, changing between use modes and adjusting the rotation angle of the handle please refer to the Doona Infant Car Seat user guide. Step 1: When the Doona Infant Car Seat is in car seat mode (wheels are folded), and the handle is in its vertical position, place the Doona Infant Car Seat facing the back of the vehicle (opposite the direction of driving) (a). Step 2: Align the Doona Infant Car Seat above the base anchor points and slide it down until a click is heard and it is locked in place (b). Step 3: Shake the handle to ensure that the Doona Infant Car Seat is properly secured (c). T H E N E X T G EN ER ATI O N CAR SEA T / DOONA BASE 29 Step 4: Check the base release button - it should turn from red to green once the Doona Infant Car Seat is successfully locked in the base (d). Step 5: Rotate the handle toward the back seat of the car, for antirebound protection (e). a. d. b. c. e. INS T ALLING T HE DOONA INF ANT CAR S E AT W ITH A BA SE 30 09 / Removing the Doona Infant Car Seat from the Doona Base. Note: For further information on the Doona Infant Car Seat use modes, changing between use modes, and adjusting the rotation angle of the handle, please refer to the Doona Infant Car Seat user guide. Step 1: Rotate the Doona Infant Car Seat handle to its vertical position (a). Step 2: Press and hold the base release button (#10) with the one hand and slightly tilt the Doona Infant Car Seat toward your body until it is released from the base anchor points (#1) (b), then lift the Doona Infant Car Seat up and remove it from the car (c). Step 3: Unfold the Doona Infant Car Seat wheels (d), rotate and extend the handle to ‘stroller mode’ (e) and you are ready to go! T H E N E X T G EN ER ATI O N CAR SEA T / DOONA BASE 31 a. b. c. d. e. R EMO V ING T HE DOONA INF ANT CAR S E AT F ROM T HE DOON A BA SE 32 10 / Care Instructions. WARNING • In an accident, at a collision speed above 6 mph (10 km/h), the Doona Base and/or the Doona Car Seat could suffer damage which is not necessarily visible. • Simple Parenting recommends using NHTSA’s re-use after crash guidelines. • Regularly check all important parts for damage. Ensure the correct operation of all mechanical components. • Should the Doona Base be damaged (e.g. after dropping it) it must be inspected. • Never use spare parts or accessories other than those supplied or approved by the manufacturer – The Doona Base is compatible only with the Doona Infant Car Seat. Cleaning It is recommended to clean the Doona Base periodically, in order to keep it properly functioning. Always remove the Doona Infant Car Seat before cleaning the Doona Base. It is also recommended to remove the Doona Base from the car in order to clean it properly. T H E N E X T G EN ER ATI O N CAR SEA T / DOONA BASE 33 Use only a sponge to clean or rinse using warm water, soap and a rag. DO NOT use any solvents or lubrication. Using anything other than soapy water can cause the moving parts to malfunction. Replacement Parts Replacement parts are available for the Doona Base. To order replacement parts, contact your local distributor’s customer service: HAPPY KIDZ, LLC. Tel: (862) 240 1755 E-mail: [email protected] Please have the restraint model and serial numbers available to expedite service. CARE INSTRU C TION S 34 11 / Two-Year Warranty. We guarantee that the Doona Base was manufactured in accordance with the US safety standards and regulations, and it meets the highest standards of quality. For the Doona Base we provide a 2-year warranty against manufacturing or material defects. The warranty period is effective from the day of purchase. As proof of purchase we ask that you fill out the Warranty Card and retain it for the whole term of the warranty period, together with your sales receipt. In case of a warranty claim, the Warranty Card must be returned together with the product to your local distributor. Please also register your Doona Base online at: www.simpleparenting.co/register The Warranty will cover a Doona Base which has been handled properly. The warranty is valid only with Simple parenting’s replacement components for this product. Simple Parenting reserve the option to provide repair or replacement components for this product. The warranty does not apply in the following cases: T H E N E X T G EN ER ATI O N CAR SEA T / DOONA BASE 35 • The product shows normal signs of wear and tear. • Damage occurred as a result of exposing the product to excessive stress. • Damage occurred as a result of inappropriate or improper use. • The product has been used for a purpose other than that specified in this user manual. • Damage occurred as a result of use of aftermarket accessories. In the event of a warranty claim, please contact your local distributor: Customer Service Tel: (862) 240 1755 E-mail: [email protected] T WO- Y E AR WA RRA N TY 36 12 / Warranty card. Warranty card: Name: Address: Zip code: City/Town: State: Telephone no. (including area code): E-mail address: Product serial number : Retailer (store where purchased): Receipt number: T H E N E X T G EN ER ATI O N CAR SEA T / DOONA BASE simpleparenting.co [email protected]