1
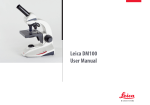
Leica DM100 User Manual Congratulations! Congratulations on purchasing the Leica DM100 Compound Microscope. This model’s exclusive design features and full range of accessories make it a truly versatile, high qualityinstrument. Though the reliability and robustness of Leica microscopes is already practically proverbial, they still require a certain degree of care and attention. Therefore, we recommend that you read this User Manual. It contains all the information you need regarding operation, safety and maintenance. Simply observing a few guidelines will ensure that even after years of intensive use, your microscope will continue to work as smoothly and reliably as on the very first day. We wish you the best of success in your work! Leica DM100 User Manual 2 Table of Contents Important Notes Symbols Used in this User Manual Important Safety Notes Instructions for Use Health risks and dangers of use Information for the Person Responsible for the Instrument Accessories, maintenance and repair Electrical data and ambient conditions Using the Leica DM100 Switching on the Microscope 23 Selecting an Objective 24 Preparing for Viewing 25 Focusing26 Adjusting the Binocular Tubes 27 Adjusting the Eyecups 29 Oil Immersion Technique (only 100× objective) 30 5 6 8 10 11 12 13 Assembling the Leica DM100 Unpacking15 Identifying your Tube 16 Fitting the tube 17 Removing and Inserting Objectives 18 Installing the Mirror (optional) 20 Installing the Polarizer Kit (optional) 21 Leica DM100 User Manual Care of the Microscope Maintenance instructions General maintenance 33 34 Dimensions Dimensions37 3 Important Notes Leica DM100 User Manual Important Notes4 Symbols Used in this User Manual Warning! Safety hazard! This symbol indicates especially important information that must be read and complied with. Failure to comply can cause the following: OO Hazards to personnel. OO Warning of hazardous electrical Voltage This symbol indicates information that must be read and observed. Failure to comply can cause the following: OO Hazards to personnel. OO Important Information This symbol indicates additional information or explanations that intend to provide clarity. Instrument malfunctions and damage. Instrument malfunctions and damage. Leica DM100 User Manual Important Notes5 Important Safety Notes Before installing, operating or using the instrument, it is mandatory to read this User Manual. In particular, please observe all safety instructions. The instruments and accessories described in this User Manual have been tested for safety and potential hazards. Original condition To maintain the unit in its original condition and to ensure safe operation, the user must follow the instructions and warnings contained in this User Manual. Leica DM100 User Manual Non-intended use Using the instrument in any way other than that described in this User Manual may result in personal injury or damage to property. Doing so can impair the functions of the protective measures provided. "Safety Concept" Brochure The "Safety Concept" brochure contains additional safety information regarding service work, requirements and the handling of the microscope, the electrical and other accessories as well as general safety instructions. The responsible Leica affiliate must be consulted whenever the instrument is altered, modified or used in conjunction with non-Leica components that are outside of the scope of this User Manual! Unauthorized alterations to the instrument or noncompliant use shall void all rights to any warranty claims. Important Notes6 Important Safety Notes (continued) Legal Regulations Adhere to general and local regulations relating to accident prevention and environmental protection. EC Declaration of Conformity Electrically operated accessories are constructed based on the state of the art of technology and are provided with an EC Declaration of Conformity. Disconnecting from the Power Supply Always position the Leica DM100 so that you can disconnect it from the power supply at any time. The power cable must remain accessible at all times, because the power cable is intended as a power disconnect device. Plug install any other plug Never (NEMA 5-15P) or unscrew any mechani- cal components unless expressly instructed to do so in the instructions. Leica DM100 User Manual Important Notes7 Instructions for Use This User Manual describes the Leica DM100 and includes important instructions related to operating safety, maintenance and accessories. Your Leica DM100 includes an interactive CD-ROM with all relevant User Manuals in additional languages. Keep it in a safe place, and readily accessible to the user. You can also download User Manuals and updates from our website at www.leica-microsystems.com. Intended Use The Leica DM100 is an optical instrument for improving the visibility of objects through magnification and illumination. It is used for observing. Place of use The Leica DM100 microscope may be used only in closed rooms and must be placed on a solid surface. Avoid large temperature fluctuations, direct sunlight and vibrations. These conditions can distort measurements and micrographic images. In warm and warm-damp climatic zones, the individual components require special care in order to prevent the build-up of fungus. The Leica DM100 can be used at +10°C to +40°C. Protect the microscope from oil, chemicals and extreme humidity. If it is used outdoors, the microscope must be protected from dust and moisture. Never use electrical instruments outdoors and place them at least 10 cm away from the wall and from flammable substances. Leica DM100 User Manual Important Notes8 Instructions on Use (continued) Accessories from third-party suppliers You can combine individual system articles with articles from external suppliers. Please read the User Manual and the safety requirements of the supplier. Integration in third-party products When installing Leica products into third-party products, the manufacturer of the complete system or its dealer is responsible for following all applicable safety instructions, laws and guidelines. Leica DM100 User Manual Transport If at all possible, use the original packaging for shipping or transporting individual modules. In order to prevent damage from vibrations, all moving parts that (according to the User Manual) can be assembled and disassembled by the customer should be packed separately. Disposal Disposal must comply with locally applicable laws and regulations. Important Notes9 Health Risks and Dangers of Use Health Risks Workplaces with microscopes facilitate and improve the viewing task, but they also impose high demands on the eyes and hand muscles of the user. Depending on the duration of uninterrupted work at such a workplace, impaired vision and problems with the musculoskeletal system may occur. For this reason, appropriate measures for reduction of the workload must be taken: OO Optimum workplace layout OO Frequent changes of activity OO Thorough training of the personnel, giving consideration to ergonomic and organizational aspects The ergonomic optical design and construction of the Leica microscopes are intended to reduce the exertion of the user to a minimum. Danger of Infection Direct contact with eyepieces can be a potential transmission path for bacterial and viral infections of the eye. The risk can be minimized by the use of personal eyecups. Dangers during Use OO The Leica DM100 may be connected to a grounded socket only. OO The Leica DM100 may be used when it is in proper working condition only. LED Class 1 /LED 1 Laser Product The illumination meets laser class 1 requirements in accordance with IEC 60825-1 "Safety of Laser devices". Caution: Hazardous radiation may occur if controls, adjustment jigs, or procedures other than those outlined in this User Manual are used! Class 1 LED Product Leica DM100 User Manual LED Class 1 Important Notes10 Information for the Person responsible for the Instrument Information for the Person responsible for the Instrument OO Ensure that the Leica DM100 is used only by persons qualified to do so. OO OO OO OO OO Ensure that this User Manual is always available at the place where the microscope is in use. OO OO Carry out regular inspections to make certain that the authorized users are adhering to safety requirements. When instructing new users, do so thoroughly and explain the meanings of the warning signs and messages. Allocate responsibilities for commissioning, operation and maintenance. Monitor compliance with this. Do not use the Leica DM100 unless it is in perfect condition. Leica DM100 User Manual Inform your Leica representative or Leica Microsystems (Schweiz) AG, Industry Division, 9435 Heerbrugg, Switzerland, immediately of any product defect that could potentially cause injury or harm. If you use accessories from other manufacturers with the microscope, make sure that these manufacturers confirm that the combination is safe to use. Follow the instructions in the User Manual for those accessories. OO Modifications to or service on the microscope may be carried out only by technicians who are explicitly authorized by Leica to do so. OO Only original Leica replacement parts may be used in servicing the product. OO After service work or technical modifications, the unit must be reconfigured with observance to our technical requirements. OO If the unit is modified or serviced by unauthorized persons, is improperly maintained (as long as maintenance was not carried out by Leica Microsystems), or is handled improperly, Leica Microsystems will not accept any liability. OO The building’s electrical wiring must comply with the relevant national standard; in other words, we recommend using a current-operated ELCB system (RCB). Important Notes11 Accessories, Maintenance and Repair Accessories Only the following accessories may be used with the Leica DM100: OO The Leica Microsystems accessories described in this User Manual. OO Other accessories, provided that these have been expressly approved for use by Leica Microsystems with regard to safety technology. Maintenance OO The Leica DM100 microscope is basically maintenance-free. To ensure that it always operates safely and reliably, we recommend that you take the precaution of contacting the responsible service organization. OO We recommend concluding a service contract with Leica Microsystems. Repairs and Service Work OO Only original Leica Microsystems spare parts may be used. OO Before opening the instruments, switch off the power and unplug the power cable. OO Avoid contact with powered electrical circuits, which can lead to injury. Service Address In case of problems, please contact us as follows: Contact address Leica Microsystems (Schweiz) AG Industry Division Max Schmidheiny Strasse 201 CH-9435 Heerbrugg (Switzerland) Leica DM100 User Manual Important Notes12 Electrical Data and ambient Conditions Fuse Replacement Unplug the instrument before changing any fuses. The Leica DM100 has two fuses, which are located behind the power cord receptacle. In order to maintain this condition and to ensure safe operation, the user must follow the instructions and warnings contained in this instruction manual. Environment Temperature for use +10 °C … +40 °C Storage temperature -20 °C … +52 °C Electrical data Input: 100–240 V, 50/60 Hz, 5 W (3 W LED) +50 °F to +104 °F Manipulation shock 25 mm on 50 mm hard wood General safety notes This instrument of safety class 1 has been built and tested in accordance with the following safety requirements for electrical equipment for measurement, control, and laboratory use: Transport shock (unpacked) 100 g / 6 ms Transport shock (packed) 800 mm free fall Transport vibrations (unpacked) 5–200 Hz / 1.5 g Air pressure during use and storage 500–1 060 mBar Humidity during use and storage 20–90 % Only use fuses of the following type: 5×20 mm, 1.0 A/250 V, high breaking capacity (# 13RFAG30003) EN 61010-1: 2002-08 EN 61010-2: 2008-06 IEC 61010-1: 2010-06 EN 61326-1: 2006-10 EN 61326-2-6: 2006-10 Leica DM100 User Manual EN 55011: 2007+A2: 2010-05 EN 60825-1: 2008-05 IEC 60825-1: 2007-03 LED Class 1 Installation Category II (Overvoltage Category) Pollution degree 2 Important Notes13 Assembling the Leica DM100 Leica DM100 User Manual Assembling the Leica DM10014 Unpacking OO Carefully remove the microscope and any components from the packaging. OO Check the components against the planned configuration. OO Optional items such as contrast accessories, camera adapters, cameras, and carrying cases are not shipped as part of the standard equipment. These items are delivered in separate packages. OO Please do not discard any of the packing materials. They should be used for safely storing and transporting the instrument should the need arise. Leica DM100 User Manual Assembling the Leica DM10015 Identifying your Tube Identifying your ube There are three types of viewing tubes. Identify which viewing tube you have: Assembly Installation of the tube is described on page 17 using the monocular "EZTube". Other tubes, however, are installed exactly the same way. Type 1: Monocular "EZTube" Type 2: Binocular "EZTube" Orientation All tubes are connected via a dovetail and can be installed in any orientation. Type 3: Open binocular tube Leica DM100 User Manual Assembling the Leica DM10016 Fitting the tube Tools used OO Allen key Assembly 1. Loosen the setscrews (on top of the stand) using the Allen key provided. 3. Turn the tube in the direction you desire. 4. Tighten the set screws on the left and right, without applying too much force. 2. Insert the dovetail of the monocular tube into the mount. The monocular "EZTube" is included in the standard delivery package of the Leica DM100. Other tubes are optionally available (refer also to page 16). Your Leica representative will gladly provide you with more help. The eyepieces are already integrated in the Leica "EZTube" and preset; for this reason, the eyepieces do not require adjustment or assembly. Leica DM100 User Manual Assembling the Leica DM10017 Removing and Inserting Objectives The objectives are already installed on the Leica DM100 at delivery. The following description shows how to (un)install the objectives if they have to be removed for cleaning or replaced by other objectives. Your Leica DM100 is normally supplied with objectives of magnification levels 4×, 10×, and 40×. The 100× objective, which is also used for oil immersion, can be retrofitted at any time. Always turn the objective nosepiece by its knurled ring. Never turn the objective nosepiece by using an objective as a handle. Removing Objectives 1. Unscrew the objectives to remove them. The Proper Sequence When inserting the objectives, you can begin with any available space on the microscope. Continuation of the sequence, however, has to be selected such that the magnification always increases when turning clockwise: 100× 4× 40× 10× Continued on next page. Leica DM100 User Manual Assembling the Leica DM10018 Removing and Inserting Objectives (continued) Inserting Objectives 1. Screw the 4× objective into any available space on the objective nosepiece. 2. Turn the objective nosepiece clockwise one unit. 3. Screw in the next-largest objective. 4. Repeat steps 2 and 3 until all objectives have been installed. Leica DM100 User Manual Assembling the Leica DM10019 Installing the Mirror (optional) The mirror is available as an optional accessory. By means of this, the ambient light can be used for illuminating the sample if no power source is available for the built-in LED illuminator. Installing the Mirror 1. Position the microscope at a well-lit location, for example before a window. Removing the Mirror 1. Simply pull the mirror out of the holder. 2. Press the mirror onto the mount of the illuminator. The mirror is equipped with a flat and a concave surface. Try them out to see which side works better. 3. Look through the eyepieces and align the mirror so that it works best. Leica DM100 User Manual Assembling the Leica DM10020 Installing the Polarizer Kit (optional) The polarizer kit is not included in the delivery package, but available as an optional accessory. Assembly 1. If you have already installed the tube, remove it (see page 17). 2. Place the analyzer with the flat side facing down into the beam path. The two screws have to rest in the two existing holes. 4. Place the polarizer onto the aperture of the illuminator. The handle must come to rest in the aperture with the white arrow pointing upwards. 3. Install the tube. 5. Turn the polarizer to align it. The arrows indicate the current orientation. Leica DM100 User Manual Assembling the Leica DM10021 Using the Leica DM100 Leica DM100 User Manual Using the Leica DM10022 Switching on the Microscope safety reasons, the power cable For is grounded via the microscope base. Never use an adapter between the power cable and the power supply; that would render the grounding ineffective. Startup Procedure 1. Attach the power cable to the rear side of the microscope. 3. Switch on the microscope using the toggle switch on the rear side of the stand. 2. Set the illumination to the lowest setting using the controller on the bottom left of the stand. Work Surface Always use the microscope on a hard, stable surface. Leica DM100 User Manual Using the Leica DM10023 Selecting an Objective Using the Condenser The condenser is furnished with a disc diaphragm, which has to be adjusted to match the effective numerical aperture of the individual objectives. Leica DM100 User Manual Selecting an Objective 1. Rotate the desired objective over the sample. 2. Rotate the condenser on the right of the stage so that the color matches the color of the selected objective. Using the Leica DM10024 Preparing for Viewing Preparation 1. Lift the retaining clip on the stage by pressing on the back of the tension spring. Leica DM100 User Manual 2. Push the slide under the retaining clip and slowly release it. 3. Move the specimen slide such that a part of the specimen is under the objective used. Using the Leica DM10025 Focusing Focusing 1. Use the knurled ring to rotate the objective nosepiece in such a way that the objective with the lowest magnification level is turned into the working position. Leica DM100 User Manual 2. Move the specimen stage upwards as far as it will go using the coarse adjustment knob. 3. Look into the eyepieces and adjust the illumination to a comfortable intensity. 4. Bring the specimen into focus using the fine adjustment knob. Using the Leica DM10026 Adjusting the Binocular Tubes 1. Adjust the tubes to your interpupillary distance. Fold or unfold the eyetubes to decrease or increase the distance between the eyepieces until you see one illuminated circle. The viewing tubes maintain a constant tube length for all interpupillary settings. This means that a change of interpupillary distance does not affect parfocality, magnification, or calibrations that depend on magnification. Open Binocular Tube If you are using an open standard tube, you need to make some adjustments. 1. Set the focusing eyetube (left side) to "0" Leica EZ tubes If you are using a Leica EZ viewing tube, which already has the eyepieces integrated with the eyetubes, no additional adjustments are necessary. Be sure you are wearing your eyeglasses or contact lenses. Continue with the "Oil immersion" section on page 30. Continued on next page Leica DM100 User Manual Using the Leica DM10027 Adjusting the Binocular Tubes (continued) corrective If you are comfortable wearing your lenses (contact lenses or eyeglasses) for microscope viewing, leave them on and your adjustments will be minimal. 2. Bring the specimen into focus using 10x magnification and the fine adjustment knob while looking through only the right eyepiece. To help focus, cover or close your left eye. 3. Now look with your left eye through the left eyepiece (focusing eyepiece). Now focus using the focus function of the eyetube. 5. Now, switch to an objective with a higher magnification level (no oil objective) and bring the specimen into focus while looking through the eyepieces with both eyes. magnification The depth of field is lower for higher levels. Thus, you will notice that if you switch to low magnification after bringing the microscope into focus with great magnification, a minor adjustment of the fine focus may be required. When doing so, do not change the height of the specimen stage. 4. Rotate the knurled ring on the left eyetube, until the specimen is sharply focused for the left eye. This corrects for any vision differences between your right eye and left eye. Leica DM100 User Manual Using the Leica DM10028 Adjusting the Eyecups If you wear eyeglasses for microscope viewing, keep the rubber eyecups folded down. If you do not wear eyeglasses, you may find it useful to unfold the rubber eyecups in order to help block out ambient room light. Leica DM100 User Manual Potential Sources of Infection Direct contact with eyepieces is a potential transmission method for bacterial and viral infections of the eye. The risk can be minimized by the use of individual eyecups. Eyecups can be ordered separately. Please contact your Leica partner. Using the Leica DM10029 Oil Immersion Technique (only 100× objective) Oil Immersion Technique 1. Search for the area on the specimen slide that you want to study. 3. Add a drop of immersion oil from Leica to the area of the specimen slide you are studying. 2. Move the specimen stage down to the lowest position using the coarse adjustment knob. 5. Slowly move the specimen stage upwards using the coarse adjustment knob until the oil drop on the slide comes into direct contact with the lens of the oil immersion objective. 4. Rotate the 100× objective to the working position. 6. Hold the knurled ring on the objective nosepiece and swing the objective back and forth to eliminate air bubbles. Then bring the oil objective into the final position, so that the oil drop is between the front lens of the objective and the specimen slide. Leica DM100 User Manual Using the Leica DM10030 Oil Immersion Technique (continued) 7. Look through the microscope and slowly rotate the fine adjustment knob, so that the specimen stage moves upwards until the specimen is in focus. 8. If you are finished working with the oil immersion objective, clean the front side of the objective, the specimen slide, and all other surfaces that have come into contact with the oil, following the instructions in the "Care of the Microscope" section on page 32. Leica DM100 User Manual Using the Leica DM10031 Care of the Microscope Leica DM100 User Manual Care of the Microscope32 Maintenance instructions General Notes OO Protect the microscope from moisture, fumes and acids and from alkaline, caustic and corrosive materials. Do not store chemicals in the vicinity. OO Protect the microscope from oil and grease. Never grease or oil mechanical parts or sliding surfaces. OO Follow the instructions of the disinfectant manufacturer. OO We recommend concluding a service contract with Leica Service. Leica DM100 User Manual Cleaning coated Parts and Plastic Parts OO Dust and dirt particles should be removed with a soft brush or lint-free cotton cloth. OO Remove coarse debris with a moistened disposable cloth. OO Acetone, xylene or nitro-containing thinners must NOT be used. OO Never use chemicals to clean colored surfaces or accessories with rubberized parts. This could damage the surfaces, and specimens could be contaminated by abraded particles. Care of the Microscope33 General Maintenance General Always use both hands to carry the microscope. Leica DM100 User Manual OO Keep all optical components clean. Cleanliness is important for maintaining good optical performance. OO Optical surfaces should be cleaned using a lint-free cloth with a commercially available glass cleaner. OO When the microscope is not in use, it should always be put away with protection against dust. OO OO If any optical surface becomes coated with dust or dirt, clean the surface by blowing it off with a syringe or brushing it off with a camel hair brush before attempting to wipe the surface clean. Use solvent only very sparingly, so that it does not flow out over the lens. No part of the microscope is quite so vulnerable to collecting dirt, dust, and oil as the front lens of the objective. Whenever you encounter lack of contrast, cloudiness or poor definition, carefully check the condition of the front lens with a magnifier. Care of the Microscope34 General Maintenance (continued) OO The lower magnification objectives have fairly large front lenses and can be cleaned with a cloth or lens tissue wrapped around a finger and moistened with window cleaner. OO Cleaning 40× and 100× objectives requires more care. To attain the typical flatness for objectives with higher magnification, the objective has a small concave front lens with a very small radius and slight curvature. The surface of this front lens can be readily cleaned with a toothpick covered with a cotton tip, or with a small cotton swab. Wipe the front lens lightly without applying undue force or scrubbing action. Make sure that the cotton tip contacts the concave lens surface. Check the objective with a magnifier after cleaning. Leica DM100 User Manual Illumination OO The Leica DM100 uses an LED illuminator. Therefore, no lamp changing is required for the entire life of the microscope. Care of the Microscope35 Dimensions Leica DM100 User Manual Dimensions36 Dimensions (all Dimensions in mm, DM100 and DM300 identical) OO side view with binocular tube Leica DM100 User Manual OO front view with binocular tube OO side view with binocular tube 180° rotated for storage Dimensions37 Dimensions (all Dimensions in mm, DM100 and DM300 identical) OO side view with monocular tube Leica DM100 User Manual OO front view with monocular tube OO side view with monocular tube 180° rotated for storage Dimensions38 The productive cooperative effort "with the user, for the user" has always been the basis for the innovative strength of Leica Microsystems. On this, we have developed our five corporate values: pioneering, high-end quality, team spirit, dedication to science, and continuous improvement. We call making these values reality Living up to Life. INDUSTRY DIVISION The Leica Microsystems Industry Division's focus is to support customers' pursuit of the highest quality end result by providing the best and most innovative imaging systems for their needs to see, measure, and analyze microstructures. Its solutions are used in routine and research industrial applications, in materials science and quality control, in forensic science investigations, and educational applications. Leica Microsystems – an international company with an experienced worldwide customer service network. Internationally active Phone Fax Australia ∙ North Ryde +61 2 8870 3500 2 9878 1055 Belgium ∙ Diegem +32 2 790 98 50 2 790 98 68 Denmark ∙ Ballerup +45 4454 0101 4454 0111 Germany ∙ Wetzlar +49 64 41 29 40 00 64 41 29 41 55 England ∙ Milton Keynes +44 800 298 2344 1908 246312 France ∙ Nanterre Cedex +33 811 000 664 1 56 05 23 23 Italy ∙ Milan +39 02 574 861 02 574 03392 Japan ∙ Tokyo +81 3 5421 2800 3 5421 2896 Canada ∙ Concord/Ontario +1 800 248 0123 847 405 0164 Korea ∙ Seoul +82 2 514 65 43 2 514 65 48 The Netherlands ∙ Rijswijk +31 70 4132 100 70 4132 109 Austria ∙ Vienna +43 1 486 80 50 0 1 486 80 50 30 Portugal ∙ Lisbon +351 21 388 9112 21 385 4668 Sweden ∙ Kista +46 8 625 45 45 8 625 45 10 Switzerland ∙ Heerbrugg +41 71 726 34 34 71 726 34 44 Singapore +65 6779 7823 6773 0628 Spain ∙ Barcelona +34 93 494 95 30 93 494 95 32 USA ∙ Buffalo Grove/lllinois +1 800 248 0123 847 405 0164 2564 6699 2564 4163 21 6387 6606 21 6387 6698 People's Republic of China ∙ Hong Kong ∙ Shanghai +852 +86 13IDE15060EN ∙ Copyright © by Leica Microsystems (Schweiz) AG, CH-9435 Heerbrugg, 2014. Subject to modifications. LEICA and the Leica Logo are registered trademarks of Leica Microsystems IR GmbH. www.leica-microsystems.com