1
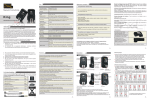
h㘈PLFUR0SURILOHU㚤 RSHUDWLRQ PDQXDO VPS0634 ᾙ◝᠍ⶵ❝ℾ㓭Ἅ VHLOLHFR FRUS1 ଞሥ ㉍ℽ ᅚ♶ሺ 65604 ㉍♽◝ୖᅉ 837㒙 WHO=;5064075<09795 ID[=;5064075<09799 XUO = kwws=22zzz1vhlolhfr1frp MHLO DSW IDFWRU\ URRP 837/ 65604 GDQJ MXQJ GRQJ NXQSR0VL/ N\XQJNL0GR NRUHD1 INDEX 1. Product specification ...... 2. Installation of Micro Profiler™ ...... P1 P2 ~ P8 2-1. Software Installation 2-2. Name of Program Icon 2-3. Installation of Additional 3. Operation of Micro Profiler™ ...... P9 4. Operation of Program ...... P10 (Read and store of Measured data) 5. Explanation of the additional functions..P11 ~ P16 5-1. Program setting and recording 5-2. Additional function 6. Management and charge method of BATTERY .... P17 6-1. Battery Spec 6-2. Charging Battery 7. Structure of Micro-profiler™ ...... P18 * Addendum - Test results and sample. - Application form of A/S (Please, fill out an application blank precisely and use copied edition.) -1- 1. Product Specification 1.1 Dimension (Unit : L×W×H/mm) MODEL SMP-304 SMP-306 Memory Unit 240 × 46 × 18 240 × 51.8 × 18 Product Case 299 × min85(max260) × 26 299 × min88(max263) × 26 1.2 Measurement range : 0∼500℃ ※ Upon using on high temperature circumstances, make use of thermal protect case. ※ Withstanding time limit in Heating : 200℃ → max 6min, 250℃ → max 3min. 1.3 Accuracy : ±1℃ 1.4 Channel - SMP-304 : 4ch on K-type sensor - SMP-306 : 6ch on K-type sensor 1.5 Battery : 3.6V Ni-Mh Rechargeable Battery(LG Rechargeable battery or equivalent) - Battery life time : about 6Months (Battery life time changes upon circumstances used) 1.6 Resolution a. Sampling Time : 0.1s, 0.2s, 0.5s, 1s, 2s, 5s, 10s. b. Total Samples : 500sec, 1000sec, 2000sec, 4000sec, 8000sec ex) Sampling Time : 0.5sec Total Samples : 2000 → About 16min of measuring is possible. 1.7 Internal protect temperature : 5min at max70℃ 1.8 P.C Spec - IBM compatible or equivalent. - Microsoft Windows XP. - SVGA graphic card(256 color) or more. - Resolution : Above 1024*768 pixel. 1.9 Weight MODEL SMP-304 SMP-306 Memory Unit 204g 265g Including Case 612g 706g Full Package 2913g 3661g -2- 2. Installation of Micro profiler™ 2.1 Software Installation 1) Circumstance of P.C for Micro-profiler - PC : Microsoft Window XP (Pentium 4p.c or more). - Memory : Above 256Mbyte. - Graphic Card : Above 1024*768pixel of resolution. - Peripheral : Micro-Soft compatible mouse. 2) Software Installation a. Install of USB drive : Execute the CD included in product list, Double click the ICON b. Install of USB drive : Double click the ICON (USBX press_Install). "S-1" c. Install of Program : Double click the ICON "SMP-304 or SMP-306". "S-2" -3- (CP210x_Drivers). ※ In the case of not recognizing USB port even if followed above procedure. 1) At "Control pannel", Delete the followings regardless of procedure. ① CP210x USB to UART Bridge controller ② Silicon Laboratories CP210X Evalvation kit Tools Release 2.1 ③ Silicon Laboratories USBX press Development kit V2.4 ④ SMP-304 & SMP-306 * You may be recommended doing the followings in the state of turning the power switch "on", connecting USB cable to product. 2) After deleting above program, install program ICON of 'Page 3' sequentially. - After installing program, refer to following description. ① Position "My Computer" on windows desktop and press right mouse button and click "Property". ② ③ Click "Hardware" Click "Installation manager" Position mouse point to "CP210x USB to UART Bridge controller" recognized as extra devices and execute "Driver Update". -4- ④ Click at "Automatically install software(recommended)" and press next. ※ There's the case executing "Driver Update" twice. In this case, execute all of the update twice. ⑤ Finish Update. ⑥ At above ①, ② item, press "Property" "Hardware" sequentially, then you can see the followings. Finish port recognition. -5- "Installation manager" 3) Removing of Software a. Execute "Control pannel". b. Execute "Add/Remove Program". c. Select the program you want to remove either "SMP-304 or SMP-306" on "Add/Remove" scroll window, Press "Add/Remove" button to remove. * You can't delete "SEILIECO" folder which is including data. 4) Program execution a. Press "SMP-304 or SMP-306" on start menu......"S-3" 6) Program finish a. Press "Exit" or the ICON on main menu......"S-4" #. To create shortcut on desktop. a. Position the mouse point to "Micro-Profiler SMP-304 or SMP-306" on start menu, press the right mouse button and select "Create shortcut". b. "Drag" the newly created ICON to desktop. 2.2 Name of program ICON "S-3" "S-3" 1) File Menu Convert to Excel Data Open -6- Save Save As Print Save Graph Exit 2) View Menu Zoom 100% Zoom In Cusor Off Zoom Out Cusor On 3) Graph Menu Compare Standard Setting Print White-Black 4) Factory Information Program Checker Product Information Exit "S-4" -7- RS-232 Port 2.3 Installation of Additional. 1) Installation of cable upon measuring profile. a. Upon transmitting the memorized data after measurement of temperature. - Connect the USB cable to USB terminal of Memory Unit and USB port of P.C and receive the memorized data from memory unit. 2) How to connect the sensor. a. Insert K-type sensor (4CH or 6CH)......"S-6" b. Adhere the end of K-type sensor tip to the place you want to measure using 'Kapton Tape' or thermal resisting solder wire......"S-5" Kapton Tape Ch1 Ch6 "S-6" "S-5" -8- 3. Operation of Micro profiler™ 3.1 Position the "ON" switch of memory unit upwards. 3.2 R/W LED lit in green and red alternately lit in red. 3.3 Press "STR" switch then LED change to green, start sampling and measure. ※ Refer to "4. Operation of Program" for details about save data.etc. ※ Refer to "5.1 2) Program Checker" for setting measuring time. R/W : Indicate start of measure and warning. (Internal temperature/Battery) STR : Start and stop measure. Mini USB Pin CHG : Indicate the state of charging battery PWR : Power ON/OFF switch. #Note ① Measured data will be deleted when you position PWR switch to off. ② Adhere the end of the sensor tip to PCB as close as possible. ③ Avoid interference with the end of the other sensor tip. ④ Confirm data and save data after that, position PWR switch to "OFF". ⑤ Not to add excessive power to the connection part of Fe-male part and the body, - Improper handling damage the product. # How to use thermal resisting case. Lock Rock Open extension wings Release Rock Locking rock after putting PCB body in. -9- Open/close extension wings Note : K-type sensor can be cut upon locking rock improperly. 4. Operation of program 4-1. Read out measured data and save 1) Run program......"S-3" 2) Connect the USB cable to the Mini USB Pin terminal of Memory unit...."S-25" 3) Port assign a. Press "Factory Information" on Main screen or the ICON . b. Press "RS-232C PORT" on configurations Information Menu or the ICON . ......"S-7" c. Assign Port. "S-7" 4) Press "Measure → Memory Store" or the ICON at Main screen. 5) Choose the folder and write down the File Name on 'File name' ...... "S-8" ※ Creation of new folder is achieved using windows search on by pressing "Open" at Main screen. 6) Press "Receive Data" - Receive the memorized date ......"S-8" 7) Fill in the required item at Main screen(The first screen upon Program Running). - How to fill in is explained at "5. Explanation of program function". "S-8" 8) Press "Measure →Memory Display" at Main screen or the ICON . 9) Save and Finish - Press "Exit" at File Menu or the ICON - Press "Save as" or the ICON . upon saving other name. ........"S-9" - 10 - "S-9" 5. Explanation of the additional function 5-1. Program setting and recording 1) Product Informations - Fill in the required ITEM about sampling data at Main screen and modify. a. Press the ICON and click "Product Informations" on 'Options' ......"S-10" b. Fill in and modify the required item and click "OK". ....."S-10" ※ When you start program again after the program is off, the last recorded 'Information' will be shown. 2) Program Checker a. To set the sampling time and the total number of sampling. "S-10" b. The basic setting up is as follows. - Sampling Time : 0.5s - Total Sampling : 2000 ∴ In this case, it's possible to record for max 1000sec (about 16min). c. Setting procedure ⓐ Run program......"S-3" ⓑConnect USB cable to Micro Profiler....."S-22" ⓒ Position PWR switch to ON. ⓓ Press the ICON then press "Program Checker" on 'Oprions'. ⓔ Choose "Sampling Time" and "Total Sampling" then press "OK"......."S-11" ex) - Sampling Time : 0.5s - Total Sampling : 2000' ∴ This means measuring number is 2000 about 16min and measuring interval is 0.5sec. "S-11" d. Example of measuring time according to setting value. In case of 0.1s and 1000 = Measuring time is 100sec (about 2min) 0.2s and 1000 = 〃 200sec (about 3min) 0.5s and 1000 = 〃 500sec (about 8min) 1s and 2000 = 〃 2000sec (about 33min) 2s and 2000 = 〃 4000sec (about 60min) 5s and 2000 = 〃 10000sec (about 160min) 10s and 2000 = 〃 20000sec (about330min) - 11 - e. When finish recording, 'Ready' change to 'Tx End'. ※ 'Sampling time Data' will not be deleted even though PWR switch is "OFF" on Micro profiler. f. Proceed to the 'Temperature Sampling' of the reflow Machine. 5-2. Additional function (Data analysis) 1) Zoom and Graphic Display a. Press "View" on 'Graphic Display' screen and select (Zoom in) or (Zoom out) then mouse point will be shown. b. Position the mouse to the place where you want to Zoom in or Zoom out and click the mouse......"S-12" "S-12" c. Press "Zoom 100%" on view or the ICON when you want to display on the first graph. 2) Confirming temperature, time by moving cursor(t1~t5) a. Press the ICON . (It will be chosen automatically when you change Main screen to Graph display) b. Position the Cursor to the place where you want to choose on the Graph display and click(t1)......"S-13" c. Position the other place on the same manner and click(t2). t1-℃ t2-℃ d. Then the selected temperature of 't1-℃' of 'Cursor information' will be displayed and you see the five number of temperature, time and slope about t1~t5. - 12 - "S-13" line setting 3) Changing Graph color and displaying Graphic line only you want. a. Press "color" on 'line setting' or the ICON select color of 'S1~S8' or the line you want and press "OK"......"S-14" b. Press "Zoom 100%" ......"S-12" * Note : Upon printing out, hard copy will be same as the state of screen itself. "S-14" c. Then it will display the choosed color or line......"S-15" Change color "S-15" 4) Changing measured data to Excel. - Press "Convert to excel data" on File menu or the ICON . (You should have Excel installed.) 5) Save to Graph picture file. - Press "Save graph" on File menu or the ICON "S-16" - 13 - ......."S-015" 6) Comparing to other Profile data and analysis a. Press the ICON on 'Graph Display' screen. b. Press "File 2" ......"S-17" c. Choose 'DATA' that you want to open and press "Open". d. Point to 'color' or 'line' of 'S1~S6' and press "OK". e. Press "Zoom 100%" and display....."S-18" "S-17" File 1 File 2 "S-18" f. Change pointing "File 1" to 'File 2' when you want to use 't1, t2' of "File 2" ....."S-17" g. Position the mouse to the place you want and click. h. Then, it will show temperature, section time, slope of 't1'~ 't5' on 'Cursor Information'. - 14 - i. Name and role of each part of Display screen Time in higher temperature than setting temperature. Basic setting is Time of arrival to 200℃(Click Scan after setting) Max temperature on each channel after measuring. Maximum temperature on each channel while measuring. The time of saving program The position of saving program "S-18" The time indication of each cursor from beginning of measurement. The time indication of each section on each cursor from beginning of measurement. The indication of state and color of each sensor - Possible to set on each sensor. Possible to adjust the exis of each time and temperature - Use when decrease/extend SEC, Temp (Click window display after setting) "S-19" - 15 - The temperature indication The slope △t of temperature increase/decrease in each cursor clicked. on each sector.. The position of present mouse point 커서 The internal temperature of the equipment The battery residual indication - Red : Need cooling for a long time. - Red : Need charging. "S-20" Temp zone Users can specify the temperature of each section randomly then according to each section, the slope of time and temperature will be shown. - Click Run after setting. The time indication of selected section The temperature slope of selected section.(△t) "S-21" - 16 - 6. Management and charge method of BATTERY 6-1. Battery Spec. 1) 3.6V Rechargeable Battery(Use LG Rechargeable battery or equivalent.) MODEL : B-1522(Ni-MN. 3.6V 550mAh) 2) Battery life time - About six months(Based on 3times of measurement a day), but it is variable by circumstances used. - Possible to measure 8 to 10 times by recharging one times, frequent usage decreases the battery functionality. (The numbers of measurement will be changed according to self-discharge, functionality decreased but it is not related to the product function.) - Recharging the battery after fully discharged will increase the functionality of battery. 3) Notes on use - Recharge filly before use. - Not to short and disassembly. - Use only honest goods.(None honest goods caused decreasing of functionality.) 6-2. Charging battery 1) Referring to the picture, connect the Mini pin part of USB rechargeable jack to terminal of Memory unit then connect "S-22" to USB port of P.C....."S-22" a. When finish the recharging : "CHG" LED lit in Green. b. On recharging : "CHG" LED lit in Red on the memory unit. c. Low voltage warning : "STR" LED flashes in Red rapidly. d. When discharged : "CHG" LED not lit or stay in lit state or doesn't operate. ※ Cautions Disassembling Fe-male part and the body of SMP-304 & SMP-306 memory unit with excessive power cause damage to the LED, power switch etc......"S-23" "Need cautions on use" "S-23" - 17 - 7. Structures of Micro-Profiler™ (SMP-304 & SMP-306) Pocket in ⑥ USB cable (Recharge cable) ⑨ Manual & Test sheet Pocket in ⑤ Kapton tape Pocket in ⑦ High temperature solder wire ⑧ Software disk ③ Product case ④ K-type sensor ② Battery(unit in) ⑩ Parking case ① Memory unit °Part list. No. Description No. Contents Etc. Main memory equipment for ① Memory unit M-001 ② Battery M-002 3.6(Ni-Mn) Rechargeable Battery ③ Product case M-003 ④ K-type sensor M-004 Made connector Ass'y (about 40㎝) CSP ⑤ Kapton tape M-005 10mm(w) X 15m CSP ⑥ USB cable(Recharge cable) M-006 USB Port ⑦ High temperature solder wire M-007 Samples ⑧ Software disk M-008 Microsoft Window XP ⑨ Manual & Test sheet M-009 User's manual ⑩ Parking case M-010 Quality assurance of memory unit temperature profile CSP For Product to memory unit from high temperature of reflow M/C CSP ※ CSP : Consumption goods, OPT : Option We are supply to above items when you purchase of SMP-XXX. but if you need a more above items. we are prepare to all of above items anytime, also M-XXX is order No for you. - 18 -