1
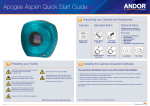
Apogee Alta Quick Start Guide
2 Unpacking your Camera and Accessories
Camera
Standard Items
Optional Items
Optional items are supplied as
specified at the time of ordering:
Items include:
Apogee Alta CCD
Camera
1 Preparing your Facility
Handle the camera and accessories with care.
Apogee Alta weighs approx 1.9 kg [4 lb 2 oz].
Observe anti-static precautions when
installing the controller card and camera.
Ensure 100 mm clearance around camera
and power supply vents (Do not block
vents when operating on benchtop).
Apogee
Integration Starter
Kit CD
12 V Alta Power
Supply
Country Specific
Power Cord
USB 2.0 Cable
•
•
•
•
•
Lens Adapters
Telescope Adapter
USB Extender
Filter Wheel
Temperature compensated focuser
Lens Adapter
Filter Wheel
3 Installing the Camera Acquisition Software
Use correct power supply and cables.
You must have administrator access on your PC to perform this installation.
• We recommend you install your camera acquisition software e.g. Windows SDK for Apogee, Micro-Manager or
MaxIm DL/CCD before setting up your Apogee camera.
Operate between 0°C and 40°C. Refer to User
guide for further information regarding ambient
temperature, cooling performance and dew point.
Store between -25°C and 50°C.
• Please see the Windows SDK for Apogee, Micro-Manager or MaxIm DL/CCD installation guides for specific
instructions related to installation of this software.
• Apogee cameras are supported by MaxIm DL/CCD version 3.21 and beyond.
If you are using different camera control software, please refer to the software installation information supplied with
the software.
Operation of the camera close to intense
pulsed sources (e.g. plasma and X-ray
sources) may compromise performance.
Keep dry, <70% humidity non-condensing
Refer to the user manual for further information.
For more information visit: andor.com/software/software_support/
Please turn over
4
6
Install the Camera Drivers
Connecting your Camera and Switching it on
WARNING:
• Do not connect your Apogee camera to a PC before installing the drivers. If you do and the “Add New Hardware
Wizard” appears, please select the Cancel button.
WARNING:
• Do not connect your Apogee camera to a PC before installing the drivers. If you do and the “Add New Hardware
Wizard” appears, please select the Cancel button.
•
•
Never connect or disconnect the camera from the PC during operation.
1. Make sure your Windows user account has administrator privileges.
2. Double click on the setupApogeeSoftware.
Never connect or disconnect the camera from the PC during operation.
1.Insert the 12V DC power cable into the power connector on the
Connections panel of the camera.
2.Connect the supplied USB cable between the USB connector
on the camera and the corresponding slot on the PC
Connections
USB to PC
3.Optional: An 8-pin Mini DIN connection enables various
hardware signals to be controlled by the device. If this is
required, connect the I/O Connection cable to the I/O 8
mini DIN type connector (refer to the user guide for further
information).
4.Turn power to the camera ON.
3. Follow the steps in the Installation Wizard.
4. Click Finish.
5. The drivers for your Apogee camera are now installed on your PC (A notification should be displayed in the bottom
5.Turn ON the PC.
Power
To Camera I/O port
6.Start your software.
7.Start acquiring data.
right corner of your PC screen).
5
Mounting
Mountingthe
theCamera
Camera
?
The Alta can be connected to a telescope, lens or other equipment using a wide range of plate-lens adapters
and other accessories. An outline is shown below. Refer to your user guide and contact your customer support
representative for further information if required.
1. Ensure the camera control software (e.g Maxim DL/CCD)
and drivers have been installed.
2. Attach the camera mounting adapter (or filter wheel) to the
camera face plate using the supplied mounting screws.
3. Attach the camera and mounting assembly to the telescope
or lens.
4. Now connect the power and signal connections.
Troubleshooting
Camera LEDS do not light
•
The LEDs should flash on startup, if this does not occur, ensure that the power cables are connected and the
power is turned on.
Cannot find camera when using ApogeeCameraInfo
•
The ApogeeCameraInfo search process takes approximately 10 seconds to complete. In extremely rare
circumstances, the camera may take longer than 10 seconds to respond.
•
If the first attempt to find the camera fails, try a second time. If the second attempt fails, the “Broadcast
Address” field may be incorrect. Verify the correct broadcast address and try again.
Above: Filter Wheel attached to an Altaready for attachment of the required lens
adapter.
Above: Example of some common
adapter types that enable connection
of the Alta camera to a wide range of
equipment.
For additional troubleshooting information please refer to the user manual on the CD provided and for
technical information about the Apogee Alta go to:
www.andor.com/scientific-cameras/apogee-camera-range/alta-ccd-series
MAN-06734
MAN-09693
ALTASG 0915 R1