1
QUICK START GUIDE
Important: Please read before you operate your Tivax HiRez7 TV
Basic Instructions (for detailed instructions please refer to our 42 page User Manual)
•
•
•
•
•
Install the Li-Ion batteries (refer to User Manual)
Connect your TV to a power source either battery or power supply
Connect your TV firmly to either an antenna for free over-the-air signals or to a TV
cable outlet.
Turn switch on the side of the unit to “ON” position. The Tivax HI-Rez7 does not
have a standby feature. The ON/OFF switch is used in order to conserve battery life.
Scan the TV for channels available in your area before initial use or after you have
changed the location of the TV.
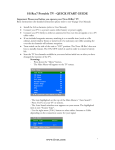
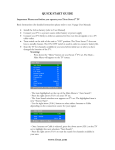
Scanning:
- Press down the “Menu” button on your Hi-Rez7 remote control. The
Main – Main Menu will appear on the TV screen.
- The item highlighted on the top of the Main Menu is “Auto Search”.
- Press the right arrow (Vol+) on your remote.
- The Auto Search window now appears on your screen. The highlighted
item is now “Source Type”.
- Use the right arrow (Vol+) button to select either Antenna or Cable
depending on the connection source for your signal.
- Once Antenna or Cable is selected, press the down arrow (CH-) on the
remote to highlight the next selection: “Start Search”.
- Press the right arrow (Vol+) to start the search for channels available in
your area.
www.tivax.com
- Wait for TV to conclude search for digital stations.
Additional Notes
•
•
•
•
•
•
Please be aware that the number of channels received depends on your proximity to
the broadcast tower. You may require a more powerful antenna to secure more
channels. An adapter (included) will be required to connect to this antenna.
Although your TV is highly portable, digital reception may be poor when moving, as
when in a vehicle. For best digital reception the TV must be stationary. This
characteristic is true for any digital TV.
The Tivax Hi-Rez7 has no provisions to accept any batteries other than the two
provided Li-Ion batteries.
The Tivax Docking Station (optional) does accommodate AA batteries. This option
will soon be available to Hi Rez7 users.
Your TV will also work with a 12V power supply through the included car battery
adapter. Such a connection will also re-charge the internal LI-Ion batteries.
The included AC adapter both powers the TV and charges the batteries. There is no
need to remove the batteries when using the AC adapter.
Errata
Early versions of the User Manual do not include below information (current version is
updated)
1. Install the Li-Ion batteries.
- Note the Li-Ion batteries are different sizes. Insert the batteries in the
appropriate slots on the back of the TV.
- Remove the cover for the compartment by lightly pushing and sliding it in
the direction of the arrow.
- Insert the batteries, smaller in the right slot and larger in the left.
www.tivax.com
-
Replace the cover by sliding back into place.
Initial Charge: The Li-Ion batteries are approximately 60% charged prior to
shipping. Before first use batteries should be charged 8 to 12 hours. During
this initial charge, please continue charging even after the LED charge
indicator light turns to green.
Re-charging: After initial use, it will only take 3 hours for depleted batteries
to be charged fully. A full charge will then be indicated when the LED on the
bottom right turns to green. A normal lifetime for the Li-Ion batteries is
approximately 500 re-charges.
2. A/V input mislabeled.
Our first batch of TVs has the 2nd input from the top on the side of the TV mislabeled. It is
marked as Audio in, and should be A/V in. This input is to be used when connecting to a
device such as a DVD player to get both audio and video. If connecting to the 3rd input,
video only will be displayed with no audio. This is not an issue for current models.
www.tivax.com
Marked Audio in, should be A/V in instead (audio and video)
Video in, video only, no sound
3. Replacing the battery in your remote control unit
•
•
•
•
In the earlier versions of the User Guide, it is incorrectly stated that the remote
control functions with 2 AA batteries. In fact, 1 button battery is required. The
updated manual does not have this issue.
The remote unit comes with a CR2025 button battery (already installed).
Replace the CR2025 battery by turning the remote over so the bottom is facing up.
There is a small “catch” on the right-hand side of the battery compartment. Push it
to the left with a finger-nail, simultaneously pulling the battery tray toward you. (refer
to accompanying sketch)
Place a new battery in tray, and re-insert the tray making sure the (+) mark is facing
upwards.
www.tivax.com
4. Screen/Format settings
Please refer to figure below for more detail on Screen/ Format settings
ATSC program
Screen Format
Setting
Full
Normal
Zoom
4:3
4:3
Format
disabled, by
default full
screen mode
display
16:9
16:9
Full screen mode
display
4:3 screen mode
display
Full screen mode
display with zoom
4:3
Full screen mode
display
Full screen mode
display with letter-box
Full screen mode
display with zoom
16:9
Format disabled,
by default full
screen mode
display
Additional Notes: Some TV stations may be broadcasting in different aspect ratios.
4:3 is usually the standard of the old analog television, while 16:9 is the new standard for
digital television. Depending on the broadcast, it may not be possible to fill the entire TV
screen with the image, also the image may be cropped or distorted if zoomed. The above
table shows some options by toggling back and forth with the Screen and Format settings.
Questions? Please contact as at the information below from 9am to 5pm PST.
General Information:
Customer Support:
[email protected]
[email protected]
1-888-33-Tivax (1-888-338-4829)
Thank you for choosing Tivax!
www.tivax.com