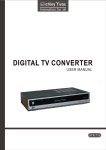
Download User Manual of converter box STB-T12
Transcript
USER MANUAL STB-T12 Tivax Digital TV Converter Important Safety Instructions The Tivax Guarantee Tivax is dedicated to bring the world of digital television to you, no matter if your TV set is an older model. For questions or technical issues, please visit: www.tivax.com WARNING - TO PREVENT FIRE OR SHOCK HAZARD, DO NOT USE THIS PLUG WITH AN EXTENSION CORD, RECEPTACLE OR OTHER OUTLET UNLESS THE BLADES CAN BE FULLY INSERTED TO PRESENT BLADE EXPOSURE. - TO PREVENT FIRE OR SHOCK HAZARD. DO NOT EXPOSE THIS APPLIANCE TO RAIN OR MOISTURE - TO PREVENT ELECTRICAL SHOCK, MATCH WIDE BLADE PLUG TO WIDE SLOT FULLY INSERT. CAUTION Risk of Electric Shock Do not open Caution: To reduce the risk of electric shock, do not remove cover (or back). No user- serviceable parts inside. Refer to qualified service personnel. This symbol is intende d to alert the user to the presence of uninsulated “dangerous voltage” within the product's enclosure that may be of sufficient magnitude to constitute a risk of electric shock to persons. This symbol is intended to alert the user to the presence of important operating and maintenance (servicing) instructions in the literature accompanying the appliance. Dolby Digital Certification Manufactured under license from Dolby Laboratories. “Dolby”, and the double-D symbol are trademarks of the Dolby Laboratories. Caution: Do not alter or change the construction of this device without written authorization from Tivax, Inc. Furthermore, any unauthorized alteration of this device without written approval by Tivax, inc. will void any warranty and the owner's right to operate this device. Note: This equipment has been tested and found to comply with the limits for a Class B Digital Device, pursuant to Part 15 of the FCC Rules. These limits are designed to provide reasonable protection against harmful interference in a residential installation. This device generates, uses and also radiate radio frequency energy and, if not installed in a proper manner and used in accordance with the instructions provided in this manual, may cause harmful interference with other equipment. In addition, Tivax does not warrant that interference will not occur when properly installed. If the device does cause interference with other equipment please defer to this manual for suggestions. Options include moving the device or re-orienting it away from equipment 1 Important Safety Information Always use care when using your Tivax. To reduce the risk of electrical shock, fire, or other possible injuries, always keep safety in mind when operating your Tivax Read all safety instructions and warnings before operating your Tivax receiver Keep this manual for future reference not use your Tivax near water or anyplace where it may make contact with Do water, such as swimming pools, sinks, etc. cleaning your Tivax, always unplug for safety. Do not use liquid cleaners When as they may affect the electronics. Instead, use a dry cloth. Your Tivax generates a small amount of heat, so do not block the vents or inhibit normal air circulation. To protect your Tivax from overheating, place it on a flat smooth surface, such as a shelf. Avoid placing it on rugs or other surfaces where air circulation may be blocked. Your Tivax comes with a standard polarized plug (one blade is wider than the other, with a third plug for grounding). Use outlets designed for this type of plug for your safety. If your outlet is not compatible with this plug please consult an electrician. Do not pinch, cut or crimp the electrical cord. Use only UL Certified antennas with your Tivax your Tivax during storms or when not used for long periods of time to Unplug protect from lightning or power surges your antenna according to the safety standards recommended by the Operate antenna manufacturer. When installing a rooftop or outdoor antenna, be sure to ground it to protect your Tivax and other indoor electronic equipment from power surges and lightning. WARNING: The mains plug is used as disconnect device, the disconnect device shall remain readily operable. WARNING: The battery (battery or batteries or battery pack) shall not be exposed to excessive heat such as sunshine, fire or the like. Double Insulation. This is CLASS II apparatus. 2 Welcome to the world of Digital TV Welcome to the world of Digital TV All set top boxes (STB) have been tested in the factory for proper operation. In case you experience any problems, please follow these simple steps to troubleshoot your problems. Please make sure your TV and STB are plugged in and powered up, and that the STB is properly connected to your TV by either a RF cable or a A/V cable set (red white yellow connectors on each end) following the guideline below. Don't forget to properly insert batteries into the remote control unit. Connection option RF: The STB can be operated in RF mode to connect to your TV. In this case the RF-OUT connector of the STB connects to your Antenna Input on your TV. Your TV must be tuned to either channel 3 or 4 and the STB needs to be set to the corresponding channel selected on theback of the STB by utilizing the small slide switch. Connection option A/V: If you TV is equipped with an A/V input, sometimes referred to as AV1 or AVin, Then you may want to choose the A/V connection for a better quality picture. A RF connection as described above has some inherent limitation and a somewhat lower quality than A/V. Please make your connection before turning on your devices and plug in the yellow terminated cable to the AV-in on your TV and the AV-out on the STB. Similarly, connect the red and white terminated cable to the corresponding Audio-in on your TV and Audio-out on the STB. Once a connection utilizing option RF or option A/V is made turn on your TV first and then your STB. The STB is turned on by pressing the power button on the front, or using the remote, power up the STB. You should see a logo come up on your TV as the STB turns on. Since channel programming is different in various regions, you must set up your set top box with your channels by using the auto scan feature. Make sure a suitable antenna is connected to the antenna input, labeled as RF-In on the STB, and after turning on your TV and STB, press the Menu button on your remote. Use the cursor keys around the OK button to move the highlighted field to Channel-Scan and press OK. You may need to reorient your antenna to achieve best results. If you have an external antenna, it may have already been oriented such that it point to the transmitter stations. To help in orienting your antenna, a signal strength indicator can be turned on in the STB. Use the menu button and select signal strength or signal quality item to display a signal quality bar on the screen. Although digital TV will give a very clear picture when a signal is received in sufficient strength, a weak signal will result in dropouts or no picture at all. Analog stations would just be received with noise in the sound and snow in the picture, Digital transmissions will dropout or have large blocks of images missing if the RF signal is of insufficient strength or quality. Reorienting your antenna or getting a better quality antenna may solve this problem. Some experimenting may be required to obtain the best results. Thank you for choosing a Tivax Set Top Box and enjoy the new world of Digital Television. 3 Bienvenido al mundo de Digital TV Todas las cajas encima del televisor (STB) se han probado en la fábrica para la operación apropiada. En caso de que usted encuentre cualquier problema, por favor siga estos pasos simples para localizar las averías de sus problemas. Por favor asegurece que su TV y STB estén conectado y encendido, y que el STB es conectado correctamente con su TV por un cable RF o cable A/V (conectadores rojos amarillos blancos en cada extremo) que sigue la pauta de abajo. No se olvide de insertar correctamente las baterías en el control remoto. Opción de conexión RF: El STB se puede funcionar en modo del RF para conectar con su TV. En este caso el conectador de RF-OUT del STB conecta con su antena entrada en su TV. Su TV se debe ser sintonizado a cualquier canal 3 o 4 y el STB necesita ser ajustado al canal correspondiente seleccionado en la parte posteriora del STB utilizando el interruptor pequeño deslizante. Opción de conexión A/V: Si le TV equipan de una entrada de A/V, designada a veces AV1 o AVin, después usted puede desear elegir la conexión de A/V para una imagen de mejor calidad. Una conexión del RF como se describe anteriormente tiene una cierta limitación inherente y un poco menor de calidad que A/V. Por favor jaga su conexión antes de encender en sus dispositivos y conecte el cable terminado amarillo al AV-in de su TV y AV-out en el STB. Parecidamente, conecte el cable terminado rojo y blanco con el Audio-in en su TV y Audio-out en el STB correspondientemente. Una vez que una conexión utiliza la opción de RF o la opción A/V se encender su TV primero y usted es su STB. El STB es encendnido presionando el botón de la energía en el frente, o con el control remoto, encienda el STB. Usted debe ver un logo que aparece en su TV mientras que el STB se enciende. Puesto que la programación del canal es diferente en varias regiones, usted debe ajustar su caja encima del televisor con sus canales usando la característica de auto exploración. Asegurece de que una antena conveniente esté conectada con la entrada de la antena, etiquetada como RF-in en el STB, y después de encender su TV y STB, presione el botón del menú en su control remoto. Utilice las teclas de cursor alrededor del botón OK para mover el campo destacado a Canal-Explorar y presione OK. Usted puede necesitar reorientar su antena para alcanzar los mejores resultados. Si usted tiene una antena externa, puede ya haber sido orientado tales que él punto a las estaciones del transmisor. Para ayudar en la orientación de su antena, un indicador de la intensidad de la señal se puede encender en el STB. Utilice el botón del menú y seleccione la intensidad de la señal o señale el artículo de la calidad para demostrar una barra de la calidad de la señal en la pantalla. Aunque la TV digital dará una imagen muy clara cuando una señal se recibe en suficiente intensidad, una señal débil causara salidas o sin imagen. Las estaciones análogas acaban de ser recibidas con ruido en el sonido y la nieve en el cuadro, las transmisiones Digitales se pierden o tienen bloques grandes de las imágenes que faltan si la señal del RF es de intensidad o de calidad debil. Reorientando su antena o conseguir una antena de una mejor calidad puede solucionar este problema. Algunos que encuentran pueden requerir para obtener los mejores resultados. Gracias por elegir una caja encima del televisorTivax y disfrute del mundo nuevo de la televisión Digital. 4 欢迎来到数字电视的世界 所有的机顶盒(STB)都已在工厂做过正常测试,如果您仍遇到问题,请按照以下简单 步骤去排除。 首先请确认您的电视和机顶盒(STB)都已插上电源,并且按照以下说明用 RF 线或 AV 线(端子颜色:红白黄)将机顶盒连接到电视上。另外,请不要忘记给遥控器装上 电池。 选择 RF 连接: 机顶盒可以通过工作在 RF 模式连接到您的电视。在此模式下,请将机顶盒的 RF-OUT 接口连接到您电视的 Antenna Input 接口。您的电视可调到3或4频道,同时您需要用 机顶盒后面的拨动开关调到与电视相应的频道。 选择 A/V 连接: 如果您的电视装有 A/V 输出端口,有时标注为 AV1 或 AV In,那么您可以选用 A/V 端子连接电视获取较好的图像质量。像前面提到的,由于 RF 连接存在一定局限性,所 以图像质量要低于 A/V 显示。 开机之前,请先用黄色A/V线连接机顶盒的 AV-OUT 口和您的电视 AV-IN 口,同样 的,用红色和白色音频线连接电视和机顶盒颜色对应的端口。 连接好 RF 或 A/V 线后,请先打开您的电视,再打开机顶盒。按前面的电源按键 (Power)启动机顶盒,或者用遥控器开机。机顶盒启动的时候会在您的电视上显示 TIVAX 标示。 由于不同的地区有不同的频道节目,您必须使用自动搜索功能来设置您机顶盒的频道。 请确认您已将适合的天线连接到机顶盒的天线输入端(标示为 RF-IN),然后打开您的 电视和机顶盒,按遥控器上的菜单(Menu)键,使用 “OK” 键周围的方向键将光标移 动到频道搜索(Channel-Scan)按下 “OK” 键。您也可以调整您的天线方向以搜到最 多的频道。如果您有室外天线,请确认天线已经指向了信号发射站。 您可以使用机顶盒自带的信号强度显示功能,帮助您调节天线的方向。按菜单键 (Menu)选择信号强度或信号质量这一项,屏幕会显示一个信号质量的指示条。 当信号足够强的时候,数字电视可以提供很清晰的画面,但信号比较弱的时候会出现画面 停滞或无图像显示的情况。如果射频信号强度或质量不好,模拟接收会看到图像出现雪花 并听到杂音,数字接收则会出现图像停滞或马赛克。请重新调整天线的方向或用更高质量 的天线来解决此类问题。为了获得更好的接收效果,请多试验几次。 感谢您选择了Tivax 数字机顶盒去享受数字电视的新世界。 5 Table of Contents Tivax Digital TV Converter Important Safety Instructions...................................................... 1 Important Safety Information ................................................................................................. 2 Welcome to the world of Digital TV........................................................................................ 3 Tivax Set Top Box User Manual - Let's Get Started! ............................................................. 7 High Definition Television..................................................................................................... 9 Multicast TV Signals ..................................................................................................... 9 Standard Definition Television ...................................................................................... 9 How to Receive the Best Digital TV Signal with Your Antenna ............................................10 1. Initial Setup ...................................................................................................................... 11 1.1 Remote Control .......................................................................................................... 11 1.1.1 Installing the Batteries ......................................................................................... 12 1.2 Front Panel and Rear Panel Illustration..................................................................... 13 1.2.1 Front Panel .......................................................................................................... 13 1.3 Connecting The Digital Converter Box ...................................................................... 14 1.3.1 Connecting Antennas .......................................................................................... 14 1.3.2 Connecting to a TV (TV Aerial) ........................................................................... 15 1.3.3 Connecting to an Audio System.......................................................................... 17 1.3.4 Quick Start Guide ................................................................................................ 18 2. On-Screen Menus............................................................................................................ 19 2.1 GUIDE ........................................................................................................................ 19 2.1.1 Simple Guide ....................................................................................................... 19 2.1.2 Full Guide (EPG) ................................................................................................. 19 2.1.3 Reminder List ...................................................................................................... 20 2.2 CHANNEL .................................................................................................................. 21 2.2.1 Auto Scan ............................................................................................................ 21 2.2.2 Manual Channel Set............................................................................................ 21 2.3 SETUP ....................................................................................................................... 22 2.3.1 Screen Setting..................................................................................................... 22 2.3.2 Screen Setting..................................................................................................... 22 2.3.3 Parental Control (V-Chip) .................................................................................... 22 2.3.4 Close Caption ...................................................................................................... 24 2.3.5 Time Zone............................................................................................................ 24 2.3.6 Smart Antenna (If Detected)................................................................................ 25 2.3.7 Factory Default .................................................................................................... 25 2.4 INFO........................................................................................................................... 26 3. Troubleshooting ............................................................................................................... 27 4. Specification..................................................................................................................... 28 5. Glossary........................................................................................................................... 29 Tivax Limited Warranty To Original Purchaser ..................................................................... 30 6 Tivax Set Top Box User Manual - Let's Get Started! Now you can start to receive the amazing world of Digital Television on your analog TV. First please read these simple questions. Question #1: What is a Tivax Set Top Box? Answer: It is a special receiver that interprets FREE Digital TV signals into analog TV signals. Question #2: If I can get ABC® or CBS® on my cable or satellite, why do I need a Tivax? Answer: Because you are only getting a FRACTION of the FREE signals. Cable and satellite providers are not required to give you all FREE Digital TV signals. Why should they? You might be very pleased with better quality FREE Digital Television. That's the “secret” many people do not know. Tivax gives you immediate access to FREE Digital Television signals at no extra cost! Question #3: If I already have cable or satellite, do I still need a Tivax to receive the FREE Digital Television signals? Answer: Unless you have a Digital TV set, YES. Don't worry. You can combine your Tivax with your cable or satellite receiver. We'll show you how. Question #4: Do I need an antenna to receive FREE Digital television signals? Answer: Yes. Digital TV is just like old-fashioned Analog TV, only better. You still need an antenna to get the signal. Just about any antenna will do, but an antenna designed for Digital TV is better. While some antennas are better than others, it also depends on where you live. If you cannot receive Analog TV signals, you will not be able to get Digital TV signals. This is very important as your Tivax will not work. Question #5: How do I test my TV to see if I can use my Tivax? Answer: This is very easy. Simply disconnect your Analog TV from your cable or satellite receiver. Connect the antenna to your Analog TV. If you can receive a picture, your Tivax will work. Don't worry if the picture is not perfect. That's another special feature of Digital TV. It's BETTER! Digital TV signals don't have the same problems Analog TV signals do. That's why this new standard is so much better! 7 OK. You've now tested your Analog TV and demonstrated you can get FREE TV signals without cable of satellite. Now get ready…you are about to discover the wonderful world of FREE Digital TV! Before we get started, here are a few easy technical terms you will need to know: What is Analog Television? Until recently, virtually all TVs in the USA were designed for Analog Television. Analog TV signals were designed in the 1940s, long before computer technology existed. Analog TV is based on an old standard called NTSC. Compared to Digital TV signals, the Analog picture is fuzzy and very inferior to Digital TV. This is why the US Government decided to turn off Analog TV signals in 2009. Analog TVs cannot receive Digital TV signals. There are only 3 ways to see digital TV signals on your Analog TV: 1. You must have a Digital TV set. Your Analog TV cannot receive the amazing world of digital television 2. You must have a Digital TV tuner. Tivax is a Digital TV tuner. 3. You must pay for cable or satellite (remember…cable and satellite will not show you many of the FREE signals you can receive with your Tivax). What is Digital Television? This is the new broadcasting standard. Digital TV signals are based on a new standard called ATSC. In early 2009, all Analog TV signals will be turned off. This is Federal Law. Under the new Federal Law, cable and satellite may not be required to provide you access to all the FREE digital signals. Eventually, you will get some of these signals, but no one knows for sure when this will happen. It could be many more years before cable or satellite decide to give you access to all FREE Digital TV signals. Digital Television is very exciting and offers too many features to be listed here. However, your Tivax Set Top Digital Receiver gives you the ability to enjoy most of these advantages on your Analog TV set! 8 High Definition Television The High Definition Digital TV is similar to a computer data signal. It is also called HDTV. In other words, it is very sophisticated and can do many more things. The broadcast station can do more interesting things with a Digital TV signal, such as broadcast High Definition television. This is a very superior picture. Your Tivax will easily decode the HDTV signal. You will be able to watch HDTV on your Analog TV. While you will NOT see the picture in its true High Definition format (only expensive High Definition TV sets can do this), you will be very surprised with the excellent picture quality. The Digital TV signal is very powerful. A broadcaster can do many things with the Digital Television signal. Sometimes, when they want to show you a very high quality picture, they will transmit the program in High Definition. When this happens, you will only get ONE Digital Television signal at that moment in time. A good example when this happens if during Prime Time (8 pm to 11 pm). Football and baseball games are commonly transmitted in High Definition. Multicast TV Signals The Digital TV signal is very powerful. A broadcaster can also choose to show you more than one TV signal on the same frequency. (Analog TV cannot do this!) A broadcaster can provide FOUR or more excellent quality signals AT THE SAME TIME! This is called “multicasting”. Tivax can decode this signal for you! A good example is during Day Time. Imagine signal #1 is dedicated to a soap opera, signal #2 is dedicated to a documentary, signal #3 is dedicated to a talk show and signal #4 is dedicated to a medical program. Only Digital TV can do this and Tivax can decode this for you! Standard Definition Television This refers to a TV picture that is NOT High Definition. When the broadcaster wants to show you more than one signal, they refer to this as Standard Definition (as opposed to HDTV). Standard Definition TV is also called SDTV. So. Are you ready to get started? 9 How to Receive the Best Digital TV Signal with Your Antenna In this section we'll show you the following: • How to find Digital TV channels in your area • How to select the best antenna for your Tivax • How to scan and store Digital TV channels with your Tivax How to find Digital TV channels in your area The number of Digital TV channels varies greatly within each local area, so it is best to look up your available channels by visiting special web sites, such as: www.titantv.com www.dtv.gov www.tvguide.com In addition, you can also find excellent local information from performing searches on the internet. Due to the proliferation of DTV channels, it is difficult to get the latest information from newspapers or other printed sources. In addition, the number of channels you receive depends on your physical location, your antenna and the location of the broadcast antenna. Broadcast television signals are “line of sight”, which means the best signals are received by pointing directly at transmitter. Buildings, mountains and other obstructions will affect the quality of the signal you receive. Selecting Your Antenna After you have determined the available channels in your area, you will need to select an antenna. The mini-antenna provided with your Tivax will work in most cases, but it may not be your best option, depending on your location. Q. Can I use my existing indoor antenna? A. Yes, but it may not give you the best results. Most likely, your existing antenna was designed for analog television and is not designed specifically for DTV. If you get good results, great! (Be sure you connect the antenna to your Tivax.) Q. Can I use my existing outdoor antenna? A. Yes. This will be a much better antenna and provide you with a better DTV signal. (Be sure you connect the antenna to your Tivax.) Q. Do I need to upgrade my antenna? A. If you are not pleased with the results, then this is recommended. There are many new antennas designed for DTV and are available at most retail electronic and other stores where televisions are sold. If your antenna provides a fair signal, upgrading to a better quality DTV-designed antenna should help. Remember to point the antenna in the proper direction to receive the strongest signal. Your local retail center can provide the best advice to receive the strongest DTV signal. Scanning & Storing DTV Channels with Your Tivax After installing the antenna, point it towards the DTV broadcast transmitter or where there are the largest number of DTV stations. Now you can scan for DTV channels and store them. More information on how to scan channels is available in later parts of the manual. 10 1. Initial Setup 1.1 Remote Control 1 3 4 10 MUTE 2 1 2 3 4 5 6 7 8 9 - CCD 0 MENU CH + EXIT 11 12 OK RECALL DISPLAY 6 CH GUIDE FAV + ZOOM SIGNAL 8 7. FAVORITE CHANNEL (UP): Press to scan upward and view FAV channel added into your Favorite’s List. 8. FAVORITE CHANNEL (DOWN): Press to scan downward and view FAV channel added into your Favorite’s List. 9. ADD/DEL: Press to add viewing channel to Favorite’s List. Press again to remove from Favorite’s List. 10. MUTE: Press to turn off sound. Press again to restore sound. 11. CLOSED CAPTION: Press to select the closed caption mode if available. 12. EXIT: Press to exit on-screen menu/display bar. 13. DISPLAY: Press to view information about the program of channel. 14. GUIDE: Press to open Simple/Full Guide/Reminder List. 15. ZOOM: Press to change the screen format according to the screen aspect ratio and the input signal format. 16. SIGNAL STRENGTH: Press to show signal strength of current channel. 17. MTS: Press to select alternative audio program if available. VOL + VOL - 5 7 6. RECALL: Press to return to last channel viewed. FAV - FAV MTS 13 14 15 16 17 9 STB- T12 Remote Key Function: 1. ON/STANDBY: Press to turn your converter box On and Standby mode. 2. NUMBER: Press to enter channel numbers and passwords. 3. SUB CHANNEL SELECTOR: Press to enter a sub channel number. 4. MENU: Press to open or close the on-screen menu. /OK/VOL/CH: 5. to adjust channels, Press to adjust volume. For Onto Screen Menu: move high light, [OK] to confirm. 11 1.1.1 Installing the Batteries Remove the battery cover from the remote control and put 2xAAA size batteries inside the compartment. The diagram inside the battery compartment shows the correct way to install the batteries. 1. Open the cover 2. Install batteries 3. Close the cover 1.1.2 Using the Remote Control To use the remote control, point it towards the front of the Digital Converter Box. The remote control has a range of up to 7 meters from the Digital Converter Box at an angle of up to 60 degrees. The remote control will not operate if its path is blocked. Sunlight or very bright light will decrease the sensitivity of the remote control. 12 1.2 Front Panel and Rear Panel Illustration 1.2.1 Front Panel 1 2 1 POWER ON / STANDBY BUTTON: 2 REMOTE CONTROL SENSOR: Used to switch the set top box on and standby (Green Light – On) (Red Light – Standby) Used to receive the signal from the remote control. 1.2.2 Rear Panel 4 1 1 2 3 4 5 6 7 8 2 3 5 7 6 8 RF OUT: This socket will transmit the NTSC CH3/4 RF signal to your TV ANT in socket. RF IN: Connect the antenna or CATV cable here. CH3/4 SWITCH: Select NTSC channel (Channel 3, Channel 4). VIDEO OUTPUT: Connect this jack to the Video Input jack on your TV using an Audio/Video cable. This output port supports only the SD output. S-VIDEO OUTPUT: Connect this jack to the S-Video Input jack on your TV using an S-Video cable. This output port supports better quality of video. AUDIO L/R: Connect these terminals to the analog audio inputs of a TV set (i.e., to a TV that has jacks for L/R inputs). Or connect these terminals to the L/R inputs of a separate audio component. SMART ANT I/F: Connect to an external smart antenna. MAIN POWER: Connect to main power supply using the power cord. 13 1.3 Connecting The Digital Converter Box The following diagrams are of typical configurations only, and may differ slightly to your existing external equipment. If you are unsure how to connect to your Digital Converter Box, always consult your manufacturer's user manual supplied with your equipment. 1.3.1 Connecting Antennas This section tells how to connect an indoor or outdoor antenna to your Digital Converter Box. You may need a 75 adaptor or a combiner. NOTES: A. If your antenna has separate leads for VHF/UHF signals, you will need to purchase a combiner to combine it before connect to the receiver. B. The Digital Converter Box can receive DTV signals in the event that a local cable provider is passing 8VSB through on their system. (8VSB is the RF modulation format utilized by the DTV(ATSC) digital television standard to transmit digital bits over the airwaves to the home consumer.) C. When Receiving Digital Cable Signal: If your cable service signal does not comply with the ATSC requirement, this product may not operate properly. 14 1.3.2 Connecting to a TV (TV Aerial) TV Aerial Connect antenna wire to RF ANTENNA IN on the rear of the convertor. Connect the supplied coaxial cable wire from the CH ¾ terminal (RF Out) to RF ANTENNA INPUT on the rear of your TV. To view, tune Ch 3 or 4 on your TV, choose the channel that does not have an active or strong signal. Slide the CH 3/4 accordingly. Over-the-air Antenna TUO VT NI ANNETNA Analog Pass -Through Please follow the procedure below when using Analog Pass-Through RF Coaxial cable to your TV 1. Make sure the converter box is in Standby mode. The power indicator light should be red; otherwise, press the Power button on the converter’s remote control. 2. This step only need to perform once after connection and it is only require if you did not scan the local channel before. Scan analog channels by following the instruction of your TV. It is the same as connecting your TV directly with an antenna. 3. You must use the remote control from your TV to change channels. Table below illustrates the different output from the RF Out connector. Power Indicator Light Standby (Sleep) Red On (Active) Green TV Out Mode (RF Out) Analog Pass-Through NTSC CH 3/4 15 Actual Output RF signal with analog programming from analog broadcast stations Analog RF signal in channel 3 or 4 converted from digital programming contents broadcasted by digital stations Connecting to a TV (Composite Video & S-Video) Composite Video yellow white Connect the supplied video (yellow) and audio (red & white) cables. red To view, cycle through your television inputs (Video 1, 2, etc) to select the source that the convertor is connected to. To TV Video Input To TV Audio L/R Input S-Video To S-Video Input on TV white For better quality, connect with an optional S-Video cable (if your TV has this input). Do not connect the yellow video cable when installing the S-Video cable. red To view, cycle through your television inputs (Video 1, 2, etc) to select the source that the convertor is connected to. To TV Audio L/R Input 16 1.3.3 Connecting to an Audio System VIDEO L S-VIDEO R OUTPUT AUDIOOUTPUT AUDIO Rear panel subject to modification white red To Dolby Surround Equipped Receiver (L + R Audio Input) Front Left Speaker Front Right Speaker Center Channel Dolby Surround Connection Example Surround Left Speaker Surround Right Speaker 17 1.3.4 Quick Start Guide Once all connections are made, follow this Quick Start Guide to begin viewing digital channels immediately. It is recommended that you read the entire manual to familiarize yourself with all of the functions available to you. Initial Installation Guide When the converter box is turned on for the first time or has been reset to factory default, the Installation Guide will be displayed automatically. User can follow the Installation Guide to set the following: • OSD (On Screen Display) Language • Time Zone / Daylight Savings • Scan Channels Installation Guide OSD Language Press [ ] to select the menu language (English, Spanich, or French) then press [OK] to confirm. OSD Langauge English English Spanish French OK Next Page Time Zone / Daylight Saving Press [ ] to select the time zone (Hawaii, Alaska, Pacific, Mountain, Central, Eastern), the press [ ] to move the curso to adjust the Auto ], then press [OK] to Daylight Saving using [ confirm and auto scanning will proceed. Installation Guide - Custom Select Time Zone Auto Daylight Saving EXIT Previous Page Auto Channel Scan Your converter box searches for available channels in your area and stores them in the channel memory. To stop scan during Auto Scan, press the [EXIT] button and the screen will be directed to the first scanned channel. Hawaii Alaska Pacific Mountain Central Eastern Hawaii Yes OK Next Page Installation Guide - Scan 1. CH 8-1: KFLA-LD 2. CH-8: CSTV CH5: 79.00 MHz Total Channels Found: Progress Quality SVSB 2 4% 0% EXIT Stop Setup Complete After auto channel scan is done, press [OK] to complete the setup and began to watch TV. Installation Guide - Finish Setup Completed The system is configured as followed: OSD Language: English Time Zone: Hawaii (-10:00) Daylight Savings: AUTO Detected Digital Channel: 51 Detected Digital Frequencies: 22 Press OK to complete a setup and exit to watch TV OK Exit 18 2. On-Screen Menus The On-Screen Menu display is for accessing and setting up preferences for the converter. 2.1 GUIDE Time / Date Guide Guide Simple Guide Full Guide Channel Guide menu consists of three options: Simple Guide, Full Guide, and Reminder List. Reminder List Setup Info. To display the correct information on Simple Guide, Full Guide, and Reminder List, your “Time Zone” must be set correctly. EXIT Exit Move MENU Previous Page OK Enter 2.1.1 Simple Guide Simple Guide can view program information of the current channel. Simple Guide Channel Time/Date 16:00 Show Name/Title 17:00 Channel 4 News 18:00 Channel 4 News 18:30 Nightly News Press [Guide] on the remote control to display or press [MENU] on the remote control to display the On-Screen Menu and follow the steps below: GUIDE Full OK Reminder/Release arrow buttons to highlight “Simple Guide”, [OK] to enter. 2. While highlighting a program, press [OK] to add or release the program to the Reminder List. 1. Using EXIT Exit 2.1.2 Full Guide (EPG) Full guide or Electronic Program Guide (EPG) is the electronic equivalent of a printed TV program guide. You can view a list of programs scheduled for the next few hours. Press [Guide] on the remote control to display the On-Screen Menu and follow the steps below: arrow buttons to highlight “Full Guide”, [OK] to enter. 2. Press arrow buttons to move/show desired information. 1. Using 19 2-1 4-1 KNBC-LA 4-2 Today The Ellen DeGee Show 16:00-17:00 TV-G Date Time CC Actor Ewan Mcgrady (”New Movie Title”) Channel 4 News 17:00-18:00 CC Williams, Mayer Channel 4 News CC 18:00-19:00 Williams, Mayer FAV+ Next Day FAV- Prev Day 4-4 Change Channel OK Move Scroll GUIDE Reminder List EXIT Exit 2.1.3 Reminder List Reminder List is a preselected set of programs which you can configure in the Simple Guide to remind you of upcoming programs. Time / Date Reminder List Guide Press [Guide] on the remote control three times or press [MENU] button on the remote control to display On-Screen Menu and follow the steps below: 1. Using arrow buttons Channel 5:00 PM Mon Jun 21 4-1 KNBC-LA Channel 4 News 6:00 PM Mon Jun 21 4-1 KNBC-LA Nightly News Setup Info EXIT Exit highlight “Reminder List”, [OK] to set Reminder/Release. 20 MENU Previous Page OK Reminder/Release 2.2 CHANNEL Channel category consists of two options: Auto Scan and Manual Channel Set. Time / Date Note: TV reception is dependent on local terrain, strength of your antenna, and distance from the local antenna tower. Channel Guide Channel Auto Scan Manual Channel Set Setup Info. EXIT Exit Move MENU Previous Page OK Enter 2.2.1 Auto Scan Scans for all digital channels automatically and stores them. Press [MENU] button on the remote control to display On-Screen Menu. 1. Using buttons, select Channel. 2. Press arrow buttons to highlight “Auto Scan”, press [OK] to begin Auto Scan. 3. To stop scan during Auto Scan, press the [Exit] button and the screen will be directed to the first scanned channel. 4. Once Auto Scan is completed, the total number of channels found will be indicated. Time / Date Auto Scan Guide Channel Setup Info. Current Frequency: 803.00 MHz Total Channels Found: Progress Quality 0 100% 0% EXIT Stop 2.2.2 Manual Channel Set Time / Date Manual Channel Set Press arrow buttons to select channel viewable or favorite channel preset. 1. Press [OK] button to add/remove each channel in the “Viewable” and “Favorite” columns. 21 Guide Channel Setup Info. EXIT Exit Channel 2-1 KCBS-DT 4-1 NBC4-LA 4-2 WX-Plus 4-4 RawNews 8-1 KFLA-LD 8-2 CSTV Move Viewable MENU Previous Page Favorite OK Select 2.3 SETUP Setup category consists of 7 options: Screen Setting, System Setting, Parental Control, Closed Caption, Time Zone, Smart Antenna, and Factory Default. Time / Date Setup Guide Channel Setup Info EXIT Exit Screen Setting System Setting Parental Control Closed Caption Time Zone Smart Antenna Factory Default Move MENU Previous Page OK Enter 2.3.1 Screen Setting Screen Setting allows you to set the screen format and aspect ratio option. Press [ZOOM] on the remote control to set screen format to Normal/Zoom/Fill or press [MENU] button on the remote control to display the On-Screen Menu and follow the steps below: 1. 2. 3. In the Setup submenu, press buttons to highlight “Screen Setting” press [OK] to confirm. Screen Format (Normal, Zoom, Fill). Aspect Ratio (Auto detect, 4:3 for standard screen, or 16:9 for wide screen). Time / Date Screen Setting Guide Fill Screen Format Auto Aspect Ratio Channel Normal Zoom Fill Setup Current Video is 1080i Aspect ratio is 16:9 Info Select EXIT Exit MENU Previous Page 2.3.2 Screen Setting Screen Setting allows you to set the OSD Language, Auto Language, Guide Default, and Auto Sleep Timer. Press [MENU] button on the remote control to display the On-Screen Menu and follow the steps below: 1. 2. 3. 4. 5. buttons In the Setup submenu, press to highlight “System Setting” press [OK] to confirm. OSD Language (English/Spanish/French). Auto Language (English/Spanish/French). Guide Default (Simple/Full). Auto Sleep (OFF/15min/30min/1hr/2hr/3hr/ 4hr). 2.3.3 Parental Control (V-Chip) Parental Control allows you to setup access to programs by its designated rating level. You can Lock System, select Country, Rating Control, and Change Password. 22 Time / Date Screen Setting Guide Channel OSD Language English Audio Language English Guide Default Simple Auto Sleep 4hr Setup Info EXIT Exit Select MENU Previous Page English Spanish French Press [MENU] button on the remote control to display the On-Screen Menu and follow the steps below: 1. In the Setup submenu, press buttons to highlight “Parental Control”, press [OK] to confirm. To access the Parental Control, enter the default code “0000” when password is requested. You may Lock System, change Country, Rating Control, and Change Password in the Parental Control submenu. 2. 3. Time / Date Parental Control Guide Channel Lock System OFF Country USA ON OFF Rating Control Change Password Setup Info Select EXIT Exit MENU Previous Page OK Enter 2.3.3.1 Parental Control – Country Once inside the Parental Control submenu, select the country you are located in and the appropriate rating options will appear. V-Chip reads the ratings for DTV programs, then block the programs which exceed the rating level you set. With this feature, you can selectively block programming inappropriate for children. Time / Date USA Guide TV rating Movie (MPAA) rating Channel Setup Info Select EXIT Exit MENU Previous Page OK Enter 2.3.3.2 Parental Control – Rating Control TV-Y All FV V TV-Y TV-Y7 TV-G TV-PG TV-14 TV-MA Movie (MPAA) Rating Appropriate for all children TV Rating S L Allow All Block All D TV-Y7 Appropriate for all children 7 & under TV-G G PG PG-13 R NC-17 X NR General audience TV-PG Parental guidance suggested TV-14 Unsuitable for children under 14 TV-MA G General audience PG Parental guidance suggested Block PG-13 Allow All Block All Unsuitable for children under 13 R Restricted: under 17 requires adult NC-17 No one 17 and under admitted X Mature audiences only Mature audiences only NR No rating TV Rating – Use arrow buttons to move and [OK] button to select. Once blocked, a icon will appear. Sub Rating: FV (Fantasy Violence), V (Violence), S (Sexual Situation), L (Coarse Language), D (Suggestive Dialogue) MPAA Rating is the rating system created by MPAA (Motion Picture Association of America). Use arrow buttons to move and [OK] button to select. Once blocked, a icon will appear. 2.3.3.3 Parental Control – Change Password Change Password – you set a new password by selecting this option. Default password is “0000”. 1. 2. Using buttons, select Change Password. Enter your new password and confirm the change by re-entering the new password. 23 Password New : - Confirm : - - - - 2.3.4 Close Caption Close Caption menu allows you to change/ customize the display settings for closed caption. Press [MENU] button on the remote control to display the On-Screen Menu and follow the steps below: 1. 2. buttons In the Setup submenu, press to highlight “Closed Caption” press [OK] to confirm. Press arrow buttons to change Caption Type and Customization. Closed Caption menu allows change/customize the display settings. 1. 2. you Time / Date Closed Caption Guide Caption Type OFF Customization OFF Channel Setup Info Select EXIT Exit OFF Auto/On Service1 Service2 Service3 Service4 Service5 Service6 CC1 CC2 MENU Previous Page to Time / Date Closed Caption Press the arrow buttons to highlight and select closed caption display option preferences. You may customize caption font size, foreground color, foreground opacity, background color, and background opacity. Guide Channel Setup Info Caption Type Customization Caption Size Foreground Color Foreground Opacity Background Color Background Opacity Select EXIT Exit OFF ON Standard White ON OFF Full Blue Full MENU Previous Page 2.3.5 Time Zone Time Zone menu allows you to change your time zone and daylight saving options. Presee [MENU] button on the remote control to display the On-Screen Menu and follow the steps below: Time / Date Time Zone Guide Time Zone Auto Daylight Saving 1. 2. 3. buttons In the Setup submenu press to highlight “Time Zone”. Select a time zone. Hawaii, Alaska, Pacific, Mountain, Central, and Eastern. Select Auto Daylight Saving (Yes/No) Refer to page for more details on Auto Daylight Saving 24 Pacific Yes Channel Setup Info EXIT Exit Select MENU Previous Page Hawaii Alaska Pacific Mountain Central Eastern 2.3.6 Smart Antenna (If Detected) Smart Antenna submenu will open if a smart antenna is detected. If smart antenna is not detected, it will be indicated and options submenu will NOT appear. Press [MENU] button on the remote control to display the On-Screen Menu and follow the steps below: 1. 2. buttons In the Setup submenu press to highlight “Smart Antenna”. Select/adjust settings to desired preferences press [OK] to save. Time / Date Smart Antenna Guide Channel Setup Mode Auto Direction 0 Gain 0 Polarity 0 Auto Manual Info Select EXIT Exit MENU Previous Page OK Save 2.3.7 Factory Default Factory Default allows you to reset the converter box to the factory default setting and will erase all preset options. Time / Date Press [MENU] button on the remote control to display the On-Screen Menu and follow the steps below: 1. 2. In the Setup submenu press buttons to highlight “Factory Default”. Select “Yes/No” to reset settings back to default, press [OK] to confirm. 25 Setup Guide Warning Channel Are you sure to load Factory Default? Setup Info EXIT Exit Yes Select No MENU Previous Page 2.4 INFO Info Menu displays the system information, software version, hardware version, and loader version. Time / Date System Information Guide Channel Product: Software Version: Hardware Version: Loader Version: Setup Info EXIT Exit MENU Previous Page 2.4.1 Display Bar Press [DISPLAY] button on the remote control to show information Display Bar. It will display channel info, rating, and length of program. Time / Date 4-2 WX-Plus Eye Witness News TV-PG DISP 4:30 PM-5:00 PM Rating Info TV Time / Date TV-PG EXIT 1/1 2.4.2 Volume Bar Press [VOL+] on the remote control to increase VOL Press [VOL-] on the remote control to decrease VOL Press [MUTE] to turn sound off or restore sound 75 2.4.3 Signal Bar Press [SIGNAL] on the remote control to display signal quality and signal strength. Signal Bar 4-2 WX-Plus Signal Qualify: Signal Strength: 26 Time / Date 100% 59% 3. Troubleshooting Q: It takes a while to display picture on the screen after turning power on or after changing channel. A: It will take several seconds for this receiver to show the logo or picture after power on since the system have to finished the initialization of the main chip and demodulator. In case of digital broadcasting, it could take 1 to 2 seconds to receive data. Therefore, it is not a faulty receiver if the picture display is delayed. Q: There is no picture on the screen. A: Make sure the power is on. Make sure the cable between the receiver and the TV is connected properly. Make sure the TV's external video input mode is selected correctly. Make sure the video output is selected correctly. Make sure the antenna is positioned correctly. Try turning the receiver off and then back on again. Q: Cannot receive certain channels through the antenna. A. Use the automatic scanning function to add the channels not included in the memory. Signal from the TV station may be weak. Reposition antenna. Q: TV blocked at certain channels. A. Use the automatic scanning method to add the channels not include in the memory. Check parental control settings. Q: Poor video quality or screen flickering. A. This is a result of a poor broadcast signal. Rotate the antenna to a different direction. Q: Black box on the screen. A. The “Text” option is enabled and no text is available. Turn off CCD (Closed Caption) on the remote control. Q: No Sound. A: Make sure the cable between the receiver and the TV audio jack or your audio system is connected properly. Try pressing the MUTE button on the remote. Try pressing the VOL+ button on the remote continuously. Try turning the receiver off and then back on again. Q: The remote control does not work. A: Make sure there is no obstruction between the remote controller and the remote sensor of the receiver. Make sure the distance and degree is not out of range. Check to insure the batteries are installed correctly. Install a pair of new batteries. 27 4. Specification Product Name Digital TV Converter Power Supply Input Voltage: 100 - 240V~ 50/60Hz Power Consumption: Maximum 8W, Standby <1W. Decoder Video Format: Standard definition CVBS. Audio Format: Dolby Digital audio R F Signal Input/Output ATSC Antenna/Cable RF In: F-Connector NTSC Ch3/4 RF out: F-Connector Antenna Impedance: 75 Ohms Channels: VHF 2 -13 , UHF 14 - 69 Smart Antenna interface Video Outputs Composite Video Output for standard analog sets: RCA Connector S-Video Output for high video quality output to your TV Audio Outputs Analog Audio Outputs (L/R): RCA Connectors 28 5. Glossary ATSC: Advanced Television Systems Committee. Formed to establish technical standards for U.S. advanced television systems. Also, the name given to the 8-VSB transmission standard itself. NTSC: "National Television Systems Committee" and the name of the current analog transmission standard used in the U.S., which the committee created in 1953. Analog TV: Analog technology has been in use for the past 50 years to transmit conventional TV signals to consumers. "Standard" television broadcasts in analog TV. Analog signals vary continuously, creating fluctuations in color, brightness and quality. Digital Television (DTV): Digital TV is the umbrella term encompassing High-definition Television and several other applications, including Standard Definition Television. SDTV: "Standard Definition Television". Digital formats that do not achieve the video quality of HDTV, but are at least equal, or superior to, NTSC pictures. SDTV may have either 4:3 or 16:9 aspect ratios, and it includes surround sound. Variations of fps (frames per second), lines of resolution, and other factors of 480p and 480i make up the 12 SDTV formats in the ATSC standard. HDTV: "High-definition Television". This is the most superior video picture available in Digital TV. In the U.S., the 1080i and 720p formats in a 16:9 aspect ratio are the two acceptable HDTV formats. HDTV is a component of DTV. Dolby Digital: This is a digital surround sound technology used in movie theaters and upscale home theater systems that enhances audio. Home theater components with this technology work in conjunction with a "5.1-speaker" system (five speakers plus a low-frequency subwoofer) to produce true-to-life audio that draws the listener into the onscreen action. Six discreet audio channels are used: Left, Center, Right, Left Rear (or side), Right Rear (or side), and a subwoofer -- LFE, "low frequency effects" -- (considered the ". 1 " as it is limited in bandwidth). Smart Antenna: A smart antenna system combines multiple antenna elements with a signalprocessing capability to optimize its radiation and/or reception pattern automatically in response to the signal environment. 29 Tivax Limited Warranty To Original Purchaser Tivax warrants this product purchased in the USA against defects in material and workmanship for a period of 3 months from the date of purchase under normal use and service. Products will not be warranted if the serial number is removed or defaced. This warranty shall be void upon transfer of ownership of this product and is effective only when used in the United States, excluding U.S. Territories. Tivax agrees to repair or replace this unit at no charge, within the warranty period, providing that the product is delivered to Tivax in its original package or equivalent, fully insured, with all shipping charges prepaid and a return authorization number listed on the outside of the packaging. A handling charge of $25 will be applied to any returned product found not to be defective. To honour this warranty and to ensure the best service to our customer, Tivax requires the following information to be included with the returned unit: A copy of the original sales invoice from your vendor. Model number & serial number of the unit. A detailed description of the problem, associate electrical connection and hardware. A Return Authorization number can be obtained by faxing to 650.240.3950 or emailing [email protected] prior to returning the unit. This warranty contemplates the owner will reasonably maintain this instrument or product without alteration, negligent use, misuse, or abuse. Furthermore, any unauthorized alteration of this device without written approval by Tivax will void any warranty and the owner's right to operate this device. This warranty presented above is exclusive and in lieu of all other expressed or implied warranties. Any warranty applicable to this product is limited to the period described above. In no event will Tivax be liable for any special, incidental, or consequential damage, loss of revenue, or cost of replacement goods resulting from the use of malfunction of this product to the equipment system on which it is used. This warranty gives specific legal rights and you may have other rights that vary from state to state. 30 Michley Electronics Inc. U.S.A www.tivax.com


