1
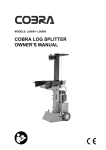
KB9000 Programmable Touch Bumpbar USER MANUAL Table of Contents 1 Introduction ..........................................................................................2 1.1 1.2 Safety Information ........................................................................................ 2 Electromagnetic compatibility statement ................................................. 3 2 Overview ................................................................................................4 2.1 2.2 2.3 2.4 Appearance ..................................................................................................... 4 Features ........................................................................................................... 5 Models ............................................................................................................. 5 Interface Connector ....................................................................................... 5 3 Hardware Connections ........................................................................6 3.1 3.2 3.3 Connecting KB9000 to KDS controller ......................................................... 6 Connecting KB9000 to computer USB port ................................................ 6 Connecting KB9000 to computer PS/2 port ................................................ 6 4 Legend Sheet Installation ................................................................... 7 4.1 4.2 4.3 Remove the legend cover ...............................................................................7 Replace legend sheet into the cover .............................................................7 Reinstall the legend cover ..............................................................................7 5 Programming Utility Software ...........................................................8 5.1 5.2 5.3 Installation...................................................................................................... 8 Programming the KB9000 ............................................................................. 8 Programming Features .................................................................................. 9 6 Connector Pinouts............................................................................... 11 7 Specifications ..................................................................................... 12 1 1 Introduction Thank you for purchasing the KB9000 Programmable Touch Bumpbar. Bematech is committed to continuously improve product quality and provide better after-sales service. This User Manual is a description of the KB9000 bumpbar including information regarding installation and operation. No warranty of any kind is made in regard to this material, including, but not limited to, implied warranties of merchantability or fitness for any particular purpose. We are not liable for any errors contained herein nor for incidental or consequential damages in connection with furnishing, performance or use of this material. We shall be under no liability in respect of any defect arising from fair wear and tear, willful damage, negligence, abnormal working conditions, failure to follow the instructions and warnings, or misuse or alteration or repair of the products without written approval. No part of this document may be reproduced, transmitted, stored in a retrieval system, transcribed, or translated into any human or computer or other language in any form or by any means electronic, mechanical, magnetic, optical, chemical, biological, manual or otherwise, except for brief passages which may be quoted for purposes of scholastic or literary review, without express written consent and authorization. We reserve the right to make changes in product design without reservation and without notification. The material in this guide is for information only and is subject to change without notice. All trademarks mentioned herein, registered or otherwise, are the properties of their various, ill, assorted owners. 1.1 Safety Information Do not dispose the bumpbar in fire. Do not put the bumpbar directly in the sun or near any heat source. Do not use or store the bumpbar in a very humid place. Do not drop the bumpbar or allow it to collide violently with other objects. Do not take the bumpbar apart without authorization. Do not spill liquid on the bumpbar or submerge the bumpbar into liquid. It may cause short-circuit of the internal components. Do not use harsh chemicals or strong cleaning solvents to clean the bumpbar. Wipe it clean with a soft terry cloth applied with a mild solution 2 When the following occurs: Liquid gets inside the bumpbar; Accidental physical damage; The interface cable is damaged; The bumpbar produces a burning smell; Immediately disconnect the bumpbar and contact a qualified service technician. 1.2 Electromagnetic compatibility statement FCC NOTICE This device complies with Part 15 of FCC Rules. Operations are subject to the following two conditions: (1) this device may not cause harmful interference, and (2) this device must accept any interference received, including interference that may cause undesired operation. EUROPEAN COMMUNITY (CE) MARK OF CONFORMITY This product is in conformity with the protection requirements of EU Council Directive 89/336/EEC on the approximation of the laws of the Member States relating to electromagnetic compatibility. Logic Controls cannot accept responsibility for any failure to satisfy the protection requirements resulting from a non-recommended modification of the product. This product has been tested and found to comply with the limits for Class A Information Technology Equipment according to CISPR 22 / European Standard EN 55022. The limits for Class A equipment were derived for commercial and industrial environments to provide reasonable protection against interference with licensed communication equipment. 3 2 Overview The KB9000 is a fully programmable bumpbar keypad with touch operations. With the advanced projected capacitive touch technology, the KB9000 provides reliable and durable touch operations that cannot be achieved with resistive contacts. The user friendly programming software helps users to customize the bumpbar layouts to desired number of keys, key locations, key dimensions and key codes that meet the unique requirement of each application and maximize operation efficiency. 2.1 Appearance 4 2.2 Features • Projected Capacitive Touch Operation • USB and PS2 keyboard interface • Audio and visual feedback with individual key beep pitch and duration settings • Programmable key contents up to 1,400 key strokes total • Easy change of legend sheet • User customizable legend sheet with advanced user friendly software • Flexible layout of number of keys (up to 64 keys), key dimensions and key locations • Programmable inter-string delay • Output data set includes all alphanumeric, controls, and function codes • Macro calls and repeat key functions • Vertical and horizontal sliding gesture translation to key operations 2.3 Models • KB9000 - • KB9000U - KB9000 with RJ-RJ cable for KDS controllers KB9000 with USB cable for USB interface 2.4 Interface Connector 5 3 Hardware Connections 3.1 Connecting KB9000 to KDS controller 3.1.1 Connect the RJ-RJ interface cable connector to the KB9000. 3.1.2 Connect the other RJ11 connector of interface cable to the KDS controller (such as LS6000) bumpbar connector. 3.2 Connecting KB9000 to computer USB port 3.2.1 Connect the USB interface cable RJ11 connector to the KB9000. 3.2.2 Connect the interface cable USB connector to the computer. 3.3 Connecting KB9000 to computer PS/2 port 3.3.1 Connect the PS/2 interface cable RJ11 connector to the KB9000. 3.3.2 Connect the interface cable PS/2 connector to the computer. 6 4 Legend Sheet Installation The KB9000 legend sheet can be installed or replaced easily with the following simple steps. 4.1 Remove the legend cover Pull open the cover from the bottom near the interface connector to unlatch it and then pull open the cover to remove it. 4.2 Replace legend sheet into the cover Remove the original legend sheet from the cover and insert the new legend sheet face down. Make sure that the top left corner of the legend sheet matches with the top left of cover indicated by the 2 LED holes. 4.3 Reinstall the legend cover Leaving the legend cover and legend sheet facing down on flat surface, orientate the KB9000 face down matching the cover, align and insert it into the cover. Press the KB9000 such that all sides fit into the cover. 7 5 Programming Utility Software 5.1 Installation The programming utility software does not require special installation. Just copy the folder in the software package into a target folder in the computer. For PS/2 Interface, a special driver is required for the utility to communicate with the KB9000. Following instructions included in the PS/2 driver package to install the driver before running the programming utility. 5.2 Programming the KB9000 1. Connecting the Keyboard For PS/2 versions: Turn off power of the PC. Connect the programmable keyboard to the PC with the special interface cable provided. Plug the standard PC keyboard to the female PS/2 connector on the interface cable and the male PS/2 connector to the computer. For USB versions: Connect the programmable keyboard to any USB port on the computer. 2. Starting the Utility Start the Programming Utility by double clicking on the“KB9Utility.exe” icon in the folder where the utility is installed. 3. Preparing the Template The utility starts with a blank template (all key definitions are blank). An existing template can be brought into the utility as a starting point for editing. There are 2 ways to get existing template files into the utility -“OPEN” from a template file stored on PC, or “READ” from the KB9000 that contains the previously programmed template. Click on "File Open" or "Read from KB9000" toolbar buttons to access these functions. Refer to the KB9000 Programming Manual for details of editing key layout and key definitions. 4. Writing into the Keyboard It is strongly advised that the template should be first saved into a template file for future reference and for programming multiple keyboards. As legend 8 design properties such as key colors and key labels are not saved into the KB9000, these information can only be saved in the template files. After saving the file, click "Write in KB9000" button on the toolbar to write the template into the KB9000. 5.3 Programming Features User defined key layout with rich rectangle drawing tool (alignment, grouping, move, automatic spacing, matrix keys, etc.) Ruler display, grid display, and zoom in/out function for easy positioning and alignment of keys. Quick template design with programmable legend sheet background color key font/background color, font size/alignment/rotation/color, key shape, key border and image superposition for direct printing of legend sheet. Export legend sheet design to JPEG, Bitmap or PNG format files for further processing with other graphic editing software or printing. Copy and paste for quick duplication of similar key designs. When copying keys, all contents of key will be copied (name and key content). Key content status indicators for easy identification of keys that are empty or modified in the current edit session. Programmable touch sensitivity and sensing delay to suit operator or application preferences on touch operations. Inter-character delay programmable from 1 to 100ms to slow down output speed to match computer/application response. String output with capitalization not affected by CapsLock status (automatically add Shift key action depending on CapsLock status in order to reserve the required capitalization). Allow emulation of keyboard typing functions such as upper/lower case switching with CapsLock and typmatic. Flexible placement of "break codes" (for indicating release action of the key) for Shift, Alt, Ctrl & Win keys to achieve special key combination operations such as Ctrl-Shift-F2. 9 Key combinations input to simulate actions of holding down up to 3 keys (other than Shift, Alt, Ctrl & Win keys). Programmable pause time of 0.1sec to 10.0 sec to allow application software to response before later part of key outputs are generated. Macro calls to macro definitions to save programming effort and memory space when similar sequence of key actions are required in many keys with just minor variations from key to key. Repeat function to program repeated key action multiple times efficiently. Programmable beep tone pitch and duration for individual keys. Direct input of key definitions from keyboard for most of the required functions. Alternatively, the on-screen keyboard can be used for input. The on-screen keyboard can also be used to enter some keys that are not possible to input via keyboard (due to editing operation requirements or Windows limitation) or not available on the keyboard. Test function for checking output of programmed keyboard by showing key outputs that are otherwise difficult to visualize with normal operations. For detail programming operations, please refer to the KB9000 Programming Utility User Guide. 10 6 Connector Pinouts PS/2 Interface Pin No. Signal Name 1 CLK 2 DATA 3 NC 4 GND 5 V+ 6 NC Pin No. Signal Name 1 NC 2 NC 3 D+ 4 GND 5 V+ 6 D- USB Interface 11 7 Specifications CHARACTERISTICS Key Operations Projected Capacitive Touch Number of keys 64 maximum Key code memory Around 1,400 key strokes total Key layout area 6.93in x 2.52in (176mm x 64mm) Key operation feedback Audio beep and LED indicator Reliability >30 million touch operations MECHANICAL Net weight without bracket 0.59 lbs (0.27Kg) Net weight with bracket 1.17 lbs (0.53Kg) Dimension without bracket (W x D x H) 8.54" x 3.54" x 1.06" (217 x 90 x 27mm) Dimensions with bracket attached (W x D x H) 8.54" x 4.21" x 2.56" (217 x 107 x 65mm) Mounting options Angle bracket and VESA mounting (75mm) ELECTRICAL Input voltage 5VDC Current consumption 125mA max, 80mA nominal ENVIRONMENTAL Operating temperature 0C to 50C Relative humidity 80% max, non-condensing INTERFACE CABLES PS/2 RJ-to-PS/2 or RJ-to-RJ cable (for LS6000/LS6100) USB RJ-to-USB (Type A) 12 KB9000 Programmable Touch Bumpbar 999 S. Oyster Bay Rd Building #104 Bethpage, NY 11714 USA Tel: +1 516 248 0400 Fax: +1 516 495 4075 13