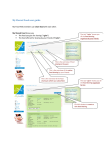
Download IV. The Seating Plan
Transcript
TAPUCATE is an application for teachers for the administration of classes, pupils, marks, etc. TAPUCATE is designed for speed and maximum user comfort. With this markadministration system the paper chase is a thing of the past! TAPUCATE Extension-App 1 (EP1) Manual Level of November 19th, 2013 Apenschi® Software Apenschi® Software 0 I. Table of Contents I. Table of Contents I. TABLE OF CONTENTS 1 II. INTRODUCTION 2 III. THE PERFORMANCE CHART 3 A. THE PERFORMANCE CHART IN THE STUDENT OVERVIEW GENERAL INFORMATION DISPLAY OF CATEGORIES/ SUBCATEGORIES 3 3 4 IV. THE SEATING PLAN 5 A. GENERAL INFORMATION CREATE A NEW (FIRST) SEATING PLAN FOR A CLASS CREATE FURTHER SEATING PLANS FOR ONE CLASS EDITING A SEATING PLAN a) Mark student-tiles b) Move student-tiles c) Align student-tiles d) Turn student-tiles e) Swap two student-tiles RENAME A SEATING PLAN DELETE A SEATING PLAN 5 7 8 8 9 9 9 10 10 10 11 B. ENTER GRADES IN THE SEATING PLAN ENTER GRADES IN THE SEATING PLAN CHANGE GRADES IN THE SEATING PLAN 11 11 12 C. ENTER ENTRIES IN THE SEATING PLAN GENERAL INFORMATION „SINGLE“-ENTRIES REPEATABLE ENTRIES 12 12 14 15 D. CHECKLISTS IN THE SEATING PLAN ADD A NEW CHECKLIST CHECK A CHECKLIST IN THE SEATING PLAN 15 15 15 E. FURTHER FUNCTIONS RANDOM STUDENT PRINT A SEATING PLAN/ CREATE A PDF-SCREENSHOT SENDING EMAILS 16 16 17 18 V. OTHER 19 A. IMPRINT/ TERMS OF USE 19 Apenschi® Software Page 1 II. Introduction II. Introduction IMPORTANT: The App “EP1” is an extension pack that can only be used TOGETHER WITH TAPUCATE!! This is the first extension pack for TAPUCATE. THIS APP IS NOT INTENDED TO BE USED DIRECTLY! It just provides new functionality and data for TAPUCATE itself! This app extends TAPUCATE with the following features: Seating plan where you can directly enter grades, entries (like attendance), check checklist and much more by just tapping on a student’s field. Graphical progress chart for the student overviews The new functions will show up in TAPUCATE automatically after installing this app. Please also read the instructions for the basic handling of grades, entries and so on in the handbook of "TAPUCATE". Apenschi® Software Page 2 III. The Performance Chart III. The Performance Chart A. The Performance Chart in the student overview General Information The graphical performance chart shows the trend of a student's grades - broken down by categories/ subcategories. Below the performance chart you can find space for each category/subcategory field in the according colors. These fields allow adjusting the display to your own needs: categories can be activated / deactivated, a moving average or the current grade values can be displayed. The curves represent accurately the individual grades - weights are not considered. The gray marker indicates the average values of all categories. NOTE: With a double tap on the curve, the curve can be extended to the entire space and can be reduced again with a "two-finger movement" and can also be shifted back. Apenschi® Software Page 3 III. The Performance Chart Display of categories/ subcategories All categories / subcategories can be displayed individually in the performance chart. With single taps on the respective squares, the display is altered accordingly. The "filled" squares indicate that a category/subcategory is NOT shown. With a tap on a "filled" square, the display changes... A square with the average-symbol shows the moving average of all grades of a category/subcategory. With another tap on the square, the display changes again... The "empty" square shows the current grades of a category/subcategory in a graphical curve. Apenschi® Software Page 4 IV. The Seating Plan IV. The Seating Plan A. General information With the expansion app "ep1" it is also possible to set up individual seating plans for each class. Via the class context menu (LONG tap on the class field) you can open an existing seating plan via the function → Seating plans. If the display of the seating plans should always be available with just one tap, you can add a "seating plan"-button to the ActionBar (→ Settings → General → Menu items in header/ActionBar). By default, the seating plan displays the student's last name in full, e.g. D.Demo (fn. lastname). The format of the student´s name can be changed in the settings → Name format): (→ Settings → General D.Demo (fn. last name) Daniel D. (first name ln.) Apenschi® Software Page 5 IV. The Seating Plan → Not yet due reminders → Due reminders → Open checklists NOTE: The seating plan cannot be rotated. It is shown for orientation purposes only, so one knows in which the seating plan is opened. In the seating plan you can change directly between the classes and their individual seating plans (e.g. for different rooms). In addition, various functions can be executed: Enter grades Add and edit checklists Record entries: Single entries (e.g. Absence) and repeatable entries (e.g. good participation) All data that are entered in the seating plan will be automatically adopted in the class overview, the student overview and all lists. It is also possible to select a random student, to create a PDF Screenshot and to send emails to the student contacts. The number in the light-blue square shows the open, but not yet due reminders. The number in the orange square shows the overdue reminders. The number in the gray square indicates the number of open checklists. Apenschi® Software Page 6 IV. The Seating Plan With a tap on a student in the "Lock input" mode you can directly change to the student overview or to the student’s base data. Create a new (first) seating plan for a class If there is no seating plan for this class found you can create a new seating plan via the class context menu (LONG tap to a class tile) via the function → Seating plan or with a tap on the button "seating plan" in the ActionBar. This dialogue will appear. Here you can enter a name and a remark. As soon as this dialogue is confirmed, all students will be arranged in an arbitrary order at first. Of course this can be changed, please take a look at: "Editing a seating plan". Apenschi® Software Page 7 IV. The Seating Plan Create further seating plans for one class If there are already seating plans for a class, you can create additional seating plans by selecting the class first. First you have to open an existing seating plan. The function → Edit seating plan opens the edit-mode. With a tap on the "+" icon the dialogue "Create new seating plan" opens and another seating plan can be created. Here too, all students will be arranged in an arbitrary order and can then be adjusted accordingly, please take a look at: "Editing a seating plan". Editing a seating plan The arrangement of the students can only be changed in edit-mode. First you have to open a seating plan (new or existing). Selecting → Edit seating plan opens the edit-mode. Apenschi® Software Page 8 IV. The Seating Plan a) Mark student-tiles With a SHORT tap on one or more students these tiles begin to flash, now: they are selected for further action (move or rotate). All students can be selected at once with one tap at the invert-selection-button. b) Move student-tiles By keeping a student-tile pressed the student or the whole selection can be moved. You have to tap in the upper part of the student-tile, otherwise the student-tiles will be rotated! IMPORTANT: Once the finger has no contact with the screen, the function → Moving is interrupted and can be restarted by a tap on LONG and STOP ENDS. c) Align student-tiles First, the students who are to be aligned must be marked with a SHORT tap, so it starts to flash. With a tap on the alignment symbols, students are appropriately aligned horizontally and vertically. NOTE: The student-tile, which is marked first, is the alignment point! Example VERTICAL alignment: 1. Mark the two students with a short tap (both will flash) 2. Tap on the "vertical" alignment Icon 3. Students will be aligned on the left hand side Apenschi® Software Page 9 IV. The Seating Plan Example HORIZONTAL alignment: 1. Mark the four students with a short tap (all will flash) 2. Tap on the "horizont" alignment Icon 3. Students will be placed aligned upwards d) Turn student-tiles By keeping a student-tile pressed the student or the whole selection can be rotated with a circular finger motion across the screen. You have to tap on the upper part of the student-tile, otherwise the student fields will be moved! IMPORTANT: Once the finger has no contact with the screen, the function → Turning is interrupted and can be restarted by a tap on LONG and STOP ENDS. e) Swap two student-tiles First you have to mark two studenttiles with a short tap. With a tap on the "Swap"-Icon, the selected student-tiles will be interchanged. Rename a seating plan First you have to open an existing seat plan and then you have to start the editing mode → Edit seating plan. With a tap on the "Edit"-Icon you can change the name and the note of the seating plan. Apenschi® Software Page 10 IV. The Seating Plan Delete a seating plan First you have to open an existing seat plan and then you have to start the editing mode → Edit seating plan. With a tap on the “Delete”-Icon the currently selected seating plan will be deleted after a confirmation request. B. Enter grades in the seating plan Enter grades in the seating plan In the seating plan grades can be entered quickly and easily with the grade mode → Enter grades and they will be automatically adopted in the class overview, the student overview and all lists. If this mode is activated, a date, a subject and a category/subcategory can be selected in the title bar, and a description can be entered, under which the grades will be stored. With a tap at one student field the grading dialogue opens, where a note can be entered and finally a grade can be selected. That way different grades – also those for other grade categories – can simply be entered. All recorded grades will be visible in the grading-mode for the whole day. Apenschi® Software Page 11 IV. The Seating Plan You can find detailed information about grading/ grading categories/ weights in our TAPUCATE manual: „Grading“. Change grades in the seating plan You can open the grade dialog of all entered grades with a single tap on a certain grade. In this dialogue all grade details can be edited. C. Enter entries in the seating plan General information In the seating plan you can enter entries quickly and easily using the entry-mode and they will of course be transferred directly into the class-/ student overview. First you have to decide if entries are captured only once or repeatedly in a lesson. Entries that will be only once captured per lesson, e.g. "Absences", "Missing Homework" will be displayed directly in the drop-down menu. Entries that are also multiple captured during a lesson, e.g. "Good work", "Is disturbing" are summarized in the function → Repeatable entries. Apenschi® Software Page 12 IV. The Seating Plan You can define the entry icon and which entry shall be used just once or repeatedly per lesson. Via → MENU → student entry types the entry overview will open and via a tap on a certain entry type the dialog "Edit entry type for students" will open. Under the item „Frequency“ you can select how often an entry shall be recorded: only "Once per lesson" or "Repeatedly per lesson" A tap on the icon opens a list of many different symbols (please scroll down), from which the symbol for this entry can be chosen arbitrarily. The selected icon will be shown in the seating plan. By selecting the "rectangular" icon, the short name is displayed with the specified color marking. You can find detailed information about entries/ entry-types in our TAPUCATE manual: „Entries“. Apenschi® Software Page 13 IV. The Seating Plan „Single“-Entries First you have to open an existing seating plan of a class and then please select an entry type, e.g. absence, a date and or a subject. With a tap on a student field this will be highlighted in the defined entry color (→ student entry types) and the defined entry icon (or the short name of the entry) appears next to the Student’s photo. Now a "simple" entry has been created. If you need further details of this entry, e.g. remarks or reminders, you can open the entry dialogue with a tap on the icon (short name of the entry). Now additions can simply be made. Apenschi® Software Page 14 IV. The Seating Plan Repeatable entries First, an existing seating plan of a class must be opened and the function → Repeatable entries has to be selected. A tap on a student-tile opens the icon for the repeatable entries. With a further tap on a certain icon (or short name of an entry) an entry will be created and the counter (number of daily entries) in the blue dot will increase accordingly. These entries are immediately saved to the student overview and can there be changed or deleted accordingly. D. Checklists in the seating plan Add a new checklist First you have to open an existing seating plan of a class and then you start the checklist mode → Checklist. With a tap at the icon “New checklist” you can create a new checklist. Check a checklist in the seating plan In the checklist mode the title bar will show the name of the first checklist and with a tap on the name a complete list of all the checklists will be displayed. Apenschi® Software Page 15 IV. The Seating Plan In the same manner as with the list view of the class overview, the checklists are listed in the following order according to the status and with the following color coding for a better overview: 1. Overdue but not yet settled checklists red 2. Open but not yet settled checklists gray 3. Completed checklists green The first line contains the title and the date shows the overdue date. "Pending" or "Done" displays how much students have not yet been checked (Pending) or were already checked off (Done). A tap to a checklist opens it, and the list can be checked in accordance by tapping on a student-tile. With a tap on an already "checked student" this can also be deselected again. E. Further functions Random student Via tapping on the icon → Random student a student is chosen at the random principle – like in the class overview. The seating plan appears, the selected student’s name enlarges and the student field starts to flash. Now you can enter grades or entries or choose another student with a further tap on the icon “further students”. Apenschi® Software Page 16 IV. The Seating Plan Print a seating plan/ Create a PDF-Screenshot With the function → PDF-Screenshot all seating plans can be printed quickly and easily. NOTE TO THE PDF-FEATURE : The PDF features are in the introductory phase and can be used free of charge until the end of this period. To continue using the PDF function after the end of the introductory period, it will be necessary to purchase a PDF extension module separately. With a tap on the icon „PDF-Screenshot” a PDF file of the seat plan with all visible entries (grades, entries …) will be created. The pdf file “„seatingplan_(class)_(name)_(date/time).pdf“ will be saved to the directory → TAPUCATE/Export. This can be printed either directly or after copying it to a PC depending on the existing printer. SEATINGPLAN_10A_RAUM A_130409-111855.PDF NOTE: Sone smartphones/tablets „block“ the sdcard as soon as the smartphone/tablet is connected to the PC via USB! Therefore: First create the PDF-Screenshot, only then connect with the PC and copy the file. PRIVACY PROTECTION: As standard the created PDF-files are unencrypted. Via → Settings → Security a password can be determined and an encryption can be activated. Then you will need a PDF-program that is able to deal with password protection. Do not send any unencrypted data via the internet! Furthermore, for sending personal data it needs the permission of the people concerned! Apenschi® Software Page 17 IV. The Seating Plan Sending Emails PRIVACY PROTECTION: For reasons of data privacy TAPUCATE does not send emails itself! For that reason TAPUCATE needs external email apps for sending emails and each mail has to be confirmed by the user. Naturally, the generated email data are unencrypted! For sending them, it is essential to use an email encrypting system (OpenPGP or S/MIME)! Email apps that are applicable are also available for Android™ (e.g. K9-email in conjunction with APG)! Apart from that, for sending personal data it needs the consent of those affected! From the seating plan you can send out emails to student contacts from the following modes: Seating plan overview Enter grades Repeatable entries Checklists Entries Therefore you have to enter the corresponding email addresses in advance. With a tap on the icon “eMail” a window opens, where you have to decide, to whom an email is to be sent: Last selected students All selected students All students In the next step you have to select to which contact persons and via which email program the emails should be send. Apenschi® Software Page 18 V. Other V. Other A. Imprint/ Terms of use Provider: Apenschi® Software Andreas Schilling Finkenweg 12 33178 Borchen Germany [email protected] Terms of use The provider endeavors to keep the information in this manual correct and current, but will not guarantee currentness, correctness or completeness. The provider reserves the right to change or to delete the content of this manual completely at any time. Apart from proven intentional or grossly negligent behavior, the provider will not be liable for any damages caused by the usage, non-usage or faultiness of the information and media offered here. Trademark and copyright All text, images and other media on this site: (C) 2012 Apenschi Software Reproduction and processing of any kind requires written permission. All rights reserved. Apenschi ® is a registered trademark. Applicable Law The instructions of this user’s manual are provided on the basis of German law. Apenschi® Software Page 19


