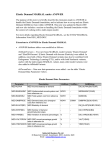
1
ANSWERv6-MARKAL Load Templates Manual (version 6.1)
1
ANSWERv6-MARKAL Load Templates Manual (version 6.1)
Table of Contents
Acknowledgement ..................................................................................................................... 2
1. Background............................................................................................................................ 2
2. Workbook Setup .................................................................................................................... 3
3. Worksheet Layout and Philosophy ........................................................................................ 4
4. Commodities Sheet ............................................................................................................... 6
5. Technologies Sheet............................................................................................................... 8
6. Constraints Sheet ................................................................................................................ 10
7. Commodity Data (CommData) Sheet.................................................................................. 12
8. Technology Data (TechData) Sheet.................................................................................... 15
9. Constraints Data (ConstrData) Sheet.................................................................................. 18
10. Specifying Declaration Information and Data for Taxes/Subsidies ................................... 20
11. Loading the Templates into ANSWER .............................................................................. 23
12. Example ANSWER “smart” template ................................................................................ 24
Appendix A: Establishing a New ANSWER Calibration and Load Workbook ......................... 25
A.1 - Creating a new (empty) ANSWER Smart Workbook ............................................... 25
A.2 - Making an existing workbook aware of ANSWER Smart Workbook facilities.......... 27
A.3 - Copying an existing workbook that is already aware of ANSWER Smart Workbook
facilities to create a new workbook ................................................................................... 28
A.4 - Updating an existing workbook that is already aware of ANSWER Smart Workbook
facilities when Noble-Soft distributes an updated version of the ANSWER smart XLS ... 29
A.5 - Adding a New ANSWER Smart Sheet to the Current XLS ...................................... 29
Appendix B: Extension of ANSWER Load Templates to handle multi-region models ............ 32
B.1 - Multi-region models that do not have common naming conventions across regions
.......................................................................................................................................... 32
B.2 - Multi-region models that do have common naming conventions across regions .... 33
B.3 - Technology Data sheet extension to handle Bilateral Trade between Regions ...... 35
© Noble-Soft Systems Pty Ltd 2005-07
August, 2007
ANSWERv6-MARKAL Load Templates Manual (version 6.1)
2
Acknowledgement
The development of the ANSWER Load Templates is the result of a collaborative effort
between Gary Goldstein of International Resources Group and Noble-Soft Systems.
1. Background
The task of assembling data for a MARKAL model requires various data preparation steps
that are usually performed using the power and flexibility of spreadsheets (Excel). New
ANSWER “smart” load templates have been developed to allow the analyst to assemble the
model data from its sources in a form readily loaded into ANSWER. The process is guided by
a few rules and supported by action buttons and selection trees or lists, along with quality
control checking, to facility the direct (and correct) loading of the data. Initially these templates
are more focused on assisting the assembling of initial year data for the calibration of a (new)
model, but the approach will be expanded to facilitate load of projection information as well.
The ANSWER “smart” templates are loaded into an ANSWER database by means of the
“File, Import, Model Data from Excel” facility. For an overview of the use of this facility see
section 11 ‘Loading the Templates into ANSWER’ of this manual, and for a detailed
explanation see section 2.10 ‘Importing Model Data from Excel’ in the ANSWERv6-MARKAL
User Manual.pdf in folder C:\AnswerV6\UserManuals.
In the sections that follow each sheet will be presented. The next two sections however
describe opening a “smart” workbook and the general layout and philosophy embodied in all
the sheets.
Note that an example ANSWER “smart” template, UtopiaSmartXLS.xls, is now provided as
part of the ANSWERv6-MARKAL installation files in folder C:\AnswerV6\UserManuals. See
section 12 ‘Example ANSWER “smart” template’ of this manual.
© Noble-Soft Systems Pty Ltd 2005-07
August, 2007
ANSWERv6-MARKAL Load Templates Manual (version 6.1)
3
2. Workbook Setup
Anyone wishing to work with an ANSWER “smart” load workbook must create an existing
ANSWER Smart Workbook to start. See Appendix A for more information on the various ways
in which this can be done. In addition, note that the functioning of some of the macro facilities
in the ANSWER load workbooks requires that ANSWER be installed on your computer.
Upon opening a “smart” workbook, depending on your Windows security level setting you
may be prompted by the security warning below. Select “Enable Macros” so that the action
buttons are made available.
It is recommended that you associate the workbook with a target ANSWER database in
response to the prompt below. This is necessary to make available the “smart” buttons on the
ANSWER workbook related to specifying Units, Set Memberships, Parameters and
Parameter Qualifiers, and to make available the ‘Check Sheet’ button on each worksheet.
The functioning of the following “smart” buttons does not depend on associating the workbook
with a target ANSWER database: the ‘CommName, CommDesc, CommUnit’ button on the
Commodity Data worksheet; the ‘TechName, TechDesc, TACT, TCAP Units’ and the
‘CommIN’ and ‘CommOUT’ buttons on the Technology Data worksheet; and the
‘ConstrName, ConstrDesc, Units’ and the ‘TechName’ buttons on the Constraint Data
worksheet.
It is essential that the Region in Cell B1 of each load template is the same Region as that
identified inside the ANSWER database.
Before getting underway with the new templates, you should check the available units and
default units settings in your new database and adjust as needed.
© Noble-Soft Systems Pty Ltd 2005-07
August, 2007
ANSWERv6-MARKAL Load Templates Manual (version 6.1)
4
3. Worksheet Layout and Philosophy
This section briefly indicates each of the six types of “smart” worksheets managed by the
ANSWER load templates, as presented in Table 1. They are segregated into two types
Declare (Declaration) and Data, and are identified by one of the ANSWER Indicators
Commodities, Technologies, Constraints, CommData, TechData or ConstrData appearing in
cell A1 of the worksheet.
Table 1 - ANSWER Smart Worksheets
Commodities
Declare
ANSWER
Indicator
Commodities
Technologies
Declare
Technologies
Constraints
Declare
Constraints
Commodities Data
Data
CommData
Technology Data
Data
TechData
Constraint Data
Data
ConstrData
Worksheet
Type
Description
All the commodities (energy carriers,
materials, demands, emissions) are named
and described, and their units and set
memberships information are declared.
In version 6.1 (and higher), taxes and
subsidies are also declared on the
Commodities sheet. See section 10.
All the technologies (resources, processes,
conversion plants, and demand devices) are
named and described, and their units and set
memberships information are declared.
All user-defined constraints (ADRATIOs) are
named and described, and their units and set
memberships information are declared.
Data associated with commodities (e.g.,
demand levels, energy carrier efficiencies,
electricity transmission and distribution costs)
are provided.
In version 6.1 (and higher), data associated
with taxes and subsidies are also provided on
the CommData sheet. See section 10.
Data associated with technologies (e.g.,
residual capacity, efficiency, availability,
input/output fuels, costs) are provided.
In version 6.1 (and higher), data associated
with taxes and subsidies are also provided on
the TechData sheet. See section 10.
Data associated with user-defined constraints
(ADRATIOs) are provided by identifying the
individual technologies that comprise the
constraint, along with their coefficients in the
constraint equation.
Note that for a single region model, only one of each type of Declare (Declaration) sheet may
be included in a workbook, while any number of each type of Data sheets is permitted. The
name given to the worksheet is up to the user, although the ANSWER Indicators in cell A1
must match those in Table 1. In addition, a workbook may contain as many other sheets as
desired, but the user is encouraged to leave cell A1, the ANSWER Indicator cell, blank.
All of the ANSWER worksheets are governed by a few formatting guidelines (requirements),
but are extremely flexible in nature. The top 7 rows of each sheet comprise the action button
and header area. These rows are non-scrollable. Columns A-C on the Declare (Declaration)
sheets, A-D on the Commodity Data sheets, A-F on the Technology Data sheets, and A-E on
the Constraint Data sheet contain action buttons and identification columns that are also nonscrollable. A row will be ignored if the first character of the cell in column A contains an ‘*’, or
if the row is completely blank. Likewise, a column will be ignored if the first character of the
cell in row 1 contains an ‘*’, or if the column is completely blank. {Other “ignore” options to be
added.}
© Noble-Soft Systems Pty Ltd 2005-07
August, 2007
ANSWERv6-MARKAL Load Templates Manual (version 6.1)
5
There are a number of action buttons on each of the ANSWER worksheets. These buttons
can be used to specify units and set memberships information, select parameter labels, and
perform quality control checks. Some buttons are context sensitive, that is the user must first
position the cursor in the appropriate cell below the column or along the row in which the
action button appears. Upon selecting from the active list the resulting value is entered into
the corresponding cell. When a simple value (text string) is deposited in the cell it is in violet,
and when a linked reference is inserted (e.g., the name/description/unit of a commodity or
technology or constraint on a Data sheet), it is in blue.
Note that when specifying Units or Set Memberships the last one provided applies down the
column until another specification is provided.
In the sections that follow each sheet is presented, with the buttons explained.
© Noble-Soft Systems Pty Ltd 2005-07
August, 2007
ANSWERv6-MARKAL Load Templates Manual (version 6.1)
6
4. Commodities Sheet
The Commodities sheet is where all the commodities (energy carriers, materials, demands,
and emissions) are named and described, and their units and set memberships information
are declared. An example Commodities sheet is shown below.
If the above sheet had been created using an ANSWERver6.1.xls, violet would replace
green, and there would be a TaxSub Sets button in column E. See section 10.
The key information entered on the Commodities sheet that is directly provided by the user
are the Commodity short Names (CommName) and Descriptions (CommDesc), appearing in
columns B and C respectively. In addition, after positioning the cursor in columns D or E of a
row the action buttons above may be used to select the Units or Set Memberships
specifications, respectively. Sample Commodity Set Memberships and Units forms are shown
below.
© Noble-Soft Systems Pty Ltd 2005-07
August, 2007
ANSWERv6-MARKAL Load Templates Manual (version 6.1)
7
The ‘Check Sheet’ button may be pressed at any time to have a standard set of consistency
and quality control checks performed. The results of the checking are presented in a Wordpad
file as shown below.
© Noble-Soft Systems Pty Ltd 2005-07
August, 2007
ANSWERv6-MARKAL Load Templates Manual (version 6.1)
8
5. Technologies Sheet
The Technologies sheet is where all the technologies (resources, processes, conversion
plants, and demand devices) are named and described, and their units and set memberships
information are declared. An example Technologies sheet is shown below.
If the above sheet had been created using an ANSWERver6.xls, violet would replace green.
The key information entered on the Technologies sheet that is directly provided by the user
are the Technology short Names (TechName) and Descriptions (TechDesc), appearing in
columns B and C respectively. In addition, after positioning the cursor in columns D or E or F
of a row the ‘TACTUnit’ or ‘TCAPUnit’ or ‘Technology Sets’ action buttons may be used to
select the Technology Activity Units or Technology Capacity Units or Set Memberships
specifications, respectively. A sample Technology Set Memberships form is shown below.
© Noble-Soft Systems Pty Ltd 2005-07
August, 2007
ANSWERv6-MARKAL Load Templates Manual (version 6.1)
9
The ‘Check Sheet’ button may be pressed at any time to have a standard set of consistency
and quality control checks performed. The results of the checking are presented in a Wordpad
file as shown below.
© Noble-Soft Systems Pty Ltd 2005-07
August, 2007
ANSWERv6-MARKAL Load Templates Manual (version 6.1)
10
6. Constraints Sheet
The Constraints sheet is where all the user-defined constraints (ADRATIOs) are named and
described, and their units and set memberships information are declared. An example version
6 Smart XLS Constraints sheet is shown below.
Similarly to the Commodities and Technologies sheets, the key information entered on the
Constraints sheet that is directly provided by the user are the Constraint short Names
(ConstrName) and Descriptions (ConstrDesc), appearing in columns B and C respectively. In
addition, after positioning the cursor in columns D or E of a row the action buttons above may
be used to select the Units or Set Memberships specifications, respectively.
For example after positioning the cursor in column E of a row and clicking on the Set
Memberships button, the following Constraints Set Memberships form appears:
The above Constraints Set Memberships form is the simplest possible for an ANSWER
database associated with a smart XLS. More complicated possibilities exist – see below.
Version 5 (and higher) Smart XLS enhancement to allow a Constraint to be declared as
“Rule-based” on the Constraints sheet
ANSWER versions 6.0.1 and higher incorporate a “Rule-based” Constraint facility. This facility
makes it much easier to create a user-defined constraint than in previous versions of
ANSWER. (For details regarding “Rule-based” Constraints in ANSWER, see section 13
‘Defining a “Rule-based” Constraint in ANSWER’ in ANSWERv6-MARKAL User Manual.pdf in
folder C:\AnswerV6\UserManuals.)
© Noble-Soft Systems Pty Ltd 2005-07
August, 2007
ANSWERv6-MARKAL Load Templates Manual (version 6.1)
11
The ANSWER version 5 (and higher) Smart XLS has been enhanced as compared with
version 4 to allow the specification of “Rule-based” Constraints. The only requirement is that
the ANSWER database that is associated with a version 5 (and higher) smart XLS must be
one that is “Rule-based” Constraint-aware, and must contain the “rules” (Technology Items
Filters) that are needed to define the “Rule-based” Constraints of interest. When this is the
case, the Constraints Set Memberships form that appears after positioning the cursor in
column E of a row and clicking on the Set Memberships button is as follows:
Note the “Rule-based Constraint (RULE_ADR)” checkbox under Additional Characterization
on the RHS of the form.
To specify that a Constraint is “Rule-based”, check this checkbox and then click on the OK
button. This results in the Set Memberships of ADRATIO,RULE_ADR being placed in column
E at the cursor position. For example, see cell E12 on the previous page where this is the Set
Memberships specification for the Constraint RENEWELC.
See section 9 “Constraints Data (ConstrData) Sheet” for details of how to specify the data
associated with a “Rule-based” Constraint.
© Noble-Soft Systems Pty Ltd 2005-07
August, 2007
ANSWERv6-MARKAL Load Templates Manual (version 6.1)
12
7. Commodity Data (CommData) Sheet
The Commodity Data sheet is where data associated with commodities (e.g., demand levels,
energy carrier efficiencies, electricity transmission and distribution costs) are provided. An
example of a Commodity Data sheet (for Demands) is shown below.
If the above sheet had been created using an ANSWERver6.1.xls, violet would replace
green, and there would be the possibility of specifying data for Taxes/Subsidies. See section
10.
Positioning the cursor in column B, of a row below 7, and pressing the ‘CommName,
CommDesc, CommUnit’ action button brings up a sorted list of the user entries from the
Commodities sheet. Selecting a commodity from this list results in its Commodity Name,
Description and Units being inserted into columns B, C and D as cell references (links) to the
Commodities sheet. Thus for example if a Commodity Name or Description is changed on the
Commodities sheet, that change will automatically flow through to the Commodity Data sheet
via the cell reference.
Columns E, F, G, … are where the user provides data. Rows 5-7 are used to identify the
nature of the data (parameter) being provided. Placing the cursor in row 5 of column E or F or
G or …and pressing the ‘Parameter’ button brings up a Parameter selection list as shown
below.
© Noble-Soft Systems Pty Ltd 2005-07
August, 2007
ANSWERv6-MARKAL Load Templates Manual (version 6.1)
13
Once a Parameter is selected its Name is entered into the (row 5) cell where the cursor is
placed, and if it is a TID parameter the TID indicator is automatically entered into row 7, the
period row. For time-dependent parameters the user may leave row 7 blank, in which case
the numeric values provided in rows 8 and downwards of the column are assumed to apply to
all periods. Or the user may specify either a single year (e.g., 2000) or a pair of years
separated by a comma (e.g., 2000, 2010) or a pair of years separated by a hyphen (e.g.,
2000-2010).
In a situation where the Parameter requires a Qualifier (e.g., a parameter such as ENV_ENT
that requires an Energy qualifier, or a parameter such as FR(Z)(Y) that requires a Timeslice
qualifier) the Parameter Name is entered into row 5 and the cursor positioned in row 6 below
the Parameter Name and an indication of the nature of the qualifier expected is displayed.
Pressing the ‘Qualifier’ button will display a list of the permitted qualifiers for the associated
Parameter.
The parameters can be provided in any order, beginning from column E.
The ‘Check Sheet’ button may be pressed at any time to have a standard set of consistency
and quality control checks performed. The results of the checking are presented in a Wordpad
file as shown below, and any offending cells are highlighted on the sheet in yellow along with
a cell comment indicating the nature of the problem.
© Noble-Soft Systems Pty Ltd 2005-07
August, 2007
ANSWERv6-MARKAL Load Templates Manual (version 6.1)
© Noble-Soft Systems Pty Ltd 2005-07
14
August, 2007
ANSWERv6-MARKAL Load Templates Manual (version 6.1)
15
8. Technology Data (TechData) Sheet
The Technology Data sheet is where data associated with technologies (e.g., residual
capacity, efficiency, availability, input/output fuels, costs) are provided.
If the above sheet had been created using an ANSWERver6.1.xls, violet would replace
green, and there would be the possibility of specifying data for Taxes/Subsidies. See section
10.
Positioning the cursor in column B of a row below 7, and pressing the ‘TechName, TechDesc,
TACT, TCAP Units’ action button brings up a sorted list of the user entries from the
Technologies sheet. Selecting a technology from this list results in its Technology Name,
Description and Units being inserted into columns B, C and D as cell references (links) to the
Technologies sheet. Thus for example if a Technology Name or Description is changed on
the Technologies sheet, that change will automatically flow through to the Technology Data
sheet via the cell reference.
In columns E and F the commodities input to (CommIN) and output from (CommOUT) the
technology are listed. When more than one input or output commodity is involved (including
emissions) a separate row must be used to identify the commodity and provide the associated
data. With the cursor in column E or F of a row pressing the ‘CommIN’ or ‘CommOUT’ button
respectively will bring up the list of commodities that the user provided on the Commodities
Sheet. Selecting a commodity from this list results in its Name being inserted into column E or
F as a cell reference (link) to the Commodities sheet.
Note that data that is not commodity dependent (e.g., AF, CF) should appear on the same
line as the Technology Name.
Columns G, H, I, … are where the user provides data. As is the case for the Commodity Data
sheet, rows 5-7 are used to identify the nature of the data (parameter) being provided. Placing
the cursor in row 5 of column G or H or I or … and pressing the ‘Parameter’ button brings up
a Parameter selection list as shown below.
© Noble-Soft Systems Pty Ltd 2005-07
August, 2007
ANSWERv6-MARKAL Load Templates Manual (version 6.1)
16
Note that the Technology Parameter list created using an ANSWERver5.xls (and higher)
differs slightly from that created using an ANSWERver4.xls, in that Bilateral Trade
Parameters are also displayed (these are the 5 parameters above whose name begins with
“BI_TRD”). See Appendix B.3 – “Technology Data sheet extension to handle Bilateral Trade
between Regions”. Of course Bilateral Trade Parameters are only relevant for multi-region
models.
As is the case for the Commodity Data sheet, once a Parameter is selected its Name is
entered into the (row 5) cell where the cursor is placed, and if it is a TID parameter the TID
indicator is automatically entered into row 7, the period row. For time-dependent parameters
the user may leave row 7 blank, in which case the numeric values provided in rows 8 and
downwards of the column are assumed to apply to all periods. Or the user may specify either
a single year (e.g., 2000) or a pair of years separated by a comma (e.g., 2000, 2010) or a pair
of years separated by a hyphen (e.g., 2000-2010).
In a situation where the Parameter requires a Qualifier (e.g., a parameter such as AF(Z)(Y)
that requires a Timeslice qualifier) the Parameter Name is entered into row 5 and the cursor
positioned in row 6 below the Parameter Name and an indication of the nature of the qualifier
expected is displayed. Pressing the ‘Qualifier’ button will display a list of the permitted
qualifiers for the associated Parameter.
In general, the parameters can be provided in any order, beginning from column G. However
there is an exception to this rule. LIFE should be specified in a column to the left of any
RESID column if the user wishes to invoke the ‘Use LIFE to set RESID where just first period
RESID’ option of the “Import Model Data from Excel” facility. (This option allows the user to
specify the LIFE of a technology and just the first period value for the RESID parameter, and
causes an automatic calculation to be done that sets RESID = 0 in the appropriate period.)
The ‘Check Sheet’ button may be pressed at any time to have a standard set of consistency
and quality control checks performed. The results of the checking are presented in a Wordpad
file as shown below, and any offending cells are highlighted on the sheet in yellow along with
a cell comment indicating the nature of the problem.
© Noble-Soft Systems Pty Ltd 2005-07
August, 2007
ANSWERv6-MARKAL Load Templates Manual (version 6.1)
© Noble-Soft Systems Pty Ltd 2005-07
17
August, 2007
ANSWERv6-MARKAL Load Templates Manual (version 6.1)
18
9. Constraints Data (ConstrData) Sheet
The Constraint Data sheet is where data associated with user-defined constraints
(ADRATIOs) are provided. An example version 6 Smart XLS Constraint Data sheet is shown
below.
The Constraint Data sheet functions similarly to the Commodity Data and Technology Data
sheets. Thus positioning the cursor in column B of a row below 7, and pressing the
‘ConstrName, ConstrDesc, Units’ action button brings up a sorted list of the user entries from
the Constraints sheet. Selecting a constraint from this list results in its Constraint Name,
Description and Units being inserted into columns B, C and D as cell references (links) to the
Constraints sheet. Thus for example if a Constraint Name or Description is changed on the
Constraints sheet, that change will automatically flow through to the Constraint Data sheet via
the cell reference.
In the TechName column (column E) the technologies that comprise the constraint are listed.
When more than one technology is involved in a constraint, a separate row must be used to
identify the technology and provide the associated data. With the cursor in column E of a row
pressing the ‘TechName’ button will bring up the list of technologies that the user provided on
the Technologies Sheet. Selecting a technology from this list results in its Name being
inserted into column E as a cell reference (link) to the Technologies sheet.
Version 5 (and higher) Smart XLS enhancement to allow Data for a “Rule-based”
Constraint to be specified on a ConstrData sheet
As already noted in section 6 “Constraints Sheet”, the ANSWER version 5 (and higher) Smart
XLS has been enhanced as compared with version 4 to allow the specification of “Rulebased” Constraints. The only requirement is that the ANSWER database that is associated
with a version 5 (and higher) smart XLS must be one that is “Rule-based” Constraint-aware,
and must contain the “rules” (Technology Items Filters) that are needed to define the “Rulebased” Constraints of interest.
The ‘ConstrName, ConstrDesc, Units’ action button is used to select “Rule-based” Constraints
from the Constraints sheet in exactly the same fashion as for selecting ordinary Constraints. It
has been used to place the rule-based constraint RENEWELC in row 13 of the above
ConstrData sheet.
However when the cursor is placed in the TechName column (column E) in a row that
corresponds to a “Rule-based” Constraint (so in either row 13 or row 14 of the above
ConstrData sheet) and the TechName action button is invoked, the following message
appears:
© Noble-Soft Systems Pty Ltd 2005-07
August, 2007
ANSWERv6-MARKAL Load Templates Manual (version 6.1)
19
As advised by the message, click on the ‘Yes’ button to select a Technology Items Filter from
those that are available in the ANSWER database associated with the Smart XLS, or click on
the ‘No’ button to select a Technology from the Technologies sheet.
Note also that where the ANSWER database that is associated with a version 5 (and higher)
smart XLS is one that is “Rule-based” Constraint-aware, then when the ‘Parameter’ action
button is clicked with the cursor in row 5 of column F or G or H or …, six additional
RATRULE_* parameters are displayed in the Parameter selection list:
These RATRULE_* parameters are used to define data associated with “Rule-based”
Constraints, for example the RATRULE_ACT parameter is used in column I along with
associated numeric entries in rows 13 and 14 as part of defining data associated with the
rule-based constraint RENEWELC.
© Noble-Soft Systems Pty Ltd 2005-07
August, 2007
ANSWERv6-MARKAL Load Templates Manual (version 6.1)
20
10. Specifying Declaration Information and Data for Taxes/Subsidies
Version 6.1 (and higher) of the ANSWER “smart” load templates allows the specification of
declaration information and data for Taxes/Subsidies. This involves extensions to the
operation of the Commodities, CommData and TechData sheets.
Commodities Sheet
Declaration information for a Tax/Subsidy is specified on the Commodities sheet, where a
new
button is provided in column E (the Set Memberships column):
CommData Sheet
Most of the data for a Tax/Subsidy is specified on the CommData sheet. Although the
appearance of the CommData sheet is unchanged:
button the list of Commodities that is
when you click on the
displayed now includes any Taxes/Subsidies that are specified on the Commodities sheet.
Also, when you place the cursor in row 5 of column E or F or … and click on the
button, the list of Commodity Parameters that is displayed now includes the following TaxSub
parameters:
If you select TSUB_ENT(ENT) as the desired TaxSub parameter, then the CommData sheet
appears as follows, with Energy in the Qualifier row indicating that an Energy Commodity
must be selected by clicking on the
© Noble-Soft Systems Pty Ltd 2005-07
button:
August, 2007
ANSWERv6-MARKAL Load Templates Manual (version 6.1)
21
A completed CommData sheet that specifies TSUB_ENT(ENT) and TSUB_COST for
Tax/Subsidy named TAX might appear as follows:
TechData Sheet
TSUB_TECH data for a Tax/Subsidy is specified on the TechData sheet. The appearance of
the TechData sheet is unchanged. If you click on the
button, and select
Technology TaxSub parameter TSUB_TECH, then the TechData sheet appears as follows,
with Tax/Subsidy in the Qualifier row indicating that a Tax/Subsidy must be selected by
clicking on the
button:
A completed TechData sheet that specifies TSUB_TECH for Tax/Subsidy named TAX might
appear as follows:
© Noble-Soft Systems Pty Ltd 2005-07
August, 2007
ANSWERv6-MARKAL Load Templates Manual (version 6.1)
© Noble-Soft Systems Pty Ltd 2005-07
22
August, 2007
ANSWERv6-MARKAL Load Templates Manual (version 6.1)
23
11. Loading the Templates into ANSWER
The “File, Import, Model Data from Excel” facility is used to load information in an ANSWER
“smart” template into an ANSWER database.
A brief overview of the steps involved in using this facility follows:
1. Open the ANSWER database into which you wish to import the ANSWER “smart”
template.
2. Invoke “File, Import, Model Data from Excel” to bring up the following form (initially
with the ‘Excel Files to be Imported’ list empty, and not necessarily with either the
‘Target Scenario’ or ‘Options’ settings that are shown below):
3. Click on the [Add…] button to bring up the common dialog file selection form and
navigate to the folder in which you have stored the ANSWER “smart” template(s),
then select one or more “smart” templates to be imported.
4. Adjust the ‘Target Scenario’ combobox to select the target scenario for the import.
5. Adjust the radio button and checkbox Options to suit your particular needs.
6. Click on the [Import] button to carry out the import.
If at step 1 above you are unable to open the ANSWER database, and get a message ending
in “Perhaps … it is already in use?”, most likely this database is already in use because you
have an open ANSWER “smart” template and this database is associated with it. So simply
close the ANSWER “smart” template so that the database is no longer associated with it, and
hence no longer in use.
Most users will have a number of ANSWER “smart” templates, and will often find it convenient
to load several templates in a single Import operation. To facilitate multi-selection of
ANSWER “smart” templates at step 3 above, store all templates in a single folder.
© Noble-Soft Systems Pty Ltd 2005-07
August, 2007
ANSWERv6-MARKAL Load Templates Manual (version 6.1)
24
12. Example ANSWER “smart” template
To provide users with a concrete example of an ANSWER “smart” template, the file
UtopiaSmartTemplate.xls is now provided as part of the ANSWERv6-MARKAL installation
files in folder C:\AnswerV6\UserManuals.
Also, an ANSWER database UtopiaWithOnlyGlobalTabData.mdb that is suitable to be
associated with the UtopiaSmartTemplate.xls (as described in section 2 ‘Workbook Setup’) is
provided in folder C:\AnswerV6\Answer_Databases. This ANSWER database has time
periods 1990, 2000, 2010, has a single region UTOPIA specified, and has standard MARKAL
timeslices. As its name would suggest, this database contains only Global tab data (and also
the special energy Carrier FEQ (Fossil Equivalent)).
To use UtopiaSmartTemplate.xls to explore various aspects of how an ANSWER “smart”
template operate:
•
•
•
If as part of exploring how an ANSWER “smart” template operates you intend to
change the contents of the ANSWER “smart” template, it is suggested that you use
Windows Explorer to make a copy of UtopiaSmartTemplate.xls.
Open UtopiaSmartTemplate.xls and click on the [Enable Macros] button.
When the ‘Specify ANSWER Database’ form appears, click on the top radio button
and then use the [Browse…] button to select UtopiaWithOnlyGlobalTabData.mdb in
folder C:\AnswerV6\Answer_Databases.
The following points should be noted about UtopiaSmartTemplate.xls:
•
•
•
Commodity Data has been specified with TID commodity data on one CommData
sheet (named CommData-TID) and TS commodity data on a second CommData
sheet (named CommData-TS). It would be perfectly OK to specify both TID and TS
commodity data on a single CommData sheet.
Likewise Technology Data has been specified with TID technology data on one
TechData sheet (named TechData-TID) and TS commodity data on two TechData
sheets (named TechData-TS1 and TechData-TS2). Again it would be perfectly OK to
have a different arrangement of TID and TS technology data, including one in which
one or more of the TechData sheets contained both TID and TS technology data.
In particular, it could be argued that so far as the electric conversion technologies
E01, E21, E31, E51, E70 are concerned, it would be preferable to have the TID
parameter OUT(ELC)_TID and the TS parameter INP(ENT)c both occurring on the
same TechData sheet, since that way both CommIN and CommOUT for these
technologies would occur on the same sheet.
The UtopiaSmartTemplate.xls contains a complete specification of the Utopia model, except
that it does not contain Global tab data (DISCOUNT, HEATCOOL(Z), QHR(Z)(Y),
STARTYRS): the ANSWER “smart” template does not allow the specification of Global tab
data.
If you import UtopiaSmartTemplate.xls into UtopiaWithOnlyGlobalTabData.mdb, you will find
that you can scan the Energy, Demand, Emission, Technology and Constraint tabs and see
that the Utopia model is indeed now fully specified.
•
Before attempting to use AnswerV6.exe to open UtopiaWithOnlyGlobalTabData.mdb
and import UtopiaSmartTemplate.xls via the “File, Import Model Data from Excel”
facility, you must first close UtopiaSmartTemplate.xls thereby closing the link to
UtopiaWithOnlyGlobalTabData.mdb. (AnswerV6.exe requires exclusive access to
open any ANSWER database, and so while UtopiaSmartTemplate.xls is open it will
be unable to open UtopiaWithOnlyGlobalTabData.mdb.)
© Noble-Soft Systems Pty Ltd 2005-07
August, 2007
ANSWERv6-MARKAL Load Templates Manual (version 6.1)
25
Appendix A: Establishing a New ANSWER Calibration and Load Workbook
The process of establishing a new workbook must be done with care so as to ensure that all
the functionality (action buttons) and cell references (links) to the Commodities, Technologies
and Constraints sheets are properly retained. The following possibilities are detailed below:
•
•
•
•
•
Creating a new (empty) ANSWER Smart Workbook;
Making an existing workbook aware of ANSWER Smart Workbook facilities;
Copying an existing workbook that is already aware of ANSWER Smart
Workbook facilities to create a new workbook;
Updating an existing workbook that is already aware of ANSWER Smart
Workbook facilities when Noble-Soft distributes an updated version of the
ANSWER smart XLS; and
Adding a new ANSWER smart sheet to the current XLS.
The text and screen snapshots that follow are for an ANSWERver6.0.XLS. If working with an
ANSWERver6.1.XLS, simply imagine 6.1 replacing all occurrences of 6.0 in the text and
screen snapshots.
A.1 - Creating a new (empty) ANSWER Smart Workbook
To create a new (empty) ANSWER Smart Workbook, open the file ANSWERver6 XLS
distributed by Noble-Soft, for example open ANSWERver6.0.XLS. Then select “Enable
Macros” to bring up the single visible sheet of ANSWERver6.0.XLS as follows:
Click on whichever is appropriate of the ‘Single-region’, ‘Multi-region, no common naming
across regions’ and the ‘Multi-region, common naming across regions’ radio buttons and then
© Noble-Soft Systems Pty Ltd 2005-07
August, 2007
ANSWERv6-MARKAL Load Templates Manual (version 6.1)
26
click on the ‘Create New ANSWER Smart XLS Version 6.0’ button. This brings up the
following form:
Use the ‘Browse…’ button to bring up the ‘New ANSWER Smart XLS’ common dialog form,
and use the ‘Save in’ combobox at the top of the form to specify the folder where you want
the new ANSWER Smart XLS to be located, then key in the filename for the new XLS in the
‘File name’ textbox near the bottom of the form, as follows:
Click on the ‘Save’ button. The full filename of the new XLS to be created will appear in the
‘Filename of XLS to be created’ textbox, as follows:
(An alternative to using the ‘Browse…’ button to specify the full filename of the new XLS is to
key the full filename into the textbox, but using the ‘Browse…’ button is recommended.)
Click on the ‘Create’ button. The creation process will proceed, concluding with a message
box indicating that the creation of the new XLS has been completed.
© Noble-Soft Systems Pty Ltd 2005-07
August, 2007
ANSWERv6-MARKAL Load Templates Manual (version 6.1)
27
The form remains open so that additional new ANSWER Smart XLS files may be created, if
desired.
Click on the ‘Close’ button to close the ‘Create New ANSWER Smart XLS’ form.
Close ANSWERver6.0.XLS.
When you open any of the new ANSWER Smart XLS files that you have created, you will
need to use the ‘Add New ANSWER Smart Sheet to Current XLS’ button to add sheets to the
XLS. See A.5 below for details of the operation of this button.
A.2 - Making an existing workbook aware of ANSWER Smart Workbook facilities
To make an existing workbook aware of ANSWER Smart Workbook facilities, ensure that this
workbook is not open and open the file ANSWERver6.0.XLS distributed by Noble-Soft. Then
select “Enable Macros” to bring up the single visible sheet of ANSWERver6.0.XLS as follows:
Click on whichever is appropriate of the ‘Single-region’, ‘Multi-region, no common naming
across regions’ and the ‘Multi-region, common naming across regions’ radio buttons and then
click on the ‘Update XLS to ANSWER Smart XLS Version 6.0’ button. This brings up the
following form:
© Noble-Soft Systems Pty Ltd 2005-07
August, 2007
ANSWERv6-MARKAL Load Templates Manual (version 6.1)
28
For clarity of explanation, suppose that the existing workbook that you wish to make aware of
ANSWER Smart Workbook facilities is called USER.XLS.
Use the ‘Browse…’ button to select USER.XLS. The form now appears as follows:
The default filename given to the ANSWER smart XLS that will be created by the update is
taken to be the filename of the XLS to be updated with v6.0 appended. So above v6.0 is
appended to USER to provide USERv6.0 as the default filename. (There is an exception to
this rule: if the filename of the XLS to be updated ends in v5, then the default filename given
to the ANSWER smart XLS is taken to be the filename of the XLS to be updated with the v5
replaced by v6.0.)
Click on the ‘Update’ button. The update process will proceed, concluding with a message
box indicating that the update has been completed.
The form remains open so that additional XLS files may be selected to be made aware of
ANSWER Smart Workbook facilities, if desired.
Click on the ‘Close’ button to close the ‘Update XLS to ANSWER Smart XLS’ form.
Close ANSWERver6.0.XLS.
A.3 - Copying an existing workbook that is already aware of ANSWER Smart Workbook
facilities to create a new workbook
If an existing workbook is already aware of ANSWER Smart Workbook facilities, then simply
copying this workbook to create a (renamed) copy will result in the (renamed) copy being
aware of ANSWER Smart Workbook facilities. There are two ways of carrying out the copy:
•
•
Open the existing XLS in Excel and use ‘File, Save As…’ to resave with another
name; or
Use Windows Explorer to make a (renamed) copy of the XLS.
In either case, all cell references (links) will be associated with the new file name.
© Noble-Soft Systems Pty Ltd 2005-07
August, 2007
ANSWERv6-MARKAL Load Templates Manual (version 6.1)
29
Depending upon your reasons for creating a new workbook by copying an existing workbook,
consider what changes may be needed in the newly created copy. For example, consider
whether the Region specified in cell B1 on each of the ANSWER smart sheets may need to
be adjusted.
A.4 - Updating an existing workbook that is already aware of ANSWER Smart
Workbook facilities when Noble-Soft distributes an updated version of the ANSWER
smart XLS
To provide additional ANSWER Smart Workbook facilities, or to correct bugs that are
detected, from time to time Noble-Soft will distribute a new version of the ANSWER
Calibration and Load Templates. So for example ANSWERver6.0.XLS is a new version that
provides additional facilities (and corrects a few bugs) as compared with the previously
available version ANSWERver5.XLS.
All that is required to update your existing (version 5) ANSWER Smart Workbook to version
6.0 is to open the file ANSWERver6.0.XLS and follow the “Making an existing workbook
aware of ANSWER Smart Workbook facilities” procedure that is documented at A.2 above.
A.5 - Adding a New ANSWER Smart Sheet to the Current XLS
This facility allows the user to easily add a new ANSWER smart sheet to their current
ANSWER Smart XLS. To use the facility, proceed as follows:
Open an ANSWER Smart XLS (default is to specify the ANSWER database to be used to
provide Parameter, Units and Years information, but this is not essential to the functioning of
this facility) and make the Home sheet (this is the first sheet in the XLS) the active sheet. For
a version 6 ANSWER Smart XLS this sheet appears as follows:
© Noble-Soft Systems Pty Ltd 2005-07
August, 2007
ANSWERv6-MARKAL Load Templates Manual (version 6.1)
30
Click on the ‘Add New ANSWER Smart Sheet to Current XLS’ button.
This brings up the following form:
The ‘Select ANSWER Smart Sheet …’ listbox contains the six types of smart sheets, namely
Commodities, Technologies, Constraints, CommData, TechData, ConstrData.
If an ANSWER database was linked to when the XLS was opened, the ‘Specify Region…’
combobox contains the regions in the ANSWER database.
If no ANSWER database was linked to when the XLS was opened, the ‘Specify Region…’
combobox contains the regions that appear in cell B1 of sheets in the XLS that are smart
sheets (namely, sheets that in cell A1 have Commodities, Technologies, Constraints,
CommData, TechData, ConstrData).
Select the type of ANSWER smart sheet that you wish to add by clicking on it in the listbox.
For example, click on TechData if you wish to add a new TechData sheet to the current XLS.
Select the Region for which this smart sheet will be created, either from the regions in the
combobox, or by typing into the combobox the name of a region (if wanting to specify a region
name that is not listed in the combobox).
Click on the ‘Add Sheet’ button.
The new smart sheet is created, and the ‘Add New ANSWER Smart Sheet …’ form remains
open (so that the user can add another smart sheet) as follows:
© Noble-Soft Systems Pty Ltd 2005-07
August, 2007
ANSWERv6-MARKAL Load Templates Manual (version 6.1)
31
To add another smart sheet to the XLS, select the type of ANSWER smart sheet to be added,
adjust the Region combobox as necessary, and click on the ‘Add Sheet’ button.
Click on the ‘Close’ button to close the ‘Add New ANSWER Smart Sheet …’ form.
Note that by default, the name given to the smart sheet that is created will be the same as the
name in the listbox, so for example a TechData sheet will be given the default name
“TechData”. If the default name is already being used for another sheet, then “(2)” is
appended and used as the name for the sheet, so for example “TechData (2)”. If the name
with “(2)” appended is already being used for another sheet, then instead “(3)” is appended,
so for example “TechData (3)”, and so on.
© Noble-Soft Systems Pty Ltd 2005-07
August, 2007
ANSWERv6-MARKAL Load Templates Manual (version 6.1)
32
Appendix B: Extension of ANSWER Load Templates to handle multi-region models
With version 5 (and higher) of the ANSWER Load Templates, as with version 4, there are two
different methods of specifying declarations and data for multi-region models. Which of these
methods should be used depends on whether or not the multi-region model has common
naming conventions across regions. In particular note that version 5 (and higher) of the
ANSWER Load Templates incorporates extensions to the format allowed for sheets that
considerably simplify the specification of declarations and data for multi-region models that do
have common naming conventions across regions.
By way of clarification, when we say that a multi-region model does have common naming
conventions across regions, we mean that the same item name necessarily has the same
associated description and set memberships (and units) in each region in which it occurs. So
for example if E01 is a ‘Coal-fired power station’ whose set memberships indicate that it is
base-loaded and centralized, then with common naming conventions across regions E01
necessarily is a base-loaded and centralized ‘Coal-fired power station’ in each region in which
it occurs.
Note that a multi-region model that does not have common naming conventions across
regions is allowed to have the same name occurring in different regions. So for example such
a model might have the same technology name, say E01, occurring in more than one region,
but E01 need not necessarily have the same description or set memberships in each region.
We first present the method that should be used for handling multi-region models that do not
have common naming conventions across regions, and then present the method that should
be used for handling multi-region models that do have common naming conventions across
regions.
B.1 - Multi-region models that do not have common naming conventions across
regions
Suppose a multi-region model that does not have common naming conventions across
regions involves N regions, say REG1, REG2, …, REGN. In this situation, the fundamental
principle used in building the Load XLS is that each Declaration or Data sheet should contain
just declarations or data for a single region, corresponding to the (single) region specified on
cell B1 of the sheet. More specifically, to handle such a model in the ANSWER version 5 (and
higher) Load Templates, proceed as follows:
Declaration Sheets
•
For each of the N regions create a single associated Commodities sheet. That is,
create a Commodities sheet with cell B1 containing only REG1 on which the
declarations for commodities in region REG1 are specified; create another
Commodities sheet with cell B1 containing only REG2 on which the declarations for
commodities in region REG2 are specified; …; and create another Commodities sheet
with cell B1 containing only REGN on which the declarations for commodities in region
REGN are specified. Thus altogether there will be N Commodities sheets.
•
Likewise, for each of the N regions create a single associated Technologies sheet. That
is, create a Technologies sheet with cell B1 containing only REG1 on which the
declarations for technologies in region REG1 are specified; create another
Technologies sheet with cell B1 containing only REG2 on which the declarations for
technologies in region REG2 are specified; …; etc.
•
And likewise, for each of the N regions create a single associated Constraints sheet.
That is, create a Constraints sheet with cell B1 containing only REG1 on which the
declarations for constraints in region REG1 are specified; create another Constraints
sheet with cell B1 containing only REG2 on which the declarations for constraints in
region REG2 are specified; …; etc.
© Noble-Soft Systems Pty Ltd 2005-07
August, 2007
ANSWERv6-MARKAL Load Templates Manual (version 6.1)
33
Data Sheets
•
For each of the N regions create one or more associated CommData sheets. That is,
create one or more CommData sheets with cell B1 containing only REG1 on which the
data for commodities in region REG1 are specified; create one or more CommData
sheets with cell B1 containing only REG2 on which the data for commodities in region
REG2 are specified; …; and create one or more CommData sheets with cell B1
containing only REGN on which the data for commodities in region REGN are specified.
•
Likewise, for each of the N regions create one or more associated TechData sheets.
That is, create one or more TechData sheets with cell B1 containing only REG1 on
which the data for technologies in region REG1 are specified; create one or more
TechData sheets with cell B1 containing only REG2 on which the data for technologies
in region REG2 are specified; …; etc.
•
And likewise, for each of the N regions create one or more associated ConstrData
sheets. That is, create one or more ConstrData sheets with cell B1 containing only
REG1 on which the data for constraints in region REG1 are specified; create one or
more ConstrData sheets with cell B1 containing only REG2 on which the data for
constraints in region REG2 are specified; …; etc.
Summary
In summary, to handle an N-region model that does not have common naming conventions
across regions, for each region k (k = 1, 2, …, N) there should be a single corresponding
Commodities, Technologies, and Constraints sheet, and one or more CommData, TechData
and ConstrData sheets, with cell B1 of each sheet containing just the single region REGk.
Thus altogether the Load XLS will contain N Commodities, Technologies and Constraints
sheets, and N or more CommData, TechData and ConstrData sheets. (Of course the Load
XLS may also contain as many other sheets as the user wishes containing assumptions,
documentation, raw data, and/or data transformations.)
B.2 - Multi-region models that do have common naming conventions across regions
In version 5 (and higher) of the ANSWER Load Templates, the following format extensions
have been incorporated specifically to simplify the specification of declarations and data for
multi-region models that have common naming conventions across regions:
1. On both Declaration and Data sheets, cell B1 may contain a comma-separated
region-list (list of regions). By default, the information on a sheet (declaration or data)
applies to every region in the region-list.
2. On both Declaration and Data sheets, the cell B1 region-list may be over-ridden by
specifying a comma-separated region-list in column A, from row 8 down. (The
region-list in column A must comprise a subset of the regions in the cell B1 regionlist.) Note that a column A region-list is inherited by the rows beneath it, and applies
until such time as another column A region-list is encountered. This allows the user
the convenience of specifying that some declarations and data will apply to a subset
of the regions specified in the cell B1 region-list.
3. On Data sheets only, the cell B1 region-list (and any column A region-list that may
apply) may be over-ridden by specifying a single region in row 1 of the column
above a data parameter. This allows the user the convenience of specifying on a
single Data sheet, a mix of Data for all regions along with data (such as RESID) for
specific regions.
Suppose a multi-region model that does have common naming conventions across regions
involves N regions, say REG1, REG2, …, REGN. In this situation, the fundamental principle
used in building the Load XLS is that each Declaration or Data sheet by default contains
© Noble-Soft Systems Pty Ltd 2005-07
August, 2007
ANSWERv6-MARKAL Load Templates Manual (version 6.1)
34
declarations or data for every region, and so cell B1 of each sheet must contain the commaseparated region-list REG1,REG2,…,REGN. More specifically, to handle such a model in the
ANSWER version 5 (and higher) Load Templates, proceed as follows:
Declaration Sheets
•
Create a single Commodities sheet with cell B1 containing the region-list
REG1,REG2,…,REGN on which the declarations for commodities in every region are
specified. If necessary, specify a region-list in column A to indicate that some
commodities are to be included for a subset of regions, rather than for every region.
•
Likewise, create a single Technologies sheet with cell B1 containing the region-list
REG1,REG2,…,REGN on which the declarations for technologies in every region are
specified. If necessary, specify a region-list in column A to indicate that some
technologies are to be included for a subset of regions, rather than for every region.
•
And likewise, create a single Constraints sheet with cell B1 containing the region-list
REG1,REG2,…,REGN on which the declarations for constraints in every region are
specified. If necessary, specify a region-list in column A to indicate that some
technologies are to be included for a subset of regions, rather than for every region.
Note that on a declaration sheet, there is a restriction imposed by the way that the ANSWER
smart XLS functions: “duplicate” Names are not permitted. However in version 5 (and higher)
of the ANSWER Load Templates what is allowable without creating a “duplicate” Name has a
different and more flexible meaning than in version 4. In version 5 (and higher), it is allowable
for a row to have the same Name in column B as for a row above it, provided that there is no
overlap in the column A region-lists in the respective rows. Only where two rows have the
same Names in column B and where there is overlap in the column A region-lists in the
respective rows is this considered to be a “duplicate” Name situation.
Suppose for example that the user wants to specify that technology XYZ123 occurs in five
regions say R1, R3, R4, R5, R8. In version 5 and higher, this may be specified on the
Technologies sheet in a number of different ways. Of course one way is to have a single row
with XYZ123 in column B, and with this row having region-list R1,R3,R4,R5,R8 in column A.
Another way is to have five separate rows each with XYZ123 in column B, and with the first
such row having R1 in column A, the second such row having R3 in column A, etc. Since
there is no overlap in the region-lists of these five rows, this does not create a “duplicate”
Name situation.
Data Sheets
•
Create one or more CommData sheets (with cell B1 of each sheet containing the
region-list REG1,REG2,…,REGN) on which by default the data for commodities in
every region are specified. If necessary, specify a region-list in column A to indicate that
data for some commodities apply to a subset of regions, rather than to every region. Or,
specify a single region in row 1 of the column above a data parameter to indicate that
data in that column apply only for that region.
•
Likewise, create one or more TechData sheets (with cell B1 of each sheet containing
the region-list REG1,REG2,…,REGN) on which by default the data for technologies in
every region are specified. If necessary, specify a region-list in column A to indicate that
data for some technologies apply to a subset of regions, rather than to every region. Or,
specify a single region in row 1 of the column above a data parameter to indicate that
data in that column apply only for that region.
•
And likewise, create one or more ConstrData sheets (with cell B1 of each sheet
containing the region-list REG1,REG2,…,REGN) on which by default the data for
constraints in every region are specified. If necessary, specify a region-list in column A
to indicate that data for some constraints apply to a subset of regions, rather than to
© Noble-Soft Systems Pty Ltd 2005-07
August, 2007
ANSWERv6-MARKAL Load Templates Manual (version 6.1)
35
every region. Or, specify a single region in row 1 of the column above a data parameter
to indicate that data in that column apply only for that region.
Additional Considerations
The user should be aware of the following means of handling the situation where some data
parameter instances apply in every region, but other data parameter instances (such as
BOUNDs, RESIDs) are region-specific. This will be described for TechData sheets, but also
applies for CommData and ConstrData sheets.
•
Create a TechData sheet on which the data parameter instances that apply in every
region are specified. As is the case for all TechData sheets, cell B1 contains the regionlist REG1,REG2,…,REGN. (Since these data parameter instances are to apply in every
region, do not use column A to specify a region-list that overrides the cell B1 region-list,
and do not specify a single region in row 1 of the column above any data parameter.)
•
For each region k (k = 1, 2, …, N) create a TechData sheet on which the data
parameter instances that are specific to region k are specified, with cell A8 containing
the single region REGk, and with other cells in column A empty (apart from comments
that begin with an *). The single region REGk that is specified in cell A8 overrides the
cell B1 region-list REG1,REG2,…,REGN and by inheritance applies to every data
parameter instance on the sheet. (So there is no need to specify a single region in row
1 of the column above any data parameter.)
There are other means of handling the above situation. For example a single TechData sheet
may contain data parameter instances (rows containing numeric values) that apply in every
region, then a row with REG1 in column A followed by data parameter instances that are
specific to region REG1, then a row with REG2 in column A followed by data parameter
instances that are specific to region REG2, etc. Or a single region may be specified in row 1
of the column above any data parameter. Version 5 (and higher) of the ANSWER Load
Templates provides considerable flexibility, but ultimately the user must decide which of a
number of possible means is most convenient.
Note that “Check Sheet” (and the “Import Model Data from Excel” facility) check to ensure that
any region that may be specified in row 1 does not conflict with any (inherited) region-list that
may be specified in column A.
Summary
In summary, to handle an N-region model that does have common naming conventions
across regions, cell B1 of each sheet must contain the comma-separated region-list
REG1,REG2,…,REGN. There should be a single Commodities sheet, a single Technologies
sheet, a single Constraints sheet, and one or more CommData, TechData and ConstrData
sheets. On both declaration and data sheets, a region-list in column A (that is inherited by
following rows) may be used to indicate that declarations or data apply to a subset of regions.
On data sheets only, a single region may be specified in row 1 of the column above any data
parameter.
B.3 - Technology Data sheet extension to handle Bilateral Trade between Regions
Version 5 (and higher) of the ANSWER Load Templates allows for the display of Bilateral
Trade parameters on TechData sheets, so permitting the user to specify Bilateral Trade
between regions of a multi-region model.
To be more specific, when the user clicks on the ‘Parameter’ action button on a TechData
sheet, in addition to the parameters that were previously displayed, five Bilateral Trade
parameters are now displayed as follows:
© Noble-Soft Systems Pty Ltd 2005-07
August, 2007
ANSWERv6-MARKAL Load Templates Manual (version 6.1)
•
•
36
Three TID indicator parameters BI_TRD(ELC), BI_TRD(ENT), BI_TRD(MAT), and
Two TID cost parameters BI_TRDCST, BI_TRDCSTE.
NOTE: If the target database associated with the workbook is an older version ANSWER
database, parameters BI_TRD(ELC) and BI_TRDCSTE will appear on the above screen
named as BI_TRDELC(Z)(Y) and BI_TRDCSTELC respectively. In that case, you should
cancel out of this form, and save and exit your workbook. Then open the target ANSWER
database with ANSWER version 5.5.8 or higher, and close it again. Now when you re-open
the workbook and associate it with this target database, you will find that parameters
BI_TRD(ELC) and BI_TRDCSTE appear in place of BI_TRDELC(Z)(Y) and BI_TRDCSTELC.
Special Considerations for Parameters BI_TRD(ELC), BI_TRD(ENT), BI_TRD(MAT)
As compared with the operation of the “smart” XLS for other data parameters, special
considerations apply for the Bilateral Trade parameters BI_TRD(ELC), BI_TRD(ENT),
BI_TRD(MAT). These special considerations will be explained using the BI_TRD(ELC)
parameter. The same considerations apply for the BI_TRD(ENT) and BI_TRD(MAT)
parameters.
Explanation of the special considerations is easiest if we first display part of the completed
worksheet that specifies bilateral trade in electricity via a link where export technology
EXPELC2 in region R1 exports electricity (named ELC in region R1) to region R2, and then
consider the actions that the user needed to take in the BI_TRD(ELC) column (column H
below) to put it into its completed state.
© Noble-Soft Systems Pty Ltd 2005-07
August, 2007
ANSWERv6-MARKAL Load Templates Manual (version 6.1)
37
The Export part of the bilateral trade link is specified via the row 11 information in columns AG of the above worksheet, namely that region R1 contains export technology EXPELC2 with
the CommIN entry of ELC coupled with the INP(ENT)x data entry of 1 indicating that this
technology exports ELC.
The Import part of the bilateral trade link is specified via the column H information in rows 1
and 5-7 coupled with the data entry of 1 in cell H11. In particular note that:
1. The cell H1 entry of R2 indicates that the import region is region R2.
2. The cell H6 Qualifier entry of <SAME> indicates that the import commodity in the
import region has the same name as the export commodity in the export region (so in
this case ELC). Alternate Qualifier options to <SAME> are available, see below.
3. The BI_TRD(ELC) data entry of 1 in cell H11 indicates that this column H import
technology is linked to the row 11 export technology.
4. For this bilateral trade link, the name of the import technology is taken to be
IMPELC2, determined by forming:
“IMP” + <import commodity name> + <final character of export technology name>
5. The import commodity must exist on the Commodities sheet.
6. The import technology must exist on the Technologies sheet, and an OUT(ENT)r of 1
must be specified for the import technology and its associated import commodity on a
TechData sheet.
Now we consider the actions that the user needed to take in the BI_TRD(ELC) column
(column H) to put it into its completed state, as shown above.
After positioning the cursor in cell H5, clicking on the ‘Parameter’ action button and selecting
parameter BI_TRD(ENT) from the Technology Parameter list, column H appears as follows:
The following actions need to be taken:
1. In cell H1, replace the text “Region” by the desired import region name, in this case
by R2. Note that the cursor is automatically positioned in cell H1 to facilitate this.
2. In cell H6, consider whether the default Qualifier of <SAME> is appropriate. It is
appropriate if you want the import commodity in the import region to have the same
name as the export commodity in the export region. To select from the alternative
Qualifier options, place the cursor in cell H6 and click on the ‘Qualifier’ action button.
This will be discussed below
3. In cell H11, insert a 1 to indicate that the export part of the bilateral trade link is
EXPELC2 in region R1.
© Noble-Soft Systems Pty Ltd 2005-07
August, 2007
ANSWERv6-MARKAL Load Templates Manual (version 6.1)
38
Qualifier Options for Parameters BI_TRD(ELC), BI_TRD(ENT), BI_TRD(MAT)
If you place the cursor in row 6 of a column for which one of the parameters BI_TRD(ELC),
BI_TRD(ENT), BI_TRD(MAT) is specified, and click on the ‘Qualifier’ action button, you will
bring up the following form that displays the three alternative Bilateral Trade Qualifier options:
Each of these options is now discussed.
•
<SAME> - This is the default option, and has already been noted above, is the
appropriate option if you want to specify a bilateral trade link in which the import
commodity in the import region has the same name as the export commodity in the
export region.
•
<EXPREG> - This is a rather specialized option that was created for the US EPA 9
region project. Use this option if you want to specify a bilateral trade link in which the
import commodity name in the import region is formed by taking the export
commodity name and appending the export region name. So if the export commodity
name is ELC and the export region name is R1, use of the <EXPREG> option results
in the import commodity name in the import region being taken to be ELCR1.
NOTE: The resultant import commodity name <ent> must not exceed 6 characters in
length, since the associated import technology name will be of the form IMP<ent>P
where P is the final character of the export technology name, and ANSWER has a
limitation of 10 characters on the length of technology names.
•
Select Import Commodity from List - Use this option if you want to specify a
bilateral trade link in which the import commodity name in the import region differs
from the export commodity name, and where you want to choose the import
commodity name from a list of commodities for the import region, specified in row 1 of
the Bilateral Trade column. (Note that for this option to work, it is essential that you
have specified a valid region in row 1!) If you select this option, say for a
BI_TRD(ENT) parameter, an Energy Carrier selection form will be displayed (only the
top half of the form is shown) that lists all appropriate energy carriers that occur for
the row-1 region (region R2):
© Noble-Soft Systems Pty Ltd 2005-07
August, 2007
ANSWERv6-MARKAL Load Templates Manual (version 6.1)
39
Note that for a multi-region model with common naming conventions across regions,
we should not be surprised to see that many such energy carriers in the list occur in
several if not all regions.
Select the desired commodity from this list and click on the [OK] button. The name
that you selected will be transferred to the Qualifier row and used as the import
commodity name in the bilateral trade link.
Summary
The following points should be kept in mind when specifying the Bilateral Trade parameters
BI_TRD(ELC), BI_TRD(ENT), BI_TRD(MAT) on a TechData sheet:
•
The Export part of the bilateral trade link is specified via a row that contains: the
export region in the (possibly inherited) column A region/regionlist; the export
technology name in the TechName column; and the export commodity name in the
CommIN column coupled with an INP(ENT)x data entry of 1.
•
The Import part of the bilateral trade link is specified via the BI_TRD(*) column that
contains: the import region in row-1; the implied/actual import commodity name in the
Qualifier row; and coupled with a data entry of 1 in the row where the export part of
the bilateral trade link is specified.
•
The Qualifier either implies the import commodity name (in the case of a Qualifier of
<SAME> or <EXPREG>), or is the actual import commodity name. The import
commodity must exist on the Commodities sheet.
•
Regardless of which Qualifier option applies, the name of the import technology is
always determined by forming IMP<ent>P where <ent> is the implied/actual import
commodity name, and P is the final character of the export technology name. The
import technology must exist on the Technologies sheet, and an OUT(ENT)r of 1
must be specified for the import technology and its associated import commodity on a
TechData sheet.
•
Since the name of the import technology is always determined by forming IMP<ent>P
where <ent> is the import commodity name, the import technology name always
satisfies standard SRCENCP naming conventions (namely that the first 3 characters
are IMP, and the remaining characters from 4 to the second-to-last character
comprise the name of the import commodity). It therefore follows that it is only
possible to use the “smart” XLS to specify a bilateral trade link in which the import
technology name satisfies standard SRCENCP naming conventions.
•
The export technology name does not need to satisfy standard SRCENCP naming
conventions.
© Noble-Soft Systems Pty Ltd 2005-07
August, 2007
ANSWERv6-MARKAL Load Templates Manual (version 6.1)
•
40
Finally, note that BI_TRD(ELC) instances are automatically generated for every
TimeSlice for the TimeSliced Bilateral Trade parameter BI_TRD(ELC). (This is also
the case for the TimeSliced Bilateral Trade parameter BI_TRDCSTE.)
© Noble-Soft Systems Pty Ltd 2005-07
August, 2007