1
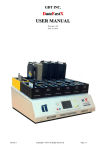
Greystone Data Technology Lot 62, Linh Trung Export Processing Zone II, Thu Duc District, HCMC, Vietnam New DataFast5™ (DF5-P, DF5-M & DF5-S) USER MANUAL Revision 1.0.0 Date March 11, 2011 Author Lam Dinh 1.0.1 July 12, 2011 Lam Dinh Description - 1.0.2 July 12, 2011 1.0.3 September 10, 2011 Approvals Quynh Bui Lam Dinh Title - Initial. Add Setting Verification function. Add Copy Logfile to USB function. Add Partitions Copy function. Add Setting up HPA screen. Update Copy Logfile to USB information Update Partitions Copy information Update modified interfaces. Update Checking disk function, button sound. Date Signature 1 Copyright © Greystone Data Technology. This controlled document is the property of Greystone Data Technology. Any duplication, reproduction, or transmission to unauthorized parties without the written permission of Greystone Data Technology is prohibited Greystone Data Technology Lot 62, Linh Trung Export Processing Zone II, Thu Duc District, HCMC, Vietnam TABLE OF CONTENTS New DataFast5™ (DF5-P, DF5-M & DF5-S) ....................................................................................1 USER MANUAL.................................................................................................................................1 TABLE OF CONTENTS ....................................................................................................................2 TABLE OF FIGURES .........................................................................................................................3 1 Introduction..................................................................................................................................5 2 Mechanical interface ....................................................................................................................5 3 Definitions and Abbreviations .....................................................................................................6 4 User guide ....................................................................................................................................6 4.1 Getting start ...........................................................................................................................6 4.2 Front Panel ............................................................................................................................9 4.3 User interface structure .......................................................................................................10 4.4 Main functions ....................................................................................................................10 4.4.1 Checking Disk .............................................................................................................11 4.4.2 Mirror Copy .................................................................................................................13 4.4.3 Smart Copy ..................................................................................................................16 4.4.4 Wipe Disk ....................................................................................................................16 4.4.5 Partition Copy ..............................................................................................................17 4.4.6 Check for Update .........................................................................................................18 4.4.7 Settings ........................................................................................................................22 4.4.8 Copy Logfile to USB ...................................................................................................32 4.4.9 Shut down ....................................................................................................................34 4.4.10 About ...........................................................................................................................37 2 Copyright © Greystone Data Technology. This controlled document is the property of Greystone Data Technology. Any duplication, reproduction, or transmission to unauthorized parties without the written permission of Greystone Data Technology is prohibited Greystone Data Technology Lot 62, Linh Trung Export Processing Zone II, Thu Duc District, HCMC, Vietnam TABLE OF FIGURES Figure 1: Mechanical interface ............................................................................................................5 Figure 2: Configuration hardware screen ............................................................................................6 Figure 3: Loading screen .....................................................................................................................7 Figure 4: Open the Door screen ...........................................................................................................8 Figure 5: Main Menu ...........................................................................................................................9 Figure 6: Front Panel with LCD, status LED and control buttons ......................................................9 Figure 7: User interface structure ......................................................................................................10 Figure 8: Main menu: Checking Disk function .................................................................................11 Figure 9: Checking disk screen..........................................................................................................11 Figure 10: Review Job Setup screen ..................................................................................................12 Figure 11: Detail of disk (Page 1)......................................................................................................12 Figure 12: Detail of disk (Page 2)......................................................................................................13 Figure 13: Setting up HPA region screen ..........................................................................................13 Figure 14: Copying process ...............................................................................................................14 Figure 15: Copying process cycle......................................................................................................15 Figure 16: Complete successfully screen ..........................................................................................15 Figure 17: Complete unsuccessfully screen ......................................................................................15 Figure 18: Detail report for the copying process ...............................................................................16 Figure 19: Main Menu: Wipe Disk function .....................................................................................17 Figure 20: Main menu: Partition Copy function................................................................................17 Figure 21: Partition List Info screen ..................................................................................................18 Figure 22: Main Menu: Check for Update function ..........................................................................18 Figure 23: Check for Update: select protocol screen .........................................................................19 Figure 24: Check for Update: Found the new version screen ...........................................................19 Figure 25: Check for Update: Not found the new version screen .....................................................19 Figure 26: Check for Update: Upgrading software screen. ...............................................................20 Figure 27: Check for Update: Downloading firmware for LCD module process .............................20 Figure 28: Check for update: Writing device driver for LCD module screen ...................................20 Figure 29: Check for Update: Writing file system for LCD module screen .....................................21 Figure 30: Check for Update: Writing application for LCD module screen .....................................21 Figure 31: Check for Update: Upgrading successfully screen ..........................................................21 Figure 32: Check for Update: Upgrading fail screen .........................................................................22 Figure 33: Main Menu: Settings function ..........................................................................................22 Figure 34: Settings Menu: Set Transfer Mode ..................................................................................23 Figure 35: Set Transfer Mode screen.................................................................................................23 Figure 36: Settings Menu: Set Translation Mode ..............................................................................24 Figure 37: Set Translation Mode screen ............................................................................................24 Figure 38: Settings Menu: Set Time Delay for Drive........................................................................25 Figure 39: Set Time Delay for Drive .................................................................................................26 Figure 40: Settings Menu: Set Verification ......................................................................................26 Figure 41: Set Verification screen .....................................................................................................27 Figure 42: Settings Menu: Set Sound signals ....................................................................................27 Figure 43: Set Sound signals screen ..................................................................................................28 Figure 44: Settings Menu: Set Smart Copy Mode .............................................................................28 3 Copyright © Greystone Data Technology. This controlled document is the property of Greystone Data Technology. Any duplication, reproduction, or transmission to unauthorized parties without the written permission of Greystone Data Technology is prohibited Greystone Data Technology Lot 62, Linh Trung Export Processing Zone II, Thu Duc District, HCMC, Vietnam Figure 45: Set Smart Copy Mode screen ...........................................................................................29 Figure 46: Settings Menu: Set Smart Options ...................................................................................30 Figure 47: Set Smart Options screen ................................................. Error! Bookmark not defined. Figure 48: Main menu: Copy Logfile to USB function .....................................................................32 Figure 49: Plug a USB memory stick to DataFast 5 ..........................................................................33 Figure 50: Copying Logfile screen ....................................................................................................33 Figure 51: Copying Logfile result .....................................................................................................34 Figure 52: Main Menu: Shut down function .....................................................................................34 Figure 53: Shut down screen .............................................................................................................35 Figure 54: Close the door screen .......................................................................................................36 Figure 55: Main Menu: About function.............................................................................................37 Figure 56: About screen.....................................................................................................................37 4 Copyright © Greystone Data Technology. This controlled document is the property of Greystone Data Technology. Any duplication, reproduction, or transmission to unauthorized parties without the written permission of Greystone Data Technology is prohibited Greystone Data Technology Lot 62, Linh Trung Export Processing Zone II, Thu Duc District, HCMC, Vietnam 1 Introduction The New DataFast5™ (DF5-P, DF5-M, and DF5-S) disk duplicator is designed to be used as a stand-alone IDE and SATA duplication system to selectively copy program software and data from one master source drive to five target disk drives, simultaneously. Ideal for volume applications, its intelligent mode enables the custom configuration of drives, including partitioning and formatting during the duplication process. Target drives that are identical to the source drive may be "mirrored", or duplicated exactly, sector by sector. The New DataFast5TM (DF5-P, DF5-M, and DF5-S) are improved base on DataFast5TM IDE with following new features: o With the front panel, the New DataFast5TM (DF5-P, DF5-M, and DF5-S) can be used without monitor, keyboard and mouse. o The interface is friendly and easy to use with 3.5-inch graphic LCD (480*320). o DF5-M: support the native SATA port to improve the copying speed for SATA drives. 2 Mechanical interface Figure 1: Mechanical interface 5 Copyright © Greystone Data Technology. This controlled document is the property of Greystone Data Technology. Any duplication, reproduction, or transmission to unauthorized parties without the written permission of Greystone Data Technology is prohibited Greystone Data Technology Lot 62, Linh Trung Export Processing Zone II, Thu Duc District, HCMC, Vietnam 1 2 POWER button Front Panel (It includes: a 3.5-inch graphic LCD (480*320) to display, LED bar to display the process status, buttons to control (UP, DOWN, LEFT, RIGHT, SELECT, CANCEL, MIRROR, SMART) Source drive port Target 1 drive port Target 2 drive port Target 3 drive port Target 4 drive port Target 5 drive port 3 4 5 6 7 8 3 Definitions and Abbreviations - LCD: Liquid Crystal Display. SATA: Serial Advanced Technology Attachment. PATA: Parallel Advanced Technology Attachment. DF: Data Fast. 4 User guide 4 .1 G e t t i n g s t a r t Here is the process to turn on the machine: - Step 1: Supply the power for the machine. - Step 2: Press the POWER button on the front of machine. - Step 3: The machine will boot follow with below process: o As the New DataFast5TM (DF5-P, DF5-M, and DF5-S) booting, the LCD will show the configuration hardware screen around 8s then switch to the Loading screen to wait the system boots up (it takes about 50 seconds). Figure 2: Configuration hardware screen 6 Copyright © Greystone Data Technology. This controlled document is the property of Greystone Data Technology. Any duplication, reproduction, or transmission to unauthorized parties without the written permission of Greystone Data Technology is prohibited Greystone Data Technology Lot 62, Linh Trung Export Processing Zone II, Thu Duc District, HCMC, Vietnam Figure 3: Loading screen o Then the New DataFast5TM (DF5-P or DF5-M or DF5-S) logo will be showed as an opened door step by step. 7 Copyright © Greystone Data Technology. This controlled document is the property of Greystone Data Technology. Any duplication, reproduction, or transmission to unauthorized parties without the written permission of Greystone Data Technology is prohibited Greystone Data Technology Lot 62, Linh Trung Export Processing Zone II, Thu Duc District, HCMC, Vietnam Figure 4: Open the Door screen 8 Copyright © Greystone Data Technology. This controlled document is the property of Greystone Data Technology. Any duplication, reproduction, or transmission to unauthorized parties without the written permission of Greystone Data Technology is prohibited Greystone Data Technology Lot 62, Linh Trung Export Processing Zone II, Thu Duc District, HCMC, Vietnam - o The software will check the version compatibility between software and firmware. If they are a couple, the machine will login to the main menu. If they are not a couple, the machine will upgrade the corresponding firmware automatically. Step 4: The machine is ready to use when the screen showed the main menu: Figure 5: Main Menu 4 .2 F r o n t Pa n e l - The New DataFast5TM (DF5-P, DF5-M, and DF5-S) front panel consists of a 3.5-inch graphic LCD screen (480*320), 8 buttons to control and a LED bar for displaying the status of processes. Figure 6: Front Panel with LCD, status LED and control buttons o o o o o UP: Move up to select the function or select hard drive... DOWN: Move down to select the function or the hard drive... LEFT: Move left to select the function or the hard drive... RIGHT: Move right to select the function or the hard drive... CANCEL: Cancel a process, a setting… or come back the previous screen. 9 Copyright © Greystone Data Technology. This controlled document is the property of Greystone Data Technology. Any duplication, reproduction, or transmission to unauthorized parties without the written permission of Greystone Data Technology is prohibited Greystone Data Technology Lot 62, Linh Trung Export Processing Zone II, Thu Duc District, HCMC, Vietnam o SELECT: Select a function, remove a hard drive, and execute a function. o MIROR: Execute the Mirror Copy function. If we use it before the checking disk job, the process will execute Mirror Copy function immediately without the review job screen. o MIROR: Execute the Mirror Copy function. If we use it before the checking disk job, the process will execute Mirror Copy function immediately without the review job screen. We also can use it after checking disk to execute the Mirror Copy function. o SMART: Execute the Smart Copy or Twin copy function (depend on the Smart Copy mode settings). If we use it before the checking disk job, the process will execute Smart Copy function immediately without the review job screen. We also can use it after checking disk to execute the Smart Copy function. o LED bar: It includes 10 LEDs (1 LED represent for 10%). It is used to show the percent of processes (copying, checking disk, wiping disk…). 4 .3 U s e r i n t e r f a c e st r u c t u r e MAIN MENU CHECKING DISK WIPE DISK PARTITION COPY TRANSFER MODE CHECK for UPDATE TRANSLATION MODE SETTINGS TIME DELAY FOR DRIVE COPY LOGFILE TO USB SOUND SHUT DOWN SMART COPY MODE ABOUT SMART OPTIONS Figure 7: User interface structure 4 .4 Ma i n f u n c t i o n s - The main function of New DataFast5TM (DF5-P, DF5-M, and DF5-S) includes: o Checking Disk o Wipe Disk, Mirror Copy, Smart Copy, Partition Copy (Standard Jobs) o Check for Update o Settings o Copy Logfile to USB o Shutdown o About 10 Copyright © Greystone Data Technology. This controlled document is the property of Greystone Data Technology. Any duplication, reproduction, or transmission to unauthorized parties without the written permission of Greystone Data Technology is prohibited Greystone Data Technology Lot 62, Linh Trung Export Processing Zone II, Thu Duc District, HCMC, Vietnam 4 .4 .1 C h e c k i n g D i s k Figure 8: Main menu: Checking Disk function - - Checking Disk is a preparing step before executing the standard jobs such as: Mirror Copy, Smart Copy, Partition Copy and Wipe Disk. It will read the information of the hard drive that user chose for the next job. When the user choose the Checking Disk function, the screen will show: Figure 9: Checking disk screen - During Checking Disk process, user can use UP/DOWN/LEFT/RIGHT button to go around and use the SELECT button to remove or enable a hard drive. o Disk Entry meaning: Led Icon: Green: Taking a part to Checking Disk function. Red: Taking a part to Checking Disk and get error. Grey: Removed by end user. o Disk Entry meaning: Drive Icon: Colored Icon: a part under Checking Disk function. 11 Copyright © Greystone Data Technology. This controlled document is the property of Greystone Data Technology. Any duplication, reproduction, or transmission to unauthorized parties without the written permission of Greystone Data Technology is prohibited Greystone Data Technology Lot 62, Linh Trung Export Processing Zone II, Thu Duc District, HCMC, Vietnam - Grey Icon: Removed by user. o Disk Entry meaning- Status Text: START-UP: preparing to check disk. TURNING ON: the drive is powered on, and waiting to boot up. CHECKING: waiting for disk becomes ready. IDENTIFYING: getting drive’s information. READY: identifying successfully. ERROR: Error occurs during Checking Disk. REMOVED: Removed by end user. During Checking Disk process, the LED bar will display the progress status. After completing the Checking Disk process, the REVIEW JOB SETUP screen will appear: Figure 10: Review Job Setup screen - - This screen is the same as the Checking Disk screen except: o All LED are solid. o Text of status: NO DISK, REMOVED or drive’s brief information. o Text on the top shows drive’s model. User could view the drive’s information in detail by pressing and holding the SELECT button. The detail of disk includes 2 pages, you can use UP/DOWN button to go up and down. Figure 11: Detail of disk (Page 1) 12 Copyright © Greystone Data Technology. This controlled document is the property of Greystone Data Technology. Any duplication, reproduction, or transmission to unauthorized parties without the written permission of Greystone Data Technology is prohibited Greystone Data Technology Lot 62, Linh Trung Export Processing Zone II, Thu Duc District, HCMC, Vietnam Figure 12: Detail of disk (Page 2) - When the Review Job Setup screen appears, you can execute two Standard Jobs: Mirror Copy and Smart Copy by pressing two buttons MIRROR and SMART. Back to Main Functions 4 .4 .2 M i r r o r C o p y - - The disk Mirror Copy mode is valid only for target drives which have the same number of cylinders, heads and sectors per track as the source drive. There are two methods to execute the Mirror Copy function: o The first method: press the MIRROR button on Main Menu. Then the machine will go to checking disk screen, and go to copying process without showing the Review Job Setup screen. o The second method: press the MIRROR button on Review Job Setup screen after checking disk. If Source drive or Target drives has a HPA region, the following screen will show before Copying process: Figure 13: Setting up HPA region screen 13 Copyright © Greystone Data Technology. This controlled document is the property of Greystone Data Technology. Any duplication, reproduction, or transmission to unauthorized parties without the written permission of Greystone Data Technology is prohibited Greystone Data Technology Lot 62, Linh Trung Export Processing Zone II, Thu Duc District, HCMC, Vietnam - Here is the copying process screen: Figure 14: Copying process - - - There are three areas on this screen: o Status area (on the top): Show the current status: Copying /Wiping / Paused. Show the percent (0% to 100%). Show the current transfer mode. o Job name (on the bottom): MIRROR COPY (SMART COPY / TWIN COPY / WIPE DISK / PARTITION MIRROR / PARTITION SMART) o Job information: Elapsed time in hh:mm:ss format Speed in MB/min Total of Mbytes transferred Animation icons for each drives: / .. : Source / Target is working / .. : Source / Target is idle / .. : Source / Target is error .. : Target is removed During the copying process, the status bar (10 LEDS) will be updated as followed: o 10 segments LED shows the entire copying process. Each LED segment is 10% of copy. o The first LED segment will flash until 10% of copying process is completed, then it will stop flashing and turn solid. o The next LED segment will start flashing. o Note: While transitioning to the next 10%, both LED segments will flash. During the copying process, the user can pause or cancel the process as follow: CANCEL CANCEL RUNNING PAUSE STOP STOP SELECT 14 Copyright © Greystone Data Technology. This controlled document is the property of Greystone Data Technology. Any duplication, reproduction, or transmission to unauthorized parties without the written permission of Greystone Data Technology is prohibited Greystone Data Technology Lot 62, Linh Trung Export Processing Zone II, Thu Duc District, HCMC, Vietnam Figure 15: Copying process cycle - When the copying process complete, the screen will show the result: o Job completed successfully: Figure 16: Complete successfully screen o Job completed unsuccessfully: Figure 17: Complete unsuccessfully screen - The Alert Sound system will be activated when the job is completed if the Alert Sound in sound signal setting is enabled. 15 Copyright © Greystone Data Technology. This controlled document is the property of Greystone Data Technology. Any duplication, reproduction, or transmission to unauthorized parties without the written permission of Greystone Data Technology is prohibited Greystone Data Technology Lot 62, Linh Trung Export Processing Zone II, Thu Duc District, HCMC, Vietnam - On the result screen, the user can press SELECT button to view the detail report, and press CANCEL to return the Main Menu. Here is the detail report: Figure 18: Detail report for the copying process Back to Main Functions 4 .4 .3 S m a r t C o p y - - - - This Smart Copy mode copies the entire source master drive to designated targets, keeping the basic source's partition structure intact. If the file system of a source partition is unknown and the source and target drives have matching heads and sector/track configuration, the target partition size will be set equal to the source partition, and the contents will be "partition mirror" copied. If the file system is known (with FAT12, FAT16, FAT32, NTFAT, or NTFS, Ext2, Ext3), the target partition size will be automatically adjusted, based on the ratio of the capacity of the source drive to the capacity of the target drive. Data will be copied file-by-file, adjusting target FAT size, and cluster size as needed. There are two methods to execute the Smart Copy function: o The first method: press the SMART button on Main Menu. o The second method: press the SMART button on Review Job Setup screen after checking disk. The interface of Copying process is same with the Mirror Copy Process’ interface. Back to Main Functions 4 .4 .4 W i p e D i s k - - When the "Wipe Disk" option is enabled, you can erase your target drives. But this option will just zero fill your target drive. For the DOD Wipeout, you should visit the Smart Options section. To execute the Wipe Disk function, the user can select the Wipe Disk function on the Main Menu: 16 Copyright © Greystone Data Technology. This controlled document is the property of Greystone Data Technology. Any duplication, reproduction, or transmission to unauthorized parties without the written permission of Greystone Data Technology is prohibited Greystone Data Technology Lot 62, Linh Trung Export Processing Zone II, Thu Duc District, HCMC, Vietnam Figure 19: Main Menu: Wipe Disk function - The interface of Wiping disk process is same with the Mirror Copy Process’ interface. Back to Main Functions 4 .4 .5 P a r t i t i o n C o p y - When in the "Partition Copy” mode, user can easily add partitions from the source drive into the target drive by selecting desirable ones. To execute the Partition Copy function, user can select the Partition Copy function on the Main Menu: Figure 20: Main menu: Partition Copy function - In this function, instead of displaying the Review Job Screen after Checking Disk, the screen will show the Partition List Info of Source drive: 17 Copyright © Greystone Data Technology. This controlled document is the property of Greystone Data Technology. Any duplication, reproduction, or transmission to unauthorized parties without the written permission of Greystone Data Technology is prohibited Greystone Data Technology Lot 62, Linh Trung Export Processing Zone II, Thu Duc District, HCMC, Vietnam Figure 21: Partition List Info screen - - In this screen, the function of the control button as follow: o UP/DOWN button: go up and go down to select setting items. o LEFT/RIGHT: disable/enable the selected item. o CANCEL button: cancel the Partition Copy process. o MIRROR button: execute the Partition Mirror copy function. o SMART button: execute the Partition Smart copy function. When the Partition List Info screen appears, you can execute two Standard Jobs: Partition Mirror and Partition Smart by pressing two buttons MIRROR and SMART. The interface of copying process is same with the Mirror Copy Process interface. Back to Main Functions 4 .4 .6 C h e c k f o r U p d a t e - The function is use to check for update software and firmware. Figure 22: Main Menu: Check for Update function - There are two ways to update the New DataFast5TM (DF5-M, DF5-P): “Update via USB” and “Update via Internet”. Up to now, they only support for update via USB. 18 Copyright © Greystone Data Technology. This controlled document is the property of Greystone Data Technology. Any duplication, reproduction, or transmission to unauthorized parties without the written permission of Greystone Data Technology is prohibited Greystone Data Technology Lot 62, Linh Trung Export Processing Zone II, Thu Duc District, HCMC, Vietnam Figure 23: Check for Update: select protocol screen - After selecting the “UPDATE VIA USB” method, the New DataFast5TM (DF5-M, DF5-P) will find available version USB drive: Figure 24: Check for Update: Found the new version screen Figure 25: Check for Update: Not found the new version screen - Downloading and upgrading software process: 19 Copyright © Greystone Data Technology. This controlled document is the property of Greystone Data Technology. Any duplication, reproduction, or transmission to unauthorized parties without the written permission of Greystone Data Technology is prohibited Greystone Data Technology Lot 62, Linh Trung Export Processing Zone II, Thu Duc District, HCMC, Vietnam Figure 26: Check for Update: Upgrading software screen. - Downloading firmware for LCD module process: Figure 27: Check for Update: Downloading firmware for LCD module process - Writing device driver for LCD module process: Figure 28: Check for update: Writing device driver for LCD module screen - Writing file system for LCD module process: 20 Copyright © Greystone Data Technology. This controlled document is the property of Greystone Data Technology. Any duplication, reproduction, or transmission to unauthorized parties without the written permission of Greystone Data Technology is prohibited Greystone Data Technology Lot 62, Linh Trung Export Processing Zone II, Thu Duc District, HCMC, Vietnam Figure 29: Check for Update: Writing file system for LCD module screen - Writing application for LCD module process: Figure 30: Check for Update: Writing application for LCD module screen - If the updating is successful, the new DataFast5TM (DF5-M, DF5-P, DF5-S) will reboot automatically after 5 seconds. Otherwise, a failure message will be displayed. Figure 31: Check for Update: Upgrading successfully screen 21 Copyright © Greystone Data Technology. This controlled document is the property of Greystone Data Technology. Any duplication, reproduction, or transmission to unauthorized parties without the written permission of Greystone Data Technology is prohibited Greystone Data Technology Lot 62, Linh Trung Export Processing Zone II, Thu Duc District, HCMC, Vietnam Figure 32: Check for Update: Upgrading fail screen Back to Main Functions 4 .4 .7 S e t t i n g s - The Settings function allows you to set several global parameters that are common to all jobs. To execute the Settings function, the user can select the Settings function in the Main Menu: Figure 33: Main Menu: Settings function - The Settings function includes sub-functions as follow: o Transfer Mode o Translation Mode o Time Delay for Drive o Verification o Sound Signal o Smart Copy Mode o Smart Options 22 Copyright © Greystone Data Technology. This controlled document is the property of Greystone Data Technology. Any duplication, reproduction, or transmission to unauthorized parties without the written permission of Greystone Data Technology is prohibited Greystone Data Technology Lot 62, Linh Trung Export Processing Zone II, Thu Duc District, HCMC, Vietnam 4 .4 .7 .1 T r a n s f e r Mo d e Figure 34: Settings Menu: Set Transfer Mode Transfer Mode - This option will ensure the user choose mode to copy data follow 2 case UDMA (0-5) (DF5-P) or UDMA (0-6) (DF5-M) and PIO (0-4). Sectors/Transaction - This option will allow user set number of sector for each transaction as read, write and duplicate: 0-128. Figure 35: Set Transfer Mode screen - In this screen, the function of the control button as follow: o UP/DOWN button: go up and go down to select setting items. o LEFT/RIGHT: decrease/increase the value of setting items. o CANCEL button: return to the Settings Menu without saving the new settings. o SELECT button: Save the new settings. 4 .4 .7 .2 T r a n s l a t i o n Mo d e 23 Copyright © Greystone Data Technology. This controlled document is the property of Greystone Data Technology. Any duplication, reproduction, or transmission to unauthorized parties without the written permission of Greystone Data Technology is prohibited Greystone Data Technology Lot 62, Linh Trung Export Processing Zone II, Thu Duc District, HCMC, Vietnam Figure 36: Settings Menu: Set Translation Mode Enable LBA translation - When enabled, this option will ensure the translated heads value will be a power of 2. When disabled, the translated heads value may or may not be a power of 2. Enable Interrupt 13 translation - When enabled, drives larger than 4GB with 16 heads will automatically have their head count reduced to 15 heads for translation purposes. Figure 37: Set Translation Mode screen - - In this screen, the function of the control button as follow: o UP/DOWN button: go up and go down to select setting items. o LEFT/RIGHT: disable/enable the selected item. o CANCEL button: return to the Settings Menu without saving the new settings. o SELECT button: Save the new settings. There are 3 options for this setting: o Enable LBA Mode. o Enable INT-13 Mode o Disable both LBA Mode and INT-13 Mode. 24 Copyright © Greystone Data Technology. This controlled document is the property of Greystone Data Technology. Any duplication, reproduction, or transmission to unauthorized parties without the written permission of Greystone Data Technology is prohibited Greystone Data Technology Lot 62, Linh Trung Export Processing Zone II, Thu Duc District, HCMC, Vietnam 4 .4 .7 .3 T i me De l a y f o r D r i v e Figure 38: Settings Menu: Set Time Delay for Drive Drive power-up delay - When the disk drives are powered up, a time delay is used to prevent simultaneous drive spin-up power surges from overloading the power supply. This parameter sets the time delay in seconds between each drive spin-up. (Default is 5 sec.) Drive power-setting time - This is a time delay used after power is applied to allow the power to settle and the drive to come up to speed before further interrogation and recalibration of the drive. (Default is 5 sec.) Drive command timeout - This is the time allowed for a drive to respond to a command before declaring a timeout error. If the drive does not respond within the allowed time, it has failed - indicating a problem, such as not connected. Most drives will respond in 5 seconds. (Default is 15 sec.) Drive spindown time - This is the time allowed for spin down after power is turned off to the drives and before the ' Safe to remove drive ' message is displayed. (Default is 7 sec.) Drive command delay - This is the time allowed for a drive to respond to a command before declaring a timeout error. If the drive does not respond within the allowed time, it has failed - indicating a problem, such as not connected. Most drives will respond in 5 seconds. (Default is 15 sec.) Drive command retry 25 Copyright © Greystone Data Technology. This controlled document is the property of Greystone Data Technology. Any duplication, reproduction, or transmission to unauthorized parties without the written permission of Greystone Data Technology is prohibited Greystone Data Technology Lot 62, Linh Trung Export Processing Zone II, Thu Duc District, HCMC, Vietnam - This is the time allowed for spin down after power is turned off to the drives and before the ' Safe to remove drive ' message is displayed. (Default is 7 sec.) Figure 39: Set Time Delay for Drive - In this screen, the function of the control button as follow: o UP/DOWN button: go up and go down to select setting items. o LEFT/RIGHT: decrease/increase the value of setting items. o CANCEL button: return to the Settings Menu without saving the new settings. o SELECT button: Save the new settings. 4 .4 .7 .4 V e r i f i c a t i o n Figure 40: Settings Menu: Set Verification - When this option is enabled, the data on the target drives is read back and compared to the source drive after the duplication process. 26 Copyright © Greystone Data Technology. This controlled document is the property of Greystone Data Technology. Any duplication, reproduction, or transmission to unauthorized parties without the written permission of Greystone Data Technology is prohibited Greystone Data Technology Lot 62, Linh Trung Export Processing Zone II, Thu Duc District, HCMC, Vietnam Figure 41: Set Verification screen - In this screen, the function of the control button as follow: o LEFT/RIGHT: disable/enable Verification. o CANCEL button: return to the Settings Menu without saving the new settings. o SELECT button: Save the new settings. 4 .4 .7 .5 S o u n d S i g n a l Figure 42: Settings Menu: Set Sound signals Alert Sound - When this option is checked, every finished job, DF5 emits sound on the speaker. Button Signal - When this option is checked, every pressing any buttons, DF5 emits sound on the speaker. 27 Copyright © Greystone Data Technology. This controlled document is the property of Greystone Data Technology. Any duplication, reproduction, or transmission to unauthorized parties without the written permission of Greystone Data Technology is prohibited Greystone Data Technology Lot 62, Linh Trung Export Processing Zone II, Thu Duc District, HCMC, Vietnam Figure 43: Set Sound signals screen - In this screen, the function of the control button as follow: o LEFT/RIGHT: disable/enable sound signal. o CANCEL button: return to the Settings Menu without saving the new settings. o SELECT button: Save the new settings. 4 .4 .7 .6 S ma r t Co p y Mo d e Figure 44: Settings Menu: Set Smart Copy Mode Automatic Smart - - If the system has different drives (differences of capacity, manufacturer, model, cylinders, sectors or heads) or file systems of FAT, FAT32, NTFS and EXT2/3/4, it is possible to choose Smart Copy for duplicating from a source to target with less time than Mirror Copy. With this copy mode, the target partitions will be resized to the ratio of the master’s partitions and the sectors that contain data will be cloned from a source drive to a target and skip the blank sectors. Twin Copy 28 Copyright © Greystone Data Technology. This controlled document is the property of Greystone Data Technology. Any duplication, reproduction, or transmission to unauthorized parties without the written permission of Greystone Data Technology is prohibited Greystone Data Technology Lot 62, Linh Trung Export Processing Zone II, Thu Duc District, HCMC, Vietnam - For faster copying, the TwinCopy is valuable mode which supports the copying data areas only for known file systems such as FAT, FAT32, NTFS and EXT2/3/4. In this mode, the system will analyses the source file structure and make a decision where is effective data that they need to copy them or not. Figure 45: Set Smart Copy Mode screen - - In this screen, the function of the control button as follow: o UP/DOWN button: go up and go down to select setting items. o LEFT/RIGHT: disable/enable the selected item. o CANCEL button: return to the Settings Menu without saving the new settings. o SELECT button: Save the new settings. There are 2 options for this setting: o Enable Automatic Smart. o Enable Twin Copy. 4 .4 .7 .7 S ma r t O p t i o n s - The Smart Option suite of utilities is designed to make the DataFast hard disk duplication product line more productive and useful. The Smart Option utilities are not part of the standard DataFast features; they are available as add-on order options with the initial purchase or later on as an upgrade. 29 Copyright © Greystone Data Technology. This controlled document is the property of Greystone Data Technology. Any duplication, reproduction, or transmission to unauthorized parties without the written permission of Greystone Data Technology is prohibited Greystone Data Technology Lot 62, Linh Trung Export Processing Zone II, Thu Duc District, HCMC, Vietnam Figure 46: Settings Menu: Set Smart Options NTFS Smart Option - - - This option allows the DataFast unit to copy only the data found on an NTFS partition from the Source to the Target Drives, and scales the Targets automatically. This greatly reduces the time required to duplicate disks with the Microsoft Windows NT file system. For example, a 60GB partition requires approximately 20 minutes to duplicate in the standard NTFS Partition Mirror copy mode that is part of all Greystone IDE duplication products. The NTFS Smart Option will enhance the duplication process by only copying the data from the Source drive to the Target drives and NOT copying blank sectors. A typical 60GB partition with 3 GB of actual data will take about 1 minute to duplicate using the NTFS Smart Option. Approximately 19 minutes is saved with the NTFS Smart Option. Using a NTFS Source drive with a data load that is 5% the size of the NTFS partition, it is possible to duplicate approximately 60 drives using the NTFS Smart Option in the same time it takes to duplicate 5 drives using the standard NTFS Partition Mirror copy. Ext2/3 - This option will allow the DataFast unit to copy the data found in the EXT-2 file table to be copied to the target/s while ignoring empty or unused sectors. DoD Wipeout - - The DoD Wipeout Smart Option enables Target drives to be completely "sanitized" (erased) or otherwise overwritten in accordance with the Department of Defense document number DoD 5220.22-M specifications. The only higher security measure recommended is the use of a metal hammer- (a.k.a.) also known as "pulverization of drive". The disk sanitization is performed in the following steps: o Overwrite all addressable locations with a character. o Overwrite all addressable locations with the complement of the character. o Overwrite all addressable locations with a random character. o Verify all addressable locations were overwritten with the random character. 30 Copyright © Greystone Data Technology. This controlled document is the property of Greystone Data Technology. Any duplication, reproduction, or transmission to unauthorized parties without the written permission of Greystone Data Technology is prohibited Greystone Data Technology Lot 62, Linh Trung Export Processing Zone II, Thu Duc District, HCMC, Vietnam Enable SATA - The Enable SATA Smart Option enables the operator to work with the Serial ATA (SATA) disk drives. HPA Copy Smart Option - - Host Protect Area (HPA) is a feature that was defined in ATA standard. A reserved area for data storage outside the normal operating system file system is required for several specialized applications. When the HPA feature is activated on Smart Option, you can see the HPA status of disk drives. That can be able to expand the source drive that to full capacity, make duplication and then restore the source drive back to original setting. You can also expand target drives to full capacity and then set the HPA address to a user specified value. Figure 47: Set Smart Options screen - In this screen, the function of the control button as follow: o CANCEL button: return to the Settings Menu without saving the new settings. o SELECT button: update Smart Options from the license file that contain on the USB drive. How do I get a Smart Option License file? - When the Smart Options screen is displayed, write down the internal serial number that is displayed on the top. Call Greystone Data Technology at (510) 661-6793 (Pacific Time) or send an email to [email protected] to ask technical support. Back to Main Functions 31 Copyright © Greystone Data Technology. This controlled document is the property of Greystone Data Technology. Any duplication, reproduction, or transmission to unauthorized parties without the written permission of Greystone Data Technology is prohibited Greystone Data Technology Lot 62, Linh Trung Export Processing Zone II, Thu Duc District, HCMC, Vietnam 4 .4 .8 C o p y L o g f i l e t o U S B Figure 48: Main menu: Copy Logfile to USB function - - All jobs will be recorded in the INFORMATION.TXT file. The following information is logged: o Date and time o Type of copy o Source and target drives o Status of copy operation o Total MBytes copied o Time it took to do copies o Startup and shutdown times of the program This function is used to copy the logfile from the DataFast 5 to the USB drive. Before executing this function, the user has to put the USB memory stick into the upper right hand USB slot in the back of the DF5. 32 Copyright © Greystone Data Technology. This controlled document is the property of Greystone Data Technology. Any duplication, reproduction, or transmission to unauthorized parties without the written permission of Greystone Data Technology is prohibited Greystone Data Technology Lot 62, Linh Trung Export Processing Zone II, Thu Duc District, HCMC, Vietnam Figure 49: Plug a USB memory stick to DataFast 5 - Then the DataFast 5 will copy the latest Logfile into USB memory stick and show the following screen: Figure 50: Copying Logfile screen - Here is the result screen: 33 Copyright © Greystone Data Technology. This controlled document is the property of Greystone Data Technology. Any duplication, reproduction, or transmission to unauthorized parties without the written permission of Greystone Data Technology is prohibited Greystone Data Technology Lot 62, Linh Trung Export Processing Zone II, Thu Duc District, HCMC, Vietnam Figure 51: Copying Logfile result Back to Main Functions 4 .4 .9 S h u t d o w n Figure 52: Main Menu: Shut down function - There are two action in Shut down menu: turn off or restart the system 34 Copyright © Greystone Data Technology. This controlled document is the property of Greystone Data Technology. Any duplication, reproduction, or transmission to unauthorized parties without the written permission of Greystone Data Technology is prohibited Greystone Data Technology Lot 62, Linh Trung Export Processing Zone II, Thu Duc District, HCMC, Vietnam Figure 53: Shut down screen - - In this screen, the function of the control button as follow: o UP/DOWN button: go up or go down to select the action. o SELECT button: execute the selected action. o CANCEL button: return the Main Menu. When user selects Turn Off or Restart, the New DataFast5TM (DF5-P or DF5-M or DF5-S) will show as a closed door step by step. o If user chooses Turn off: the closed door logo will be displayed until the machine’s power is turned off. o If user chooses Restart option: the screen will go back the booting screen. 35 Copyright © Greystone Data Technology. This controlled document is the property of Greystone Data Technology. Any duplication, reproduction, or transmission to unauthorized parties without the written permission of Greystone Data Technology is prohibited Greystone Data Technology Lot 62, Linh Trung Export Processing Zone II, Thu Duc District, HCMC, Vietnam Figure 54: Close the door screen 36 Copyright © Greystone Data Technology. This controlled document is the property of Greystone Data Technology. Any duplication, reproduction, or transmission to unauthorized parties without the written permission of Greystone Data Technology is prohibited Greystone Data Technology Lot 62, Linh Trung Export Processing Zone II, Thu Duc District, HCMC, Vietnam Back to Main Functions 4 .4 .1 0 About Figure 55: Main Menu: About function - The About screen shows some information about the New DataFast5TM (DF5-P or DF5-M or DF5-S) such as: Greystone Data Technology information, Software Version, Driver Version, Firmware Version, Serial Number… Figure 56: About screen Back to Main Functions ------------- End -------------- 37 Copyright © Greystone Data Technology. This controlled document is the property of Greystone Data Technology. Any duplication, reproduction, or transmission to unauthorized parties without the written permission of Greystone Data Technology is prohibited