Download LightSpace - Flanders Scientific
Transcript
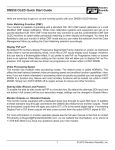
Quick Start Guide:
Using LightSpace with Resolve as Test Pattern Generator
1.0
Flanders Scientific, Inc.
6215 Shiloh Crossing
Suite G
Alpharetta, GA 30005
Phone: +1.678.835.4934
Fax: +1.678.804.1882
E-Mail: [email protected]
www.FlandersScientific.com
Using LightSpace CMS with Resolve as TPG
1. Before starting set the monitor to default by selecting Menu -> System ->
Load Profile -> Default, when prompted
confirm by selecting Yes.Then go to the
Color Management menu -> LUT Bypass, and select 3D LUT.
2. Start LightSpace CMS and select the
network manager icon. Click Enable and
take note
of the listed
IP address.
3. Start DaVinci Resolve and create a
new timeline. Verify your signal is getting to the monitor from Resolve. Then
click on the Color tab in Resolve.
4. From the Color Menu in Resolve se- 5. In the popup dialog enter the IP Ad- 6. Return to LightSpace CMS, open the
lect Monitor Calibration -> LightSpace
dress noted in step 2 and select Connect. Tools menu, select Discoverable Probes,
and then choose your probe from the
dropdown list.
7. After selecting the probe you will use
please select the Display Characterization icon from the menu bar.
8. Select your desired profile size. Larger
profiles take longer, but typically generate better results. We suggest selecting
17 side.
9. Next click on Probe Options to set your
integration time (if applicable), Extra Delay (we suggest 0.25), Sync Frequency
(if applicable), and Calibration Settings
(if using colorimeter).
10. Click OK to verify Probe Option set- 11. Give your profile an easily identifiable
tings. Then center your probe in front of name and then press OK to start the prothe screen and press the Measure but- filing process.
ton.
12. When your profile is complete select
the Convert Colour Space icon and type
in your monitor model name in the first
field.
13. In the source dialog select the target
space you would like to work within (e.g.
Rec709) and in the destination dialog
select your display profile from step 11.
Then click Create New.
15. Finally plug the provided USB to RJ45 cable between computer and monitor
and copy the userX.cfe file to the monitor. Select Update CFE from the monitor’s Color Management Menu, then set
Bypass LUT back to NONE, and lastly
select your userX postion from the color space menu on the monitor to enable
your LUT (see full manual for details).
14. Now select File -> Export from the
LightSpace menu and select Flanders
Scientific17 (*.cfe) as your LUT type,
then select Export. Once saved change
the name of the saved LUT file to user1.
cfe, user2.cfe, or user3.cfe.
Additional information can be found in the expanded LightSpace guides as well as
the Flanders Scientific monitor user manual.
2
© 2014 Flanders Scientific, Inc.


