1
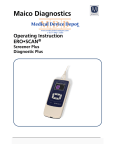
Operating Instructions ERO•SCAN® Database Software MAICO Diagnostic GmbH, Salzufer 13/14, 10587 Berlin, Germany, Tel. +49 30-70 71 46 50, Fax +49 30-70 71 46 99 Operating Instructions ERO•SCAN® Database Software Table of Contents 1 Introduction ............................................................................................................................. 1 1.1 Intended Use...................................................................................................................... 1 2 Setup ....................................................................................................................................... 2 2.1 Precautions for Patient Confidentiality................................................................................. 2 2.2 Prerequisites....................................................................................................................... 2 2.2.1 ERO•SCAN® Database Software PC Minimum Requirements ........................................ 2 2.2.2 ERO•SCAN® Database Software Supported Operating Systems ..................................... 2 2.2.3 ERO•SCAN® Database Software Requirements ............................................................. 2 3 Installation Instructions ............................................................................................................. 3 3.1 Connecting the ERO•SCAN® to the PC ............................................................................... 3 4 General Functionality ................................................................................................................ 5 4.1 Overview ........................................................................................................................... 5 4.1.1 Main Window Details .................................................................................................. 5 4.2 Home Tab Functions........................................................................................................... 6 4.2.1 Transfer Information to and from ERO•SCAN® ............................................................. 6 4.2.2 Manage Patient Records .............................................................................................. 8 4.2.3 Manage Database Files .............................................................................................. 11 4.2.4 Print Patient Reports .................................................................................................. 12 4.2.5 Database Information ................................................................................................ 14 4.3 Export and Audit Toolbar Functions .................................................................................. 15 4.3.1 Settings ..................................................................................................................... 15 4.3.2 Export to OZ eSP........................................................................................................ 17 4.3.3 Export to HiTrack ....................................................................................................... 17 4.3.4 Audit......................................................................................................................... 17 5 Viewing Patient Data .............................................................................................................. 18 5.1 Viewing Patient Details ..................................................................................................... 18 5.2 Viewing Patient Results..................................................................................................... 20 6 Customizing the Display.......................................................................................................... 23 6.1 Customization of the Patients Tab .................................................................................... 23 6.2 Customization of the Results Tab ...................................................................................... 24 7 Typical Use Cases.................................................................................................................... 26 7.1 Transfer Patient Names to ERO•SCAN, Transfer Data to Database Software ....................... 26 7.2 Collect Test Results, Transfer Results to Database Software, Assign Results to Patient ......... 26 7.3 Archive and Back-up Patient Results .................................................................................. 27 8 Ownership, Warranty, and Disclaimer ...................................................................................... 28 8.1 Ownership ....................................................................................................................... 28 8.2 Copyrights ....................................................................................................................... 28 8.3 Limited Warranty.............................................................................................................. 28 Operating Instructions_8104664-2_EROSCAN_Database-SW_14b i 8104664-2 05/14 Operating Instructions ERO•SCAN® Database Software 8.4 Disclaimer ........................................................................................................................ 28 8.5 General Terms and Conditions .......................................................................................... 29 Operating Instructions_8104664-2_EROSCAN_Database-SW_14b ii 8104664-2 05/14 Operating Instructions ERO•SCAN® Database Software Title: Operating Instructions – ERO•SCAN® Database Software EC REP MAICO Diagnostic GmbH Salzufer 13/14 10587 Berlin Germany Tel.: +49 30 - 70 71 46 50 Fax: +49 30 - 70 71 46 99 E-mail: [email protected] Internet: www.maico.biz Copyright © 2014 MAICO Diagnostic. All rights reserved. No part of this publication may be reproduced or transmitted in any form or by any means without the prior written permission of MAICO. The information in this publication is proprietary to MAICO. Compliance MAICO Diagnostic is an ISO 13485 certified corporation. Operating Instructions_8104664-2_EROSCAN_Database-SW_14b iii 8104664-2 05/14 Operating Instructions ERO•SCAN® Database Software 1 Introduction The ERO•SCAN® Database Software is a data management tool that complements the MAICO ERO•SCAN Screener and Diagnostic Plus. It provides the ability to transfer patient OAE test data from the device to a PC for the purposes of viewing, archiving, managing, and printing OAE reports. For Newborn Hearing Screening Programs, the database integrates with 3rd party database tools such as HiTrack and OZ eSP. 1.1 Intended Use The ERO•SCAN Database Software is used to view, archive, and report OAE data acquired from the MAICO ERO•SCAN Otoacoustic Emissions (OAE) unit. Screening and diagnostic data is acquired from the MAICO ERO•SCAN. The ERO•SCAN unit is connected to a PC and the OAE data is transferred to the Database Software. The Database Software can also be a vehicle to generate and transfer patient names to the ERO•SCAN unit. The OAE data is used as part of an audiologic diagnostic evaluation or as part of the infant hearing screening programs for newborns or infants. The results are of interest to the audiologist, olaryngologist, nursing staff, and/or nurse managers. Test results obtained with the ERO•SCAN can only be transferred, viewed, and saved within the Database Software if the device is connected to a PC. Previously acquired data may be viewed for evaluation without a connection to the ERO•SCAN. Data transferred from the ERO•SCAN includes Transient Evoked Otoacoustic Emissions (TEOAE) or Distortion Product Otoacoustic Emissions (DPOAE) from each ear, displayed in graphic and tabular formats. The data will include screening or diagnostic data of both or either OAEs. Screening data will include results that include Pass, Refer, Noise, or No Seal. Diagnostic test results include the absolute responses at each stimulus, the noise floor and/or the Signal to Noise ratio of the response at each stimulus. The patient demographic and test result data is saved to a directory for future retrieval and/or converted to electronic format for transfer to an EMR program. The Database Software provides reports in electronic formats that are compatible with electronic medical records including PDF, RTF, JPEG, TIFF, GIF, PNG, BMP, EMF, and WMF. Operating Instructions_8104664-2_EROSCAN_Database-SW_14b 1 8104664-2 05/14 Operating Instructions ERO•SCAN® Database Software 2 Setup 2.1 Precautions for Patient Confidentiality Store a backup of the data in a safe manner. Create backups of patients’ data regularly. To avoid data from being misused if stolen, the data must be encrypted. All users should have a unique login to the PC. When using a third party networked software, the communication to the database should be secure (encrypted) to avoid client information being captured during network transmission. See the third party user manual for details. When using a third party networked software, all users should have a unique login to the database to ensure traceability and identification of data when updated or deleted from the database. See the third party user manual for details. 2.2 Prerequisites 2.2.1 ERO•SCAN® Database Software PC Minimum Requirements CPU: 1 GHz RAM: 512 MB Hard Disk: 2 GB USB Port: 1 for each connected instrument Optionally, an additional USB port will be required if a printer is connected to the PC Display Resolution: 1024 x 768 CD-ROM Drive (if installing from a CD) Network connection if installing from a network location Network connection if printing to a network printer Internet Explorer 6.0 or later Current service pack is recommended 2.2.2 ERO•SCAN® Database Software Supported Operating Systems Microsoft Windows® 8 Microsoft Windows® 7 Microsoft Windows® Vista Microsoft Windows® XP Professional or Home (Service Pack 3) Microsoft Windows® Server (2003 or newer); Windows Imaging Component (WIC) must also be installed 2.2.3 ERO•SCAN® Database Software Requirements • • • Microsoft .NET Framework version 4.0 (bundled with installer if not already installed) PDF Viewer FTDI USB Driver for instrument connection Operating Instructions_8104664-2_EROSCAN_Database-SW_14b 2 8104664-2 05/14 Operating Instructions ERO•SCAN® Database Software 3 Installation Instructions The ERO•SCAN Database Software is provided with the purchase of each ERO•SCAN device. The installation process can be completed by the CD or a USB thumb drive. For installation from the CD: o Insert CD in to the CD drive. o Use Windows Explorer to navigate to setup.exe. o Double click and follow the instructions. For installation from the USB thumb drive: o Insert the USB thumb drive in to an available USB port on the computer. o Use Windows Explorer to navigate to setup.exe. o Double click and follow the instructions. NOTE: If you already have an older version of application installed, it will be replaced if it was installed from the same path. If you use a different drive for CD, uninstall the older application first manually by using Control Panel. Always make a copy of the database file and store the copied file in a safe location during a new install or upgrade. 3.1 Connecting the ERO•SCAN® to the PC For connection with USB 1. Make sure the ERO•SCAN is charged. 2. Use a standard USB to micro USB cable. 3. Plug the hexagon connector (micro USB B plug) into the USB port on the ERO•SCAN. 4. Plug the USB connector (A plug) into a USB port on the computer. 5. Power on the PC and launch the Database Software. 6. Power on the ERO•SCAN. 7. The ERO•SCAN will display “Ready” or “Waiting for PC”. 8. The Database Software will automatically detect the ERO•SCAN. 9. The Database Software is now ready for data or name transfer. For connection with Bluetooth® NOTE: When pairing to a computer for use with the Database Software, confirm the computer has Bluetooth availability or a Bluetooth dongle will be required. Confirm the Bluetooth settings of the computer are as shown in Figure 1, page 4. Operating Instructions_8104664-2_EROSCAN_Database-SW_14b 3 8104664-2 05/14 Operating Instructions ERO•SCAN® Database Software Figure 1: Bluetooth Settings 1. 2. 3. 4. Make sure the ERO•SCAN is charged. Power on the ERO•SCAN. On the ERO•SCAN, navigate to the New BT Device menu. Press the Discover arrow to initiate discovery of available Bluetooth devices. 5. The ERO•SCAN searches for approximately 15 seconds. During this time the message ‘Please Wait’ appears on the ERO•SCAN screen. 6. Identified Bluetooth devices are displayed when the Discovered screen is shown. 7. Select the correct Bluetooth device by pressing the Left or Right arrow until the PC is displayed on the ERO•SCAN screen. 8. Select the Down arrow to Pair. 9. While the device is pairing to the computer a notification will display on your computer “Add a device“. Select this notification on your computer and enter PIN 1234. 10. The first time the ERO•SCAN Database Manager Software is opened, select ‘Detect Com Port’ within the Database software to finalize the ERO•SCAN connection. This is located within the Transfer area of the toolbar and only required the first time the ERO•SCAN is connected. NOTE: For Bluetooth pairing instructions using the device (steps 3-8 above), review the ERO•SCAN Operating Instruction – Bluetooth Device Pairing section 17.1. Operating Instructions_8104664-2_EROSCAN_Database-SW_14b 4 8104664-2 05/14 Operating Instructions ERO•SCAN® Database Software 4 General Functionality 4.1 Overview For an overview of the general functionality see Figure 2. Menu Bar Toolbar Patient Results Patients and Recent Results Numerical Results Figure 2: Overview of Main Window Graphical Results 4.1.1 Main Window Details Menu Bar Home Tab: The majority of functions such as viewing test data, adding patients, and transferring patient names are accessible in the Home Tab. Export and Audit Tab: Allows for exporting patient data to 3rd party database tools used for NHS patient tracking and for auditing ear or test changes made to patient records. Settings for the Database Software are also displayed in this tab. Tool Bar Tool Bar: A row of icons in the Home Tab and Export/Audit Tab that activate key functions when clicked. Patients and Recent Results Patients Tab: Displays a cumulative list of all patients that have been transferred into the Database Software including the most recent. “Unnamed” is always included in this tab for test data that have been transferred from the ERO•SCAN device that have not been assigned to a specific patient. Recent Results Tab: Displays the most recent list of patient and/or test results that have been transferred from the ERO•SCAN for easy access to the most current data. Operating Instructions_8104664-2_EROSCAN_Database-SW_14b 5 8104664-2 05/14 Operating Instructions ERO•SCAN® Database Software NOTE: For new databases, the first set of patients and data will display in the Patients Tab only. Patient Results Displays all test records for a selected patient. Numerical Results Displays OAE test data of selected test in numerical form. Graphical Results Value Graph Tab: Displays in graphical form, the OAE test data of the selected test from the Patient Test Results list. SNR Tab: Displays the Signal/Noise Ratio across test frequencies in bar graph form of the selected test result from the Patient Test Results list. 4.2 Home Tab Functions 4.2.1 Transfer Information to and from ERO•SCAN® Figure 3 shows the Toolbar’s Transfer Section. Figure 3: Toolbar Section Transfer Results: Transfer test results from the ERO•SCAN to the Database Software using USB connector: 1. Turn on the ERO•SCAN. 2. Connect the ERO•SCAN to the PC using the micro USB connector. 3. The application will default to the previously used Com Port number and automatically detect the ERO•SCAN on that port. (See Detect Com Port below if this is the first time the instrument has been connected.) 4. ERO•SCAN will display “Ready” or “Waiting on PC”. 5. Click Results icon to begin data transfer. 6. The “Recent Results” tab will show the latest uploaded test results. (The Patient Tab will show all patient data transferred.) Results: Transfer test results from the ERO•SCAN to the Database Software using Bluetooth: 1. Turn on the ERO•SCAN. 2. Click Results icon to begin data transfer. 3. Immediately press the UP arrow on the device to display the Bluetooth screen for data transfer. 4. Press CONNECT (on device) for data transfer. 5. The “Recent Results” tab will show the latest uploaded test results. (The Patient Tab will show all patient data transferred.) Operating Instructions_8104664-2_EROSCAN_Database-SW_14b 6 8104664-2 05/14 Operating Instructions ERO•SCAN® Database Software Names: Transfer patient names to the ERO•SCAN using USB connector: 1. Turn on the ERO•SCAN. 2. Connect the ERO•SCAN to the PC using the micro USB connector. 3. The application will default to the previously used Com Port number and automatically detect the ERO•SCAN on that port. (See Detect Com Port below if this is the first time the instrument has been connected.) 4. ERO•SCAN will display “Ready” or “Waiting on PC”. 5. Click on the Names icon and a Store Names to Instrument window will appear (Figure 4). Figure 4: Store Names to Instrument 6. If necessary, clear the previously transferred list by clicking Clear List. 7. If desired, click Clear Instrument to delete all patient and test records on the ERO•SCAN. 8. Per on screen instructions, drag names from the Patients list to build the ERO•SCAN list. 9. The order of patient names displayed on the ERO•SCAN will be the same order as on the Database Software. If desired, click on the column header to sort names prior to storing. 10. Click Store Names to transfer names to the ERO•SCAN as shown (Figure 5). Figure 5: Screen Store Names to Instrument Operating Instructions_8104664-2_EROSCAN_Database-SW_14b 7 8104664-2 05/14 Operating Instructions ERO•SCAN® Database Software Names: Transfer patient names to the ERO•SCAN using Bluetooth: 1. Click on the Names icon and a Store Names to Instrument window will appear. 2. If necessary, clear the previously transferred list by clicking Clear List. 3. If desired, click Clear Instrument to delete all patient and test records on the ERO•SCAN. Once Clear Instrument (Figure 4, page 7) is selected immediately Press the UP arrow on the device to display the Bluetooth screen for data transfer. Then press CONNECT(on device) for action to take place. 4. Per on screen instructions, drag names from the Patients list to build the ERO•SCAN list. 5. The order of patient names displayed on the ERO•SCAN will be the same order as on the Database Software. If desired, click on the column header to sort names prior to storing (Figure 3). 6. Click Store Names to transfer names to the ERO•SCAN (Figure 5). Once Store Names is selected immediately Press the UP arrow on the device to display the Bluetooth screen for data transfer. Then press CONNECT(on device) for action to take place. Detect Com Port: Detect the Com Port for the ERO•SCAN connection: 1. Turn on the ERO•SCAN and connect to the PC using the micro USB connector or Bluetooth connection. NOTE: Bluetooth connection requires pairing to the computer prior to Detect Com Port selection. See section 3.1 Connecting the ERO•SCAN® to the PC, page 3. Pairing is only required upon initial data transfer. 2. Click Detect Com Port when the ERO•SCAN instrument is connected for the first time or when connecting a different ERO•SCAN device. 4.2.2 Manage Patient Records Figure 6 shows the Toolbar’s Records Section. Figure 6: Toolbar Section Records Assign to Patients: Assigns unnamed tests to patient names. Transferred test results will be listed as “Unnamed” if patient names were not transferred to the device prior to testing. 1. Add all New Patient names to the database (see instructions below). 2. Click on the Assign to Patients icon. 3. Drag the unnamed test results from the list on the left, to the corresponding patient on the right (see Figure 7, page 9). Operating Instructions_8104664-2_EROSCAN_Database-SW_14b 8 8104664-2 05/14 Operating Instructions ERO•SCAN® Database Software NOTE: Multiple tests can be transferred at once by pressing the Ctrl key when selecting tests. 4. A confirmation window will pop up stating the patient name and number of tests to be transferred. Click OK if accurate. 5. Click OK when all transfers are complete. Figure 7: Screen Assign Tests to Patients New Patient: Add a new patient record to the Database Software. 1. Click on the New Patient icon and the New Patient information Screen will open (Figure 8). 2. Enter patient demographics, last name or patient ID is required. 3. Enter patient specific history. 4. Click OK to save new patient. 5. For NHS programs, use the Newborn Specific tab to enter demographics such as mother’s last name, nursery type, etc. NOTE: HiTrack requires Last Name, Date of Birth and Patient ID for export of data to occur. Operating Instructions_8104664-2_EROSCAN_Database-SW_14b 9 8104664-2 05/14 Operating Instructions ERO•SCAN® Database Software Figure 8: Screen New Patient Information Edit Patient: Edit a Patient Record: 1. Select a Patient from the Patient list. 2. Click the Edit Patient icon. 3. Add to, or correct, patient information. 4. Click OK to save. Delete: Delete a Patient or Test from the database: 1. Click on the Patient name in the list or the specific test to be deleted. 2. Click the Delete icon. 3. A warning window will pop up with the specific patient name/test to be deleted. 4. Click Yes to permanently delete the patient and test results from the database. 5. Click No to cancel the delete function. Physician and Testers: Add Physician and Testers Names (Figure 9). It is possible to build a list of referring physicians and testers that can be assigned to the patient record in the New Patient tab. 1. Click on the Physicians and Testers icon. 2. Click “+” to add a name to the individual list. 3. Enter the name on the line as it will appear in the database and on the report. 4. Click OK to save. Operating Instructions_8104664-2_EROSCAN_Database-SW_14b 10 8104664-2 05/14 Operating Instructions ERO•SCAN® Database Software Figure 9: Screen Physicians and Testers NOTE: To access this function, No Exports must be selected in the Export/Audit Tab. NOTE: Once a Physician is entered, selection can be made from the New Patient screen. The Tester is available in the Patient Results section. 4.2.3 Manage Database Files Figure 10 shows the Toolbar’s Database Section. Figure 10: Toolbar Section Database New: Create a New Database: 1. Click on the New Database icon. 2. Name and save the New Database file to the desired location on the PC. Then click OK. 3. The program will now exit and a window will pop up. Click OK. NOTE: The previous database will be archived. 4. The ERO•SCAN Database Software will automatically close. 5. Re-open the Database Software to view the new and empty database. Open: Open an Existing Database: 1. Click the Open Folder Icon. 2. Locate and highlight the desired database file and click Open. Operating Instructions_8104664-2_EROSCAN_Database-SW_14b 11 8104664-2 05/14 Operating Instructions ERO•SCAN® Database Software 3. The program will now exit and a window will pop up. Then click OK. 4. The ERO•SCAN Database Software will automatically close. 5. Re-open the Database Software to view the selected database. Save: Save a Database: 1. Click on the Save Database icon. 2. Name and Save the current database file to the desired location on the PC. 3. A confirmation window will pop up. Click OK. 4. The ERO•SCAN Database Software will automatically close. 5. Re-open the Database Software to view the newly named database file. NOTE: It is recommended that all databases be named for easy access to historical patient test results. NOTE: Upon software installation, the default database name is MAICOpatient.mdb and is located at C: Users/XXX. It is recommended to save and name the default database to the desired location on your computer. 4.2.4 Print Patient Reports Figure 11 shows the Toolbar’s Print Section. Figure 11: Toolbar Section Print Print: Print Patient Reports including demographics, numerical, and graphical OAE results. 1. Select the patient record to be printed in the Patients list. 2. To print all test results, click on the Print icon to view the report. 3. To print selected test results, select the desired tests in the Patient Test list. NOTE: Select multiple tests to be printed by pressing the Ctrl key when selecting tests. 4. 5. 6. 7. Click Print to view report. Click Quick Print to print directly to default printer. Click Print to select a printer or to print multiple copies. Click Export icon to access electronic printing options such as PDF, RTF or image file (BMP, JPEG, TIFF, etc.). Operating Instructions_8104664-2_EROSCAN_Database-SW_14b 12 8104664-2 05/14 Operating Instructions ERO•SCAN® Database Software 8. Close Print Preview to return to the main window of the ERO•SCAN Database Software (Figure 12). Figure 12: Toolbar Print Preview Report Header: Entering Report Header: 1. Click on the Report Header icon and the Test Report Header Options Screen will open (Figure 13, page 13). 2. Enter the Clinic/Hospital name and address to appear in the report. 3. Click OK to save. Figure 13: Screen Test Report Header Options Spreadsheet View: The Spreadsheet View allows patient data to be exported to an Excel file where two tabs will be display, Test Results and Statistics. The Test Results tab exhibits all results from the patient record fields. The Statistics tab exhibits the percent of Pass, Refer and Other test results by tester: 1. Select the patient record(s) to be placed in the spreadsheet from the Patients list. NOTE: Select multiple tests by pressing the Ctrl key when selecting tests. 2. Click on the Spreadsheet View icon (Figure 14). 3. Click on Save As to export the document for excel operations to be conducted on the data. 4. Click Quick Print to print directly to default printer. 5. Click Print to select a printer or to print multiple copies. 6. Click Print Preview to view report. 7. Click the red X to Exit and to return to the Database Software. Operating Instructions_8104664-2_EROSCAN_Database-SW_14b 13 8104664-2 05/14 Operating Instructions ERO•SCAN® Database Software Figure 14: Spreadsheet View Toolbar 4.2.5 Database Information Figure 15 shows the Toolbar’s Info Section. Figure 15: Toolbar Section Info. Clicking on the About icon will show the version of the Database Software in use (Figure 16). You can also view the name and location of the database in use. Figure 16: Screen About ERO•SCAN Database Selection of About Boys Town Norms button reveals a template with the explanation displayed in the window. Users should refer to the reference article for additional information (Figure 17. Operating Instructions_8104664-2_EROSCAN_Database-SW_14b 14 8104664-2 05/14 Operating Instructions ERO•SCAN® Database Software Figure 17: About Boys Town Norms 4.3 Export and Audit Toolbar Functions 4.3.1 Settings Figure 18 shows the Export Toolbar Section for the Settings. Figure 18: Export Toolbar Section Settings No Exports: This is the recommended default selection for Non-Newborn Hearing Screening facilities. Patient Identifiers: Patient Identifiers determine the two fields that are viewed on the ERO•SCAN when transferring Names to the device. The default setting for the first field is the ‘Last Name’, the default for the second field is the ‘First Name’. The Patient Identifiers are used to select alternatives for the last name and first name. Alternative identifiers can be used by selecting a field in the First Identifier and Second Identifier columns. Operating Instructions_8104664-2_EROSCAN_Database-SW_14b 15 8104664-2 05/14 Operating Instructions ERO•SCAN® Database Software Figure 19: Set Patient Identifiers NOTE: The selected Patient Identifiers must be completed in the New Patient record or the names will not be transferred to the device. NOTE: The ERO•SCAN uses two fields to identify the patient. Both fields are visible during the scrolling function to select a patient. After a patient is selected on the device, only the first field is displayed for testing. It is important that the first field is a unique identifier for the examiner to know the correct patient is selected. Language: Language allows the user to select the desired language for the ERO•SCAN Database Manager. Once the language is selected, it will be in use next time the program is started. Languages available are: - English - German - Chinese - Italian NOTE: Depending on the language, it is possible that some words will still be shown in English. NOTE: Language selection for the device is separate from the ERO•SCAN Database Manager. For further information on selecting the language within the device see Section 17.8 Language in the ERO•SCAN Operating Instructions. Operating Instructions_8104664-2_EROSCAN_Database-SW_14b 16 8104664-2 05/14 Operating Instructions ERO•SCAN® Database Software 4.3.2 Export to OZ eSP Figure 20 shows the Export Toolbar Section for Export to OZ eSP. Figure 20: Export Toolbar Section Export to OZ eSP 1. In Settings, select Use OZ eSP. 2. Click the appropriate icon to export All Records or New Records. 3. The export status window will display the number of exported records and the location of the exported file. 4. Click OK to complete. 4.3.3 Export to HiTrack Figure 21 shows the Export Toolbar Section for Export to HiTrack. Figure 21: Export Toolbar Section Export to HiTrack In Settings, select Use HiTrack. 1. Click the appropriate icon to export all New Records or All Records. 2. The export status window will display the number of incomplete records and/or the number of exported records and the location of the exported file. 3. Click OK to complete. 4. Click Export Folder to select a folder where HiTrack export file will be exported. 5. Click Pick List Folder to access the location of a facility’s Pick Lists, such as screener or physicians names, used for tracking purposes. 4.3.4 Audit Figure 22 shows the Export Toolbar Section for Audit. Figure 22: Export Toolbar Section Audit 1. Click on Ear Changes to review test records that had Test Ear changed. 2. Click on Test Changes to review patient specific test results that have been re-assigned from one patient name to another. Operating Instructions_8104664-2_EROSCAN_Database-SW_14b 17 8104664-2 05/14 Operating Instructions ERO•SCAN® Database Software 5 Viewing Patient Data Figure 23 shows the Screen Overview of the Patient Data. Patient List Result List Numerical Results Figure 23: Screen Overview of Patient Data Graphical Results 5.1 Viewing Patient Details Patients: Cumulative lists of all patient names in the database including most recently transferred results (Figure 24). The selected Patient is highlighted in blue. Column Header Auto Filter Unnamed Patient Selected Patient Figure 24: Screen Patient List Sorting Column Header Information: Click on the column header to sort the information below it. Example: Clicking on the Last Name will sort the last names alphabetically from A to Z and an arrow is displayed next to the header name. Clicking on the Last Name again will sort the last names from Z to A. To disable Sorting command, select Ctrl and right mouse click the column header. Auto Filter: This tool assists in quickly finding a patient or tests when the patient database is large. Type the text for the variable you are searching for in the open field. All applicable patient records will be displayed. In the example below (Figure 25), all patients named Jones were identified Operating Instructions_8104664-2_EROSCAN_Database-SW_14b 18 8104664-2 05/14 Operating Instructions ERO•SCAN® Database Software by typing Jones in the Auto Filter field. To close Auto Filter and view the entire database, click on the X at the bottom of the patient window. Recent Results X to Close Auto Filter Figure 25: Functionalities of Screen Patient List “Unnamed” Patient: Appears in the patient list when data has been transferred from the ERO•SCAN but not assigned to a patient name. Selected Patient: The selected or active patient is always highlighted in blue. Click on the row of the patient you want to select. Recent Results Tab: List of all patients and/or tests that were most recently transferred from the ERO•SCAN to the Database Software for easy access. This includes all functions as stated above for Patient List. NOTE: For new databases, the first set of data transferred will appear in the Patients list only. Operating Instructions_8104664-2_EROSCAN_Database-SW_14b 19 8104664-2 05/14 Operating Instructions ERO•SCAN® Database Software 5.2 Viewing Patient Results Result: Cumulative list of test results obtained on selected patient. Equipment: Includes the serial numbers of the ERO•SCAN unit and the Probe that were used to collect the results. Column Header Auto Filter Selected Test Figure 26: Screen Result List Sorting Column Header Information: Click on the column header to sort the information below. Example: Clicking on Test Date will sort the dates from most recent to oldest date and an arrow is displayed next to the header name. Clicking on the Test Date again will sort the dates from oldest to newest. To disable Sorting command, select Ctrl and right mouse click the column header. Auto Filter: This tool assists in quickly finding specific test results such as all Outcomes. Close the Auto Filter and view the entire database by clicking on the X at the bottom of the patient window. Selected Test: The selected or active patient is highlighted in blue. Equipment: The serial number of the probe and the ERO•SCAN unit is displayed with each test result. Results: A display of the test results of selected tests in a graphical and Numerical form (Figure 27). Figure 27: Graphical and Numerical Operating Instructions_8104664-2_EROSCAN_Database-SW_14b 20 8104664-2 05/14 Operating Instructions ERO•SCAN® Database Software Value Graph: Displays the graph of OAE test data showing amplitude in dB SPL of the emission and noise floor across the test frequency range. Ear data is color and symbol coded: red circles for right, blue X’s for left (Figure 28). Value Graph Figure 28: Screen Value Graph Value Graph Details: Hover the mouse over an individual data point to view details at that frequency as shown above. The enlarged symbols (e.g. enlarged blue X and diamond symbols) designate the selected response. Boys Town Norms: Boys Town Norms allow the normative data to be displayed for qualifying DPOAE measurements. This displays when the Value Graph is used as shown in Figure 28. The user may optionally show the Boys Town Norms on the Value Graph. To remove from the Value Graph, click the black box next to Boys Town Norms (Figure 28). The Boys Town Norms template is explained in a pop up window (Figure 16, page 15). Users should refer to the reference article for additional information. SNR: The SNR Tab displays the signal to noise ratio at each test frequency in bar graph form (Figure 29). For the default screening bar graphs, green bars represents pass, orange bars represent non-pass. Diagnostic bar graphs are displayed in grey unless a PASS criteria is set in the protocol. SNR Graph Figure 29: Screen SNR Graph SNR Details: Hover the mouse over an individual data point to view the specific SNR at that test frequency as shown below. Operating Instructions_8104664-2_EROSCAN_Database-SW_14b 21 8104664-2 05/14 Operating Instructions ERO•SCAN® Database Software Specific Numerical Test Results: The numerical view of a specific test provides complete test information including F2 frequencies, L1 and L2, DP or TE, NF, SNR, and outcome (Figure 30). A ‘P’ will be displayed at each frequency only when a PASS criteria has been set in the device and that frequency passed. If the frequency does not pass, nothing will be displayed. Figure 30: Screen Specific Numerical Test Results Operating Instructions_8104664-2_EROSCAN_Database-SW_14b 22 8104664-2 05/14 Operating Instructions ERO•SCAN® Database Software 6 Customizing the Display Upon installation, columns and data windows are sized to best fit your computer screen. Columns of data can be added, deleted, or moved in the Patient and Results windows to customize your software. 6.1 Customization of the Patients Tab Sort Columns: Right click in column header such as Last Name (see Figure 24, page 18) to sort the information below. Example: Clicking on the Last Name will sort the last names alphabetically from A to Z and an arrow is displayed next to the header name. Clicking on the Last Name again will sort the last names from Z to A. To disable the Sorting command, select Ctrl and right mouse click the column header. Move Columns: To move columns, click and drag column header to the desired location. Add Columns: To add columns in Patients tab left click on the header bar and a pop up will display. Select Column Chooser (Figure 31) to obtain the Customization window (Figure 32). Drag the column of data you want to add to the desired location in the Patients Tab. Column Chooser Figure 31: Screen Column Chooser Figure 32: Screen Customization Remove Columns: To remove columns, click on the column title in Patients tab and drag back to the customization window. Operating Instructions_8104664-2_EROSCAN_Database-SW_14b 23 8104664-2 05/14 Operating Instructions ERO•SCAN® Database Software NOTE: Adding multiple columns of data will alter the Main Window view. Click on the X to close the Customization window. 6.2 Customization of the Results Tab Sort Columns: Right click in column header to sort the information below. Example: Clicking on Test Date will sort the dates from most recent to oldest date. Clicking on the Test Date again will sort the dates from oldest to newest. Move Columns: To move columns, click and drag column header to the desired location. Add Columns: Click on Column/Band Chooser (Figure 33) to obtain the Customization window (Figure 34). Drag the column of data you want to add to the desired location in the Patients Tab. Column/Band Chooser Figure 33: Screen Column/Band Choose Figure 34: Screen Column Customization Remove Columns: To remove columns, click on the column title in Patients tab and drag back to the Columns tab in the customization window. Remove Bands: To remove an entire band (section) of fields, such as the Equipment band, click on the band title in the Patients tab and drag back to the Bands tab in the customization window (Figure 35). Operating Instructions_8104664-2_EROSCAN_Database-SW_14b 24 8104664-2 05/14 Operating Instructions ERO•SCAN® Database Software Figure 35: Screen Bands Customization NOTE: Adding multiple columns of data will alter the Main Window view Click on the X to close Customization window. Operating Instructions_8104664-2_EROSCAN_Database-SW_14b 25 8104664-2 05/14 Operating Instructions ERO•SCAN® Database Software 7 Typical Use Cases 7.1 Transfer Patient Names to ERO•SCAN®, Transfer Data to Database Software Typical use of the ERO•SCAN Database Software could include transferring patient names to the ERO•SCAN at the start of the day, testing patients, transferring data to the Database Software, or printing test results. The steps are as follows: 1. 2. 3. 4. 5. Launch the MAICO Database Software. Click on the New Patient icon to add all patient names to be tested. Turn on the ERO•SCAN and connect the device to the computer. Click on the transfer Names icon. Drag the patient names to be tested from the patient list to the Store Names to Instrument window. 6. Click Store Names to transfer to device. NOTE: Previous test data will be deleted from the device prior to transfer. NOTE: When using a Bluetooth connection to the PC, navigate to the Bluetooth transfer screen on the ERO•SCAN device. Press UP from the main menu screen. Select CONNECT for the transfer to complete. 7. Complete all testing with the ERO•SCAN. 8. Turn on the ERO•SCAN and connect to the computer. 9. Click on the Results icon to transfer the test data from the ERO•SCAN to the computer. 10. Add notes to a specific test by clicking on the Notes icon in Results and enter. NOTE: Notes will appear in the printed report. 11. To print, select the patient name and review test data. 12. Select the tests in the list to be printed and click on the Print icon. 13. Click Quick Print to print one copy of the report. 7.2 Collect Test Results, Transfer Results to Database Software, Assign Results to Patient The ERO•SCAN can be set to automatically number each test. After transferring the data to the Database Software, each test number can be assigned to a patient name. In this scenario, it is important to manually record the Test Number displayed on the ERO•SCAN to the patient name/ear for each test so you can accurately assign tests to the appropriate patient name. Operating Instructions_8104664-2_EROSCAN_Database-SW_14b 26 8104664-2 05/14 Operating Instructions ERO•SCAN® Database Software NOTE: The ERO•SCAN must be set to the “250 Test” mode to automatically number each test. Refer to the ERO•SCAN Operation Instruction to set the ERO•SCAN to the 250 Test mode. NOTE: Include the Test Number in the Results window when using this process. Refer to section Customization of the Results Tab of this manual to add the Test Number. The steps are as follows: 1. Test patients noting test numbers that appear on the ERO•SCAN after each test. 2. Launch the ERO•SCAN Database Software, turn on the ERO•SCAN and connect. 3. Click on the Transfer icon. NOTE: When using a Bluetooth connection to the PC, navigate to the Bluetooth transfer screen on the ERO•SCAN device. Press UP from the main menu screen. Select CONNECT for the transfer to complete. 4. Navigate to the Recent Results tab and click on the “Unnamed” patient to view all transferred tests. 5. Add all names of patients tested by clicking on the New Patient icon. 6. Click on the Assign to Patients icon. 7. Drag all unnamed test results on the left side to the appropriate patient name on the right side of the window as shown and click OK when done. 8. Select a patient from the Patient list and review all tests. Add notes to a specific test by clicking on the Notes icon in Results and then enter. NOTE: Notes will appear in the printed report. 9. Select the tests in the list to be printed and click on the Print icon. 10. Click Quick Print to print one copy of the report. 7.3 Archive and Back-up Patient Results It is strongly advised that the data in the ERO•SCAN Database Software be periodically archived and backed up. Refer to the Precautions section of this user manual regarding patient data security when archiving or backing up data. Operating Instructions_8104664-2_EROSCAN_Database-SW_14b 27 8104664-2 05/14 Operating Instructions ERO•SCAN® Database Software 8 Ownership, Warranty, and Disclaimer 8.1 Ownership The ERO•SCAN Database Software (hereinafter the “SOFTWARE”) is solely owned by MAICO Diagnostic GmbH, Salzufer 13/14, D-10587 Berlin, Germany. By purchasing the SOFTWARE the buyer is entitled the right of usage, but not the ownership of the SOFTWARE. The SOFTWARE is to be used in accordance to the agreed terms of usage provisioned by MAICO. 8.2 Copyrights MAICO’s ownership of the SOFTWARE covers worldwide and is therefore, protected against any unauthorized copying of the SOFTWARE. Nonconformity of use of the SOFTWARE is strictly prohibited. 8.3 Limited Warranty MAICO warrants you that any physical media and physical documentation provided by MAICO are free of defects in materials and workmanship. This limited warranty is effective for a period of ninety (90) days from the original purchase date. If MAICO receives notification within the warranty period of defects in materials or workmanship and determines that such notification is correct, MAICO will replace defective media or documentation. DO NOT RETURN ANY PRODUCT UNTIL YOU HAVE OBTAINED AUTHORIZATION TO DO SO FROM YOUR SUPPLIER. The entire and exclusive liability and remedy for breach of this limited warranty shall be limited to replacement of defective media or documentation supplied by MAICO, and shall not include or extend to any claim for or right to recover any other damages, including but not limited to, loss of profit, data, or use of the SOFTWARE, or special, incidental or consequential damages, or other similar claims, even if MAICO has been specifically advised of possibility of such damages. In no event will MAICO’s liability for any damages to you or any other person ever exceed the lowest list price or the actual price paid for the license to use the SOFTWARE, regardless of the form of the claim. 8.4 Disclaimer MAICO COVERS; INCLUDING BUT NOT LIMITED TO; ALL WARRANTIES, REPRESENTATIONS AND TERMS AND CONDITIONS, EITHER EXPRESSED OR IMPLIED; UNDER THE SPECIFIED TERMS OF USE AND APPLICATION OF THE SOFTWARE FOR IST SPECIFIC PURPOSE. ALL OTHER TERMS AND CONDITIONS SHALL NOT APPLY. Operating Instructions_8104664-2_EROSCAN_Database-SW_14b 28 8104664-2 05/14 Operating Instructions ERO•SCAN® Database Software Furthermore, MAICO does not guarantee that the SOFTWARE or Documentation is free of bugs, or fulfill the relevant standards, requirement or needs of a user. In this case, all the warranties, guarantees and terms and conditions on all MAICO delivered physical disk and documentation shall be limited to the 90 days warranty period. MAICO is not liable for any third party’s product, disks, software or documentation that is used in conjunction with MAICO’s SOFTWARE or programs, but is not directly manufactured or supplied by MAICO. 8.5 General Terms and Conditions Any change made to this Agreement shall be notified in writing, agreed and signed between both parties, namely the purchaser of the SOFTWARE and a representative of MAICO. In the event that the essential purpose of the above remedy (limited warranty) is not fulfilled, all other limited liability including the liability limits and exclusions of damage claims shall continue to apply. This Software License Agreement shall be interpreted and construed according to, and governed by, the laws of Jurisdiction of Republic of Germany. In the event that any legal or commercial dispute or controversy arising out of, or relating to this agreement; provided MAICO is in all case violated of the rights, to the SOFTWARE or other intellectual property protection right related to the SOFTWARE; shall be presented under the Jurisdiction of Germany in the court of Berlin. The SOFTWARE is protected under both Copyright Law and the International Copyright Treaties. Copying of the SOFTWARE is strictly prohibited except for copies made of the SOFTWARE for backup purposes to protect data loss. The SOFTWARE can be used by any number of users, on any number of computers, and in any place, provided that they are not on more than one display screen at the same time. Operating Instructions_8104664-2_EROSCAN_Database-SW_14b 29 8104664-2 05/14 Operating Instructions ERO•SCAN® Database Software Specifications are subject to change without notice. MAICO Diagnostic GmbH Salzufer 13/14 D-10587 Berlin Telephone +49 30 70 71 46 - 50 Telefax: +49 30 70 71 46 – 99 E-mail: [email protected] Internet: www.maico.biz Operating Instructions_8104664-2_EROSCAN_Database-SW_14b 30 8104664-2 05/14