1
2201 Rack Chassis
User Manual
EdgeAccess Universal Chassis System
CAUTION!
This product may contain a laser diode operating at a wavelength of 1300 nm - 1600 nm. Use of
optical instruments (e.g., collimating optics) with this product may increase eye hazard. Use of
controls or adjustments, or performing procedures other than those specified herein may result in
hazardous radiation exposure.
Under normal conditions, the radiation levels emitted by this product are under Class 1 limits in 21
CFR Chapter 1, Subchapter J.
ATTENCION!
Cet équipement peut avoir une diode laser émettant à des longueurs d'onde allant de 1300nm à
1600nm. L'utilisation d'instruments optiques (par exemple : un collimateur optique) avec cet
équipement peut s'avèrer dangereuse pour les yeux. Procéder à des contrôles, des ajustements ou toute
procédure autre que celles décrites ci-après peut provoquer une exposition dangereuse à des
radiations.
Sous des conditions normales, le niveau des radiations émises par cet équipement est en dessous des
limites prescrites dans CFR21, chapitre 1, sous chapitre J.
NOTICE!
This device contains static sensitive components. It should be handled only with proper ElectroStatic
Discharge (ESD) grounding procedures.
NOTE!
Cet équipement contient des composants sensibles aux décharges électro-statiques. Il doit absolument
être manipulé en respectant les règles de mise à la terre afin de prévenir de telles décharges.
2201 Rack Chassis User Manual
i
EdgeAccess Universal Chassis System
NOTICE
Canoga Perkins has prepared this users manual for use by customers and Canoga Perkins personnel as
a guide for the proper installation, operation and/or maintenance of Canoga Perkins equipment. The
drawings, specifications and information contained in this document are the property of Canoga
Perkins and any unauthorized use or disclosure of such drawings, specifications and information is
prohibited.
Canoga Perkins reserves the right to change or update the contents of this manual and to change the
specifications of its products at any time without prior notification. Every effort has been made to
keep the information in this document current and accurate as of the date of publication or revision.
However, no guarantee is given or implied that the document is error free or that is accurate with
regard to any specification.
Canoga Perkins Corporation
20600 Prairie Street
Chatsworth, California 91311-6008
Business Phone: (818) 718-6300
(Monday - Friday 7 a.m. - 5 p.m. Pacific Time)
FAX: (818) 718-6312 (24 hrs.)
Web Site: www.canoga.com
Email: [email protected]
Copyright © 1994 - 2005 Canoga Perkins Corporation
All Rights Reserved
EdgeAccess®
2201 Rack Chassis
User Manual
Product Number 6910040
Rev. K 01/2008
EdgeAccess and Canoga Perkins are registered trademarks of Canoga Perkins Corp.
To reference Technical Advisories and Product Release Notes, go to Canoga Perkins'
website: http://www.canoga.com
ii
2201 Rack Chassis User Manual
EdgeAccess Universal Chassis System
Table of Contents
Chapter 1 Overview .................................................................................................1-1
Chapter 2 Installing and Troubleshooting the Chassis ........................................2-1
Installing the Chassis...........................................................................................................................2-1
Troubleshooting the Power Supply(s) .................................................................................................2-3
Chapter 3 Specifications..........................................................................................3-1
Appendix A Warranty Information ......................................................................A-1
List of Figures
Figure 1. 2201 Rack Chassis ..............................................................................................................1-1
Figure 2. 2201 Rear Panel ..................................................................................................................2-2
List of Tables
Table 1. Power Supply Cable Pinout..................................................................................................2-3
2201 Rack Chassis User Manual
iii
EdgeAccess Universal Chassis System
iv
2201 Rack Chassis User Manual
EdgeAccess Universal Chassis System
Chapter 1
Overview
The 2201 Rack Chassis houses and supplies power to Canoga Perkins fiber optic modem modules in
the 2200 series, including the 2240, 2262, 2270, and 2290. Although the chassis is not managed, it
supports up to 10 fiber optic modems.
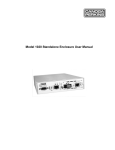
Figure 1. 2201 Rack Chassis
The 2201 supports one or two AC and/or DC power supplies in the chassis. The power monitor
board includes an LED for each power supply; if a supply fails, the LED for that supply lights red and
an alarm buzzes. For specifications for the power supplies, see Chapter 3. Figure 1 shows the 2201
with the power monitor board.
The chassis includes alarm output terminals at the rear panel. Use the ALRMC and ALRM terminals
to connect to an external device that can receive alarm information. If an alarm condition occurs in
the chassis power supply, notification is sent to the external device.
The front panel includes one pushbutton for alarm acknowledgement, which turns off the buzzer, and
two LEDs that light red if the primary or secondary power fails.
2201 Rack Chassis User Manual
1-1
EdgeAccess Universal Chassis System
1-2
2201 Rack Chassis User Manual
EdgeAccess Universal Chassis System
Chapter 2
Installing and Troubleshooting the Chassis
This section describes how to set up and install the chassis.
Installing the Chassis
Before setting up the chassis, make sure these items are available:
•
•
•
Chassis with application modules
Power cables; 14 or 16 gauge wire for DC power
Contact wires for the Alarm (optional)
Caution:
Equipment intended only for installation in a RESTRICTED ACCESS LOCATION
accessible only to electrically skilled persons and electrically instructed persons with
the proper authorization.
Follow these steps to install the chassis:
1. Plan the installation, considering these characteristics:
•
•
•
Place the chassis within 7 ft. (2.134 m) of the power source.
Plan to use one or more of these locations for the connection to Earth Ground:
• The grounding prong on the AC power cord
• The ground of the DC terminal strip
• The mounting hardware for the rack, if the rack is tied to Earth Ground
Place the chassis adjacent to other Canoga Perkins or related equipment.
2. Unpack the chassis, cables, and modems, and inspect all parts for damage and compare them with
the packing list. Set the packaging aside in case you need to return the equipment.
3. On the power monitor board in the slot next to the power supply(s), check the switch and
jumpers:
a. Set Power Switch to A for one power supply or to A+B for two power supplies.
b. Install a jumper at W1 to isolate the Signal and Chassis grounds or at W2 to connect the
grounds, then check that a jumper is installed at W4.
4. On the Power Distribution board located inside the back panel; install a jumper at W1 if you will
connect a normally-closed alarm or at W2 if you will connect a normally-open alarm.
5. Remove the front cover for the power supply, then slide the power supply(s) into the front of the
chassis. Install the primary (A) supply in the lower bay and the secondary (B) supply in the upper
bay. Secure each retaining screw finger-tight and then re-install the power supply cover.
6. Plug each power supply output cable into its connector on the power distribution board; plug the
primary (A) supply into the lower connector and the secondary (B) supply into the upper
connector.
2201 Rack Chassis User Manual
2-1
EdgeAccess Universal Chassis System
7. Slide the power monitor board into the slot next to the power supply(s) and firmly seat it in the
power distribution board, then push in the retainer latches at the front.
8. Mount the chassis in a standard 19-inch relay rack or in a 23-inch rack. The chassis ships with
mounting brackets for a standard 19-inch relay rack.
•
•
For a 19-inch rack, position the chassis in the rack and secure the brackets to the rack with
four screws.
For a 23-inch rack, secure the optional 23-inch extender brackets with four screws, then
position the chassis in the rack and secure the brackets to the rack with four screws.
9. At ALRM and ALRMC (common or ground) at the rear panel, connect a device to receive alarm
information; see Figure Error! Reference source not found..
Figure 2. 2201 Rear Panel
10. To connect power to the power supply(s), follow these steps:
•
•
For an AC supply, plug the power cord into the socket at the rear, then plug the cord into the
power source.
For a DC supply, loosen the screws for the GND and BV terminals at the rear, then slide the
wires under the square washers, and tighten the screws. See Figure 2. Connect the power cables
according to the power source:
• For -48 V or -24V input, connect +V to GND
connect -V to BV
• For +48 V or +24V input, connect +V to BV
connect -V to GND
Note:
To turn off the power, unplug the AC power cord or turn off the DC supply.
11. Insert the modems into the chassis; for details, see the user manual for each modem.
12. Turn on the chassis power supply(s). The LEDs on all modules may blink during the power-on
sequence, then the PWR LEDs light steady.
13. To configure each modem in the chassis, see the user manual for that modem.
2-2
2201 Rack Chassis User Manual
EdgeAccess Universal Chassis System
Troubleshooting the Power Supply(s)
If the Power LED on the power monitor board lights red and the alarm buzzer sounds, it indicates a
problem with the power supply. Press the alarm reset switch to silence the alarm, then make these
checks:
•
•
•
•
•
•
If the Power Monitor board indicates a fault, but the Power LEDs on all modems are lit, check
that the A/A+B switch on the Power Monitor board is set correctly for one (A) or two (A+B)
power supplies.
Unplug the cable for the failing power supply and check the voltage between ground on pins 1, 9,
or 10 and supply on pins 3, 4, 5, 6, 7, or 8; see Table 1. For an AC supply, 9 VAC is normal. For
a DC supply, +9 or -9 VDC is normal.
Check the voltage between pins 3 and 4, 5 and 6, or 7 and 8; see Table 1. For an AC supply,
normal voltage is 18 VAC. For a DC supply, normal voltage is 18 VDC.
If all voltages are faulty, unplug the power cord for the faulty supply and check the main fuse for
that power supply.
If voltages are faulty on only one pair of pins, unplug the power cord for the faulty supply and
check the secondary fuses, located inside the power supply; one fuse for each group of slots. If
needed, you can move a modem from a faulty slot to an empty slot. For more information, see
Table 1.
If a fuse blows after you replace it, it can indicate a fault on a modem on that output circuit. To
isolate a modem, swap each modem on that output circuit to slots on the other output circuits. If
a different fuse blows, the fault is on that modem; replace it. For more information, see Table 1.
Table 1. Power Supply Cable Pinout
Pin Number
Function
1
Return
2
Key
3, 4
Power for slots 1, 2, and 3
5, 6
Power for slots 4, 5, and 6
7, 8
Power for slots 7, 8, 9, and 10
9, 10
Return
2201 Rack Chassis User Manual
2-3
EdgeAccess Universal Chassis System
2-4
2201 Rack Chassis User Manual
EdgeAccess Universal Chassis System
Chapter 3
Specifications
Chassis dimensions
8.8" H x 19" W x 12.8 D" (223.5 mm x 482.6 mm x 325.1 mm)
Weight
Chassis (empty)
7.7 lbs. (3.49 kg)
AC power supply
9.0 lbs. (4.08 kg)
DC power supply
3.0 lbs. (1.36 kg)
Power supply monitor board
0.5 lbs. (0.23 kg)
Power
Redundancy
Optional (AC/AC, DC/DC or AC/DC)
AC power supply
115 VAC +10% 47 to 63 Hz, 2.2 A Max.
230 VAC +10% 47 to 63 Hz, 1.1 A Max.; optional
Heat dissipation, max: 825 BTU/hr
DC power supply
+/-48 VDC, 5 A Max.
Heat dissipation, max: 825 BTU/hr
Environment
Operating temperature
0 to 50° C
Humidity
10 to 95% (non-condensing)
2201 Rack Chassis User Manual
3-1
EdgeAccess Universal Chassis System
3-2
2201 Rack Chassis User Manual
EdgeAccess Universal Chassis System
Appendix A
Warranty Information
Current Warranty information is available on-line in the Client Login Area of the Canoga Perkins
web site (www.canoga.com) or by contacting Technical Support at 800-360-6642 (voice) or
[email protected] (email).
2201 Rack Chassis User Manual
A-1
CANOGA PERKINS CORPORATION
20600 Prairie Street
Chatsworth, California 91311-6008 USA
Phone: (818) 718-6300 FAX: (818) 718-6312
Web Site: www.canoga.com
Email: [email protected]