1
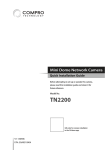
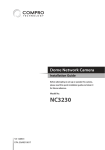
Mini Dome Network Camera
Quick Installation Guide
Before attempting to set up or operate this camera,
please read this installation guide and retain it for
future reference.
Model No.
NC2200
V1-120619
P/N: 3GA0310812
Copyright
© 2012 Compro Technology, Inc. All rights reserved.
Trademark
Compro Technology is the registered trademark of Compro Technology Inc.
SD, SDHC and microSDHC Logos are trademarks of SD-3C, LLC. All other company and
product names mentioned in this document are registered trademarks of the respective companies.
Restriction
No part of this document may be copied or reproduced in any form or by any means
without the prior written consent of Compro Technology, Inc.
Disclaimer
Compro Technology makes no warranties with respect to this documentation and
disclaims any implied warranties of merchantability, quality, or fitness for any particular purpose. The information in this document is subject to change without notice.
COMPRO reserves the right to make revisions to this publication without obligation to
notify any person or entity of any such changes.
Revision History
2012/06/19 Original version
Compro Technology Inc.
www.comprosecurity.com
Tel. +886 2 2918 0169, Fax +886 2 2915 2389
3F, No.12, Alley 6, Lane 45, Pao Shin Road, Hsintien District, New Taipei City 231, Taiwan
Support e-mail: [email protected]
Compro NC2200 - Quick Installation Guide
Contents
Table of Contents
Important Notices. . . . . . . . . . . . . . . . . . . . . . . . . . . . . . . . . . . . . . . . 2
Regulatory Notice . . . . . . . . . . . . . . . . . . . . . . . . . . . . . . . . . . . . . . . . 2
Safety Rules . . . . . . . . . . . . . . . . . . . . . . . . . . . . . . . . . . . . . . . . . . . 2
Product Overview. . . . . . . . . . . . . . . . . . . . . . . . . . . . . . . . . . . . . . . . 3
Package contents. . . . . . . . . . . . . . . . . . . . . . . . . . . . . . . . . . . . . . . . 3
Hardware Overview. . . . . . . . . . . . . . . . . . . . . . . . . . . . . . . . . . . . . . . 4
Installation . . . . . . . . . . . . . . . . . . . . . . . . . . . . . . . . . . . . . . . . . . . . 6
Wall / Ceiling Mount. . . . . . . . . . . . . . . . . . . . . . . . . . . . . . . . . . . . . . 6
Connect the Cables . . . . . . . . . . . . . . . . . . . . . . . . . . . . . . . . . . . . . . 10
Adjust the Lens . . . . . . . . . . . . . . . . . . . . . . . . . . . . . . . . . . . . . . . . .12
Change SD Memory Card. . . . . . . . . . . . . . . . . . . . . . . . . . . . . . . . . . .13
Install Camera Software. . . . . . . . . . . . . . . . . . . . . . . . . . . . . . . . . . . .14
Operation . . . . . . . . . . . . . . . . . . . . . . . . . . . . . . . . . . . . . . . . . . . . 15
Access the Camera. . . . . . . . . . . . . . . . . . . . . . . . . . . . . . . . . . . . . . .15
Access the Camera over the Internet. . . . . . . . . . . . . . . . . . . . . . . . . . . 16
Reset to the Factory Default Settings. . . . . . . . . . . . . . . . . . . . . . . . . . . 17
Technical Specifications . . . . . . . . . . . . . . . . . . . . . . . . . . . . . . . . . . . 18
NC2200 Technical Specifications . . . . . . . . . . . . . . . . . . . . . . . . . . . . . .18
Technical Support Information. . . . . . . . . . . . . . . . . . . . . . . . . . . . . . . 21
Contact Compro Technical Support. . . . . . . . . . . . . . . . . . . . . . . . . . . . 21
Contents
1
Compro NC2200 - Quick Installation Guide
Important Notices
Regulatory Notice
This device complies with Part 15 of the FCC Rules. Operation is subject to the following
two conditions: (1) This device may not cause harmful interference, and (2) This device
must accept any interference received, including interference that may cause undesired
operation.
FCC Interference Statement
This equipment has been tested and found to comply with the limits for a Class B digital
device, pursuant to Part 15 of the FCC Rules. These limits are designed to provide reasonable protection against harmful interference in a residential installation.
This equipment generates, uses and can radiate radio frequency energy and, if not installed and used in accordance with the instructions, may cause harmful interference to
radio communications. However, there is no guarantee that interference will not occur
in a particular installation. If this equipment does cause harmful interference to radio or
television reception, which can be determined by turning the equipment off and on, the
user is encouraged to try to correct the interference by one of the following measures:
• Reorient or relocate the receiving antenna.
• Increase the separation between the equipment and receiver.
• Connect the equipment into an outlet on a circuit different from that to which the receiver is connected.
• Consult the dealer or an experienced radio/TV technician for help.
To assure continued compliance, any changes or modifications not expressly approved
by the party responsible for compliance could void the user's authority to operate this
equipment.
Safety Rules
•
•
•
•
•
•
•
•
2
The camera ought to be installed by a qualified technician.
Place the camera on a steady surface whenever possible.
Do not drop the camera body to the ground; it may cause the damage to main parts.
Do not shake, move or disturb the camera when it is in operation, as such actions may
result in the malfunction of the device.
Power off the camera as soon as it is found smoking or smelt unusual.
Please do not place the camera around the heat sources, such as television or microwave oven.
Please do not remodel the camera; it may cause damage or fire.
Please do not attempt to repair the camera on your own; contact Compro or your local distributor for repair service.
Important Notices
The following is a list of items included in the package. Please check the package contents on your hand. If anything is missing, please don’t hesitate to contact your local
distributor.
Qty
Item
Description
1
Network camera
Compro NC2200 network camera
1
Wall mount base
For mounting the camera on the wall
4
Self-tapping screw
For fastening the wall mount base to the wall,
or for ceiling mouting the camera without using
wall mount base
4
Screw anchor
For fastening wall mount base in concrete
2
Screw for wall mount For fastening the camera to the wall mount
base
base; must be used with rubber o-ring
2
Rubber O-ring
Prevents water from entering the casing
1
Hex key
For removing the camera's top cover
1
Installation Guide
Providing instructions on installation
Product Overview
3
Compro NC2200 - Quick Installation Guide
Product Overview
Package contents
Compro NC2200 - Quick Installation Guide
Hardware Overview
Camera Layout
4
Product Overview
Name
Compro NC2200 - Quick Installation Guide
No.
Description
1
Ethernet port
For connection to the network
2
Socket head screw (4 To remove the top cover, unscrew the 4 socket head
in total )
screws with the supplied hex key
3
Microphone pinhole
4
Screw holes for wall For installing the wall mount base; for ceiling mouting
mount base/ceiling the camera without the use of wall mount base
mounting
5
microSD card slot
Push the memory card in order to release it
6
Composite video jack
For connecting to a standad TV and helping you adjust
camera angle during installation
7
Lens
Fixed iris, F 2.0, f 1.96mm
8
Reset button
Press and hold the button to reset the camera back to
factory defaults
9
Tilt adjustment screw
2 tilt adjustment screws hold the tilting position of the
camera
10
Pan adjustment
screw
For holding the panning position of the camera
For receiving ambient sound
Product Overview
5
Compro NC2200 - Quick Installation Guide
Installation
Wall / Ceiling Mount
The camera can be mounted on a wall
or ceiling
with or without the supplied wall
Composite
Video Output
Reset Button
mount base installed. The wall mount base is generally used for wall mount applications
when the camera's cable is not run through the mounting surface.
Wall Mount Base
microSD card slot
If you want to feed the camera's cable through a dropped ceiling, you can drill a cable
hole on the mounting surface and then mount the camera without using the wall
mount base. The following sections explain 2 different mounting options.
Using Wall Mount Base
1. Use the supplied hex key to unscrew the top cover from the camera.
2. Stick the supplied drill template A to the wall (or place the wall mount base
against the wall to mark the screw hole locations). Then drill 4 mounting holes on
the wall.
6
Installation
Compro NC2200 - Quick Installation Guide
3. Then, if you're mounting on a concrete wall, insert a screw anchor into each of
the mounting holes. After that, secure the wall mount base to the wall with the
supplied self-tapping screws.
4. Fasten the camera to the wall mount base on the wall. Make sure you use a supRubber O-ring
plied rubber O-ring in between the screws and the screw holes (as circled) to
avoid moisture entering the casing. Finally, re-attach the camera’s top cover and
secure the screws tightly with the supplied hex key.
Rubber O-ring
Installation
7
Compro NC2200 - Quick Installation Guide
Rubber O-ring
Rubber O-ring
Note: Should you ever need to detach the mounted camera from the wall in the future,
simply twist the camera in counter-clockwise direction and then pull it off the wall.
8
Installation
Compro NC2200 - Quick Installation Guide
Without Using Wall Mount Base
1. Use the supplied hex key to remove the top cover.
2. Drill 2 mounting holes on the mounting surface. The 2 screw holes should be
spaced exactly 80 mm (3.15 inch) apart to correspond to the position of mounting holes on the camera. (Or use the supplied drill template B to drill the mounting holes.) Then drill a cable hole if you need to run the cable through the mounting surface.
80 mm
Cable Hole
3. Fix the camera to the mounting surface with the supplied self-tapping screws.
Make sure you use a supplied rubber O-ring in between the screws and the screw
holes (as circled) to avoid moisture entering the casing. Feed the camera’s cable
through the cable hole. Lastly, re-attach the camera’s top cover and secure the
screws tightly with the supplied hex key.
Rubber O-ring
Installation
Rubber O-ring
9
Compro NC2200 - Quick Installation Guide
Rubber O-ring
Connect the Cables
This camera can only be powered using PoE (Power-over-Ethernet), which allows electrical power and IP data to be both delivered on a single Ethernet cable. The following
instructions explain ways to connect this PoE-enabeld network camera.
Using a PoE Switch
If the Ethernet ports on your network switch/router support PoE, connect your camera
in the following way:
PoE Switch
(802.3af class3)
10
Installation
2. Ethernet port of the camera: Use the bundled RJ-45 Ethernet cable to connect
the Ethernet port of the network camera to the PoE port of your network switch/
router.
Using a Non-PoE Switch
If you are using the camera with a non PoE capable network switch/router, please prepare a PoE injector (midspan, not supplied) first in order to power the camera. Then connect your camera in the following way:
Switch
Midspan
(PoE Injector)
1. Ethernet cable from PC to switch/router: If your Ethernet cable from PC has been
connected to your Cable/ADSL modem, please re-connect it to the Ethernet port
of your network switch/router.
2. Ethernet port on PoE injector: Use a RJ-45 Ethernet cable to connect the Ethernet
port of the network switch/router to the RJ-45 connector on PoE injector marked
“IN”. Then connect the power of your PoE injector.
3. Ethernet port on camera: Attach a RJ-45 Ethernet cable from the “OUT” RJ-45 connector on PoE injector to the Ethernet port of the network camera.
Installation
11
Compro NC2200 - Quick Installation Guide
PoE Switch
1. Ethernet cable from PC to PoE
switch/router:
If your Ethernet cable from PC has
(802.3af
class3)
been connected to your Cable/ADSL modem, please re-connect it to the non-PoE
Ethernet port of your network switch/router.
Compro NC2200 - Quick Installation Guide
Adjust the Lens
To adjust the direction of the lens, you need to remove the camera’s top cover first. You
can connect the camera’s composite video jack to the video input jack of your TV to aid
you in lens adjustment.
Reset Button
Composite Video Output
Adjust Pan/Tilt
To adjust the camera's panning or tilting position:
1. Loosen the pan adjustment screw and then gently twist the lens holder left or
right to adjust the camera's panning position. The camera allows for 40 degrees
of pan adjustment, as shown in below figure.
microSD card slot
40°
2. Tighten the pan adjustment screw and then, if necessary, go on to adjust the tilting position.
3. Loosen the tilt adjustment screw on both sides of the lens holder, as shown in below figure, and then gently tilt the lens holder up or down to adjust the camera's
tilting position. The camera allows for 90 degrees of tilt adjustment.
12
Installation
40°
4. Having obtained the optimal result, tighten the tilt adjustment screws and reattach the top cover to complete the operation.
Compro NC2200 - Quick Installation Guide
90°
Change SD Memory Card
The camera comes with a 4GB microSD card pre-installed inside the housing. The SD
memory card is user-upgradeable. The following explains how to change the SD memory card.
1. Power off the camera. Then loosen the fixing screws on the top cover with the
Composite
supplied hex key and remove the top cover. Reset Button
2. Locate the microSD card slot. Then push the pre-installed SD card gently to release it.
microSD card slot
3. Pull the SD card out and insert a new one into the slot. Finally, re-install the top
cover to complete the upgrade.
Installation
13
Compro NC2200 - Quick Installation Guide
Install Camera Software
After the camera is powered on and is connected to the same home/office network that
your viewing PC connects to, you can then begin software installation by inserting the
installation CD included in the package into the CD-ROM drive of your viewing PC. Then
the Compro iWizard setup utility will start automatically to guide you through the installation process. If the iWizard doesn't start on its own, browse the contents of the installation CD and double-click on the "iWizard.exe" file to run the setup wizard.
After the Compro iWizard is launched, select the displayed language first. Then click
[IP Camera Setup] and select the camera model you wish to install, and follow the onscreen instructions to complete the software installation. Note if you see the Windows
Security Alert dialog box during wizard setup, please choose [Unblock]. (If your PC
is running Windows 7/ Vista, you need to run iWizard tool with system administrator
rights. Simply right click on the iWizard icon on your desktop, and select “Run as administrator.”)
14
Installation
Find Out the Camera's IP Address
Using the iWizard setup utility to search for your Compro IP camera on the LAN network
is the easiest way to find out your camera's IP address, as the IP address of your camera
will be revealed in the search result.
To start searching for your camera using iWizard, double-click on the iWizard icon (or
insert the installation CD into the CD-ROM drive of your viewing PC) to launch the iWizard setup utility. Then select your language and a camera model, and go ahead to scan
for all the available Compro IP surveillance products installed on your LAN network. The
scanning generally takes around 1 minute to complete, and once the scanning completes, you shall see your Compro IP camera and its IP address on the list. Then you can
double-click your camera on the list to view live camera video right away on the Internet Explorer.
If your camera does not turn up on the list, try performing another search. Or try connecting your IP camera directly to your viewing PC, and run iWizard again to manually
configure the camera's IP address.
View Live Camera Video
After you have determined the camera's IP address, you may now:
1. Open the Internet Explorer on your viewing PC.
2. Enter the camera’s IP address in the address bar. (e.g. 192.168.0.100)
3. A dialog box that requests the user name and password appears; enter a valid
user name and password, and then press OK. The default user name and password are both "admin".
4. After valid user name and password are entered, Internet Explorer will prompt
the installation of camera software from "Compro Technology, Inc.’’
5. Click on the warning message and choose to install the ActiveX. (Compro ActiveX
Operation
15
Compro NC2200 - Quick Installation Guide
Operation
Access the Camera
Compro NC2200 - Quick Installation Guide
components only support 32-bit Internet Explorer. Hence, if the viewing computer system is running 64-bit version of Windows, the 32-bit version of Internet
Explorer must still be used to access the camera.)
6. And then the reconfirmation dialog box will come up. Please press [Install] twice
to install both the "USActiveX.cab" and "ComproClientActivex.cab" on your system.
7. Meanwhile, the Windows Security Alert dialog may appear. Please click [Unblock]
to unblock it from firewall.
8. Now you can start using WebVUer on Internet Explorer to watch live video and
manage IP camera.
Access the Camera over the Internet
To view camera video remotely over the Internet, one will need to:
1. Ensure that the camera’s image quality setting stays within the bandwidth limit.
Check the camera’s image quality setting in [Setup] > [Video]. If the quality setting exceeds the upstream bandwidth limit, stuttering video or even blank screen
may occur.
2. Check the network ports used by the camera by going to [Setup] > [Network] and
note down the HTTP and RTSP port number, which are 80 and 554 respectively
by default.
3. Set up port forwarding on the router that the camera connects to, and allow traffic
on ports the IP camera is using. Consult the user manual of your router for port forwarding setup instructions. (When configuring port forwarding/mapping on your
16
Operation
After configuring port forwarding successfully, you can now log on to the IP camera
from a remote location by entering the camera's IP address plus its HTTP port number in
the location field of Internet Explorer. For example, enter "http://61.220.20.16:80".
If you have multiple Compro IP cameras installed, you will need to change the HTTP
and RTSP port on them manually so each one of them will use a different port. For
instance, let the second camera use HTTP port 81 and RTSP port 555 and log on to
"http://61.220.20.16:81" to access the second camera.
Reset to the Factory Default Settings
Compro NC2200 - Quick Installation Guide
router, note that the public RTSP port must be equal to the internal RTSP port used
by the IP camera.)
If you forget your system password or if you feel your IP camera has been acting weird,
you can follow the steps below to reset the camera to its default state in which it will be
obtaining IP address from the available local DHCP server. To reset the camera:
1. Detach the camera's top cover. Locate the reset button as shown in below figure.
Composite Vi
Reset Button
2. Press and hold the reset button for about 10 seconds.
3. After the camera is reset, it will take 1 minute to reboot. Please wait patiently and
start the Compro iWizard later again to scan for and re-configure the camera.
microSD card slot
Operation
17
Compro NC2200 - Quick Installation Guide
Technical Specifications
NC2200 Technical Specifications
CAMERA
VIDEO
AUDIO
System
Integration
System
Integration
18
Sensor
1/3" CMOS 2-Megapixel sensor
Lens
Fixed iris, F 2.0, f 1.96mm
Zoom
10x digital
Angle of View
105°
Min Illumination
1.0 lux
Shutter Time
1/5 ~ 1/16000 Sec.
Camera Angle
Adjustment
40° pan, 90° tilt
Video Format
M-JPEG, MPEG-4, H.264
Resolutions
160x120, 320 x 240, 640 x 480, 1280 x 1024, 1600
x 1200
Frame Rate
Turbo picture mode:1600 x1200 up to 15 FPS
Motion adaptive mode: HDTV 720P (1280 x 720)
up to 30 FPS; VGA or below up to 30 FPS
Video Streaming
Dual video stream supported
Dynamic Control
Active bandwidth management, activity adaptive
streaming
Image Settings
Adjustable image size and quality
AGC, AWB, AES
Co n f i g u ra b l e b r i g ht n e s s, s at u rat i o n a n d
sharpness
Compression
Format
G.711 PCM 64 Kbit/sec
Audio Input /
Output
Built-in microphone
Intelligent
Analytics
Motion detection, tampering detection, loitering
detection, audio detection, multi-zone/sensitivity
Triggering Event
Analytics, schedule, network failure
Triggering
Reaction
SMS, snapshot, local/remote recording, e-mail,
FTP, alarm output, ComproView® notification
SDK
Yes
Technical Specifications
Network
Remote
Surveillance
General
Mechanical
Electrical
Local Storage
Built-in microSD memory slot (with a pre installed 4GB memory card)
Format
AVI (audio incl.), by events or schedule; JPEG, file
name format customizable
Protocols
3GPP, ARP, DDNS, DHCP, DNS, FTP, HTTP, ICMP/
IPv4, IGP, NTP, PPPoE, QoS, RSP, RTSP, SMTP, TCP/IP,
UDP, UPnP
Ethernet
10/100 Base-T, autosensing, RJ-45
User Group
2 levels, unlimited users, ID/password protected,
max 10 simultaneous users
Diagnostics
Auto connectivity diagnosis, auto bandwidth
detection, iWizard
Mobile
Surveillance
M-JPEG, 3GPP over Android, BlackBerry, iPhone,
Windows Mobile (features vary)
Web Surveillance
16-CH WebVUer over Internet Explorer, Chrome,
Firefox, Safari (features vary)
Advanced
Surveillance
ComproView® 32-CH surveillance system
Unit
Configuration
Rebooting, factor y default, date/time
synchronization, user profile management,
firmware upgrade, OSD, multilingual UI
User
Authentication
ID, password
Firmware
HTTP mode
OSD
Text or image overlay, 4 locations
Language
Chinese Traditional, Chinese Simplified, German,
Spanish, English, Japanese, Portuguese, Russian,
Turkish, Ukrainian, Bulgarian
Regulatory
CE, FCC
Weather
Resistance
IP66
Dimensions
103mm x Ø100 x 56 mm (L x W x H)
Weight (Net)
270g
Input Voltage
PoE (Power-over-Ethernet) only
PoE
IEEE 802.3af Class 3
Technical Specifications
Compro NC2200 - Quick Installation Guide
Local
Storage
19
Compro NC2200 - Quick Installation Guide
Environmental
Operating
Temperature
-20~ 55 °C / -4 ~ 131 °F
Humidity
20~80% RH non-condensing
OS
Microsoft Windows XP SP3, Vista SP1, 7 (x86/x64)
Browsing
Processor
Requirement
Web Browser
Intel 2.8 GHz, 2GB RAM
Microsoft Internet Explorer 8.0 or above, non-IE
browsers require 3rd-party VLC plugin
* Specifications are subject to change without prior notice.
20
Technical Specifications
If you need any technical support, fill out the online form (http://comprousa.com/en/
form.htm) or directly email to [email protected].
Compro Technology, Inc.
www.comprosecurity.com
Tel. +886 2 2918 0169, Fax +886 2 2915 2389
3F, No.12, Alley 6, Lane 45, Pao Shin Road,
Hsintien District, New Taipei City 231, Taiwan
Technical Specifications
21
Compro NC2200 - Quick Installation Guide
Technical Support Information
Contact Compro Technical Support
www.comprosecurity.com
Compro Technology Head Office
3F, No.12, Alley 6, Lane 45, Pao Shin Road, Hsintien District, New Taipei City 231, Taiwan
Tel. +886 2 29180169 Fax. +886 2 29152389