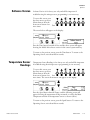
1
Model 420 Series
Forma Orbital Shaker *
Operating and Maintenance Manual 7000420 Rev. 7
Preface
* Triple counter-balanced, single eccentric drive mechanism (U.S. Patent
#5,558,437)
* Test tube rack (U.S. Patent #5,632,388)
MANUAL NUMBER 7000420
--
--
11/15/06
Clarified that platforms are ordered separately (pack list)
ccs
7
22245/OS284
3/26/04
Updated timer specifications to 5 minute increments
ccs
--
OS-279
2/19/04
Added unit specific electrical schematic, no Model 4500 Series
ccs
--
--
6/25/03
Inserted platform installation section, removed erroneously
ccs
6
20194
7/3/01
Changed ferrite installation and updated EMC standard
aks
5
19305/OS-217
10/21/00
Added platform stalled and check fuse alarm messages
ccs
4
--
10/2/00
Quark format
ccs
3
18544/OS-202
10/19/99
Added power fail time delay, chg’d check belt alarm message clear
ccs
2
18404
7/9/99
Removed drive mechanism shipping bracket, Section 2.8
ccs
--
17928/SI-7405
6/8/99
Added universal test tube holder 600088
ccp
1
SI-7348
2/10/99
Updated parts list and schematics (board chgs) per R. Bruker
deg
REV
ECR/ECN
DATE
DESCRIPTION
By
Thermo Fisher Scientific
Orbital Shaker
i
Preface
Important Read this instruction manual. Failure to read, understand and follow the instructions in this manual
may result in damage to the unit, injury to operating personnel, and poor equipment performance. ▲
Caution All internal adjustments and maintenance must be performed by qualified service personnel. ▲
Warning Model 420 Obital Shaker may be used to process non-flammable materials only! ▲
Warning Grounding circuit continuity is vital for the safe operation of this shaker. Never operate this unit with
the grounding circuit disconnected. ▲
Material in this manual is for information purposes only. The contents and the product it describes are subject
to change without notice. Thermo Fisher Scientific makes no representations or warranties with respect to this
manual. In no event shall Thermo be held liable for any damages, direct or incidental, arising out of or related
to the use of this manual.
©1999 Thermo Fisher Scientific. All rights reserved.
ii
Orbital Shaker
Thermo Fisher Scientific
Preface
Important operating and/or maintenance instructions. Read the accompanying text carefully.
Potential electrical hazards. Only qualified persons should perform procedures associated with this
symbol.
Equipment being maintained or serviced must be turned off and locked off to prevent possible injury.
Marking of electrical and electronic equipment, which applies to electrical and electronic equipment
falling under the Directive 2002/96/EC (WEEE) and the equipment that has been put on the market
after 13 August 2005.
This product is required to comply with the European Union’s Waste Electrical & Electronic
Equipment (WEEE) Directive 2002/96/EC. It is marked with the WEEE symbol. Thermo Fisher
Scientific has contracted with one or more recycling/disposal companies in each EU Member State
European Country, and this product should be disposed of or recycled through them. Further
information on Thermo’s compliance with this directive, the recyclers in your country and information
on Thermo products will be available at www.thermofisher.com.
✔
Always use the proper protective equipment (clothing, gloves, goggles, etc.)
✔ Always dissipate extreme cold or heat and wear protective clothing.
✔ Always follow good hygiene practices.
✔ Each individual is responsible for his or her own safety.
Thermo Fisher Scientific
Orbital Shaker
iii
Preface
Do You Need Information or Assistance on
Thermo Fisher Scientific Products?
If you do, please contact us 8:00 a.m. to 6:00 p.m. (Eastern Time) at:
1-740-373-4763
1-888-213-1790
1-740-373-4189
http://www.thermo.com/forma
[email protected]
Direct
Toll Free, U.S. and Canada
FAX
Internet Worldwide Web Home Page
Service E-Mail Address
Our Sales Support staff can provide information on pricing and give you quotations. We can
take your order and provide delivery information on major equipment items or make
arrangements to have your local sales representative contact you. Our products are listed on the
Internet and we can be contacted through our Internet home page.
Our Service Support staff can supply technical information about proper setup, operation or
troubleshooting of your equipment. We can fill your needs for spare or replacement parts or
provide you with on-site service. We can also provide you with a quotation on our Extended
Warranty for your Thermo products.
Whatever Thermo products you need or use, we will be happy to discuss your applications. If
you are experiencing technical problems, working together, we will help you locate the problem
and, chances are, correct it yourself...over the telephone without a service call.
When more extensive service is necessary, we will assist you with direct factory trained
technicians or a qualified service organization for on-the-spot repair. If your service need is
covered by the warranty, we will arrange for the unit to be repaired at our expense and to your
satisfaction.
Regardless of your needs, our professional telephone technicians are available to assist you
Monday through Friday from 8:00 a.m. to 6:00 p.m. Eastern Time. Please contact us by
telephone or fax. If you wish to write, our mailing address is:
Thermo Fisher Scientific Inc
Controlled Environment Equipment
401 Millcreek Road, Box 649
Marietta, OH 45750
International customers, please contact your local Thermo distributor.
iv
Orbital Shaker
Thermo Fisher Scientific
Table of Contents
Thermo Fisher Scientific
Section 1
Installation . . . . . . . . . . . . . . . . . . . . . . . . . . . . . . . . . . . . . . . . . . . . . . . . . .1-1
Remove the Pallet Shipping Brackets . . . . . . . . . . . . . . . . . . . . . . . . .1-1
Location . . . . . . . . . . . . . . . . . . . . . . . . . . . . . . . . . . . . . . . . . . . . . . .1-1
Special Ventilation Requirements . . . . . . . . . . . . . . . . . . . . . . . . . . . .1-2
Power Module . . . . . . . . . . . . . . . . . . . . . . . . . . . . . . . . . . . . . . . . . .1-2
Electrical Requirements . . . . . . . . . . . . . . . . . . . . . . . . . . . . . . . . . . .1-2
Check Operating Voltage . . . . . . . . . . . . . . . . . . . . . . . . . . . . . . . . . .1-3
Change Operating Voltage . . . . . . . . . . . . . . . . . . . . . . . . . . . . . . . . .1-3
Install the Platform . . . . . . . . . . . . . . . . . . . . . . . . . . . . . . . . . . . . . .1-4
Assemble the Flask Clips . . . . . . . . . . . . . . . . . . . . . . . . . . . . . . . . . .1-5
Install the Flask Clips . . . . . . . . . . . . . . . . . . . . . . . . . . . . . . . . . . . . .1-6
Install the Test Tube Holders . . . . . . . . . . . . . . . . . . . . . . . . . . . . . . .1-6
RS-232 Interface Connector . . . . . . . . . . . . . . . . . . . . . . . . . . . . . . .1-7
Connect the Remote Alarm . . . . . . . . . . . . . . . . . . . . . . . . . . . . . . .1-10
Section 2
Operation . . . . . . . . . . . . . . . . . . . . . . . . . . . . . . . . . . . . . . . . . . . . . . . . . . . .2-1
Control Panel Operation . . . . . . . . . . . . . . . . . . . . . . . . . . . . . . . . . .2-2
Quick Start-Up . . . . . . . . . . . . . . . . . . . . . . . . . . . . . . . . . . . . . . . . .2-2
Factory (Default) Settings . . . . . . . . . . . . . . . . . . . . . . . . . . . . . . . . .2-3
Change Temperature, Speed, Time Settings . . . . . . . . . . . . . . . . . . . .2-3
Change Temperature . . . . . . . . . . . . . . . . . . . . . . . . . . . . . . . . . . . .2-4
Change RPM . . . . . . . . . . . . . . . . . . . . . . . . . . . . . . . . . . . . . . . . .2-4
Change Time . . . . . . . . . . . . . . . . . . . . . . . . . . . . . . . . . . . . . . . . .2-4
Change from Hold to Countdown . . . . . . . . . . . . . . . . . . . . . . . . .2-5
The Shaker Alarms . . . . . . . . . . . . . . . . . . . . . . . . . . . . . . . . . . . . . . .2-5
Overtemp Shutdown . . . . . . . . . . . . . . . . . . . . . . . . . . . . . . . . . . . .2-6
Cycle Complete . . . . . . . . . . . . . . . . . . . . . . . . . . . . . . . . . . . . . . . .2-6
Power Failure . . . . . . . . . . . . . . . . . . . . . . . . . . . . . . . . . . . . . . . . . .2-7
RPM Tracking . . . . . . . . . . . . . . . . . . . . . . . . . . . . . . . . . . . . . . . . .2-7
Check Belt . . . . . . . . . . . . . . . . . . . . . . . . . . . . . . . . . . . . . . . . . . .2-8
Sensor Fault . . . . . . . . . . . . . . . . . . . . . . . . . . . . . . . . . . . . . . . . . .2-8
Temperature High or Low . . . . . . . . . . . . . . . . . . . . . . . . . . . . . . . .2-8
Platform Stalled . . . . . . . . . . . . . . . . . . . . . . . . . . . . . . . . . . . . . . . .2-9
Check Fuse . . . . . . . . . . . . . . . . . . . . . . . . . . . . . . . . . . . . . . . . . . .2-9
Change Shaker Configuration . . . . . . . . . . . . . . . . . . . . . . . . . . . . . .2-9
Turn Audible Alarm On/Off . . . . . . . . . . . . . . . . . . . . . . . . . . . . .2-10
Set Alarm Limits . . . . . . . . . . . . . . . . . . . . . . . . . . . . . . . . . . . . . .2-11
Calibrate Speed and Temperature . . . . . . . . . . . . . . . . . . . . . . . . . . .2-13
Orbital Shaker
v
Table of Contents
vi
Section 2 (continued)
Calibrate RPM . . . . . . . . . . . . . . . . . . . . . . . . . . . . . . . . . . . . . . .2-14
Calibrate the Temperature . . . . . . . . . . . . . . . . . . . . . . . . . . . . . . .2-14
Remote Alarm System . . . . . . . . . . . . . . . . . . . . . . . . . . . . . . . . . . .2-15
Cycle Complete . . . . . . . . . . . . . . . . . . . . . . . . . . . . . . . . . . . . . . .2-15
Power Failure . . . . . . . . . . . . . . . . . . . . . . . . . . . . . . . . . . . . . . . . .2-16
RPM Tracking . . . . . . . . . . . . . . . . . . . . . . . . . . . . . . . . . . . . . . . .2-16
Check Belt . . . . . . . . . . . . . . . . . . . . . . . . . . . . . . . . . . . . . . . . . .2-16
Sensor Fault . . . . . . . . . . . . . . . . . . . . . . . . . . . . . . . . . . . . . . . . .2-17
Temperature High or Low . . . . . . . . . . . . . . . . . . . . . . . . . . . . . . .2-17
View Total Operating Hours . . . . . . . . . . . . . . . . . . . . . . . . . . . . . .2-17
Heat % . . . . . . . . . . . . . . . . . . . . . . . . . . . . . . . . . . . . . . . . . . . . . .2-18
Software Version . . . . . . . . . . . . . . . . . . . . . . . . . . . . . . . . . . . . . . . .2-19
Temperature Sensor Readings . . . . . . . . . . . . . . . . . . . . . . . . . . . . . .2-19
Menu Map . . . . . . . . . . . . . . . . . . . . . . . . . . . . . . . . . . . . . . . . . . . .2-20
Alarm Messages . . . . . . . . . . . . . . . . . . . . . . . . . . . . . . . . . . . . . . . .2-21
Preventive Maintenance . . . . . . . . . . . . . . . . . . . . . . . . . . . . . . . . .2-23
Section 3
Maintenance . . . . . . . . . . . . . . . . . . . . . . . . . . . . . . . . . . . . . . . . . . . . . . . .3-1
Platform and Cabinet . . . . . . . . . . . . . . . . . . . . . . . . . . . . . . . . . . . . .3-1
Control Panel . . . . . . . . . . . . . . . . . . . . . . . . . . . . . . . . . . . . . . . . . . .3-1
Clean-up After a Spill . . . . . . . . . . . . . . . . . . . . . . . . . . . . . . . . . . . . .3-1
Test Overtemperature Alarm . . . . . . . . . . . . . . . . . . . . . . . . . . . . . . .3-2
Section 4
Service . . . . . . . . . . . . . . . . . . . . . . . . . . . . . . . . . . . . . . . . . . . . . . . . . . . . . .4-1
Alarms and Alarm Conditions . . . . . . . . . . . . . . . . . . . . . . . . . . . . . .4-1
Adjust Drive V-belt Tension . . . . . . . . . . . . . . . . . . . . . . . . . . . . . . . .4-2
Install a New Drive V-belt . . . . . . . . . . . . . . . . . . . . . . . . . . . . . . . . .4-3
Troubleshoot/Replace Circuit Boards . . . . . . . . . . . . . . . . . . . . . . . . .4-4
Electronics Panel . . . . . . . . . . . . . . . . . . . . . . . . . . . . . . . . . . . . . . .4-4
Output Board . . . . . . . . . . . . . . . . . . . . . . . . . . . . . . . . . . . . . . . . .4-6
Motor Driver Circuit Board . . . . . . . . . . . . . . . . . . . . . . . . . . . . . .4-6
Manual Reset Thermostat . . . . . . . . . . . . . . . . . . . . . . . . . . . . . . . .4-7
Temperature Sensors . . . . . . . . . . . . . . . . . . . . . . . . . . . . . . . . . . . .4-7
Drive Belt Sensor . . . . . . . . . . . . . . . . . . . . . . . . . . . . . . . . . . . . . .4-7
Spare Fuses . . . . . . . . . . . . . . . . . . . . . . . . . . . . . . . . . . . . . . . . . . . .4-8
Clean Inside Cabinet After a Major Spill . . . . . . . . . . . . . . . . . . . . . .4-8
Section 5
Specifications . . . . . . . . . . . . . . . . . . . . . . . . . . . . . . . . . . . . . . . . . . . . . . .5-1
Section 6
Parts List . . . . . . . . . . . . . . . . . . . . . . . . . . . . . . . . . . . . . . . . . . . . . . . . . . . .6-1
Section 7
Electrical Schematics . . . . . . . . . . . . . . . . . . . . . . . . . . . . . . . . . . . . . . . .7-1
Section 8
Warranty Information . . . . . . . . . . . . . . . . . . . . . . . . . . . . . . . . . . . . . . . .8-1
Orbital Shaker
Thermo Fisher Scientific
Section 1
Installation
The Model 420 Orbital Incubator Shaker is supplied with the following
materials:
1 - T-handle 5/32” hex socket wrench
2 - Platform alignment studs 1/4-20
6 - Grade 8, 5/32” hex socket flat head screws (provided with platform)
1 - Screwdriver for flask clip installation and removal
1 - Line cord set
2 - Cable mountable ferrites for remote alarm and RS-232 connections
1 - Platform (if applicable, must be ordered separately)
Remove the Pallet
Shipping Brackets
Warning This shaker is heavy! The net weight of Model 420 is 185 lbs.
(83.9kg). Have assistance available when moving it. Place this unit on a
support surface that will accommodate the weight and operating motion of
this shaker. ▲
The Orbital Shaker is secured to its shipping pallet with two brackets, one
on each side of the frame (Figure 1-1). A 7/16” wrench is required to
remove the brackets from the pallet. Remove the shipping brackets from
the shaker by unhooking them from the shaker frame.
ORBITAL SHAKER
Pallet Shipping
Bracket
Figure 1-1. Bracket
Location
Thermo Fisher Scientific
Install the shaker on a sturdy table or bench. The support structure must
be able to accommodate both the weight and operating motion of the
shaker. The shaker can also be placed under a bench or in a “knee well.”
Orbital Shaker
1-1
Section 1
Installation
Special Ventilation
Requirements
If the shaker is to be operated at a temperature 5° to 10°C above ambient,
the circular vent at the rear of the cabinet must be 1” from the wall and
the rear vent must be fully opened by turning the Phillips screw
clockwise. Refer to Figure 1-2.
If operating temperatures are more than 10° above ambient, the rear vent
must remain closed (fully counterclockwise).
Vent
Power
Module
(mains
disconnect)
ORBITAL SHAKER
Figure 1-2. Vents
Power Module
A power module (Figure 1-3) located on the right side of the shaker
contains the On/Off power switch, two fuses, and the line cord receptacle.
It is the mains disconnect for the unit.
Figure 1-4 lists the voltage, rating and part numbers of the power module
fuses.
115V
115V fuse 10A P/N 285633
230V fuse 4A P/N 230165
Figure 1-3. Power Module
Electrical
Requirements
Figure 1-4. Fuses
The electrical power requirements of the Model 420 Shaker are:
115VAC, 50/60 Hz, 1 PH, 6.5 FLA
230VAC, 50/60 Hz, 1 PH, 3.2 FLA
1-2
Orbital Shaker
Thermo Fisher Scientific
Section 1
Installation
Check Operating
Voltage
A small window in the power module above the On/Off switch shows the
shaker’s operating power configuration. The voltage shown in this window
must match the line voltage available where the shaker will be installed.
Figure 1-3 shows the shaker configured for 115 volts.
If the electrical service does not match the voltage shown, the power
module must be changed before the unit is plugged in and turned on.
Caution Do not plug the shaker in or try to operate it if the line voltage
does not match the configuration voltage shown on the power module. ▲
Remove the line cord if it is plugged in, then change the operating voltage
by following the illustrations in Figures 1-5 through 1-7.
115V
Open the
hinged
cover
115V
230V
SPST
115V
SPST
Insert
screwdriver
115V
Change Operating
Voltage
230V
Remove and rotate the fuse holder,
then change the fuses as shown below.
Figure 1-5. Remove and Rotate Fuseholder
Remove the two existing fuses
and replace them with fuses
of proper voltage and rating
Side view of fuse holder with
230V fuse in place
Side view of fuse holder with
115V fuse in place
Figure 1-6. Replace Fuses
Replace the
Fuse Holder
Close the
Hinged Cover
230V
230V
When the shaker is completely
assembled, make sure the power switch
is turned off and plug the line cord
into the power module.
Figure 1-7. Re-install
Thermo Fisher Scientific
Orbital Shaker
1-3
Section 1
Installation
Install the Platform
Caution Install the shaker platform before plugging in or attempting to
operate the unit. ▲
The Model 420 Shaker/Incubator accepts a
heavy-duty, 18" (wide) x 17-3/4" (front to
back), 5/16" aluminum platform. The shaker
platform is attached to the orbital mechanism
with six 1/4-20 x 3/4" long hex socket flat head
screws, Grade 8. These screws are hardened and
should not be replaced with any other screw
Figure 1-8. Included Wrench
type. A 5/32" hex socket wrench is included
with the shaker to attach the platform. Figure 1-8 identifies the hex socket
wrench and hex socket flat head screws.
Caution Do not attempt to use a Phillips head screwdriver! ▲
To install the shaker platform:
1. Insert the two 1/4-20 alignment pins into the two mounting holes
identified in Figures 1-9 and 1-10.
Platform mounting stud locations
(insert alignment pins)
Alignment Pins
Platform mounting
holes on the
drive mechanism
= Platform Mounting Holes
Figure 1-9. Mounting Holes and Pin
Figure 1-10. Mounting Holes
2. Rotate the drive mechanism until the four mounting holes
approximately match the holes in the platform.
3. Place the platform onto the shaker and over the alignment pins.
4. Move the platform in an orbital motion until one or more of the center
mounting holes are located.
1-4
Orbital Shaker
Thermo Fisher Scientific
Section 1
Installation
Install the Platform
cont.
5. Insert the hex socket head screws as the four holes are located. Do not
tighten the screws.
6. Remove the 1/4-20 alignment pins and replace them with the
remaining two hex socket screws.
7. Seat all screws very tightly, using the T-handle wrench. If a torque
wrench is available, tighten these screws at 120 in./lbs. Check these
screws monthly if the unit is operated at or near maximum RPM.
Caution Use only the included hex socket screws and T-handle wrench to
fasten the platform. If a torque wrench is available, torque the screws to
120 in./lbs. The platform screws should be checked monthly if the unit is
operated at or near maximum RPM. ▲
Assemble the Flask
Clips
Each Flask Clip, up to 1 liter in size, is supplied with a metal spring that
must be installed onto the clip. Two-liter flask clips are supplied with two
springs.
For flask clips through 500 ml, insert the end of each spring into the holes
on the top of the clip leg as shown in Figure 1-11. One liter and larger
flask clips require the spring ends to be hooked together as shown in Figure
1-12.
The spring ends on the two-liter flask clip are also hooked together, but
require the rubber spring tubes to be installed between the clip legs (Figure
1-11). The second spring and spring tubes are placed around the base of
the clip after it has been installed onto the platform.
Upper Spring and
Spring Tubes
Clip Leg
Lower Spring and
Spring Tubes
Figure 1-11. Clip Mounting Screw
Thermo Fisher Scientific
Figure 1-12. Clip Components
Orbital Shaker
1-5
Section 1
Installation
Install the Flask Clips
The Model 420 will accommodate glassware in numbers and sizes from
forty-nine 25 ml flasks to six, 2-liter flasks.
Flask clips can be attached anywhere on the shaker platform. The
counterbalanced design of these shakers accommodates even an unbalanced
load. The flask clips are supplied with the proper screws and are attached
to the platform with a standard Phillips screwdriver or with the screwdriver
provided with the unit.
Table 1-1. Platform Flask Clip Capacity
Platform Number
No. of Clips
Flask Size
Springs/Clip
Screws/Clip
238010
49
25 ml
1
1
238011
49
50 ml
1
1
238012
25
125 ml
1
1
238013
18
250/300 ml
1 (w/1 lg. pad)
1
238014
16
500 ml
1
1
238015
8
1L
1
5
238016
5
2L
2 (w/10 tubes)
5
Figures 1-11 and 1-12 illustrate the installation of the flask clips. Note that
1-liter and 2-liter flask clips use five screws. The 250/300-flask clip has an
adhesive-backed flask cushion pad that is installed on the flat base of the
clip body. A hole is provided in the pad for the mounting screw. Refer to
Figure 1-11.
Install the Test Tube
Holders
Accessory Test Tube Racks and Test Tube Rack Holders are available in
four sizes and are listed in Table 1-2. All the Test Tube Rack Holders are
adjustable into seven positions, swinging and locking at 15°, 30° and 45° in
either direction. Figure 1-13 illustrates the Test Tube Rack Holder with
rack in place.
Spread metal tabs outward
to remove test tube rack
... .
....
... .
....
....
.. . .
.. . .
... .
....
....
....
....
.. . .
....
....
...
.. .
... .. ..
.. .. .. .
... .. .
... .. .. .
.... .
....
...
... ..
.... .
....
...
... ..
.... .
....
...
... ..
.... .
Locking Pin to swing/tilt
test tube rack 15°, 30°, 45°
Figure 1-13. Holder with Rack
1-6
Orbital Shaker
Thermo Fisher Scientific
Section 1
Installation
Install the Test Tube
Holders (cont.)
To remove the rack, spread the metal tabs on
either end of the holder and lift out the
plastic Test Tube Rack.
To install the Test Tube Rack Holder onto the
shaker platform, remove the rack and rotate
the swing-bed of the holder 90° by pulling
the knobs of the locking pins on either end of
the holder outward. The pins are locked
outward by turning the knob 1/4-turn
Figure 1-14. Holder with
(Figure 1-14). Attach the tray to the platform Rack Removed
with the screws provided.
Table 1-2. Accessory Test Tube Racks and Adjustable-Angle Rack Holders
RS-232 Interface
Connector
Thermo Fisher Scientific
Part No.
Description
950040
Test Tube Rack, 10-13 mm size
950060
Test Tube Rack, 16-20 mm size
600074
Test Tube Rack, 21-25 mm size
600075
Test Tube Rack, 26-30 mm size
600076
Adjustable-Angle Test Tube Holder with Rack, 10-13 mm
600077
Adjustable-Angle Test Tube Holder with Rack, 16-20 mm
600078
Adjustable-Angle Test Tube Holder with Rack, 21-25 mm
600079
Adjustable-Angle Test Tube Holder with Rack, 26-30 mm
600088
Universal Adjustable-Angle Test Tube Holder. 10-25 mm
600089
2-Tier Micro-Plate Rack
600090
3-Tier Micro-Plate Rack
194024
#10-24 Pan Head Phillips Screws for mounting test tube holders to platform
The Model 420 Orbital Shaker is equipped with an RS-232 Serial
Communication Interface for the remote transmission of data. A RJ-11
telephone style connector is located on the left side of the incubator. A
cable with RJ-11 plugs and an RJ-11 to DB-25
adapter are required. Refer to Figure 1-16 for pin
identification and Figure 1-17 for connector
locations on the shaker side panel. A cable
mountable ferrite is included for installation of
the RJ-11 cable. Loop and snap (Figure 1-15) the
ferrite over the cable to reduce electro-magnetic
emissions from the unit. Attach the ferrite device
Figure 1-15. Ferrite
close to the unit.
Orbital Shaker
1-7
Section 1
Installation
RS-232 Interface
Connector (cont.)
The RS-232 data is a formatted “dumb terminal”, which permits
interfacing with either a computer or a serial printer.
Figure 1-16. Remote Alarm and RS-232 Connectors
RS-232
Remote
Alarms
Figure 1-17. Connector Location
Three wires are used for the RS-232 interface:
1. Transmit data (/TXD) - pin 2 DB-25 connections
2. Receive data (/RXD) - pin 3 DB-25 connections
3. Signal ground (GND) - pin 7 DB-25 connections
The data format is:
Baud . . . . . . . . .1200 (9600 baud with jumper at J1,
. . . . . .pins 3 and 4 on the Main Control Board)
Data bits . . . . . . . .8 (7 bit ASCII with leading zero)
Start bits . . . . . . . . . . . . . . . . . . . . . . . . . . . . . . . . .1
Stop bits . . . . . . . . . . . . . . . . . . . . . . . . . . . . . . . . . .1
Parity . . . . . . . . . . . . . . . . . . . . . . . . . . . . . . . . .none
1-8
Orbital Shaker
Thermo Fisher Scientific
Section 1
Installation
RS-232 Interface
Connector (cont.)
The data transfer sequence is transmitted in the following format. X refers
to the numerical time, RPM and temperature.
(NUL)XX:XX(H)(SP)(SP)XXXRPM(SP)(SP)XX.XC(SP)(LF)(CR)(EOT)
NUL . . . . . . . . . . . . . . . . . . . . .Null character (0)
SP
. . . . . . . . . . . . . . . . . . . . . . . . . . . . . . .Space
LF
. . . . . . . . . . . . . . . . . . . . . . . . . . . .Line feed
CR . . . . . . . . . . . . . . . . . . . . . . . .Carriage return
EOT . . . . . . . . . . . . . . . . . . . . . . .End of text (4)
H . . . . . . . . . . . . . . . . . . . . . . . . . . . . .Hold Mode
The Model 420 transmits time, RPM and temperature information one
minute after power is first applied to the unit, then every 60 minutes.
The shaker’s microprocessor responds to two ASCII commands from the
remote: DC1 (XON), and DC3 (XOFF)
DC1 (17, 11 Hexadecimal)
The shaker will transmit Time, Temperature and RPM data upon receiving
“DC1” (XON) and will restart 60 minute interval transmissions if they
have been inhibited by a “DC3” (XOFF).
DC3 (19, 13 Hexadecimal)
Receiving a “DC3” (XOFF) from the remote inhibits the shaker from
sending serial data indefinitely until a “DC1” (XON) is received.
Thermo Fisher Scientific
Orbital Shaker
1-9
Section 1
Installation
Connect the Remote
Alarm
An internal SPDT relay is provided to monitor alarms and is connected by
a RJ-11 (telephone style) jack on the rear of the cabinet. The remote alarm
provides NO (normally open) and NC (normally closed) output. Figure 116 identifies the pin contacts. Figure 1-17 shows the location of the
Remote Alarm Connector.
A modular to modular cable (Stock No. 190388) and an RJ-11 telephone
style terminal converter (Stock No. 190392) or equivalent may be used to
convert the remote alarm output to a screw terminal connection. Refer to
Figure 1-18 below. When using the remote alarm contacts, loop and snap
the cable-mountable ferrite over the cable to reduce electro-magnetic
emissions from the unit (Figure 1-15). Attach the ferrite device close to the
unit.
Figure 1-18. Alarm Contacts
1-10
Orbital Shaker
Thermo Fisher Scientific
Section 2
Operation
Figure 2-1. Front View
Model 420 is a microprocessor-controlled benchtop orbital shaker designed
to accommodate a wide variety of flasks, test tubes and other glassware.
The control system is easily programmed and stores the user-defined time,
temperature and speed setting which remain in memory even when the
shaker is turned off and unplugged.
The computer-based speed controller continuously adjusts for line voltage
fluctuations and provides smooth start-ups and consistent RPM control.
The circuitry is designed to slowly bring the platform up to speed and
down to a stop to prevent liquid splashing from flasks or test tubes. A
convenience interlock requires that the lid be closed for the drive motor,
circulating fans and heating elements to operate.
Thermo Fisher Scientific
•
The microprocessor speed control system may take up to one minute
to bring the platform up to speed.
•
Never leave the shaker unattended when starting it. Make sure all
flasks and test tube racks are firmly seated in the clips and check the
security of the flask clip and platform attachment screws monthly.
•
The lid must be closed to operate the shaker.
•
Do not operate the shaker at maximum RPM without a load.
Orbital Shaker
2-1
Section 2
Operation
Control Panel
Operation
The Model 420 Control Panel has a liquid crystal display and eight
operating keys or buttons which are identified by word and symbol.
During programming activities, the up and down arrows increase and
decrease the numerical values of time, platform speed, or temperature.
Pressing and holding either arrow will cause the values to scroll in that
direction. Pressing and holding for about five seconds will increase the
scrolling speed.
When programming the system configuration, the UP arrow returns the
display to the system’s Operating Screen showing the Time, RPM and
Temperature, while the DOWN arrow advances the display to the next
programming screen.
Actual
Setpoints
00:00
Hold
000
100
37.0
37.0
START
STOP
Silence
Time
Speed
o
Temp C
Figure 2-2. Control Panel
The alarm indicator and alarm silence button complete the shaker control
panel. When in alarm, the unit sounds an audible warning and flashes the
three red indicators. Pressing the Silence button turns off the audible
portion of the alarm. However, the three flashing indicators continue to
flash until the alarm condition is corrected. The audible warning will
sound again in about fifteen minutes if the condition continues.
The alarm features are discussed in more detail in the Configuration
section of this manual.
Quick Start-Up
The Model 420 Orbital Shaker may be operated as soon as the platform is
installed, the unit is plugged in, and turned on.
Note At power up, the screen at the right
briefly appears. ▲
Pressing Start and Stop will operate the shaker at the factory settings shown
in Figure 2-2. When starting, the Actual numbers along the top of the
liquid crystal display will differ from the Setpoint values shown along the
bottom. These numbers will change as the unit begins to operate.
2-2
Orbital Shaker
Thermo Fisher Scientific
Section 2
Operation
Quick Start-Up (cont.)
Time - With the time set at Hold, the time display in the upper left portion of the screen begins to count upward, showing the total operating
hours and minutes. The system resets to 00:00 whenever the unit is
stopped and restarted, using the Stop and Start buttons. The unit will
not reset if the unit is turned off and on using the power switch, or if the
cover is repeatedly opened and closed.
Speed - The Actual speed will display zero RPM’s and will gradually rise
as the platform begins its motion.
Temperature - The temperature, shown in the upper right portion of the
liquid crystal display, will indicate the actual ambient temperature inside
the cabinet and will slowly move toward the 37° setpoint.
The values shown in Figure 2-2 are set at the factory and are considered
default values. Other factory settings are shown in the table following.
Factory (Default)
Settings
Table 3-1. Defaults
Function
Default
Audible Alarm
ON
RPM Tracking Limit (fixed)
5
Temperature Tracking Limit
10°C
Over Temperature Shut-down
83°C - 85°C
All Remote Alarms
ON
To get the most from the shaker’s microprocessor-based technology, the
Model 420 can be easily programmed to meet the most demanding
laboratory requirements. The following sections outline the procedures for
changing the settings and for programming the shaker control system.
Change Temperature,
Speed, Time Settings
When first turned on or when the shaker is operating, Temperature, Time
and RPM values are displayed on the LCD. A typical screen is illustrated
in Figure 2-2. For convenience, this is called the Operating Screen
throughout these instructions. All programming or setting changes start
from this screen.
The instructions to program the Model 420 are written in a step-by-step
format. For convenience, the instructions begin and end at the Operating
Screen.
Thermo Fisher Scientific
Orbital Shaker
2-3
Section 2
Operation
Change Temp, Speed,
Time Settings (cont.)
Change Temperature
Note At any time during programming or changing settings, if no control
panel buttons are pressed for about fifteen seconds, the display automatically
returns to the Operating Screen, storing any settings made. New settings are
also stored immediately when either arrow key is pressed. ▲
1. Press the button beneath the temperature setpoint (Temp °C). The
temperature value will begin to flash.
2. Press the up or down arrows to set the new temperature in 0.1°C
increments. Hold either button to scroll.
3. Press the temperature button again to return to the Operating Screen.
Change RPM
1. Press the button beneath the Speed setpoint. The RPM value will begin
to flash.
2. Press the up or down arrows to set the new speed in 1 RPM increments.
Hold either button to scroll.
3. Press the Speed button again to return to the Operating Screen.
Change Time
2-4
Orbital Shaker
The Model 420 manages operating time in two ways:
Hold - When Time is set to Hold, the value shown in the Actual portion of
the display represents total operating time and may be reset at the operator’s convenience. The shaker will continue to count upwards even if the
cover has been repeatedly opened and closed, or turned off and on with
the power switch. The Time will, however, reset to 00:00 when the Stop
button is pressed and the unit then restarted by pressing the Start button.
Countdown - When the Hold setpoint is changed to countdown entering a
time value in hours and minutes, the shaker will operate for that period
and automatically shut down. The display will show the total time in the
Setpoint segment and the operating time remaining in the Actual part of
the display, as the microprocessor counts down to zero.
Thermo Fisher Scientific
Section 2
Operation
Change from Hold to
Countdown
1. Press the button beneath the Time setpoint. Hold will begin to flash.
Figure 2-3. Flashing Hold
2. Press either arrow to access the Countdown Time setpoint. The preset
time setpoint will begin to flash.
3. Press the up or down arrows to set the desired operating time in five
minute increments. Hold either arrow to scroll in that direction.
4. When the desired elapsed time is set (8 hours, 30 minutes in this
example), press the Time button to return to the Operating Screen.
Pressing the Start button will start the shaker and begin the countdown
sequence. When 00:00 is reached, the shaker will automatically shut
off and the Cycle Complete alarm will sound.
Figure 2-4. Time Set
The Shaker Alarms
Thermo Fisher Scientific
The Model 420 Orbital Shaker control system monitors and provides
alarms for nine operating parameters.
Parameter . . . . . . . . . . . . . . . . . . . . . .Alarm Message
Overtemp Setpoint Status . . . . .Overtemp Shutdown
Cycle Status . . . . . . . . . . . . . . . . . . .Cycle Complete
Loss of Input Power . . . . . . . . . . . . . . .Power Failure
RPM versus Setpoint . . . . . . . . . . . . . .RPM Tracking
Drive Belt Integrity . . . . . . . . . . . . . . . . . .Check Belt
Temp Sensor Integrity . . . . . . . . . . . . . . .Sensor Fault
Temp Control Status . . . . . . .Temperature High/Low
Platform Movement Status . . . . . . . .Platform Stalled
Motor Fuse Integrity . . . . . . . . . . . . . . . .Check Fuse
Orbital Shaker
2-5
Section 2
Operation
The Shaker Alarms
(cont.)
Both audible and visual alarm warnings for these nine parameters are
provided by the Orbital Shaker. Visual flashing of the three diagonal
indicator lights on the control panel, a progression of text messages on the
display, and an audible tone alerts the operator that an alarm condition has
occurred or currently exists.
For convenience, the audible tone is silenced by pressing the Silence
button, but rings back in about 15 minutes. However, the alarm warning
indicator lights and alarm messages continue until the alarm condition is
corrected by the operator. Then, pressing the Silence button clears the
message from the display (‘Check Belt’ and ‘Check Fuse’ alarms require the
unit to be turned off, then on again to remove the message from the
display).
As discussed in the Configuration section of this manual, the audible alarm
feature may be turned off to suit operator or laboratory needs.
Refer also to the alarms and corrective actions chart in the Service section
of this manual.
Overtemp Shutdown
Overtemp Shutdown alerts the operator that the overtemp setpoint has
been exceeded by a few tenths of a degree.
The Overtemp Shutdown message displays and the heaters are turned off,
but the platform and the blowers continue to operate.
In the alarm state, the audible alarm is silenced by pressing the Silence
button, but rings back in about 15 minutes. The screen message and
warning lights, however, continue until the fault is corrected. Then, press
the Silence button to clear the alarm message.
Cycle Complete
Cycle Complete alerts the operator that the end of the count-down
running time has been reached.
The Cycle Complete message shown displays and the shaker stops.
Press the Silence button to clear the message from the display screen.
2-6
Orbital Shaker
Thermo Fisher Scientific
Section 2
Operation
Power Failure
Power Failure alerts the operator that electrical power to the shaker has
been interrupted and then restored while it was shaking.
While the system returns to normal operation when power is restored, the
alarm message remains and the audible tone continues to sound to alert
the operator. Both the display message and the audible tone are cleared by
pressing the Silence button.
Note The alarm will not occur if the power failure is less than 15 seconds
in duration. ▲
Note If power is interrupted for two hours or more while the Shaker is
turned on but not shaking, a Power Fail alarm will occur. The purpose of
the alarm in this case is to alert the user that an extended duration power
failure occurred during the Hold interval after a timed shaking operation,
or during a period of incubation only. This alarm will also occur any time
the Shaker is turned on after an extended off period greater than 2 hours
(such as when the unit is shipped from the factory, or when it is returned
to use after a period of storage). ▲
RPM Tracking
RPM Tracking alerts the operator by either alarm message shown at the
left that the platform speed has varied ±5 RPM.
Note A two-minute alarm delay is built into the software. ▲
In the alarm state, the audible alarm is silenced by pressing the Silence
button, but rings back in about 15 minutes. The screen message and
warning lights, however, continue until the fault is corrected. Then, the
alarm message is cleared by pressing the Silence button.
Thermo Fisher Scientific
Orbital Shaker
2-7
Section 2
Operation
Check Belt
Check Belt alerts the operator that the drive belt may have broken or
something is slowing or preventing platform movement.
In the alarm state, the audible alarm is silenced by pressing the Silence
button, but will ring back in about 30 minutes. The screen message and
warning lights, however, will continue until the fault is corrected. Then,
the alarm message is cleared by cycling power to the unit OFF, then ON.
Sensor Fault
Sensor Fault alerts the operator that either of the shaker’s two temperature
sensors have failed. An alarm message similar to those shown below will
show which sensor has failed.
When in the alarm state, the audible alarm is silenced by pressing the
Silence button, but rings back in about 15 minutes if the fault condition
persists. The screen message and warning lights continues until the fault is
corrected.
When the sensor problem is corrected, the alarm message is cleared by
pressing the Silence button.
Temperature High or Low
Temperature High or Temperature Low alerts the operator that the
operating temperature of the shaker has risen above or fallen below the
programmed temperature tracking limit control point. Therefore, either of
the alarm messages shown below will be displayed.
In the alarm state, the audible alarm is silenced by pressing the Silence
button, but rings back in about 15 minutes if the fault condition persists.
The screen message and warning lights continues until fault is corrected.
After the temperature problem is corrected, press the Silence button to
clear the alarm message.
2-8
Orbital Shaker
Thermo Fisher Scientific
Section 2
Operation
Platform Stalled
Check Fuse
Platform Stalled alerts the operator that something is preventing free
platform movement. The motor automatically shuts off and the audible
alarm, screen message and warning lights are initiated. The motor will
attempt restart after approximately 15-20 seconds. The motor will
continue to cycle on and off until the obstruction is removed or the unit is
turned off. On motor restart, the audible alarm and warning lights are
automatically cleared. The screen message will remain until cleared by the
operator.
Check Fuse alerts the operator that primary drive motor fuse has blown.
The audible alarm, screen message and warning lights are initiated. When
the unit is turned on after fuse replacement, all alarm indicators are
automatically cleared.
Warning Fuse replacement must be performed by qualified service
personnel. See Service section. ▲
Change Shaker
Configuration
To access the system Configuration menu, press the down arrow, the up
arrow and the Silence button in that sequence.
This screen will appear on the display.
Pressing the down arrow continues with system configuration.
Thermo Fisher Scientific
Orbital Shaker
2-9
Section 2
Operation
Change Shaker
Configuration (cont.)
Pressing the up arrow returns to the Operating Screen.
During the following configuration procedures, menu options are given to
either modify a setting as it appears in sequence, or scroll past to the next
item. If no selection is made by pressing a button or arrow, the display will
revert to the Operating Screen in about fifteen seconds. The complete
configuration menu is illustrated in the chart at the end of this section.
In these procedures, values and settings for time, temperature, speeds,
alarms, and so forth are shown on the display screens. These numbers are
for example only and may not be the values encountered when
programming your shaker.
Turn Audible Alarm On/Off
Begin by pressing the down arrow, the up arrow, and
the Silence button. The screen shown below will appear
on the display:
When this screen opens, press the down arrow once.
2-10
Orbital Shaker
Thermo Fisher Scientific
Section 2
Operation
Turn Audible Alarm On/Off
(continued)
At this screen, press the Time button beneath Audible. The following
screen will appear and the current setting will flash.
Press the up or down arrow to turn the audible alarm function on or off.
Pressing any of the three buttons (Time, Speed, or Temp) will return the
display to the previous screen. Not pressing anything for about fifteen
seconds returns the display to the Operating Screen.
When the audible alarm is disabled, a warning message is placed in the
Setpoint portion of the Operating
Screen display as illustrated at the right.
Set Alarm Limits
Two temperature alarms are programmed into the Model 420 orbital
shaker: Overtemperature and Tracking limits. To
change these values, open the Configuration menu by
pressing the down arrow, up arrow, and the Silence
button in the sequence shown at the right.
When this screen (below) opens....
Press the down arrow once ....
Then press the temperature button beneath Alarms.
Set Overtemperature Alarm
Thermo Fisher Scientific
To change the overtemperature alarm setting, press the Time button
beneath Overtemp. The following screen appears and the current overtemperature alarm setting flashes.
Orbital Shaker
2-11
Section 2
Operation
Set Overtemperature Alarm
(continued)
Change the temperature setting by pressing the up or down arrow. When
set, press the Temperature button to return to the previous screen or press
nothing for about fifteen seconds. The display will change to the
Operating Screen, saving the new settings into memory.
When the overtemperature setpoint is exceeded by a few tenths of a
degree, the control system will shut the shaker down by turning off the
heaters.
The Overtemp Shutdown warning shown above will be displayed, the
warning lights will flash and the audible warning (if not turned off ) will
sound.
Pressing the Silence button turns off the audible alarm. However, the
warning lights continues to flash and the alarm message continues to be
displayed until the overtemperature condition is corrected. The audible
warning also sounds again in about 15 minutes if the overtemperature
condition persists.
When the fault is corrected, press the Silence button to clear the alarm
message from the display.
Set Temperature Alarm Tracking
Limit
The Temperature Tracking alarm activates whenever the operating
temperature goes above or below the setpoint temperature by a
predetermined value. This adjustable limit is set at the factory as 10° above
and below the temperature setpoint.
Note The above and below limits will always be the same value. ▲
To change this limit, open the configuration menu as in the previous
Overtemperature Alarm procedure. From the screen above, press the
temperature button beneath Tracking.
2-12
Orbital Shaker
Thermo Fisher Scientific
Section 2
Operation
Set Temperature Alarm Tracking
Limit (continued)
The following screen appears and the present temperature tracking alarm
limit setting flashes.
Change the temperature tracking limit by pressing the up or down arrow.
When set, press the Temperature button to save the setting and return to
the previous screen. If no buttons are pressed for about fifteen seconds, the
display changes to the Operating Screen, saving the new setting to
memory.
When the chamber temperature rises above or falls below the temperature
tracking limit, the appropriate message is displayed, the warning lights
flash and the audible warning (if not turned off ) sounds.
Pressing the Silence button turns off the audible alarm. However, the
warning lights continue to flash and the alarm message continues to be
displayed until the high or low temperature condition is corrected. The
audible warning also sounds again in about fifteen minutes if the over or
under temperature tracking condition persists.
When the fault is corrected, press the Silence button to clear the alarm
message from the display.
Calibrate Speed and
Temperature
From the Operating screen, press the down arrow, up
arrow and Silence button in that sequence (shown at
the right) to open the Configuration menu.
From the screen below, press the down arrow twice to bring up the
following screen.
Thermo Fisher Scientific
Orbital Shaker
2-13
Section 2
Operation
Calibrate RPM
After accessing the Configuration menu (above), press the Speed button
beneath RPM.
The value shown on this screen is the present speed setpoint. Using the up
and down arrows, increase or decrease the platform speed until the reading
on an independent, accurate speed measuring device matches the shaker
speed setpoint.
When finished, press the Speed button to save the setting. The display will
return to the Calibrate - RPM Temp screen. Or, if nothing is pressed for
about fifteen seconds, the display will revert to the Operating Screen and
the setting will be automatically saved to memory.
Calibrate the Temperature
After accessing the Configuration menu (above), press the Temperature
button beneath Temp.
Using the up and down arrows, increase or decrease the temperature value
to match an independent, accurate temperature measuring device. When
selected, press the Time, Speed, or Temp button to save the setting. The
display will return to the Calibrate - RPM Temp screen. (Or, if nothing is
pressed for about fifteen seconds, the display reverts to the Operating
Screen and the setting is automatically saved to memory.)
2-14
Orbital Shaker
Thermo Fisher Scientific
Section 2
Operation
Remote Alarm System
Any of the alarm states described can alert a remote alarm monitoring
system through an internal SPDT relay connected to an RJ-11 jack on the
rear of the shaker cabinet. Refer also to ‘Connect the Remote Alarm’ in
Section 1. For the convenience of the laboratory, these remote alarms can
be individually turned on or off.
Any or all of the remote alarms set to On will activate the internal relay.
Note The Remote Overtemp Shutdown, Platform Stalled and Check Fuse
alarms cannot be deactivated. ▲
To set the remote alarms to On
or Off, open the Remote
Alarm Configuration menu by
pressing the down arrow, up
arrow, and silence buttons in
that sequence. Then, press the down arrow three times until the screen
below is showing.
Press Rmte (remote). The alarms will be shown in the following sequence:
Cycle Complete
Toggle the Cycle Complete alarm with either the up (On) arrow or the
down (Off ) arrow. Pressing the Next (temperature) button advances the
display to the next alarm, saving the shown Cycle Complete setting to
memory.
If no buttons are pressed, the display automatically returns to the
Operating Screen after about fifteen seconds, saving the selection to
memory.
Thermo Fisher Scientific
Orbital Shaker
2-15
Section 2
Operation
Power Failure
Toggle the Power Failure alarm with either the up (on) arrow or the down
(off ) arrow. Pressing the Next (temperature) button advances the display to
the next alarm, saving the Power Failure setting to memory.
If no buttons are pressed, the display automatically returns to the
Operating Screen after about fifteen seconds, saving the selection to
memory.
RPM Tracking
Toggle the RPM Tracking alarm with either the up (On) arrow or the
down (Off ) arrow. Pressing the Next (temperature) button advances the
display to the next alarm, saving the RPM Tracking setting to memory.
If no buttons are pressed, the display automatically returns to the
Operating Screen after about fifteen seconds, saving the selection to
memory.
Check Belt
Toggle the Check Belt alarm with either the up (on) arrow or the down
(off ) arrow. Pressing the Next (temperature) button advances the display to
the next alarm, saving the Check Belt setting to memory.
If no buttons are pressed, the display automatically returns to the
Operating Screen after about fifteen seconds, saving the selection to
memory.
2-16
Orbital Shaker
Thermo Fisher Scientific
Section 2
Operation
Sensor Fault
Toggle the Sensor Fault alarm with either the up (On) arrow or the down
(Off ) arrow. Pressing the Next (temperature) button advances the display
to the next alarm, saving the on/off setting to memory.
If no buttons are pressed, the display automatically returns to the
Operating Screen after about fifteen seconds, saving the selection to
memory.
Temperature High or Low
Toggle the Temperature High/Low alarm with either the up (On) arrow or
the down (Off ) arrow. Pressing the Return (temperature) button advances
the display to the display shown below.
If no buttons are pressed, the display automatically returns to the
Operating Screen after about fifteen seconds, saving the selection to
memory.
View Total Operating
Hours
Whether the shaker has been operated in the hold or countdown modes,
and/or has been turned off and unplugged many times, the microprocessor
control system maintains a running total operating hours.
To view this information, access
the Configuration menu by
pressing the down arrow, up
arrow and Silence button in
sequence, then press the down
arrow three times.
Thermo Fisher Scientific
Orbital Shaker
2-17
Section 2
Operation
View Total Operating
Hours (continued)
Pressing RunHrs shows the total accumulated run hours as displayed in the
illustration below. In about fifteen seconds, the display returns to the
Operating Screen.
Heat %
Heat percent is intended for factory use only, but can be helpful in
troubleshooting the heat control system.
To view this information, access
the Configuration menu by
pressing the down arrow, up
arrow and Silence button in that
sequence, then press the down
arrow three times.
Press Heat %.
Heat % is the percentage of time that the heater is turned on during a five
second period. Example: If the heater is being cycled on for two seconds
and off for three seconds, the Heat % value is 40 percent.
Return to RunHrs Rmte Heat% screen by pressing any of the three
buttons beneath the display.
If no buttons are pressed, the display automatically returns to the
Operating Screen in about fifteen seconds.
2-18
Orbital Shaker
Thermo Fisher Scientific
Section 2
Operation
Software Version
Software Version is for factory use only and will be important if
troubleshooting the microprocessor programming is ever necessary.
To access this screen, press
the down arrow, up arrow,
Silence button, then the
down arrow button four
more times.
The screen below will appear on the display:
Press the Time button beneath SwVers and the above screen will appear
showing the Model 420 software version in the control system memory.
To return to the previous screen, press the Time button. To return to the
Operating Screen, wait about fifteen seconds.
Temperature Sensor
Readings
Temperature Sensor Readings is for factory use only and will be important
if troubleshooting the microprocessor programming is ever necessary.
To access this screen, press
the down arrow, up arrow,
Silence button, then the
down arrow button four
more times. The screen shown below will appear on the display:
Press the Speed button beneath Temps. and the following screen will
appear, showing the temperatures being measured or read by the Main
Temperature and the Overtemperature sensors as shown (above).
To return to the previous screen, press the Speed button. To return to the
Operating Screen, wait about fifteen seconds.
Thermo Fisher Scientific
Orbital Shaker
2-19
PREVENTIVE MAINTENANCE
Shakers
Your equipment has been thoroughly tested and calibrated before shipment. Regular preventive maintenance is important to keep your
unit functioning properly. The operator should perform routine cleaning and maintenance on a regular basis. For maximum
performance and efficiency, it is recommended the unit be checked and calibrated periodically by a qualified service technician.
The following is a condensed list of preventive maintenance requirements. See the specified section of the operating manual for
further details.
We have qualified service technicians, using NIST traceable instruments, available in many areas. For more information on Preventive
Maintenance or Extended Warranties, please contact us at the number below.
Cleaning and calibration adjustment intervals are dependent upon use, environmental conditions and accuracy required.
Tips for all shakers:
•
Use only our standard flat-head screws for flask clips.
•
Use only our standard round-head screws for test tube racks, holders and utility trays.
401 Millcreek Road, Box 649 • Marietta, Ohio 45750 USA • 740-373-4763
USA and Canada 888-213-1790 • Telefax: 740-373-4189 • http://[email protected]/forma
Preventive Maintenance for 420 Series Shakers
Refer to Manual
Section
Action
Daily
Monthly
Yearly
--
Clean the unit with mild detergent and wipe dry
as needed
9
--
Clean the acrylic cover with a dedicated plastic
cleaner and wipe dry with lint-free towels
9
--
Check under the platform for broken glass or
other debris.
9
3
* Check and document calibration of
temperature, alarms, speed and time, as
applicable.
9
--
* Verify operation of circulation fan motor
9
* Qualified service technicians only
Section 3
Maintenance
Model 420 Orbital Shaker uses a brushless DC motor and oversized,
permanently-lubricated bearings that require no maintenance.
Platform and Cabinet
The anodized brushed aluminum platform and powder-coated steel cabinet
surfaces can be cleaned with a mild detergent and water. However, liquids
should not be allowed to enter the shaker cabinet from under the platform.
All spills should be cleaned up immediately. If necessary, remove the
platform. Refer to ‘Clean-up After a Spill’ below. See Section 1 when reinstalling the platform.
Control Panel
The microprocessor control panel has sealed push buttons and a liquid
crystal display. It may be cleaned by wiping with laboratory detergents and
drying with a soft cloth.
Clean-up After a Spill
If an accidental spill places liquids or other materials under the platform,
immediately turn the unit off, unplug it, and remove the platform with the
T-handle wrench supplied with the unit. Clean up the spill following
regular laboratory procedures. Replace the platform following the
procedures in Section 1.
Thermo Fisher Scientific
Orbital Shaker
3-1
Section 3
Maintenance
Test Overtemperature
Alarm
After every 6,000 hours of operating time, it is recommended that the
over-temperature alarm be tested.
1. Set the OverTemp Alarm setpoint at least 20°C above ambient
temperature, refer to Section 2 in this manual.
2. Set the shaker operating temperature at least 10°C, but no more than
15°C above ambient. Allow the unit to stabilize at this temperature. To
change the operating temperature, refer to Section 2 in this manual.
3. Lower the OverTemp Alarm setpoint to 2°C below the operating
temperature setpoint, refer to Section 2 in this manual.
4. Return to the Operating Screen.
5. The alarm lights and audible alarm should come on.
6. The display should read “Overtemp Shutdown.”
7. Press the Silence button to mute the audible alarm if desired.
8. The actual cabinet temperature should drop to just above the
OverTemp Alarm setpoint.
9. The alarm lights and audible alarm will momentarily go off as the
cabinet temperature drops below the Over Temp Alarm setpoint.
10. Reset the OverTemp Alarm and Operating Temperature setpoints to
their original settings.
11. If the shaker control system does not react as outlined above, contact
the Technical Services Department at the numbers listed on the service
page at the beginning of this manual.
3-2
Orbital Shaker
Thermo Fisher Scientific
Section 4
Service
Caution The procedures outlined in this section shall be performed by
persons experienced in servicing and maintaining laboratory equipment.
Lockout and tagout electrical power connections whenever removing
cabinet panels or working on electrical or motor control components. ▲
With the exception of replacing the drive v-belt and the six electrical fuses,
the Model 420 Orbital Shaker contains no user-serviceable components.
The following lists display messages which may help diagnose abnormal
conditions.
Alarms and Alarm
Conditions
If the microprocessor control system senses a fault, malfunction or
abnormal operating condition, alarm messages appears on the liquid crystal
display. These messages will be helpful should service or repair assistance be
necessary.
Table 4-1. Alarm Indications
Thermo Fisher Scientific
Alarm Message
Fault Condition
Overtemp Shutdown
System shutdown due to overtemperature condition
Main Temp Sensor
Temperature sensor has failed
Over Temp Sensor
Temperature sensor has failed
Temperature is High
Temperature tracking has sensed higher temperature than setting
Temperature is Low
Temperature tracking has sensed lower temperature than setting
RPM High
RPM tracking has sensed shaker speed higher than setting
RPM Low
RPM tracking has sensed shaker speed lower than setting
Power Failure
Power has failed during shaker operation
Cycle Complete
Notifies operator that end of countdown cycle has been reached
Check Belt
Motor V-belt has broken or slipped
Audible is Disabled!
Continuously notifies operator that audible alarm has been disabled
Platform Stalled
Free movement of the platform has been obstructed
Check Fuse
Primary drive motor fuse has blown
Orbital Shaker
4-1
Section 4
Service
Table 4-2. General Fault Conditions
Adjust Drive V-belt
Tension
Symptom
What to Check and Where to Look
Display is dark, shaker will not operate
Power at the wall outlet
Fuses on the back of the unit are blown
Power switch not turned on
Display is lit, motor will not operate
Voltage selector switch at wrong position
Drive motor fuses inside cabinet are blown
Acrylic lid is not closed
No time value entered into the system (see
Section 2)
Time countdown has been reached (see Section
2)
Display is on, motor operates, display shows
7.5°C or over temp state
Faulty temperature sensor
Faulty overtemperature sensor
Display is on, motor operates, fan(s) do not
run
Blower motor fuses are blown
Connections or wires to fan relay board interrupted
Display is on, heat is on but fans and motor
do not operate
Voltage selector switch
Display on, unit will not operate (Time reads
zero)
Countdown time reached, reset TIME (see
Section 2)
Forgot the Access Code
Call Technical Services Department
Tools needed:
Phillips screwdriver
3/8” drive socket wrench with 7/16” socket
1. Remove all connectors and the line cord from the back of the shaker.
2. Lift the front of the shaker and rest it on its back. Remember that the
weight of the shaker is 185 pounds (83.9kg).
Warning The shaker is not stable when on its back. A second person may
be necessary to support the shaker while in this position. ▲
3. Remove the bottom cabinet cover (8 Phillips screws).
4-2
Orbital Shaker
Thermo Fisher Scientific
Section 4
Service
Adjust Drive V-belt
Tension (continued)
4. Loosen, but do not remove, the three 1/4-20 screws located in the
slotted holes adjacent to the shaker drive motor. Refer to Figure 4-1.
Internal springs will automatically apply the proper tension against the
drive belt.
Figure 4-1. Loosen Three Screws
5. Tighten the three screws.
6. The v-belt is now under proper operating tension.
Warning Tighten all screws. Do not allow the shaker to operate against the
spring tension. ▲
Install a New Drive
V-belt
Follow the procedures in the steps above to loosen all three 1/4-20 screws.
Warning The drive motor is under spring tension and may suddenly move
when the third pivot screw is loosened. When the new belt is installed,
tighten all screws. Do not allow the shaker to operate against spring
tension. ▲
1. Place the new v-belt around the bottom of both the motor and the
large drive wheel.
2. Force the drive motor inward toward the drive wheel and rotate the
drive wheel counterclockwise, forcing the v-belt into the wheel groove.
It may be necessary to use a lever (large screwdriver or pry bar) to
move the drive motor inward against the spring tension. The large
rubber foot can be used to pry against. When the belt is properly
seated in the motor and drive wheels, the internal springs apply proper
tension.
3. Tighten the three screws in the slotted holes.
4. Install the bottom cover and return the shaker to service.
Thermo Fisher Scientific
Orbital Shaker
4-3
Section 4
Service
Troubleshoot/Replace
Circuit Boards
Electronics Panel
The plastic control panel frame is attached to the cabinet by Velcro strips.
Grasp the frame by the corners and pull it off. There are also small indents
located along the edges of the panel to accommodate a flat screwdriver
blade. The display circuit board is attached to the back of the control panel
by ten 6-32 x 3/8” Phillips head screws.
All circuit boards (with the exception of the control panel on the front of
the unit) are installed on a swing-down electronics panel inside the rear
portion of the cabinet.
To access the panel, unplug the shaker and move it to a sturdy location
that will allow the back of the cabinet to swing down and lie flat. Remove
the screws indicated by the arrows in Figure 4-2 and lower the back panel.
Figure 4-2. Screws to Remove Back Panel
4-4
Orbital Shaker
Thermo Fisher Scientific
Section 4
Service
Electronics Panel
(continued)
Components in the electronics panel are identified in Figure 4-3. Refer to
the parts list and the electrical schematics in the back of this manual for
part numbers.
Figure 4-3. Panel Components
Figure 4-4. Board Components
Table 4-3. Board Pin Connectors
Thermo Fisher Scientific
Connector
Description
J1 (pins 1,2)
Lid Open Switch
J1 (pins 3,4)
Baud rate 1200 default, 9600 with pins shorted
J1 (pins 5,6)
Factory test use only
J2
Display panel
J8 (pins 1,2)
Control temperature sensor
J8 (pins 3,4)
Overtemp temperature sensor
J7
RS-232 port
J9
To Motor Driver Circuit Board
J10
Remote alarm contacts
J11
Connector to Output Board
J12
10 VAC in
Orbital Shaker
4-5
Section 4
Service
Output Board
The Output Board is illustrated in Figure 4-5. Fuses F1 and F2 (0.4 Amp)
protect the circulating fan circuit.
Figure 4-5. Fuse Locations
Motor Driver Circuit
Board
Figure 4-6. Driver Board Connector Locations
Figure 4-6 shows the locations of the connectors.
Table 4-4 identifies connectors and pins of Motor Driver Circuit Board.
Table 4-4. Connectors and Pins
Connector
J1
J2
J3
J4
4-6
Orbital Shaker
Pin No.
1
2
3
1
2
3
1
2
3
4
5
1
2
3
4
5
6
7
8
Description
20VAC in
Ground
20VAC in
Phase A out
Phase B out
Phase C out
+ 5 volts
HS3
HS2
HS1
Ground
PA5
MISO
MOSI
SCK
Ground
Ground
HS4
+ 5 volts
Thermo Fisher Scientific
Section 4
Service
Manual Reset Thermostat
To prevent excessively high temperatures inside the shaker cabinet, if the
air circulating fans should fail, a manual-reset thermostat is located
adjacent to the heating elements (Figure 4-7). This thermal device will
shut off the heaters and must be manually reset. Lower the electronics
panel to access this thermostat.
Figure 4-7. Components Behind Electronics Panel
Temperature Sensors
Two sensors, located inside the back of the shaker, are part of the
temperature regulating and temperature alarm systems. The location of
these sensors is shown in Figure 4-7. Both sensors are wired to a single
connector on the Controller Circuit Board. Refer to Figure 4-4. If either of
these sensors should fail, an alarm will activate.
Drive Belt Sensor
To alert the operator of a broken drive belt, a sensor is located beneath the
drive mechanism. To access this sensor, remove the platform and the sheet
metal panel beneath it. Refer to Figure 4-8.
Figure 4-8. Belt Sensor
Thermo Fisher Scientific
Orbital Shaker
4-7
Section 4
Service
Spare Fuses
Six spare fuses are provided with this shaker and are taped to the underside
of the control panel plastic frame. The plastic frame is attached to the
cabinet by Velcro strips. Grasp the frame by the corners and pull to
remove. There are also small indents located along the edges of the panel
that accommodate a flat screwdriver blade. Figure 4-9 illustrates the
underside of the frame.
Figure 4-9. Spare Fuse Location
The fuses are:
• 2 each 0.4 amp - circulating fans
• 2 each 0.15 amp - microprocessor control board
• 2 each 0.8 amp - motor driver
For further information about these fuses, see Figure 4-4 and the parts list.
Clean Inside Cabinet
After a Major Spill
If liquids or materials have entered the unit through the orbital mechanism
hole, the shaker must be disassembled and cleaned immediately. Follow the
procedure below.
1. Place the shaker on a sturdy bench or table that will allow the back of
the cabinet to be opened and hinged down.
2. Make sure the unit is turned off, unplugged, and the line cord removed
from the side of the cabinet. The platform should already be removed.
3. Remove the four screws
securing the sheet metal cover
plate located under the
platform. They are identified
with arrows in Figure 4-10.
The plate will remain in place.
Figure 4-10. Screws Securing Base Plate
4-8
Orbital Shaker
Thermo Fisher Scientific
Section 4
Service
Clean Inside After
Major Spill (cont. )
4. Remove the six screws securing the back panel, identified with arrows
in Figure 4-11. Allow the back of the unit to swing down.
Figure 4-11. Back Panel Screws
5. Remove the four screws identified by the black arrows in Figure 4-12.
Disconnect the ribbon connector from J2 of the microprocessor board
(white arrow). Also remove the two screws from the ribbon cable cover
plate on the base of the cabinet.
6. Remove the wiring connector from J2 of the motor control board
(white arrow) and disconnect (separate) the square connector where
the wiring enters the base of the unit (also identified by a white arrow
in Figure 4-12).
Figure 4-12. Screw and Ribbon Locations
7. Slowly slide the cabinet back and carefully lift it off the base, being
careful of the wiring. It will be necessary to feed the ribbon cable
through the access hole.
Thermo Fisher Scientific
Orbital Shaker
4-9
Section 4
Service
Clean Inside After
Major Spill (cont. )
8. The mechanism will be accessible as shown in Figure 4-13.
Figure 4-13. Motor, Bearing, and Counterweight Location
9. Clean the mechanism area with a 70% solution of alcohol. Everything
must be cleaned, with special attention given to the area around the
motor.
10. Allow the unit to air-dry about one hour before reassembling.
4-10
Orbital Shaker
Thermo Fisher Scientific
Section 5
Specifications
*Specifications are based on nominal voltages of 115V or 230V in ambients of 22°C
to 25°C.
Shaking
Range . . . . . . . . . . . . . . . . . . . . . . . . .25-525 RPM
Accuracy . . . . . . . . . . . . . . . . . . . . . . . . . . .1 RPM
Motion . . . . . . . . . . . . . . . . . . .One inch per orbit
Indicator . . . . . . . . . . .LCD in 1 RPM increments
Temperature
Range . . . . . . .5°C above ambient to 80°C (176°F)
Control Range . . . . . . . . . . . . . . . . . . . . . . . .0.1°C
Temperature Uniformity . . . .0.2° at 37°C (in flask)
. . . . . . . . . . . . . . . . . . . . .0.6° at 60°C (in flask)
. . . . . . . . . . . . . . . . . . . . . . .1° at 80°C (in flask)
Timer
Set for continuous (hold) operation or set for countdown operation in 5minute increments from 5 minutes to 200 hours. Timer counts up or
down in 5-minute increments.
Alarms
Audible and visual alarms for adjustable tracking high/low RPM, independent platform monitor (check belt), adjustable tracking high/low
temperature, independent over temperature, temperature sensor failure,
run termination and power failure.
Safeties
Over temperature alarm conditions shuts down heaters, independent
platform monitor alarm condition shuts down motor.
LCD Display
40-character LCD readout continuously displays speed in 1 RPM increments, temperature in 0.1°C increments, and time to 5-minute increments.
Microprocessor
Non-volatile memory retains all programming and automatically restarts
in the event of a power failure, controlled acceleration provides smooth
start up and stopping.
Thermo Fisher Scientific
Orbital Shaker
5-1
Section 5
Specifications
Drive Motor
1/3 HP brushless DC, permanently lubricated ball bearing
Cover
Hardened acrylic, dual gas spring cylinder assisted
Construction
Interior . . . . . . . . . . . . . . . . . . . . .Cold rolled steel
Exterior . . . . . . . . . . . . . . . . . . . . .Cold rolled steel
Finish . . . Powder coated for a durable, easily maintained surface
Platform . . . . . . . . . .Anodized brushed aluminum
Dimensions
Exterior . . . . . . . . . .4.3” W x 20.9” H x 29.0” F-B
. . . . . . . . . . . . . . . .(61.7cm x 53.1cm x 73.7cm)
Exterior (lid open) .4.3” W x 35.7” H x 29.0” F-B
. . . . . . . . . . . . . . . .(61.7cm x 90.7cm x 73.7cm)
Interior . . . . . . . . . .0.6” W x 12.6” H x 20.5” F-B
. . . . . . . . . . . . . . . .(52.3cm x 32.0cm x 52.1cm)
Electrical
Nominal . . .115 VAC, 50/60 Hz, 1 PH, 6.5 FLA,
Operating Range: 90 - 125 VAC
Nominal . . . .230 VAC, 50/60Hz, 1 PH, 3.2 FLA,
Operating Range: 180 - 253 VAC
Data Output . . . . . . . . . . . . . . . . .RS-232 standard
Remote Alarm Contacts . . Time, RPM, Temperature and Power Failure
Alarms
Certification
UL . . . . . . . . . . . . . . . . . . . . . . . .Standard 3101-1
CSA . . . . . . . . . . . . . . . .Standard C22.2 No. 1010
CE Mark . . . . . . . . . . . . . . . .IEC 1010 and EMC
Capacity
Flasks from (49) 25ml up to (6) 2L
Weights
Net . . . . . . . . . . . . . . . . . . . . . . .185 lbs. (83.9kg)
Shipping . . . . . . . . . . . . . . . .266 lbs. (120.7kg)
Optional Platforms
Size . . . . . . . . . .18” x 17-3/4” (45.7cm x 45.1cm)
Clips . . .25ml, 50ml, 125ml, 250/300ml, 500ml, 1l, and 2l
5-2
Orbital Shaker
Thermo Fisher Scientific
Section 5
Specifications
Ambient Operating Conditions - For indoor use only
Temperature . . . . . . .10°C (50°F) to 40°C (104°F)
Humidity . . . . . . . . .20% to 80%, non-condensing
Sound Level . . . . . . . . . . . . . . . .Not to exceed 85db
Safety Specifications
Altitude - 2,000 meters
Temperature - 10°C to 40°C
Humidity - 20% to 80%, non-condensing
Mains Supply Fluctuations - Operating Voltage Range
Installation Category II 1
Pollution Degree 2 2
Class of Equipment I
1 Installation category (overvoltage category) defines the level of transient overvoltage
that the instrument is designed to withstand safely. It depends on the nature of the
electricity supply and its overvoltage protection means. For example, in CAT II which is
the category used for instruments in installations supplied from a supply comparable to
public mains such as hospital and research laboratories and most industrial laboratories,
the expected transient overvoltage is 2500V for a 230V supply and 1500V for a 120V
supply.
2 Pollution Degree describes the amount of conductive pollution present in the operating
environment. Pollution Degree 2 assumes that normally only non-conductive pollution
such as dust occurs with the exception of occasional conductivity caused by condensation.
Thermo Fisher Scientific
Orbital Shaker
5-3
Section 6
Parts List
*All parts, with the exception of approved fuses, must be obtained from manufacturer,
or its authorized dealers or service representatives.
Part No. . . . . . . . . . . . . . . . . . . . . . . . . .Description
129034 . . . . . . . . . . . . . . .Pneumatic Spring, 30 lbs.
103079 . . . .U-channel gasket for acrylic cover, front
103080 . .U-channel gasket for acrylic cover, left side
103081 . . . . . . . .Gasket for acrylic cover, right side
900117 . . . . . . . . . . .Tubaxial Fan, 106 CFM, 115 V
138010 . . .Heater, Wirewound, 600 W, 115V/230V
156089 . . . . . . . . . . . . . . . . . .Motor, Brushless 24V
191535 . . . . . . . . . . . . . . . . . . .Motor Driver Board
190816 . . . . . . . . . . . . . . . . . . . .LCD Display Panel
190594 . . . . . . . . . . . . . . . . . . . . . . . .Output Board
190802 . . . . . . . . . . .Microprocessor Control Board
230141 . .Fuse, 800MA, T.D. 5 x 20 mm, Drive Transformer UL198G
230149 . .Fuse, 400MA, T.D. 5 x 20 mm, Circulation Fans UL198G
230142 . .Fuse, 150MA, T.D. 5 x 20 mm, Control Transformer UL198G
285306 . . . . . .Pushbutton Switch, SPDT (lid open)
290160 . . . . . . . . .Probe, 2252 OHM/25C, 1/8 x 2
290144 . . Sensor, 5VDC 4MA, Hall Effect,Check Belt
400113 . . . . . . . . . . . . . . . . . . . . . . . . . .Thermostat
420064 . . . . . . . . . . . . . . . . . . .Transformer, 130VA
420085 . . . . . . . . . . . . . . . . . . . .Transformer, 25VA
230165 . .Fuse, 4A, Type T, IEC, 5 x 20mm, Main Power In, 230V
285633 . .Fuse, 10A, normal blow, 1/4” x 1-1/4” Main Power In, 115V
800040 . . . . . . . . . . . . . .V-Belt, AX43, 1/2” x 45”
435051 . . . . . . . . . . . . .Screwdriver, Phillips 8-3/4”
443020 . . . . . . . . . . . . .Wrench, Hex with T-handle
194046 . . . . .Spare Part Screw Bag, (platform/clips1)
1
Thermo Fisher Scientific
Platform clips are provided by the manufacturer.
Orbital Shaker
6-1
Section 7
Electrical Schematics
Thermo Fisher Scientific
Orbital Shaker
7-1
Section 7
Electrical Schematics
7-2
Orbital Shaker
Thermo Fisher Scientific
Thermo Fisher Scientific
Rev. 2 2/07
REGISTERED
ISO
9001
If equipment service is required, please call your Technical Services Department at 1-888-213-1790 (USA and Canada) or 1740-373-4763. We’re ready to answer any questions on equipment warranty, operation, maintenance, service and special
applications. Outside the USA, contact your local distributor for warranty information.
Your local Thermo Sales Office is ready to help with comprehensive site preparation information before your equipment arrives.
Printed instruction manuals carefully detail equipment installation, operation, and preventive maintenance.
THIS WARRANTY IS EXCLUSIVE AND IN LIEU OF ALL OTHER WARRANTIES, WHETHER WRITTEN, ORAL, OR
IMPLIED. NO WARRANTIES OF MERCHANTABILITY OR FITNESS FOR A PARTICULAR PURPOSE SHALL APPLY.
Thermo shall not be liable for any indirect or consequential damages including, without limitation, damages relating to lost profits or loss of products.
Replacement or repair of components parts or equipment under this warranty shall not exceed the warranty to either the equipment or to the component part beyond the original warranty period. The Technical Services Department must give prior
approval for return of any components or equipment.
During the first two years or 12,000 hours of use, whichever comes later, component parts proven to be non-conforming in
materials or workmanship will be repaired or replaced at Thermo’s expense, labor included. In addition, after the initial warranty period of two years or 12,000 hours, the Orbital Shaker mechanism is warranted for Unit Production Life, parts only,
F.O.B. factory. The mechanism is defined as the bearing assemblies. Unit Production Life is defined as the period of time the
current mechanism design is in production, plus seven years. The warranty will be void if the equipment is altered without written authorization from Thermo. The 12,000 hours use must be validated by the internal timer and/or objective documentation.
If validation or documentation of run hours are not available, unit warranty defaults to 3 years, parts and labor. Installation and
calibration is not covered by this warranty agreement. The Technical Services Department must be contacted for warranty
determination and direction prior to performance of any repairs. Expendable items, i.e., glass, filters, light bulbs and lid gaskets are excluded from this warranty.
The Warranty Period starts two weeks from the date your equipment is shipped from our facility. This allows shipping time
so the warranty will go into effect at approximately the same time your equipment is delivered. The warranty protection extends
to any subsequent owner during the warranty period.
THERMO FISHER SCIENTIFIC ORBITAL SHAKER WARRANTY USA
Section 8
Warranty Information
Orbital Shaker
8-1
8-2
Orbital Shaker
Rev. 2 2/07
REGISTERED
ISO
9001
If equipment service is required, please call your Technical Services Department at 740-373-4763, or Fax 740-373-4189. We’re
ready to answer your questions on equipment warranty, operation, maintenance, service and special applications. Outside the USA,
contact your local distributor for warranty information.
Thermo International Sales Office is ready to help with comprehensive site preparation information before your equipment arrives.
Printed instruction manuals carefully detail equipment installation, operation, and preventative maintenance.
THIS WARRANTY IS EXCLUSIVE AND IN LIEU OF ALL OTHER WARRANTIES, WHETHER WRITTEN, ORAL, OR IMPLIED.
NO WARRANTIES OF MERCHANTABILITY OR FITNESS FOR A PARTICULAR PURPOSE SHALL APPLY. Thermo shall not be
liable for any indirect or consequential damages including, without limitation, damages relating to lost profits or loss of products.
Replacement or repair of component parts or equipment under this warranty shall not exceed the warranty to either the equipment
or to the component part beyond the original warranty period. The Technical Services Department must give prior approval for return
of any components or equipment.
During the first two years or 12,000 hours of use, whichever comes later, component parts proven to be non-conforming in materials or workmanship will be repaired or replaced at Thermo’s expense, excluding labor. The orbital shaker mechanism is warranted
for life, parts only, F.O.B. factory. The mechanism is defined as the bearing assemblies. Life is defined as the period of time the
current mechanism design is in production, plus seven years. The warranty will be void if the equipment is altered without the written authorization from Thermo. The 12,000 hour use must be validated by the internal timer and/or objective documentation. If validation or documentation of run hours are not available, unit warranty defaults to 3 years, parts only. Installation and calibration is
not covered by this warranty agreement. Expendable items, i.e., glass, filters, light bulbs and lid gaskets are excluded from this warranty.
The Warranty Period starts two months from the date your equipment is shipped from our facility. This allows shipping time so the
warranty will go into effect at approximately the same time your equipment is delivered. The warranty protection extends to any subsequent owner during the warranty period.
THERMO FISHER SCIENTIFIC INTERNATIONAL ORBITAL SHAKER WARRANTY
Section 8
Warranty Information
Thermo Fisher Scientific
Section 9
Appendix
Thermo Fisher Scientific
Orbital Shaker
9-1
Thermo Fisher Scientific
Controlled Environment Equipment
401 Millcreek Road
Marietta, Ohio 45750
United States
www.thermofisher.com