1
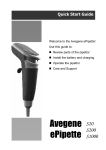
SpotLiter
SL-96 Instruction Manual
Introduction
A compact, bench top pipetting aid for enhanced visualization of 96 well plates.
It provides illumination of specific wells during dispensing and as a standalone
device requires no computer interface.
The SpotLiter reduces errors associated
with manual pipetting into 96 well plates and increases the confidence of the
operator in delivering the correct reagent or sample to the intended well.
SpotLiter has the following modes :
Illuminate all 96 wells
Illuminate partial or entire row/column
Single well illumination
Illuminate rectangular area
1
Installation
Power on:connect the power supply, step on the foot, press the “power” button, and
then all of the lights will flash. When the whole plate illuminates, the
power is on. The default mode is “All”(A).
Power off:press “power” button for 3 seconds, then all of the lights will be off.
2
All Mode
ACT
3
ACT
“All” mode is a default mode.
Under “All” mode, only the “Act” button, foot pedal, and “Mode”
button function. When pressing “Act” button, or stepping on foot pedal, the LED light will
illuminate one by one. Press “Mode” button to switch the mode.
4
Column & Row Mode
Column
.4
.8
When switching to “Column & Row” mode, the direction control panel located on the bottom
right corner will illuminate.
At this time, any column or row can be selected, but column and row
can’t be selected simultaneously.
After selection, the direction control panel will be off.
Pressing “Act” button or stepping on the foot pedal, the selected column or row will illuminate in
selection order and one by one.
5
ACT
6
ROW
.C
.F
ACT
7
ACT
8
Single Mode
When switching to “Single” mode, the direction control panel located on the bottom right
corner will illuminate. At this time, any single well can be selected, and the selected well will
flash constantly.
After selection, the direction control panel will be off. Pressing “Act” button or
stepping on the foot pedal, the selected wells will illuminate in selection order and one by one.
.4
9
.E
.7
10
.H
ACT
ACT
11
Region Mode
When switching to “Region” mode, the direction control panel located on the bottom right
corner will illuminate. At this time, please select any two columns and any two rows to form a
rectangular area.
After selection, the direction control panel will be off.
Pressing “Act” button
or stepping on the foot pedal, the selected area will illuminate in selection order and one by one.
12
.5
.D
.9
.G
ACT
ACT
13
ACT
14
Save Function
Save
15
.1
ACT
complete
16
Load Function
Load
17
.1
ACT
18
ACT
complete
19