1
General Inquiries
<docomo Information Center>
0120-005-250 (toll free)
* Service available in: English, Portuguese, Chinese, Spanish.
* Unavailable from part of IP phones.
(Business hours : 9:00 a.m. to 8:00 p.m.)
■ From DOCOMO mobile phones (In Japanese only)
(No prefix) 151 (toll free)
* Unavailable from land-line phones, etc.
■ From land-line phones (In Japanese only)
0120-800-000 (toll free)
Repairs
■ From DOCOMO mobile phones (In Japanese only)
(No prefix) 113 (toll free)
* Unavailable from land-line phones, etc.
■ From land-line phones (In Japanese only)
0120-800-000 (toll free)
* Unavailable from part of IP phones.
(Business hours : 24 hours (open all year round))
* Unavailable from part of IP phones.
(Business hours : 9:00 a.m. to 8:00 p.m. (open all year round))
● Please confirm the phone number before you dial.
● For Applications or Repairs and After-Sales Service, please contact the above-mentioned information center or the docomo Shop etc. near you on the
NTT DOCOMO website or the i-mode site.
NTT DOCOMO website http://www.nttdocomo.co.jp/english/
i-mode site iMenu ⇒ お客様サポート (User support) ⇒ ドコモショップ (docomo Shop) * In Japanese only
N-01F
For loss, theft, malfunction, and inquiries while overseas (24-hour reception)
<docomo Information Center>
■ From DOCOMO mobile phones
International call access code
for the country you stay
INSTRUCTION MANUAL
-81-3-6832-6600* (toll free)
’13.11
* You are charged a call fee to Japan when calling from a land-line phone, etc.
※ If you use N-01F, you should dial the number +81-3-6832-6600 (to enter '+', press and hold the '0' key for at least one second).
■ From land-line phones <Universal number>
Universal number international
prefix
* You might be charged a domestic call fee according to the call rate for the country you stay.
※ For international call access codes for major countries and universal number international prefix, refer to DOCOMO International Services website.
-8000120-0151*
● If you lose your FOMA terminal or have it stolen, immediately take the steps necessary for suspending the use of the FOMA terminal.
● If the FOMA terminal you purchased is damaged, bring your FOMA terminal to a repair counter specified by DOCOMO after
returning to Japan.
Don’t forget your mobile phone … or your manners!
When using your mobile phone in a public place, don't forget to show
common courtesy and consideration for others around you.
Sales: NTT DOCOMO, INC.
Manufacturer:
2013.11 (1st Edition)
K
DIC 2484
N-01F (薄型英文1版) H1H4
Thank you for choosing "N-01F".
Before use, be sure to thoroughly read this manual to ensure that you use N-01F correctly.
About manual of N-01F
The operations of N-01F are also described in " 使 い か た ガ イ ド " (Guide) (available in this FOMA
terminal) and "Instruction Manual (Detailed version)" (Japanese) (PDF file) other than this manual.
■ "INSTRUCTION MANUAL" (this manual): Provides information about screens and basic operations.
■ " 使いかたガイド " (Guide) (available in this FOMA terminal): Provides information about the
outline of frequently-used functions and of operations (in Japanese only).
On the N-01F standby screen, Iis " 便利ツール " (Tool) s " 使いかたガイド " (Guide)
* " 使いかたガイド " (Guide) is not available when "English" is set for "Select language".
■ "Instruction Manual (Detailed version)" (Japanese): Provides detailed information about
all functions and operations.
From PC: Download from NTT DOCOMO'S website
http://www.nttdocomo.co.jp/support/trouble/manual/download/index.html
Make various applications or change your billing plan, check your charges and points, and more online.
i-mode access : iMenu ⇒ お客様サポート (User support) ⇒ お申込・お手続き (Applications/
procedures) ⇒ 各種お申込・お手続き (Various applications/procedures)
(in Japanese only)
No packet communications charges apply
My docomo (http://www.mydocomo.com/) ⇒ 各種お申込・お手続き (Various
PC access:
applications/procedures) (in Japanese only)
* You need your "Network security code" to use via i-mode.
* Packet communications charges do not apply to use via i-mode. Charges will apply if using the service
from overseas.
* "docomo ID/password" are required to use this site from a PC.
* Please contact "General Inquiries" For details, contact "General Inquiries" on the back cover if you
forget or do not have "Network security code" or "docomo ID/password".
* May not be available in some cases depending on the conditions of your subscription.
* There are cases where the site may not be available due to system maintenance, etc.
* The URL and content may change without prior notice.
Accessories and major optional extras
Using mobile phone with your manners!
When using mobile phone in a public
place, don't forget to show courtesy and
consideration for others.
■ Basic package
N-01F (including written
warranty)
Back Cover N67
N-01F INSTRUCTION MANUAL
(Japanese)
Battery Pack N30
Desktop Holder N45
■ Options and accessories compatible with this FOMA terminal → p.87
Before using this manual
・ Note that "N-01F" is referred to as "FOMA terminal" in this manual.
・ This manual uses the default settings and screen shots for "WHITE" to describe operations. To
read a screen easily in this manual, "Stand-by display" is set to "OFF", and the font color is black
while the background color is white.
・ The screens shown as examples in this manual are displayed when "English" is set for "Select
language". Set "English" for "Select language" in advance. ( → p.23)
・ The images or illustration used in this manual are examples. They may differ from the actual displays.
・ Unauthorized copying of all or part of this manual is prohibited.
What DOCOMO does to be eco-friendly
Slimming down the manual
Turn the power off when you are:
■ In places where use is prohibited
・In an airplane or hospital, follow the instructions
given by the respective airline or medical
institution.
Turn off the power in a location where use is
prohibited.
By describing only basic functions and operations,
we have succeeded in reducing paper usage and
slimming down the Japanese instruction manual.
For further explanations, see your 使 い か た ガ イ
ド (Guide) (Japanese, available in your FOMA
terminal) or visit NTT DOCOMO's websites.
Always set Public mode when you are:
■ Driving
・Using a handheld mobile phone while driving
will result in a penalty. Exceptions are made in
case of emergency, such as to safeguard injured
persons or to maintain public safety.
■ In places such as theaters, cinemas, and art galleries
We collect your unnecessary mobile
phones and other devices irrespective
of carrier. Bring them to a docomo
Shop near you.
* Intended devices: Mobile phone, PHS,
battery pack, charger and desktop
holder (irrespective of carrier)
Respect privacy
P l e a s e b e co n s i d e ra t e o f t h e p r i v a c y o f
individuals around you when taking and sending
photos using camera-equipped mobile phones.
Collecting and recycling of mobile phones
Contents
FOMA Terminal ..........................2
Part Names and Functions.......3
Precautions (Always follow
these directions)........................5
Waterproof/Dustproof Function... 16
Before Using.............................20
Screen Explanation .................24
Character Entry........................31
Sound/Screen Setting ............33
Basic Operation
Lock/Security ...........................38
Call Telephone .........................43
Mail ............................................51
Phonebook ...............................55
Connect
p.43
i-mode/Full Browser ...............56
i-channel ...................................59
Map............................................60
Search
p.56
Camera ......................................61
1Seg...........................................64
Music .........................................66
i-αppli/i-Widget .......................68
i-motion/Movie........................69
Enjoy
p.61
Osaifu-Keitai ............................70
i-concier ....................................72
Convenient Tools .....................73 More Convenient
Data Management ..................75
p.70
Support .....................................79
Appendix ..................................88
Index ...................................... 101
Introduction
p.1
p.20
Others
p.79
1
FOMA Terminal
Introduction
・ N-01F supports W-CDMA and GSM/GPRS systems.
・ FOMA terminals use wireless communications and cannot be used in tunnels, underground
・
・
・
・
・
・
・
2
areas, buildings, and other areas without reception; in outdoor locations with weak reception; or
outside the service area. Reception may also be weak in even some unobstructed upper floors
of high-rise buildings and apartments. Please be aware that calls or communications may be
disconnected even under optimal conditions when reception is strong and all three antenna
icons are displayed, and when in a stationary position.
A third party may be able to use special equipment to listen in on your calls, as FOMA terminals
use radio waves. However, W-CDMA and GSM/GPRS systems automatically support privacy
protection with a scrambling function for all calls to make conversations incomprehensive to
third parties.
FOMA terminals convert voice into digital signals for wireless communications, and therefore
if you are in an area where radio reception is weak, these digital signals may not be properly
restored and this may result in distortion of the actual caller's voice.
Please keep a separate record of the information (Phonebook, Schedule, Memo, Record message,
Voice memo etc.) you have registered in your FOMA terminal. Please be aware that DOCOMO
bears no obligation or responsibility in the event that data is altered or lost.
It is recommended that you back up important data to a microSD card. If you own a PC, you can
also transfer and save data, such as Phonebook, Mail or Schedule, to your PC using DOCOMO
keitai datalink.
The user hereby agrees that the user shall be solely responsible for the result of the use of SSL/
TLS. Neither DOCOMO nor the certifier as listed herein makes any representation or warranty as
for security in the use of SSL/TLS. In the event that the user shall sustain damage or loss due to
the use of SSL/TLS, neither DOCOMO nor the certifier shall be responsible for any damage or loss.
Certifier: VeriSign Japan K.K., Cybertrust Japan Co., Ltd., GlobalSign K.K., EMC Japan Corp., SECOM
Trust Systems Co., Ltd., Comodo CA Ltd., Entrust Limited and Go Daddy Group, Inc.
This FOMA terminal is available for use in the FOMA Plus-Area and FOMA HIGH-SPEED area.
The display is manufactured using high-precision technology but there may be some dots that
fail to light or remain permanently lit. Please note that this is a characteristic of displays and not a
malfunction.
Part Names and Functions
n
o
2
Introduction
1
p
3
j
k
q
4
5
7
a
6
8
9
b
l s
m
t
u
c
d
f
r
v
e
g
h
i
<Using Earphone>
Connect an external-connector-terminalcompatible earphone (optional). To use
an incompatible earphone, connect an
adapter converter (optional).
* The 1Seg antenna is built-in and the FOMA
terminal itself works as an antenna.
Stereo Earphone/Microphone 01 for External
connector terminal (optional) connection example
The AC adapter (for charging) and the Stereo Earphone/Microphone 01
(earphone/microphone terminal) use the same slot.
Stereo Earphone/
Microphone 01
AC adapter
3
1 Earpiece
Introduction
4
Hear other party's voice from here.
2 Display
3 Illuminance sensor
Detect brightness. Do not cover with hand or
put sticker on it.
4 Multi-function keys
f/g: Up/Down key
・ Move the cursor or contents etc. upward or
downward.
・ Display the Search phonebook menu screen.
・ Activate shortcut.
h/j : Left/Right key
・ Move the cursor to the left or right.
・ Activate MyFACE.
d : OK key
・ Perform the function displayed on this key.
5 i key
Display the main menu.
6 u key
Display the still image shooting screen.
7 o key
Display the mail menu.
8 p key
Display the iMenu.
9 t Back (Clear)/i-channel key
・ Return to the previous step or delete the
entered characters.
・ Display i-channel.
a r Start key
Make calls.
b y Power/End/Hold key
c Dial keys
Enter phone numbers or characters.
d w/Public mode (Drive mode) key
Set Public mode (Drive mode).
e q/Manner key
f Q Quick key
g
h
i
j
k
l
m
n
o
p
q
r
s
t
u
v
Activate a function selected in "Quick button
set".
m Multi key
Display the TASK MENU screen.
Mouthpiece/Microphone
Charging terminal
Strap hole
External connector terminal
Multi-terminal for charging, connecting an
earphone, etc.
Connect AC Adapter (optional), DC Adapter
(optional), FOMA USB Cable with Charge
Function 02 (optional) or Stereo Earphone/
Microphone 01 (optional), etc.
a Volume up key
Raise the earpiece volume or set Manner
mode.
s Volume down key
Lower the earpiece volume.
Illumination/Charge lamp/Recording
indicator
Sub-display
Display the clock or FOMA terminal status.
e mark
Read the IC card and make iC transmissions.
FOMA antenna
The antenna is built-in. Covering the antenna
part with your hand may affect the quality.
Camera
Infrared data port
Speaker (monaural)
microSD card slot (inside)
Back cover
Precautions (Always follow these directions)
correctly, read "Precautions" carefully before use.
Keep this manual after reading for future reference.
n The precautions must be observed at all times
since they contain information intended to
prevent the bodily injury or damage to property.
n The following symbols indicate the different
degrees of injury and damage that may occur if
the information provided is not observed and
the FOMA terminal is used incorrectly:
DANGER
Indicates that death or serious
bodily injury may result directly and
immediately from improper use.
WARNING
Indicates that death or serious
bodily injury may result from
improper use.
CAUTION
Indicates that slight bodily injury
and/or damage to the property
may result from improper use.
n The following symbols indicate specific
directions:
Do
Unplug
following categories:
1. Precautions for the FOMA terminal, Battery Pack,
Adapter, Desktop Holder and miniUIM
(Common)・・・・・・・・・・・・・・・・・・・・・・・・・・・・・・・・ p.5
2. Precautions for the FOMA terminal ・・・・・・・・・ p.7
3. Precautions for the Battery Pack ・・・・・・・・・・・ p.8
4. Precautions for the Adapter and Desktop
Holder ・・・・・・・・・・・・・・・・・・・・・・・・・・・・・・・・・・・ p.9
5. Precautions for the miniUIM ・・・・・・・・・・・・・・ p.10
6. Precautions for Use Near Electronic Medical
Devices ・・・・・・・・・・・・・・・・・・・・・・・・・・・・・・・・・ p.11
7. Material List ・・・・・・・・・・・・・・・・・・・・・・・・・・・・・ p.11
1. Precautions for the FOMA terminal,
Battery Pack, Adapter, Desktop
Holder and miniUIM (Common)
Indicates that it is prohibited.
No liquids
No wet hands
I ndicates that it must not be
disassembled.
Indicates that it must not be used
near water, which means that you
must not let it become wet.
Indicates that you must not touch
it with wet hands.
Indicates that you must unplug
the power cord from the outlet.
n Safety precautions are explained in the
Don't
No disassembly
Indicates that it is an instructionbased compulsory conduct (must
be acted).
Introduction
n To ensure that you use your FOMA terminal
Don't
Do not use, keep or leave the devices in locations
subject to high temperatures (near a fire or
heating unit, in a kotatsu, under direct sunlight,
inside a car on a hot day, etc.).
Doing so may cause fire, burns, or injury.
Do not put the devices in a microwave
oven or pressurized container.
Don't
Doing so may cause fire, burns, injury or
electric shock.
Do not disassemble or modify the equipment.
No disassembly
Doing so may cause fire, burns, injury or
electric shock.
5
No liquids
Introduction
No liquids
Do not allow the devices to become wet
with liquids, such as drinking water or
other water, pet urine or sweat.
Doing so may cause fire, burns, injury or electric shock.
For waterproof function, refer to the following:
→ p.16 "Waterproof/Dustproof Function"
Do
Do not allow liquids (drinking water or
other water, pet urine, sweat, etc.) to
enter the charging terminal or external
connector terminal.
Failure to observe these precautions may
cause fire, burns, injury or electric shock.
Doing so may cause fire, burns, injury or
electric shock.
CAUTION
Use the options specified by NTT DOCOMO
for the FOMA terminal.
Do
Failure to observe this precaution may cause
fire, burns, injury or electric shock.
Do not leave the devices on a slope or
unstable surface.
Don't
Don't
Don't
Doing so may cause fire, burns, injury or
electric shock.
Do not cover or wrap the devices with
bedding, etc. while in use or charging.
Don't
Do
6
Don't
Doing so may cause fire, burns or electric shock.
Do
If your child uses the FOMA terminal, instruct
him/her on how to use it. Check if he/she always
uses the FOMA terminal correctly as you instruct.
Doing so may cause fire, burns, injury or
electric shock.
Do not place electrically conductive objects
(wires, pencil leads, etc.) in contact with the
charging terminals or external connector
terminal. Do not insert those materials
inside the terminal.
Doing so may cause fire or burns.
Make sure to turn off the FOMA terminal
and stop charging before you get close
to the places like a gas station where a
flammable gas is generated.
Failure to observe this precaution may cause
the gas to ignite.
Turn off the power, when you use OsaifuKeitai at a gas station (if the IC card lock is set,
turn the power off after the lock is released).
The devices may fall and cause injury.
Do not leave the devices in humid, dusty
or hot places.
WARNING
Do not apply excessive force to the FOMA
terminal, throw it or expose it to strong shocks.
If something unusual happens, such as
unusual odor, overheating, discoloration
or deformation during use, charge or
storage, be sure to:
・ Unplug the power cord from the power
outlet or the cigarette lighter socket.
・ Turn off the power.
・ Remove the battery pack from the
FOMA terminal.
Improper usage could result in bodily injury.
Keep the FOMA terminal out of young
children's reach.
Do
A young child may try to swallow it or suffer injury.
Do
Pay special attention when you use the
FOMA terminal connected to the adapter
for a long period.
If you use i-αppli or videophone or watch 1Seg
programs for a long time while charging, the
temperature of the FOMA terminal, battery
pack or adapter may rise.
If you touch the warm part of these devices for a
long period of time, it may cause redness, itch, skin
irritation or low temperature burns depending on
your constitution or physical condition.
2. Precautions for the FOMA terminal
WARNING
Do
Don't
Doing so may cause eye injury.
Don't
Do not direct the infrared data port towards
consumer equipment with infrared devices
during infrared communication.
Don't
Doing so may cause malfunction of the
infrared devices and result in an accident.
Do not put fluids such as water or substances
such as pieces of metal or flammable
materials into the miniUIM slot or microSD
card slot inside of the FOMA terminal.
Doing so may cause fire, burns, injury or
electric shock.
Do
Too large a volume may lead to defective
hearing. Also, hearing difficulties may cause
an accident.
If you have a weak heart, take precautions
when setting the Vibrator or Ring volume.
Do
Do
Failure to observe this precaution may affect
your heart.
If you are wearing electronic medical devices,
ask the manufacturer or sales agent whether
the devices can be affected by radio waves
before using your FOMA terminal.
The terminal may adversely affect electronic
medical devices.
Please turn off your FOMA terminal when
inside an airplane, hospital, or other area
where use is prohibited.
The terminal may adversely affect electronic
or medical equipment. If the Auto power
function is set, make sure to disable the
function before turning off the power.
Follow the instructions provided by the
medical facility for the use of mobile phones.
You will be punished if you take activity
prohibited by law such as use of mobile
phones in airplanes. However, use of the
FOMA terminal may be permitted by turning
off transmissions using radio waves, etc., but
follow airline instructions for proper use.
Introduction
Do not direct the infrared data port
towards your or another person's eyes.
Make sure to hold the FOMA terminal at a
safe distance from your ear when you use
the handsfree mode or the ring tone
sounds. Also, when you play games or
music, etc. with an earphone/microphone
etc. connected to the FOMA terminal,
adjust the volume properly.
Do
Please turn off the power near electronic
equipment that contains high-precision
mechanisms or handles delicate signals.
Do
If the display or camera lens is broken, be
careful with the broken glass and any
exposed FOMA terminal parts.
The terminal may interfere with the operation
of sensitive electronic equipment.
* Electronic equipment to watch out for:
Hearing aids, implanted pacemakers, ICDs and
other electronic medical devices; fire alarms,
automatic doors, and other automatically
controlled apparatus.
Users of implanted pacemakers, ICDs, and other
electronic medical devices are advised to ask
the manufacturer or sales agent whether or not
these devices can be affected by radio waves.
A plastic panel is used for the display or the
surface of the camera lens to prevent glass
from shattering. However, touching broken or
exposed parts may cause injury.
7
CAUTION
Do not swing the FOMA terminal by its
strap or other parts.
Introduction
Don't
Do not use the damaged FOMA terminal.
Don't
Don't
Doing so may cause fire, burns, injury or
electric shock.
If the display is broken and the inner
substance such as liquid crystal leaks, do
not allow it to come in contact with your
face, hands, etc.
Failure to observe this precaution may cause
loss of eyesight or damage to your skin. If the
inner substance such as liquid crystal comes
into your eyes or mouth, immediately rinse
with clean water and see a doctor.
If the liquid crystal adheres to your skin or
clothing, immediately wipe it off with alcohol
and wash with soap and water.
Do
Before using your FOMA terminal in a
vehicle, ask the manufacturer or sales
agent whether the operation of the
vehicle can be affected by radio waves.
In some types of vehicle, using the FOMA
terminal may interfere with the operation of
the vehicle's electronic equipment. In this case,
stop using the FOMA terminal immediately.
Do
Do
The terminal may strike you or others around
you, resulting bodily injury.
There may be cases where the customer's
physical condition or predisposition
leads to itchiness, rashes, or sores. If this
occurs, immediately stop using the
FOMA terminal and see a doctor.
Do
8
Such pinching may cause injury.
Failure to observe this precaution may impair
your vision.
3. Precautions for the Battery Pack
n Refer to the information shown on the battery
pack label to check the type of battery.
Don't
Don't
Display
Battery type
Li-ion00
Lithium-ion
Do not place metal items such as wires in contact with
the charging terminals. Also, do not carry or store the
battery pack with metal items such as necklaces.
Doing so may cause the battery pack to ignite,
explode, overheat or leak.
Check the orientation of the battery pack
before attaching it. If you have difficulty
attaching it to the FOMA terminal, do not
put excessive pressure on the battery pack.
Failure to observe this precaution may cause
the battery pack to ignite, explode, overheat
or leak.
Do not throw the battery pack into fire.
Don't
Doing so may cause the battery pack to ignite,
explode, overheat or leak.
Do not puncture the battery pack, hit it
with a hammer or step on it.
Material used in each part→p.11 "7. Material List"
Take care not to pinch your fingers or the
strap when opening/folding the display
of the FOMA terminal.
When viewing the display, keep a proper
distance between your eyes and it in a
bright place.
Don't
Doing so may cause the battery pack to ignite,
explode, overheat or leak.
Do
If battery fluid etc. comes into contact
with your eyes, do not rub your eyes but
immediately rinse your eyes with clean
water and see a doctor.
If the battery pack leaks, do not touch
battery fluid etc. with your face, hands, etc.
Do
WARNING
Don't
Do
Never use the battery pack if it has fallen
to have something abnormal such as
deformation and damage.
Failure to observe this precaution may cause
the battery pack to ignite, explode, overheat
or leak.
If the battery pack leaks or emits an
unusual odor, stop using it immediately
and move it away from any flame or fire.
4. Precautions for the Adapter and
Desktop Holder
WARNING
Do not use the adapter if its power cord
is damaged.
Don't
Doing so may cause fire, burns or electric shock.
Don't
Do not use the AC adapter or desktop
holder in humid locations such as a
bathroom.
The battery fluid is flammable and could
ignite, causing a fire or explosion.
Keep your pets away from the battery
pack as they may accidentally bite it.
Do
Failure to observe this precaution may cause
the battery pack to ignite, explode, overheat
or leak.
CAUTION
Don't
Doing so may cause fire and create an
environmental hazard. Put insulation tape on
the terminals of used battery pack and return
it to a docomo Shop or Service Counter, or
dispose of the battery pack in accordance
with your local regulations.
Do not touch the adapter when you see
lightning or hear thunder.
Don't
Don't
Do not use or charge the wet battery pack.
Don't
Doing so may cause fire, burns or electric shock.
The DC adapter must be used only in
vehicles with a negative ground. Do not
use the adapter in vehicles with a
positive ground.
Doing so may cause fire, burns or electric shock.
Do not dispose of used battery packs
with ordinary garbage.
Don't
Failure to observe this precaution may cause
loss of eyesight or damage to your skin. If
the battery fluid etc. comes into your eyes or
mouth or it adheres to your skin or clothing,
immediately rinse with clean water. In the case
that it comes into contact with your eyes or
mouth, see a doctor immediately after rinsing.
Introduction
Failure to observe this precaution may result
in loss of eyesight.
Doing so may cause the battery pack to ignite,
explode, overheat or leak.
Doing so may cause electric shock.
Do not short-circuit the charging terminals
when the adapter is plugged into the
power outlet or cigarette lighter socket.
Also, do not let the charging terminals
contact with your body (hand, finger, etc.).
Doing so may cause fire, burns or electric shock.
Do not put heavy objects on the power
cord of the adapter.
Don't
Doing so may cause fire, burns or electric shock.
9
Don't
Introduction
When plugging/unplugging the AC
adapter into/from the power outlet,
make sure that no metallic straps or
other metallic objects are caught
between the plug and the socket.
Do
Failure to observe this precaution may cause
fire, burns or electric shock.
Metallic objects may cause fire, burns or
electric shock.
When plugging/unplugging the adapter
into/from the FOMA terminal, keep it
straight and horizontal and do not apply
excessive force.
Don't
Do not apply excessive force to the top,
bottom, left, or right while the adapter is
connected to the FOMA terminal.
Doing so may cause fire, burns, injury or
electric shock.
Failure to observe this precaution may cause
fire, burns, injury or electric shock.
No wet hands
Do not touch the power cord of the adapter,
charging terminals, desktop holder or the
power outlet with wet hands.
Unplug the adapter from the power
outlet or cigarette lighter socket when
the adapter will be left unused for a long
period.
Do
Use the specified voltage and current. Use
the AC Adapter for Global use to charge
the battery overseas.
Do
Do
Unplug
Doing so may cause fire, burns or electric shock.
Using the adapters with incorrect voltage may
cause fire, burns or electric shock.
AC Adapter : AC 100V
DC Adapter : DC 12V/24V
(specific to vehicle with negative ground)
AC Adapter for Global Use :
AC 100V to 240V (household AC outlet only)
If the fuse in the DC adapter blows, always
replace it with the specified type of fuse.
Failure to observe this precaution may cause
fire, burns or electric shock. Refer to the
respective manuals for the information on the
specified fuse.
Failure to observe this precaution may cause
fire, burns or electric shock.
Unplug
If water or other liquid gets into the
adapter, immediately unplug it from the
power outlet or cigarette lighter socket.
Unplug
Unplug the adapter from the power
outlet or cigarette lighter socket before
cleaning it.
Do
Failure to observe this precaution may cause
fire, burns or electric shock.
When plugging the AC adapter into the
power outlet, make sure to insert it firmly.
Do
Failure to observe this precaution may cause
fire, burns or electric shock.
Failure to observe this precaution may cause
fire, burns or electric shock.
Failure to observe this precaution may cause
fire, burns or electric shock.
5. Precautions for the miniUIM
CAUTION
Wipe off any dust on the plug.
10
Always grasp the adapter when
unplugging the plug from the power
outlet or cigarette lighter socket. Do not
pull the cord itself.
Be careful with sharp edges when
removing the miniUIM.
Do
Sharp edges may cause injury.
6. Precautions for Use Near
Electronic Medical Devices
Do
Do
Anyone with an electronic medical device,
such as an implanted pacemaker or ICD
should use or carry the FOMA terminal at
least 15 cm from the site of implantation.
Somebody nearby may have an electronic
medical device such as an implanted
pacemaker or ICD. Radio waves from the
FOMA terminal can adversely affect the
operation of electronic medical devices.
Radio waves from the FOMA terminal can
adversely affect electronic medical devices.
Do
Electronic medical devices other than
implanted pacemakers and ICDs may also
be used outside hospitals. Users of
electronic medical devices are advised to
ask the manufacturer whether these
instruments can be affected by radio waves.
Do
Introduction
WARNING
If there is a chance that the distance from
a person may become less than 15 cm
such as when you are unable to freely
move around, set the FOMA terminal to
not emit radio waves in advance (by
setting Self mode, turning the power off,
etc.).
For use of the FOMA terminal inside
medical institutions, follow the instructions
given at the respective medical institutions.
Radio waves from the FOMA terminal can
adversely affect electronic medical devices.
7. Material List
Parts
External chassis
Display
Key and battery pack
storage
Sub-display
Battery-pack-storageside hinge panel
Display panel
Sub-display panel
Sub-display side panel
Camera and Infrared data port panel
Keys
Material
Nylon resin
Coating
UV coating
Polycarbonate resin
UV coating
Polycarbonate resin
UV coating
Acrylic resin
Polycarbonate resin
Polycarbonate resin
Acrylic, Polycarbonate
composite resin
UV cured resin
Hard coating
UV coating
Tin deposition, UV coating
Side keys
Polycarbonate resin
Strike pad
UV cured resin
Hard coating
−
Aluminum deposition,
UV coating
−
11
Parts
Outer side
Back cover
Introduction
Inner side
External connector
External connector terminal cap
terminal cap
Water stop
Charging terminal
Storage
Battery pack
storage
Inner frame
microSD card holder
miniUIM card slot
Battery terminal
Battery pack N30
Desktop holder
N45
12
Battery terminal
connector
Terminal
Material
Polycarbonate resin
Polycarbonate resin,
Silicon rubber
Polycarbonate resin, Polyester
thermoplastic elastomer
Silicon rubber
Brass
Metal parts: Stainless alloy
Resin: Nylon resin
Polycarbonate resin
Stainless alloy
Cover: Stainless alloy
Terminal: Phosphor bronze
Connector: LCP resin
Coating
UV coating
−
UV coating
Silicon coating
Gold plating
Metal parts: Nickel plating
Resin: −
−
−
Cover: −
Terminal: Gold plating
Connector: −
−
Nylon resin
Titanium copper
Resin: Polycarbonate resin
Label: PET resin
Terminal
Glass epoxy resin
External chassis
ABS resin
Charging terminal lever POM resin
Charging terminal
Phosphor bronze
External connector
Terminal: Phosphor bronze
terminal
Resin: PPS resin
Rubber cushion
Silicon rubber
Rubber feet
Polyurethane
Screw
Steel
Gold plating
−
Battery pack
Gold plating
−
−
Gold plating
Terminal: Gold plating
Resin: −
−
−
Black nickel plating
Handling precautions
General Notes
not allow water to seep in or dust to get in the
FOMA terminal. Also, do not allow accessories
and options to get wet or be exposed to dust.
The battery pack, adapter, desktop holder and the
miniUIM are not waterproof/dustproof. Do not
use them in humid locations such as bathrooms,
and avoid exposing them to rain. If you carry
the FOMA terminal close to your skin, sweat
may cause internal components to corrode and
result in malfunction. The FOMA terminal cannot
be repaired in the following cases: the water
exposure detection sticker shows water exposure;
tests determine that corrosion has occurred due
to water exposure, condensation, or perspiration.
These cases are not covered by the warranty, and
any repairs that may be possible will be carried out
at the subscriber's expense.
Wipe with a soft, dry cloth (such as an eyeglass
cleaning cloth).
Rubbing the display of the FOMA terminal with
a dry cloth may scratch the display surface.
The display surface may be stained if moisture
or dirt is left on it for a long period.
Never use chemicals such as alcohol, thinners,
benzene or detergents as these agents may
erase the printing on the FOMA terminal or
cause discoloration.
Occasionally clean the connection terminals
with a dry cotton swab, etc.
Soiled connectors may result in poor connections,
loss of power, or incomplete charging. Wipe with
dry cloth or cotton swab.
When cleaning, take care not to damage connectors.
Do not place the FOMA terminal near an air
conditioning vent.
Condensation may form due to rapid changes in
temperature, and this may cause internal corrosion
and malfunction.
terminal or battery pack.
Do not put the FOMA terminal in a bag filled with
many objects or sit down with it in a hip pocket.
Excessive pressure may result in malfunction
or damage to the display, internal circuit or the
battery pack, etc.
Also, if an external device is connected to
the external connector terminal (earphone/
microphone terminal), excessive pressure may
result in malfunction or damage to the connector.
Introduction
N-01F is waterproof/dustproof, however, do
Do not put excessive pressure on the FOMA
Do not scratch the display with metallic objects.
Doing so may cause scratches, malfunction or damage.
Carefully read the manuals supplied with
each of the options.
Handling the FOMA Terminal
Avoid using the FOMA terminal in extremely
high or low temperatures.
The ambient temperature of the room should be
5℃ to 35℃ with humidity of 45% to 85%.
Reception may be affected if you use your FOMA
terminal near a land-line phone, television, or radio in
use. Use the FOMA terminal away from such devices.
Please keep a separate record of the information
you have registered in your FOMA terminal.
Please be aware that DOCOMO bears no obligation or
responsibility in the event that data is altered or lost.
Do not drop the FOMA terminal or expose it
to strong shocks.
Doing so may cause malfunction or damage.
When connecting an external device to the external
connector terminal (earphone/microphone
terminal), do not insert at an angle or pull the cord.
Doing so may cause malfunction or damage.
Do not fold the FOMA terminal with the strap
pinched between the folding parts.
Doing so may cause malfunction or damage.
It is normal for the FOMA terminal to become
warm while being used or charged. This is
not a malfunction. Keep using it.
13
Do not leave the camera exposed to direct
sunlight.
Doing so may discolor or burn the components of
the camera.
Introduction
Keep the external connector terminal (earphone/
microphone terminal) cap closed when not in use.
Failure to observe this precaution may cause
malfunction due to dust or water getting in.
Do not use FOMA terminal with the back
cover removed.
Doing so may cause the battery pack to fall out, or
cause malfunction or damage.
Do not put an extremely-thick sticker, etc. on
the display or keypads.
Doing so may cause malfunction or damage.
Do not remove the microSD card or turn off
the power while in use.
Doing so may cause data loss or malfunction.
Do not let magnetic cards, etc. come close to
or be sandwiched between FOMA terminal
parts.
The magnetic data in cash cards, credit cards,
telephone cards, floppy disks, etc. may be erased.
Do not let strong magnetic objects come
close to the FOMA terminal parts.
Strong magnetic objects may cause misoperation.
Handling the Battery Pack
The battery pack is consumable.
Battery life varies depending on usage conditions,
etc., but it is time to change battery packs when
the usage time has become extremely short even
though the battery pack has been fully recharged.
In this case, please purchase a new battery pack.
The ambient temperature of the room should
be 5℃ to 35℃ .
The available operating time of the battery
pack depends on the conditions of usage
and battery pack.
Depending on the usage condition, the battery
pack may inflate slightly when the battery life
is almost over. This is not a malfunction.
14
Do not store the battery pack in the following
cases:
The battery is fully charged (immediately after
the charging is complete)
The battery has run out (the phone cannot power on)
The performance and life of the battery pack may
deteriorate.
It is recommended that you store the battery pack
with two battery marks displayed or around 40%
battery level.
Handling the Adapter
The ambient temperature of the room should
be 5℃ to 35℃ .
Do not charge the battery pack:
In a humid, dusty or unstable place
Near a land-line phone, TV or radio
It is normal that the adapter become warm
while charging. Keep using it.
Do not use the DC adapter to charge the battery
when the car engine is not running.
Doing so may drain the car battery.
If you use an electrical outlet with an unplugging-
protection mechanism, follow the instructions of
the manual for the outlet.
Do not expose the adapter to strong shocks.
Do not deform the charging terminal.
Doing so may cause malfunction.
Handling the miniUIM
Do not apply excessive force to the miniUIM
when attaching/removing it.
Note that the warranty does not cover
damage caused by inserting the miniUIM
into another type of IC card reader or writer.
Always keep the IC part clean.
Wipe with a soft, dry cloth (such as an eyeglass
cleaning cloth).
Please keep a separate record of the information
you have registered in your miniUIM.
Please be aware that DOCOMO bears no obligation
or responsibility in the event that data is altered or
lost.
To preserve the environment, bring discarded
Doing so may cause data loss or malfunction.
Do not drop the miniUIM or expose it to
strong shocks.
Doing so may cause malfunction.
Do not bend the miniUIM or place a heavy
object on it.
Doing so may cause malfunction.
Do not put a label or sticker on the miniUIM
when attaching it to the FOMA terminal.
Doing so may cause malfunction.
Be careful when using the FOMA terminal
while driving.
A penalty may be imposed for holding a mobile
phone while driving. However, exceptions are
made in case of emergency, such as to safeguard
injured persons or to maintain public safety.
Use the FeliCa reader/writer function only in
Japan.
The FeliCa reader/writer function of the FOMA
terminal complies with radio standards of Japan.
You may be punished if you use it overseas.
Introduction
miniUIM to a docomo Shop or Ser vice
Counter.
Do not damage, scratch, unnecessarily touch,
or short-circuit the IC.
Do not modify the system software improperly.
This may be regarded as "remodelling" and
requests for repair of the terminal may be
rejected.
Handling the FeliCa Reader/Writer
The FeliCa reader/writer function of the
FOMA terminal handles delicate signals that
require no radio station license.
The 13.56 MHz frequency band is used.
If there is another reader/writer around,
keep enough distance between the FOMA
terminal and the reader/writer. Also, make
sure that there is no radio station using the
same frequency band nearby.
Cautions
Do not use the altered FOMA terminal. Using
an altered device is a violation of the Radio
Law/Telecommunications Business Act.
A "Technical Conformity Mark " affixed on the
manufacturer's specification sticker certifies that
the FOMA terminal meets technical regulations
for specified radio equipment based on the Radio
Law and technical regulations for terminal devices
based on the Telecommunications Business Act.
If you remove the screws and alter the inside of
the FOMA terminal, the technical regulations
conformity certification becomes invalid. Do not
use the FOMA terminal with the certification
invalid, as it is a violation of the Radio Law/
Telecommunications Business Act.
15
Waterproof/Dustproof Function
Introduction
N-01F is waterproof to IPX5*1 and IPX7*2 standards, and dustproof to IP5X*3 standard if the
external connector terminal cap is closed as well as the back cover is securely attached.
*1 : IPX5 means that the N-01F continues to function as a phone after being sprayed from all directions with 12.5 liters
of water per minute from a 6.3 mm diameter nozzle for at least 3 minutes, from a distance of approx. 3 meters.
*2 : IPX7 means that the N-01F retains phone functionality after slowly immersing in still, room-temperature
tap water to a depth of 1 meter and leaving it there for 30 minutes before bringing it out of the water.
*3 : IP5X means the level of protection. IP5X means that N-01F continues to function as a phone and to maintain
security after being left in a device containing dust (diameter: 75 μ m or smaller) for 8 hours, agitated and removed.
The waterproof/dustproof capabilities of N-01F
・ You can talk or watch 1Seg without an umbrella in the rain (approx. 20 mm of rain in an hour).
・ Do not attach/remove the back cover or do not open/close the external connector
terminal cap when your hands are wet or when your FOMA terminal has water drops on it.
・ You can rinse the FOMA terminal by immersing and slowly moving in tap water of room
temperature filled in a bowl, or rinse it with hands under light running water from the faucet.
* Rinse the FOMA terminal with the back cover securely attached while covering the
external connector terminal cap to prevent it from opening.
* Do not use a brush, sponge, soap, or detergent for washing.
* Do not apply running water directly to the mouthpiece/microphone, earpiece or speaker.
・ Do not immerse or drop the FOMA terminal in a swimming pool or in the sea.
・ If the FOMA terminal comes in contact with any mud or soil, rinse it immediately. If these
dry up and set, the dirt would be harder to remove, and it may cause scratches and failures.
Things to keep in mind
・ Before use, ensure that you securely close the external connector terminal cap and back cover so
that they are completely attached. If any fine dirt (fine fibers, hairs, or sands) is between the cap/
cover and the FOMA terminal, water or dust could enter the inside of the FOMA terminal.
・ Do not spray or immerse the FOMA terminal in liquids other than water of room temperature as illustrated below.
<Example>
16
Soap/Detergent/Bath powder
Sea water
Swimming pool
Hot spring
Opening/closing the external connector terminal cap
■ Opening
■ Closing
Align the tab on the back of the cap with the
concave of the FOMA terminal, then close the
cap by pressing securely in direction of arrow.
Introduction
Hook your finger on the slot and open the
cap in the direction of arrow.
Tab on the back
of the cap
Slot
Concave
Attaching/removing the back cover
■ Removing
Hold the FOMA terminal and hook your finger on
the slot to remove the back cover in the direction
of arrow without applying excessive force on it.
■ Attaching
Insert the left and right tabs of the back
cover in direction ① , and push the back
cover down securely in direction ② .
Tab
Slot
Securely push the areas illustrated by and
make sure that there is no space between the
back cover and the FOMA terminal.
・When removing the back cover, make sure that you drain water (p.19) and wipe moisture off the FOMA terminal.
・When attaching the back cover, make sure that no dust or dirt adheres to the back cover (especially to the rubber packing).
・Water or dust might enter the inside of the FOMA terminal unless you attach the back cover securely.
・When attaching the back cover, make sure that the miniUIM, the microSD card and the battery pack are attached
securely. If the miniUIM is not securely inserted, the battery pack sits on the miniUIM which causes a gap between
the FOMA terminal and the back cover when attaching the back cover. The waterproof/dustproof function might
deteriorate because of the gap.
17
To maintain waterproof/dustproof function, replacement of parts is recommended once every 2
years regardless of whether the FOMA terminal appears normal or abnormal. DOCOMO replaces the
parts as a chargeable service. Bring the FOMA terminal to a repair counter specified by DOCOMO.
Introduction
Important notices
・ If the FOMA terminal gets wet with water or other liquids with the external connector terminal cap or the back
cover open, the liquid may get inside the FOMA terminal causing electric shock or malfunction. Stop using the
FOMA terminal, turn off the power, remove the battery pack and contact a repair counter specified by DOCOMO.
・ The external connector terminal cap and the rubber packing of the back cover play an important role
in maintaining waterproof/dustproof function. Do not remove or scratch them. Also, prevent dust from
adhering to them. If the external connector terminal cap and the rubber packing of the back cover is
damaged or deformed, replace it at a repair counter specified by DOCOMO.
・ Do not insert sharp objects through the gap of the external connector terminal cap or back cover. Doing
so may damage the rubber packing and allow water to seep or dust to get in.
・ If the back cover is damaged, replace it. Water may seep into the inside of the FOMA terminal through a
damaged section causing electric shock, corrosion of the battery pack, or other malfunctions.
・ Do not leave the FOMA terminal with water drops. In cold places, water may freeze and cause malfunction.
・ To prevent condensation, do not transport the FOMA terminal from a cold place to a warm place without
allowing the FOMA terminal to reach room temperature.
・ Do not apply water flow stronger than allowed ( → p.16) (e.g., such water flow that gives you pain when
applied to your skin directly from a faucet or shower head). Doing so may cause malfunction though N-01F
is waterproof to IPX5 standard.
・ Do not wash the FOMA terminal in a washing machine etc.
・ Accessories and options are not waterproof/dustproof. When watching 1Seg etc. with the FOMA
terminal attached to the provided desktop holder, do not use it in a bathroom, shower room, kitchen or
washroom even if it is not connected to the AC adapter.
・ Do not put the FOMA terminal in hot water, use it in a sauna or apply hot air flow (from a hair dryer etc.) to it.
・ Do not poke the mouthpiece/microphone, earpiece or speaker with cotton swabs or sharp objects. The
waterproof/dustproof function may deteriorate.
・ Do not leave the FOMA terminal wet. Doing so may cause short-circuit of the supply terminal.
・ The FOMA terminal does not float on water.
・ Do not drop the FOMA terminal. Scratches caused by dropping may result in deterioration of waterproof/
dustproof function.
・ Do not leave water on the mouthpiece/microphone, earpiece or speaker. If water adheres to the FOMA
terminal, the volume of the other party's voice or melody may be decreased, sound quality may deteriorate, or
sound when the camera is functioning may be audible. In such a case, drain the water to recover the function.
・ DOCOMO does not guarantee all operations under actual use conditions. Malfunctions deemed to be
18
caused by inappropriate operation by the customer are not covered by the warranty.
Draining water when the FOMA terminal gets wet
・ If water adheres to the mouthpiece/microphone, earpiece or speaker, the volume of the other
party's voice or melody may be decreased or sound quality may deteriorate. In such a case, drain
the water following the steps below and dry the FOMA terminal in open air to recover the function.
❶ Wipe the surface of the ❷ Securely hold the FOMA
❸ Softly press a clean dry cloth
FOMA terminal with a
terminal and shake it
etc., on the FOMA terminal to
clean dry cloth, etc.
approx. 20 times until there
wipe off water remaining in
is no more water splattering
the mouthpiece/microphone,
earpiece, speaker, keys or
hinges
* Do not wipe off water
remaining in gaps directly
with a cotton swab etc.
<Draining from mouthpiece/
microphone or earpiece>
Introduction
When the FOMA terminal gets wet, drain the water following the steps below.
<Draining from
speaker>
❹ Thoroughly wipe off water drained from the FOMA
terminal with a clean dry cloth, etc.
* Water, if any, remaining in the FOMA terminal
may leak out after wiping off.
When charging the battery
Accessories and options are not waterproof/dustproof. Check the following before and after charging.
・ Make sure that the FOMA terminal is not wet. If the FOMA terminal is wet,
thoroughly drain the water and wipe off with a clean dry cloth, etc. before placing it
on a provided desktop holder or opening the external connector terminal cap.
・ When the external connector terminal cap is opened for charging, close the cap securely
after charging. It is recommended that the desktop holder be used for charging to prevent
water from seeping inside and dust from getting in through the external connector terminal.
* Never try to charge the battery pack when the FOMA terminal is wet.
* Do not touch the AC adapter or desktop holder with wet hands. Doing so may cause electric shock.
* Use the AC adapter or desktop holder in a place free from water splashes. Do
not use them in a bathroom, shower room, kitchen, washroom and other places
subject to water. Otherwise, it may cause fire or electric shock.
19
Before Using
Attaching miniUIM/battery pack
Basic Operation
Make sure to turn the power off before attaching/removing the miniUIM
or the battery pack. Also, keep the FOMA terminal folded and held in your
hand.
・ The miniUIM is an IC card that contains private information such as your phone
number.
・ This FOMA terminal only supports the miniUIM. If you have a UIM or UIM (FOMA
card), check with a docomo Shop Service Counter for a replacement.
❶ Remove the back cover ( → p.17)
❷ Insert the miniUIM
Cut corner
Insert the card into the slot until it locks in place
in direction ① with the gold colored IC side
down.
IC
miniUIM
Insertion slot
Gold colored
IC side down
❸ Attach the battery pack
With the side marked facing up, attach the
battery pack in direction ② making sure that
its metal terminal fits into the FOMA terminal's
metal terminal, then press the battery pack
down in direction ③ .
❹ Attach the back cover ( → p.17)
20
Charging
For the charging time and continuous talk time, refer to "Main specifications" ( → p.92).
・ The battery pack, AC adapter and provided desktop holder are not waterproof/
dustproof. Never charge the battery with the FOMA terminal left wet.
・ It is recommended that the desktop holder be used for charging to prevent water
from seeping inside and dust from getting in through the external connector terminal.
Basic Operation
・ The charge lamp lights up when charging starts. The charge lamp turns off when
charging ends (fully charged).
Charging using desktop holder
❶ Plug the connector of the AC adapter (optional) horizontally,
facing the face with an engrave mark up, into the external
connector terminal on the back of the provided desktop holder
❷ Plug the AC adapter into the outlet
❸ Holding down the desktop holder, insert the FOMA
terminal in direction ① and securely attach it
・ Take care not to pinch the strap, etc. when attaching it.
❹ When charging is complete, the FOMA terminal can be
removed by simultaneously holding down the desktop
holder and lifting up the FOMA terminal
Charging using AC adapter
❶ Open the external connector terminal cap of the FOMA
terminal ( → p.17), then plug the AC adapter connector
horizontally, facing the face with the engraved mark up,
into the FOMA terminal's external connector terminal
With the arrow
side facing up
❶
Charge
lamp
100V AC
Connector
power outlet
❷
Plug
Desktop Holder N45
FOMA AC Adapter 01/02
100V AC
power outlet
❷
Plug
Terminal
cap
adapter connector horizontally from the FOMA
terminal while pressing the release buttons, then
unplug the AC adapter from the outlet
Charge lamp
❶
❷ Plug the AC adapter into the outlet
❸ When charging is complete, remove the AC
❸
FOMA
AC Adapter
01/02
Connector
Release
buttons
With the arrow
side facing up
21
Turning power ON/Configuring default setting
❶ y (1 second or longer)
■ If Initial setting screen appears
Basic Operation
When you turn the power on for the first time after purchase, Initial setting screen
appears.
If you select "YES", screens for initial settings such as "Auto time", "Change security
code" and "Keypad sound" appear.
■ To turn the power off
Press y for 2 seconds or longer.
・For the initial settings, you can also set the time difference adjustment and
character size. After you set all functions, Initial setting screen will no longer
appear at power on.
Notifying your caller ID on the other party's phone
Set whether to show your phone number (caller ID) on the other party's
phone (display) when making a call.
❶ is "TEL function" s "Dial/Receive setting" s "Caller ID
notification" s "Activate/Deactivate" s "ON" or "OFF"
・If you hear a message requesting your caller ID, make a call again with Caller ID
notification enabled or with 186 prefix.
22
Checking your own phone number
On Profile screen, check your phone number (own number) stored in your
miniUIM and model name.
❶ is "Profile"
You can also check your phone number by pressing is0.
To save mail address, enter directly or obtain from i-mode automatically as follows.
On Profile screen, Uu (Edit)sEnter your security codes <Mail address>
s "Acquire Automatically" sConnect to i-mode to enter your mail address
to <Mail address> field automaticallysUu (Finish).
・To change your mail address, refer to NTT DOCOMO website.
Basic Operation
・Only phone numbers are displayed by default in the Profile screen.
Switching between Japanese and English
❶ is" 本体設定 " (Setting)s" 文字表示 / 入力 " (Text display/input)
s"Select language" ( バイリンガル )s"English" ( 日本語 )
23
Screen Explanation
Viewing display/icon
Basic Operation
Symbols ( , , , etc.) displayed on the screen are referred to as icons.
Icons indicate the status of such as the FOMA terminal and signal reception.
■ Icons indicating the status of the FOMA terminal
At the top of the screen, icons indicate the status of the FOMA terminal.
Battery level (use this icon as a guide)
:Fully charged.
:Recharge the battery.
Signal strength
Good
:Vibrator set
:Ring volume set to "Silent"
:Manner mode ON
Poor
: Out of the FOMA service
area
:During i-mode
:Unread mail
:During a voice call
:Dial lock is set
:New i-concier information
:Multitask activating
:microSD card inserted
:Public mode (Drive mode) ON
:Alarm notification function ON
:The number of Voice Mail messages
for voice/videophone calls
:The number of record VP messages
:eco mode set
:Auto-key lock set
:USB cable connected and
Communication mode on
• Only major icons are covered here. To check the
24
names of the icons, Iis "Setting" s "Screen/
Display" s "Icons".
■ Desktop icons and shortcut icons
In the middle of the screen, desktop icons indicate the status of new arrivals. You can
paste shortcut icons, with which you can launch functions.
Basic Operation
Desktop icons (examples)
:Missed call
:Record message
:Record VP message
:Voice Mail
:New mail
Shortcut icons (examples)
:i-concier
:使いかたガイド
(Guide) (Japanese)
: Voice quick start
: Medias viewer
Function display area
→ p.27
・To select a desktop icon or shortcut icon to launch a function, on the standby
screensXd.
Viewing sub-display
On the sub-display, incoming call, mail or alarm notifications appear with
various messages, images or animations.
■ Example
Clock (Digital 1)
Missed call/
New mail
25
Checking missed calls/new mail
■ Checking missed calls
Press a to view "received date/time/caller's name (phone
number)", etc.
■ Checking new mail
Basic Operation
Press a to view "sender/received date and time/subject", etc. You need to set
"Mail" under "Sub-display setting" to "ON".
is "Setting" s "Screen/Display" s "Sub-display setting" s "ON" s "Mail"
s "ON" su (Finish).
Viewing main menu
You can select various functions of the FOMA terminal from the main menu.
・ The main menu here is in "Standard".
Mail
:
i-mode/web :
i-appli
:
CAMERA/TV/MUSIC :
:
Data box
:
Tool
TEL function :
Setting
:
Map/Overseas :
i-concier
:
:
Profile
Osaifu-Keitai :
Display the mail functions.
Display the menus of i-mode and Full Browser.
Display the i-appli menu.
Display the menus of Camera, MUSIC
Player and 1Seg.
Display folders in Data box.
Display useful functions.
Display phone functions such as the
phonebook, dialed/received calls, etc.
Display the setting menu of the FOMA terminal.
Display the menus of Map and Overseas setting.
Display the i-concier screen.
Display the miniUIM own number, etc.
Display the setting menus of IC card, ToruCa, etc.
p (Original) : Display the original menu.
26
■ Changing the design of the main menu
You can change the design of the main menu (background, icon, etc.). Choose from
"Standard", "Colourful", "neco", "Simple", "Original theme" and "Kisekae Tool".
❶ is u (Kisekae) s Select a design
Key operation
Basic Operation
The soft keys (Function display) corresponding to i, d, u, o, p, and the
direction icons corresponding to b are displayed on the screen. These icons
appear only when the corresponding keys can be used.
Performing the functions assigned to the function key
■ Display examples and assigned functions
❶
❹ ❷
❺
❻
❸
❶ shows (Submenu), (Exit), (MENU), etc.
❷ shows (Select), (Set), (Play), (Send), etc.
❸ shows (Set), (Edit), (Finish), (Play), (Send), (New), etc.
❹ shows (Back), (microSD), ( ← Set.), etc.
❺ shows (Change), (Delete), (Set. → ), etc.
❻ shows an icon (
) to indicate direction available for
moving or scrolling vertically and horizontally. Press b to
move or scroll the direction.
27
Menu operation
You can select various functions of the FOMA terminal from the main menu,
which appears when you press i on the standby screen.
❶ isb to move the highlight, then d (Select)sSelect the
displayed menu sequentially
Basic Operation
i
s
・If no key is pressed for 15 seconds or longer while the main menu is displayed,
the main menu ends and the previous screen reappears.
When
Submenu
is displayed
When
is displayed at the bottom left of the screen, pressing i displays functions,
which can be used on the screen, such as saving, editing and deleting. When the
submenu contains more menu items, " " is displayed.
28
docomo Palette UI
You can switch from the standby screen to the MyFACE and shortcut list,
and easily access various functions or services. In addition, you can freely
customize this new function.
Using MyFACE
Basic Operation
■ Activating MyFACE
❶ On the standby screen, v
h
h
h
h
j
j
j
j
■ Downloading MyFACE content from sites
You can download MyFACE content up to approx. 600 KB from i-mode sites.
❶ Select MyFACE on a MyFACE downloadable sitesv to select where
to register the contentsSelect "YES" or "NO" whether to automatically
update the content or service
・You can register up to 12 MyFACE contents.
・Downloading upgrades of MyFACE will result in packet communication charges.
29
Using shortcuts
■ Activating a shortcut
5 or more shortcut icons are registered by default.
❶ On the standby screen, gsg
❷ b to select a shortcut icon, then d (Select)
Basic Operation
■ Creating a shortcut
❶ On the screen for which you want to create a shortcut, i (Submenu)
s"Create shortcut"
Using Guide
Using the "Guide" enables you to check the operations. You can look up the
functions without the manual (in Japanese only).
* " 使いかたガイド " (Guide) is not available when "English" is set for "Select
language".
❶ is " 便利ツール " (Tool)s " 使いかたガイ
ド " (Guide)
❷ Enter the keyword or select searching
method
Guide screen
30
Character Entry
Entering characters
When entering information to save to the phonebook, or creating mails or
schedules, enter text.
the text entry screen
to display entry mode
change screen.
Entry mode change screen
② Entering characters
Press a dial key several times
to enter your desired text.
〈Example : when pressing 2〉
When entering Alphabetic
"a → b → c → A → B → C → 2"
When entering Numeric
"2"
When entering Kanji/Hiragana
" か→き→く→け→こ "
When entering Kana
" カ→キ→ク→ケ→コ→ 2"
③ Converting entered text
Convert entered text to
Kanji or Kana.
g
:Display conversion
candidates
b:Select from the
candidates
p :Convert to Kanji, etc.
v to change the
conversion range
u :Convert to Alphabetic,
Numeric and Kana
d:Set
Basic Operation
① Switching entry modes
Pre s s o (C h rc t ) o n
■ Other key operations
Wt : Delete character.
W
w
: Insert a line feed, switch upper case/lower case, or enter dakuten/handakuten.
W
r
: Return to the previous character assigned to that key.
W
r
(1 second or longer) : Undo the operation such as pasting or cutting.
Pp : Enter Pictograph or symbols consecutively or enter face marks or URL.
While displaying List, pressing Ii or Uu switches the tabs.
31
Let's enter text.
<Example : entering " 秋のキャンプ (Autumn camp)">
Enter Hiragana
1 once
2 twice
あ
き
5 5 times
2 twice
8 once
w once
0 3 times
6 3 times
の
Basic Operation
や
ん
w twice
き
to lower case
sg to move the cursor to the target conversion
candidate and then b to select the candidate
s d (Select)
ふ
゜(Han-dakuten)
Entering Deco-mail pictogram/Deco-mail picture
Deco-mail pictograms/Deco-mail pictures are images that meet certain conditions,
including moving pictogram.
Press p (PI・SB) on the Message screen and then use i or u to display the "Deco"
or "D-picture" tab. Use b to move the frame and press d (Select) to enter a Decomail pictogram or Deco-mail picture.
Pressing q under the "Deco" tab displays the categorized Deco-mail pictogram
entry screen.
32
Sound/Screen Setting
Changing ring tone
Basic Operation
Changing the ring tone for calls
❶ is "Setting" s "Sound/Vib./Manner" s "Select ring tone"
s "Phone" s "Select ring tone" s "Melody" sSelect ring tone
・Other options such as a melody, i-motion, Chaku-Uta®, or Chaku-Uta-Full® can be
set to ring tones.
When i-motion is set, a video also plays.
* "Chaku-Uta" and "Chaku-Uta-Full" are registered trademarks of Sony Music
Entertainment (Japan) Inc.
Adjusting volume of ring tone
Adjusting the volume of calls
❶ is "Setting" s "Sound/Vib./Manner" s "Ring volume"
s "Phone" sc to adjust the volume, then d (Set)
Setting vibrator
Informing you of incoming calls by vibration
❶ is "Setting" s "Sound/Vib./Manner" s "Vibrator setting"
s "Phone" sSelect a vibration pattern
33
Using manner mode
Set the FOMA terminal not to play ring tones or keypad sound through
the speaker with a single key operation. Even in manner mode, the camera
shutter sound, the auto focus lock sound or the start/end/pause sound of a
moving picture recording or a voice recorder plays.
❶ On the standby screen, q (1 second or longer)
Basic Operation
appears on the standby screen.
■ To release the setting
On the standby screen, q (1 second or longer)
Setting keypad sound OFF
❶ is "Setting" s "Sound/Vib./Manner" s "Other sound setting"
s "Keypad sound" s "OFF"
Changing screen setting
Changing standby display
❶ is "Setting" s "Screen/Display" s "Stand-by display"
s "Stand-by display" s Select an image
Changing display brightness
Set the backlight behavior of the display or keys, and adjust the brightness.
❶ is "Setting" s "Backlight/Illum." s "Backlight" s Select an
item
34
Making display hard to see from people around
Privacy angle makes it difficult for others to see the display. When Privacy angle is
set, is displayed on the standby screen.
❶ 8 (1 second or longer)
■ To release the setting
8 (1 second or longer)
Basic Operation
・You may not be able to set/release the Privacy angle while editing a text, etc.
Changing menu display
❶ is"Setting"s"Screen/Display"s"Menu display set"sSelect
an item
Changing font settings
❶ On the standby screen, 7 (1 second or longer) s "Select font" s
Select a folder s Select an item (font), then u (Set) s Select the
thickness in "Thickness" s Select a character size in "Character size"
Changing Machi-chara setting
Set Machi-chara, and a character appears on the standby screen to inform you of
i-concier information, missed call, new mail, unread mail, etc.
❶ is "Setting" s "Screen/Display" s "Machi-chara setting"
s "Display setting" s "ON"
❷ Select a folder sSelect a Machi-charasu (Set)
・i-αppli and Machi-chara cannot be set to the standby screen at the same time.
35
Setting Kisekae Tool
Set various FOMA terminal designs such as screens and ring tones at once.
❶ is "Setting" s "Screen/Display" s "Kisekae Tool setting"
s Select a folder
❷ Highlight an itemsu (Set all)s "YES"
Basic Operation
・When you use Kisekae Tool to change the menu display design, the structures of
some menus may change in accordance with the frequency of use.
Changing illumination when receiving
Set the illumination flashing color or pattern used when you receive voice/
videophone calls, mails, MessageR/F or i-concier information.
Changing the illumination for incoming calls
❶ is "Setting" s "Backlight/Illum."s "Illumination setting"
s "Illumination in call" s "Illumination" s "Phone"
❷ Select a colorsts "Set pattern" s Select a pattern
・You can set different flashing colors to arriving calls or mails from the specified phone
numbers, mail addresses and a set of group.
■ To set the flashing color to phonebook
On Phonebook detail screen, Ii (Submenu) s "Set" s "Ring tone/Image"
sSelect the tab of the item to sets "Illumination"
36
Checking missed calls or new mail with illumination
Set whether to keep the illumination flashing or to stop flashing.
Checking with illumination
When there is a missed call or new mail (i-mode mail, Message R/F, Area Mail or SMS),
notification is made with the illumination, which keeps flashing.
Basic Operation
Setting illumination
❶ is "Setting"s "Backlight/Illum." s "Illumination setting"
s "Illumination in call" s "Missed info" s "ON" or "OFF"
Setting eco mode
When eco mode is set, the settings are collectively changed to reduce
battery consumption. This is useful for saving battery power.
❶ 5 (1 second or longer)
■ To release the setting
5 (1 second or longer)
eco mode autostart
eco mode is automatically enabled/disabled depending on whether the battery level
is higher or lower than the set range.
❶ is "Setting" s "Battery" s "eco mode autostart"
❷ "ON" s "Battery level" sSelect a battery levelsu (Finish)
37
Lock/Security
Various security codes
To make the FOMA terminal more convenient and secure, some functions
require the security code.
Basic Operation
Terminal security code
■ Default:0000
This security code is required for deleting all data, changing settings, etc.
You can change the number.
is "Setting" s "Lock/Security" s "Change security code" sEnter your current
security codesEnter a new 4- to 8-digit security codes "YES"
Network security code
■ Any code is set at time of subscription
A 4-digit number is required to verify your identity when you subscribe to some services
at a docomo Shop, docomo Information Center and " お客様サポート " (User support) (in
Japanese only), or when you use network services.
You can change the number. Via i-mode,
ps " お客様サポート " (User support) s " 各種設定(確認・変更・利用)" (Various
settings [confirm, change, use]) s " ネットワーク暗証番号変更 " (Change Network
security code)
i-mode password
■ Default:0000
This password is required to register/unregister sites in My Menu, to use Message
service, to subscribe to/cancel i-mode pay services, and to perform other operations.
You can change the number. Via i-mode,
ps "English" s "Options" s "Change i-mode Password"
38
PIN1 code/PIN2 code
■ Default:0000
Basic Operation
These codes are set to the miniUIM. PIN1 code is a 4- to 8-digit number to prevent
unauthorized use of the miniUIM by a third party and must be entered every time
you insert the miniUIM into the FOMA terminal or turn on the power. PIN2 code is a
4- to 8-digit number that you enter when performing tasks such as resetting total call
charges. If you enter an incorrect PIN1/PIN2 code three times in a row, the PIN1/PIN2
code is locked and cannot be used any more (remaining allowable counts appear on
the screen). After you enter the correct PIN1/PIN2 code, the number of times for entry is
reset to three.
You can change the number.
is "Setting" s "Lock/Security" s "UIM setting" s Enter your security code s
"Change PIN1 code" or "Change PIN2 code" s Enter your current PIN code s Enter a
new PIN code s Enter a new PIN code again for confirmation.
・ To change the PIN1 code, set "PIN1 code entry set" to "ON".
PIN unblocking key (PUK)
PIN unblocking key (PUK) is an 8-digit number used to unlock PIN1 or PIN2. The PIN
unblocking key (PUK) cannot be changed.
・ If the wrong PIN unblocking key (PUK) is entered ten times in a row, the miniUIM is
then completely locked. In this case, contact a docomo Shop Service Counter.
■ Notes on the security codes
・ When setting a security code, avoid using personal information such as date of birth, telephone
number, street address/room number, "1111" and "1234" that may be guessed by a third party.
Keep records of your security codes.
・ Keep your security code private. If the security code is disclosed to others and abused, DOCOMO
shall have no liability for any damage due to any unauthorized use of it.
・ If you have forgotten your security codes, please bring your FOMA terminal, miniUIM and official
documents that verify your identity, such as a driver's license, to a docomo Shop Service Counter.
For details, contact "General Inquiries" on the back cover of this manual.
・ Your PIN unblocking key (PUK) is written on application form (copy for customer), which a
docomo Shop gives you at time of subscription. If you have subscribed at a retailer other than
the docomo Shop, please bring your miniUIM and official documents that verify your identity,
such as a driver's license, to a docomo Shop Service Counter, or contact "General Inquiries" on
the back cover of this manual.
39
Various lock functions
You can protect your important information in your FOMA terminal with the following locks.
Type of Lock
Basic Operation
Dial lock
Omakase
Lock
Original
Lock
IC card
lock
Function
Setting procedure
To activate: is "Setting" s "Lock/Security"
Lock your terminal so that s "Lock" sEnter your security codes "Dial lock"
no one can use it. Even
To deactivate: On the dial lock setting screen,
if you turn the power
enter your security codesd
off, Dial lock will not be
・5 consecutive failed entries to release the Dial lock
unlocked.
will turn your FOMA terminal off.
If you misplace your FOMA
terminal, etc., you can
Setting/releasing Omakase Lock
lock the personal data
Business hours : 24 hours (open all year round)
such as phonebook or IC
0120-524-360 (in Japanese only)
* Unavailable from part of IP phones.
card function of Osaifu* My docomo is also available to set/release Omakase Lock via PC, etc. (in Japanese only)
Keitai only by contacting
DOCOMO.
Lock functions that use
private information such
as mail or phonebook
entries to prevent others
from viewing or altering
these improperly.
You can lock the IC card
functions such as OsaifuKeitai or reception of
ToruCa to prevent others
from using them without
your permission.
To activate: is "Setting" s "Lock/Security"
s "Lock" sEnter your security codesSelect
an item in Original lock
To deactivate: is "Setting" s "Lock/Security"
s "Lock" sEnter your security codes "OFF"
To activate: On the standby screen, 3 (1 second
or longer)
To deactivate: On the standby screen, 3
(1 second or longer)sEnter your security code
Lock key operations
To activate: is "Setting" s "Lock/Security"
automatically when the
sEnter your security
Auto-key FOMA terminal is folded or s "Auto-key lock"
lock
turned off, or no operation codesSelect an item su (Finish)
is performed for a certain
To deactivate temporarily: On the Auto-key lock
period of time.
setting screen, enter your security codesd
40
Setting incoming call restriction
Rejecting calls without caller ID
Basic Operation
Set whether to accept or reject voice/videophone calls from unidentified numbers by
configuring the setting for each reason.
❶ is "Setting" s "Lock/Security" s "Call rejection set."
❷ Enter your security codes Select any item from "User unset" to
"Unknown" s "Accept" or "Reject"
If you select "Accept", you can set "Select ring tone" and "Select calling disp.".
・The setting can be configured for each of the following reasons.
- User unset
: Calls made by callers who opt not to send caller ID
- Payphone
: Calls from pay phones, etc.
- Unknown
:From callers who are unable to provide the caller ID, such as
calls from overseas or calls from land-line phones sent via a
call forwarding service
Rejecting calls from numbers not stored in phonebook
Set whether to accept or reject calls from callers not in the phonebook.
❶ is "Setting" s "Lock/Security" s "Call rejection set."
❷ Enter your security codes "Reject unknown"s "Accept" or "Reject"
・This function is valid only for calls with caller ID.
It is recommended that you also set "Caller ID request" and "User unset" in this function.
41
Resetting to default
Resetting the function settings to default
Reset the function settings to default. For the function that can be reset, see "Menu
list" ( → p.88).
Basic Operation
"Initialize" and "Reset settings" are different. Do not mix them up.
If you perform "Initialize", you will lose all data you have stored.
❶ is "Setting" s "Other setting" s "Reset settings" sEnter
your security codes "YES"
Deleting stored data at once
Delete stored data and reset the function settings to default.
Performing "Initialize" deletes all of your important data, logs or information such
as personal data like phonebook entries or mails, downloaded images or melodies,
i-αppli, Widget Appli, PDF data, the photo images (still images) or moving pictures
shot by camera, or various log records or information, etc. (protected data is also
deleted).
❶ is "Setting" s "Other setting" s "Initialize" sEnter your
security code s "YES" s "YES"
・Pre-installed data will not be deleted. However, Osaifu-Keitai compatible i-appli
that is deletable may be deleted. Pre-installed i-α ppli/Widget Appli will be
deleted if they have been upgraded or deleted then downloaded.
・Data stored/registered/set in a miniUIM or microSD card will not be deleted.
・Charge the battery fully before initializing. Initialization may not be possible if the
battery is low.
・Do not turn off the power while initializing.
42
Call Telephone
Making a call/videophone call
The image sent to the other party during a videophone call is the substitute image
(Chara-den) or rear camera image because the N-01F does not have a front camera.
Making a call by entering the phone number
Making a call from phonebook
Add the phone number of the other party to the phonebook in advance. ( → p.55)
❶ f (Search phonebook) to select a search condition and search the
phonebook sb to select an entry, then r (voice call) /
u (1 second or longer) (V.phone)
Connect
❶ Enter the phone number starting with the area code, then r (voice
call) / u (V.phone)
❷ After the call ends, y
Making a call with redials
❶ is "TEL function" s "Dialed/Received call" s "Redial" to
select the other party, then r (voice call) / u (V.phone)
■ To make a call with received calls
is "TEL function" s "Dialed/Received call" s "Received calls" s "All calls" or
"Missed calls”to select the other party, then r (voice call)/u (V.phone)
43
Using Koe-no-Takuhaibin
This is a service to record a voice message and deliver it to the other party.
❶ Enter the other party's phone number, then o (Koetaku)
❷ Follow the operation guidance and record a message
The other party will be notified that a message is waiting.
■ To play a recorded message
On the Recording notification SMS detail screen, " 再生 " (Play) s "YES"
Also, it can be played from: is "TEL function" s "Koe-no-Takuhaibin"
s "Message confirm (voice)" s "YES".
Making an international call
Connect
Use WORLD CALL to make international calls from Japan.
・ For WORLD CALL, please contact "General Inquiries" on the back cover of this manual.
❶ 010sCountry codesArea code (City code)sThe other party's
phone numbersr (voice call) / u (V.phone)
❷ After the call ends, y
・ Dial the other party's phone number excluding "0" at the beginning of the area code (city
code). However, to make a call to some countries/areas, such as in Italy, "0" is required.
・ You can make calls from overseas. ( → p.48)
Receiving a call/videophone call
When you receive an incoming call, the ring tone sounds and the
illumination flashes.
❶ When you receive an incoming call, r or d (V.phone)/(Subst.)
You can only receive a videophone call with a substitute image.
❷ After the call ends, y
44
Adjusting earpiece volume
❶ is "TEL function" s "Dial/Receive setting" s "In-call
setting"s "Volume" sAdjust with csd (Set)
・During a call, you can adjust the volume with Ya/Ss.
When you can not answer a call
Connect
Setting record message
When you cannot answer a voice or videophone call, the FOMA terminal can record a
voice or videophone message.
❶ is"TEL function"s"Rec. msg./Voice memo"s"Record message
setting"s"ON"s"Phone" or "Videophone"sSelect an item
❷ Set ring time (3-digit number between 000 and 120 seconds)
■ If you receive a call with Record message setting ON
Record message activates if the set time ends. Press r to answer a voice call/
videophone call while recording.
■ To play a recorded message
On the standby screen, ds "
message)sSelect an item
" (Record message) or "
" (Record VP
Setting Public mode (Drive mode)
When Public mode (Drive mode) is set, a caller hears a message that you cannot
answer the call because you are driving or in a place where you have to refrain
from using a mobile phone (on a train or bus, in a theater, etc.), then the call ends
automatically.
❶ On the standby screen, w (1 second or longer)
appears on the standby screen.
45
■ To release the setting
On the standby screen, w (1 second or longer)
Setting Public mode (Power OFF)
When Public mode (Power OFF) is set, a caller who made a call while the power is off hears a message
that you cannot answer the call because you are in a place where you have to turn off the mobile phone
(in a hospital, on an airplane, around a priority seat on a train, etc.), then the call ends automatically.
❶ w25251sr
■ To release the setting
w25250sr
Connect
Using various network services
■ Available network services
Useful DOCOMO network services are available.
・ The network services are not available when you are outside the service area or in a place where the signal is weak.
・ For details, refer to NTT DOCOMO website.
・ For the application and inquiries, please contact "General Inquiries" on the back cover of this
manual.
Service name
Voice Mail Service
Missed call notice service
Call Waiting
Call Forwarding Service
Nuisance Call Blocking
Caller ID Notification
Caller ID Request
English Guidance
Multi Number
2in1
Public mode (Drive mode)
Public mode (Power OFF)
Melody call
Koe-no-Takuhaibin
46
Application
Required
Not required
Required
Required
Not required
Not required
Not required
Not required
Required
Required
Not required
Not required
Required
Not required
Monthly charge
Charged
Free
Charged
Free
Free
Free
Free
Free
Charged
Charged
Free
Free
Charged
Free
Setting voice mail service
❶ is "TEL function" s "Voice mail service" sSelect an item
Setting call waiting
❶ is "TEL function" s "Other network serv." s "Call waiting"
sSelect an item
Setting call forwarding
Emergency call
Emergency call
Police emergency
Fire brigade/Ambulance emergency
Maritime distress call
Connect
❶ is "TEL function" s "Other network serv." s "Call forwarding"
sSelect an item
Phone number
110
119
118
・ Your FOMA terminal supports "Emergency Location Report". Calls made to emergency service
organizations (e.g. by dialing 110, 119 or 118) disclose information on the caller's location to the
organization receiving the call. The location information may not be correctly sent depending
on the current location or signal quality. The location information and phone number are not
disclosed when, before each individual call made, "184" or another blocking prefix is dialed
first. If the information is deemed necessary for the protection of life, etc., this information may
be acquired by the organization being called. Locations/timing planned for adoption of this
feature vary according to the status of the preparations by the relevant emergency service
organizations.
・ When calling 110, 119 or 118 from the FOMA terminal, first say you are calling from a mobile
phone, give your number, and state your location clearly, because the police or fire department
may call you back for confirmation. Also, do not move around when making the call. Do not turn
off the power immediately after ending the call, but leave it turned on for ten minutes or so, so
that you can receive a call.
・ Depending on the area you are calling from, you may not be connected with the nearest police
or fire department, etc.
47
・ When making a videophone call to 110, 119 or 118 from the FOMA terminal, the call
automatically changes to a voice call.
・ If you make a voice call to an emergency phone number (110, 119, or 118), the following
functions will be disabled and then set again automatically after approximately 5 minutes.
- "Call rejection"/"Call acceptation"
- "Call forwarding"
- "Voice mail"
- "Org. lock(Original Lock)" − "Incoming/Mail disp." − "Incoming call"
- When "Reject unknown" of "Call rejection set." is set to "Reject" (also including
"Secret" − "Incoming call act." − "Alert+Show No.")
- When "Voice mail"/"Call forwarding"/"Call rejection" in "Arrival call act" is set
・ If you make a voice call to an emergency phone number (110, 119, or 118) while "Public mode
(Drive mode)" or "Self mode" is set, the setting will be canceled.
Connect
48
Using overseas
To make calls overseas, use international roaming (WORLD WING).
■ International roaming (WORLD WING) is the service, which enables you to make calls and perform
communication over networks of affiliated overseas operators using the FOMA terminal, phone
number and mail address of your own for Japan, even when you are overseas. Voice calls, SMS and
i-mode mail services are available without any special settings.
■ Supported area
This FOMA terminal is Class 4 and can be used in 3G or GSM/GPRS network service areas. Also it can
be used in countries/regions compatible with 3G850 MHz. Check available areas.
■ Before overseas use, refer to the following:
- "Mobile Phone User's Guide [International Services]"
- DOCOMO "International Services website"
■ Information
・ For a country code, international call access code, universal number international prefix, available
countries and overseas operators, refer to "Mobile Phone User's Guide [International Services]" or
DOCOMO "International Services website".
・ Overseas usage fees (call charge, packet communications charge) differ from those in Japan.
Available services overseas
Main communication services
MyFACE *1
Voice call *2
Videophone call *2
○
○
○
○
○
○
○
○
○
○
GSM/GPRS
○
○
×
○
○
○
○
○
○
○
GSM
×
○
×
○
×
×
×
×
×
×
*1 : "Auto-upd set. roam" setting is required.
Packet communications charges will apply when you automatically update MyFACE content that
was registered at the time of purchase.
When traveling overseas from Japan, "MyFACE auto-update set" is set to "Don't auto-update".
When using auto-update for the first time, select whether or not to auto-update overseas.
*2 : When 2in1 is active, dialing using Number B is not available. Dialing using the additional number
of Multi number is not available.
*3 : When sending an SMS to FOMA terminal user, enter the other party's phone number as in Japan.
*4 : "i-mode overseas use" setting is required.
*5 : "i-channel overseas use" setting is required. Packet communications charges will apply when you
automatically update information on "Basic Channel". (Included in i-channel charges in Japan.)
*6 : Overseas use setting for i-concier is required. Packet communications charges will apply for each
reception of information.
*7 : "i-Widget overseas use" setting is required. When you open the i-Widget screen, multiple Widget
Appli may establish communications. In this case, packet communications charges will apply for
each communication.
Connect
SMS *3
i-mode *4
i-mode mail
i-channel *4 *5
i-concier *6
i-Widget *7
Packet communications via a PC
3G
・Some services are not available depending on the operator or network overseas.
49
Making a call to outside the country you stay in
❶ On the standby screen, 0 (1 second or longer) to enter +
s Country code s Area code (City code) sThe other party's
phone number s r (voice call) / u (V.phone)
❷ After the call ends, y
Connect
・To make an international call to Japan, dial "81" as country code.
・Dial the other party's phone number excluding "0" at the beginning of the area
code (city code). However, to make a call to some countries/areas, such as in
Italy, "0" is required.
Making a call in the country of stay
❶ Area code (City code)sThe other party's phone numbers
r (voice call) / u (V.phone)
❷ After the call ends, y
Making a call to WORLD WING user overseas
When making a call to "WORLD WING" user overseas, make a call as an international
call to Japan (dial "81" (Japan) as the country code), irrespective whether the other
party is in or out of the country you stay.
❶ On the standby screen, 0 (1 second or longer) to enter +
s81sThe other party's mobile phone number excluding
the first "0"sr (voice call) / u (V.phone)
❷ After the call ends, y
50
Mail
Only by subscribing to i-mode, Mail can be exchanged between i-mode
users or anyone who has an Internet e-mail address. You can send up to 10
attachments (images, moving picture files, etc.) of up to 2 MB in addition to
the message (The maximum number of the files varies depending on the
file size). Also, the FOMA terminal is Deco-mail-compatible. By changing
the character size, background color, etc. and using Deco-mail pictograms
in the message, you can compose and send fun, decorative i-mode mail.
i-mode mail enables you to use Decome-Anime, which is Flash movie with
messages and images.
Sending i-mode mail
❶ oso (New mail)sEnter each of the "
<No address>", "
<No subject>", and "
<No message>" items
❷ u (Send)
■ To attach files
On the New mail screen, "
Connect
・ For details on i-mode mail, refer to NTT DOCOMO website.
<Add att. file>"sSelect a file
・The following files can be attached to i-mode mail:
- Still image, image
- SWF Flash movie
- Moving picture, i-motion
- Melody
- PDF data
- Document in a microSD card
- ToruCa, ToruCa (detail)
- Phonebook data
- Profile data
- Schedule or Memo data
- Bookmark
- SD other files in a microSD card
- Movie*
* : Movie can be sent as an attachment file only if it is forwarded.
51
Sending Deco-mail/Decome-Anime
■ Deco-mail
Deco-mail is a service that
a l l ows yo u to d e co rate
i-mode mail by changing
the character color/size and
background color, waving
characters, etc.
■ Decome-Anime
Decome-Anime is a service
that allows you to compose
decorative mail using
animation templates with
Flash movie containing
messages/images.
Sending Deco-mail
Connect
❶ On Message screen, r
❷ b to select a decoration menu, then
compose messagesu (Send)
Sending Decome-Anime
: Change the font color
: Change the font size
: Select an image to insert
: Blink text
: Restore the entered text or
decoration to the previous
etc.
state
❶ os "Create new Deco-Anime" s Enter an address and subject s"
<No
message>"sSelect a Decome-Anime templatesu (Set)
❷ Select the Message field, then edit the text su (Finish) su (Send)
・A template is a form for Deco-mail/Decome-Anime to which the layout and decoration are
already set. Using a template allows you to compose Deco-mail/Decome-Anime easily.
?os "Decome-Template" s "Deco-mail" or "Decome-Anime"
Reading received i-mode mail
When the FOMA terminal is in the service area, the i-mode center automatically sends i-mode mail.
・ When the reception of i-mode mail is completed, "
52
screen, indicating the mail has not been read.
" appears on the standby
❶ os "Inbox" sSelect a foldersSelect an i-mode mail
Replying to i-mode mail
❶ On Received mail list screen/Received mail detail screen u (
sCompose messagesu (Send)
・To quote the received message to reply, press Uu (
)
) for 1 second or longer.
Connect
Checking new i-mode mail
You can receive the i-mode mails and messages stored at the i-mode center by
checking with the center.
❶ On the standby screen, o (1 second or longer)
Sorting i-mode mail
Sort mail into the specified folders by preset criteria such as mail address or subject.
❶ On the Outbox/Inbox folder list screen, highlight the destination
foldersi (Submenu)s "Auto-sort" sSet a sort criteria
Early warning "Area Mail"
■ What is Area Mail?
Area Mail is a service that enables you to receive Early Warnings and tsunami warnings issued by the
Japan Meteorological Agency.
When the FOMA terminal is in the service area, Area Mail is automatically received.
・ A subscription to i-mode is not necessary to receive Area Mail.
・ Area Mail cannot be received regardless of the Receive setting in the following cases:
" is displayed
- During a voice call
- The power is off
- "
- During a videophone call - During international roaming
- In Omakase Lock
- In Self mode
- During infrared communications/iC transmissions
- During Memory refresh process
53
Receiving Area Mail
When you receive Area Mail, a special beep or ring tone sounds and "
the top of the screen.
" appears at
Setting Area Mail
❶ os "Mail setting" s "Area Mail setting" sSelect an item
Using SMS
This service allows you to exchange SMS between mobile phones, or with
subscribers to overseas operators.
Connect
・ For countries and overseas operators, refer to "Mobile Phone User's Guide
[International Services]" or the DOCOMO "International Services website".
Sending SMS
❶ os "Compose new SMS"sEnter each of the "
address>" and "
" itemssu (Send)
<No
・Files such as image files cannot be attached to SMS.
Checking received SMS
Operations to be performed when SMS is received are the same as ones for i-mode mail.
Also, the storage capacity and operations to be performed when the storage capacity
for received mail becomes full are the same as for i-mode mail.
❶ os "Inbox" sSelect a foldersSelect an SMS
Checking new SMS
SMS that the FOMA terminal could not receive are stored at the SMS center. You can
receive the stored SMS by checking with the SMS center.
❶ os "Check new SMS"
54
Phonebook
Adding phonebook entries
FOMA terminal has two types of phonebooks: FOMA terminal phonebook that various functions
can be set to and miniUIM phonebook whose entries are available even in another terminal.
Adding phone numbers, mail addresses, etc.
An entry cannot be stored unless you fill in the "Name" field.
Adding phonebook entries from redial/received calls
Connect
❶ i s "TEL function" s "Phonebook" s "Add to phonebook"
s "Phone" or "UIM" s Enter a name and reading sEnter each
item, then u (Finish)
❶ On Redial/Received calls screen, i (Submenu)s "Add to
phonebook" s "Phone" or "UIM" s "New"sEnter each item,
then u (Finish)
Editing phonebook entries
You can add or edit information in the phonebook, such as phone numbers or mail addresses.
Editing FOMA terminal phonebook entries
❶ On Phonebook detail screen, i (Submenu)s "Edit" sAdd or
edit entriessu (Finish)s "YES"
Deleting phonebook entries
❶ On Phonebook detail screen, i (Submenu)s "Delete" sSelect
an items "YES"
55
i-mode/Full Browser
■ i-mode
Search
56
You can use online services such as i-mode site connection, accessing to Internet, i-mode mail, with
i-mode by using display of i-mode compatible terminal.
・ i-mode requires a subscription and is a fee based service.
・ For details on i-mode, refer to NTT DOCOMO website.
・ Information on i-mode menu sites and Internet websites is generally protected by copyright law.
Text and images downloaded from these sites to i-mode compatible terminals should be for
personal use only and cannot be sold or redistributed in part or as a whole in their original or a
modified form without the copyright holder's permission.
・ If the miniUIM is replaced or the power is turned on with no miniUIM inserted, you cannot display/
play images, movies and melodies downloaded from sites, files attached to mail (images, movies,
melodies, etc.), "Screen memo" and "Message R/F".
・ If a file whose display and playback are restricted by the miniUIM is set as the standby screen
or as a ring tone, the default settings apply if the miniUIM is replaced or the power is turned on
without the miniUIM inserted.
■ Full Browser
Using the Full Browser function, you can view websites designed for PCs.
・ Note that communications charges may be high if large volumes of data are transmitted by
viewing websites containing many image data or downloading files.
・ For details on packet communications charges, refer to NTT DOCOMO website.
・ Up to 1.5 MB per page can be viewed with the Full Browser.
■ " みんな N らんど " (only in Japanese)
Download and save i-αppli, dictionary, Deco-mail template
from the site " みんな N らんど " of iMenu.
・ Select the shortcut icon " "( みんな N らんど)→ p.30
QR code to
・ Pps" メニューリスト " (Menu List)s" ケータイ電話メーカー "
access the site
(Mobile Phone Manufacturer)s" みんな N らんど " (Japanese)
Browsing i-mode site
❶p
http://docomo.xxxx.xxxxx
" " flashes while communicating, and " " flashes while receiving
i-mode services (during i-mode).
❷ Scroll down to the bottom of the iMenu screen to
select "English"
Connected screen
Displaying web pages designed for PC
❶ is "i-mode/web" s "Full Browser Home"
Switching Browsers
When you switch the browser types, note that charge systems are different between i-mode Browser and Full Browser.
■ To switch from Full Browser to i-mode Browser
Site displayed using Full Browsersi (Submenu) s "i-mode Browser" s "Switch to i-mode"
Search
❶ Site or website displayed using i-modesi (Submenu)
s "Full Browser" s "Switch to FB." s "YES" or "YES(default)"
Viewing and operating sites
①
① Tab
②
• Title of the displayed website (if there is no title, the URL appears)
• As many tabs as websites displayed simultaneously
② Scroll bars : Current position in the displayed Full Browser page
③ Displayed while connecting to the Internet with Full Browser
③
Scroll in the direction that
the key is pressed.
Jump to the previous page.
Jump to the next page.
* Press r then o (Page ▲ ) /
p (Page ▼ ) to scroll up or down
by screen.
57
Storing frequently accessed sites
❶ Website displayed using i-mode or Full Browsersi (Submenu)
s "Bookmark" s "Add bookmark" s "OK" sSelect a
folders "OK"
■ To view bookmarked site
is "i-mode/web" s "Bookmark" sSelect a foldersSelect a bookmark
Saving site contents
Search
❶ Website displayed using i-mode or Full Browsersi (Submenu)
s "Screen Memo" s "Save screen memo"s Select a destination
s Select a saving method s "OK"
"YES+Shortcut" and "Disp.+Shortcut" storing methods can only be selected when
the storing destination is set to "Phone".
■ To display a screen memo
is "i-mode/web"s "Screen Memo" sSelect a destinationsSelect a screen memo
・Up to 200 bookmarks can be registered for i-mode and Full Browser.
・Up to 250 screen memos can be stored for i-mode and Full Browser.
・Some pages cannot be saved as screen memos, e.g. if saving is prohibited on the
page.
58
i-channel
i-channel is a news and information service distributed for i-mode subscribers with i-channel
compatible terminals. The ticker on the standby screen shows latest information that is automatically
delivered to your terminal.
"Basic Channel": This channel is distributed by DOCOMO. Packet communications charges do not
apply to automatically update basic channels.
"Okonomi (Optional) Channel": This channel is distributed by information service providers (IP).
Packet communications charges apply to automatically update "Okonomi (Optional) Channel".
* Detailed content will be subject to packet communications charges for both "Basic Channel"
and "Okonomi (Optional) Channel".
* The packet communications charges apply both to automatically update and to view
detailed content when used overseas, and they differ from those in Japan.
* i-channel requires a subscription and is a fee based service (i-mode subscription is required).
・ For details on i-channel, refer to NTT DOCOMO website. The i-channel service is only available in
Japanese.
If you have subscribed to i-channel, the ticker on the standby screen shows
information when it is delivered to your terminal.
Search
Displaying i-channel
❶ On the standby screen, t
59
Map
Viewing map
Start the i-αppli to display a map.
❶ is "Map/Overseas" s "Map"
Setting Map
Select the i-αppli you want to set from the Map Appli list. " 地図アプリ " (Map Appli) is
set by default.
❶ is "Map/Overseas" s "Map setting" s "Select Map"
Search
60
Camera
Viewing and operating shooting screen
Viewing and operating shooting screen
①
②
③
⑫
②
⑬
⑧
⑨
⑩
⑪
④
⑤
⑥
⑦
Photo (still image) shooting screen
① Remaining storage count/Memory info
⑤ Zoom
⑨ Quality
⑬ Shooting status
⑤
①
⑧
⑭
⑮
⑩
⑪ * Description is
⑥
based on a QVGA
sized screen.
⑦
Movie (moving picture) shooting screen
② Save
⑥ Submenu setting status
⑩ White balance
⑭ Sound setting
③ Scene
④ Focus frame
⑦ Key operation guidance ⑧ Display orientation
⑪ Self timer
⑫ Recording time
⑮ Quality
d: Shoot
i: Submenu
p: Activate Medias viewer
g: Auto Focus lock
1: Camera-mode
4: Size
7: ISO sensitivity (Photo) / File size (Movie)
w: Switch Standard/Quick Shot
o: Switch photo/movie shooting
t: Auto Focus lock release
h/j: Zoom (Wide)/Zoom (Tele.)
2: Scene
3: Auto focus
5: Brightness 6: Shake correction
8: Other
9: Show/hide icons
0: Help
q: Switch ISO sensitivity
Enjoy
■ Main key operations
61
Shooting still images/moving pictures
Shooting still images
❶ usFrame the shot, then d (Shoot)sd (Save)
The image is automatically saved when using Quick Shot.
Shooting moving pictures
❶ uso (
)sFrame the shot, then d (Record)sTo stop
shooting, d (Stop)sd (Save)
・Do not leave the camera lens exposed to direct sunlight. Doing so may discolor
or burn the components of the camera.
・If the battery is low, you may not be able to save still images or moving pictures.
Enjoy
62
Viewing still images/moving pictures after shooting
Still images are saved in "My picture", and moving pictures are saved in
"i-motion/movie" under Data box. Still images/moving pictures can be set to
the standby screen, etc.
Viewing still images/moving pictures in Data box
❶ is "Data box" s "My picture" or "i-motion/Movie" s
"Camera" sb to select the still image/moving picture
■ To view image while shooting
On Photo/Movie shooting screen, p (
)
・To set the shot still image to the standby screen, etc., do the following:
On Still image confirmation screen, Ii (Submenu)s "Set display" sSelect the
image to set.
❶ On Photo/Movie shooting screen, i (Submenu)s "Cameramode" sSelect the camera mode
Enjoy
Shooting in various ways
63
1Seg
Using 1Seg
Enjoy
64
1Seg service is provided by broadcasting companies (broadcasters). Communications charges do not
apply to receive video and voice data. For details on NHK receiving fees, contact NHK.
* Packet communications charges apply to view data broadcast site and i-mode site. Information
charges may apply for some sites (i-mode pay sites).
* For 1Seg service details, visit the following website:
The Association for Promotion of Digital Broadcasting (Dpa)
From PC : http://www.dpa.or.jp/english/
i-mode
: http://www.dpa.or.jp/1seg/k/ (in Japanese only)
■ Broadcast waves
1Seg is one of the broadcast services and receives signals (broadcast waves) different from those of FOMA
services. In locations such as the following, the signal reception status may become weak or out of service.
・ Far from the signal tower
・ Hiding behind objects; e.g. in a mountain or building
・ In tunnels, underground areas, and some locations far inside buildings
* The 1Seg antenna is built-in. You may be able to improve reception by keeping the FOMA terminal
away from/close to your body, or moving to another location.
<Caution>
With the ending of analog waves, some channels have been reorganized. For this reason, it may be necessary for you to reset
the channels yourself by automatic setting (p.65). After resetting a channel, be sure to register the setting in the channel list.
For details of the Terrestrial Digital Channel Repack, visit the following website, etc.:
Channel Update Call Center, Consultation Center for Terrestrial Digital Television Broadcast, Ministry
of Internal Affairs and Communications
Tel
: 0120-922-303
From PC : http://www.digisuppo.jp/repack/ (in Japanese only)
i-mode
: http://digisuppo.jp/m/index.php (in Japanese only)
■ Battery
When you activate 1Seg with the low battery, a confirmation screen appears prompting you to select whether
or not to activate 1Seg. When the battery gets low while watching or recording 1Seg, the low-battery alarm tone
sounds, and a confirmation screen appears prompting you to select whether or not to end watching or recording.
・ If "Rec. when low battery" is set to "ON", the low-battery alarm tone does not sound while recording.
・ When no operation is performed on the confirmation screen for approx. 1 minute, 1Seg is
automatically turned off.
■ Display when using 1Seg for the first time
The disclaimer screen appears. When selecting "NO" on a confirmation screen that is displayed by
pressing Xd (OK), the screen will not appear from the next time.
Setting channels
When you use 1Seg for the first time or move to another area, set the channels.
❶ is "CAMERA/TV/MUSIC" s "1Seg" s "Channel setting"
s "Auto channel setting" s "YES" s "YES" sEnter title
■ To select an area and register a channel list
is "CAMERA/TV/MUSIC" s "1Seg" s "Channel setting" s "Select area"
sSelect an area or prefectures "YES"
Watching 1Seg
❶ is "CAMERA/TV/MUSIC"s "1Seg" s "Activate 1Seg"
Viewing and operating watching screen
①
②
③
pressing the key for 1 second or longer while watching, stop recording by pressing
the key while recording movie (Recorded movie is saved in microSD card)
r: Display a program information, switch the display (landscape view only)
Enjoy
1Seg watching
screen
① Video ② Caption ③ Screen status, operation mode, etc.
c: Adjust the volume
v: Select the channel in order
t: Mute
0 to 9, q, w: One-touch channel selection
d: Record still image by pressing the key while watching, start movie recording by
Setting timer watching or recording 1Seg
❶ is"CAMERA/TV/MUSIC"s"1Seg"s"TV timer list" or "Timer
recording list"su (New)sEnter each itemsu (Finish)
Playing recorded video
❶ is "Data box" s "1Seg" s "Video" sSelect a video file
65
Music
Playing music data
You can play Chaku-Uta-Full® downloaded with i-mode Browser or Full
Browser, as well as WMA data (without DRM).
・ For details on WMA data, refer to " 使いかたガイド " (Guide) (Japanese).
is " 便 利 ツ ー ル " s " 使 い か た ガ イ ド " s " 機 能 一 覧 検 索 " s " カ メ ラ / TV /
MUSIC" s " ミュージックプレーヤー " s " 再生できる音楽データ " s "WMA データ
について "
* " 使いかたガイド " (Guide) is not available when "English" is set for "Select language".
・ You can enjoy music by copying WMA data (without DRM) from your PC to the
"PRIVATE/NEC/MUSIC" folder on a microSD card.
❶ is "CAMERA/TV/MUSIC" s "MUSIC Player" s "All music"
s Select a track
・Some programs/tracks have playback restrictions. "
Enjoy
66
" or " "appears at the
beginning of the title for the program/track with restrictions on the play count, period
or time limit. The program/track whose playback period is restricted cannot be played
before or after the period.
・If the battery pack is removed for a long period, the date and time stored on the
FOMA terminal may be reset. In this case, the program/track whose playback period
or time limit is restricted cannot be played.
・You cannot download Chaku-Uta-Full® whose size exceeds 5 MB or Chaku-Uta-Full®
whose size is unknown.
Viewing and operating MUSIC Player screen
①
②
③
④
⑤
①
②
③
④
⑤
⑥
⑦
⑧
Image
Track
Title
Artist name
Elapsed time (minutes : seconds)/Total playback
time (minutes : seconds)
⑥ Repeat status/Sound quality (Equalizer), etc.
⑦ Sound effect applied
⑧ Volume (Level 0 to 25)
d: Pause/Resume playback
c: Adjust volume
h: Playback from the beginning of the track. Play the previous track by pressing the key
within 3 seconds from the beginning of the track
Enjoy
j: Play the next track
h (1 second or longer) : Skip backward
j (1 second or longer) : Skip forward
u: Stop
o: Display music list
p: BGM playback
67
i-αppli/i-Widget
i-αppli are software applications that run on i-mode compatible terminals. You can automatically receive
updated stock prices, weather information, etc., and play games without being connected to the network,
by downloading i-αppli from i-mode sites. The FOMA terminal also supports i-αppli online which allows
you to make online communication with multiple users, using real-time communication and i-αppli call.
You can enjoy versus games, chat application, etc. Some i-αppli programs are available for i-Widget.
・ Communication charges may apply depending on the i-αppli.
i-Widget is a convenient function that allows you to access frequently used content and tools (Widget
Appli) such as calculator, clock, memo, and stock price information. You can paste multiple Widget Appli (up
to 8) on the i-Widget screen and enjoy multiple applications at a time just by displaying the i-Widget screen.
If you select a desired Widget Appli, you can also obtain more detailed information. You can add
Widget Appli by downloading from sites.
・ When i-Widget screen is displayed, multiple Widget Appli may be connected to network.
・ Detailed content will be subject to packet communications charges.
・ For details on i-αppli and i-Widget, refer to NTT DOCOMO website.
Packet communications charges incurred overseas differ from those in Japan.
Activating i-αppli
❶ On the standby screen, p (1 second or longer)sSelect a software
Enjoy
Downloading applications from sites
You can download i-αppli whose size is up to approx. 10 MB and Widget Appli from i-mode sites.
❶ Select an application from an i-αppli/Widget Appli downloadable site s "YES"
・Up to 200 applications can be stored for i-αppli and Widget Appli.
Activating Widget Appli
❶ On the standby screen, f (1 second or longer)sSelect a Widget Appli
68
i-motion/Movie
i-motion/Movie
i-motion is sounds, moving pictures, etc. Download i-motion from i-motion-downloadable sites to the FOMA terminal.
You can download and play various movies provided on websites such as portal sites or moving picture sites.
* When downloading/streaming movies, the received file size may become very large. Note that packet
communications charges may be high when large files such as streaming type with no file size restriction are received.
・ For details on packet communications charges and billing plans, refer to NTT DOCOMO website.
Downloading i-motion/movie
❶ Select i-motion or movie from an i-motion-downloadable site sWhen the
i-motion or movie can be saved, "Save" s "YES"s Select a folder
■ Download type
・Streaming type: When i-motion/movie download starts, the playback starts simultaneously.
・Standard type (Download type): When data download is finished, the "Download" screen appears,
Playing i-motion/movie
Enjoy
prompting you to select an option such as to play back or to save.
❶ is "Data box" s "i-motion/Movie" sSelect a foldersSelect a movie
■ License (WMDRM (Windows Media digital rights management))
・Movies protected by license cannot be played (Windows Media DRM10 is not
supported).
69
Osaifu-Keitai
Osaifu-Keitai/ToruCa
More Convenient
70
■ Osaifu-Keitai
Osaifu-Keitai allows you to use "Osaifu-Keitai services" in which you can make payments or use
coupons by holding the FOMA terminal over a reader in a shop, and "Kazashite-Link services" in
which you can access site information and other information by holding the FOMA terminal over a
reader.
You can check e-money received or balance and remaining points, and use the Omakase Lock and IC
card lock as a preventive measure in case of theft or loss.
For details on Osaifu-Keitai, refer to NTT DOCOMO website.
* To use the Osaifu-Keitai services, download Osaifu-Keitai i-appli from the Osaifu-Keitai site*1
and make the settings, or make the settings on the Osaifu-Keitai site*1.
*1: Pps" メニューリスト (Menu List)"s"【生活情報】おサイフケータイ (Osaifu-Keitai)" (Japanese)
・ Data (including e-money and points) stored in the IC card may happen to be erased or altered due
to the malfunction of the FOMA terminal. (As a general rule, data should be deleted by the owner
itself before undergoing repairs because the FOMA terminal cannot be kept for repair if it has data
in it.) For supports such as reissue or restore of data or temporary keeping or transferring data,
contact the Osaifu-Keitai service provider. For important data, please be sure to use the OsaifuKeitai service supporting the backup service.
・ Please be aware that DOCOMO is not responsible for loss or alteration of the IC card data, any
monetary losses incurred while using Osaifu-Keitai services under any circumstance such as
malfunction or changing your model.
・ If your FOMA terminal is stolen or lost, contact the Osaifu-Keitai service provider immediately and
seek for advice.
■ ToruCa
ToruCa is an electronic card that can be captured with the FOMA terminal, and you can conveniently
utilize it with application of flyers, restaurant cards, coupons, etc. ToruCa can be obtained from the
reader, websites, or data broadcast, etc., and you can readily trade items through mail, infrared
communication, iC transmission and a microSD card.
・ The captured ToruCa is saved in "ToruCa" of "Osaifu-Keitai".
・ For details on ToruCa, refer to NTT DOCOMO website.
Using Osaifu-Keitai
By holding the e mark printed on the FOMA terminal over the reader unit,
you can make payments with e-money or utilize as tickets.
・ Even when the power is turned off, or the battery
is running out, the IC card function is available by
holding the e mark over the reader.
Hold the e mark over
the reader unit
More Convenient
71
i-concier
i-concier
i-concier helps you in your daily life using a character that acts just like a butler (concierge). The service keeps
your data (living area, memos, schedules, ToruCa, Phonebook, etc.), and information is delivered timely to
your mobile phone according to the content of memos and schedules, your living area, location and interests.
Information related to the memos, schedules, and ToDo lists in your FOMA terminal is delivered, schedule
information and ToruCa in the FOMA terminal are automatically updated to the latest, and useful information
such as shop hours is automatically added to the Phonebook. Also, you can share schedules and images in
certain groups such as your friends, family, etc. You can easily print Images kept by i-concier. Machi-chara (a
character on the standby screen) gives you i-concier information on the standby screen.
i-concier is only available in Japanese.
■ Notes on using i-concier
・ i-concier requires a subscription and is a fee based service (i-mode subscription is required).
・ A non-subscriber to Data Security Service will be the subscriber to Data Security Service at the
same time when subscribing to i-concier.
・ In addition to i-concier monthly charges, separate information charges may apply depending on
the content (information, i-schedule, etc.).
・ Packet communications charges apply to receive information except some types of information.
・ Detailed content will be subject to packet communications charges.
・ During international roaming, packet communications charges apply both to receive information and
to view detailed content. Packet communications charges incurred overseas differ from those in Japan.
・ To use i-concier overseas, overseas use setting for i-concier is required.
・ Packet communications charges apply to automatically update i-schedule/Memo/ToruCa/Phonebook, etc.
・ For details on i-concier, refer to NTT DOCOMO website.
More Convenient
Receiving information
When you receive information, "
the top of the screen.
Icon
" appears at
❶ On the standby screens Select a pop up message
Displaying i-concier
72
❶ is "i-concier"
Pop up
message
" ひつじのしつじくん ® (Butler Sheep)"
©NTT DOCOMO
Convenient Tools
Using Shabette-Kensaku
Say the keyword in Japanese to use i-mode search.
❶ i s "Tool" s "Shabette-Kensaku"
When using for the first time, select "Use" on the usage guide screen.
❷ Within 10 seconds, say the keyword into the mouthpiece/microphone when
the vibrator vibrates and "Speak keyword in Japanese" appears s d (Fix)
When silence continues for approximately 2 seconds, voice entering automatically ends even if d [Fix]
is not pressed, and search starts. The vibrator vibrates and the i-mode search results screen is displayed.
・Speak clearly at natural conversation speed.
・Recognition results may vary depending on factors such as your surroundings and the way you speak.
・Packet communications charges apply to use.
Using Voice quick start
From the standby screen, you can activate and execute a function by voice. This function is convenient when you
do not know under which menu the required function belongs to, or when you want to activate a function quickly.
* Voice quick start is not available when "English" is set for "Select language".
・If the function cannot be determined, search for a candidate in " 使いかたガイド " (Guide) (Japanese).
・Speak clearly at natural conversation speed.
・Recognition results may vary depending on factors such as your surroundings and the way you speak.
More Convenient
・ When using for the first time, select " 利用する " (Use) on the usage guide screen or press u ( 開始 ) (Start).
❶ On the standby screen, r (1 second or longer) s Within 10 seconds,
say the keyword for the function into the mouthpiece/microphone
when " それではどうぞ ★★音声受付中★★ " (Say the keyword) appears
73
Using schedule
Save a schedule to notify you of the saved content with an alarm sounding at
the specified date and time, a message and animation appearing.
❶ is "Tool" s "Schedule" sSelect the date si (Submenu)
s "New" sEnter each itemsu (Finish)
Using alarm
❶ is"Tool"s"Alarm"sSelect an alarmsu (Edit)sEnter each
itemsu (Finish)
Using Bar code reader
Use the camera to scan JAN code or QR code.
・Hold the FOMA terminal firmly to avoid shaking during scanning.
・When scanning bar codes, use the camera approx. 10 cm away from the bar code.
❶ is "Tool" s "Bar code reader"sWhen the bar code is displayed
in the recognition field, scanning starts automaticallys
i (Submenu) s "Store" s "YES" s "OK"
More Convenient
74
Data Management
Using microSD card
This FOMA terminal supports commercially available microSD cards of up to 2 GB and
microSDHC cards of up to 32 GB (as of November, 2013).
・ Make sure to format microSD card on N-01F. You may not be able to use microSD card
formatted on another terminal or PC.
・ Visit the following website for the latest information about supported microSD cards such
as manufacturers or capacity. Contact the microSD card manufacturer for any microSD cards
that are not listed on the website.
- From i-mode (to access " みんな N らんど ")
• Select the shortcut icon " "( みんな N らんど)→ p.30
• Pps" メニューリスト " (Menu List)s" ケータイ電話メーカー " (Mobile Phone
Manufacturer)s" みんな N らんど " (Japanese)
- From PC
http://www.n-keitai.com/guide/faq/ (in Japanese only)
(Select the model name on the " よくある質問 " (FAQ) page and then select " データ管理 "
(Data Management).)
Note that information described on the website is only the result of the operation check
and does not guarantee all operations.
・ Turn off the power before inserting or removing a microSD card.
・ Do not put a label or sticker on a microSD card.
・ Keep a backup copy of data stored in a microSD card. Please be aware that DOCOMO is not
responsible for any damages the subscriber may incur due to the card data being deleted,
erased, or altered.
Do not touch the metal contacts of the FOMA terminal when lifting the holder up. Do
not apply excessive force to the holder when sliding it (you could damage the holder
or hurt your hand or fingers).
More Convenient
Inserting/removing microSD card
❶ Remove the back cover
❷ Slide the metal holder in the direction of arrow "OPEN" and lift it up
75
❸ Insert the microSD card straight and slowly along the rails
with the metal contacts facing you
To remove the microSD card, hold the microSD card and
slowly pull it out along the rails.
❹ Close the metal holder and slide it in the direction of arrow
"LOCK" to lock
If the holder does not close properly, lift the holder up
and make sure that the microSD card has been properly
inserted along the rails and inserted deep enough.
❺ Attach the back cover
When you turn on the power after inserting the microSD
card, " " appears.
Rail
Rail
Metal contacts of the
microSD card
Formatting microSD card
Note that all data in the microSD card will be deleted when you format it.
❶ is "Tool" s "microSD" s "Refer microSD data" s
i (Submenu)s "microSD format"sEnter your security code
s "YES"
Viewing data in microSD card
More Convenient
76
<Example: To display phonebook>
❶ is "Tool" s "microSD" s "Refer microSD data" s
"Phonebook" sSelect a filesSelect data
Copying data to microSD card
<Example: To copy a phonebook to the microSD card>
❶ On Phonebook list screen, i (Submenu) s"Copy data" s "Copy
to microSD" sSelect a copying method
Copying data to FOMA terminal
<Example: To copy a phonebook to the FOMA terminal>
❶ i s "Tool" s "microSD" s "Refer microSD data" s
"Phonebook" s Highlight a file s i (Submenu)s "Add to
phone" or "OVR to phone" sSelect a copying methods Enter
your security codes "YES"
Backing up data to microSD card
Note that, if backup data exists in the microSD card, the data will be overwritten.
❶ is "Tool" s "microSD" s "Backup/Restore"
s "Backup to microSD" sEnter your security codes "YES"
Sending/receiving data by infrared communication
Exchange data such as phonebook entries and received mail
with other devices equipped with the infrared communication.
Infrared data port
・ Set the other party's device to receiving status.
・ You may not be able to transfer data depending on the other
party's device.
・ This FOMA terminal conforms to the IrMC™1.1 standard.
■ To send one data item
Within ±15°
from
the center
❶ On the screen of the data to send, i (Submenu)
s "Send data"s "Send Ir data"
❷ Direct the infrared data port toward the infrared data port of the other
party's devicess "YES"
More Convenient
<Example: To send one phonebook data>
Approx.
20cm or less
■ To receive one data item
is "Tool" s "Receive Ir data" s "Receive" s Direct the infrared data port toward
the infrared data port of the other party's device s Upon completion of reception, "YES"
77
Sending/receiving data by iC transmission
iC transmission is a function that allows you to send or receive data such as phonebook
entries to or from other FOMA terminals just by overlapping the FOMA terminals.
・ You may not be able to transfer data depending on the other party's device.
■ To send one data item
<Example: To send one phonebook data>
❶ On the screen of the data to send, i (Submenu)s"Send
data"s"iC transmission"
❷ Put your e mark close to the other party's FOMA
terminals "YES"
■ To receive one data item
Put your e mark close to the other party's FOMA terminal sPerform data transmission on the other party's FOMA terminal
Connecting to a PC
You can transfer WMA data, images, etc. to/from a microSD card by connecting the FOMA
terminal to a PC. Also, you can perform data communication by accessing to Internet.
・The FOMA USB Cable with Charge Function 02 (optional) or FOMA USB Cable (optional) is required.
・To transfer data, you need to install the "FOMA communication setting file" (driver). For
More Convenient
details, refer to the "Manual for PC Connection". "FOMA communication setting file"
(driver) and "Manual for PC Connection" can be downloaded from NTT DOCOMO website.
http://www.nttdocomo.co.jp/english/support/
DOCOMO Connection Manager
"DOCOMO Connection Manager" is a useful software for performing DOCOMO data communications.
・ "DOCOMO Connection Manager" enables simplification of appropriate setting on PC
78
depending on the subscription. The fare counter function is also available for checking an
indication of the data traffic or usage amount. For details, refer to NTT DOCOMO website.
http://www.nttdocomo.co.jp/support/utilization/application/service/connection_manager/
(in Japanese only)
Support
Troubleshooting
・ Check if your FOMA terminal needs an update, and if necessary, update the required
software. ( → p.84)
・ If you are still unable to identify the problem after checking the points, please contact "Repairs"
on the back cover of this manual (in Japanese only) or a repair counter specified by DOCOMO.
The power will not turn on
● Is the battery pack properly attached? → p.20
● Has the battery run out? → p.21
Cannot charge the battery (The charge lamp flashes/does not light up)
● Is the battery pack properly attached? → p.20
● Is the adapter or cigarette lighter plug correctly plugged into the power outlet or
cigarette lighter socket? → p.21
● Are the adapter and the FOMA terminal correctly connected? (Is the AC adapter
(optional) firmly connected to the FOMA terminal or the provided desktop holder?)
→ p.21
● Are the charging terminals of the FOMA terminal soiled when the desktop holder is
used? When soiled, wipe with dry cotton swab. → p.21
● The temperature of the FOMA terminal may rise and the charge lamp may turn off
with the battery icon flashing if used for a long time while being charged. In this
case, wait for the temperature to go down, then charge again. → p.21
● Charging may interrupt depending on the usage condition. Exit all running
functions and then charge again.
1Seg programs for a long time while charging, the temperature of the FOMA terminal,
battery pack or adapter may rise. There will be no problem with operation. Keep using it.
Others
The FOMA terminal becomes hot during operation/battery charge
● During operation, during battery charge, or if you use i-αppli or videophone or watch
79
Battery life is very short
● Is the FOMA terminal left outside the service area for a long time?
In a place outside the service area, the terminal searches the radio waves for
communication and the battery is consumed more quickly.
● The available operating time of the battery pack depends on the conditions of
usage and degraded degree of battery pack.
● The battery pack is consumable. The operation time for battery packs steadily decreases
with each charge. When the operating time has become extremely short even though
the battery pack has been fully recharged, please purchase a new battery pack.
The power is turned off or turned back on suddenly
● Soiled terminals of the battery pack may result in poor connections and loss of
power. When soiled, wipe with dry cotton swab.
Key operations are not available
● If you bring the FOMA terminal near magnetic products, you may not be able to perform
correct key operations. Keep the FOMA terminal away from magnetism.
● Is Dial lock/Omakase Lock set? → p.40
● Is Auto-key lock set? → p.40
● Is "Side key guard" set to "ON"?
A miniUIM cannot be recognized
● Is the miniUIM inserted correctly into your FOMA terminal? → p.20
Clock shows wrong time
● Clock may show wrong time if you leave the power on for a long period of time.
Others
80
Confirm that Auto time adjust is set, then reboot the power at a location with good
signal quality.
Cannot make a call by pressing the dial keys
●
●
●
●
●
Is Original Lock for "Keypad dial" under "Dial/sending mail" set? → p.40
Is Auto-key lock set? → p.40
Is Restrict dialing set?
Is Dial lock set? → p.40
Is Self mode set?
Calls cannot be made or received (" " does not disappear even after you move. /
You cannot make or receive calls despite the signal strength is enough.)
● Reboot the power, or remove the battery pack or miniUIM then insert it again.
● Depending on the signal quality, you may not be able to make or receive calls even
if the signal strength icon shows " " – " ". Move to another location and try again.
● Is Call rejection, Call acceptation, or another restriction applied?
● Depending on the network congestion, you may have difficulty talking or mailing
in crowded places. In this case, you see the message "Please wait" and hear the busy
tone. Move to a location and try again, or perform the operation later.
Still images or movies shot with the camera look blurred
●
●
●
●
Is the camera lens cloudy or dirty?
When shooting a subject close-up , set Auto focus to "Close-up".
Is Shake correction set to "OFF"?
Is Auto focus set to "OFF"?
Osaifu-Keitai cannot be used
● When the battery pack is removed or Omakase Lock is set, the IC card function
cannot be used regardless of the IC card lock setting.
● Have you activated IC card lock or Dial lock?
● Are you holding the e mark of the FOMA terminal over a reader unit?
Others
81
Warranty and After-Sales Service
Warranty
・ Make sure that a warranty is included when you purchase the FOMA terminal. Check the
content, information about " 販売店名・お買い上げ日 " (the shop, date of purchase), etc.
Keep the warranty card in a safe place. If the warranty card does not contain necessary
information, immediately contact the shop and request them to fill in the card. The
warranty is valid for one year from the date of purchase written on the warranty.
・ The product in whole or in part, including its accessories, is subject to improvement without notice.
After-sales service
● If your FOMA terminal needs repairs
Others
Before having your FOMA terminal repaired, see "Troubleshooting" in this manual or in
" 使 い か た ガ イ ド " (Guide) (Japanese) that is installed in FOMA terminal. If you still have
problems, please contact "Repairs" on the back cover of this manual (in Japanese only).
● If, after contacting DOCOMO, you are informed that your FOMA terminal needs repairs
Bring it to a repair counter specified by DOCOMO. The repair counter is only open
during business hours. Depending on the malfunction, repairs may take some time.
・ Within the warranty period
- Repairs will be made free of charge based on the provisions of the warranty.
- Bring the warranty card when requesting repairs. Charges will apply even when the FOMA
terminal is still under warranty if the warranty card is not submitted, or if malfunction or
damage (damage on the display, connector, etc.) is the result of mishandling by the subscriber.
- Charges will apply even within the warranty period for repairs resulting from use of
devices and accessories not specified by DOCOMO.
・ Repairs may not be possible in the following circumstances:
- The repair counter detects water exposure (Example: the water exposure detection sticker detects water exposure)
- Tests determine that corrosion has occurred due to water exposure, condensation,
perspiration, etc. or the circuit board has been damaged or altered (the external connector
terminal (earphone/microphone terminal), display, case, etc. has been damaged)
* These cases are not covered by the warranty, and any repairs that may be possible
will be carried out at the subscriber's expense.
・ After the warranty has expired
Repairs can be carried out upon request but at the subscriber's expense.
・ Stock period of parts
Functional parts (required to maintain phone operation) will be kept in stock for a minimum
of 4 years after the product is discontinued. Depending on the malfunction, parts shortage
and other conditions may mean that the FOMA terminal cannot be repaired.
82
Important
● Do not attempt to modify the FOMA terminal or accessories.
・ Requests for repair of the modified FOMA terminal may be rejected. The following
may be regarded as modifications:
- Put stickers, etc. on the display or keys
- Decorate the FOMA terminal using adhesives, etc.
- Replace the external parts, etc. with non-DOCOMO components
・ If malfunction or damage occurs as a result of modification, charges will apply even if
the FOMA terminal is still under warranty.
● Do not remove the manufacturer's specification sticker put on the FOMA terminal.
If the content of the sticker cannot be confirmed, determination of whether technical
standard is satisfied cannot be made. Thus, requests for repair may be rejected.
● The settings of the functions may be cleared (reset) due to the damage, repair or
improper use of the FOMA terminal. In this case, configure the settings again.
● Magnetic components are used for the following parts of the FOMA terminal. A
cash card (ATM card, bank card), etc. which is easily affected by magnetism, may
become unusable if it is kept close to the components:
Parts: speaker, earpiece and u key areas
● This FOMA terminal is waterproof. However, if any internal part of your FOMA
terminal gets wet or moist, immediately turn the power off, remove the battery
pack, and bring the FOMA terminal to a repair counter as soon as possible. Note
that repairs may not be possible depending on the condition.
Error info send set.
If an error occurs with the FOMA terminal, select whether or not to send the
recorded error information to DOCOMO.
・ Even if an error occurs, it may not be recorded depending on the type of error.
・ The recorded information is sent to DOCOMO at night.
・ Packet communications charges do not apply to sending error information.
・ The sent information does not include information that will identify the sender.
Others
❶ i s "Setting" s "Other setting" s "Error info send set."
s Enter your security code s "ON" or "OFF"
83
i-mode fault diagnosis site
The service lets you check if your FOMA terminal's i-mode is working correctly for
operations such as sending/receiving mail, and downloading images/ring tones.
When there seems to be a malfunction as a result of checking, please contact
"Repairs" on the back cover of this manual (in Japanese only).
■ Connecting to "i-mode fault diagnosis site" (Japanese)
ps" お客様サポート " (User support) s " お問い合わせ " (Inquiries)
s " 故障・電波状況お問い合わせ先 " (Inquiries for fault/signal quality)
s " iモード故障診断 " (i-mode fault diagnosis)
・ Charges will apply if using the service overseas.
QR code to access the site
Updating software
Others
84
This function establishes a network connection and checks whether the FOMA terminal software needs
to be updated. If update is required, this function downloads a part of software by packet communication
and then updates the software. When software update is required, the information can be viewed on the
NTT DOCOMO websites or in " お客様サポート " (User support) (in Japanese only) of iMenu. Software may
be updated in the following three methods : "Auto-update", "Now update" and "Reserved update".
* It is possible to perform software updates while keeping your Phonebook entries, camera
images, downloaded data and other data saved on the FOMA terminal intact. However, note
that in some cases data cannot be protected depending on the condition of your FOMA terminal
(malfunction, damage, water exposure, etc.). It is recommended that you back up necessary data.
Please note that it may not be possible to back up some data such as downloaded data.
■ Note
・ Never remove the battery pack while updating software. Doing so may cause the update to fail.
・ Charge the battery fully before updating software.
・ Software updates (downloading and rewriting) may take time.
・ While software is being updated, functions such as making calls, receiving calls or communication
functions, and other functions are not available (While downloading, voice calls can be answered).
・ It is recommended that you perform software updates when the FOMA terminal is stationary and in
a location with good signal quality (three bars for the antenna icon). If the reception becomes poor
and then the download is interrupted, try to update again in a location with good signal quality.
・ When software is updated, the unique information (model, serial number, etc.) of your FOMA
terminal is automatically transmitted to the server at DOCOMO. We do not use the transmitted
information for any purposes other than Software Update.
・ If the update fails, the message "Rewrite failed" will appear and all operations will become
unavailable. In this case, please seek advice at a repair counter specified by DOCOMO.
Running software update by selecting the icon
Select the icon
(Update icon) on the standby screen to update software.
❶ Select the Update icon s "Yes" sEnter your security code
Your FOMA terminal is checked if it needs an update.
❷ The check result appears
■ When "Update is needed" appears
To download the software immediately, select "Now update". To update later, select
"Reserve" and then specify the date and time to update.
■ When "No update is needed Please continue to use as before" appears
Continue using the FOMA terminal.
Running software update from the menu
Update Software from the main menu.
❶ is "Setting" s "Other setting" s "Software Update"
❷ Enter your security codes "Update"
Your FOMA terminal is checked if it needs an update. Go to step 2 in "Running software update by selecting the icon".
Scanning function
This function detects data and programs that are imported to the FOMA terminal, and deletes data
or stops launching applications that could cause some fault.
・ The Scanning function prevents the data that causes some fault from invading your FOMA
terminal when viewing websites or receiving mail. If pattern data for a failure is not downloaded
to the FOMA terminal, or if pattern data for certain failure does not exist, it may be impossible to
delete the harmful data using this function.
Updating pattern data
❶ is "Setting" s "Lock/Security" s "Scanning function"
s "Update" s "YES" s "YES" s "OK"
Others
First, update the pattern data to the latest pattern data.
85
Scanning results display
■ Scanned problems display
Following problems
were detected
Problem element1
Problem element2
Problem element3
Problem element4
Problem element5
Other:xxxx
A list of up to 5 problems detected by the Scanning function appears,
starting with the highest-level problem.
If 6 or more problems are detected, the names of the 6th and
subsequent problems are omitted.
Return
■ Scanning results display
Warning level 0
Warning level 1
Warning level 2
Warning level 3
Warning level 4
Operation may not
run properly
Operation may not
run properly
Cancel operation?
Operation may not
run properly
Canceling operation
Operation may not
run properly
Delete data?
Operation may not
run properly
Deleting data
(OK) : Continue
the operation
Others
86
(YES) : Stop and cancel
the operation
(NO) : Continue the
operation
(OK) : Stop
and cancel the
operation
(YES) : Delete the data and
cancel the operation
(NO) : Stop and cancel the
operation
(OK) : Delete the
data and cancel
the operation
Options and related devices
By combining various options and accessories sold separately, your FOMA
terminal can support a wide range of applications to meet both your
personal and professional needs. Note that some products may not be
available depending on the area you are in.
For more information, contact a docomo Shop or Service Counter. For
details of options and accessories, refer to relevant User's Manual.
・ Earphone/Microphone 01
・ Stereo Earphone/Microphone 01
・ Earphone Plug Adapter 01
・ Earphone/Microphone with Switch
P001*1/P002*1
・ Stereo Earphone Set P001*1
・ Earphone Plug Adapter P001*2
・ Flat-plug Earphone/Microphone with
Switch P01*2/P02*2
・ Flat-plug Stereo Earphone Set P01*2
・ Earphone Terminal P001*1
・ Bone conduction microphone/
receiver 01*2
・ FOMA USB Cable*3
・ FOMA AC Adapter 01*4/02*4
・ FOMA Dry Battery Adapter 01
・ Carry Case L 01
・ Carry Case 02
・ FOMA USB Cable with Charge Function 02*3
・ FOMA Portable Charging Adapter
01/02/03
・ In-Car Hands-Free Kit 01*5
・ FOMA In-Car Hands-Free Cable 01
・ Data Communications Adapter N01
・ FOMA Indoor Booster Antenna*6
・ FOMA Indoor Booster Antenna (Stand Type)*6
・ In-Car Holder 01*7
・ FOMA AC Adapter 01 for Global use*4
・ FOMA DC Adapter 01/02
・ Earphone Plug Adapter 01 for External
connector terminal
・ Desktop Holder N45
・ Battery Pack N30
・ Back Cover N67
・ FOMAeco Solar Panel 01
Others
*1: To connect to N-01F, the Earphone Plug Adapter P001 or Earphone Plug Adapter 01 for External
connector terminal is required.
*2: To connect to N-01F, the Earphone Plug Adapter 01 for External connector terminal is required.
*3: May not work correctly when connected to a USB HUB.
*4: Charging with the AC adapter → p.21
*5: To charge N-01F, the FOMA In-Car Hands-Free Cable 01 is required.
*6: Use in Japan only.
*7: To attach N-01F to the In-Car Holder, attach to the 5th position shown in ② listed in "In-Car
Holder 01 Manual".
87
Appendix
Menu list
settings are reset to default by "Reset settings".
・ Some functions that cannot be reset to default settings (or default states) may be included in
settings.
Main item
Sub item
Mail
Others
88
Branch item
Inbox
Outbox
Draft
Mail history box
Compose new message
Create new Deco-Anime
Decome-Template
Compose new SMS
Check mail/message
Check new SMS
Receive option
Mail setting
Receive setting
Display setting
Signature setting
Phrases/Store
word
Mail box lock
Set check mail/
message
Reply format setting
Blog/Mail group
Address/Spam
Mail Set.
Auto save setting
Read out setting
Emotion/Keyword
SMS setting
Area Mail setting
Check settings
Reset
Main item
mode/web
ppli
Sub item
Branch item
Menu/Search
Bookmark
Screen Memo
Browsing history
Enter URL
Enter URL
URL enter history
i-Channel
i-Channel list
Ticker display setting
Reset i-Channel
mode/web setting mode Browser Set.
Full Browser Settings
Common Settings
Confirm mode setting
Reset mode setting
One-touch mlt win.
Full Browser Home
Software list(phone)
ppli(microSD)
i- ppli call logs
ppli run info
ppli setting Auto-start setting
Disp. software info
i-Widget
overseas use
i-Widget sound
effect
i- ppli call settings
ppli volume
Preferred tone
Backlight
Main item
ppli
CAMERA/TV/
MUSIC
Sub item
ppli setting
Camera
1Seg
Data box
Tool
Branch item
Power saver
Vibrator
Check settings
Still image shooting
Movie shooting
Art photo mode
Bar code reader
Medias viewer
Activate 1Seg
Program guide
TV timer list
Timer recording list
Recording result
TVlink
Channel list
Channel setting
User setting
TEL function
Sub item
Branch item
Dictionary
Data Security Service
Guide
Life history viewer
Voice announce
Voice recorder
Common phrases
Phrases/Store
word
Store word
Download dictionary
Voice quick start
Shabette-Kensaku
Contact DOCOMO
Phonebook
Search phonebook
Add to phonebook
UIM operation
Phonebook set./
Check
Forwarding image
Rec. msg./Voice Play/Delete msg.
memo
Play/Delete VP
msg.
Record voice memo
Record message
setting
Dialed/Received Dialed calls
call
Received calls
Redial
Nuis. call blocking
Dial/Receive
setting
Caller ID request
Caller ID notification
Arrival call act
Dial call setting
Receive call setting
In-call setting
Headset
function set.
Call rejection set.
Missed call notice
Visual preference
Videophone
setting
Select image
Others
MUSIC Player
My picture
MUSIC
motion/Movie
Melody
Content package
My document
Kisekae Tool
Machi-chara
Chara-den
1Seg
Document viewer
Font
SD other files
Search all history
Bar code reader
Calculator
Alarm
Receive Ir data
Schedule
Memo
Medias viewer
microSD
Main item
Tool
89
Main item
TEL function
Setting
Others
90
Sub item
Branch item
Auto redial as voice
Ntfy switch-mode
Hands-free switch
V.phone while
packet
Call duration/
Call duration/
charge
charge
Notify cost limit
Reset total
Auto reset
DisasterVoiceMessaging
Koe-no-Takuhaibin
2in1
Melody call
Voice mail service
Other network Call forwarding
serv.
Call waiting
English guidance
Remote access
Multi Number
Additional service
Choku-Den
Screen/Display Kisekae Tool setting
Stand-by display
MyFACE setting
Color theme
setting
Each display
setting
Sub-display
setting
Machi-chara setting
Soft key
Original menu
Menu display set
Viewer settings
Icons
Icons setting
Privacy angle
Image display mode
Quick Info setting
Videophone
setting
Main item
Setting
Sub item
Screen/Display
Branch item
Information
display
Sound/Vib./
Ring volume
Manner
Select ring tone
Other sound setting
Vibrator setting
Manner mode
setting
Machi-chara
chat set.
Backlight/Illum. Backlight
Illumination setting
Text display/
Font
input
Character input set
バイリンガル
Time
Lock/Security
Battery
External
connection
Other setting
(Select language)
Set main time
Sub clock setting
Clock display
Auto power ON
Auto power OFF
Lock
Auto-key lock
Secret
Call rejection set.
Change security
code
UIM setting
Scanning function
IC card lock setting
eco mode
eco mode autostart
Battery level
USB mode
Headset microphone
Femtocell
Side key guard
Set assigned
function
Alarm setting
Main item
Setting
Map/Overseas
Branch item
Self mode
Memory refresh
Reset settings
Initialize
Software Update
Error info send set.
Quick search URL
Map
imadoco search imadoco kantan
search
imadoco search
i-area
Map setting
3G/GSM setting
Overseas NW
search
Network search
setting
PLMN setting
Display operator
name
Display area status
Re-search icon
set.
Overseas setting Inquiries(overseas)
Sub clock setting
Bar incoming
when roam
Missed call notice
Roaming
guidance
Int'l dial
assistance
mode service
set.
Mail/Message
usage set
Network service
Main item
Osaifu-Keitai
Sub item
IC card content
DCMX
ToruCa
IC card lock
setting
Setting
IC card usage
Check IC owner
Change IC owner
Search by mode
Branch item
IC card lock
IC lock(power-off)
Auto lock setting
ToruCa settings
Receive ToruCa
IC card notice set
Others
i-concier
Profile
Sub item
Other setting
91
Main specifications
Phone
Product name
Size (When folded)
Others
92
N-01F
Height approx. 110 mm x Width approx. 51 mm x Thickness approx.
14.4 mm (Thickest : Approx. 17.4 mm)
Weight
Approx. 118 g (Battery pack attached)
Continuous standby time
[FOMA/3G]
Stationary ("AUTO"*1) : Approx. 780 hours
[GSM]
Stationary ("AUTO"*1) : Approx. 430 hours
Continuous talk time
[FOMA/3G]
Voice call
: Approx. 270 min.
[GSM]
Voice call
: Approx. 280 min.
Charging time
AC Adapter : Approx. 150 min. DC Adapter : Approx. 150 min.
1Seg watching time
Approx. 350 min.*7
Display
Type
Display : TFT 16,777,216 colors
Sub-display : Organic EL 1 color
Size
Display : Approx. 3.4 inches
Sub-display : Approx. 0.8 inches
Resolution
Display : 409,920 pixels (480 x 854 dots) Sub-display : 3,360 pixels (96 x 35 dots)
Image
Type
CMOS
sensor
Size
1/3.2 inches
Effective pixels
8.1 mill. pixels
Camera
Maximum recorded pixels 8.0 mill. pixels
Digital zoom
Up to approx. 6.7 x (16 levels)
Record
No. of photos that
When saved to Phone : Up to approx. 1,300*2
can be stored
When saved to 1 GB microSD card : Up to approx. 9,999*2
Continuous shooting 5 – 108*3
Photo file format
JPEG
Moving picture
When saved to Phone : Approx. 83 sec. per moving picture*4, total of
recording time
approx. 29 min.*4
When saved to 1 GB microSD card : Approx. 120 min. per moving
picture*4, total of approx. 130 min.*4
Moving picture file format MP4
1Seg recording time When saved to 1 GB microSD card : Up to approx. 320 min. (Total)*5
When saved to 32 GB microSDHC card : Up to approx. 10,240 min. (Total)*5
Music
Continuous playback i-motion
Approx. 2,100 min.*6
time
playback
Chaku-Uta-Full®
Approx. 2,100 min.*6*7
SD-Audio
Approx. 2,100 min.*6*7
Windows Media Audio (WMA) file
Approx. 2,220 min.*7
Capacity
Chaku-Uta®/Chaku-Uta-Full® Approx. 210 MB*8*9
*1 : Switch networks in "3G/GSM setting".
*2 : Size = VGA V. (480 x 640), Quality = Normal (File
size = 95 KB)
*3 : Varies depending on the size.
*4 : Recording time under the following conditions:
<Phone>
Size=VGA (640 × 480), Quality=Normal, File
size=10 MB, Sound setting = ON
<1 GB microSD card>
Size=VGA (640 × 480), Quality=Normal, File
size=Unlimited, Sound setting = ON
*5 : Varies depending on the broadcaster and
program.
*6 : File format = AAC
*7 : Background playback supported
*8 : For Chaku-Uta®, up to approx. 10 MB capacity is
separately prepared for the Secret Folder.
*9 : Shared with images, i-motion, Melody, PDF data,
Screen memo, Music, Kisekae Tool, Machi-chara,
Internet movies, ToruCa, i-α ppli and Content
package
Battery pack
Product name
Battery type
Battery Pack N30
Lithium-ion
Voltage
Current
DC 3.8V
1010 mAh
Numbers of stored/registered/protected items in the FOMA terminal
Item
Others
Store/Register
Protect
1,000 max.*1
TV link
50
TV timer
100
Timer recording
100
*2
Schedule
Schedule
2,500
Holiday
100
Mail (SMS + i-mode)
Received mail
2,500 max.*3*4*5
2,500 max.*3
*3*4
Sent mail
1,000 max.
500 max.*3
Draft mail
200 max.*3
i-αppli
200 max.*3 (5 for mail-linked i-αppli)
Image
3,500 max.*3*6*7
Movie/i-motion
3,500 max.*3*6*8
Kisekae Tool
3,500 max.*3*6
Chaku-Uta-Full®
Approx. 68*3*9
*1 : Up to 50 entries can be stored in a miniUIM.
*6 : Includes pre-installed data.
*2 : Includes i-schedule.
*7 : Up to 250 images can be additionally stored in
*3 : Actual storable/registerable/protectable counts
the Secret Folder.
may be decreased depending on the data size.
*8 : Up to 10 files can be additionally stored in the
*4 : Up to 20 more received or sent SMS can be
Secret Folder.
additionally stored in a miniUIM.
*9 : Number of stored items when the size of 1 track
*5 : Includes data in the "Mail" folder in default.
is calculated as 3 MB.
Phonebook
1Seg
93
Specific absorption rate (SAR) of mobile phone
Specific Absorption Rate (SAR) of Mobile Phones
This model N-01F mobile phone complies with Japanese technical regulations and international
guidelines regarding exposure to radio waves.
This mobile phone was designed in observance of Japanese technical regulations regarding
exposure to radio waves*1 and limits to exposure to radio waves recommended by a set of equivalent
international guidelines. This set of international guidelines was set out by the International
Commission on Non-Ionizing Radiation Protection (ICNIRP), which is in collaboration with the World
Health Organization (WHO), and the permissible limits include a substantial safety margin designed
to assure the safety of all persons, regardless of age and health condition.
The technical regulations and international guidelines set out limits for radio waves as the Specific
Absorption Rate, or SAR, which is the value of absorbed energy in any 10 grams of tissue over a
6-minute period. The SAR limit for mobile phones is 2.0 W/kg. The highest SAR value for this mobile
phone when tested for use at the ear is 0.783 W/kg. There may be slight differences between the SAR
levels for each product, but they all satisfy the limit.
The actual SAR of this mobile phone while operating can be well below that indicated above. This
is due to automatic changes to the power level of the device to ensure it only uses the minimum
required to reach the network. Therefore in general, the closer you are to a base station, the lower the
power output of the device.
This mobile phone can be used in positions other than against your ear. This mobile phone satisfies
the international guidelines when used with a carrying case or a wearable accessory approved by NTT
DOCOMO, INC.*2 In case you are not using the approved accessory, please use a product that does not
contain any metals, and one that positions the mobile phone at least 1.5 cm away from your body.
The World Health Organization has stated that "a large number of studies have been performed
over the last two decades to assess whether mobile phones pose a potential health risk. To date, no
adverse health effects have been established as being caused by mobile phone use."
Please refer to the WHO website if you would like more detailed information.
http://www.who.int/docstore/peh-emf/publications/facts_press/fact_english.htm
Please refer to the websites listed below if you would like more detailed information regarding SAR.
Ministry of Internal Affairs and Communications Website: http://www.tele.soumu.go.jp/e/sys/ele/index.htm
Association of Radio Industries and Businesses Website: http://www.arib-emf.org/index02.html (in Japanese only)
NTT DOCOMO, INC. Website: http://www.nttdocomo.co.jp/english/product/sar/
NEC CASIO Mobile Communications, Ltd. Website: http://www.n-keitai.com/lineup/sar/ (in Japanese only)
Others
*1: Technical regulations are defined by the Ministerial Ordinance Related to Radio Law (Article 14-2
of Radio Equipment Regulations).
*2: Regarding the method of measuring SAR when using mobile phones in positions other than
against the ear, international standards (IEC62209-2) were set in March of 2010. The information
communication sectional committee of the information communication council partly submitted a
report on consultation No. 118 in October, 2011 for the Japanese technical standard.
94
Radio Frequency (RF) Signals
THIS MODEL PHONE MEETS THE U.S. GOVERNMENT'S REQUIREMENTS FOR EXPOSURE TO RADIO WAVES.
Your wireless phone contains a radio transmitter and receiver. Your phone is designed and manufactured
not to exceed the emission limits for exposure to radio frequency (RF) energy set by the Federal
Communications Commission of the U.S. Government. These limits are part of comprehensive guidelines
and establish permitted levels of RF energy for the general population. The guidelines are based on
standards that were developed by independent scientific organizations through periodic and thorough
evaluation of scientific studies.
The exposure standard for wireless mobile phones employs a unit of measurement known as the Specific
Absorption Rate (SAR). The SAR limit set by the FCC is 1.6 W/kg.* Tests for SAR are conducted using standard
operating positions accepted by the FCC with the phone transmitting at its highest certified power level in
all tested frequency bands. Although the SAR is determined at the highest certified power level, the actual
SAR level of the phone while operating can be well below the maximum value. This is because the phone is
designed to operate at multiple power levels so as to use only the power required to reach the network. In
general, the closer you are to a wireless base station antenna, the lower the output.
Before a phone model is available for sale to the public, it must be tested and certified to the FCC that it
does not exceed the limit established by the U.S. government-adopted requirement for safe exposure. The
tests are performed on position and locations (for example, at the ear and worn on the body) as required
by FCC for each model. The highest SAR value for this model phone as reported to the FCC when tested
for use at the ear is 0.80 W/kg, and when worn on the body, is 0.56 W/kg. (Body-worn measurements differ
among phone models, depending upon available accessories and FCC requirements). While there may
be differences between the SAR levels of various phones and at various positions, they all meet the U.S.
government requirement.
The FCC has granted an Equipment Authorization for this model phone with all reported SAR levels
evaluated as in compliance with the FCC RF exposure guidelines. SAR information on this model phone is
on file with the FCC and can be found under the Display Grant section at http://www.fcc.gov/oet/ea/fccid/
after search on FCC ID A98-MDD1075.
For body worn operation, this phone has been tested and meets the FCC RF exposure guidelines. Please
use an accessory designated for this product or an accessory which contains no metal and which positions
the handset a minimum of 1.5 cm from the body.
Non-compliance with the above restrictions may result in violation of FCC RF Exposure guidelines.
* In the United States, the SAR limit for wireless mobile phones used by the public is 1.6 watts/kg
(W/kg) averaged over one gram of tissue. SAR values may vary depending upon national reporting
requirements and the network band.
FCC Regulations
Others
This mobile phone complies with part 15 of the FCC Rules. Operation is subject to the following two
conditions: (1) This device may not cause harmful interference, and (2) this device must accept any
interference received, including interference that may cause undesired operation.
This mobile phone has been tested and found to comply with the limits for a Class B digital device,
pursuant to Part 15 of the FCC Rules. These limits are designed to provide reasonable protection against
harmful interference in a residential installation.
95
This equipment generates, uses and can radiate radio frequency energy and, if not installed and used in
accordance with the instructions, may cause harmful interference to radio communications. However, there
is no guarantee that interference will not occur in a particular installation; if this equipment does cause
harmful interference to radio or television reception, which can be determined by turning the equipment off
and on, the user is encouraged to try to correct the interference by one or more of the following measures:
・ Reorient or relocate the receiving antenna.
・ Increase the separation between the equipment and receiver.
・ Connect the equipment into an outlet on a circuit different from that to which the receiver is connected.
・ Consult the dealer or an experienced radio/TV technician for help.
Changes or modifications not expressly approved by the party responsible for compliance could void the
user's authority to operate the equipment.
Declaration of Conformity
Hereby, NEC CASIO Mobile Communications, Ltd. declares that this product is compliance with
the essential requirements and other relevant provisions of Directive 1999/5/EC.
Declaration of Conformity can be found on http://www.n-keitai.com/lineup/index.html
(Japanese only).
Others
This mobile phone complies with the EU requirements for exposure to radio waves.
Your mobile phone is a radio transceiver, designed and manufactured not to exceed the SAR* limits**
for exposure to radio-frequency (RF) energy, which SAR* value, when tested for compliance against the
standard was 0.684 W/kg. While there may be differences between the SAR* levels of various phones and at
various positions, they all meet*** the EU requirements for RF exposure.
*
The exposure standard for mobile phones employs a unit of measurement known as the Specific
Absorption Rate, or SAR.
** The SAR limit for mobile phones used by the public is 2.0 watts/kilogram (W/kg) averaged over
ten grams of tissue, recommended by The Council of the European Union. The limit incorporates
a substantial margin of safety to give additional protection for the public and to account for any
variations in measurements.
*** Tests for SAR have been conducted using standard operating positions with the phone transmitting
at its highest certified power level in all tested frequency bands. Although the SAR is determined at
the highest certified power level, the actual SAR level of the phone while operating can be well below
the maximum value. This is because the phone is designed to operate at multiple power levels so as
to use only the power required to reach the network. In general, the closer you are to a base station
antenna, the lower the power output.
96
Important Safety Information
Warning:To prevent possible hearing damage, do not listen to high volume levels
for long periods.
Export Administration Regulations
The product and accessories are subject to the Foreign Exchange and Foreign Trade Control Law and
other applicable export/import laws and regulations of Japan. You shall obtain licenses, permissions,
and consents required thereunder at your own expense and on your own responsibility. For more
details, contact the Ministry of Economy, Trade and Industry (METI).
Others
97
Intellectual Property Right
Copyrights and portrait rights
Except for personal use, subscribers are prohibited
from copying, modifying or distributing content
such as photos taken with the FOMA terminal or
text/music/software downloaded from Internet
websites, whose copyrights belong to third parties,
without the permission of the copyright holder.
Capturing or recording a stage performance,
entertainment or exhibition may be prohibited
even if it is for personal use.
Taking a photo of someone using the FOMA terminal
without consent, or posting it on a website without
consent, may infringe the right of portrait.
Trademarks
・ "FOMA", "i-mode", "i-αppli", "i-motion", "Deco-mail",
・
・
・
・
Others
98
・
・
・
"Chara-den", "ToruCa", "WORLD CALL", "DCMX",
"i-area", "WORLD WING", "2in1", and "iC" logo
are trademarks or registered trademarks of NTT
DOCOMO, INC.
"Catch Phone (Call waiting service)" is a registered
trademark of Nippon Telegraph and Telephone
Corporation.
McAfee® is a registered trademark or trademark of
McAfee, Inc. or its subsidiaries in the United States
and other countries.
Rovi, G-GUIDE, G-GUIDE MOBILE and
G-Guide related logos are
trademarks or registered trademarks
of Rovi Corporation and/or its
subsidiaries in Japan.
Powered by JBlend™ Copyright 2002-2013
Aplix Corporation. All rights reserved.
JBlend and JBlend-related trademarks are
trademarks or registered trademarks of Aplix
Corporation in Japan and other countries.
is a registered trademark of FeliCa Networks, Inc.
QR code is a registered trademark of Denso Wave
Inc.
microSDHC logo is a trademark of SD-3C, LLC.
・ " 感情お知らせメール ", " みんな N らんど ", " ライフヒ
ストリービューア ", " クイックインフォ ", "MEDIAS
VIEWER", " フォト文字クリエイター ", "Quick Shot",
"Art Photo", " な め ら か ワ ン セ グ ", "Speed movie",
・
・
・
・
・
・
・
・
・
"Privacy angle" and "MULTITASK" are trademarks
or registered trademarks of NEC CASIO Mobile
Communications, Ltd.
QuickTime is a registered trademark of Apple Inc.,
in the US and other countries.
Microsoft®, Windows®, Windows Media®, Windows Vista®,
Excel® and PowerPoint® are trademarks or registered
trademarks of Microsoft Corporation in the United States
and/or other countries.
T9® is a trademark or registered trademark of
Nuance Communications, Inc. and its affiliates
in the United States and other countries.
Powered By Mascot Capsule®/Micro3D Edition™
MASCOT CAPSULE® is a registered trademark of HI
CORPORATION.
PhotoSolid®, MovieSolid® and their logos are
trademarks or registered trademarks of Morpho,
Inc. in Japan and other countries.
"Google" is a trademark of Google, Inc.
"CROSS YOU" is a trademark of Sony Corporation.
Twitter is either registered trademark or trademark of
Twitter, Inc. in the United States and/or other countries.
All other company names and product names
appearing in this manual are trademarks or
registered trademarks of their respective holders.
Others
・ THIS PRODUCT IS LICENSED UNDER THE MPEG-
4 VISUAL PATENT PORTFOLIO LICENSE FOR THE
PERSONAL AND NON-COMMERCIAL USE OF A
CONSUMER FOR (i) ENCODING VIDEO IN COMPLIANCE
WITH THE MPEG-4 VISUAL STANDARD ("MPEG4 VIDEO") AND/OR (ii) DECODING MPEG-4 VIDEO
THAT WAS ENCODED BY A CONSUMER ENGAGED
IN A PERSONAL AND NON-COMMERCIAL ACTIVITY
AND/OR WAS OBTAINED FROM A VIDEO PROVIDER
LICENSED BY MPEG LA TO PROVIDE MPEG-4 VIDEO. NO
LICENSE IS GRANTED OR SHALL BE IMPLIED FOR ANY
OTHER USE. ADDITIONAL INFORMATION INCLUDING
THAT RELATING TO PROMOTIONAL, INTERNAL AND
COMMERCIAL USES AND LICENSING MAY BE OBTAINED
FROM MPEG LA, L.L.C. SEE HTTP://WWW.MPEGLA.COM.
THIS PRODUCT IS LICENSED UNDER THE AVC PATENT
PORTFOLIO LICENSE FOR THE PERSONAL USE OF A
CONSUMER OR OTHER USES IN WHICH IT DOES NOT
RECEIVE REMUNERATION TO (i) ENCODE VIDEO IN
COMPLIANCE WITH THE AVC STANDARD ("AVC VIDEO")
AND/OR (ii) DECODE AVC VIDEO THAT WAS ENCODED
BY A CONSUMER ENGAGED IN A PERSONAL ACTIVITY
AND/OR WAS OBTAINED FROM A VIDEO PROVIDER
LICENSED TO PROVIDE AVC VIDEO. NO LICENSE IS
GRANTED OR SHALL BE IMPLIED FOR ANY OTHER USE.
ADDITIONAL INFORMATION MAY BE OBTAINED FROM
MPEG LA, L.L.C. SEE HTTP://WWW.MPEGLA.COM.
・ FeliCa is a contactless IC card technology developed
by Sony Corporation. FeliCa is a registered trademark
of Sony Corporation.
・ Contains Adobe® Flash® Lite® and Adobe Reader®
Mobile technology by Adobe Systems Incorporated.
Adobe Flash Lite Copyright© 2003-2013 Adobe
Systems Incorporated. All rights reserved.
Adobe Reader Mobile Copyright© 1993-2013 Adobe
Systems Incorporated. All rights reserved.
Adobe, Adobe Reader and Flash Lite are either
registered trademarks or trademarks of Adobe
Systems Incorporated in the United States and/or
other countries.
・ This product contains NetFront Browser, NetFront
Document Viewer and NetFront Sync Client of
ACCESS CO., LTD.
ACCESS, the ACCESS logo, and NetFront are
registered trademarks or trademarks of ACCESS
CO., LTD. in the United States, Japan and/or other
countries.
Copyright© 2013 ACCESS CO., LTD. All rights
reserved.
This software is based in part on the work of the
Independent JPEG Group.
・ Manufactured under license
from Audyssey Laboratories. U.S.
and foreign patents pending.
Audyssey Premium Mobile is a trademark of
Audyssey Laboratories. Audyssey Premium
Mobile ™ fixes the audio problems found in
mobile phones. It corrects the speaker and
headphone response problems caused by the
enclosure, extends the bass to lower frequencies,
eliminates large volume variations across and
within content and allows louder playback by
blocking distortion.
・ Hyper Clear Voice is manufactured based
on SRS VIP+ licensed by SRS Labs, Inc.
SRS, VIP+ and the
mark are trademarks of SRS Labs, Inc.
・ This product contains software licensed
complying with GNU General Public License (GPL),
GNU Lesser General Public License (LGPL), etc.
For more details, see MENU → "Data box" → "My
document" → "i-mode" → "GPL/LGPL ライセンス
説明" (About GPL/LGPL licenses). (The first part
of "GPL/LGPL ライセンス説明 " is only available in
Japanese.)
・ This product contains IrFront of ACCESS CO., LTD.
Others
IrFront is a registered trademark or trademark
of ACCESS CO., LTD. in the United States,
Japan and/or other countries.
iWnn©OMRON SOFTWARE Co., Ltd. 2008-2013 All
Rights Reserved.
・ "AXIS Font" is a trademark of AXIS Inc., and the
"AXIS" font is a font developed by Type Project Inc.
99
・ The HMM-Based Speech Synthesis Engine embedded
in this product uses the Simplified BSD License.
----------------------------------------The HMM-Based Speech Synthesis System (HTS)
hts_engine API developed by HTS Working Group
http://hts-engine.sourceforge.net/
----------------------------------------Copyright©
2001-2010 Nagoya Institute of Technology, Department of Computer Science
2001-2008 Tokyo Institute of Technology, Interdisciplinary Graduate School of Science and Engineering
All rights reserved.
Redistribution and use in source and binary forms, with or without modification, are
permitted provided that the following conditions are met:
- Redistributions of source code must retain the above copyright notice, this list of
conditions and the following disclaimer.
- Redistributions in binary form must reproduce the above copyright notice, this list of
conditions and the following disclaimer in the documentation and/or other materials
provided with the distribution.
- Neither the name of the HTS working group nor the names of its contributors may be
used to endorse or promote products derived from this software without specific prior
written permission.
THIS SOFTWARE IS PROVIDED BY THE COPYRIGHT HOLDERS AND
CONTRIBUTORS "AS IS" AND ANY EXPRESS OR IMPLIED WARRANTIES,
INCLUDING, BUT NOT LI M ITE D TO, T H E IMPLIED WA R RA NTIE S OF
MERCHANTABILITY AND FITNESS FOR A PARTICULAR PURPOSE ARE
D I S C L A I M E D . I N N O E V E N T S H A L L T H E C O P Y R I GH T O W N E R OR
CONTRIBUTORS BE LIABLE FOR ANY DIRECT, INDIRECT, INCIDENTAL,
SPECIAL, EXEMPLARY, OR CONSEQUENTIAL DAMAGES (INCLUDING, BUT
NOT LIMITED TO, PROCUREMENT OF SUBSTITUTE GOODS OR SERVICES;
LOSS OF USE, DATA, OR PROFITS; OR BUSINESS INTERRUPTION) HOWEVER
CAUSED AND ON ANY THEORY OF LIABILITY, WHETHER IN CONTRACT,
STRICT LIABILITY, OR TORT (INCLUDING NEGLIGENCE OR OTHERWISE)
ARISING IN ANY WAY OUT OF THE USE OF THIS SOFTWARE, EVEN IF ADVISED
OF THE POSSIBILITY OF SUCH DAMAGE.
・ This product is equipped with NetFront DTV
・
Others
・
・
・
100
Profile Wireless Edition of ACCESS CO., LTD. as data
broadcast BML browser.
This product employs Media:/Media colon of ACCESS
CO., LTD. as broadcast content start information.
Copyright© 1996-2013 ACCESS CO., LTD. ACCESS,
NetFront and Media:/Media colon are trademarks
or registered trademarks of ACCESS CO., LTD in
Japan and/or other countries.
Fr a m e r a t e e n h a n c e m e n t f u n c t i o n u s e s
FrameSolid ™ technology by Morpho, I nc.
FrameSolid ™ is a trademark of Morpho, Inc.
This product employs GestureTek technologies.
Copyright©2006-2013, GestureTek, Inc. All Rights
Reserved.
©Primeworks/catalyst mobile
©ATR-Trek Co.,Ltd.
・ ©MTI.Ltd.
・ © 駅探
Description on Windows
・ The abbreviations of operating systems (Japanese
versions) below are used in this manual.
- Windows 8 stands for Microsoft® Windows®
8, Microsoft® Windows® 8 Pro and Microsoft®
Windows® 8 Enterprise.
- Windows 7 stands for Microsoft® Windows® 7
(Starter, Home Basic, Home Premium,
Professional, Enterprise and Ultimate).
- Windows Vista stands for Windows Vista® (Home Basic,
Home Premium, Business, Enterprise and Ultimate).
- Windows XP indicates the Microsoft® Windows®
XP Professional operating system or Microsoft®
Windows® XP Home Edition operating system.
SIM Lock Removal
This FOMA terminal supports SIM lock removal.
Removing the SIM lock allows you to use another
operator's SIM card.
・ SIM lock can be removed at any docomo Shop.
・ An unlocking fee is charged.
・ Certain services and features might be disabled
when another operator's SIM card is used. Please
be aware that DOCOMO does not under any
circumstances guarantee operation.
・ For details of SIM lock removal, refer to NTT
DOCOMO website.
Index
A
AC adapter................................................................ 21
Adapter ........................................................................9
After-Sales Service .................................................. 82
Alarm ......................................................................... 74
Area Mail................................................................... 53
Auto receive mail .................................................... 52
Auto-key lock ........................................................... 40
B
Backlight................................................................... 34
Bar code reader ....................................................... 74
Battery level ............................................................. 24
Battery pack
Attach .............................................................................20
Handling .......................................................................... 8
Bookmark ................................................................. 58
C
Call forwarding ........................................................ 47
Call rejection set. ..................................................... 41
Call waiting .............................................................. 47
Caller ID notification............................................... 22
Camera
Shoot moving pictures .............................................62
Shoot still images .......................................................62
Change Machi-chara ............................................... 35
Character entry........................................................ 31
Character size .......................................................... 35
Charge ....................................................................... 21
Charge (about waterproof/dustproof) ................ 19
Check with the illumination .................................. 37
Check your own phone number ........................... 23
Connect to PC .......................................................... 78
D
E
Early warning "Area Mail" ...................................... 53
eco mode .................................................................. 37
Error info send set. .................................................. 83
Export Administration Regulations ..................... 97
F
FeliCa
Osaifu-Keitai .................................................................71
Full Browser
Bookmark ......................................................................58
Screen memo ...............................................................58
Viewing/Operating sites...........................................57
G
Guide ......................................................................... 30
H
Handling precautions ............................................. 13
Handling the FOMA terminal ...................................7
I
IC card lock ............................................................... 40
iC transmission ........................................................ 78
i-channel ................................................................... 59
Icon description....................................................... 24
i-concier .................................................................... 72
Illumination.............................................................. 36
i-mode ....................................................................... 56
Display i-mode site ....................................................57
Screen memo ...............................................................58
i-mode fault diagnosis site .................................... 84
Others
Deco-mail ................................................................. 52
Deco-mail pictogram/Deco-mail picture ............ 32
Decome-Anime........................................................ 52
Desktop holder ........................................................ 21
Desktop icon ............................................................ 25
Dial lock .................................................................... 40
docomo Palette UI................................................... 29
Download
i-motion .........................................................................69
i-αppli .............................................................................68
Movie ..............................................................................69
Widget Appli ................................................................68
101
i-mode mail
Attach file ......................................................................51
Check ..............................................................................53
Deco-mail ......................................................................52
Decome-Anime ...........................................................52
Receive ...........................................................................52
Reply ...............................................................................53
Send ................................................................................51
i-mode password..................................................... 38
i-motion .................................................................... 69
Infrared communication ........................................ 77
Initialize .................................................................... 42
Initial setting ............................................................ 22
Intellectual property right
Copyrights and portrait rights ...............................98
Trademarks ...................................................................98
International call ..................................................... 44
International roaming ............................................ 48
i-Widget .................................................................... 68
i-αppli ........................................................................ 68
K
Key operation
1Seg ................................................................................65
Camera ...........................................................................61
Character entry ...........................................................31
Display ...........................................................................27
i-mode/Full Browser ..................................................57
MUSIC Player ................................................................67
Kisekae Tool ............................................................. 36
Koe-no-Takuhaibin ................................................. 44
L
Lock function ........................................................... 40
Lock/Security
Auto-key lock ...............................................................40
Dial lock .........................................................................40
IC card lock ...................................................................40
Omakase Lock..............................................................40
Original Lock ................................................................40
Others
M
Mail ............................................................................ 51
Main menu
Change main menu ...................................................27
102
Change menu display ...............................................35
Viewing main menu...................................................26
Manner mode setting ............................................. 34
Map............................................................................ 60
Material list .............................................................. 11
Menu list ................................................................... 88
microSD card
Insert/Remove .............................................................75
Use...................................................................................75
miniUIM
Attach .............................................................................20
Handling ........................................................................14
Missed info ............................................................... 37
Movie ........................................................................ 69
Movie (Camera) ....................................................... 62
Music
Play music data ...........................................................66
MUSIC Player ............................................................ 67
Mute keypad sound ................................................ 34
N
Network security code ........................................... 38
Network service....................................................... 46
O
Omakase Lock.......................................................... 40
Options and related devices ................................. 87
Original Lock ............................................................ 40
Osaifu-Keitai
Osaifu-Keitai .................................................................70
ToruCa ............................................................................70
Overseas use ............................................................ 48
Own number display .............................................. 23
P
Part names and functions .........................................3
Pattern data update................................................ 85
Phone
Make a call by entering the phone number ......43
Make a call from phonebook ..................................43
Make a call from redial/received calls ..................43
Make an international call .......................................44
Overseas use ................................................................48
Receive ...........................................................................44
Phonebook
Add entries ...................................................................55
Delete entries ..............................................................55
Edit entries ....................................................................55
PIN code (PIN1/PIN2) .............................................. 39
PIN unblocking key (PUK) ...................................... 39
Play
i-motion .........................................................................69
Movie ..............................................................................69
Music data.....................................................................66
Video...............................................................................65
Playback restriction ................................................ 66
Precautions .................................................................5
Privacy angle............................................................ 35
Profile ........................................................................ 23
Public mode (Drive mode) ..................................... 45
Public mode (Power OFF)....................................... 46
R
Received calls........................................................... 43
Reception level (Signal strength) ......................... 24
Record message setting ......................................... 45
Redial ........................................................................ 43
Reject unknown ...................................................... 41
Reset settings .......................................................... 42
Retrieve mail address automatically.................... 23
Ring tone .................................................................. 33
Ring volume ............................................................. 33
S
T
Terminal security code ........................................... 38
ToruCa ....................................................................... 70
Troubleshooting ...................................................... 79
U
Using MyFACE .......................................................... 29
Using shortcut ......................................................... 30
V
Vibrator setting ....................................................... 33
Videophone call
Make ...............................................................................43
Overseas use ................................................................49
Receive ...........................................................................44
Viewing display ....................................................... 24
Viewing sub-display ............................................... 25
Voice Mail Service ................................................... 47
Voice quick start ...................................................... 73
Volume ...................................................................... 45
W
Warranty ................................................................... 82
Waterproof/dustproof function............................ 16
When you cannot answer a call
Public mode (Drive mode).......................................45
Public mode (Power OFF) ........................................46
Record message ..........................................................45
WMA .......................................................................... 66
WORLD CALL ............................................................ 44
WORLD WING ........................................................... 48
Numerals, etc.
1Seg........................................................................... 64
みんな N らんど .......................................................... 56
Others
Scanning function................................................... 85
Scanning results display...........................................86
Update pattern data ..................................................85
Schedule ................................................................... 74
Security code ........................................................... 38
Security Scan (Scanning function) ....................... 85
Select language ....................................................... 23
Shabette-Kensaku................................................... 73
Shoot moving pictures ........................................... 62
Shoot still images .................................................... 62
Shortcut icon ........................................................... 25
Signal strength (Reception level) ......................... 24
SMS ............................................................................ 54
Software update...................................................... 84
Specific absorption rate (SAR) .............................. 94
Specifications
Battery pack .................................................................93
Numbers of stored/registered/protected items ...93
Phone .............................................................................92
Stand-by display ..................................................... 34
103
Thank you for choosing "N-01F".
Before use, be sure to thoroughly read this manual to ensure that you use N-01F correctly.
About manual of N-01F
The operations of N-01F are also described in " 使 い か た ガ イ ド " (Guide) (available in this FOMA
terminal) and "Instruction Manual (Detailed version)" (Japanese) (PDF file) other than this manual.
■ "INSTRUCTION MANUAL" (this manual): Provides information about screens and basic operations.
■ " 使いかたガイド " (Guide) (available in this FOMA terminal): Provides information about the
outline of frequently-used functions and of operations (in Japanese only).
On the N-01F standby screen, Iis " 便利ツール " (Tool) s " 使いかたガイド " (Guide)
* " 使いかたガイド " (Guide) is not available when "English" is set for "Select language".
■ "Instruction Manual (Detailed version)" (Japanese): Provides detailed information about
all functions and operations.
From PC: Download from NTT DOCOMO'S website
http://www.nttdocomo.co.jp/support/trouble/manual/download/index.html
Make various applications or change your billing plan, check your charges and points, and more online.
i-mode access : iMenu ⇒ お客様サポート (User support) ⇒ お申込・お手続き (Applications/
procedures) ⇒ 各種お申込・お手続き (Various applications/procedures)
(in Japanese only)
No packet communications charges apply
My docomo (http://www.mydocomo.com/) ⇒ 各種お申込・お手続き (Various
PC access:
applications/procedures) (in Japanese only)
* You need your "Network security code" to use via i-mode.
* Packet communications charges do not apply to use via i-mode. Charges will apply if using the service
from overseas.
* "docomo ID/password" are required to use this site from a PC.
* Please contact "General Inquiries" on the back cover of this manual if you forget or do not have
"Network security code" or "docomo ID/password".
* May not be available in some cases depending on the conditions of your subscription.
* There are cases where the site may not be available due to system maintenance, etc.
* The URL and content may change without prior notice.
Accessories and major optional extras
Using mobile phone with your manners!
When using mobile phone in a public
place, don't forget to show courtesy and
consideration for others.
■ Basic package
N-01F (including written
warranty)
Back Cover N67
N-01F INSTRUCTION MANUAL
(Japanese)
Battery Pack N30
Desktop Holder N45
■ Options and accessories compatible with this FOMA terminal → p.87
Before using this manual
・ Note that "N-01F" is referred to as "FOMA terminal" in this manual.
・ This manual uses the default settings and screen shots for "WHITE" to describe operations. To
read a screen easily in this manual, "Stand-by display" is set to "OFF", and the font color is black
while the background color is white.
・ The screens shown as examples in this manual are displayed when "English" is set for "Select
language". Set "English" for "Select language" in advance. ( → p.23)
・ The images or illustration used in this manual are examples. They may differ from the actual displays.
・ Unauthorized copying of all or part of this manual is prohibited.
What DOCOMO does to be eco-friendly
Slimming down the manual
Turn the power off when you are:
■ In places where use is prohibited
・In an airplane or hospital, follow the instructions
given by the respective airline or medical
institution.
Turn off the power in a location where use is
prohibited.
By describing only basic functions and operations,
we have succeeded in reducing paper usage and
slimming down the Japanese instruction manual.
For further explanations, see your 使 い か た ガ イ
ド (Guide) (Japanese, available in your FOMA
terminal) or visit NTT DOCOMO's websites.
Always set Public mode when you are:
■ Driving
・Using a handheld mobile phone while driving
will result in a penalty. Exceptions are made in
case of emergency, such as to safeguard injured
persons or to maintain public safety.
■ In places such as theaters, cinemas, and art galleries
We collect your unnecessary mobile
phones and other devices irrespective
of carrier. Bring them to a docomo
Shop near you.
* Intended devices: Mobile phone, PHS,
battery pack, charger and desktop
holder (irrespective of carrier)
Respect privacy
P l e a s e b e co n s i d e ra t e o f t h e p r i v a c y o f
individuals around you when taking and sending
photos using camera-equipped mobile phones.
Collecting and recycling of mobile phones
General Inquiries
<docomo Information Center>
0120-005-250 (toll free)
* Service available in: English, Portuguese, Chinese, Spanish.
* Unavailable from part of IP phones.
(Business hours : 9:00 a.m. to 8:00 p.m.)
■ From DOCOMO mobile phones (In Japanese only)
(No prefix) 151 (toll free)
* Unavailable from land-line phones, etc.
■ From land-line phones (In Japanese only)
0120-800-000 (toll free)
Repairs
■ From DOCOMO mobile phones (In Japanese only)
(No prefix) 113 (toll free)
* Unavailable from land-line phones, etc.
■ From land-line phones (In Japanese only)
0120-800-000 (toll free)
* Unavailable from part of IP phones.
(Business hours : 24 hours (open all year round))
* Unavailable from part of IP phones.
(Business hours : 9:00 a.m. to 8:00 p.m. (open all year round))
● Please confirm the phone number before you dial.
● For Applications or Repairs and After-Sales Service, please contact the above-mentioned information center or the docomo Shop etc. near you on the
NTT DOCOMO website or the i-mode site.
NTT DOCOMO website http://www.nttdocomo.co.jp/english/
i-mode site iMenu ⇒ お客様サポート (User support) ⇒ ドコモショップ (docomo Shop) * In Japanese only
N-01F
For loss, theft, malfunction, and inquiries while overseas (24-hour reception)
■ From DOCOMO mobile phones
International call access code
for the country you stay
INSTRUCTION MANUAL
-81-3-6832-6600* (toll free)
’13.11
* You are charged a call fee to Japan when calling from a land-line phone, etc.
※ If you use N-01F, you should dial the number +81-3-6832-6600 (to enter '+', press and hold the '0' key for at least one second).
■ From land-line phones <Universal number>
Universal number international
prefix
* You might be charged a domestic call fee according to the call rate for the country you stay.
※ For international call access codes for major countries and universal number international prefix, refer to DOCOMO International Services website.
-8000120-0151*
● If you lose your FOMA terminal or have it stolen, immediately take the steps necessary for suspending the use of the FOMA terminal.
● If the FOMA terminal you purchased is damaged, bring your FOMA terminal to a repair counter specified by DOCOMO after
returning to Japan.
Don’t forget your mobile phone … or your manners!
When using your mobile phone in a public place, don't forget to show
common courtesy and consideration for others around you.
Sales: NTT DOCOMO, INC.
Manufacturer:
2013.11 (1st Edition)
K
DIC 2484
N-01F (薄型英文1版) H1H4
Manual for PC Connection
Data Communication ........................................................................ 1
Before Using................................................................................ 4
Checking the Procedure .............................................................. 5
Installing the FOMA Communication Setting File (Drivers) ......... 8
Preparing Bluetooth Communication........................................... 12
Connecting to a Wi-Fi-compatible PC ......................................... 14
DOCOMO Connection Manager.................................................. 15
Executing Set Data Communication............................................ 20
Setting up Dial-up Network.......................................................... 22
Setting up Dial-up ........................................................................ 30
AT Command List ........................................................................ 42
About Manual for PC Connection
This manual describes necessary information for data communication using the FOMA terminal and how to
install "FOMA communication setting file" and "DOCOMO Connection Manager".
The procedures or screens may vary depending on your environment.
・The words which represent the FOMA terminal model name, such as driver names and modem names, are
referred to as "【model name】". Read "【model name】" as your model name.
・The screen images or illustrations used in this manual are examples. They may differ depending on the FOMA
terminal you use.
・Description of Bluetooth, Wi-Fi connection and User authorizations is only for compatible models.
’13.10(3rd Edition)
Data Communication
Data Communication Available for the FOMA Terminal
Available data communication between the FOMA terminal and PCs is classified in 3
categories: data exchange (OBEXTM communication), packet communication and 64K data
communication.
Data exchange (OBEXTM communication)
The data such as images, phonebook entries, mails, and more can be exchanged with equipment such as other
FOMA terminals and PCs.
FOMA terminal
PC
Infrared data exchange
FOMA terminal
iC communication
Bluetooth communication
FOMA terminal
FOMA USB Cable with Charge Function 02
microSD card
DOCOMO keitai datalink
PC
Packet communication
Packet communication is charged according to the amount of data sent and received.*1 High speed
communication at up to 7.2Mbps downlink*2 and up to 5.7Mbps uplink*2 is available in the FOMA HIGH-SPEED
area. Communication is provided on a best-effort basis. Communication speed varies depending on the
communication environment or network congestion. This is suitable for exchanging small amount of data at high
speed.
You can also access a corporate LAN connected to the FOMA network.
Use an access point that supports FOMA packet communication, such as DOCOMO Internet connection
service “mopera U”.
For packet communication, connect the FOMA terminal to a PC using FOMA USB Cable with Charge Function
02 (optional), Bluetooth communication*3 or Wi-Fi connection, or to a PDA using a dedicated cable.
*1 : Note that the communication charge can become very expensive when large files are sent and received.
*2 : It is the maximum value on the technical standards, and the actual communication speed varies depending
on the network congestion or communication environment. The communication speed may be lower when
you are out of the FOMA HIGH-SPEED area, you connect to the access point to which the HIGH-SPEED
service is not supported.
*3 : When connecting using Bluetooth communication, the FOMA terminal communication speed will be that of
HIGH-SPEED service. But, communication at the maximum speed may not be possible due to Bluetooth
communication speed limitation.
FOMA USB Cable with
Charge Function 02
1
64K data communication
64K data communication is charged according to the length of time the line is connected, regardless of the
amount of data.
Use an access point that supports FOMA 64K data communication, such as DOCOMO Internet connection
service “mopera U”, or ISDN synchronized 64K access point.
For 64K data communication, connect the FOMA terminal to a PC using FOMA USB Cable with Charge
Function 02 or Bluetooth communication, or to a PDA using a dedicated cable.
* Note that the communication charge can become very expensive when the line is connected for a long time.
FOMA USB Cable with
Charge Function 02
NOTE
d The communication speed is 384kbps at maximum for receiving and 64kbps at maximum for sending outside the
FOMA service area and overseas.
d Select IP connection method when you perform packet communication overseas. (Packet communication using
PPP connection is not supported.)
d Select PPP connection method when you perform packet communication using Wi-Fi connection. (Packet
communication using IP connection is not supported.)
d 64K data communication is not available overseas.
2
Notice before using
Internet service provider fees
In addition to FOMA service charges, you may need to pay user fees to an Internet service provider to use the
Internet. These fees must be paid directly to the Internet service provider in addition to service fees of FOMA
service. Contact your Internet service provider for details.
DOCOMO Internet connection service "mopera U" is available. "mopera U" is a pay service for which you need
to apply.
Setting an access point (e.g. Internet service provider)
Packet communication and 64K data communication use different access points. If you are using packet
communication, use an applicable access point for it; if 64K data communication, use an access point for FOMA
64K data communication or ISDN synchronized 64K.
User authorization when accessing network
Some access points may require your user authorization (ID and password) when connecting. Use
communication software (Dial-up network) to enter your ID and password. ID and password will be provided by
your Internet service provider or the network administrator. Contact the Internet service provider or network
administrator for details.
Required conditions for performing packet and 64K data communication
The following conditions are required to perform communication using the FOMA terminal (For communication in
Japan):
a Your PC is compatible with the FOMA USB Cable with Charge Function 02 (optional).
a You are in the FOMA service area.
a For packet communication, the access point supports FOMA packet communication.
a For 64K data communication, the access point supports FOMA 64K data communication or ISDN
synchronized 64K.
However, depending on congestion of the base station or weaker signal strength, you cannot perform
communication even when the above conditions are satisfied.
3
Before Using
Operating environment
The PC operating environment to use data communication is as shown below:
Operating environment
Data communication
DOCOMO Connection Manager
Item
PC unit
a PC/AT compatible model
a When using the FOMA USB Cable with Charge Function 02 (optional): USB port (compliant to
Universal Serial Bus Specification Rev1.1/2.0)
a When using Bluetooth communication: Bluetooth Specification Ver.1.1, Ver.1.2 or Ver.2.0+EDR
compliant (Dial-up Networking Profile)
a When using Wi-Fi connection: wireless LAN standard IEEE 802.11b or IEEE 802.1g compliant
a Display resolution of 800 × 600 dots or better,
High Color (65,536 colors) or better is
recommended
OS*1
a Windows XP (Japanese version)
a Windows Vista (32-bit/64-bit) (Japanese
version)
a Windows 7 (32-bit/64-bit) (Japanese version)
a Windows 8 (32-bit/64-bit) (Japanese version)
Required memory*2
a
a
a
a
a
a
a
-
Hard disk space*2
Web browser
Mail software
Windows XP: 128MB or higher
Windows Vista: 512MB or higher
Windows 7 (32-bit): 1GB or higher
Windows 7 (64-bit): 2GB or higher
Windows 8 (32-bit): 1GB or higher
Windows 8 (64-bit): 2GB or higher
5MB or higher
a Display resolution of 1,024 ×600 dots or
better (1,024 × 768 dots or better is
recommended), High Color (65,536 colors) or
better
a Windows XP Home Edition SP3 or later
(Japanese version)
a Windows XP Professional SP3 or later
(Japanese version)
a Windows Vista SP1 or later (32-bit/64-bit)
(Japanese version)
a Windows 7 (32-bit/64-bit) (Japanese version)
a Windows 8 (32-bit/64-bit) (Japanese version)
a Recommended environment for your OS
a
a
a
a
10MB or higher
Internet Explorer 6.0 or later
Windows Mail
Outlook Express 6.0
*1: The proper operations on the upgraded, added or modified OS are not guaranteed.
*2: The required memory and necessary hard disk space may differ depending on the PC's system configuration.
d For the latest information on the operating environment, visit the DOCOMO website.
NOTE
d This FOMA terminal is not compatible with Remote Wakeup function.
d This FOMA terminal is not compatible with the FAX communication.
Required devices
The following hardware and software, in addition to the FOMA terminal and a PC, are required.
a "FOMA USB Cable with Charge Function 02" (optional) or "FOMA USB Cable" (optional)*1
a "FOMA communication setting file (drivers)"*2
*1: For USB connection
*2: Download the file from DOCOMO website.
NOTE
d Purchase the specified "FOMA USB Cable with Charge Function 02" or "FOMA USB Cable". The USB cable for PC
cannot be used because the shape of the connector is different.
d The FOMA USB Cables may not function properly when connected to a USB HUB.
4
Checking the Procedure
In data communication, the connection is made through a dial-up connection with Internet
service providers or LANs that support FOMA data communication.
d The FOMA communication setting file is software (driver) needed for connecting the FOMA terminal
with a PC via a FOMA USB Cable with Charge Function 02 (optional) to carry out packet
communication, 64K data communication and data transfer (OBEXTM communication). Installing the
FOMA communication setting file embeds each driver into Windows.
Using DOCOMO Connection Manager, you can easily set up packet communication and 64K data
communication and create a dial-up connection.
Flow chart for completing the data communication setup
■ Data exchange (OBEXTM communication)
Install the "FOMA communication setting file" (driver) to use the FOMA USB Cable with Charge
Function 02.
Download/Install the "FOMA communication
setting file" (driver)*
Download the file from the DOCOMO website and install it.
Data exchange
*: Install DOCOMO keitai datalink in addition.
5
■ Packet communication and 64K data communication
For USB connection
For Bluetooth connection
Download and install the FOMA
communication setting file (drivers) /
Connect to PC
Connect the FOMA terminal to a PC
wirelessly using Bluetooth communication
(p.12)
a Install the FOMA communication setting file by
downloading from the DOCOMO website.→ p.8
a Connect the FOMA terminal to the PC with the FOMA
USB Cable with Charge Function 02 (optional).
Check the setting after installation(p.10)
Check the modem(p.13)
<To set up the access point using
"DOCOMO Connection Manager">
<Not using "DOCOMO Connection
Manager">
Download "DOCOMO Connection
Manager" from the DOCOMO website, and
install it to PC
a Enables you to use DOCOMO Connection Manager.
"Installing DOCOMO Connection Manager"→ p.17
Set up
Set up
a mopera U*
a Other providers
a Set up communication not using "DOCOMO Connection
Manager" →p.22
Connect and disconnect
Connect and disconnect
a Connect → p.20
a Disconnect→p.21
a Connect → p.40
a Disconnect→p.41
*: To use Internet with the FOMA terminal and PC connected, "mopera U" (you need to apply for) is useful, which supports
broadband connection, etc. Consider the plan in which you are charged only in a month when you use the service.
For more information, visit the DOCOMO website.
For Wi-Fi connection (Packet communication only)
Set the FOMA terminal to Access point mode
a For details, refer to the Instruction Manual for the FOMA terminal.
Set up(p.14)
Connect and disconnect
6
Setting the USB mode to "Communication mode"
d Set the mode before connecting to PC.
d Setting is not required when using Bluetooth connection or Wi-Fi connection.
1
MENU key"Setting""External connection""USB mode"
"Communication mode"
7
Installing the FOMA Communication Setting File
(Drivers)
The following procedure explains how to install the FOMA communication setting file (drivers).
d Before installing the FOMA communication setting file, make sure to quit any Windows software
running on your computer.*
d When installing FOMA communication setting file, be sure to log on as Administrator. If you attempt to
install the file with another account, an error may occur. Contact your PC's manufacturer or Microsoft
for information on how to set Administrator privileges on your PC.
d Install the FOMA communication setting file only when connecting to the PC using the FOMA USB
Cable with Charge Function 02.
*:Quit any Windows software, including anti-virus, that resides on the task bar.
To close software that resides on task bar, click an icon on the task bar and click " 閉じる" (Close) or
"終了 " (Finish).
1
Access the FOMA communication setting file (drivers) download page on
DOCOMO website
Access http://www.nttdocomo.co.jp/support/utilization/application/foma/com_set/driver/index.html
(in Japanese only)
2
3
Go to the driver download page for the in-use model
4
5
Specify the destination to save, and download the file
Upon confirming the user agreement, click "同意する" (Agree) to agree it
■ If the “ファイルのダウンロード−セキュリティの警告”(File Download - Security Warning)
screen appears
Click “保存”(Save)
Double-click the downloaded file "【model name】_driver.exe"
( "【model name】_driver_win8.exe" for Windows 8), and click "実行"
(Execute)
Follow the onscreen instruction to specify the destination to extract the file.
6
7
Read "ReadMe.txt" in the "【model name】_driver" folder created at Step 5,
and double-click an installation file that is compatible with the in-use OS
When the User Account Control screen appears, click “はい”(Yes) for
Windows 8 and Windows 7, and click “続行”(Continue) for Windows Vista
For Windows XP, the User Account Control screen is not displayed.
8
Click “ドライバインストール”
(Install driver)
Installation starts.
8
When this screen appears, click
9 “OK”
The title bar display differs depending on the inuse OS.
on the FOMA terminal, then connect the FOMA USB Cable with Charge
10 Turn
Function 02 (optional) to your FOMA terminal
For connecting the FOMA terminal and FOMA USB Cable with Charge Function 02, refer to the
Instruction Manual for the FOMA terminal.
11
Connect the FOMA USB Cable with Charge Function 02 to the USB terminal
of the PC
A message appears on the task bar indicator, and then installation starts. Click the message and display
the progress of installation.
If this screen appears, click “閉じ
12 る”
(Close)
Installation of the driver is completed when 4
drivers are displayed on the screen. Proceed to
“Checking the installed driver”(p.10).
NOTE
d"
" appears on the FOMA terminal display when the FOMA communication setting file is installed on a PC and the PC and
the FOMA terminal is connected with the FOMA USB Cable with Charge Function 02.
9
Checking the installed driver
Check that the FOMA communication setting file (drivers) has been correctly installed.
This section describes an example using Windows 7.
1
Select "
" → "コントロールパネル" (Control Panel)
For Windows 8
From the Start screen, open the " デスクトップ " (Desktop), and then move the mouse cursor to the
top right corner of the screen to display the Charm Bar → Select " 設定 " (Settings) → " コントロール
パネル " (Control Panel)
For Windows XP
Select " スタート " (Start) → " コントロールパネル " (Control Panel)
2
Open "システムとセキュリティ " (Systems and security) in the "コントロール
パネル" (Control Panel)
For Windows Vista
Open " システムとメンテナンス " (System and maintenance) in the " コントロールパネル " (Control
Panel)
For Windows XP
Click the " システム " (System) icon in " パフォーマンスとメンテナンス " (Performance and
maintenance)
3
Select "デバイスマネージャー " (Device Manager)
When the User Account Control screen appears, click " はい " (Yes).
For Windows Vista
Select " デバイスマネージャ " (Device Manager)
When the User Account Control screen appears, click " 続行 " (Continue).
For Windows XP
Click the " ハードウェア " (Hardware) tab and click " デバイスマネージャ " (Device manager)
4
Click each device to check the
installed driver name
Check that all the driver names are displayed under
" ポート(COM と LPT)" (Ports (COM& LPT)), " モ
デム " (Modems) and " ユニバーサルシリアルバス
コントローラー "* (Universal Serial Bus Controller)
or "USB(Universal Serial Bus)コントローラー "*
(USB (Universal Serial Bus) controller).
*:It is displayed " ユニバーサルシリアルバスコン
トローラ " or "USB (Universal Serial Bus) コント
ローラ " on Windows Vista and Windows XP.
Device name
Driver name
ポート(COMとLPT)
a FOMA【model name】Command Port
a FOMA【model name】OBEX Port
モデム
a FOMA【model name】
ユニバーサルシリアルバスコントローラー or USB (Universal
Serial Bus) コントローラー
a FOMA【model name】
NOTE
d When you check the above, if not all the driver names appear, follow the uninstall instructions (p.11) to delete the
FOMA communication setting file and install the proper file.
10
Uninstalling the FOMA communication setting file (drivers)
If necessary (when updating the drivers, etc.), uninstall the drivers as follows. The procedure
for uninstalling from a Windows 7 or Windows Vista machine is described as an example.
d Uninstallation is not available while connecting the FOMA terminal with PC.
d When uninstalling FOMA communication setting file, be sure to log on as Administrator. If you attempt
to uninstall the file with another account, an error may occur. Contact your PC's manufacturer or
Microsoft for information on how to set Administrator privileges on your PC.
1
If the FOMA terminal and the PC are connected by the FOMA USB Cable
with Charge Function 02 (optional), remove the FOMA USB Cable with
Charge Function 02
2
Start "プログラムと機能" (Applications and functions) on the Windows
Click " " → " コントロールパネル" (Control Panel) → " プログラムのアンインストール " (Uninstall a
program)
For Windows 8
From the Start screen, open the " デスクトップ " (Desktop), and then move the mouse cursor to the
top right corner of the screen to display the Charm Bar → Click "設定 " (Settings) → " コントロールパ
ネル " (Control Panel) → " プログラムのアンインストール " (Uninstall a program)
For Windows XP
Click " スタート " (Start) → " コントロールパネル " (Control Panel) → " プログラムの追加と削除 "
(Add and remove applications)
3
Select "FOMA 【model name】USB" and click "アンインストールと変更"
(Uninstall/Change)
For Windows XP
Select "FOMA 【model name】USB"and click " 変更と削除 " (Change and delete)
4
When the User Account Control screen appears, click "はい" (Yes) for
Windows 7, and click "続行" (Continue) for Windows Vista
The User Account Control screen is not displayed for Windows 8 and Windows XP.
5
6
Click "OK" to uninstall
To cancel uninstallation, click " キャンセル " (Cancel).
Click "はい" (Yes) to restart Windows
Now the uninstallation is completed.
If you click " いいえ " (No), restart Windows manually.
NOTE
d When "FOMA【model name】USB" is not displayed in the " プログラムと機能 " (Applications and functions) on the
Windows, perform the following procedure:
①Open the "【model name】_driver" folder created when the FOMA communication setting file (drivers) is installed
②For Windows 7 (32-bit), open "【model name】_driver" → "【model name】_Win7_32" folder
For Windows 7 (64-bit), open "【model name】_driver" → "【model name】_Win7_64" folder
For Windows Vista (32-bit), open "【model name】_driver" → "【model name】_WinVista32" folder
For Windows Vista (64-bit), open "【model name】_driver" → "【model name】_WinVista64" folder
For Windows XP, open "【model name】_driver" → "【model name】_Win_XP" folder
For Windows 8 (32-bit), open "【model name】_driver" → "【model name】_Win8_32" folder
For Windows 8 (64-bit), open "【model name】_driver" → "【model name】_Win8_64" folder
③Double-click "【model name】_un.exe" *
*:It is displayed as "【model name】_un" depending on the setting of your PC.
11
Preparing Bluetooth Communication
Perform data communication by connecting a Bluetooth communication compatible PC to the
FOMA terminal wirelessly.
Register and connect the PC to the FOMA terminal
To connect a PC to the FOMA terminal for the first time, register the PC to the FOMA terminal.
1
MENU key"Tool""Bluetooth""Accept dialup devices"
2
Search and register the Bluetooth device from the PC
3
4
The FOMA terminal changes to the Bluetooth standby mode, and " (blue)" appears on the display.
If no communication is established for about 5 minutes, the Bluetooth standby mode is released
automatically.
Register the device from the PC while the FOMA terminal is in Bluetooth standby mode.
Refer to the instruction manual of your PC for details on operating it. (Depending on the instruction
manual, " 探索 " (Search) or " サーチ " (Search) is used instead of " 検索 " (Search), and " ペアリング "
(Pairing) is used " 機器登録 " (Register devices).)
Select "YES" when the message informing the device registration appears
Enter Bluetooth passkey
The PC is registered, and the PC is connected to the FOMA terminal wirelessly. When the connection is
established, " (blue)" flashes on the display.
■ To connect to the registered PC
Select "Accept dialup devices" on the FOMA terminal, and then perform connection operations
on the PC.
You can also connect the FOMA terminal to the registered PC by selecting "Tool"
"Bluetooth""Accept registered" and confirming "Dial-up" is in standby mode, then performing
connection operation on the PC.
12
Check the modem setting
Before setting communication, confirm the modem name and the COM port number for the
dial-up connection.
1
Select "
" → "コントロールパネル" (Control Panel)
For Windows 8
From the Start screen, open the " デスクトップ " (Desktop), and then move the mouse cursor to the
top right corner of the screen to display the Charm Bar → Select " 設定 " (Settings) → " コントロール
パネル " (Control Panel)
For Windows XP
Select " スタート " (Start) → " コントロールパネル " (Control Panel)
2
Open "システムとセキュリティ " (Systems and security) in the "コントロー
ルパネル" (Control Panel)
For Windows Vista
Open " システムとメンテナンス " (System and maintenance) in the " コントロールパネル " (Control
Panel)
For Windows XP
Click the " システム " (System) icon in " パフォーマンスとメンテナンス " (Performance and
maintenance)
3
Select "デバイスマネージャー " (Device Manager)
When the User Account Control screen appears, click " はい " (Yes).
For Windows Vista
Select " デバイスマネージャ " (Device Manager)
When the User Account Control screen appears, click " 続行 " (Continue).
For Windows XP
Click the " ハードウェア " (Hardware) tab and click " デバイスマネージャ " (Device manager)
4
Click each device to check the modem name and the COM port number
The modem name and the COM port number are displayed under "ポート(COMと LPT)" (Ports
(COM&LPT)) and " モデム " (Modem).
Stopping the dial-up connection standby
Stop the dial-up connection service being connected.
1
2
MENU key"Tool""Bluetooth""Device list"
Uncheck "Dial-up" Press a key corresponding to "Finish"
13
Connecting to a Wi-Fi-compatible PC
Packet communication is possible by setting the FOMA terminal as an access point and
connecting the FOMA terminal and a Wi-Fi-compatible PC via Wi-Fi.
d Set the FOMA terminal to Access point mode beforehand. Refer to the Instruction Manual for the
FOMA terminal for how to set to Access point mode and details for Access point mode settings.
<Example: For Windows 7>
1
2
3
4
5
6
Open "
" → "コントロールパネル" (Control Panel)
Select “ネットワークとインターネット”(Network and Internet) → “ネッ
トワークの状態とタスクの表示”(Show network status and task)
Click “ワイヤレスネットワークの管
理”(Wireless network management)
Click "追加" (Add)
Select "ネットワークプロファイルを手動で作成します" (Set up the
network profile manually)
Enter ESSID for the FOMA
terminal in the "ネットワーク名"
(Network name) column, set the
security type for the FOMA
terminal in the "セキュリティの種
類" (Security type) column, and
click "次へ" (Next)
"WPA2- パーソナル " (WPA2-personal) under
" セキュリティの種類 " (Security type) has the
same meaning of "WPA2-PSK".
If encryption function is set to the FOMA
terminal
Set " 暗号化の種類 " (Encryption type) and
" セキュリティキー" (Security key) options to
the same settings as the FOMA terminal.
7
Click "閉じる" (Close)
14
DOCOMO Connection Manager
DOCOMO Connection Manager is a useful software for performing the flat-rate data
communications and the measured-rate data communications. "DOCOMO Connection
Manager" enables simplification of mopera U subscription, or appropriate setting on PC
depending on the subscription. The fare counter function is also available for checking an
indication of the data traffic or usage amount.
This document describes procedures to install DOCOMO Connection Manager.
* To connect the FOMA terminal to the Internet, signing in to the flat-rate data plan or FOMA service, and the Internet
service provider including mopera U is required, which supports data communication. For more information, see
DOCOMO website.
Fare counter
Connection/
disconnection
button
Use of measured-rate data communications
Note that the communication charge can become expensive if packet communication is used to communicate
large volumes of data such as to view sites and websites containing images or to download data (eg:
applications, music, movie data, or update files for OS or anti-virus software).
Note that data communication with a PC using a USB Cable is out of the FOMA packet flat-rate services, such
as flat-rate data plans in "Pake-Houdai", "Pake-Houdai full".
Before installing DOCOMO Connection Manager
d Operating environment
For the PC operating environment to use DOCOMO Connection Manager, see "Operating
environment" (p.4).
For the latest information on the operating environment, visit the DOCOMO website.
d Preparation
1
2
Prepare the FOMA terminal, and FOMA USB Cable with Charge Function 02
(optional)
Confirm the price plan, discount services and contract details with the
Internet Service Provider
15
3
When the connection software other than DOCOMO Connection Manager is
installed, disable it if necessary
"Other connection software than DOCOMO Connection Manager" → p.17
d Setting for Internet Explorer
Before installing DOCOMO Connection Manager, set the Internet option for connection in Internet
Explorer.
1
2
Start Internet Explorer to select "ツール" (Tool) → "インターネットオプショ
ン" (Internet option)
3
Click "OK"
Click "接続" (Connect) tab and select
"ダイヤルしない" (Not dialing)
d Log on as a user who uses DOCOMO Connection Manager
When installing DOCOMO Connection Manager, be sure to log on as a user with Administrator
privilege. If you attempt to install the software with another account, an error may occur.
■ For Windows 8/Windows 7/Windows Vista
An Administrator account is required. If you log on with an account other than Administrator, a
screen for inputting Administrator name and password appears during installation.
■ For Windows XP
Log on as a user in Administrators group, or an "Administrator".
d Quit all running applications
Before starting installation, quit any Windows software, including anti-virus.
Example: To close software that resides on task bar, right-click an icon on the task bar and click
"閉じる " (Close) or " 終了 " (Finish).
16
d Other connection software than DOCOMO Connection Manager
d DOCOMO Connection Manager provides the same functions as the ones included in other connection
software listed below, and this is all you need. Disable or uninstall the following software, if necessary.
■Software you do not need to use simultaneously
a mopera U start up tool
a mopera U connection & setting tool
a FOMA PC setting software
a FOMA byte counter
d Uninstall the following public wireless LAN connection software if docomo Wi-Fi is used through
DOCOMO Connection Manager. The simultaneous use prohibits docomo Wi-Fi connection through
DOCOMO Connection Manager.
a U public wireless LAN utility software
a DOCOMO public wireless LAN utility software
a DOCOMO public wireless LAN utility program
Installing DOCOMO Connection Manager
1
Access DOCOMO Connection Manager page on DOCOMO website
2
Click "ドコモ コネクションマネージャ (Windows®)へ" (DOCOMO
Connection Manager (Windows®)
3
Click "[ドコモ コネクションマネージャ (Windows® 用)]ダウンロードへ"
(Download DOCOMO Connection Manager (for Windows®))
4
Upon confirming the user agreement, click "同意する" (Agree) of "ダウン
ロード" (Download) to agree it
Access http://www.nttdocomo.co.jp/support/utilization/application/service/connection_manager/
(in Japanese only)
■ If the “ファイルのダウンロード−セキュリティの警告”(File Download - Security Warning)
screen appears
Click “実行”(Execute)
5
Execute the downloaded file, and when the User Account Control screen
appears, click "はい" (Yes) for Windows 8 and Windows 7, and click "続行"
(Continue) for Windows Vista
For Windows XP, the "ユーザーアカウント制御 " (User Account Control) screen is not displayed. Setup
program starts immediately.
For Windows 8
17
For Windows 7
For Windows Vista
6
Click "次へ" (Next)
7
Confirm the precautions and click "
次へ" (Next)
8
Upon confirming the user
agreement, click "使用許諾契約の
条項に同意します" (Agree) to agree
to it, and click "次へ" (Next)
18
9
Select the installation location and
click "次へ" (Next)
If you want to change the location, click " 変更 "
(Change), specify the location and click " 次へ "
(Next).
10 Click "インストール" (Install)
11
Click "完了" (Finish)
Installation is completed.
19
Starting DOCOMO Connection Manager
1
Start DOCOMO Connection Manager
Open " " or " スタート " (Start) → " すべてのプログラム " (All programs) → "NTT DOCOMO" → " ド
コモ コネクションマネージャ " (DOCOMO Connection Manager) → " ドコモ コネクションマネー
ジャ " (DOCOMO Connection Manager)
For Windows 8, click "ドコモ コネクションマネージャ " (DOCOMO Connection Manager) on the
Start screen
2
Specify the settings by following
the setting wizard
The setting wizard will automatically appear
when you start DOCOMO Connection Manager
for the first time.
Follow the guidance and you can make
preparations for Internet connection.
For details, refer to DOCOMO Connection
Manager Help.
Executing Set Data Communication
1
2
Start DOCOMO Connection Manager
"Starting DOCOMO Connection Manager" → p.20
Click the tab of the desired connection method, and click "接続する"
(Connect)
For details, refer to DOCOMO Connection Manager Help.
When connection is not available, check “Setting up Dial-up Network” (p.22) and “Setting up Dial-up”
(p.30).
d During packet communication, a different icon appears on the FOMA terminal depending on the
communication conditions.
(Communicating, sending data)
(Communicating, receiving data)
(Communicating, no data transfer)
(Sending, or disconnecting)
(Receiving, or disconnecting)
d"
" appears on the FOMA terminal during 64K data communication.
NOTE
d The icons on the FOMA terminal display may differ depending on the model. For details, refer to the Instruction Manual
for the FOMA terminal.
d When executing data communication by using the FOMA USB Cable with Charge Function 02 (optional), to connect
the PC to another FOMA terminal, the FOMA communication setting file (drivers) must be installed again.
20
How to disconnect
Just closing the browser or mailer on your PC does not disconnect the communication line.
When you do not perform data communication, be sure to disconnect by the following
procedure:
1
Click " 切断する " (Disconnect) on the
DOCOMO Connection Manager
screen
2
Click "OK"
NOTE
d With Windows OS, software will be automatically updated if set to do so, and you may incur high packet
communications charges without knowing you are doing so.
d The communication speed displayed on the PC may be different from the actual communication speed.
21
Setting up Dial-up Network
This section describes how to set up a dial-up connection for packet communication / 64K data
communication without using DOCOMO Connection Manager. The flow of operation is described
below.
d It is unnecessary to set up the dial-up network for 64K data communication. Go on to "Setting up Dialup" (p.30).
About AT commands
d AT commands are commands for modem control. The FOMA terminal complies AT commands and
supports some enhanced commands and its own AT commands.
d Entering an AT command allows you to set or confirm (display) the detail settings and the contents of
the settings for the "Data communication" and FOMA terminal.
Checking the COM port
To set up the access point (APN), you need to specify the COM port number assigned to
"FOMA 【model name】" (Modem) built in after installing the FOMA communication setting file
(drivers). This section describes how to confirm the COM port number. The COM port
confirmed here will be used in the access point (APN) set up (p.26).
d Preparation
This section takes the setting using the FOMA USB Cable with Charge Function 02 for
example. When you connect using Bluetooth communication, see p.12.
1
2
Connect the FOMA USB Cable with Charge Function 02 (optional) to the
FOMA terminal
Turn on the FOMA terminal, then connect the FOMA USB Cable with Charge
Function 02 connected to the FOMA terminal to your PC
d To check the COM port on Windows 8
1
From the Start screen, open the "デスクトップ" (Desktop), and then move
the mouse cursor to the top right corner of the screen to display the Charm
Bar → Select "設定" (Settings) → "コントロールパネル" (Control Panel)
2
3
4
Open "デバイスとプリンターの表示" (Device and printer)
Right-click the in-use FOMA terminal model name, and select "モデムの設
定" (Modem settings)
If the "所在地情報" (Address information) screen is displayed, enter "市外局
番/エリアコード" (Area code) and click "OK"
22
5
Click the "モデム" (Modem) tab to
confirm the COM port of the "接続
先" (Access point) column of the inuse FOMA terminal, and click "OK"
When connecting wirelessly using Bluetooth
communication, confirm the COM port number
of the in-use Bluetooth linked standard modem
or Bluetooth modem provided by a Bluetooth
device maker in the " 接続先 " (Access point)
column.
The COM port confirmed here will be used in the
access point (APN) set up (p.26).
The contents displayed on the screen and the
COM port number differ depending on the PC.
d To check the COM port on Windows 7
1
2
3
4
5
Open "
" → "コントロールパネル" (Control Panel)
Open "デバイスとプリンターの表示" (Device and printer) in Control Panel
Right-click the in-use FOMA terminal model name, and select "モデムの設
定" (Modem setting)
If the "所在地情報" (Address information) screen is displayed, enter "市外局
番/エリアコード" (Area code) and click "OK"
Click the "モデム" (Modem) tab to
confirm the COM port of the "接続
先" (Access point) column of the inuse FOMA terminal, and click "OK"
When connecting wirelessly using Bluetooth
communication, confirm the COM port number
of the in-use Bluetooth linked standard modem
or Bluetooth modem provided by a Bluetooth
device maker in the " 接続先 " (Access point)
column.
The COM port confirmed here will be used in the
access point (APN) set up (p.26).
The contents displayed on the screen and the
COM port number differ depending on the PC.
23
d To check the COM port on Windows Vista
1
2
3
4
Open "
"→ "コントロールパネル" (Control Panel)
Open "ハードウェアとサウンド" (Hardware and Sound) → "電話とモデム
のオプション" (Telephone and modem options) in Control Panel
If the "所在地情報" (Address information) screen is displayed, enter "市外局
番/エリアコード" (Area code) and click "OK"
Click the "モデム" (Modem) tab to
confirm the COM port of the "接続
先" (Access point) column of the inuse FOMA terminal, and click "OK"
When connecting wirelessly using Bluetooth
communication, confirm the COM port number
of the in-use Bluetooth linked standard modem
or Bluetooth modem provided by a Bluetooth
device maker in the " 接続先 " (Access point)
column.
The COM port confirmed here will be used in the
access point (APN) set up (p.26).
The contents displayed on the screen and the
COM port number differ depending on the PC.
d To check the COM port on Windows XP
1
Open "スタート" (Start)→"コント
ロールパネル" (Control Panel)
24
2
Open "電話とモデムのオプション"
(Telephone and modem options)
from "プリンタとその他のハード
ウェア" (Printers and other
hardware) in Control Panel
3
4
If the "所在地情報" (Address information) screen is displayed, enter "市外局
番/エリアコード" (Area code) and click "OK"
Click the "モデム" (Modem) tab to
confirm the COM port of the "接続
先" (Access point) column of the inuse FOMA terminal, and click "OK"
When connecting wirelessly using Bluetooth
communication, confirm the COM port number
of the in-use Bluetooth linked standard modem
or Bluetooth modem provided by a Bluetooth
device maker in the " 接続先 " (Access point)
column.
The COM port confirmed here will be used in the
access point (APN) set up (p.26).
The contents displayed on the screen and the
COM port number differ depending on the PC.
25
Setting up the access point (APN)
Default setting
cid1:mopera.net(PPP) cid2:not set cid3:mopera.net(IP) cid4:mpr.ex-pkt.net(PPP) cid5 to 10:not set
Communication software to enter AT commands is required for the settings. This section describes
how to set it up using "Hyper terminal" that comes with Windows XP.
d Windows 8, Windows 7, and Windows Vista are not compatible with "Hyper terminal". For Windows
8, Windows 7, and Windows Vista, set with software compatible with your operating system.
Access points <APN/cid>
d Normal telephone numbers are not used for access points for packet communication unlike 64K data
communication. Set up APN instead of a telephone number for connection.
d Setting up the APN is just like registering a phonebook for packet communication from a PC. When
registering, assign registration number (cid) 1 through 10, which is used as a part of the access point
number. As the APN of mopera U ("mopera.net") is assigned by default to cid1 and cid3 and the APN
of mopera U ("mpr.ex-pkt.net") to cid4, assign the APN to cid2 and cid5 through cid10.*1
d APN is administered by "cid (administration numbers 1 through 10)". Specifying " *99*** <cid
number> #" as the access point number enables the connection to the access point with the cid
number.
d Specifying "*99***1#", "*99***3#", or "*99***4#" as the access point number for
the mopera U connection enables you to use mopera U easily.*2
d The APN setting registers the access point to the FOMA terminal just like registering other parties'
information (telephone number, etc.) on a mobile phone. The following are comparisons with the
Phonebook of the mobile phone:
APN setting
Data to be registered
APN
cid
Memory number of Phonebook
─
How to register
Register using PC
Register using Mobile phone
How to use
Phonebook of mobile phone
Phone number
Available (DOCOMO Connection
Manager, etc.)
Other party's name
Available (Dedicated software
required)
Unavailable (Cannot even check)
Available
Specify cid to connect
Look up Phonebook to call
─
Enter the telephone number directly
from the dial key on the FOMA
terminal to call.
d Registered cid will be connection numbers in the dialup connection settings.
d Contact your Internet service provider or network administrator for an access point (APN) other than
mopera U.
*1: Set up the APN setting for the access point (Internet service provider) on the FOMA terminal in advance instead of entering
APN in the Telephone Number column of "ダイヤルアップネットワーク" (Dial-up Network) for connection.
*2: To connect to other Internet service providers, set the APN and assign it to cid2 and cid5 through cid10.
<Example: Using the FOMA USB Cable with Charge Function 02 on Windows XP>
1
Connect the FOMA USB Cable with Charge Function 02 (optional) to the
FOMA terminal
2
Turn on the FOMA terminal, then connect the FOMA USB Cable with Charge
Function 02 connected to the FOMA terminal to the PC
26
3
Click "スタート" (Start) → "すべてのプログラム" (All programs) → "アクセ
サリ" (Accessories) → "通信" (Communication) → "ハイパーターミナル"
(Hyper terminal) to start Hyper terminal
4
5
Select the "今後、このメッセージを表示しない" (Do not display this
message again) checkbox and then click "はい" (Yes)
Enter any name in the "名前"
(Name) column and click "OK"
"sample" is entered here as an example.
6
Select the in-use FOMA terminal
from "接続方法" (Connection
method), and click "OK"
Click " キャンセル " (Cancel) after the connection
screen appears.
If a COM port of the in-use FOMA terminal
can be selected
When Properties of the COM port is displayed,
click "OK".
In this example, "COM3" is selected. See
"Checking the COM port" (p.22) to confirm
the actual COM port number to be selected in
" 接続方法 " (Connection method).
If a COM port of the in-use FOMA terminal
cannot be selected
Click " キャンセル " (Cancel) to close the " 接
続の設定 " (Connection Settings) screen and
then follow the steps below:
(1) Select " ファイル " (File) menu → "プロパ
ティ " (Properties)
(2) Select the in-use FOMA terminal in the " 接
続方法 " (Connection method) column of
the " 接続の設定 " (Connection Settings)
tab on the "sample のプロパティ "
(sample Properties) screen
(3) Uncheck " 国 / 地域番号と市外局番を使
う " (Use the Country/Region Code and
Area Code)
(4) Click "OK"
27
7
Enter the access point (APN) and
press
Enter in the format of AT+CGDCONT=<cid>,
"PDP_type", "APN"
<cid>: Enter any number between 5 and 10.
Please be cautious because if cid has been
already set, the setting will be overwritten.
"PDP_type":Enter "PPP" or "IP".
"APN": Put " " around the access point (APN)
to enter.
If "OK" is displayed, the settings for the access
point (APN) are completed.
Example: To enter APN named XXX.abc in cid
Number5
Enter AT+CGDCONT=5,"PPP","XXX.abc"
.
8
Confirm that "OK" appears and click "ハイパーターミナルの終了" (Close
Hyper terminal) in the "ファイル" (File) menu
""sample" と名前付けされた接続を保存しますか? " (Are you going to save the connection "sample"?)
appears, but it is not necessary to save.
NOTE
d The AT commands entered in "Hyper terminal" may not be displayed after Step 7 on p.28. In this case, if you enter
ATE1
, AT commands you enter from then on are displayed.
d To reset the access point (APN) settings using the AT command
・ If reset, the access point (APN) setting for cid=1 and cid=3 returns to "mopera.net" (default value) and cid=4 to "mpr.ex-pkt.net"
(default value); cid=2 and cid=5 through 10 will be unregistered.
<How to enter>
AT+CGDCONT=
(to reset all cid)
AT+CGDCONT=〈cid〉
(to reset a certain cid only)
d To confirm the access point (APN) settings using the AT command
・ Display the current settings.
<How to enter>
AT+CGDCONT?
Notifying or Not notifying the Caller ID
d You can set whether to notify the other person of your caller ID when packet communication is carried
out. Since the caller ID is important information, please take care when you send your caller ID.
d You can set up the Notify or not notify Caller ID setting using the AT command prior to a dial-up connection.
d Use the *DGPIR command (p.43) to notify or not notify the caller ID or change back to "Not set"
(Default value).
1
2
Start "ハイパーターミナル" (Hyper terminal)
For how to start Hyper terminal, see "Setting up the access point (APN)" (p.26).
Set up Notify (186) or Not notify
(184) Caller ID for packet
communication
Enter in the format of "AT * DGPIR=<n >".
To automatically attach 184 (Not notify) for
dialing an outgoing call/answering an
incoming call
Enter the following:
AT* DGPIR=1
To automatically attach 186 (Notify) for dialing
an outgoing call/answering an incoming call
Enter the following:
AT* DGPIR=2
28
3
Confirm that "OK" appears and
click "ハイパーターミナルの終了"
(Close Hyper terminal) in the "ファ
イル" (File) menu
NOTE
d The Caller ID needs to be set to "Notify" to use DOCOMO's internet connection service mopera U.
About 186 (Notify)/184 (Not notify) in Dial-up Network
You can attach 186/184 to the access point number in the Dial-up network settings as well.
The following table shows what happens if you set 186/184 both for the * DGPIR command and the Dial-up
network setting.
Dial-up network setting (for
cid=2)
Notify/Not notify setting by
* DGPIR command
Not set
*99 *** 2#
184*99***2#
Notify/Not notify Caller ID
Notify
Not notify
Not notify
Notify
Notify
Not set
Not notify (Dial-up network notification 184 has the
priority)
Not notify
Notify
Not set
186* 99***2#
Notify (Dial-up network notification 186 has the
priority)
Not notify
Notify
29
Setting up Dial-up
d This section takes accessing mopera U by packet communication for example.
d To connect using packet communication, enter " *99***3#" as the number of access point for
mopera U. To connect using 64K data communication, enter "*8701" as the number of access point
for mopera U.
Setting up dial-up on Windows 8
1
From the Start screen, open the "デスクトップ" (Desktop), and then move
the mouse cursor to the top right corner of the screen to display the Charm
Bar → Select "設定" (Settings) → "コントロールパネル" (Control Panel)
ネットワークとインターネット”(Network and Internet) →
2 “Select“
ネットワークの状態とタスクの表示”(View network status and tasks)
“新しい接続またはネットワークのセットアップ”(Set up a new
3 Click
connection or network)
Select “インターネットに接続します”(Connect to the Internet) and click
4 “次へ”
(Next)
5 Select “ダイヤルアップ”(Dial-up) and click “次へ”(Next)
the modem selection screen
6 Ifappears,
click the in-use FOMA
terminal
When connecting wirelessly using Bluetooth
communication, click the in-use Bluetooth linked
standard modem or Bluetooth modem provided
by a Bluetooth device maker.
The modem selection screen appears only if
there are multiple modems.
7
Select the "ダイヤルアップの電話
番号" (Dial-up phone number) and
enter the number of the access
point
You can leave user name and password blank for
mopera U connection.
To connect to any other provider than mopera U,
enter the user name and password specified by
the provider or network administrator in the "
ユーザー名 " (User Name) and " パスワード "
(Password) columns as this screen.
This screen is an example of accessing mopera
U by packet communication.
8
Click "接続" (Connect) and then click "スキップ" (Skip)
To confirm the settings, cancel a connection test.
30
9 Click “閉じる”(Close)
ネットワークとインターネット”(Network and Internet) →
10 “Click“
ネットワークに接続”(Connect to a network) on Control Panel
the name created for the dial-up and
11 Right-click
click "接続プロパティの表示" (View connection
properties)
Confirm the settings on the "全般"
12 (General)
tab
If two or more modems are connected to the
PC
When connecting using the FOMA USB Cable
with Charge Function 02, confirm that only the
in-use FOMA terminal is checked in the "接続
の方法 " (Connect Using) column.
When connecting wirelessly using Bluetooth
communication, confirm that only " モデム
(Modem) - the name of the in-use Bluetooth
linked standard modem or Bluetooth modem
provided by a Bluetooth device maker" is
checked in the " 接続の方法 " (Connect Using)
column.
If it is not checked, check it.
Confirm that " ダイヤル情報を使う " (Use Dial
Information) is unchecked. If not, uncheck it.
31
Click the "ネットワーク" (Network)
13 tab
and set up each setting
Check only " インターネット プロトコル バー
ジョン4(TCP/IPv4)" (Internet Protocol version 4
(TCP/IPv4)) in the " この接続は次の項目を使用
します " (Use the following items for this
connection).
the "オプション" (Options)
14 Click
tab and click "PPP設定" (PPP Settings)
15 Clear all the boxes and click "OK"
16 Click "OK"
Setting up dial-up on Windows 7
1
2
3
4
Select “
”→ “コントロールパネル”(Control Panel)
Select “ネットワークとインターネット”(Network and Internet) → “ネッ
トワークの状態とタスクの表示”(Show network status and task)
Click “新しい接続またはネットワークのセットアップ”(Set up new
connection or network)
Select “ダイヤルアップ接続をセットアップします”(Set up dial-up
connection) and click “次へ”(Next)
32
5
If the modem selection screen
appears, click the in-use FOMA
terminal
When connecting wirelessly using Bluetooth
communication, click the in-use Bluetooth linked
standard modem or Bluetooth modem provided
by a Bluetooth device maker.
The modem selection screen appears only if
there are multiple modems.
6
Select the "ダイヤルアップの電話
番号" (Phone number for dial-up)
and enter the number of the access
point
You can leave user name and password blank for
mopera U connection.
To connect to any other provider than mopera U,
enter the user name and password specified by
the provider or network administrator in the
" ユーザー名 " (User Name) and "パスワード "
(Password) columns as this screen.
This screen is an example of accessing mopera
U by packet communication.
7
8
9
Click "接続" (Connect) and then click "スキップ" (Skip)
To confirm the settings, cancel a connection test.
Click “閉じる”(Close)
Click “ネットワークとインターネット”(Network and Internet) → “ネット
ワークの状態とタスクの表示”(Show network status and task) → “ネット
ワークに接続”(Connect to network) on Control Panel
the icon created for the dial-up and click
10 Right-click
"プロパティ " (Properties)
33
11
Confirm the settings on the "全般"
(General) tab
If two or more modems are connected to the
PC
When connecting using the FOMA USB Cable
with Charge Function 02, confirm that only the
in-use FOMA terminal is checked in the "接続
の方法 " (Connection method) column.
When connecting wirelessly using Bluetooth
communication, confirm that only " モデム
(Modem) - the name of the in-use Bluetooth
linked standard modem or Bluetooth modem
provided by a Bluetooth device maker" is
checked in the " 接続の方法 " (Connection
method) column.
If it is not checked, check it.
Confirm that " ダイヤル情報を使う " (Use Dial
Information) is unchecked. If not, uncheck it.
the "ネットワーク" (Network)
12 Click
tab and set up each setting
Check only " インターネット プロトコル バー
ジョン 4(TCP/IPv4)" (Internet Protocol version
4 (TCP/IPv4)) in the " この接続は次の項目を使用
します " (Use the following items for this
connection).
the "オプション" (Options)
13 Click
tab and click "PPP設定" (PPP
settings)
14 Clear all the boxes and click "OK"
15 Click "OK"
34
Setting up dial-up on Windows Vista
1
2
3
4
Open "
" → "接続先" (Access point)
Click "接続またはネットワークをセットアップします" (Set up the
connection or network)
Select "ダイヤルアップ接続をセットアップします" (Set up dial-up
connection) and click "次へ" (Next)
If the modem selection screen
appears, click the in-use FOMA
terminal
When connecting wirelessly using Bluetooth
communication, click the in-use Bluetooth linked
standard modem or Bluetooth modem provided
by a Bluetooth device maker.
The modem selection screen appears only if
there are multiple modems.
5
Select the "ダイヤルアップの電話
番号" (Phone number for dial-up)
and enter the number of the
access point
You can leave user name and password blank for
mopera U connection.
To connect to any other provider than mopera U,
enter the user name and password specified by
the provider or network administrator in the
" ユーザー名 " (User Name) and "パスワード "
(Password) columns as this screen.
This screen is an example of accessing mopera
U by packet communication.
6
7
8
Click "接続" (Connect) and then click "スキップ" (Skip)
To confirm the settings, cancel a connection test.
Click "接続をセットアップします" (Set up the connection) and then "閉じ
る" (Close)
Open "
" → "接続先" (Access point)
35
9
Right-click the icon created for the
dial-up and click "プロパティ "
(Properties)
Confirm the settings on the "全般"
10 (General)
tab
If two or more modems are connected to the
PC
When connecting using the FOMA USB Cable
with Charge Function 02, confirm that only the
in-use FOMA terminal is checked in the "接続
の方法 " (Connection method) column.
When connecting wirelessly using Bluetooth
communication, confirm that only " モデム
(Modem) - the name of the in-use Bluetooth
linked standard modem or Bluetooth modem
provided by a Bluetooth device maker" is
checked in the " 接続の方法 " (Connection
method) column.
If it is not checked, check it.
Confirm that " ダイヤル情報を使う " (Use Dial
Information) is unchecked. If not, uncheck it.
11
Click the "ネットワーク" (Network)
tab and set up each setting
Check only " インターネット プロトコル バー
ジョン 4(TCP/IPv4)" (Internet Protocol version
4 (TCP/IPv4)) in the " この接続は次の項目を使用
します " (Use the following items for this
connection). Check "QoS パケットスケジュー
ラ " (QoS Packet Scheduler) and other items if
instructed by the provider.
12 Click the "オプション" (Options) tab and click "PPP設定" (PPP settings)
36
13 Clear all the boxes and click "OK"
14 Click "OK"
Setting up dial-up on Windows XP
1
Open "スタート" (Start) → "すべてのプログラム" (All programs) → "アクセ
サリ" (Accessories) → "通信" (Communication) → "新しい接続ウィザード"
(New connection wizard)
2
When the "新しい接続ウィザード"
(New Connection Wizard) screen
appears, click "次へ" (Next)
3
4
5
6
Select "インターネットに接続する" (Connect to the Internet) and click "次
へ" (Next)
Select "接続を手動でセットアップする" (Set up the connection manually)
and click "次へ" (Next)
Select "ダイヤルアップモデムを使用して接続する" (Connect using a dialup modem) and click "次へ" (Next)
If the "デバイスの選択" (Select the
device) screen appears, select
only the in-use FOMA terminal,
and click "次へ" (Next)
When connecting wirelessly using Bluetooth
communication, select the in-use Bluetooth
linked standard modem or Bluetooth modem
provided by a Bluetooth device maker.
The "デバイスの選択" (Select the device) screen
appears only if there are multiple modems.
(COMx) is a number of COM port displayed in
"Checking the COM port" (p.22).
37
7
Enter any name you want in the "ISP
名 " (ISP Name) and click "次へ "
(Next)
8
Enter the number of the access
point in the "電話番号" (Telephone
Number) column and click "次へ"
(Next)
This screen is an example of accessing
mopera U by packet communication.
9
Click "次へ" (Next)
You can leave user name and password blank for
mopera U connection.
To connect to any other provider than mopera U,
enter exact information specified by the provider
or network administrator in the "ユーザー名 "
(User Name), " パスワード" (Password) and "パ
スワードの確認入力 " (Confirm Password)
columns as this screen.
10 Click "完了" (Finish)
The newly created connection wizard appears.
Open "スタート" (Start) → "すべてのプログラム" (All programs) → "アクセ
11 サリ"
(Accessories) → "通信" (Communication) → "ネットワーク接続"
(Network connections)
38
the icon created for the dial12 Select
up and open "プロパティ "
(Properties) in the "ファイル" (File)
menu
Confirm the settings on the "全般"
13 (General)
tab
If two or more modems are connected to the
PC
When connecting using the FOMA USB Cable
with Charge Function 02, confirm that only the
in-use FOMA terminal is checked in the "接続
方法 " (Connection method) column.
When connecting wirelessly using Bluetooth
communication, confirm that only " モデム
(Modem) - the name of the in-use Bluetooth
linked standard modem or Bluetooth modem
provided by a Bluetooth device maker" is
checked in the " 接続方法 " (Connection
method) column.
If it is not checked, check it.
Confirm that " ダイヤル情報を使う " (Use Dial
Information) is unchecked. If it is checked,
uncheck it.
This screen is an example of accessing mopera U by packet communication.
Click the "ネットワーク" (Network)
14 tab
and set up each setting
Select "PPP: Windows 95/98/NT4/2000,
Internet" in the " 呼び出すダイヤルアップサー
バーの種類 " (Type of the dial-up server to call).
Select "インターネットプロトコル(TCP/IP)"
(Internet Protocol (TCP/IP)) in the " この接続は次
の項目を使用します " (Use the following items
for this connection). Since the setting of "QoS パ
ケットスケジューラ " (QoS Packet Scheduler)
cannot be changed, leave it as it is.
15 Click "設定" (Settings)
16 Clear all the boxes and click "OK"
39
17 When the Step 14 screen reappears, click "OK"
Running dial-up connection
This section describes how to make a dial-up connection for packet communication by using the dialup setting.
<Example: Using the FOMA USB Cable with Charge Function 02 on Windows 7>
1
2
Connect the FOMA terminal to the PC with the FOMA USB Cable with
Charge Function 02 (optional)
Open " " → "コントロールパネル" (Control Panel)→ "インターネットへ
の接続" (Connect to Internet)
For Windows 8
From the Start screen, open the " デスクトップ " (Desktop), and then move the mouse cursor to the
top right corner of the screen to display the Charm Bar → Click "設定 " (Settings) → " コントロールパ
ネル " (Control Panel) → " インターネットへの接続 " (Connect to the Internet)
3
Select the access point and click
"次へ" (Next)
4
Confirm the settings and click "ダイ
ヤル" (Dial)
This screen is an example for mopera U
connection. You can leave user name and
password blank for mopera U connection.
40
<The Connecting screen appears>
While this screen appears, the log-on process
such as confirmation of the user name and
password is performed.
<Completion of the connection>
When the connection is complete and a screen indicating the completion of the connection appears,
click " 閉じる " (Close). (Depending on the OS, a message appears from the indicator of the taskbar
located on the bottom-right of the desktop for a few seconds.)
You can start browser software to view sites and websites or to use e-mail.
When connection is not available, check "Setting up Dial-up Network" (p.22) and "Setting up Dial-up"
(p.30).
See p.20 for communication conditions.
How to disconnect
Just closing the Internet browser may not disconnect the communication line. Follow the instructions
below to disconnect for sure. This section describes an example using Windows 7.
1
2
Click the dial-up icon in the task-tray
The connection condition screen for Internet will be displayed.
Select the connected item and click "切断" (Disconnect)
NOTE
d The communication speed displayed on the PC may be different from the actual communication speed.
When this happens
d Check the followings if you cannot connect to the network or dial-up successfully.
Problem
Points to check
A FOMA terminal is not
recognized by the PC.
・ Check if your PC satisfies the required operating environment (p.4).
・ Check if the FOMA terminal is connected to the PC and the power is turned on.
<When using the FOMA USB Cable with Charge Function 02 (optional)>
・ Check if the FOMA communication setting file (drivers) is installed.
・ Check if the FOMA USB Cable with Charge Function 02 (optional) is firmly connected.
・ Check if the USB mode (p.7) is set to "Communication mode".
<When using Bluetooth communication>
・ Check if the Bluetooth device is connected to the FOMA terminal via dial-up communication
service.
Unable to connect with the
access point.
・ Check if the settings for the ID (user name) and password are correct.
・ If the access point requires the Caller ID, make sure that "184" is not added to the phone
number.
・ Check if the box of "フロー制御を使う" (Use the flow control) of the modem property is
checked.
・ Check if the APN is set correctly.
・ If you still cannot connect to the other end after checking the above, consult with the Internet
service provider or network administrator about the setting method.
41
AT Command List
AT commands available on FOMA terminal
d The following abbreviations are used in the AT command list;
[&F] : Command of which setting is initialized by AT&F command.
[&W] : Command of which setting is saved by AT&W command. The setting can be retrieved by ATZ
command.
d When you make a call via an external device or using AT command, the call is made from Number A in
A mode/Dual mode, and from Number B in B mode.
Modem port command list
The followings are the usable commands for "FOMA 【model name】(モデム)" (modem):
d When you execute commands via Bluetooth connection, a single-byte space is inserted after each ":"
in the results.
AT command
Outline
Parameter/description
Command execution example
A/
Executes the last executed
command again. No carriage
return is necessary.
−
A/
OK
AT
−
The modem function of a FOMA terminal is
controllable by adding the command of this
table after this command.
* OK is answered even when only AT is entered.
AT
OK
AT%V
Displays the version of the
FOMA terminal.
−
AT&Cn
Selects the operating
condition of the circuit CD
signal to DTE.
n = 0 : CD is always ON.
n = 1 : CD changes according to the carrier of
AT%V
Ver1.00
OK
AT&C1
OK
Selects the operation to
take place when the circuit
ER signal received from DTE
transits between ON and
OFF.
n = 0 : Ignores ER status (always assumed
Selects how to display the
connection speed.
n = 0 : Displays the wireless network
AT&Fn
Restores all of registers to
their defaults. If this
command is input during
communication, the line will
be disconnected.
Only n = 0 can be specified (can be omitted).
AT&Sn
Sets the Data Set Ready
signal to be output to DTE.
n = 0 : DR is always ON (initial value).
n = 1 : DR signal is ON when the line is
[&F] [&W]
AT&Dn
[&F] [&W]
AT&En
[&F] [&W]
[&F] [&W]
the other party's modem (initial value).
to be ON).
n = 1 : When ER changes from ON to OFF, it
becomes an on-line command status.
n = 2 : If ER changes from ON to OFF, a
connection is disconnected and it will be in
an off-line command status (initial value).
transmission speed.
n = 1 : Displays the DTE serial transmission
speed (initial value).
connected (when the communication
call is established).
42
AT&D1
OK
AT&E0
OK
(At the time of off-line
mode)
AT&F
OK
AT&F?
ERROR
AT&F=?
ERROR
(At the time of on-line
command mode)
AT&F
NO CARRIER
(Change to off-line
mode)
AT&S0
OK
AT command
Outline
Parameter/description
AT&Wn
Stores the current settings.
Only n = 0 can be specified (can be omitted).
AT* DANTE
Displays the FOMA terminal
signal reception level.
0: FOMA terminal signal reception level is displayed as
out of area.
1: FOMA terminal signal reception level is 0 or 1
bar.
2: FOMA terminal signal reception level is 2 bars.
3: FOMA terminal signal reception level is 3 bars.
AT* DGANSM=n
AT *DGAPL=n [,cid]
AT*DGARL=n [,cid]
AT* DGPIR=n
AT*DRPW
AT+CAOC
Sets the reject/permit mode
setting for the packet
incoming call. This
command is effective for
those incoming packet calls
after the setting command is
input.
Sets APN, which permits
incoming packet calls, by
using <cid> parameter
defined by
+CGDCONT
Sets APN, which rejects
incoming packet calls, by
using <cid> parameter
defined by
+CGDCONT
This command validates the
setting for notifying Caller ID
when sending/receiving
packet communication.
Even in the dial up network
setting, you can also add
186 (notify) or 184 (not
notify) to the access point
number. (p.28)
Displays the indicator value
of the receiving power of the
FOMA terminal.
Inquires for the current
charge.
n = 0 : Disables the incoming call reject (AT*
DGARL)/permit setting (AT*DGAPL) (initial
value).
n = 1 : Enables the incoming call reject
setting.
n = 2 : Enables the incoming call permit
setting.
AT * DGANSM?
: Displays the current setting.
n = 0 : Adds the APN defined by <cid> to
incoming call permission list.
n = 1 : Deletes the APN defined by <cid>
from incoming call permission list.
If <cid> is omitted, this will apply to all cid.
AT * DGAPL?
: Displays incoming call permission list.
n = 0 : Adds the APN defined by <cid> to
incoming call rejection list.
n = 1 : Deletes the APN defined by <cid>
from incoming call rejection list.
If <cid> is omitted, this will apply to all cid.
AT * DGARL?
: Displays incoming call rejection list.
n = 0 : Uses APN as it is (initial value).
n = 1 : Uses APN by adding "184". (Caller ID
is always not sent.)
n = 2 : Uses APN by adding "186". (Caller ID
is always sent.)
AT * DGPIR?
:Displays the current setting.
Command execution example
AT&W0
OK
AT&W
OK
AT&W?
ERROR
AT&W=?
ERROR
AT* DANTE
* DANTE:3
OK
AT* DANTE=?
* DANTE:(0-3)
OK
AT*DGANSM=0
OK
AT* DGANSM?
* DGANSM:0
OK
AT*DGAPL =0,5
OK
AT* DGAPL?
* DGAPL:1
OK
AT* DGAPL =1
OK
AT* DGAPL?
OK
AT*DGARL =0,5
OK
AT* DGARL?
* DGARL:1
OK
AT* DGARL =1
OK
AT* DGARL?
OK
AT*DGPIR =0
OK
AT* DGPIR?
* DGPIR:0
OK
AT* DRPW
* DRPW:0
OK
−
AT* DRPW=?
* DRPW:(0-75)
OK
AT+CAOC
+CAOC:"000014"
OK
−
43
AT command
Outline
AT+CBC
Displays the battery status
of the FOMA terminal.
AT+CBST
Changes the bearer service
type.
[&F] [&W]
AT+CDIP=n
[&F] [&W]
AT+CEER
AT+CGDCONT
AT+CGEQMIN
AT+CGEQREQ
AT+CGMR
AT+CGREG=n
Sets whether to notify the
called sub address for the
incoming call. Inquires for
Multi number subscription.
Displays the reason for
disconnection of the
previous call.
Sets the access point name
(APN) for packet origination.
Registers a criterion to be used
to decide whether or not to allow
the QoS (quality of service) that is
informed from the network side
when PPP packet
communication is established.
Sets the QoS (quality of
service) to be requested to
network when originating a
PPP packet communication.
Displays the version of the
FOMA terminal.
Specifies whether to notify
the network registration
condition.
The returned notification
displays whether you are
inside or out of service.
[&F] [&W]
AT+CGSN
Displays the product number
of the FOMA terminal.
Parameter/description
Result: +CBC:<bcs>,<bcl>
bcs:
0 : FOMA terminal is powered by the battery.
1 : FOMA terminal is not powered by the battery.
2 : FOMA terminal is not connected to the battery.
3 : FOMA terminal is out of transmission due to
the power-supply error.
bcl:
0 : Battery has run out, or battery is not
connected.
1-100 : Battery remained
Format: AT+CBST=<n >,1,0
n=116: 64,000bps (bit transparent) (initial
value)
n=134: 64,000bps (multimedia)
n = 0 : Not notify the called sub address
(initial value).
n = 1 : Notify the called sub address.
AT+CDIP?
: Displays the current setting.
+CDIP:n ,m
m = 0 : You do not subscribe to Multi number.
m = 1 : You subscribe to Multi number.
m = 2 : Unknown
Result: +CEER:<report>
report: List of disconnection reasons (p.55).
Command execution example
AT+CBC
+CBC:0,70
OK
AT+CBC?
ERROR
AT+CBC=?
+CBC:(0-3),(0-100)
OK
AT+CBST=134,1,0
OK
AT+CBST?
+CBST:134,1,0
OK
AT+CBST=?
+CBST:(116,134),
(1),(0)
OK
AT+CDIP=0
OK
AT+CDIP?
+CDIP:0,1
OK
p.52
AT+CEER
+CEER:36
OK
p.52
p.52
p.52
p.53
p.53
−
AT+CGMR
12345xxxxxxxxxxx
OK
AT+CGREG=1
OK (Set to informed)
AT+CGREG?
+CGREG: 1,0
OK
AT+CGREG=?
+CGREG: (0,1)
OK
(Outside the service area)
n = 0 : Not informed (initial value).
n = 1 : Informed.
Informed when switching between
"Inside the service area" and "Outside
the service area" is completed.
AT+CGREG?
: Displays the current setting.
+CGREG: <n >, <stat>
n : Set value
stat:
0: Out of packet area
1: Within packet area
4: Unknown
5: Within packet area
−
44
(When you move from
"outside the service
area" to "inside the
service area".)
+CGREG:1
AT+CGSN
12345xxxxxxxxxxx
OK
AT command
AT+CLIP=n
[&F] [&W]
AT+CLIR=n
AT+CMEE=n
Outline
Displays the other party's
Caller ID on a PC when a
64K data communication
call is received.
Sets whether or not to notify
the other party of the phone
number when originating a
64K data communication
call.
Sets whether the error
report of the FOMA terminal
is present.
Parameter/description
Command execution example
n = 0 : Not display the result (initial value)
n = 1 : Display the result
AT+CLIP=0
OK
AT+CLIP?
: Displays the current setting.
+CLIP:n,m
m = 0 : NW setting not notifying the other
party of the Caller ID in outgoing call.
m = 1 : NW setting notifying the other party
of the Caller ID in outgoing call.
m = 2 : Unknown
AT+CLIP?
+CLIP:0,1
OK
n = 0 : Complies to the CLIR service contract.
n = 1 : Not notify the other party of the
AT+CLIR=0
OK
(A call is received when
+CLIP=1 is set)
RING
+CLIP:
"090XXXXXXXX",177,
"123",136
caller's phone number.
n = 2 : Notify the other party of the caller's
phone number (initial value).
AT+CLIR?
: Displays the current setting.
+CLIR:n,m
m =0 : CLIR is not started (Caller ID is
always sent)
m = 1 : CLIR is started (Caller ID is always
not sent)
m = 2 : Unknown
m = 3 : CLIR temporary mode (default is not
notify)
m =4 : CLIR temporary mode (default is
notify)
n = 0 : Use the ERROR result (initial value).
n = 1 : +CME ERROR:<err> result code is
used, and a numeral value is used for
<err>.
n = 2 : +CME ERROR:<err> result code is used,
and characters are used for <err>.
AT+CMEE?
: Displays the current setting.
The command displayed on the right is the
execution example for cases when there is a
FOMA terminal problem or a connection error.
AT+CLIR?
+CLIR:0,1
OK
AT+CLIR=?
+CLIR:(0-2)
OK
AT+CMEE=0
OK
AT+CNUM
ERROR
AT+CMEE=1
OK
AT+CNUM
+CME ERROR:10
AT+CMEE=2
OK
AT+CNUM
+CME ERROR:SIM not
inserted
+CME ERROR result code is as follows.
1:no connection to phone
10:SIM not inserted
15:SIM wrong
16:incorrect password
100:unknown
[&F] [&W]
AT+CNUM
Displays the own number of
the FOMA terminal.
Result: +CNUM:,<number>,<type>
number: phone number
type : 129 or 145
129 : International access code (+) is not
included.
145 : International access code (+) is
included.
45
AT+CNUM
+CNUM:,"+8190XXXXX
XXX",145
OK
AT command
AT+COPS
Outline
Selects the network
operator to connect.
Parameter/description
Format : AT+COPS=<mode>,2,<oper>
mode=0 : automatic (searches the network
and switches the network operator
automatically)
mode=1 : manual (connects to the network
operator specified in <oper>)
mode=2 : Disconnects the connection to the
network operator
mode=3 : Mapping is not performed.
mode=4 : manual/automatic (if the connection
to the network operator specified in
<oper> fails, works as automatic
mode.)
AT+CPAS
Displays whether the control
signal to the FOMA terminal
is available or not.
<oper> is a hexadecimal value which consists
of Country code (MCC) and Network code
(MNC). The format is as follows:
Digit 1 of MCC・・・octet 1 bits 1 to 4
Digit 2 of MCC・・・octet 1 bits 5 to 8
Digit 3 of MCC・・・octet 2 bits 1 to 4
Digit 3 of MNC・・・octet 2 bits 5 to 8
Digit 2 of MNC・・・octet 3 bits 5 to 8
Result: +CPAS: <pas>
pas:
0 : FOMA terminal can send/receive control
signal.
1 : FOMA terminal can not send/receive
control signal.
2 : Unknown (control signal sending/
receiving is not assured).
3 : FOMA terminal can send/receive control
signal and it is currently receiving.
4 : FOMA terminal can send/receive control
signal and it is currently communicating.
46
Command execution example
AT+COPS=0
OK
AT+COPS?
+COPS:0
OK
AT+COPS=?
+COPS:(2,,,"44F001"),
(3,,,"44F002"),,(0,1,3),(2)
OK
AT+CPAS
+CPAS:0
OK
AT+CPAS?
ERROR
AT+CPAS=?
+CPAS:(0-4)
AT command
AT+CPIN
Outline
Enters the PIN code in the
FOMA terminal.
Parameter/description
Format: AT+CPIN="<pin>","<newpin>"
This command is to enter the PIN1,
PIN2, or PUK code - depending on
the state of the result code returned
when AT+CPIN? is entered - of the
FOMA terminal.
Even if PIN code entry or the PUK
code is requested on the screen,
depending on the state of the result
code when AT+CPIN? is entered, you
may not be able to use this command
to enter the PIN. Do not use this
command to change PIN code. Put
<pin> and <newpin> in " ".
AT+CPIN? result
+CPIN:READY:PIN1 code, PIN2
code
Cannot enter the PUK1 or PUK2
code
+CPIN:SIM PIN:PIN1 entry
standby
+CPIN:SIM PIN2:PIN2 entry
standby
+CPIN:SIM PUK:PIN1 blocked
(Can enter PUK1 code)
+CPIN:SIM PUK2 : PIN2 blocked
(Can enter PUK2 code)
The command displayed on the right
is an entry sample of PIN code
"1234" and PUK code "12345678".
Command execution example
(The status in which
+CPIN: READY is
answered when
+CPIN? is entered)
AT+CPIN="1234"
ERROR
(The status in which
+CPIN: READY is
answered when
+CPIN? is entered)
AT+CPIN="12345678",
"1234"
ERROR
(The status in which
+CPIN: SIM PIN is
answered when
+CPIN? is entered)
AT+CPIN="1234"
OK
(The status in which
+CPIN: SIM PUK is
answered when
+CPIN? is entered:
PIN1 lock status)
AT+CPIN="12345678",
"1234"
OK
(The status in which
+CPIN: SIM PUK2 is
answered when
+CPIN? is entered:
PIN2 lock status)
AT+CPIN="12345678",
"1234"
OK
AT+CPIN?
+CPIN:READY
OK
AT+CR=n
When the line is connected,
displays the bearer service
type before the CONNECT
result code is displayed.
[&F] [&W]
AT+CRC=n
Sets whether to use the
extended result code for the
incoming call.
n = 0 : Not display (initial value).
n = 1 : Display.
<serv>
: Displays only "GPRS", which means
packet communication.
(Displaying "SYNC" or "AV64K"
depending on the line type.)
AT+CR?:
:Displays the current setting.
n = 0 : Not use +CRING (initial value).
n = 1 : Use +CRING.<type>.
Format of +CRING:
+CRING:SYNC
+CRING:AV64K
: GPRS “PPP”,,,“<APN>”
AT+CRC?
: Displays the current setting.
[&F] [&W]
47
AT+CPIN=?
OK
AT+CR =1
OK
ATD * 99 *** 1#
+CR : GPRS
CONNECT
AT+CRC=0
OK
AT+CRC?
+CRC:0
OK
(PPPoverUD received)
+CRING:SYNC
(AV64K received)
+CRING:AV64K
(PPP packet received)
+CRING:GPRS
“PPP”,,,
“〈APN〉”
AT command
AT+CREG=n
Outline
Specifies whether the result
screen is present regarding
the inside/outside the
service area information
display.
c This setting may not be
available depending on
the Operating System.
[&F] [&W]
AT+CUSD
Specifies or inquires for the
network setting regarding
the additional services.
Parameter/description
n = 0 : Not informed (initial value).
n = 1 : Informed.
Informed when switching between
"Inside the service area" and
"Outside the service area" is
complete.
AT+CREG?
: Displays the current setting.
+CREG : <n >,<stat>
n : Set value
stat:
0: Outside voice call area
1: Inside voice call area
4: Unknown
5: Inside voice call area
Format: AT+CUSD=<n >,"<str>"[,0]
n = 0 : Does not send mid result
<m>[<str>,<dcs>] (initial value)
n = 1 : Sends mid result <m>[<str>,<dcs>]
Mid result:
m = 0 : The settings completed
m = 1 : The network requires the
information.
str : Only 0-9, #,* can be entered. Enclose
<str> with "" (double quotation mark).
[&F] [&W]
AT+FCLASS=n
[&F] [&W]
AT+GCAP
Sets the communication
class supported by the
FOMA terminal.
Displays the supported area
for the AT commands
available for the FOMA
terminal.
Command execution example
AT+CREG=1
OK
(Set to informed)
AT+CREG?
+CREG :1,0
OK
(Outside the service
area)
(When you move from
outside the service area
to inside the service
area.)
+CREG :1
AT+CUSD=0, "xxxxxxxxx"
OK
AT+CUSD=1,"*148 *
1* 0000#",0
+CUSD:0,"148 *7#",0
OK
AT+CUSD?
+CUSD:0
OK
AT+CUSD =?
+CUSD:(0,1)
OK
n = 0 : data is only supported. (initial value)
AT+FCLASS=0
OK
Result: +GCAP:<area>,<area>,<area>
area:
+CGSM
: Some or all GSM commands
are supported.
+FCLASS : +FCLASS command is
supported.
+W
: +W command is supported.
AT+GCAP
+GCAP:+CGSM,+FCL
ASS,+W
AT+GMI
NEC
OK
AT+GMM
FOMA 【model name】
OK
AT+GMR
Ver1.00
OK
AT+IFC=2,2
OK
AT+GMI
Displays the manufacturer
name.
−
AT+GMM
Displays the FOMA terminal
product name.
−
AT+GMR
Displays the version of the
FOMA terminal.
−
AT+IFC=n,m
Selects the flow control
method.
n : DCE by DTE
m : DTE by DCE
0 : No flow control
1 : XON/XOFF flow control.
2 : RS/CS (RTS/CTS) flow control.
initial value: n,m =2, 2
AT+IFC?: Displays the current setting.
OK
AT+IFC?
+IFC:2,2
OK
AT+IFC=?
+IFC:(0,1,2),(0,1,2)
[&F] [&W]
AT+WS46
Displays the wireless
communication network of
the FOMA terminal.
12:GSM/GPRS fixed mode
22:3G fixed mode
25:Auto mode
48
OK
AT+WS46?
25
OK
AT command
Outline
Parameter/description
Command execution example
AT¥S
Displays the contents of
commands and S registers
currently set.
−
AT¥Vn
Selects the response code
specification for connecting
the line.
n = 0 : Not use extended result code (initial
Handles the incoming call
process according to the
mode received by the FOMA
terminal.
Handles the automatic
calling process for the
FOMA terminal according to
the specified parameters
and dial parameters.
−
RING
ATA
CONNECT
ATD*99***<cid># : Packet communication
<cid> 1 to 10: displays APN with
+CGDCONT setting.
<Packet communication>
ATD * 99 *** 1#
CONNECT
AT+CBST=116,1,0
ATD<phone number> : 64K communication
<64K communication>
AT+CBST=116,1,0
OK
ATD090xxxxxxxx
CONNECT
AT+CBST=134,1,0
ATD<phone number> : AV64K
communication
<AV64K communication>
AT+CBST=134,1,0
OK
ATD090xxxxxxxx
CONNECT
ATE1
OK
[&F] [&W]
ATA
ATD
ATEn
[&F] [&W]
ATHn
ATIn
value).
AT¥S
E1 Q0 V1 X4 &C1
&D2 &S0 &E1 ¥V0
S000=000
S002=043
S003=013
S004=010
S005=008
S006=005
S007=060
S008=003
S010=001
S030=000
S103=001
S104=001
OK
AT¥V0
OK
n = 1 : Use extended result code.
Selects whether the echo
back is present for DTE in
the command mode.
n = 0 : Echo back absent.
n = 1 : Echo back present (initial value).
Performs on-hook operation
for the FOMA terminal.
n = 0 : Disconnect the line (can be omitted).
Displays the ID code.
n = 0 : Displays "NTT DoCoMo".
n = 1 : Displays the product name (same
with +GMM).
n = 2 : Displays the version of the FOMA
terminal (same with +GMR).
n =3 : Displays the each element of ACMP
(During packet
communication)
+++
OK
ATH
NO CARRIER
ATI0
NTT DoCoMo
OK
ATI1
FOMA 【model name】
OK
signal.
n =4 : Displays the details of communication
functions of the FOMA terminal.
ATOn
ATQn
Returns from the online
command mode to the
online data mode during
communication.
Specifies whether or not to
display the result code for
DTE.
n = 0 : Returns from online command mode
to online data mode (can be omitted).
n = 0 : Displays the result code (initial value).
n = 1 : Not display the result code.
[&F] [&W]
49
ATO
CONNECT
ATQ0
OK
ATQ1
(At that time, OK is not
returned.)
AT command
ATS0=n
Outline
Specifies how many times
the FOMA terminal rings
before it automatically
receives a call.
[&F] [&W]
ATS2=n
[&F]
ATS3=n
Sets an escape character.
Sets a carriage return (CR)
character.
Parameter/description
n = 0 : No automatic answer (initial value).
n = 1- 255: A call is automatically answered
after the specified number of
rings.
ATS0?: Displays the current setting.
n = 43 : Initial value.
n = 127 : Escapes processing is invalid.
ATS2? : Displays the current setting.
n = 13
ATS3?
Sets a line feed (LF)
character.
n = 10
ATS4?
[&F]
ATS5=n
Sets a backspace (BS)
character.
n=8
ATS5?
[&F]
ATS6=n
[&F]
ATS8=n
[&F]
ATS10=n
[&F][&W]
ATS30=n
ATS3=13
OK
ATS3?
013
OK
: Initial value (Only n = 10 can be
specified).
: Displays the current setting.
ATS4=10
OK
ATS4?
010
OK
: Initial value (Only n = 8 can be
specified).
: Displays the current setting.
ATS5=8
OK
ATS5?
008
OK
Sets the pause time
(second) until a dial starting.
This command can be set but cannot be
operated.
Sets the pause time
(second) by using the
comma dial.
This command can be set but cannot be
operated.
Automatic disconnection
delay time setting.
(1/10 second)
This command can be set but cannot be
operated.
Disconnects the line when
there is no user data
exchange for the time set in
this command.
n = 0 : Inactive timer off (initial value)
n = 0 - 255
Sets the called sub address
character.
ATS6=5
OK
ATS6?
005
OK
ATS6=?
ERROR
ATS8=3
OK
ATS8?
003
OK
ATS8=?
ERROR
ATS10=1
OK
ATS10?
001
OK
ATS10=?
ERROR
ATS30=0
OK
Where n is the number of minutes.
ATS30?
000
OK
[&F]
ATS103=n
ATS2=43
OK
ATS2?
043
OK
: Initial value (Only n = 13 can be
specified).
: Displays the current setting.
[&F]
ATS4=n
Command execution example
ATS0=0
OK
ATS0?
000
OK
n=0 : *
n = 1 : / (initial value)
n = 2 : ¥ (¥ mark or back slash)
ATS30=?
ERROR
ATS103=0
OK
ATS103?
000
OK
ATS103=?
ERROR
[&F]
50
AT command
ATS104=n
Outline
Sets the calling sub address
character.
Parameter/description
n=0 : #
n = 1 : % (initial value)
n=2 : &
Command execution example
ATS104=0
OK
ATS104?
000
OK
ATS104=?
ERROR
[&F]
ATVn
Specifies whether the result
code is returned in numerals
or alphabets.
n = 0 : Returns the result code in numeral
Specifies whether the speed
indication is present in the
CONNECT display when
connecting the line.
Also detects a busy tone or
a dial tone.
n=0 :
n=1 :
[&F] [&W]
ATXn
n=1 :
n=2 :
n=3 :
n=4 :
[&F] [&W]
ATZ
Resets the current setting to
the contents of the nonvolatile memory.
If this command is input
during communication, the
line will be disconnected.
−
+++
In response to the escape
sequence, the online data
mode changes to the online
command mode while
maintaining the line
connection.
−
value.
Returns the result code in characters
(initial value).
Without dial tone detection; without
busy tone detection; without speed
display.
Without dial tone detection; without
busy tone detection; with speed
display.
With dial tone detection; without
busy tone detection; with speed
display.
Without dial tone detection; with
busy tone detection; with speed
display.
With dial tone detection; with busy
tone detection; with speed display.
(initial value)
ATV1
OK
ATX1
OK
(Online command
mode)
ATZ
NO CARRIER
(Offline command
mode)
ATZ
OK
(Online data mode)
+++ (No display)
OK
51
d Supplementary explanation of AT command
■ Commands which do not function
The following commands do not generate errors but will not function as a command:
・ ATT (Tone setting)
・ ATP (Pulse setting)
■ Command name: +CGDCONT=[parameter]
・Outline
Sets the access point name (APN) for packet origination.
Though this command is a setting command, it will not be recorded in non-volatile memory written by [&W], nor reset
by [&F] or [Z].
・Format
+CGDCONT=[ <cid>[ ,"<PDP_type>"[ ,"<APN>"] ] ]
・Explanation of the parameters
Sets the access point name (APN) for packet origination. See the following command execution example:
<cid>*1: 1 ~ 10
<PDP_type>*2:PPP or IP
<APN>*3: Any value
*1:<cid> is a number for managing the access point name (APN) registered in the FOMA terminal for packet
communication. For the FOMA terminal, you can register a number from 1 to 10. As "mopera.net" is assigned by
default to <cid>=1 and <cid>=3 and "mpr.ex-pkt.net" to <cid>=4, assign the APN to cid2 or cid5 through cid10.
*2:<PDP_type> is the connection method. For the FOMA terminal, you can specify PPP or IP. By default, PPP is
assigned to <cid>=1 and 4 and IP to <cid>=3. Specify PPP when you use the FOMA terminal as an access point
for Access point mode.
*3:<APN> is an arbitrary character string indicating each access point name.
・Operation performed when the parameter is omitted
+CGDCONT=: Sets the initial value to all <cid>.
+CGDCONT=<cid>:Sets the specified <cid> to the initial value.
+CGDCONT=?: Displays a list of values that can be set.
+CGDCONT?: Displays the current setting.
・Command execution example
Command for registering an APN name of abc (when cid is 5).
AT+CGDCONT=5,"PPP","abc"
OK
■ Command name: +CGEQMIN=[parameter]
・Outline
Registers a criterion to be used to decide whether or not to allow the QoS (quality of service) that is informed from the
network side when PPP packet communication is established.
There are 4 setting patterns as described in the following command execution example.
Though this command is a setting command, it will not be recorded in non-volatile memory written by [&W], nor reset
by [&F] or [Z].
・Format
+CGEQMIN=[<cid>[ ,,<Maximum bitrate UL>[ ,<Maximum bitrate DL>] ] ]
・Explanation of the parameters
<cid>*1: 1 ∼ 10
<Maximum bitrate UL>*2:None (initial value) or 5,760
<Maximum bitrate DL>*2:None (initial value) or 7,232
*1:<cid> is a number for managing the access point name (APN) registered in the FOMA terminal for a packet
communication.
*2:<Maximum bitrate UL> and <Maximum bitrate DL> set the maximum communication speed (kbps) of uplink and
downlink between the FOMA terminal and base station. When it is set to "None" (initial value), all speeds will be
permitted, but when set to 5,760 or 7,232, a connection at a speed of other values will not be permitted, and a
packet communication may not be connected.
・Operation performed when the parameter is omitted
+CGEQMIN=:Sets the initial value to all <cid>.
+CGEQMIN=<cid>:Sets the specified <cid> to the initial value.
+CGEQMIN=?:Displays a list of values that can be set.
+CGEQMIN?:Displays the current setting.
52
・Command execution example
Only the following 4 patterns can be set. (1) is set as an initial value to each cid.
(1) Command for permitting all speeds of both uplink and downlink (when cid is 5)
AT+CGEQMIN=5
OK
(2) Command for permitting only the speed of uplink 5,760kbps and downlink 7,232kbps (when cid is 6)
AT+CGEQMIN=6,,5760,7232
OK
(3) Command for permitting uplink 5,760kbps and all speeds of downlink (when cid is 7)
AT+CGEQMIN=7,,5760
OK
(4) Command for permitting all speeds of uplink and only 7,232kbps of downlink (when cid is 8)
AT+CGEQMIN=8,,,7232
OK
■ Command name: +CGEQREQ=[parameter]
・Outline
Sets the QoS (quality of service) to be requested to network when originating a PPP packet communication.
For setting, only the following pattern in the command execution example can be set, which is also set as an initial
value.
Though this command is a setting command, it will not be recorded in non-volatile memory written by [&W], nor reset
by [&F] or [Z].
・Format
+CGEQREQ=[<cid>]
・Explanation of the parameters
<cid>*:1 to 10
*: <cid> is a number for managing the access point name (APN) registered in the FOMA terminal for a packet
communication.
・Operation performed when the parameter is omitted
+CGEQREQ=:Sets the initial value to all <cid>.
+CGEQREQ=<cid>:Sets the specified <cid> to the initial value.
+CGEQREQ=?:Displays a list of values that can be set.
+CGEQREQ?:Displays the current setting.
・Command execution example
Only the following 1 pattern can be set. This is set to each cid as an initial value.
Command for requesting a connection at a speed of uplink 5,760kbps and downlink 7,232kbps (when cid is 5).
AT+CGEQREQ=5
OK
Saving modem port command setting value
The values set by AT commands are initialized every time the power of FOMA terminal is turned on or off, except the
access point name (APN) set by AT+CGDCONT command (p.26), QoS setting by AT+CGEQMIN/AT+CGEQREQ
command, permit or reject incoming call setting by AT * DGAPL/AT* DGARL/AT * DGANSM command, the setting for
specifying sending/not sending caller ID of packet communication set by AT * DGPIR command and the setting for
specifying sending/not sending caller ID of 64K data communication set by AT+CLIR command. However, you can save
the values set by commands with [&W] if you enter
AT&W
after the setting. In this case, other set values with [&W] will also be saved. These values can be retrieved by entering
ATZ
even after the power is turned on or off.
53
Result codes
■ Result codes related with data communication
Number
indication
Character indication
Description
0
OK
Successfully executed.
1
CONNECT
Connected.
2
RING
Incoming call.
3
NO CARRIER
Line disconnected.
4
ERROR
Command not acceptable.
6
NO DIALTONE
Unable to detect dialing tone.
7
BUSY
Busy tone detected.
8
NO ANSWER
Time out in connection completing.
100
RESTRICTION
Network restricted.
101
DELAYED
Redialing restricted.
■ Extended result codes
• &E0
Number
indication
Character indication
Description
122
CONNECT 64000
Connected between the FOMA terminal and base station at 64,000bps.
125
CONNECT 384000
Connected between the FOMA terminal and base station at 384,000bps.
133
CONNECT 3648000
Connected between the FOMA terminal and base station at 3,648,000bps.
135
CONNECT 7232000
Connected between the FOMA terminal and base station at 7,232,000bps.
• &E1
Number
indication
Character indication
Description
5
CONNECT 1200
Connected between the FOMA terminal and PC at 1,200bps.
10
CONNECT 2400
Connected between the FOMA terminal and PC at 2,400bps.
11
CONNECT 4800
Connected between the FOMA terminal and PC at 4,800bps.
13
CONNECT 7200
Connected between the FOMA terminal and PC at 7,200bps.
12
CONNECT 9600
Connected between the FOMA terminal and PC at 9,600bps.
15
CONNECT 14400
Connected between the FOMA terminal and PC at 14,400bps.
16
CONNECT 19200
Connected between the FOMA terminal and PC at 19,200bps.
17
CONNECT 38400
Connected between the FOMA terminal and PC at 38,400bps.
18
CONNECT 57600
Connected between the FOMA terminal and PC at 57,600bps.
19
CONNECT 115200
Connected between the FOMA terminal and PC at 115,200bps.
20
CONNECT 230400
Connected between the FOMA terminal and PC at 230,400bps.
21
CONNECT 460800
Connected between the FOMA terminal and PC at 460,800bps.
■ Communication protocol result codes
Number
indication
Character indication
Description
1
PPPoverUD
Connected by PPPoverUD (BC=UDI, +CBST=116,1,0)
3
AV64K
Connected by AV (Videophone) [64K]
5
PACKET
Connected by Packet
NOTE
d The result code appears as character indication (default value) when ATVn command (p.51) is set to n=1, and as
number indication when the command is set to n=0.
d Though the communication speed appears in order to maintain a compatibility with the modem connected by
traditional RS-232C, it differs from the actual connection speed because the FOMA terminal and PC are connected
via FOMA USB Cable with Charge Function 02 (optional) or via Bluetooth Communication.
d "RESTRICTION" (Number indication: 100) indicates that the network is congested. If this is displayed, wait for a
while and then try again.
54
Result code display example
■ When ATX0 is set
Regardless of the AT¥Vn command (p.49) setting, only CONNECT appears when the connection is completed.
Character indication example: ATD * 99 *** 1#
CONNECT
Number indication example:
ATD * 99 *** 1#
1
■ When ATX1 is set
・ATX1, AT¥V0 are set (default)
Displayed in CONNECT <rate between the FOMA terminal and the PC> format when the connection is completed.
Character indication example: ATD * 99 *** 1#
CONNECT 460800
Number indication example:
ATD * 99 *** 1#
1 21
・ATX1, AT¥V1 are set *
The following format appears when the connection is completed:
CONNECT <rate between the FOMA terminal and the PC> PACKET <Connecting party's APN>/<Upstream (the
FOMA terminal → Wireless base station) maximum rate>/<Downstream (the FOMA terminal ← Wireless base station)
maximum rate>
The following sample indicates that a connection is made to mopera.net at maximum 5,440kbps for sending, and
maximum 7,232kbps for receiving.
Character indication example: ATD * 99 *** 1#
CONNECT 460800 PACKET mopera.net/5440/7232
ATD * 99 *** 1#
1 21 5
*: If both ATX1 and AT¥V1 are set simultaneously, a dial-up connection may not be correctly made. The single setting
of AT¥V0 is recommended.
Number indication example:
List of disconnection reasons
■ Packet communication
Value
Reason
26
27
Missing or incorrect APN.
30
Activation rejected by the network.
33
Requested service option not subscribed.
36
Disconnected successfully.
■ 64K data communication
Value
Reason
1
The specified number does not exist.
16
Disconnected successfully.
17
Cannot communicate because the other party's line is busy.
18
Dialed, but no response within the specified time.
19
Cannot communicate because the other party is ringing.
21
The other party has rejected the communication.
63
The service or option of the network is not valid.
65
A transmission capacity not provided has been specified.
88
Sent to a terminal with different terminal attributes or received call.
55
Kuten Code List
Kuten Code List
<Guide to the kuten code table>
First enter “digits 1-3 of the kuten code” then “digit 4”.
d Some kuten codes in the table here may look different from what actually appear on screens.
First to third
First to third
Fourth digit of Kuten codes
Fourth digit of Kuten codes
digits of
digits of
Kuten codes 0 1 2 3 4 5 6 7 8 9 Kuten codes 0 1 2 3 4 5 6 7 8 9
010
(スペース) 、 。 , . ・ : ; ? 075 б в г д е ё ж з и й
011 ! ゛ ゜ ´ ` ¨ ^  ̄ _ ヽ 076 к л м н о п р с т у
012 ヾ ゝ ゞ 〃 仝 々 〇 ー ― 077 ф х ц ч ш щ ъ ы ь э
013 ‐ / \ ∼ ‖ | … ‥‘ ’ 078 ю я
014 “ ”( )〔 〕[ ]{ }
015 〈 〉《 》「 」『 』【 】 080
─│┌┐┘└├┬┤
016 + − ± × ÷ = ≠ < > ≦ 081 ┴ ┼ ━ ┃ ┏ ┓ ┛ ┗ ┣ ┳
017 ≧ ∞ ∴ ♂ ♀ ° ′ ″ ℃ ¥ 082 ┫ ┻ ╋ ┠ ┯ ┨ ┷ ┿ ┝ ┰
018 $ ¢ £ % # & @ § ☆ 083 ┥ ┸ ╂
019 ★ ○ ● ◎ ◇
020
◆ □ ■ △ ▲ ▽ ▼ ※ 〒 130
①②③④⑤⑥⑦⑧⑨
131 ⑩ ⑪ ⑫ ⑬ ⑭ ⑮ ⑯ ⑰ ⑱ ⑲
021 → ← ↑ ↓ 〓
132
022
∈∋⊆⊇
⑳ⅠⅡⅢⅣⅤⅥⅦⅧⅨ
133 Ⅹ ㍉ ㌔ ㌢ ㍍ ㌘ ㌧ ㌃ ㌶
023 ⊂ ⊃ ∪ ∩
134 ㍑ ㍗ ㌍ ㌦ ㌣ ㌫ ㍊ ㌻ ㎜ ㎝
024
∧∨¬⇒⇔∀∃
135 ㎞ ㎎ ㎏ ㏄ ㎡
026 ∠ ⊥ ͡ ∂ ∇ ≡ ≒ ≪ ≫ √ 136
平成 № ㏍ TEL ㊤
137 ㊥ ㊦ ㊧ ㊨ ㈱ ㈲ ㈹ ㍾ ㍽ ㍼
027 ∽ ∝ ∵ ∫ ∬
028
Å ‰ ♯ ♭ ♪ † ‡ ¶ 138 ≒ ≡ ∫ ∮ ∑
∟⊿
139 ∵
029
⃝
あ
031
0 1 2 3 160
亜唖娃阿哀愛挨姶逢
161 葵 茜 穐 悪 握 渥 旭 葦 芦 鯵
032 4 5 6 7 8 9
033
A B C D E F G 162 梓 圧 斡 扱 宛 姐 虻 飴 絢 綾
034 H I J K L M N O P Q 163 鮎 或 粟 袷 安 庵 按 暗 案 闇
164 鞍 杏
035 R S T U V W X Y Z
い
036
abcde
037 f g h i j k l m n o 164
以伊位依偉囲夷委
038 p q r s t u v w x y 165 威 尉 惟 意 慰 易 椅 為 畏 異
166 移 維 緯 胃 萎 衣 謂 違 遺 医
039 z
040
ぁ あ ぃ い ぅ う ぇ え ぉ 167 井 亥 域 育 郁 磯 一 壱 溢 逸
041 お か が き ぎ く ぐ け げ こ 168 稲 茨 芋 鰯 允 印 咽 員 因 姻
042 ご さ ざ し じ す ず せ ぜ そ 169 引 飲 淫 胤 蔭
043 ぞ た だ ち ぢ っ つ づ て で 170
院陰隠韻吋
う
044 と ど な に ぬ ね の は ば ぱ
045 ひ び ぴ ふ ぶ ぷ へ べ ぺ ほ 170
右宇烏羽
046 ぼ ぽ ま み む め も ゃ や ゅ 171 迂 雨 卯 鵜 窺 丑 碓 臼 渦 嘘
047 ゆ ょ よ ら り る れ ろ ゎ わ 172 唄 欝 蔚 鰻 姥 厩 浦 瓜 閏 噂
173 云 運 雲
048 ゐ ゑ を ん
え
050
ァ ア ィ イ ゥ ウ ェ エ ォ 173
荏餌叡営嬰影映
051 オ カ ガ キ ギ ク グ ケ ゲ コ 174 曳 栄 永 泳 洩 瑛 盈 穎 頴 英
052 ゴ サ ザ シ ジ ス ズ セ ゼ ソ 175 衛 詠 鋭 液 疫 益 駅 悦 謁 越
053 ゾ タ ダ チ ヂ ッ ツ ヅ テ デ 176 閲 榎 厭 円 園 堰 奄 宴 延 怨
054 ト ド ナ ニ ヌ ネ ノ ハ バ パ 177 掩 援 沿 演 炎 焔 煙 燕 猿 縁
055 ヒ ビ ピ フ ブ プ ヘ ベ ペ ホ 178 艶 苑 薗 遠 鉛 鴛 塩
お
056 ボ ポ マ ミ ム メ モ ャ ヤ ュ
057 ユ ョ ヨ ラ リ ル レ ロ ヮ ワ 178
於汚甥
179 凹 央 奥 往 応
058 ヰ ヱ ヲ ン ヴ ヵ ヶ
180
押旺横欧殴王翁襖鴬
060
Α Β Γ Δ Ε Ζ Η Θ Ι 181 鴎 黄 岡 沖 荻 億 屋 憶 臆 桶
061 Κ Λ Μ Ν Ξ Ο Π Ρ Σ Τ 182 牡 乙 俺 卸 恩 温 穏 音
か
062 Φ Χ Ψ Ω
063
α β γ δ ε ζ η 182
下化
064 θ ι κ λ μ ν ξ ο π ρ 183 仮 何 伽 価 佳 加 可 嘉 夏 嫁
184 家 寡 科 暇 果 架 歌 河 火 珂
065 σ τ υ φ χ ψ ω
185 禍 禾 稼 箇 花 苛 茄 荷 華 菓
070
А Б В Г Д Е Ё Ж З 186 蝦 課 嘩 貨 迦 過 霞 蚊 俄 峨
071 И Й К Л М Н О П Р С 187 我 牙 画 臥 芽 蛾 賀 雅 餓 駕
072 Т У Ф Х Ц Ч Ш Щ Ъ Ы 188 介 会 解 回 塊 壊 廻 快 怪 悔
189 恢 懐 戒 拐 改
073 Ь Э Ю Я
074
а 190 魁 晦 械 海 灰 界 皆 絵 芥
1
First to third
Fourth digit of Kuten codes
digits of
Kuten codes 0 1 2 3 4 5 6 7 8 9
191 蟹 開 階 貝 凱 劾 外 咳 害 崖
192 慨 概 涯 碍 蓋 街 該 鎧 骸 浬
193 馨 蛙 垣 柿 蛎 鈎 劃 嚇 各 廓
194 拡 撹 格 核 殻 獲 確 穫 覚 角
195 赫 較 郭 閣 隔 革 学 岳 楽 額
196 顎 掛 笠 樫 橿 梶 鰍 潟 割 喝
197 恰 括 活 渇 滑 葛 褐 轄 且 鰹
198 叶 椛 樺 鞄 株 兜 竃 蒲 釜 鎌
199 噛 鴨 栢 茅 萱
200
粥刈苅瓦乾侃冠寒刊
201 勘 勧 巻 喚 堪 姦 完 官 寛 干
202 幹 患 感 慣 憾 換 敢 柑 桓 棺
203 款 歓 汗 漢 澗 潅 環 甘 監 看
204 竿 管 簡 緩 缶 翰 肝 艦 莞 観
205 諌 貫 還 鑑 間 閑 関 陥 韓 館
206 舘 丸 含 岸 巌 玩 癌 眼 岩 翫
207 贋 雁 頑 顔 願
き
207
企伎危喜器
208 基 奇 嬉 寄 岐 希 幾 忌 揮 机
209 旗 既 期 棋 棄
210
機帰毅気汽畿祈季稀
211 紀 徽 規 記 貴 起 軌 輝 飢 騎
212 鬼 亀 偽 儀 妓 宜 戯 技 擬 欺
213 犠 疑 祇 義 蟻 誼 議 掬 菊 鞠
214 吉 吃 喫 桔 橘 詰 砧 杵 黍 却
215 客 脚 虐 逆 丘 久 仇 休 及 吸
216 宮 弓 急 救 朽 求 汲 泣 灸 球
217 究 窮 笈 級 糾 給 旧 牛 去 居
218 巨 拒 拠 挙 渠 虚 許 距 鋸 漁
219 禦 魚 亨 享 京
220
供侠僑兇競共凶協匡
221 卿 叫 喬 境 峡 強 彊 怯 恐 恭
222 挟 教 橋 況 狂 狭 矯 胸 脅 興
223 蕎 郷 鏡 響 饗 驚 仰 凝 尭 暁
224 業 局 曲 極 玉 桐 粁 僅 勤 均
225 巾 錦 斤 欣 欽 琴 禁 禽 筋 緊
226 芹 菌 衿 襟 謹 近 金 吟 銀
く
226
九
227 倶 句 区 狗 玖 矩 苦 躯 駆 駈
228 駒 具 愚 虞 喰 空 偶 寓 遇 隅
229 串 櫛 釧 屑 屈
230
掘窟沓靴轡窪熊隈粂
231 栗 繰 桑 鍬 勲 君 薫 訓 群 軍
232 郡
け
232
卦袈祁係傾刑兄啓圭
233 珪 型 契 形 径 恵 慶 慧 憩 掲
234 携 敬 景 桂 渓 畦 稽 系 経 継
235 繋 罫 茎 荊 蛍 計 詣 警 軽 頚
236 鶏 芸 迎 鯨 劇 戟 撃 激 隙 桁
237 傑 欠 決 潔 穴 結 血 訣 月 件
238 倹 倦 健 兼 券 剣 喧 圏 堅 嫌
239 建 憲 懸 拳 捲
240
検権牽犬献研硯絹県
241 肩 見 謙 賢 軒 遣 鍵 険 顕 験
242 鹸 元 原 厳 幻 弦 減 源 玄 現
243 絃 舷 言 諺 限
こ
243
乎個古呼固
244 姑 孤 己 庫 弧 戸 故 枯 湖 狐
First to third
First to third
First to third
Fourth digit of Kuten codes
Fourth digit of Kuten codes
Fourth digit of Kuten codes
digits of
digits of
digits of
Kuten codes 0 1 2 3 4 5 6 7 8 9 Kuten codes 0 1 2 3 4 5 6 7 8 9 Kuten codes 0 1 2 3 4 5 6 7 8 9
す
245 糊 袴 股 胡 菰 虎 誇 跨 鈷 雇
377 宕 島 嶋 悼 投 搭 東 桃 梼 棟
246 顧 鼓 五 互 伍 午 呉 吾 娯 後 315
笥 諏 378 盗 淘 湯 涛 灯 燈 当 痘 祷 等
247 御 悟 梧 檎 瑚 碁 語 誤 護 醐 316 須 酢 図 厨 逗 吹 垂 帥 推 水 379 答 筒 糖 統 到
248 乞 鯉 交 佼 侯 候 倖 光 公 功 317 炊 睡 粋 翠 衰 遂 酔 錐 錘 随 380
董蕩藤討謄豆踏逃透
318 瑞 髄 崇 嵩 数 枢 趨 雛 据 杉 381 鐙 陶 頭 騰 闘 働 動 同 堂 導
249 効 勾 厚 口 向
250
382 憧 撞 洞 瞳 童 胴 萄 道 銅 峠
后 喉 坑 垢 好 孔 孝 宏 工 319 椙 菅 頗 雀 裾
251 巧 巷 幸 広 庚 康 弘 恒 慌 抗 320
383 鴇 匿 得 徳 涜 特 督 禿 篤 毒
澄摺寸
せ
252 拘 控 攻 昂 晃 更 杭 校 梗 構
384 独 読 栃 橡 凸 突 椴 届 鳶 苫
253 江 洪 浩 港 溝 甲 皇 硬 稿 糠 320
世 瀬 畝 是 凄 制 385 寅 酉 瀞 噸 屯 惇 敦 沌 豚 遁
254 紅 紘 絞 綱 耕 考 肯 肱 腔 膏 321 勢 姓 征 性 成 政 整 星 晴 棲 386 頓 呑 曇 鈍
な
255 航 荒 行 衡 講 貢 購 郊 酵 鉱 322 栖 正 清 牲 生 盛 精 聖 声 製
256 砿 鋼 閤 降 項 香 高 鴻 剛 劫 323 西 誠 誓 請 逝 醒 青 静 斉 税 386
奈那内乍凪薙
257 号 合 壕 拷 濠 豪 轟 麹 克 刻 324 脆 隻 席 惜 戚 斥 昔 析 石 積 387 謎 灘 捺 鍋 楢 馴 縄 畷 南 楠
258 告 国 穀 酷 鵠 黒 獄 漉 腰 甑 325 籍 績 脊 責 赤 跡 蹟 碩 切 拙 388 軟 難 汝
に
326 接 摂 折 設 窃 節 説 雪 絶 舌
259 忽 惚 骨 狛 込
260
此 頃 今 困 坤 墾 婚 恨 懇 327 蝉 仙 先 千 占 宣 専 尖 川 戦 388
二尼弐迩匂賑肉
328 扇 撰 栓 栴 泉 浅 洗 染 潜 煎 389 虹 廿 日 乳 入
261 昏 昆 根 梱 混 痕 紺 艮 魂
さ
329 煽 旋 穿 箭 線
390
如尿韮任妊忍認
ぬ∼の
261
些 330
繊羨腺舛船薦詮賎践
262 佐 叉 唆 嵯 左 差 査 沙 瑳 砂 331 選 遷 銭 銑 閃 鮮 前 善 漸 然 390
濡禰
263 詐 鎖 裟 坐 座 挫 債 催 再 最 332 全 禅 繕 膳 糎
391 祢 寧 葱 猫 熱 年 念 捻 撚 燃
そ
264 哉 塞 妻 宰 彩 才 採 栽 歳 済
392 粘 乃 廼 之 埜 嚢 悩 濃 納 能
265 災 采 犀 砕 砦 祭 斎 細 菜 裁 332
噌 塑 岨 措 曾 393 脳 膿 農 覗 蚤
は
266 載 際 剤 在 材 罪 財 冴 坂 阪 333 曽 楚 狙 疏 疎 礎 祖 租 粗 素
267 堺 榊 肴 咲 崎 埼 碕 鷺 作 削 334 組 蘇 訴 阻 遡 鼠 僧 創 双 叢 393
巴把播覇杷
268 咋 搾 昨 朔 柵 窄 策 索 錯 桜 335 倉 喪 壮 奏 爽 宋 層 匝 惣 想 394 波 派 琶 破 婆 罵 芭 馬 俳 廃
336 捜 掃 挿 掻 操 早 曹 巣 槍 槽 395 拝 排 敗 杯 盃 牌 背 肺 輩 配
269 鮭 笹 匙 冊 刷
270
察 拶 撮 擦 札 殺 薩 雑 皐 337 漕 燥 争 痩 相 窓 糟 総 綜 聡 396 倍 培 媒 梅 楳 煤 狽 買 売 賠
271 鯖 捌 錆 鮫 皿 晒 三 傘 参 山 338 草 荘 葬 蒼 藻 装 走 送 遭 鎗 397 陪 這 蝿 秤 矧 萩 伯 剥 博 拍
272 惨 撒 散 桟 燦 珊 産 算 纂 蚕 339 霜 騒 像 増 憎
398 柏 泊 白 箔 粕 舶 薄 迫 曝 漠
340
273 讃 賛 酸 餐 斬 暫 残
臓 蔵 贈 造 促 側 則 即 息 399 爆 縛 莫 駁 麦
し
341 捉 束 測 足 速 俗 属 賊 族 続 400
函箱硲箸肇筈櫨幡肌
273
仕 仔 伺 342 卒 袖 其 揃 存 孫 尊 損 村 遜 401 畑 畠 八 鉢 溌 発 醗 髪 伐 罰
た
274 使 刺 司 史 嗣 四 士 始 姉 姿
402 抜 筏 閥 鳩 噺 塙 蛤 隼 伴 判
275 子 屍 市 師 志 思 指 支 孜 斯 343 他 多 太 汰 詑 唾 堕 妥 惰 打 403 半 反 叛 帆 搬 斑 板 氾 汎 版
276 施 旨 枝 止 死 氏 獅 祉 私 糸 344 柁 舵 楕 陀 駄 騨 体 堆 対 耐 404 犯 班 畔 繁 般 藩 販 範 釆 煩
277 紙 紫 肢 脂 至 視 詞 詩 試 誌 345 岱 帯 待 怠 態 戴 替 泰 滞 胎 405 頒 飯 挽 晩 番 盤 磐 蕃 蛮
ひ
278 諮 資 賜 雌 飼 歯 事 似 侍 児 346 腿 苔 袋 貸 退 逮 隊 黛 鯛 代
347 台 大 第 醍 題 鷹 滝 瀧 卓 啄 405
279 字 寺 慈 持 時
匪
280
次 滋 治 爾 璽 痔 磁 示 而 348 宅 托 択 拓 沢 濯 琢 託 鐸 濁 406 卑 否 妃 庇 彼 悲 扉 批 披 斐
281 耳 自 蒔 辞 汐 鹿 式 識 鴫 竺 349 諾 茸 凧 蛸 只
407 比 泌 疲 皮 碑 秘 緋 罷 肥 被
282 軸 宍 雫 七 叱 執 失 嫉 室 悉 350
叩 但 達 辰 奪 脱 巽 竪 辿 408 誹 費 避 非 飛 樋 簸 備 尾 微
283 湿 漆 疾 質 実 蔀 篠 偲 柴 芝 351 棚 谷 狸 鱈 樽 誰 丹 単 嘆 坦 409 枇 毘 琵 眉 美
284 屡 蕊 縞 舎 写 射 捨 赦 斜 煮 352 担 探 旦 歎 淡 湛 炭 短 端 箪 410
鼻柊稗匹疋髭彦膝菱
285 社 紗 者 謝 車 遮 蛇 邪 借 勺 353 綻 耽 胆 蛋 誕 鍛 団 壇 弾 断 411 肘 弼 必 畢 筆 逼 桧 姫 媛 紐
286 尺 杓 灼 爵 酌 釈 錫 若 寂 弱 354 暖 檀 段 男 談
412 百 謬 俵 彪 標 氷 漂 瓢 票 表
ち
287 惹 主 取 守 手 朱 殊 狩 珠 種
413 評 豹 廟 描 病 秒 苗 錨 鋲 蒜
288 腫 趣 酒 首 儒 受 呪 寿 授 樹 354
値 知 地 弛 恥 414 蛭 鰭 品 彬 斌 浜 瀕 貧 賓 頻
355 智 池 痴 稚 置 致 蜘 遅 馳 築 415 敏 瓶
289 綬 需 囚 収 周
ふ
290
宗 就 州 修 愁 拾 洲 秀 秋 356 畜 竹 筑 蓄 逐 秩 窒 茶 嫡 着
291 終 繍 習 臭 舟 蒐 衆 襲 讐 蹴 357 中 仲 宙 忠 抽 昼 柱 注 虫 衷 415
不付埠夫婦富冨布
292 輯 週 酋 酬 集 醜 什 住 充 十 358 註 酎 鋳 駐 樗 瀦 猪 苧 著 貯 416 府 怖 扶 敷 斧 普 浮 父 符 腐
293 従 戎 柔 汁 渋 獣 縦 重 銃 叔 359 丁 兆 凋 喋 寵
417 膚 芙 譜 負 賦 赴 阜 附 侮 撫
294 夙 宿 淑 祝 縮 粛 塾 熟 出 術 360
帖 帳 庁 弔 張 彫 徴 懲 挑 418 武 舞 葡 蕪 部 封 楓 風 葺 蕗
295 述 俊 峻 春 瞬 竣 舜 駿 准 循 361 暢 朝 潮 牒 町 眺 聴 脹 腸 蝶 419 伏 副 復 幅 服
296 旬 楯 殉 淳 準 潤 盾 純 巡 遵 362 調 諜 超 跳 銚 長 頂 鳥 勅 捗 420
福腹複覆淵弗払沸仏
297 醇 順 処 初 所 暑 曙 渚 庶 緒 363 直 朕 沈 珍 賃 鎮 陳
421 物 鮒 分 吻 噴 墳 憤 扮 焚 奮
つ
298 署 書 薯 藷 諸 助 叙 女 序 徐
422 粉 糞 紛 雰 文 聞
へ
363
299 恕 鋤 除 傷 償
津墜椎
300
丙併兵塀
勝 匠 升 召 哨 商 唱 嘗 奨 364 槌 追 鎚 痛 通 塚 栂 掴 槻 佃 422
301 妾 娼 宵 将 小 少 尚 庄 床 廠 365 漬 柘 辻 蔦 綴 鍔 椿 潰 坪 壷 423 幣 平 弊 柄 並 蔽 閉 陛 米 頁
302 彰 承 抄 招 掌 捷 昇 昌 昭 晶 366 嬬 紬 爪 吊 釣 鶴
424 僻 壁 癖 碧 別 瞥 蔑 箆 偏 変
て
303 松 梢 樟 樵 沼 消 渉 湘 焼 焦
425 片 篇 編 辺 返 遍 便 勉 娩 弁
304 照 症 省 硝 礁 祥 称 章 笑 粧 366
亭 低 停 偵 426 鞭
ほ
305 紹 肖 菖 蒋 蕉 衝 裳 訟 証 詔 367 剃 貞 呈 堤 定 帝 底 庭 廷 弟
306 詳 象 賞 醤 鉦 鍾 鐘 障 鞘 上 368 悌 抵 挺 提 梯 汀 碇 禎 程 締 426
保舗鋪圃捕歩甫補輔
307 丈 丞 乗 冗 剰 城 場 壌 嬢 常 369 艇 訂 諦 蹄 逓
427 穂 募 墓 慕 戊 暮 母 簿 菩 倣
308 情 擾 条 杖 浄 状 畳 穣 蒸 譲 370
邸 鄭 釘 鼎 泥 摘 擢 敵 滴 428 俸 包 呆 報 奉 宝 峰 峯 崩 庖
371 的 笛 適 鏑 溺 哲 徹 撤 轍 迭 429 抱 捧 放 方 朋
309 醸 錠 嘱 埴 飾
310
法泡烹砲縫胞芳萌蓬
拭 植 殖 燭 織 職 色 触 食 372 鉄 典 填 天 展 店 添 纏 甜 貼 430
311 蝕 辱 尻 伸 信 侵 唇 娠 寝 審 373 転 顛 点 伝 殿 澱 田 電
431 蜂 褒 訪 豊 邦 鋒 飽 鳳 鵬 乏
と
312 心 慎 振 新 晋 森 榛 浸 深 申
432 亡 傍 剖 坊 妨 帽 忘 忙 房 暴
313 疹 真 神 秦 紳 臣 芯 薪 親 診 373
兎 吐 433 望 某 棒 冒 紡 肪 膨 謀 貌 貿
314 身 辛 進 針 震 人 仁 刃 塵 壬 374 堵 塗 妬 屠 徒 斗 杜 渡 登 菟 434 鉾 防 吠 頬 北 僕 卜 墨 撲 朴
375 賭 途 都 鍍 砥 砺 努 度 土 奴 435 牧 睦 穆 釦 勃 没 殆 堀 幌 奔
315 尋 甚 尽 腎 訊 迅 陣 靭
376 怒 倒 党 冬 凍 刀 唐 塔 塘 套 436 本 翻 凡 盆
2
First to third
digits of
Kuten codes 0
1
Fourth digit of Kuten codes
2 3 4 5 6 7 8
ま
436
437
438
439
440
摩磨魔麻埋
昧枚毎哩槙幕膜枕鮪
鱒桝亦俣又抹末沫迄
繭麿万慢満
漫蔓
440
441
味未魅巳箕岬
蜜湊蓑稔脈妙粍民眠
み
む
441
442
夢無牟矛霧鵡椋婿娘
442
443
444
名命明盟迷銘鳴姪牝
免棉綿緬面麺
め
も
444
445
446
447
摸模茂
孟毛猛盲網耗蒙儲木
目杢勿餅尤戻籾貰問
紋門匁
447
448
449
也冶夜爺耶野
矢厄役約薬訳躍靖柳
鑓
449
450
451
452
愉
諭
悠憂
祐裕
や
ゆ
愈
輸
揖
誘
油
唯
有
遊
癒
佑優勇友宥
柚湧涌猶猷
邑郵雄融夕
よ
452
453
454
455
456
余
揚
窯
養
456
457
458
螺裸来莱頼雷洛絡落
乱卵嵐欄濫藍蘭覧
与
揺
羊
慾
誉
擁
耀
抑
輿
曜
葉
欲
預
楊
蓉
沃
傭
様
要
浴
幼
洋
謡
翌
妖
溶
踊
翼
容
熔
遥
淀
ら
り
458
459
460
461
462
463
464
465
利
履李
痢
葎掠
隆竜
両凌
糧良
厘林
梨
裏
略
龍
寮
諒
淋
理
裡
劉
侶
料
遼
燐
璃
里
流
慮
梁
量
琳
466
467
468
469
470
瑠
嶺
齢
漣
涙
玲
歴
簾
連
累
礼
列
練
錬
類令伶例冷
苓鈴隷零霊
劣烈裂廉恋
聯
470
471
472
473
呂魯櫓炉賂
露労婁廊弄朗楼榔浪
牢狼篭老聾蝋郎六麓
肋録論
473
474
475
476
477
478
479
480
481
482
483
484
485
486
487
倭和話歪賄脇
枠鷲亙亘鰐詫藁蕨椀
碗腕
離
溜
旅
涼
陵
臨
陸
琉
虜
猟
領
輪
律
留
了
療
力
隣
率
硫
亮
瞭
緑
鱗
る∼れ
塁
怜
暦
煉
蓮
ろ
わ
乖
亟
仂
佝
侑
俑
倅
弌
乘
亠
仗
佗
佯
俚
伜
丐
亂
亢
仞
佇
來
俐
俶
丕
亅
亰
仭
佶
侖
俤
倡
个
豫
亳
仟
侈
儘
俥
倩
丱
亊
亶
价
侏
俔
倚
倬
丶
舒
从
伉
侘
俟
倨
俾
丼
弍
仍
佚
佻
俎
倔
俯
丿
于
仄
估
佩
俘
倪
們
First to third
First to third
Fourth digit of Kuten codes
Fourth digit of Kuten codes
digits of
digits of
9 Kuten codes 0 1 2 3 4 5 6 7 8 9 Kuten codes 0 1 2 3 4 5 6 7 8 9
488 偃 假 會 偕 偐 偈 做 偖 偬 偸 564 愴 愽 慂 慄 慳 慷 慘 慙 慚 慫
565 慴 慯 慥 慱 慟 慝 慓 慵 憙 憖
妹 489 傀 傚 傅 傴 傲
柾 490
僉 僊 傳 僂 僖 僞 僥 僭 僣 566 憇 憬 憔 憚 憊 憑 憫 憮 懌 懊
侭 491 僮 價 僵 儉 儁 儂 儖 儕 儔 儚 567 應 懷 懈 懃 懆 憺 懋 罹 懍 懦
492 儡 儺 儷 儼 儻 儿 兀 兒 兌 兔 568 懣 懶 懺 懴 懿 懽 懼 懾 戀 戈
493 兢 竸 兩 兪 兮 冀 冂 囘 册 冉 569 戉 戍 戌 戔 戛
494 冏 冑 冓 冕 冖 冤 冦 冢 冩 冪 570
戞戡截戮戰戲戳扁扎
密 495 冫 决 冱 冲 冰 况 冽 凅 凉 凛 571 扞 扣 扛 扠 扨 扼 抂 抉 找 抒
496 几 處 凩 凭 凰 凵 凾 刄 刋 刔 572 抓 抖 拔 抃 抔 拗 拑 抻 拏 拿
497 刎 刧 刪 刮 刳 刹 剏 剄 剋 剌 573 拆 擔 拈 拜 拌 拊 拂 拇 抛 拉
務 498 剞 剔 剪 剴 剩 剳 剿 剽 劍 劔 574 挌 拮 拱 挧 挂 挈 拯 拵 捐 挾
499 劒 剱 劈 劑 辨
575 捍 搜 捏 掖 掎 掀 掫 捶 掣 掏
500
辧 劬 劭 劼 劵 勁 勍 勗 勞 576 掉 掟 掵 捫 捩 掾 揩 揀 揆 揣
冥 501 勣 勦 飭 勠 勳 勵 勸 勹 匆 匈 577 揉 插 揶 揄 搖 搴 搆 搓 搦 搶
滅 502 甸 匍 匐 匏 匕 匚 匣 匯 匱 匳 578 攝 搗 搨 搏 摧 摯 摶 摎 攪 撕
503 匸 區 卆 卅 丗 卉 卍 凖 卞 卩 579 撓 撥 撩 撈 撼
504 卮 夘 卻 卷 厂 厖 厠 厦 厥 厮 580
據擒擅擇撻擘擂擱擧
妄 505 厰 厶 參 簒 雙 叟 曼 燮 叮 叨 581 舉 擠 擡 抬 擣 擯 攬 擶 擴 擲
黙 506 叭 叺 吁 吽 呀 听 吭 吼 吮 吶 582 擺 攀 擽 攘 攜 攅 攤 攣 攫 攴
悶 507 吩 吝 呎 咏 呵 咎 呟 呱 呷 呰 583 攵 攷 收 攸 畋 效 敖 敕 敍 敘
508 咒 呻 咀 呶 咄 咐 咆 哇 咢 咸 584 敞 敝 敲 數 斂 斃 變 斛 斟 斫
509 咥 咬 哄 哈 咨
585 斷 旃 旆 旁 旄 旌 旒 旛 旙 无
弥 510
咫 哂 咤 咾 咼 哘 哥 哦 唏 586 旡 旱 杲 昊 昃 旻 杳 昵 昶 昴
薮 511 唔 哽 哮 哭 哺 哢 唹 啀 啣 啌 587 昜 晏 晄 晉 晁 晞 晝 晤 晧 晨
512 售 啜 啅 啖 啗 唸 唳 啝 喙 喀 588 晟 晢 晰 暃 暈 暎 暉 暄 暘 暝
513 咯 喊 喟 啻 啾 喘 喞 單 啼 喃 589 曁 暹 曉 暾 暼
514 喩 喇 喨 嗚 嗅 嗟 嗄 嗜 嗤 嗔 590
曄暸曖曚曠昿曦曩曰
幽 515 嘔 嗷 嘖 嗾 嗽 嘛 嗹 噎 噐 營 591 曵 曷 朏 朖 朞 朦 朧 霸 朮 朿
由 516 嘴 嘶 嘲 嘸 噫 噤 嘯 噬 噪 嚆 592 朶 杁 朸 朷 杆 杞 杠 杙 杣 杤
517 嚀 嚊 嚠 嚔 嚏 嚥 嚮 嚶 嚴 囂 593 枉 杰 枩 杼 杪 枌 枋 枦 枡 枅
518 嚼 囁 囃 囀 囈 囎 囑 囓 囗 囮 594 枷 柯 枴 柬 枳 柩 枸 柤 柞 柝
595 柢 柮 枹 柎 柆 柧 檜 栞 框 栩
予 519 囹 圀 囿 圄 圉
庸 520
圈 國 圍 圓 團 圖 嗇 圜 圦 596 桀 桍 栲 桎 梳 栫 桙 档 桷 桿
521
用
圷 圸 坎 圻 址 坏 坩 埀 垈 坡 597 梟 梏 梭 梔 條 梛 梃 檮 梹 桴
陽 522 坿 垉 垓 垠 垳 垤 垪 垰 埃 埆 598 梵 梠 梺 椏 梍 桾 椁 棊 椈 棘
523 埔 埒 埓 堊 埖 埣 堋 堙 堝 塲 599 椢 椦 棡 椌 棍
524 堡 塢 塋 塰 毀 塒 堽 塹 墅 墹 600
棔棧棕椶椒椄棗棣椥
羅 525 墟 墫 墺 壞 墻 墸 墮 壅 壓 壑 601 棹 棠 棯 椨 椪 椚 椣 椡 棆 楹
酪 526 壗 壙 壘 壥 壜 壤 壟 壯 壺 壹 602 楷 楜 楸 楫 楔 楾 楮 椹 楴 椽
527 壻 壼 壽 夂 夊 夐 夛 梦 夥 夬 603 楙 椰 楡 楞 楝 榁 楪 榲 榮 槐
528 夭 夲 夸 夾 竒 奕 奐 奎 奚 奘 604 榿 槁 槓 榾 槎 寨 槊 槝 榻 槃
605 榧 樮 榑 榠 榜 榕 榴 槞 槨 樂
吏 529 奢 奠 奧 奬 奩
530
奸 妁 妝 佞 侫 妣 妲 姆 姨 606 樛 槿 權 槹 槲 槧 樅 榱 樞 槭
立 531 姜 妍 姙 姚 娥 娟 娑 娜 娉 娚 607 樔 槫 樊 樒 櫁 樣 樓 橄 樌 橲
粒 532 婀 婬 婉 娵 娶 婢 婪 媚 媼 媾 608 樶 橸 橇 橢 橙 橦 橈 樸 樢 檐
僚 533 嫋 嫂 媽 嫣 嫗 嫦 嫩 嫖 嫺 嫻 609 檍 檠 檄 檢 檣
稜 534 嬌 嬋 嬖 嬲 嫐 嬪 嬶 嬾 孃 孅 610
檗蘗檻櫃櫂檸檳檬櫞
倫 535 孀 孑 孕 孚 孛 孥 孩 孰 孳 孵 611 櫑 櫟 檪 櫚 櫪 櫻 欅 蘖 櫺 欒
麟 536 學 斈 孺 宀 它 宦 宸 寃 寇 寉 612 欖 鬱 欟 欸 欷 盜 欹 飮 歇 歃
537 寔 寐 寤 實 寢 寞 寥 寫 寰 寶 613 歉 歐 歙 歔 歛 歟 歡 歸 歹 歿
励 538 寳 尅 將 專 對 尓 尠 尢 尨 尸 614 殀 殄 殃 殍 殘 殕 殞 殤 殪 殫
615 殯 殲 殱 殳 殷 殼 毆 毋 毓 毟
麗 539 尹 屁 屆 屎 屓
憐 540
屐 屏 孱 屬 屮 乢 屶 屹 岌 616 毬 毫 毳 毯 麾 氈 氓 气 氛 氤
541 岑 岔 妛 岫 岻 岶 岼 岷 峅 岾 617 氣 汞 汕 汢 汪 沂 沍 沚 沁 沛
542 峇 峙 峩 峽 峺 峭 嶌 峪 崋 崕 618 汾 汨 汳 沒 沐 泄 泱 泓 沽 泗
543 崗 嵜 崟 崛 崑 崔 崢 崚 崙 崘 619 泅 泝 沮 沱 沾
路 544 嵌 嵒 嵎 嵋 嵬 嵳 嵶 嶇 嶄 嶂 620
沺泛泯泙泪洟衍洶洫
漏 545 嶢 嶝 嶬 嶮 嶽 嶐 嶷 嶼 巉 巍 621 洽 洸 洙 洵 洳 洒 洌 浣 涓 浤
禄 546 巓 巒 巖 巛 巫 已 巵 帋 帚 帙 622 浚 浹 浙 涎 涕 濤 涅 淹 渕 渊
547 帑 帛 帶 帷 幄 幃 幀 幎 幗 幔 623 涵 淇 淦 涸 淆 淬 淞 淌 淨 淒
548 幟 幢 幤 幇 幵 并 幺 麼 广 庠 624 淅 淺 淙 淤 淕 淪 淮 渭 湮 渮
625 渙 湲 湟 渾 渣 湫 渫 湶 湍 渟
惑 549 廁 廂 廈 廐 廏
湾 550
廖 廣 廝 廚 廛 廢 廡 廨 廩 626 湃 渺 湎 渤 滿 渝 游 溂 溪 溘
551 廬 廱 廳 廰 廴 廸 廾 弃 弉 彝 627 滉 溷 滓 溽 溯 滄 溲 滔 滕 溏
552 彜 弋 弑 弖 弩 弭 弸 彁 彈 彌 628 溥 滂 溟 潁 漑 灌 滬 滸 滾 漿
553 彎 弯 彑 彖 彗 彙 彡 彭 彳 彷 629 滲 漱 滯 漲 滌
554 徃 徂 彿 徊 很 徑 徇 從 徙 徘 630
漾漓滷澆潺潸澁澀潯
555 徠 徨 徭 徼 忖 忻 忤 忸 忱 忝 631 潛 濳 潭 澂 潼 潘 澎 澑 濂 潦
乂 556 悳 忿 怡 恠 怙 怐 怩 怎 怱 怛 632 澳 澣 澡 澤 澹 濆 澪 濟 濕 濬
亞 557 怕 怫 怦 怏 怺 恚 恁 恪 恷 恟 633 濔 濘 濱 濮 濛 瀉 瀋 濺 瀑 瀁
仆 558 恊 恆 恍 恣 恃 恤 恂 恬 恫 恙 634 瀏 濾 瀛 瀚 潴 瀝 瀘 瀟 瀰 瀾
635 瀲 灑 灣 炙 炒 炯 烱 炬 炸 炳
佛 559 悁 悍 惧 悃 悚
佰 560
悄 悛 悖 悗 悒 悧 悋 惡 悸 636 炮 烟 烋 烝 烙 焉 烽 焜 焙 煥
俛 561 惠 惓 悴 忰 悽 惆 悵 惘 慍 愕 637 煕 熈 煦 煢 煌 煖 煬 熏 燻 熄
倥 562 愆 惶 惷 愀 惴 惺 愃 愡 惻 惱 638 熕 熨 熬 燗 熹 熾 燒 燉 燔 燎
倆 563 愍 愎 慇 愾 愨 愧 慊 愿 愼 愬 639 燠 燬 燧 燵 燼
3
First to third
First to third
First to third
Fourth digit of Kuten codes
Fourth digit of Kuten codes
Fourth digit of Kuten codes
digits of
digits of
digits of
Kuten codes 0 1 2 3 4 5 6 7 8 9 Kuten codes 0 1 2 3 4 5 6 7 8 9 Kuten codes 0 1 2 3 4 5 6 7 8 9
640
燹 燿 爍 爐 爛 爨 爭 爬 爰 716 艝 艚 艟 艤 艢 艨 艪 艫 舮 艱 792 鏨 鏥 鏘 鏃 鏝 鏐 鏈 鏤 鐚 鐔
641 爲 爻 爼 爿 牀 牆 牋 牘 牴 牾 717 艷 艸 艾 芍 芒 芫 芟 芻 芬 苡 793 鐓 鐃 鐇 鐐 鐶 鐫 鐵 鐡 鐺 鑁
642 犂 犁 犇 犒 犖 犢 犧 犹 犲 狃 718 苣 苟 苒 苴 苳 苺 莓 范 苻 苹 794 鑒 鑄 鑛 鑠 鑢 鑞 鑪 鈩 鑰 鑵
795 鑷 鑽 鑚 鑼 鑾 钁 鑿 閂 閇 閊
643 狆 狄 狎 狒 狢 狠 狡 狹 狷 倏 719 苞 茆 苜 茉 苙
644 猗 猊 猜 猖 猝 猴 猯 猩 猥 猾 720
茵 茴 茖 茲 茱 荀 茹 荐 荅 796 閔 閖 閘 閙 閠 閨 閧 閭 閼 閻
645 獎 獏 默 獗 獪 獨 獰 獸 獵 獻 721 茯 茫 茗 茘 莅 莚 莪 莟 莢 莖 797 閹 閾 闊 濶 闃 闍 闌 闕 闔 闖
646 獺 珈 玳 珎 玻 珀 珥 珮 珞 璢 722 茣 莎 莇 莊 荼 莵 荳 荵 莠 莉 798 關 闡 闥 闢 阡 阨 阮 阯 陂 陌
647 琅 瑯 琥 珸 琲 琺 瑕 琿 瑟 瑙 723 莨 菴 萓 菫 菎 菽 萃 菘 萋 菁 799 陏 陋 陷 陜 陞
648 瑁 瑜 瑩 瑰 瑣 瑪 瑶 瑾 璋 璞 724 菷 萇 菠 菲 萍 萢 萠 莽 萸 蔆 800
陝陟陦陲陬隍隘隕隗
725 菻 葭 萪 萼 蕚 蒄 葷 葫 蒭 葮 801 險 隧 隱 隲 隰 隴 隶 隸 隹 雎
649 璧 瓊 瓏 瓔 珱
650
瓠 瓣 瓧 瓩 瓮 瓲 瓰 瓱 瓸 726 蒂 葩 葆 萬 葯 葹 萵 蓊 葢 蒹 802 雋 雉 雍 襍 雜 霍 雕 雹 霄 霆
651 瓷 甄 甃 甅 甌 甎 甍 甕 甓 甞 727 蒿 蒟 蓙 蓍 蒻 蓚 蓐 蓁 蓆 蓖 803 霈 霓 霎 霑 霏 霖 霙 霤 霪 霰
652 甦 甬 甼 畄 畍 畊 畉 畛 畆 畚 728 蒡 蔡 蓿 蓴 蔗 蔘 蔬 蔟 蔕 蔔 804 霹 霽 霾 靄 靆 靈 靂 靉 靜 靠
805 靤 靦 靨 勒 靫 靱 靹 鞅 靼 鞁
653 畩 畤 畧 畫 畭 畸 當 疆 疇 畴 729 蓼 蕀 蕣 蕘 蕈
654 疊 疉 疂 疔 疚 疝 疥 疣 痂 疳 730
蕁 蘂 蕋 蕕 薀 薤 薈 薑 薊 806 靺 鞆 鞋 鞏 鞐 鞜 鞨 鞦 鞣 鞳
655 痃 疵 疽 疸 疼 疱 痍 痊 痒 痙 731 薨 蕭 薔 薛 藪 薇 薜 蕷 蕾 薐 807 鞴 韃 韆 韈 韋 韜 韭 齏 韲 竟
656 痣 痞 痾 痿 痼 瘁 痰 痺 痲 痳 732 藉 薺 藏 薹 藐 藕 藝 藥 藜 藹 808 韶 韵 頏 頌 頸 頤 頡 頷 頽 顆
657 瘋 瘍 瘉 瘟 瘧 瘠 瘡 瘢 瘤 瘴 733 蘊 蘓 蘋 藾 藺 蘆 蘢 蘚 蘰 蘿 809 顏 顋 顫 顯 顰
658 瘰 瘻 癇 癈 癆 癜 癘 癡 癢 癨 734 虍 乕 虔 號 虧 虱 蚓 蚣 蚩 蚪 810
顱顴顳颪颯颱颶飄飃
735 蚋 蚌 蚶 蚯 蛄 蛆 蚰 蛉 蠣 蚫 811 飆 飩 飫 餃 餉 餒 餔 餘 餡 餝
659 癩 癪 癧 癬 癰
660
癲 癶 癸 發 皀 皃 皈 皋 皎 736 蛔 蛞 蛩 蛬 蛟 蛛 蛯 蜒 蜆 蜈 812 餞 餤 餠 餬 餮 餽 餾 饂 饉 饅
661 皖 皓 皙 皚 皰 皴 皸 皹 皺 盂 737 蜀 蜃 蛻 蜑 蜉 蜍 蛹 蜊 蜴 蜿 813 饐 饋 饑 饒 饌 饕 馗 馘 馥 馭
662 盍 盖 盒 盞 盡 盥 盧 盪 蘯 盻 738 蜷 蜻 蜥 蜩 蜚 蝠 蝟 蝸 蝌 蝎 814 馮 馼 駟 駛 駝 駘 駑 駭 駮 駱
815 駲 駻 駸 騁 騏 騅 駢 騙 騫 騷
663 眈 眇 眄 眩 眤 眞 眥 眦 眛 眷 739 蝴 蝗 蝨 蝮 蝙
664 眸 睇 睚 睨 睫 睛 睥 睿 睾 睹 740
蝓 蝣 蝪 蠅 螢 螟 螂 螯 蟋 816 驅 驂 驀 驃 騾 驕 驍 驛 驗 驟
665 瞎 瞋 瞑 瞠 瞞 瞰 瞶 瞹 瞿 瞼 741 螽 蟀 蟐 雖 螫 蟄 螳 蟇 蟆 螻 817 驢 驥 驤 驩 驫 驪 骭 骰 骼 髀
666 瞽 瞻 矇 矍 矗 矚 矜 矣 矮 矼 742 蟯 蟲 蟠 蠏 蠍 蟾 蟶 蟷 蠎 蟒 818 髏 髑 髓 體 髞 髟 髢 髣 髦 髯
667 砌 砒 礦 砠 礪 硅 碎 硴 碆 硼 743 蠑 蠖 蠕 蠢 蠡 蠱 蠶 蠹 蠧 蠻 819 髫 髮 髴 髱 髷
668 碚 碌 碣 碵 碪 碯 磑 磆 磋 磔 744 衄 衂 衒 衙 衞 衢 衫 袁 衾 袞 820
髻鬆鬘鬚鬟鬢鬣鬥鬧
745 衵 衽 袵 衲 袂 袗 袒 袮 袙 袢 821 鬨 鬩 鬪 鬮 鬯 鬲 魄 魃 魏 魍
669 碾 碼 磅 磊 磬
670
磧 磚 磽 磴 礇 礒 礑 礙 礬 746 袍 袤 袰 袿 袱 裃 裄 裔 裘 裙 822 魎 魑 魘 魴 鮓 鮃 鮑 鮖 鮗 鮟
671 礫 祀 祠 祗 祟 祚 祕 祓 祺 祿 747 裝 裹 褂 裼 裴 裨 裲 褄 褌 褊 823 鮠 鮨 鮴 鯀 鯊 鮹 鯆 鯏 鯑 鯒
672 禊 禝 禧 齋 禪 禮 禳 禹 禺 秉 748 褓 襃 褞 褥 褪 褫 襁 襄 褻 褶 824 鯣 鯢 鯤 鯔 鯡 鰺 鯲 鯱 鯰 鰕
825 鰔 鰉 鰓 鰌 鰆 鰈 鰒 鰊 鰄 鰮
673 秕 秧 秬 秡 秣 稈 稍 稘 稙 稠 749 褸 襌 褝 襠 襞
674 稟 禀 稱 稻 稾 稷 穃 穗 穉 穡 750
襦 襤 襭 襪 襯 襴 襷 襾 覃 826 鰛 鰥 鰤 鰡 鰰 鱇 鰲 鱆 鰾 鱚
675 穢 穩 龝 穰 穹 穽 窈 窗 窕 窘 751 覈 覊 覓 覘 覡 覩 覦 覬 覯 覲 827 鱠 鱧 鱶 鱸 鳧 鳬 鳰 鴉 鴈 鳫
676 窖 窩 竈 窰 窶 竅 竄 窿 邃 竇 752 覺 覽 覿 觀 觚 觜 觝 觧 觴 觸 828 鴃 鴆 鴪 鴦 鶯 鴣 鴟 鵄 鴕 鴒
677 竊 竍 竏 竕 竓 站 竚 竝 竡 竢 753 訃 訖 訐 訌 訛 訝 訥 訶 詁 詛 829 鵁 鴿 鴾 鵆 鵈
678 竦 竭 竰 笂 笏 笊 笆 笳 笘 笙 754 詒 詆 詈 詼 詭 詬 詢 誅 誂 誄 830
鵝鵞鵤鵑鵐鵙鵲鶉鶇
755 誨 誡 誑 誥 誦 誚 誣 諄 諍 諂 831 鶫 鵯 鵺 鶚 鶤 鶩 鶲 鷄 鷁 鶻
679 笞 笵 笨 笶 筐
680
筺 笄 筍 笋 筌 筅 筵 筥 筴 756 諚 諫 諳 諧 諤 諱 謔 諠 諢 諷 832 鶸 鶺 鷆 鷏 鷂 鷙 鷓 鷸 鷦 鷭
681 筧 筰 筱 筬 筮 箝 箘 箟 箍 箜 757 諞 諛 謌 謇 謚 諡 謖 謐 謗 謠 833 鷯 鷽 鸚 鸛 鸞 鹵 鹹 鹽 麁 麈
682 箚 箋 箒 箏 筝 箙 篋 篁 篌 篏 758 謳 鞫 謦 謫 謾 謨 譁 譌 譏 譎 834 麋 麌 麒 麕 麑 麝 麥 麩 麸 麪
835 麭 靡 黌 黎 黏 黐 黔 黜 點 黝
683 箴 篆 篝 篩 簑 簔 篦 篥 籠 簀 759 證 譖 譛 譚 譫
684 簇 簓 篳 篷 簗 簍 篶 簣 簧 簪 760
譟 譬 譯 譴 譽 讀 讌 讎 讒 836 黠 黥 黨 黯 黴 黶 黷 黹 黻 黼
685 簟 簷 簫 簽 籌 籃 籔 籏 籀 籐 761 讓 讖 讙 讚 谺 豁 谿 豈 豌 豎 837 黽 鼇 鼈 皷 鼕 鼡 鼬 鼾 齊 齒
686 籘 籟 籤 籖 籥 籬 籵 粃 粐 粤 762 豐 豕 豢 豬 豸 豺 貂 貉 貅 貊 838 齔 齣 齟 齠 齡 齦 齧 齬 齪 齷
687 粭 粢 粫 粡 粨 粳 粲 粱 粮 粹 763 貍 貎 貔 豼 貘 戝 貭 貪 貽 貲 839 齲 齶 龕 龜 龠
688 粽 糀 糅 糂 糘 糒 糜 糢 鬻 糯 764 貳 貮 貶 賈 賁 賤 賣 賚 賽 賺 840
堯槇遙瑤
765 賻 贄 贅 贊 贇 贏 贍 贐 齎 贓
689 糲 糴 糶 糺 紆
690
紂 紜 紕 紊 絅 絋 紮 紲 紿 766 賍 贔 贖 赧 赭 赱 赳 趁 趙 跂
691 紵 絆 絳 絖 絎 絲 絨 絮 絏 絣 767 趾 趺 跏 跚 跖 跌 跛 跋 跪 跫
692 經 綉 絛 綏 絽 綛 綺 綮 綣 綵 768 跟 跣 跼 踈 踉 跿 踝 踞 踐 踟
693 緇 綽 綫 總 綢 綯 緜 綸 綟 綰 769 蹂 踵 踰 踴 蹊
694 緘 緝 緤 緞 緻 緲 緡 縅 縊 縣 770
蹇蹉蹌蹐蹈蹙蹤蹠踪
695 縡 縒 縱 縟 縉 縋 縢 繆 繦 縻 771 蹣 蹕 蹶 蹲 蹼 躁 躇 躅 躄 躋
696 縵 縹 繃 縷 縲 縺 繧 繝 繖 繞 772 躊 躓 躑 躔 躙 躪 躡 躬 躰 軆
697 繙 繚 繹 繪 繩 繼 繻 纃 緕 繽 773 躱 躾 軅 軈 軋 軛 軣 軼 軻 軫
698 辮 繿 纈 纉 續 纒 纐 纓 纔 纖 774 軾 輊 輅 輕 輒 輙 輓 輜 輟 輛
775 輌 輦 輳 輻 輹 轅 轂 輾 轌 轉
699 纎 纛 纜 缸 缺
700
罅 罌 罍 罎 罐 网 罕 罔 罘 776 轆 轎 轗 轜 轢 轣 轤 辜 辟 辣
701 罟 罠 罨 罩 罧 罸 羂 羆 羃 羈 777 辭 辯 辷 迚 迥 迢 迪 迯 邇 迴
702 羇 羌 羔 羞 羝 羚 羣 羯 羲 羹 778 逅 迹 迺 逑 逕 逡 逍 逞 逖 逋
703 羮 羶 羸 譱 翅 翆 翊 翕 翔 翡 779 逧 逶 逵 逹 迸
704 翦 翩 翳 翹 飜 耆 耄 耋 耒 耘 780
遏遐遑遒逎遉逾遖遘
705 耙 耜 耡 耨 耿 耻 聊 聆 聒 聘 781 遞 遨 遯 遶 隨 遲 邂 遽 邁 邀
706 聚 聟 聢 聨 聳 聲 聰 聶 聹 聽 782 邊 邉 邏 邨 邯 邱 邵 郢 郤 扈
707 聿 肄 肆 肅 肛 肓 肚 肭 冐 肬 783 郛 鄂 鄒 鄙 鄲 鄰 酊 酖 酘 酣
708 胛 胥 胙 胝 胄 胚 胖 脉 胯 胱 784 酥 酩 酳 酲 醋 醉 醂 醢 醫 醯
785 醪 醵 醴 醺 釀 釁 釉 釋 釐 釖
709 脛 脩 脣 脯 腋
710
隋 腆 脾 腓 腑 胼 腱 腮 腥 786 釟 釡 釛 釼 釵 釶 鈞 釿 鈔 鈬
711 腦 腴 膃 膈 膊 膀 膂 膠 膕 膤 787 鈕 鈑 鉞 鉗 鉅 鉉 鉤 鉈 銕 鈿
712 膣 腟 膓 膩 膰 膵 膾 膸 膽 臀 788 鉋 鉐 銜 銖 銓 銛 鉚 鋏 銹 銷
713 臂 膺 臉 臍 臑 臙 臘 臈 臚 臟 789 鋩 錏 鋺 鍄 錮
714 臠 臧 臺 臻 臾 舁 舂 舅 與 舊 790
錙錢錚錣錺錵錻鍜鍠
715 舍 舐 舖 舩 舫 舸 舳 艀 艙 艘 791 鍼 鍮 鍖 鎰 鎬 鎭 鎔 鎹 鏖 鏗
4

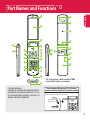

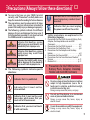


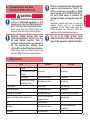
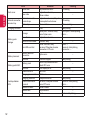


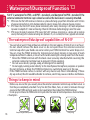
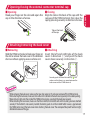

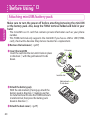

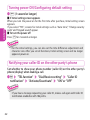
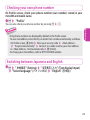
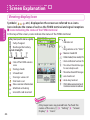

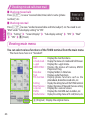
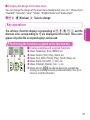
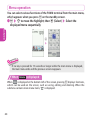
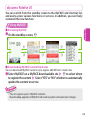


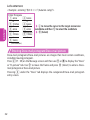
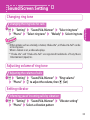
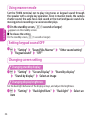
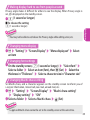
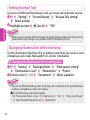
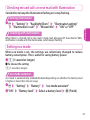
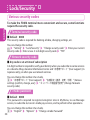

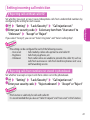

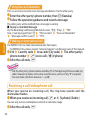
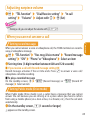
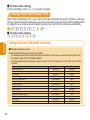


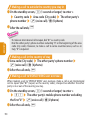
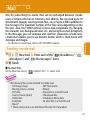
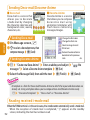
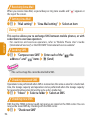
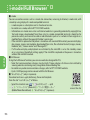


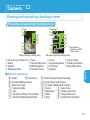
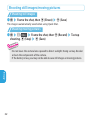
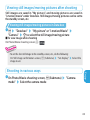
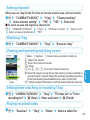
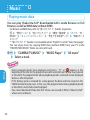
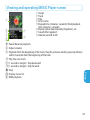

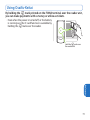

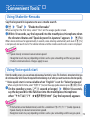


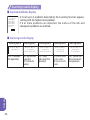

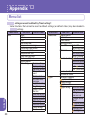

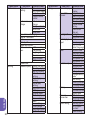


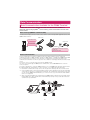

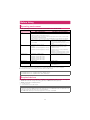


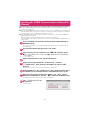


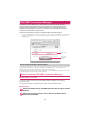


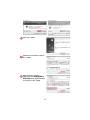
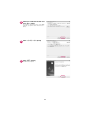
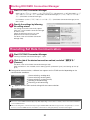


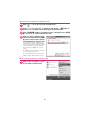
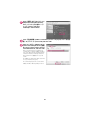
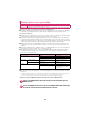


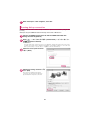
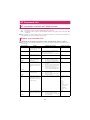


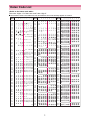
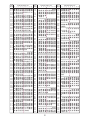
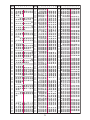


![取扱説明書 [F-03B] - Altehandys.de](http://vs1.manualzilla.com/store/data/006538124_2-9b53d14369fe3af8b4369d863b7cba7c-150x150.png)