1
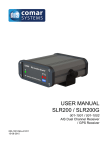
USER MANUAL
SLR200N / SLR200NG
001-1003 / 001-1004
AIS Dual Channel Receiver
Network / GPS Receiver
003-1003-MA-v01r01
15-08-2015
SLR200N / SLR200NG
CONTENTS
1
INTRODUCTION ................................................................................. 4
1.1
1.2
Background to AIS ........................................................................................ 4
The SLR200N ............................................................................................... 4
2
CONTENTS OF THE BOX .................................................................. 5
3
SLR200N INSTALLATION................................................................... 5
3.1
3.2
3.3
3.4
3.5
3.6
3.7
3.8
3.9
4
SLR200NG INSTALLATION ................................................................ 9
4.1
4.2
4.3
5
Installing the Antenna ................................................................................... 5
Antenna location ........................................................................................... 5
Mounting ....................................................................................................... 5
SLR200N Connections ................................................................................. 6
SLR200NG Connections .............................................................................. 6
Power ........................................................................................................... 7
Connection to a Network .............................................................................. 7
Configuring the Network ............................................................................... 7
Com Port Redirector ..................................................................................... 8
GPS Receiver Technical Specification ......................................................... 9
Correct Operation ......................................................................................... 9
Range of AIS ................................................................................................ 9
TROUBLE SHOOTING ..................................................................... 10
5.1
5.2
5.3
5.4
No power light is displayed ......................................................................... 10
Channel 1 and Channel 2 lights do not flash .............................................. 10
Channel 1 and Channel 2 lights flash but no data is received .................... 10
I can receive ships on my display but no names are shown ....................... 10
6
SPECIFICATION ............................................................................... 11
7
TRANSMISSION SPECIFICATION ................................................... 12
7.1
7.2
Class A Units .............................................................................................. 12
Class B Units .............................................................................................. 12
8
LIMITED WARRANTY ....................................................................... 13
9
PRODUCT SUPPORT ...................................................................... 13
3
SLR200N / SLR200NG
1
1.1
INTRODUCTION
Background to AIS
AIS is an Automatic Identification System. For improved safety and specifically for
collision avoidance reasons, vessels need to know the position, details and navigational
intentions of other vessels within VHF range.
IMO regulations covering most commercial vessels worldwide have been passed
requiring that AIS transponders are fitted to all commercial vessels over 300 grt on
international voyages.
The transponders use VHF frequencies to:
● Transmit details of their own vessel
● Receive details from other vessels or navigation aids within VHF range
1.2
The SLR200N
The SLR200N is a low cost AIS (Automatic Identification System) receive only unit,
designed specifically for the Small Commercial, Leisure, Fishing Boat and Vessel
Monitoring Markets where vessels are currently not mandated to transmit AIS
information.
Connected to an Ethernet Network and directly or via a Router to a PC running
compatible software, AIS data transmitted from ships within range can be displayed on
the screen giving the skipper or navigator a visual interpretation of the traffic within VHF
range.
Information from AIS transponders carried by most vessels or navigation aids are
transmitted at different rates as specified in Table 1.
(Information source ITU Recommendations Technical Document ITU-R M.1371-1)
Information transmitted from vessels fitted with AIS transponders includes:
•
•
•
•
•
•
Name of Vessel
Speed (SOG)
Position
MMSI Number
Rate of Turn
Destination
•
•
•
•
•
•
Call Sign
Course (COG)
Navigational Status
IMO Number
Size of Vessel
ETA
•
•
•
•
•
•
Type of Vessel
Heading
Vessel Dimensions
Draft
Status
Cargo
Note: Not all the above information is necessarily transmitted by each vessel.
4
SLR200N / SLR200NG
2
CONTENTS OF THE BOX
Before proceeding with the installation of the SLR200N, check the contents of the box
which should include:
●
●
●
●
The SLR200N AIS Receiver with Trunnion Mounting Bracket
Power Cable
SLR200N Installation CD
This Manual
3 SLR200N INSTALLATION
3.1
Installing the Antenna
The SLR200N Receiver is not supplied with a VHF antenna as the type of antenna and
cable requirements differ from vessel to vessel. An antenna can be acquired from a
marine electronics outlet.
Hint: The antenna connector type is BNC, 50 ohms.
3.2
Antenna location
Hint: The AIS VHF antenna should be separated as far as possible from the voice
VHF to avoid unnecessary interference.
Hint: Best separation is achieved by installing the antennas over each other or on
separate sides of the mast.
Hint: The VHF antenna should be mounted at least 3 metres away from and out of
the transmitting beam of high-power transmitters or other VHF antenna
installations.
Hint: Mount the antenna with a relatively clear view of the horizon. Large
obstructions that might shade the antenna should be avoided.
Hint: The higher the antenna is located, the longer the range.
3.3
Mounting
The SLR200N receiver comes with a trunnion mount to secure to a suitable bulkhead or
shelf.
Hint: Select a location away from excessive heat sources, avoid high levels of
vibration and shock.
5
SLR200N / SLR200NG
3.4
SLR200N Connections
Power
3.5
Antenna
SLR200NG Connections
Power
6
Network
Network
GPS
Antenna
SLR200N / SLR200NG
3.6
Power
Connect the power lead to a 12 or 24V DC supply.
Hint: This should be connected to a breaker/ switch panel preferably with a fuse
rated at 1 Amp. Pin connections are shown below.
Pin 1 Positive =
RED +9 to +30 volts
Pin 2 Negative = BLACK
3.7
Connection to a Network
The SLR200N can be connected to a standard PC, Network Router or Switch. Note if
connecting directly to a PC you will need a crossover cable.
When correctly connected to a network the small green LED light on the network port at
the rear of the SLR200N will be illuminated. The amber LED light on the Network port
will also initially flash, and then change to flashing green to indicate network activity.
The CD included with the product contains two programs, “Device Installer” for setting
up and configuring the unit, and “Com Port Redirector” for creating a virtual com port
for use with conventional AIS monitoring programs.
3.8
Configuring the Network
To install the Device Installer program run the “Device Installer” installation executable
file in the “Device Installer” folder on the CD.
When the Device Installer software is installed, select “Device Installer” from the
installed applications.
● If you have installed the SLR200N on your local network then select “Search”
from the “Device” menu and your SLR200N should appear on the list of
devices, shown as a “Xport-03” type product in red.
● Device installer has the facility to display the Web Configuration Utility. (But if
you wish to use your favourite browser then simply navigate to the IP address
that has been assigned to the unit, for example http://192.168.1.200:80)
● In Device Installer double click on the Xport Device, normally shown in red, then
select the web Configuration Tab. Press the “Go” button, green arrow. When
prompted for a User name and Password, leave blank and press “OK” to
continue (the default Username/Password is blank).
● When the “Xport Device Server Configuration Manager” screen is shown,
proceed to configure the device to suit your network, for instance assigning the
device a fixed IP address etc.
For more detailed information on the use of Device Installer and configuring for your
network read the full “Device Installer Manual” on the CD.
7
SLR200N / SLR200NG
3.9
Com Port Redirector
If you wish to display AIS data as a Serial Com Port then you will need to run the “Com
Port Redirector xxxxx.exe” installation executable in the “Com Port Redirector” folder on
the CD.
Note that the Com Port Redirector software requires that Microsoft.NET framework
version 2.0 or later is installed on your PC. If your PC is connected to the Internet then
the software will attempt to download the .NET framework, the .NET framework installer
is also supplied in the “Dot Net Framework” folder on the CD.
When the Com Port Redirector software is installed select the “CPR Manager” from the
installed options.
● If you have installed your SLR200N on your local network then select “Search”
from the “Device” menu and your SLR200N should appear on the list of
devices, shown as a “Xport-03” product.
● Select the “Com Port” menu and then “Add and Remove”. Choose a free
(unchecked) com port number to use and check it.
● Highlight your new Com Port so that the “Settings” dialog is shown on the right
hand side of the screen
● Double Click on your SLR200N in the “Device” list at the bottom of the screen,
so that the Host IP and TCP Port are added to the “Service” list.
● Select the “Com Port” menu and then “Save Settings”.
To test your new connection select the “Test” tab which has now appeared and click on
the “Open” button. “Com Status” should change to “Open” and Network Status to
“Connected to …..”, also if your SLR200N is connected to an antenna and receiving AIS
data then the “Rx Data” field should show the number of bytes being received. Click on
the “Close” button to end the test.
8
SLR200N / SLR200NG
4 SLR200NG INSTALLATION
The SLR200NG contains an integral GPS receiver allowing positional data and AIS data
to be output together from the receiver.
A standard 5 volts DC GPS antenna needs to be connected to the TNC connector on
the rear of the SLR200NG for the GPS receiver to work.
By default the GPS receiver will output the following NMEA messages:
GLL, GGA, GSA, GSV, RMC
4.1
4.2
GPS Receiver Technical Specification
Channels:
12 Parallel Channels
Frequency:
1575.42 MHz
WAAS:
Yes
Datum:
default WGS84
Update Rate:
1 sec
Hot Start:
6 sec
Warm Start:
35 sec
Cold Start:
45 sec
Correct Operation
Operation of the SLR200NG unit is fully automatic and only requires power, VHF and
data cable connection.
On powering up the unit
● The green light marked ON should illuminate
● The Channel lights should come on for approximately 5 seconds then go off
● The channel A and B lights should flash momentarily when information from
nearby transceivers is received
Data is then output for visual or textual viewing on compatible electronic charting
systems or other systems or devices.
4.3
Range of AIS
The AIS reception range is similar to that normally associated with Marine VHF
Radiotelephone. Range is dependent on height of antenna and also type of antenna,
the higher and better antenna installed the greater the reception range.
Typically an antenna mounted on the rail of a yacht will achieve 15 miles, mounted on
the masthead will increase this to 20 miles. Shore based reception is governed by local
terrain, however an open view to the sea with an antenna mounted in the clear at a
height of approximately 20 metres will achieve 25 miles plus, higher gain antenna can
be used on shore to further increase the range.
9
SLR200N / SLR200NG
5 TROUBLE SHOOTING
5.1
No power light is displayed
● Check the power supply and that the unit is connected correctly to a 12 or 24
volt DC supply
● Check the polarity of the supply is correct (red = +ve and black is -ve)
5.2
Channel 1 and Channel 2 lights do not flash
● Check that a VHF antenna is fitted and correctly connected
● Check that the antenna is correctly positioned, i.e. at a suitable location to
visibly ‘see’ vessels.
5.3
Channel 1 and Channel 2 lights flash but no data is received
If the red channel lights flash then data is being received from nearby vessels.
● Check that the correct data cable is connected to the PC or NMEA device
● Check on the PC application or device that the correct port is assigned and
the correct baud rate is setup. The correct baud rate is 38,400
5.4
I can receive ships on my display but no names are shown
● Remember that the names of ships as well as other static information are only
sent every 6 minutes or when requested by another station
10
SLR200N / SLR200NG
6 SPECIFICATION
SLR200N is a compact dual channel synthesised VHF receiver designed to receive and
decode all transmissions from vessels fitted with Class A or B AIS transceivers, Aids to
Navigation, and SARTS.
Physical
Dimensions: L140 x W120 x H50mm
Weight: 600g
Mounting: Trunnion Bracket
Connector: Antenna BNC
Output Port: RJ45
Power: 2-pole Plug
Power
Power Supply Range: 9 - 30 Volts DC
Power Consumption: 400mW
Output
Buad Rate: 38,400 Baud (38.4Kb)
Format: ITU / NMEA 0183
Output Message: VDM
Receiver
Frequency:
AIS 161.975 MHz
AIS 162.025 MHz
Channel Spacing: 25KHz
Sensitivity: -112dBm
Demodulation: GMSK
Data Rate: 9600
Antenna Impedance: 50 Ω
Indicators
On (Green), Channel A (Red), Channel B (Red)
Designed to Meet
IEC 61993-2
EN 60945: CE Approval
EN 6100-6-1/2
FCC part 15
11
SLR200N / SLR200NG
7 TRANSMISSION SPECIFICATION
7.1
Class A Units
Static information
Every 6 minutes, or when data has been amended, or on request.
Dynamic information
This is dependent on speed and course alteration.
Table 1
Class “A” Shipborne Mobile Equipment Reporting Intervals
Ship's Dynamic Conditions
Ship at anchor or moored and not moving faster
than 3 knots
Ship at anchor or moored and moving faster
than 3 knots
Ship 0-14 knots
Ship 0-14 knots and changing course
Ship 14-23 knots
Ship 14-23 knots and changing course
Ship >23 knots
Ship >23 knots and changing course
7.2
Class B Units
Static information
Every 6 minutes
Dynamic information
Every 3 minutes if speed is less than 2 knots
Every 30 seconds if speed is greater than 2 knots
12
Reporting Interval
3 Minutes
10 Seconds
10 Seconds
3 1/3 Seconds
6 Seconds
2 Seconds
2 Seconds
2 Seconds
SLR200N / SLR200NG
8 LIMITED WARRANTY
Comar Systems Ltd warrants this product to be free from defects in materials and
manufacture for one year from the date of purchase. Comar Systems Ltd will, at its
sole option, repair or replace any components that fail in normal use. Such repairs
or replacement will be made at no charge to the customer for parts and labour. The
customer is, however, responsible for any transportation costs incurred in returning
the unit to Comar Systems Ltd.
This warranty does not cover failures due to abuse, misuse, accident or
unauthorised alteration or repairs.
The above does not effect the statutory rights of the consumer.
Note: Every effort has been made to ensure that all information contained in this
manual is accurate at the time of going to press. We therefore cannot take any
responsibility for the content of this manual and advise that you take normal steps to
ensure that the information is at its most current when you are reading this manual.
9 PRODUCT SUPPORT
Comar Systems Limited
Vittlefields Technology Centre
Forest Road
Newport
Isle of Wight, PO30 4LY
United Kingdom
Telephone: +44 (0) 1983 828900
E-mail: [email protected]
Internet: www.comarsystems.com
13