1
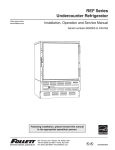
FZR Series
Undercounter Freezer
Order parts online
www.follettice.com
Installation, Operation and Service Manual
Serial numbers before C45184
Following installation, please forward this manual
to the appropriate operations person.
801 Church Lane • Easton, PA 18040, USA
Toll free (800) 523-9361 • (610) 252-7301
Fax (610) 250-0696 • www.follettice.com
00156216R08
This page intentionally left blank.
2
Welcome to Follett
Follett equipment enjoys a well-deserved reputation for excellent performance, long-term reliability and
outstanding after-the-sale support. To ensure that this product delivers that same degree of service, we ask that
you take a moment to review this manual before beginning the installation. Should you have any questions or
require technical help at any point, please call our technical service group at (800) 523-9361 or (610) 252-7301.
Before you begin
After uncrating and removing all packing material, inspect the equipment for concealed shipping damage.
If damage is found, notify the shipper immediately and contact Follett Corporation so that we can help in the
filing of a claim, if necessary.
Specifications
Series specifications
FZR5
34.00" height for freestanding use or installation below standard 36" (915mm) high counter
4.0 cu ft (usable cubic volume)
FZR4-ADA
31.25" height for freestanding use or installation below 34" (864mm) high ADA-compatible counter
3.3 cu ft (usable cubic volume)
Electrical specifications
115V, 60Hz, 1 phase
Full load amps: 8.0
Minimum circuit ampacity: 15 amp
Maximum size of branch circuit overcurrent device: 15 amp
Refrigeration specifications
Refrigerant – R404A
Charge size – 10 oz
Maximum design pressures:
High side – 383psi
Low side – 175psi
Installation specifications
Ambient temperature must not exceed 100 F (38 C).
The front louvered panel must be kept free of any cabinet trim or obstructions to ensure proper ventilation of the
refrigeration system.
Important cautions
• Equipment must be wired according to local and NEC codes.
• Always disconnect power before servicing freezer.
3
Installation
Fig. 1
Installing legs – required
1. Remove legs from plastic bag packed inside freezer.
2. Tip freezer back and screw legs in all the way to stop (they will extend
1/8" below base of freezer).
3. Adjust legs as needed to level freezer in both directions. To access
legs, remove the lower front panel. Turn legs clockwise to extend legs.
Fig. 2
Installing shelves – required
1. Remove shelves and shelf brackets packed inside freezer.
2. Install shelf brackets in pilasters (insert top tab, squeeze and push in
lower tab).
2
1
3
Fig. 3
Installing controller faceplate – required
The freezer is shipped from the factory configured to display in
degrees C. If degrees F display is desired, resetting of temperature
controller is required.
1. Remove degrees F and degrees C faceplates from plastic bag
packed inside refrigerator.
2. Snap appropriate faceplate in place over controller face.
Changing temperature controller settings – optional
Follett’s temperature controller is pre-programmed with a -25 C (-13 F)
set point and degrees C display. The -25 C (-13 F) set point delivers a
temperature range of -23 to -25 C (-9 to -13 F). Follett’s controller set point
can be changed to deliver up to a -15 C (+5 F) temperature for applications
where a lower temperature is not desired (i.e. ice cream). See page 6 to
change controller settings.
4
Fig. 4
Reversing the door swing – optional
Fig. 5
NOTICE
When reinstalling latch and hinge screws, 242 blue Loctite* MUST be
applied to screws. Torque screws to 25 in-lbs.
1. Remove screws and latch from refrigerator cabinet (Fig. 5.1).
2. Use flat screwdriver to carefully remove (do not scratch) hinge
covers (Fig. 6.1).
1
3. Support door and remove screws attaching hinge to refrigerator
cabinet (Fig. 6.2).
2
4. Cover hinge screw holes with screw hole plugs removed from
opposite side.
5. Reverse door. Apply 242 blue Loctite to hinge screws and reinstall
torqued to 25 in-lbs.
Fig. 6
6. Reinstall latch on opposite side.
7. Remove screws and handle from door (Fig. 7.1).
8. Rotate handle (Fig. 7.2).
9. Apply 242 blue Loctite to latch screws and reinstall torqued to 25 in-lbs.
2
1
Fig. 7
1
1
2
Loctite is a registered trademark of Henkel Corporation in the United States and other countries.
5
Controller operation
Fig. 8
In normal operation the controller displays cabinet temperatures
in degrees C (default) or user-selected degrees F. Degrees C
temperatures are displayed to 1 decimal point.
evaporator
fan
energized
Rocker buttons to the right of the temperature display control all
programming functions.
The controller is pre-programmed with a -25 C (-13 F) set point
which provides a compressor cut-in at -23 C (-9 F) and cut-out at
-25 C (-13 F). The controller set point can be raised to -15 C (+5 F)
for nourishment applications where a lower temperature is not
desired (i.e. ice cream). Follow instructions for changing temperature
cut-out below.
defrost
refrigeration
system
energized
- 25
prg
SET
°C
not used
All set points have a 2 C differential. The 2 C differential means that with a -25 C set point, for example, the
compressor will turn off at -25 C (-13 F) and turn on when it reaches -23 C (-9 F).
To display temperature cut-out
STEP
1
INPUT
DISPLAY
Press and release SET
Current cut-out temperature will display for approximately 5 seconds.
Display will return to current refrigerator temperature.
To change temperature cut-out
STEP
INPUT
DISPLAY
1
Press and hold SET for
3 seconds
Current cut-out temperature displayed, refrigeration system
energized LED flashes
2
Press UP or DOWN arrows to
desired cut-out temperature
New cut-out temperature displayed
3
Press and release SET
New cut-out temperature blinks three times, then current refrigerator
temperature will display
To change temperature display from degrees C to degrees F
Follett includes a programming key (part# 00155630) that changes the display and temperature settings from
degrees C to degrees F.
Programming freezer from a degree F key (download)
1. Turn OFF freezer.
2. Remove 6 screws from panel holding controller to access back of controller.
3. Insert degree F programmed key into 5 PIN receptacle on controller back.
4. TURN ON freezer.
5. Values from key automatically download to freezer (“dol” message blinks followed by “end”).
6. After 10 seconds display returns to current freezer temperature and controller will restart with new values.
7. Remove key.
8. Freezer will now display in degrees F.
Note: An “Err” message displays for failed programming. Turn freezer OFF then ON to restart download, or
remove key to abort.
6
Controller security
The controller panel can be locked to prevent inadvertent or intentional programming changes. In locked mode,
the controller will display cabinet temperature and cut-out set point only.
To lock the controller
1. Press the UP/DOWN ARROW in the middle until “POF” displays.
2. Programmer is now locked.
To unlock the controller
1. Press UP/DOWN ARROW in middle until “PON” displays.
2. Programmer is now unlocked.
Controller programming key degrees C (optional accessory)
A controller programming key is available from Follett to provide fast and easy reprogramming of factory settings
in degrees C (part# 00155648).
Programming key from a freezer (upload)
1. Set the controller to the desired cut-out temperature using the controller key pad.
2. Remove 6 screws from panel holding controller to access back of controller.
3. With controller ON, insert key into 5 PIN receptacle on controller back.
4. Push UP ARROW on controller front (“uPL” displays followed by “end”).
5. Press SET (“end” stops flashing).
6. TURN OFF freezer and remove key.
7. Turn freezer back on.
8. Programming key is now programmed.
Note: An “Err” message displays for failed programming. Push UP ARROW again to restart upload or remove
key and abort.
7
Operation
The temperature controller and probe indicate when the refrigeration system is required to turn on and off.
The refrigeration system removes heat from the cabinet interior and rejects it to the surrounding room air. When
the cabinet interior temperature reaches +2.2 C (+4 F) above the controller set point, the probe signals the
controller to turn the refrigeration system on. The normally-open controller contacts 4 and 5 close and energize the
evaporator and condenser fan motors, compressor and door heater. The LED's under the snowflake and fan on the
controller will come on to indicate the refrigeration system is on. The compressor uses a current-style starting relay
and a starting capacitor to start the compressor motor.
When the cabinet interior temperature falls to the set point, the probe signals the controller to turn the refrigeration
system off. The controller contact 5 reopens, which de-energizes the condenser fan motor and the compressor.
The LED under the snowflake will go out and the LED under the fan will remain on.
Any accumulated frost on the evaporator coils melts during the defrost cycle. The condensate drains to a drain
pan mounted along the condensing unit. The heat from the condensing unit evaporates any condensate in the
drain pan.
Temperature control
The temperature control system is preset by the factory to maintain a cabinet temperature of -23 C (-10 F). If
desired, the cut-out temperature can be raised as high as -15 C (5 F) by following the instructions on page 6
for changing the temperature set point. The 2 C cut-out differential will be maintained regardless of the controller
set point.
Defrosting
The FZR series undercounter freezers control frost accumulation on the evaporator through automatic timed
defrost cycles. The defrost cycle is initiated by the temperature controller every 4 hours. Contacts 4 and 5 on the
controller open and the refrigeration system is turned off. Contact 2 is closed and the defrost heater is energized.
The LED under the melting snowflake on the controller will come on, and the temperature display will read: “DEF”
to indicate the freezer is in the defrost cycle.
The heater warms the evaporator coil and drain pan to melt the frost and drain the water to the condensate pan.
The temperature controller monitors evaporator temperature using a probe embedded in the coil. The controller
terminates the defrost cycle when the evaporator temperature reaches +5 C (+41 F) or after 15 minutes of defrost
time, whichever occurs first. As the defrost cycle terminates, the controller de-energizes the heater and restarts
the compressor and condenser fan. The LED under the snowflake on the controller will come on to indicate the
refrigeration system is running.
There is a 5 minute delay before the evaporator fan motor is re-energized. The LED under the fan on the controller
will come on to indicate the fan is running and the temperature display resumes displaying cabinet temperature.
A defrost cycle can be initiated manually at any time by depressing and holding the melting snowflake button for
approximately three seconds. As a safety feature, a temperature safety switch mounted on the evaporator will turn
off the defrost heater if the temperature of the evaporator reaches +27 C (+80 F) regardless of controller operation.
The FZR series freezers have been designed specifically for the storage of temperature–critical medications.
Other storage applications may require modifications of the factory-programmed defrost cycle settings. Please
consult Follett technical service if defrost modification is needed.
Note: Storage of products with very low volumes may require additional product insulation.
Note: Serial numbers below C57095 were programmed with defrost cycles every 4 hours terminating at
+5 C (+41 F) or after 15 minutes, whichever came first. If you are experiencing problems with frost on any of
these earlier units, please call Follett's technical service department at (800) 523-9361 or (610) 252-7301 for
a programming key to update your unit to the 2 hour - 18 minute defrost cycle.
Cleaning
!
Use only non-chlorine-based cleaners. Cleaners containing chlorine can cause staining and pitting of the
stainless steel.
Interior – Using a sponge or soft cloth, clean unit with a non-abrasive, non-chlorinated, all-purpose detergent.
Exterior – Wipe exterior with a soft cloth in the direction of grain as needed. Stainless steel polish may be used to
enhance the finish of the unit.
8
Annual cleaning
Fig. 10
Removal of dust and other particulates from air intake areas
and the condenser is important for proper operation. Some
environments with large amounts of dust may require more
frequent cleaning.
1. Disconnect power to unit by turning switch on the lower
front panel to the OFF position, switching circuit breaker
to OFF position, and removing power cord from receptacle.
2. Remove lower front panel (Fig. 10.1).
Note: Front louvered panel may be completely removed
for easier cleaning by disconnecting the controller wiring
plugs from the freezer.
3. Remove drain pan (Fig. 10.2).
4. Clean drain pan with a non-abrasive, non-chlorinated
all-purpose detergent.
5. Reinstall drain pan.
6. Use a vacuum cleaner with brush attachment to clean
condenser through lower front panel and compressor
motor and related parts through lower rear panel.
7. Reinstall lower front panel.
2
1
Fig. 11
Service
Latch adjustment
To adjust for proper latch engagement
1. Loosen striker plate mounting screws (Fig. 11.1).
2. Move striker plate up or down as required and tighten screws.
3. Test operation of latch.
1
To adjust for proper gasket seal
2
1. Loosen striker depth adjustment screw (Fig. 11.2).
2. Adjust stop in or out and tighten screws.
3. Test operation of latch.
Fig. 12
Door gasket replacement
1. Remove existing gasket from mounting track.
2. Verify mounting track is free of any remaining gasket material.
3. Align new gasket with mounting track and press firmly in place.
a
ylvani
Easto
ION L NO
ORATSERIA
CORP
n Penns NO
PART
LE
SING E
PHAS
OZ
HZ
D
PSIG
ECTEGE
S
Y PROTCHAR
MALL
SIDE
THER
LOW
VOLT
L
OR
MODE
FULL
RESS
AMPS
R COMP
LOAD
MOTO
SIDE
ANT
HIGH
IGER
4. Open and close door, checking for proper gasket seal without
pinching against freezer.
N PRES
DESIG
IN
MADE
USA
THE
NS
F
C
TY
AMPACI
CIRCUIT
BRANCH
MIN.
UL
R
UL
R
AMPS
AMPS
SURE
REFR
SIZE
FUSE
CIRCUIT
BRANCH
MAX.
208264
No.
Modulet
Produc
No.
Service
5. Adjust latch and or striker as necessary for proper door closure.
Slide-out compressor tray
Follett’s slide-out compressor tray allows technicians to partially slide
the condensing unit from the freezer back without cutting refrigerant
lines.
2
3
1. Remove rear panel (Fig. 12.1).
2. Remove two bolts securing condensing unit to refrigerator base
(Fig. 12.2).
3. Gently slide condensing unit out (Fig. 12.3).
Note: Do not put undue strain on the refrigerant lines.
9
1
Controller replacement
1. Disconnect power to unit.
a. Push front panel rocker switch to OFF position.
b. Disconnect power cord.
2. Remove 6 screws from front panel and slide panel forward to access back of controller.
3. Disconnect front panel and wiring harness from freezer at the 3, 4, and 5 pin connectors and door heater
connector to simplify replacement.
4. Push in on center of side brackets (on controller) to release and slide brackets back and off controller.
5. Push controller and wires out through front of front panel.
6. Using wiring schematic (attached to front panel and below) as a guide, remove wires one at a time from back
of existing controller and connect to corresponding terminals on replacement controller.
7. Gently remove faceplate from existing controller and install on replacement controller.
8. Insert replacement controller back through front of panel.
9. Slide brackets onto sides of controller and push against back of front panel.
10. Reconnect 3, 4, and 5 pin connectors of wiring harness to freezer.
11. Keeping wiring clear of condenser, replace front panel.
12. Restore power and test operation. Reprogram replacement controller if necessary.
Wiring diagram
COMP
10
11
12
13
R
DOOR
HEATER
FAN
BLK
HEATER
DEFROST
SAFETY SWITCH
DEFROST
S
14
FAN
WHT
CONDENSING UNIT
EVAPORATOR UNIT
1
2
3
WHT
L2
BLU
RED
GND
BLK
4
1
2
3
4
5
1
2
3
4
5
1
2
3
BLK
BLU
BLK
6 7
RED
YEL
CHAMBER
THERMISTOR
10
WHT
WHT
VIO
9 10 11 12
EVAPORATOR
THERMISTOR
1
2
3
4
SUPPLY
VAC
GROUND SCREWS
BLK
1
2
3
1 2 3 4 5
120 VAC
1 PHASE
15 AMPS
BLK
WHT
L1
WHT
WHT
WHT
WHT
GRN
WHT
RED
BLK
BLK
Refrigeration system
The FZR series -20 C (-4 F) freezer refrigeration system is designed to give many years of trouble-free service.
Except for routine cleaning of the air-cooled condenser and related parts, the refrigeration system requires no
service or maintenance. The system uses a thermostatic expansion valve and is critically charged. Access fittings
are provided for ease of service. However, the connection of refrigeration service hoses to the fittings will almost
invariably result in a significant change in the system charge. This change can adversely affect the performance
of your freezer. Therefore, Follett recommends that if hoses are ever connected to the refrigeration system for
service, the refrigerant should be recovered, the system evacuated, and recharged by weighing in the correct
refrigerant charge.
Note: Do not charge the system by pressures.
Checking refrigeration system pressures
1. Remove the rear access panel (Fig. 12).
2. Turn the power switch to the on position.
3. Following the instructions on page 5 verify that the temperature controller is set to the original factory
cut-in setting of -23 C (-9 F).
4. Allow the freezer to operate and stabilize at least 60 minutes, verifying the cut-out temperature is
being reached.
5. Connect refrigerant hoses to access fittings and measure air temperature at condenser intake grille.
6. Verify correct pressures with the temperature chart below.
7. Troubleshoot refrigeration system as needed.
Note: Do not attempt to obtain correct refrigeration pressures by adjusting the system charge.
Condenser inlet air temperature
70 F
80 F
90 F
100 F
Discharge pressure (psi)
197
225
255
285
Suction pressure (psi)
12
13
14
15
Refrigeration system diagram
COMPRESSOR
10oz. Charge
High Psi
Vapor
Low Psi
Vapor
DEFROST HEATER
FAN
EVAPORATOR
EVAPORATOR FAN
LOW SIDE
SERVICE PORT
HIGH SIDE
SERVICE PORT
Low Psi
Liquid
TXV
HEAT EXCHANGE
DRYER
CONDENSING UNIT
EVAPORATOR/DEFROST UNIT
HIGH PRESSURE VAPOR
High Psi
Liquid
HIGH PRESSURE LIQUID
11
LOW PRESSURE LIQUID
LOW PRESSURE VAPOR
Freezer troubleshooting guide
Before calling for service
1. Check that unit is plugged in.
2. Test outlet with another appliance to verify power.
Symptom
Possible cause
Solution
Freezer does not operate
(no components run).
1. Power switch faulty or in OFF
position; loose connection.
2. Freezer not plugged in.
3. No power to cord.
4. Temp controller not energizing
components.
5. Probe not sensing cut in
temperature.
1. Turn power switch to ON position;
check switch and connections.
2. Connect plug.
3. Restore power.
4. Check controller contact terminals for
power. Replace controller if needed.
5. Replace controller and/or probe.
Compressor does not run.
1. Thermal overload open or
defective.
2. Capacitor and/or relay defective.
3. Compressor defective.
1. Allow to cool or replace.
Compressor and condenser fan do
not run.
1. No power on terminal 5 of
controller (during cooling).
1. Replace controller
Evaporator fan motor does not run.
1. No power on terminal 4 of
controller (during cooling).
1. Replace controller.
Freezer does not shut off.
1. Controller not sensing cut off
temperature.
2. Controller keeping refrigeration
system energized.
1. Replace controller and/or probe.
1. Condenser or evaporator coil
needs cleaning.
2. Faulty door gasket.
3. Excessively high ambient.
1. Clean coils as needed.
Freezer does not maintain
temperature (all components run).
4. Refrigerant leak.
5. Incorrect refrigerant charge.
6. Plugged expansion valve.
7. Inefficient compressor.
8. Evaporator coil blocked with ice.
Evaporator does not defrost.
1. Defective defrost heater.
2. Faulty heater safety switch.
3. No power on terminal 2 of
controller (during defrost).
4. Defrost settings may require
change for specific applications.
2. Replace as required.
3. Replace compressor.
2. Replace controller.
2. Replace door gasket.
3. Maximum recommended ambient is
100 degrees F.
4. Locate and repair leak.
5. Recover, evacuate and weigh in
correct charge.
6. Replace expansion valve.
7. Consult technical service.
8. Depress defrost button on controller
to defrost coil.
1. Replace defrost heater
2. Replace switch.
3. Replace controller.
4. Call Follett's technical service
department.
If problems persist after following this basic troubleshooting guide, call Follett’s
technical service group at (800) 523-9361 or (610) 252-7301.
12
Accessories
Follett offers alarm and temperature monitoring accessories to provide greater product security. Both accessories
are equipped with immersible probes that should be routed through the gasketed refrigeration port in the back of
the FZR to the product simulation bottle that will be installed in the unit.
Installing probes
Fig. 13
1. Use flat head screwdriver to open partial knockout on left
side of evaporator cover panel inside freezer (Fig. 13.1).
2. Install supplied short length of plastic tubing on end of
stainless probe.
3. From back of FZR, insert plastic tubing/probe assembly
through soft gasketing where refrigeration line enters back
of FZR.
1
2
4. Route tubing/probe assembly into FZR cabinet through
opened knock-out in evaporator cover panel.
5. Remove tubing from probe and discard tubing.
6. Insert center tab of short bottle bracket into top of rear left
pilaster (Fig. 13.2).
Note: Use longer bottle bracket for FZR freezers with third
shelf installed high in FZR.
7. Fill supplied plastic bottle with glycerin or other liquid
solution used by your facility to simulate product.
8. Hang bottle in bracket.
9. Push probe through hole in top of gasketed bottle top.
Note: Probe must be placed in bottle for proper alarming
and/or operation.
Temperature alarm
Before installing alarm
Fig. 14
1. Remove supplied 9-volt back-up battery from packing box.
OFF
2. Remove 2 screws from module face and remove faceplate.
OFF
3. Install back-up battery on battery connector.
OFF
4. Locate DIP switches on the back of the faceplate
(Fig. 14).
OFF
5. Review the factory DIP switch settings (Fig. 15) and
make any changes required to meet the needs of your
specific application.
6. Reinstall faceplate.
POWER SENSOR OUTPUT
Fig. 15
Dip Switch
1
2
OFF (factory default setting)
No alarm delay
Auto reset (alarm stops automatically as
soon as temperature returns to set range)
3&4
3
Audible alarm on (no snooze with both off)
Enables 5 min alarm “snooze”
when reset button is pressed (3 off with 4 on)
13
ON
45 minute alarm delay
Manual reset of alarm (user must press
RESET button to stop audible alarm even if
temperature has returned to set range)
No audible alarm
Enables 45 min alarm “snooze”
when reset button is pressed (3 on with 4 off)
Mounting alarm
Fig. 16
1. Mount alarm in desired location with screws (supplied by
others) through back of housing. Do not place undue strain
on probe cable.
AC
AC
Note: Do not modify length of probe wire. Probe will
not measure temperature correctly if wire length is changed.
2. Plug cord into 110 VAC outlet.
Black
White
Sensor
Red
3. Refer to above instructions to install probe.
NC
4. Refer to Figure 16 if attaching alarm to central monitoring or
alarm system. A SPDT 1 amp 24 VAC resistive relay is
provided for this connection.
Setting alarm temperatures
Power
in
NO
Output
Com
Fig. 17
1. After the installation is complete, allow 30 minutes for the
system to stabilize to ambient temperature.
2. Calibrate temperature alarm to refrigerator display
a. Calibration is best done with the alarm probe removed
from the probe bottle and placed in the vicinity of the
temperature controller probe. Allow at least 15 minutes
for the probe temperature to stabilize.
b. Note the temperature value displayed on the refrigerator
controller and subtract the temperature value displayed on
the alarm. This value is the differential.
Example:
Temperature controller: 36 F
Controller – Alarm = Differential
Alarm: 38 F
36 – 38 = -2
1
c. Press SET until “CAL” is displayed (Fig. 17.1).
2
d. Press SET again to display “CAL” value (Fig. 17.1).
e. Press top or bottom of ADJUST arrow to display the
calculated differential (-2 F in example above).
3. Set high alarm limit
a. Press SET until “HSP” is displayed (Fig. 17.1).
b.
Press SET again to display HSP value (Fig. 17.1).
c.
Press top or bottom of ADJUST arrow until desired HSP
value is displayed (Fig. 17.2).
4. Set low alarm limit
a. Press SET until “LSP” is displayed (Fig. 17.1).
b.
Press SET again to display LSP value (Fig. 17.1).
c.
Press top or bottom of ADJUST arrow until desired LSP
value is displayed (Fig. 17.2).
5. Display will return to temperature display in approximately
15 seconds.
6. Place alarm probe back in probe bottle.
14
Viewing high/low log
Follett’s alarm module allows users to view the highest and lowest temperatures recorded since the last time the
RESET button was pressed.
To view high and low log values
1. Press SET button until “HI” appears.
2. Press SET button to view HI log value.
3. Press SET button until “LOW” appears.
4. Press SET button to view low log value.
5. Press RESET button to clear log.
Alarm operation facts
The back-up battery will continue to provide alarm protection during power failure but will alarm ONLY if
temperatures go out of the selected range. During power failure the alarm face will be dark but temperatures can
be read by pressing the RESET button.
Because the temperature alarm display simulates the true temperature of stored medications rather than the air
temperature inside the freezer, we suggest that staff refer to the alarm display to log temperatures for JCAHO
compliance.
Automated medication dispensing and inventory systems interface
(Pyxis*, Omnicell*, MedSelect*, etc.)
Follett refrigerators and freezers are compatible with most major automatic medication and inventory systems.
In some cases a Follett bracket accessory is required. Contact factory for further information.
*Pyxis is a registered trademark of Cardinal Health in the United States and other countries.
*Omnicell is a registered trademark of Omnicell, Inc. in the United States.
*MedSelect is a registered trademark of AmerisourceBergen Technology Group, in the United States.
15
Replacement parts
11
10
9
5
1
2
4
3
6
8
13
7
12
Evaporator
Reference #
1
1
2
3
4
5
6
7
7
8
9
10
11
12
13
Description
Cover, evaporator, FZR5 (includes 00152892)
Cover, evaporator, FZR4-ADA (includes 00152892)
Fan guard
Fan blade
Bracket, fan motor
Fan motor, evaporator
Defrost heater
Drain pan, evaporator, FZR5
Drain pan, evaporator, FZR4-ADA
Evaporator
Heater safety switch
Expansion valve (includes 00106534)
Insulation, bulb
Evaporator cover guard
Clips, defrost heater (2 needed)
16
Part #
00155564
00155572
00152892
00152991
00152983
00104919
00152645
00162511
00155614
00151563
00153932
00155671
00106534
00157586
00161554
3
2
4
7
1
8
5
6
Condensing Unit
Reference #
1
2
3
4
5
6
7
8
Not shown
Not shown
Description
Condensing unit
Condenser
Shroud, condenser
Condenser fan blade
Condenser fan motor
Fan motor bracket
Compressor
Starting capacitor
Filter drier
Starting relay
Overload protector
Part #
00153874
00157339
00157347
00105007
00104992
00157412
00157313
00104968
502724
00157305
00104984
17
12
11
1
9
3
1
8
10
7
2
6
4
5
Hardware
Reference #
1
2
3
3
4
5
6
6
7
7
8
8
9
10
11
12
Not shown
Description
Latch & striker includes screws
Latch screws, 3 per latch
Door, FZR5 (includes gasket - 21 3/8" x 21 3/8")
Door, FZR4-ADA (includes gasket - 21 3/8" x 18 5/8")
Hinge, each - 2 required, includes screws
Hinge screws, each - 6 per hinge
Gasket, FZR5
Gasket, FZR4-ADA
Strip sealer (set of 4) FZR5
Strip sealer (set of 4) FZR4-ADA
Door heater, FZR4-ADA (includes 00130146)
Door heater, FZR5 (includes 00130138)
Striker screws, each - 2 per striker
Shelf
Shelf support, snap in, each
Pilaster, each
Thumbscrews, set of 8
18
Part #
00105023
00103507
00105015
00113910
00105031
00105080
00125732
00127738
00130138
00130146
00155549
00155531
502287
00152876
00156240
00105346
00105353
7
6
4
3
2
1
5
Hardware & electrical components
Reference #
1
2
2
Not shown
3
4
5
Not shown
Not shown
6
7
Not shown
Description
Temperature controller
Faceplate, degrees F
Faceplate, degrees C
Probes & harness
Power switch
Front panel (includes 00114371 and 00105379)
Front panel screws, each - 6 per panel
Rear panel, includes screws
Rear panel screws, each - 6 per panel
Condensate pan
Evaporator drain line, sold by the foot
Power cord
Part #
00900092
00158055
00157644
00155705
00114371
00157669
00105379
00130161
00105387
00155622
203627
00103903
Description
Bottle kit (includes bottle, bracket and gasket)
Controller kit (includes battery, probe and power supply)
Gasket, bottle
Bracket, bottle
Bottle
Battery
Screws, (includes two for securing cover)
Label, controller cover
Temperature probe
Part #
00113779
00108175
00112029
00112011
00112037
00112177
00115063
00115071
00115097
Temperature alarm accessory
Reference #
Not shown
Not shown
Not shown
Not shown
Not shown
Not shown
Not shown
Not shown
Not shown
19
801 Church Lane • Easton, PA 18040, USA
Toll free (800) 523-9361 • (610) 252-7301
Fax (610) 250-0696 • www.follettice.com
00156216R08
07/09