1
SERVICE MANUAL
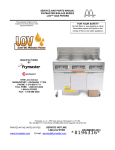
FRYMASTER BIPH52/55 AND MPH52/55 SERIES
GAS FRYERS
This equipment chapter is to be
installed in the Fryer Section of the
Equipment Manual.
FOR YOUR SAFETY
Do Not Store or use gasoline or
other flammable vapors and
liquids in the vicinity of this or any
other appliance.
MANUFACTURED
BY
P.O. BOX 51000
SHREVEPORT, LOUISIANA 71135-1000
PHONE: 1-318-865-1711
TOLL FREE: 1-800-551-8633
1-800-24 FRYER
FAX: 1-318-219-7135
Frymaster, L.L.C. 8700 Line Avenue 71106, 5489 Campus Drive 71129
P.O. Box 51000, Shreveport, Louisiana 71135-1000
TEL 318-865-1711 FAX (Parts) 318-219-7140 (Tech Support) 318-219-7135
SERVICE HOTLINE
1-800-24-FRYER
E-mail: [email protected]
PRINTED IN THE UNITED STATES
www.frymaster.com
MAY 2006
*8196094*
NOTICE
IF, DURING THE WARRANTY PERIOD, THE CUSTOMER USES A PART FOR THIS ENODIS
EQUIPMENT OTHER THAN AN UNMODIFIED NEW OR RECYCLED PART PURCHASED
DIRECTLY FROM FRYMASTER DEAN, OR ANY OF ITS AUTHORIZED SERVICE CENTERS,
AND/OR THE PART BEING USED IS MODIFIED FROM ITS ORIGINAL CONFIGURATION, THIS
WARRANTY WILL BE VOID. FURTHER, FRYMASTER DEAN AND ITS AFFILIATES WILL NOT BE
LIABLE FOR ANY CLAIMS, DAMAGES OR EXPENSES INCURRED BY THE CUSTOMER WHICH
ARISE DIRECTLY OR INDIRECTLY, IN WHOLE OR IN PART, DUE TO THE INSTALLATION OF
ANY MODIFIED PART AND/OR PART RECEIVED FROM AN UNAUTHORIZED SERVICE CENTER.
NOTICE
This appliance is intended for professional use only and is to be operated by qualified
personnel only. A Frymaster DEAN Factory Authorized Service Center (FASC) or other qualified
professional should perform installation, maintenance, and repairs. Installation, maintenance,
or repairs by unqualified personnel may void the manufacturer’s warranty.
NOTICE
This equipment must be installed in accordance with the appropriate national and local codes of
the country and/or region in which the appliance is installed.
NOTICE TO U.S. CUSTOMERS
This equipment is to be installed in compliance with the basic plumbing code of the Building
Officials and Code Administrators International, Inc. (BOCA) and the Food Service Sanitation
Manual of the U.S. Food and Drug Administration.
NOTICE
Drawings and photos used in this manual are intended to illustrate operational, cleaning and
technical procedures and may not conform to onsite management operational procedures.
NOTICE TO OWNERS OF UNITS EQUIPPED WITH COMPUTERS
U.S.
This device complies with Part 15 of the FCC rules. Operation is subject to the following two
conditions: 1) This device may not cause harmful interference, and 2) This device must accept
any interference received, including interference that may cause undesired operation. While
this device is a verified Class A device, it has been shown to meet the Class B limits.
CANADA
This digital apparatus does not exceed the Class A or B limits for radio noise emissions as set
out by the ICES-003 standard of the Canadian Department of Communications.
Cet appareil numerique n’emet pas de bruits radioelectriques depassany les limites de classe A
et B prescrites dans la norme NMB-003 edictee par le Ministre des Communcations du Canada.
WARNING
To ensure the safe and efficient operation of the fryer and hood, the electrical plug for the 120volt line, which powers the hood, must be fully engaged and locked in its pin and sleeve socket.
DANGER
Improper installation, adjustment, maintenance or service, and unauthorized alterations or
modifications can cause property damage, injury, or death. Read the installation, operating,
and service instructions thoroughly before installing or servicing this equipment. Only qualified
service personnel may convert this appliance to use a gas other than that for which it was
originally configured.
DANGER
No structural material on the fryer should be altered or removed to accommodate placement of
the fryer under a hood. Questions? Call the Frymaster Dean Service Hotline at 1-800-551-8633.
DANGER
Adequate means must be provided to limit the movement of this appliance without depending
upon the gas line connection. Single fryers equipped with legs must be stabilized by installing
anchor straps. All fryers equipped with casters must be stabilized by installing restraining
chains. If a flexible gas line is used, an additional restraining cable must be connected at all
times when the fryer is in use.
The front ledge of the fryer is not a step!
from slips or contact with the hot oil.
DANGER
Do not stand on the fryer. Serious injury can result
DANGER
Do not store or use gasoline or other flammable liquids or vapors in the vicinity of this or any
other appliance.
DANGER
Instructions to be followed in the event the operator smells gas or otherwise detects a gas leak
must be posted in a prominent location. This information can be obtained from the local gas
company or gas supplier.
DANGER
This product contains chemicals known to the state of California to cause cancer and/or birth
defects or other reproductive harm.
Operation, installation, and servicing of this product could expose you to airborne particles of
glasswool or ceramic fibers, crystalline silica, and/or carbon monoxide. Inhalation of airborne
particles of glasswool or ceramic fibers is known to the State of California to cause cancer.
Inhalation of carbon monoxide is known to the State of California to cause birth defects or other
reproductive harm.
DANGER
The crumb tray in fryers equipped with a filter system must be emptied into a fireproof container
at the end of frying operations each day. Some food particles can spontaneously combust if left
soaking in certain shortening material.
WARNING
Do not bang fry baskets or other utensils on the fryer’s joiner strip. The strip is present to seal
the joint between the fry vessels. Banging fry baskets on the strip to dislodge shortening will
distort the strip, adversely affecting its fit. It is designed for a tight fit and should only be
removed for cleaning.
WARRANTY STATEMENT
Frymaster, L.L.C. makes the following limited warranties to the original purchaser only for this
equipment and replacement parts:
A. WARRANTY PROVISIONS - FRYERS
1. Frymaster L.L.C. warrants all components against defects in material and workmanship for a
period of one year.
2. All parts, with the exception of the frypot, heating elements and fuses, are warranted for one year
after installation date of fryer.
3. If any parts, except fuses and filter O-rings, become defective during the first year after
installation date, Frymaster will also pay straight-time labor costs to replace the part, plus up to
100 miles/160 km of travel (50 miles/80 km each way).
B. WARRANTY PROVISIONS - FRYPOTS
(Applies to fryers manufactured after December 1, 2003, only.)
1. Frymaster warrants the frypot assembly for ten years parts and labor. Components attached to
the frypot, such as the high-limit, probe, gaskets, seals, ignitors and related fasteners, are also
covered by the ten-year warranty if replacement is necessitated by the frypot replacement.
Components that are not part of the frypot assembly, such as the blower, gas valve, micro
switches, doors and cabinetry are not covered by the frypot warranty. If the frypot is found to be
defective, Frymaster will replace the frypot, allowing up to the maximum time per the Frymaster
time allowance chart hours of straight-time labor plus up to 100 miles/160 km of travel (50
miles/80 km each way) to change the frypot.
2. This warranty is limited to fryers operating on natural or propane (LP) gas. Fryers that operate
on manufactured gas (also known as town gas or high-hydrogen gas) have a lifetime frypot
warranty, parts only.
C. WARRANTY PROVISIONS – COMBUSTION CHAMBERS
(Applies to fryers installed on or after November 1, 1994, only.)
1. Frymaster L.L.C. warrants the combustion chambers against defective material or workmanship
for a period of ten years from the original installation date, parts and labor.
2. The combustion chamber consists of the infrared burners and the structural components to mount
the burners. This warranty does not cover ancillary components, including the igniter, blower,
high-limit thermostat, and temperature probe.
3. This warranty is limited to fryers operating on natural or propane (LP) gas.
i
D. WARRANTY PROVISIONS - COOKING COMPUTER
1. Frymaster L.L.C. warrants the M-2000 Cooking Computer against defective material or
workmanship for a period of three years from the original installation date. If the unit fails within
the first year, warranty will cover part and labor. If the part fails the second year, warranty will
cover part only. Labor is charged to the store. The third year, warranty will cover the part at a
reduced cost of $90.00. No labor or handling will be covered.
2. During this warranty period, Frymaster will replace a returned defective cooking computer with a
new or factory rebuilt and functionally operative units.
3. For replacement of defective computers under warranty, call your local Frymaster Authorized
Service Center. All computers replaced under the Frymaster exchange program only carry the
remaining original warranty.
E. PARTS RETURN
All defective in-warranty parts must be returned to a Frymaster Authorized Factory Service Center
within 60 days for credit. After 60 days, no credit will be allowed.
F. WARRANTY EXCLUSIONS
This warranty does not cover equipment that has been damaged due to misuse, abuse, alteration, or
accident such as:
•
improper or unauthorized repair (including any frypot which is welded in the field);
•
failure to follow proper installation instructions and/or scheduled maintenance procedures as
prescribed in your MRC cards. Proof of scheduled maintenance is required to maintain the warranty;
•
improper maintenance;
•
damage in shipment;
•
abnormal use;
•
removal, alteration, or obliteration of either the rating plate or the date code on the heating elements;
•
operating the frypot without shortening or other liquid in the frypot;
•
no fryer will be warranted under the ten-year program for which a proper start-up form has not been
received.
This warranty also does not cover:
•
transportation or travel over 100 miles/160 km (50 miles/80 km each way), or travel over two hours;
•
overtime or holiday charges;
•
consequential damages (the cost of repairing or replacing other property which is damaged), loss of
time, profits, use or any other incidental damages of any kind.
There are no implied warranties of merchantability or fitness for any particular use or purpose.
This warranty is applicable at the time of this printing and is subject to change.
ii
BIPH52/55-MPH52/55
SERIES GAS FRYERS
TABLE OF CONTENTS
CHAPTER 1: Service Procedures
1.1 Functional Description ...................................................................................................... 1-1
1.1.1
The Electronic Ignition System.......................................................................... 1-1
1.1.2
Interface Board ................................................................................................... 1-2
1.1.3
Thermostats ........................................................................................................ 1-4
1.2 Accessing Fryers for Servicing ......................................................................................... 1-4
1.3 Cleaning the Gas Valve Vent Tube ................................................................................... 1-5
1.4 Checking the Burner Manifold Gas Pressure .................................................................... 1-5
1.5 Measuring Flame Current.................................................................................................. 1-7
1.6 Replacing Fryer Components............................................................................................ 1-7
1.6.1
Replacing the Controller or the Controller Wiring Harness............................... 1-7
1.6.2
Replacing the Temperature Probe or High-Limit Thermostat ........................... 1-8
1.6.3
Replacing the Interface Board ............................................................................ 1-9
1.6.4
Replacing an Ignition Module.......................................................................... 1-10
1.6.5
Replacing an Ignitor Assembly ........................................................................ 1-10
1.6.6
Replacing or Cleaning a Combustion Air Blower............................................ 1-11
1.6.7
Replacing a Gas Valve ..................................................................................... 1-14
1.6.8
Replacing a Burner Assembly.......................................................................... 1-15
1.6.9
Replacing the Filter Motor, Filter Pump, or Filter Pump Solenoid Valve ....... 1-16
1.6.10 Replacing the Frypot ........................................................................................ 1-17
1.6.11 Replacing Frypot Insulation and/or Upper Burner Rails.................................. 1-19
1.7 Troubleshooting and Problem Isolation .......................................................................... 1-25
1.7.1
Ignition Failure ................................................................................................. 1-25
1.7.2
Improper Burner Function................................................................................ 1-26
1.7.3
Improper Temperature Control ........................................................................ 1-28
1.7.4
Computer Malfunctions.................................................................................... 1-28
1.7.5
Filtration Malfunctions..................................................................................... 1-29
1.7.6
Leakage ............................................................................................................ 1-30
1.8 Troubleshooting Guides .................................................................................................. 1-31
1.8.1
Troubleshooting the 24 VAC Circuit ............................................................... 1-33
1.8.2
Troubleshooting the Gas Valve ........................................................................ 1-35
1.8.3
Troubleshooting the Temperature Probe .......................................................... 1-35
1.9 Probe Resistance Chart.................................................................................................... 1-36
1.10 Principal Wiring Connections ......................................................................................... 1-37
1.11 Wiring Diagrams ............................................................................................................. 1-38
1.11.1 Main.................................................................................................................. 1-38
1.11.2 Transformer / Filter Boxes ............................................................................... 1-39
1.11.2.1
MPH152/155 ................................................................................. 1-39
1.11.2.2
BIPH252/255 and 452/455 Domestic............................................ 1-40
1.11.2.3
BIPH252/255 and 452/455 International ...................................... 1-41
1.11.2.4
BIPH352/355 Domestic ................................................................ 1-42
1.11.2.5
BIPH352/355 International ........................................................... 1-39
iii
BIPH52/55-MPH52/55
SERIES GAS FRYERS
TABLE OF CONTENTS
1.12 Simplified Wiring Diagrams ........................................................................................... 1-44
1.12.1 BIPH52/55 Series Full Vat............................................................................... 1-44
1.12.2 BIPH52/55 Series Dual Vat ............................................................................. 1-45
1.12.3 BIPH52/55 Series Full Vat (Australia and Pacific Rim).................................. 1-46
CHAPTER 2: Parts List
2.1 Accessories........................................................................................................................ 2-1
2.2 Cabinetry ........................................................................................................................... 2-3
2.2.1
Backs, Doors, Flue Caps, Sides, and Top Caps ................................................. 2-3
2.2.2
Filter Cabinet Bases, Casters, Framing, and Related Components .................... 2-6
2.2.3
Non-Filter Cabinet Bases, Casters, Framing, and Related Components............ 2-8
2.3 Controllers ....................................................................................................................... 2-10
2.4 Drain, Filtration, and Oil Return System Components ................................................... 2-11
2.4.1
Filtration System Components ......................................................................... 2-11
2.4.2
Drain Valves and Associated Components ...................................................... 2-13
2.4.3
Rear Flush Oil Return Line Components ......................................................... 2-15
2.5 Electronics and Electrical Components........................................................................... 2-17
2.5.1
Component Boxes ............................................................................................ 2-17
2.5.2
Transformer Boxes ........................................................................................... 2-19
2.5.3
High-Limit Thermostat and Temperature Probe .............................................. 2-22
2.7 Frypots and Associated Components .............................................................................. 2-23
2.7.1
Full-Vat Frypot Components............................................................................ 2-23
2.7.2
Dual-Vat Frypot Components .......................................................................... 2-25
2.8 Gas Supply and Combustion System Components ......................................................... 2-27
2.9 Gas Valves and Associated Components ........................................................................ 2-29
2.10 Wiring Assemblies and Harnesses .................................................................................. 2-31
2.11 Miscellaneous Connectors and Terminals....................................................................... 2-35
iv
BIPH52/55-MPH52/55 SERIES GAS FRYERS
CHAPTER 1: SERVICE PROCEDURES
1.1
Functional Description
BIPH52/55 and MPH52/55 Series gas fryers contain a welded stainless steel frypot that is directly
heated by a high efficiency infrared burner system requiring approximately 43% less energy than
conventional burners to cook the same volume.
Self-contained combustion chambers (referred to as “burners”) are fitted into rails attached to the
sides of the frypot, one on each side. Each combustion chamber is fitted with special ceramic tiles
that are heated by the burning of a forced air/gas mixture. The tiles transfer heat to the frypot by
means of infrared radiation, providing much more constant and uniform heat dispersion over the
surface of the frypot than do conventional burners. Because less heat is lost to the atmosphere in the
process, compared to “open-burner” designs, less fuel is required to achieve and maintain a given
frypot temperature.
In full-vat units, gas flow to both of the burners is regulated by one electromechanical gas valve. In
dual-vat units, each burner has its own valve. All fryers in this series are equipped with 24 VAC gas
valve systems, and all are configured with electronic ignition.
1.1.1 The Electronic Ignition System
An ignition module mounted in the component box
(located behind the control panel) is connected to an
ignitor assembly at the burner. The ignition module
performs four important functions: it provides fuse
protection for the 24-volt circuit, provides an ignition
spark, supplies voltage to the gas valve, and proofs the
burner flame. The module contains a 4-second time delay
circuit and a coil that activates the gas valve. Three types
are in use. A closed-box design is used in most fryers, but
in some fryers built for export the module resembles an
interface board. A single dual-spark module is used on
current production full-vat fryers. All dual-vat fryers use
two single-spark modules.
Inside the Ignition Module
Out to
Gas Valve
To Alarm
25 V +
Coil
TD
HV
GND
Ignition Wire
Flame Sensor
The ignitor assembly consists of a spark plug, an
enrichment tube, and a flame sensor.
At start-up, the power switch is placed in the ON position, supplying approximately 12-volts DC to
the heat-control circuitry in the controller or computer and to one side of the heat relay coils on the
interface board. If resistance in the temperature probe indicates the temperature in the frypot is
below 180ºF (82ºC), the current flows through a melt cycle circuit where a timer switch alternately
closes for 6 seconds and opens for 24 seconds. If the temperature is 180ºF (82ºC) or above, the
current flows through a heat circuit, bypassing the timer switch. In either case, ground is supplied
to the other leg of the heat relay coils, which then close electronic switches in the 24 VAC circuit to
1-1
provide current to the ignition module. Circuitry in the ignition module sends 24 VAC to the gas
valve via a normally closed high-limit switch (and, in fryers with built-in filtration systems, a
normally closed drain safety switch). Simultaneously, the module causes the ignitor to spark for 4
seconds to light the burner. A flame sensor verifies the burner ignition by measuring the flow of
microamps through the flame. If the burner does not light (or is extinguished), current to the
ignition module is cut, the gas valve closes, and the ignition module “locks out” until the power
switch is turned off and then back on. A probe monitors the temperature in the frypot. When the
programmed setpoint temperature is reached, resistance in the probe causes the heat cycle circuitry
in the controller to cut off current flow through the heat relay. This in turn cuts off the 24 VAC to
the ignition module, causing the gas valve to close.
1.1.2 Interface Board
All fryers in this series have an interface board located in the component box behind the control
panel. The interface board provides a link between the controller/computer and the fryer’s individual
components without requiring excessive wiring, and allows the controller to execute commands
from one central point. This standard interface board is also used in a number of fryer types besides
the BIPH52/55 and MPH52/55 Series. The information contained in this section applies to
BIPH52/55 and MPH52/55 Series applications ONLY.
K2 and K3 are double-pole-double throw (dpdt) relays that supply 24VAC to the ignition and gas
valve circuits, as well as 120VAC to the blower motor. The relays on this board plug into sockets.
If a relay fails, that relay can be replaced.
LEDs (labeled D1 through D7) are arrayed around the board to assist in troubleshooting.
SOUND
1
GND
GND
J2
1
4
7
10
13
2
2
5
8
11
14
3
3
6
9
12
15
F2
I gn it i on
2 AMP Module
D6
D7
AIR
12V
J1
3
6
9
12
3
6
9
12
2
5
8
11
2
5
8
11
1
4
7
10
1
4
7
10
INTERFACE BOARD
LED DIAGNOSTIC LIGHTS
J3
D1 24 VAC to left gas valve (dual vat only)
D1
GND
K1
GV
V2D
Blower
Motor
2 Amp
K4
D3 24 VAC from transformer
GND
D4 24 VAC to right ignition module
V1D
PWR
D3
AD
AS
V2S
D2 24 VAC to left ignition module
D5
GV
D2
GND
PWR
HEAT
RELAY
AND
BLOWER
MOTOR
RELAY
K2
24V
D5 24 VAC to gas valve (right valve if dual vat)
PWR
HEAT
RELAY
AND
BLOWER
MOTOR
RELAY
D6 12 VAC from transformer
ALR
D4
D7 CE and Japanese units only: air sw itch closed
V1S
PWR
GND
K3
INTERFACE BOARD P/N 106-0386SP
NOTE: Although the printing on some boards may indicate 2 Amp fuses, 3 Amp fuses (P/N
807-3843) must be used. In full-vat fryers, the relay for the left side (K2) may not be present.
The chart on the following page illustrates current flow through the board, and the table at the top of
page 1-4 identifies frequently used test points.
1-2
INTERFACE BOARD
J2
12 VAC TO CPTR
GROUND
1
2
COMPUTER (12 VAC)
3
COMPUTER
COMPUTER
4
5
COMPUTER
J3 PIN 1
GROUND
J3 PIN 3
RT HT RELAY
12 VDC TO RELAYS
LT HT RELAY
6
COMPUTER
NOT USED
COMPUTER
** RT ALARM OUT
COMPUTER
* LT ALARM OUT
7
8
9
10
11
RT BL RELAY
NOT USED
LT BL RELAY
*
** Dual Vat configurations
** Full Vat configurations
ALR (RIGHT)
SOUND DEVICE
AD (LEFT)
12
J3 PIN 6
COMPUTER
13
COMPUTER
J1 PIN 2 & J3 PIN 2
14
COMPUTER
15
J1 PIN 6
J1
NOT USED
J3
1
TEMP PROBE
NOT USED
J2 PIN 1
J2 PIN 14
J2 PIN 14
2
NOT USED
J2 PIN 3
NOT USED
NOT USED
NOT USED
NOT USED
3
NOT USED
MAIN GAS VALVE
via HLS
BASKET LIFT (UP)
NOT USED
6
7
8
9
J2 PIN 15
J2 PIN 13
LT BL RELAY
RT BL RELAY
NOT USED
PWR via RT HT RELAY
MOD 25V TERM
DRAIN SWITCH (OPT)
V2D
V1S OR V1D
LT BL RELAY
RT BL RELAY
NOT USED
BLOWER via K4 (old)
or K2/K3 (new)
NOT USED
BLOWER
10
NOT USED
NOT USED
7
8
9
10
11
GND
V2D
PWR
TEMP PROBE
6
12
MOD V2D
NOT USED
5
NOT USED
MOD 25V GROUND
NOT USED
4
5
TEMP PROBE
TEMP PROBE
12 VAC XFMR
3
4
NOT USED
BASKET LIFT (DN)
12 VAC XFMR
2
NOT USED
NOT USED
1
GROUND
GROUND
J1 PIN 9
J3 PIN 9
J1 PIN 8 via LT HT RELAY
AD
AS
V2S
J3 PIN 8 via RT HT RELAY
J2 PIN 12
J2 PIN 10
NOT USED
J3 PIN 9
11
12
GND
V1D
PWR
ALR
V1S
BASKET LIFT (DN)
24 VAC IN
MAIN GAS VALVE
via HLS
BASKET LIFT (UP)
120 VAC IN
XFMR BOX
MOD 25V GROUND
MOD V1D *
MOD 25V TERM
DRAIN SWITCH (OPT)
MOD V1S **
NOT USED
LEFT VAT
FULL OR RIGHT VAT
CURRENT FLOW THROUGH INTERFACE BOARD
106-0386SP (BIPH52/55 and MPH52/55 SERIES
APPLICATION)
1-3
FREQUENTLY USED TEST POINTS FOR INTERFACE BOARD 106-0386SP
Meter
Setting
Test
Pins
Results
12VAC Power to Controller
50VAC Scale
1 and 3 on J3 or J2
12-18
24VAC Power to Right Module
50VAC Scale
8 on J3 and GROUND
22-28
120 VAC Power
250VAC Scale
11 on J3 and GROUND
110-125
120 VAC Power to Blowers
250VAC Scale
12 on J3 and GROUND
110-125
24VAC Power to Full- or Right-vat High-Limit
50VAC Scale
9 on J3 and GROUND
22-28
24VAC Power to Left High-Limit (if present)
50VAC Scale
9 on J1 and GROUND
22-28
Probe Resistance (Full- or Right-vat) *
R x 1000 OHMS 2 and 6 on J3 or 13 and 14 on J2
**
Probe Resistance (Left - if present) *
R x 1000 OHMS 2 and 6 on J1 or 14 and 15 on J2
**
Probe Isolation
R x 1000 OHMS 6 on J1 or J3 and GROUND
***
High-Limit Continuity (Full- or Right-vat)
R x 1 OHM
9 on J3 and Wire 13C on Gas Valve
0
High-Limit Continuity (Left - if present)
R x 1 OHM
9 on J1 and Wire 12C on Gas Valve
0
** Disconnect 15-pin harness from controller before testing probe circuit.
** See Probe Resistance Chart at end of chapter.
*** 5 mega-Ohms or greater.
1.1.3 THERMOSTATS
BIPH52/55 and MPH52/55 Series gas fryers have temperature probes located on the front centerline
of each frypot (dual-vat frypots have two probes, one in each vat). In this type of thermostat, the
probe resistance varies directly with the temperature. That is, as the temperature rises, so does
resistance, at a rate of approximately 2 ohms for every 1º F. Circuitry in the controller monitors the
probe resistance and controls burner firing when the resistance exceeds or falls below programmed
temperatures (setpoints). The temperatures are programmed by means of a keypad on the face of the
controller.
BIPH52/55 and MPH52/55 Series fryers are also equipped with a high-limit thermostat. In the event
that the fryer fails to properly control the oil temperature, the high-limit thermostat prevents the fryer
from overheating to the flash point. The high-limit thermostat acts as a normally closed power
switch that opens when exposed to temperatures above 425ºF to 450ºF (218ºC to 232ºC). The
different types of thermostats have different part numbers for CE and Non-CE models, and are not
interchangeable.
1.2
Accessing Fryers for Servicing
DANGER
Moving a fryer filled with oil may cause spilling or splattering of the hot liquid.
Follow the draining instructions in Chapter 4 of the BIPH52/55-MPH52/55 Installation
and Operation manual (P/N 819-6087) before attempting to relocate a fryer for
servicing.
1. Shut off the gas supply to the unit. Unplug the power cords. Disconnect the unit from the gas
supply.
1-4
2. Remove any attached restraining devices and relocate the fryer for service accessibility.
3. After servicing is complete, reconnect the unit to the gas supply, reattach restraining devices, and
plug in the electrical cords. NOTE: To ensure the safe and efficient operation of the fryer
and hood, the electrical plug for the 120-volt line, which powers the hood, must be fully
engaged and locked in its pin and sleeve socket.
1.3
Cleaning the Gas Valve Vent Tube
1. Set the fryer power switch and the gas valve to the OFF position.
2. Carefully unscrew the vent tube from the gas valve. NOTE: The vent tube may be straightened
for ease of removal.
3. Pass a piece of ordinary binding wire (.052 inch diameter) through the tube to remove any
obstruction.
4. Remove the wire and blow through the tube to ensure it is clear.
5. Reinstall the tube and bend it so that the opening is pointing downward.
1.4
Checking the Burner Manifold Gas Pressure
1. On non-CE fryers only ensure that the gas valve knob is in the OFF position.
Honeywell
ON
OFF
2. Remove the pressure tap plug from the gas valve assembly.
Pressure Tap Plug
Typical Non-CE
Valve Assembly
Typical CE Valve
Assembly
1-5
3. Insert the fitting for a gas pressure-measuring device into the pressure tap hole.
4. On non-CE fryers only, place the gas valve in the ON position.
5. Place the fryer power switch in the ON position. When the burner has lit and burned steadily for
at least one minute, compare the gas pressure reading to the pressure for the corresponding gas in
the appropriate table below. The tables list the burner manifold gas pressures for each of the gas
types that can be used with this equipment.
CE Standard
Burner Manifold Gas Pressures
Pressure (mbar)
Gas
Natural Gas Lacq
(G20) under 20 mbar
Natural Gas Gronique *
(G25) under 25 mbar
Natural Gas Gronique
(G25) under 20 mbar
Butane/Propane
(G30) at 28/30 or 50 mbar
Propane
(G31) under 37 or 50 mbar
Single
Vat
Dual
Vat
7
7
10
10
10
10
17
17
20
20
* Belgian G25 = 7,0 mbar (single or dual)
Non-CE Standard
Burner Manifold Gas Pressures
Gas
Pressure
3" W.C.
0.73 kPa
8.25" W.C.
2.5 kPa
Natural
Propane
6. To adjust the burner gas pressure, remove the cap from the gas valve regulator and adjust to the
correct pressure.
Non-CE
Valve
CE
Valve
GAS VALVE REGULATOR CAP
1-6
7. Place the fryer power switch (and the gas valve in non-CE fryers) in the OFF position. Remove
the fitting from the pressure tap hole and reinstall the pressure tap plug.
1.5
Measuring Flame Current
When the burner flame is properly adjusted, it will produce a current between 2.5 μA and 3.5 μA.
Flame current is measured by placing a microamp (not milliamp) meter in series with the sensing
wire on the ignitor. This is accomplished as follows:
1. Place the fryer power switch in the OFF position.
2. Disconnect the sensing wire from one of the burner ignitors and connect it to the positive lead of
the meter. Connect the negative lead of the meter to the terminal from which the sensing wire
was removed.
Flame Sensor Wire
(Right Burner)
3. Place the fryer power switch in the ON position to light the burners. After the frypot temperature
reaches 200°F (93°C), wait at least one minute before checking the reading. NOTE: The closer
the unit is to normal operating temperature, the more accurate the reading will be.
1.6
Replacing Fryer Components
1.6.1 Replacing the Controller or the Controller Wiring Harness
1. Disconnect the fryer from the electrical power supply.
2. The controller bezel is held in place by tabs at the top and bottom. Slide the bezel up to
disengage the lower tabs. Then slide the bezel down to disengage the upper tabs.
3. Remove the top two screws in the upper corners of the control panel.
4. Hinge the controller down. Allow it to rest on its hinge tabs to access the 15-pin connector on
the back.
5. Disconnect the 15-pin wiring harness from the back of the controller and, if replacing the
harness, disconnect it from the interface board.
6. Use a 5/16” nut driver (P/N 802-0352) to remove the nut and green ground wire from the back of
the controller.
1-7
7. Remove the controller by lifting it up and out from the hinge slots in the control panel frame.
8. Re-hinge the NEW controller by inserting the tabs on the bottom into the slots on the control
panel frame and allow it to rest on the hinge tabs.
9. If replacing the 15-pin connector, do so now. Plug the new 15-pin wiring harness into the
interface board ensuring the black ferrite metal ring is on the controller-end of the wire harness.
10. Connect the 15-pin connector and the green ground wire to the new controller. When the
connector is completely engaged, the clips on either side of the connector will snap into place.
11. Move the controller into the closed position against the control panel frame and replace the
screws in the top corners.
12. Insert the top tabs on the bezel into the slots on the underside of the top cap. Slide the bezel
down to engage the lower tabs in the lower slots.
1.6.2
Replacing the Temperature Probe or High-Limit Thermostat
1. Disconnect the fryer from the electrical supply.
2. Drain cooking oil below the level of the probe or thermostat.
3. Lift up on the bezel to disengage the tabs on its lower edge from the control panel frame.
4. Remove the top two screws in the upper corners of the control panel.
5. Swing the controller out from the top and allow it to rest on its hinge tabs.
6. Disconnect the controller wiring harness and ground wire from the back of the controller and
remove the controller by lifting it from the hinge slots in the control panel frame.
7. If the fryer has a built-in filtration system, remove the clevis securing the oil return handle to the
oil return operating rod and separate the rod from the handle.
8. Disconnect the ignition cables from the ignitors by grasping the boots and gently pulling toward
you.
9. Disconnect the flame sensor wires from the flame sensors.
10. Disconnect the sound device lead from the interface board.
11. If working on the left frypot, cut the wire tie on the wiring bundle and disconnect the main
wiring harness 15-pin connector.
12. Remove the component box mounting screws.
1-8
13. Rotate the top of the component box out of the frame and carefully pull it out enough to
disconnect the wiring harness plug from the back of the box. If the unit is equipped with built-in
filtration, disconnect the wires from the filter switch. This will leave one set of wires, enclosed
in spiral wrap, connected to the component box.
14. Remove the box and set it atop the fryer to expose the temperature probe and high-limit
thermostat.
15. Cut the leads of the probe or thermostat, as appropriate, near the component and unscrew it from
the frypot.
16. Apply Loctite® PST56765 pipe thread sealant or equivalent to the replacement part threads and
screw the replacement part into the frypot, torquing to 180 inch-pounds.
17. Unscrew and remove the temperature probe (or high-limit thermostat) from the frypot.
18. Connect the wires from the new component as follows:
a. If replacing the temperature probe, use a pin pusher to disconnect (one at a time) the red and
white leads from the connector and insert the corresponding leads from the new probe.
b. If replacing the high-limit thermostat, use a pin pusher to disconnect the lead running to the
connector and insert the corresponding lead from the new thermostat. Disconnect the other
lead from the drain safety switch and connect the remaining lead from the new thermostat.
19. Reverse steps 1 through 14 to complete the procedure.
1.6.3 Replacing the Interface Board
1. Disconnect the fryer from the electrical power supply.
2. The controller bezel is held in place by tabs at the top and bottom. Slide the bezel up to
disengage the lower tabs. Then slide the bezel down to disengage the upper tabs.
3. Remove the top two screws in the upper corners of the control panel.
4. Hinge the controller down. Allow it to rest on its hinge tabs to access the 15-pin connector on
the back.
5. Disconnect the 15-pin wiring harness from the back of the controller and from the interface
board.
6. Use a 5/16” nut driver (P/N 802-0352) to remove the nut and green ground wire from the back of
the controller.
7. Remove the controller by lifting it up and out from the hinge slots in the control panel frame.
8. Disconnect the wires attached to the interface board, marking or making a note of the wires and
terminals to facilitate reconnection.
1-9
9. Remove the nuts at each corner of the interface board and carefully pull it from the studs far
enough to allow the connector on the back of the board to be disconnected, then remove the
board from the box. When removing the board, be careful not to lose the spacers that fit over the
studs behind the board.
10. Recover the relay(s) from the failed interface board and install on the replacement board.
11. Reverse the procedure to install the replacement board, being sure that the spacers behind the
board are in place.
1.6.4 Replacing an Ignition Module
1. Disconnect the fryer from the electrical supply.
2.
Lift up on the bezel to disengage the tabs on its lower edge from the control panel frame.
3. Remove the top two screws in the upper corners of the control panel.
4. Swing the controller out from the top and allow it to rest on its hinge tabs.
5. Disconnect the wires from the ignition module, marking or making a note of the wires and
terminals to facilitate reconnection.
6. Remove the four ignition module screws and pull the module from the component box.
7. Move the spacers to the new module.
8. Reverse the procedure to install the replacement module.
1.6.5 Replacing an Ignitor Assembly
DANGER
Drain the frypot or remove the handle from the drain valve before proceeding further.
1. Disconnect the fryer from the electrical supply.
2. Disconnect the flame sensor wire by carefully pulling its push-on terminal from the terminal
strip on the ignitor. Disconnect the gas enrichment tube at the ignitor-end compression fitting.
Disconnect the ignition cable from the ignitor by grasping its boot and gently pulling toward
you. (See photo on the following page)
1-10
Flame Sensor Wire
Gas Enrichment Tube
Ignition Cable
3. Remove the sheet metal screws securing the ignitor to the mounting plate and pull the ignitor
from the fryer.
4. Reverse the procedure to install the replacement ignitor.
1.6.6 Replacing or Cleaning a Combustion Air Blower
1. Disconnect the blower wiring harness, remove the blower assembly mounting nuts, and remove
the blower assembly from the fryer. If cleaning the motor, continue with Step 2; otherwise,
install the replacement blower, reconnect the wiring harness, and then go to Step 6.
Wiring connection
Blower assembly
mounting nuts
2. Remove the blower motor shield and separate the blower motor from the housing as shown in
the illustration on the following page.
1-11
Remove these screws to
remove the shield from the
blower assembly.
Remove these nuts to
separate the blower
motor from the housing.
3. Wrap the motor with plastic wrap to prevent water from entering it. Spray degreaser or
detergent on the blower wheel and the blower housing. Allow it to soak for five minutes. Rinse
the wheel and housing with hot tap water, then dry with a clean cloth.
Wrap the motor and wires
with plastic wrap or a
plastic bag.
Blower Housing
Blower Wheel
4. Remove the plastic wrap from the blower motor assembly. Reassemble the blower motor
assembly and blower housing. Reinstall the blower shield.
5. Reinstall the blower assembly in the fryer and reconnect the wiring disconnected in Step 1.
6. Light the fryer in accordance with the procedure described in Chapter 3, Section 3.1.2 of the
BIPH52/55-MPH52/55 Series Gas Fryer Installation and Operation Manual (P/N 819-6087).
1-12
7. After the burners have been lit for at least 90 seconds, observe the flames through the burner
viewing ports located on each side of the combustion air blower.
Left Viewing
Port is behind
motor.
Right
Viewing
Port.
The air/gas mixture is properly adjusted when the burner manifold pressure is in accordance with
the applicable table on page 1-6 and the burners display a bright orange-red glow. If a blue
flame is observed or if there are dark spots on a burner face, the air/gas mixture requires
adjustment.
Adjusting the Air/Gas Mixture
On the side of the blower housing opposite the motor is a shutter plate with a locking nut.
Loosen the nut enough to allow the shutter to be moved, then adjust the position of the shutter to
open or close the air intake opening until a bright orange-red glow is obtained. Carefully hold
the shutter in position and tighten the locking nut.
Loosen this nut and
rotate shutter to open
or close air intake.
1-13
1.6.7 Replacing a Gas Valve
DANGER
Drain the frypot or remove the handle from the drain valve before proceeding further.
1. Disconnect fryer from electrical and gas supplies.
2. Disconnect the drain safety and high-limit thermostat wires from the gas valve. Mark each wire
to facilitate reconnection.
3. Remove the vent tube (on non-CE fryers) and the enrichment tube fitting from the valve.
Disconnect the flexible gas line(s).
If replacing the left-most valve on any configuration, or the right valve on a two-fryer battery,
follow the instructions below. If replacing valves in other positions, skip to “ALL OTHER
VALVES.”
A. Remove the filter pan from the unit. Remove the door adjacent to the valve being replaced.
B. Remove the five screws on the front face of the pan rail assembly adjacent to the valve being
replaced. Remove the nut and bolt securing the rear end of the rail to the cabinet.
C. Remove the two nuts and bolts immediately behind the front face of the pan rail assembly. Pull
the assembly from the unit to gain access to the pipe union on the gas line.
D. Uncouple the pipe union and remove the gas valve and associated piping from the unit.
E. Remove the fittings and associated piping from the failed valve and install them on the
replacement valve using Loctite® PST56765 or equivalent pipe thread sealant.
F. Reconnect the gas valve assembly to the fryer using Loctite® PST56765 or equivalent pipe
thread sealant, and reattach the flexible gas line(s), enrichment tube(s), and the vent tube (on
non-CE units). Reconnect the high-limit thermostat wires and drain safety wires to the valve.
G. Reconnect the fryer to the gas supply and open the cut off valve. Apply a solution of soapy
water around each connection to check for gas leaks. Eliminate any that are found.
H. Position the pan rail assembly beneath the fryer and rest the rear end of the rail on the cabinet
frame. Install the two nuts and bolts behind the front face of the rail, but do not tighten them.
Install the nut and bolt at the rear end of the filter rail and tighten securely.
I. Install the five screws in the front face of the rail, but do not tighten them. Install the filter pan
in the unit to make sure that all components are properly aligned; then, securely tighten the
remaining bolts and screws.
J. Reconnect the fryer to the electrical power supply and check for proper operation. When proper
operation has been verified, reinstall the door removed in Step A.
1-14
ALL OTHER VALVES
4. Carefully unscrew the valve from the manifold. NOTE: Some models may have the valve
attached to the manifold by means of a pipe union. In such cases, remove the valve by
uncoupling the union.
5. Remove all fittings from the old gas valve and install them on the replacement valve, using
Loctite® PST56765 or equivalent pipe thread sealant.
6. Reconnect the gas valve assembly to the fryer using Loctite® PST56765 or equivalent pipe
thread sealant, and reattach the flexible gas line(s), enrichment tube(s), and the vent tube (on
non-CE units). Reconnect the high-limit thermostat wires and drain safety wires to the valve.
7. Reconnect the fryer to the gas supply and open the cut off valve. Apply a solution of soapy
water around each connection to check for gas leaks. Eliminate any that are found.
8. Reconnect the fryer to the electrical power supply and check for proper operation.
1.6.8 Replacing a Burner Assembly
DANGER
Drain the frypot or remove the handle from the drain valve before proceeding further.
1. Disconnect the unit from the electrical and gas supplies.
2. Remove the combustion air blower per the procedure found in Section 1.6.6.
3. Remove the four nuts from the air plenum assembly and pull the assembly straight out toward
you until it clears the burner tubes.
NOTE: On a dual-vat fryer, it will be necessary to remove the drain valve handles before the
plenum can be removed.
NOTE: If the flexible oil return lines are blocking the plenum, carefully bend them upward
enough to clear the plenum.
4. Disconnect the ignition cable from the ignitor by grasping its boot and pulling gently toward
you. Disconnect the flame sensor wire from the ignitor by gently pulling its push-on terminal
from the terminal strip on the ignitor.
5. Disconnect the flexible gas lines from the burner orifice and the enrichment tube from the ignitor
assembly.
6. Remove the four ¼-inch nuts securing the outer front covers to the frypot assembly.
7. Remove the sheet metal screws at the top of the outer front covers and pull the covers straight
out toward you until clear of the mounting studs.
1-15
8. Remove the washers and tubular spacers from the mounting studs, then pull the inner covers
straight out toward you until clear of the mounting studs.
9. Grasp the burner firmly and pull it toward you until it clears the burner channels, taking care not
to damage the ceramic tiles in the process.
10. Clean all debris from the burner channels and combustion area.
11. Inspect the upper and lower burner rails for cracked or burned out welds.
a. If the welds in the lower rail are cracked or burned out, the frypot must be replaced. Refer to
Section 1.6.10 for procedure.
b. If the welds in the upper rail are cracked or burned out, the upper rail must be replaced.
Refer to Section 1.6.11 for procedure.
12. Place a new insulating strip along the top, rear, and bottom edge of the burner and carefully slide
it straight into the rails. NOTE: Use P/N 826-0931 for full-vat frypots and P/N 826-0932 for
dual-vat frypots.
13. Reverse steps 1 through 9 to reassemble the components.
14. Fill the frypot with oil. Turn the fryer on, turn off or bypass the melt cycle, and operate the unit
for at least 10 minutes.
15. Visually examine the burner flame. The color and intensity on both sides should be the same.
16. Use an inspection mirror to check for leaks in areas that cannot be directly observed.
17. If a leak is detected, tighten all the lower insulation retainer nuts, allow the frypot to run for five
additional minutes, and repeat steps 15 and 16.
18. If the leak persists, use a rubber hammer and a small block of wood to tap the corners of the
lower combustion chamber insulation retainers. Repeat steps 15 through 17. Repeat this step
until no leakage is detected.
1.6.9 Replacing the Filter Motor, Filter Pump, or Filter Pump Solenoid Valve
1. Disconnect the unit from the electrical power supply.
2. Remove the filter pan from the unit and drain the frypots into a Shortening Disposal Unit (SDU)
or other appropriate metal container.
1-16
DANGER
DO NOT attempt to drain more than one full frypot or two split frypots into the SDU
at one time.
3. Position a container beneath the oil return fitting at the front of the cabinet. Disconnect the
flexible oil line from the fitting, allowing any residual oil to drain into the container.
4. At the rear of the fryer, unplug the left connector (as viewed from the rear of the fryer) from the
transformer box. Using a pin pusher, push the pump solenoid valve wires from Pins 7 and 9.
5. Remove the four nuts and bolts attaching the motor mount to the rear motor mount support.
6. At the front of the fryer, remove the cover plate from the front of the motor and disconnect the
motor wires.
7. Place a 1-foot (30.5-cm) length of wood (or similar support) beneath the motor mount near the
front of the unit and remove the two remaining nuts and bolts attaching the motor mount to the
front cabinet cross-brace.
8. Carefully remove the support and lower the motor mount to the floor, allowing the rear of the
mount to slide forward and off the rear motor mount support.
9. Disconnect the return flexline from the pump. The motor and pump assembly can now be pulled
from beneath the fryer and the failed component can be removed and replaced.
10. Position the new/repaired motor and pump assembly beneath the fryer and reconnect the oil
return flexline to the pump. Lift the rear of the motor mount up and onto the rear motor mount
support.
11. Lift the front of the motor mount up and support it with a 1-foot (30.5-cm) piece of wood or a
similar support. Install but do not tighten the two nuts and bolts that attach the motor mount to
the front cabinet cross-brace.
12. Install and tighten the four nuts and bolts that secure the motor mount to the rear motor mount
support. Reconnect the solenoid valve wires to Pins 7 and 9 of the 9-pin connector (polarity
does not matter) and reconnect the plug.
13. At the front of the fryer, tighten the two nuts and bolts at the front of the motor mount.
Reconnect the motor power wires and reinstall the wiring cover plate.
14. Reconnect the oil return flexline and reinstall the filter pan.
15. Reconnect the unit to the electrical power supply, fill the frypots with oil and check for proper
operation.
1.6.10
Replacing the Frypot
1. Disconnect the fryer from the electrical and gas supplies.
1-17
2. Remove the filter pan from the unit and drain one frypot at a time into a Shortening Disposal
Unit (SDU) or other appropriate metal container.
DANGER
DO NOT attempt to drain more than one full frypot or two split frypots into the SDU
at one time.
3. Dismount the topcap by removing the screws on the bottom of each front corner and lifting the
topcap straight up.
4. Remove the bezels by lifting them up to disengage the tabs along the lower edges from the slots
in the control panel frame. Remove the top two screws in the upper corners of the control panel.
5. Grasp the upper edge of each controller and swing the controller downward. Unplug the
controller wiring harness and grounding wire from the back of each controller.
6. Remove the controllers by lifting them from the hinge slots in the control panel frame.
7. Remove the clevis that secures the oil return rod to the oil return handle and separate the rod and
handle. NOTE: On split-vat units, there are two oil return handles.
8. Disconnect the sound device wire from the interface board and disconnect the oil return switch
wires from the switch terminals.
9. Disconnect the flame sensor wires by carefully pulling the push-on terminals from the terminal
strips on the ignitors. Disconnect the gas enrichment tube at the ignitor-end compression fitting.
Disconnect the ignition cables from the ignitors by grasping the boots and gently pulling toward
you.
10. Remove the two mounting screws on each side of the component box and rotate the top of the
box out of the frame. Carefully pull it out enough to disconnect the wiring harness connector
from the back of the box. Cut any ties that prevent the box from being pulled out of the control
panel frame.
11. Carefully pull the box clear of the frame and rest it atop the fryer.
12. Using a pin pusher, remove the temperature probe and high-limit thermostat wires from the plugs
or terminals, marking each wire to facilitate re-assembly.
13. Remove the cover from the safety drain switch. Disconnect the wires from the switch.
14. Remove the section(s) of drain from the drain valve(s) of the frypot to be removed.
15. Disconnect the gas lines from the burner orifices and ignitor assemblies.
16. Remove the frypot hold down bracket.
1-18
17. Remove the screws in the back panel and inside the flue cap at each end that secure the flue cap
to the fryer and lift it clear of the fryer.
18. Disconnect the oil return line(s) from the frypot to be removed.
19. Carefully lift the frypot from the fryer cabinet.
20. Remove the drain valve(s), temperature probe(s), high-limit thermostat(s), and ignitor
assemblies. Inspect each of these components carefully and install them in the replacement
frypot if they are in serviceable condition. Use Loctite® PST56765 sealant or equivalent on
component threads.
NOTE: Some servicers, based upon their experience, recommend that probes and thermostats
be replaced whenever a frypot is replaced; however, this remains the customer’s decision.
21. Reverse steps 1-19 to reassemble fryer.
NOTE: Care should be taken not to over-torque nuts on frypots made of 400-series stainless
steel, as this could tear the material. One turn past hand-tight is sufficient torque.
22. Perform steps 14 through 18 of Section 1.6.8 to ensure that there are no leaks in the burner
insulation.
CAUTION
Before installing temperature probe, high-limit thermostat, and drain valve on
replacement frypot, clean the threads and apply Loctite® PST56765 thread sealant or
equivalent.
1.6.11
Replacing Frypot Insulation and/or Upper Burner Rails
NOTE: Replacing the burner rails requires completely tearing down the frypot and installing new
frypot insulation. Refer to the frypot exploded view on page 1-21 for component identification.
1. Remove the frypot per Section 1.6.10.
2. Remove the burner assemblies (1).
3. Remove insulation retainers and blanket insulation (2).
4. Remove the upper oil zone insulation bracket and upper oil zone insulation (3).
5. Remove the plenum (4).
6. Remove the front lower combustion chamber insulation retainer and insulation (5), and the front
lower combustion chamber inner insulation retainer and insulation (6). NOTE: Full-vat units
have two-piece insulation retainer and insulation components. Dual-vat units have one-piece
components.
7. Remove the upper combustion chamber insulation retainer and insulation (7).
1-19
8. Remove the inner upper combustion chamber insulation retainer and insulation (8).
9. Remove the rear lower combustion chamber retainers, back, and insulation (9). NOTE: Full-vat
units have two-piece backs and four retainers. Dual-vat units have one-piece backs and two
retainers.
10. Remove the flue assembly (10).
See Page 1-22 for Reassembly
1-20
1-21
4
Spacers
5
2
6
7
8
Disassembling A Frypot
(Full Vat Illustrated)
3
11
Spacer
1
10
9
11. Remove the upper burner rails (11). NOTE: For the following steps, refer to the frypot exploded
view on page 1-24 for component identification.
12. Remove any residual insulation, sealant, and/or oil from the exterior of the frypot.
13. Place the “L” shaped pieces of the combustion chamber insulation (1) in the front and rear
corners of both upper rail-retaining slots. (See page 1-24).
14. Using a mallet and short piece of wood, tap the corner tabs of the combustion chamber over the
insulation to ensure a solid seal of the burner.
15. Install the upper burner rails (2) with the heat deflectors slanting toward the rear of the frypot.
The rails will cover the “L” shaped pieces of combustion chamber insulation previously
installed.
16. Place the upper inner combustion chamber insulation and insulation retainers (3) on the top two
studs on each side of the front of the frypot and secure with ¼”-20 washer-nuts. It is normal for
the retainers to slice off the overhanging insulation.
17. Place the lower rear combustion chamber insulation (4) on the lower four studs at the rear of the
frypot.
18. Place one 1.625-inch tubular spacer (5) on each of the flue assembly (upper) studs at the rear of
the frypot. NOTE: There are three different sizes of spacers. Verify the size to ensure the
correct spacers are installed.
19. Press the flue assembly (6) over the burner rails. It may be necessary to use a rubber mallet or
screwdriver to align the components. Use four ¼”-20 washer nuts to secure the flue assembly.
Do not tighten the retainer nuts at this point. They should be finger-tight only. NOTE:
The flue edge will cover one to two inches of the lower insulation.
20. Install the lower rear combustion chamber back(s) and retainer(s) (7) with the flanged edge(s)
against the flue. Secure with ¼”-20 washer nuts. NOTE: Full-vat units have two-piece backs
and four retainers. Dual-vat units come with one-piece backs and only two retainers.
21. Insert the burners (9) into the rails to ensure the rail spacing and alignments are correct. The
burner should slide freely into and out of the rails. The upper rail can be bent slightly to increase
or decrease tension on the burner and the edges of the slot can be closed or opened slightly to
best fit the burner frame.
22. Carefully wrap a strip of burner insulation (8) tightly around the rear and sides of the burner
frame (9), with the glass-tape side of the strip on the outside. Do not use duct tape or adhesive
to secure the strip to the burner frame.
23. Align the burner to the burner rails while maintaining tension on the insulation strip. Insert the
burner at a slight angle and begin pushing the burner slowly into the rails until it contacts the
rear combustion chamber. The fit should be snug, but not excessively tight.
1-22
24. Verify that the burners are flush with the front edge of the burner rails. Remove the excess
burner insulation by cutting with a knife or diagonal pliers. Do not try to tear the insulation!
25. Insert the upper front insulation (10) into its retainer (11), making sure that the holes in each
piece are aligned with one another. Install the assembly with the insulation side toward the
frypot and secure with ¼”-20 washer-nuts. Do not over tighten.
26. Place a washer on each of the four lower studs on the front of the frypot. Install the lower inner
front insulation (12) with the rectangular openings toward the drain valve nipple. Install the
lower inner front insulation retainer(s) (13). NOTE: Full-vat units have a two-piece insulation
retainer. Dual-vat units have a one-piece retainer.
27. If necessary, replace the sight-glasses and insulation (14).
28. Place one washer and one 1.888-inch spacer (15) on each stud. NOTE: There are three different
sizes of spacers. Verify the size to ensure the correct spacers are installed.
29. Insert the front lower insulation (16) into the front lower insulation retainer(s) (17) and install
assembly on frypot. Secure with ¼”-20 washer-nuts. If frypot uses two retainers, connect them
together with two ¼” self-tapping screws. NOTE: Full-vat units have a two-piece insulation
retainer and two pieces of insulation. Dual-vat units have one-piece components.
30. Return to the rear of the frypot and fully tighten all washer-nuts.
31. Remove and replace the plenum gaskets (18).
32. Place a 0.938-inch spacer (19) on the plenum-mounting studs, and mount the plenum (20).
Ensure the gaskets are clear of the burner tubes by pulling the plenum back slightly. Place a
washer on each stud and secure plenum with ¼”-20 lock-nuts.
33. Install the upper oil-zone insulation (21) by pressing it under the upper combustion chamber
metalwork. Secure the insulation with the bracket (22) and ¼” self-tapping screws.
34. Install the upper burner rail blanket insulation (23). Position any excess insulation toward the
top of the frypot. Avoid overhang past the bottom of the upper burner rail. Overhang in this
area will make future burner replacement more difficult.
35. Cover the insulation with the insulation retainer (24), and secure with ¼” self-tapping screws.
36. Reinstall probes, drain valves, high-limit thermostats, and other pipefittings using Loctite®
PST56765 sealant or equivalent on the threads.
1-23
1-24
20
19
18
17
16
15
14
24
11
22
21
10
3
Re-assembling A Frypot
(Full-Vat Illustrated)
13
12
23
1
1
4
5
6
2
9
8
7
1.7
Troubleshooting and Problem Isolation
Because it is not feasible to attempt to include in this manual every conceivable problem or trouble
condition that might be encountered, this section is intended to provide technicians with a general
knowledge of the broad problem categories associated with this equipment, and the probable causes
of each. With this knowledge, the technician should be able to isolate and correct any problem
encountered.
Problems you are likely to encounter can be grouped into six categories:
1.
2.
3.
4.
5.
6.
Ignition failure
Improper burner function
Improper temperature control
Computer malfunctions
Filtration malfunctions
Leakage
The probable causes of each category are discussed in the following sections. A series of
Troubleshooting Guides is also included at the end of the chapter to assist in solving some of the
more common problems.
1.7.1 Ignition Failure
Ignition failure occurs when the ignition module fails to sense a flame within the 4-second time
delay period and locks out. When this happens, the module sends 24 VAC through the interface
board alarm circuit to the computer.
M2000 computers display “IGNITION FAILURE.”
The three primary reasons for ignition failure, listed in order of probability, are problems related to:
1. Gas and/or electrical power supplies
2. Electronic circuits
3. Gas valve.
PROBLEMS RELATED TO THE GAS AND/OR ELECTRICAL POWER SUPPLIES
The main indicators of this are that an entire battery of fryers fails to light and/or there are no
indicator lights illuminated on the fryer experiencing ignition failure. Verify that the quick
disconnect fitting is properly connected, the fryer is plugged in with connector twisted and locked,
the main gas supply valve is open, and the circuit breaker for the fryer electrical supply is not
tripped.
PROBLEMS RELATED TO THE ELECTRONIC CIRCUITS
If gas and electrical power are being supplied to the fryer, the next most likely cause of ignition
failure is a problem in the 24 VAC circuit. Verify that the drain valve is fully closed. The valve is
attached to a microswitch that must be closed for power to reach the gas valve (often, although the
1-25
valve handle appears to be in the closed position, the microswitch is still open). If the valve is fully
closed, refer to Section 1.8.1, TROUBLESHOOTING THE 24 VAC CIRCUIT.
Some typical causes of ignition failure in this category include a defective sensing wire in the ignitor
assembly, a defective module, a defective ignition wire, and a defective ignitor.
Occasionally you may encounter an ignition failure situation in which all components appear to be
serviceable and the microamp reading is within specification, but the unit nevertheless goes into
ignition failure during operation. The probable cause in this case is an intermittent failure of an
ignition module. When the unit is opened up for troubleshooting, the module cools down enough to
operate correctly; however, when the unit is again closed up and placed back into service the module
heats up and fails.
PROBLEMS RELATED TO THE GAS VALVE
If the problem is not in the 24 VAC circuit, it is most likely in the gas valve, itself. Before replacing
the gas valve, refer to Section 1.8.2 TROUBLESHOOTING THE GAS VALVE.
1.7.2 Improper Burner Function
With problems in this category, the burner ignites but exhibits abnormal characteristics such as
“popping,” dark spots on the burner ceramics, fluctuating flame intensity, and flames shooting out of
the flue.
“Popping” indicates delayed ignition. In this condition, the main gas valve is opening but the burner
is not immediately lighting. When ignition does take place, the excess gas “explodes” into flame,
rather than smoothly igniting.
The primary causes of popping are:
•
Incorrect or fluctuating gas pressure
•
Defective or incorrectly adjusted combustion air blower
•
Inadequate make-up air
•
Heat-damaged controller or ignition module
•
Cracked ignitor or broken ignition wire
•
Defective ignition module
•
Cracked burner tile (typically causes a very loud pop).
If popping occurs only during peak operating hours, the problem may be incorrect or fluctuating gas
pressure. Verify that the incoming gas pressure (pressure to the gas valve) is in accordance with the
appropriate CE or Non-CE Standard found in Section 2.3 of the BIPH52/55-MPH52/55 Series Gas
Fryer Installation and Operation Manual (part number 819-6087), and that the pressure remains
constant throughout all hours of usage. Refer to Section 1.4, Checking the Burner Manifold Gas
Pressure in this manual for the procedure for checking the pressure of gas supplied to the burner.
If popping is consistent during all hours of operation, the most likely cause is an insufficient air
supply. Check for “negative pressure” conditions in the kitchen area. If air is flowing into the
1-26
kitchen area, this indicates that more air is being exhausted than is being replenished and the burners
may be starved for air.
If the fryer’s gas and air supplies are okay, the problem is most likely with one of the electrical
components. Examine the ignition module and controller for signs of melting, distortion, and/or
discoloration due to excessive heat build-up in the fryer (this condition usually indicates improper
flue performance). A melted or distorted ignition module is automatically suspect and should be
replaced; however, unless the condition causing excessive heat is corrected, the problem is likely to
recur.
Verify that the ignition wire is tightly connected at both ends and free of obvious signs of damage.
Again, if damage is due to excessive heat in the fryer, that problem must also be corrected. Check
for proper operation by disconnecting the wire from the ignitor (spark plug), inserting the tip of a
screw driver into the terminal. With the insulated handle of the screwdriver, hold the shaft near the
frame of the fryer as the power switch is placed in the ON position. A strong, blue spark should be
generated for at least 4 seconds.
DANGER
Make sure you are holding the insulated handle of the screwdriver and not the blade.
The sparking charge is approximately 25,000 volts.
Examine the ignitor (spark plug) for any signs of cracking. A cracked ignitor must be replaced.
If all other causes have been ruled out, examine the burner tiles for any signs of cracking. If
cracking is found, the burner must be replaced.
Fluctuating flame intensity is normally caused by either improper or fluctuating incoming gas
pressure, but may also be the result of variations in the kitchen atmosphere. Verify incoming gas
pressure in the same way as for “popping,” discussed in the preceding paragraphs. Variations in the
kitchen atmosphere are usually caused by air conditioning and/or ventilation units starting and
stopping during the day. As they start and stop, the pressure in the kitchen may change from
positive or neutral to negative, or vice versa. They may also cause changes in airflow patterns that
may affect flame intensity.
Dark spots on the burner tiles are the result of an improper air/gas mixture. Adjust the combustion
air blower to reduce the amount of air in the mixture to correct this problem
Flames shooting out of the flue are usually an indication of negative pressure in the kitchen. Air is
being sucked out of the burner enclosure and the flames are literally following the air. If negative
pressure is not the cause, check for high burner manifold gas pressure in accordance with the
procedures in Section 1.4.
An excessively noisy burner, especially with flames visible above the flue opening, may indicate
that the gas pressure is too high, or it may simply be that the gas valve vent tube is blocked. If the
incoming gas pressure is correct and the vent tube is unobstructed, the gas valve regulator is
probably defective.
Occasionally a burner may apparently be operating correctly, but nevertheless the fryer has a slow
recovery rate (the length of time required for the fryer to increase the oil temperature from 270ºF to
1-27
320ºF (132ºC to 160ºC)). The primary causes of this include an over-filled frypot, a dirty or
out-of-adjustment combustion air blower, low burner manifold pressure, and/or damaged burner
tiles. Adding oil to the frypot during the recovery process will also cause a slow recovery rate.
If these causes are ruled out, the probable cause is a misadjusted gas valve regulator. Refer to
Section 1.4, Checking the Burner Manifold Gas Pressure, for the gas valve adjustment procedure.
1.7.3 Improper Temperature Control
Temperature control, including the melt cycle, is a function of several interrelated components, each
of which must operate correctly. The principle component is the temperature probe. Other
components include the interface board, the controller itself, and the ignition module.
Improper temperature control problems can be categorized into melt cycle problems and failure to
control at setpoint problems.
MELT CYCLE PROBLEMS
In fryers equipped with M2000 computers, initiation of the melt cycle is automatic. Problems may
originate from the controller itself, the temperature probe, or a malfunctioning heat relay on the
interface board.
FAILURE TO CONTROL AT SETPOINT
Problems in this category may be caused by the temperature probe, the interface board, or the
controller.
1.7.4 Computer Malfunctions
RECOVERY TIME
Recovery time – is a method of measuring a fryer’s performance. Put simply, it is the time required
for the fryer to increase the oil temperature from 270ºF to 320ºF (132ºC to 160ºC). This range is
used as a standard since ambient kitchen temperatures can affect the test if lower ranges are used.
The M2000 computer performs the recovery test each time the fryer warms up. An operator can
view the results of the test any time the fryer is above the 325ºF (163ºC) point by pressing the
button and entering the code 1652. The test results will be displayed in the computer’s LED panel in
minutes and seconds. The maximum acceptable recovery time for BIPH52/55-MPH52/55 Series gas
fryers is two minutes and twenty-five seconds.
1-28
COMMON COMPUTER COMPLAINTS
Most problems concerning computers have to do with programming them. There are two common
complaints:
1. Fryer constantly displays “HI.”
Cause: Setpoint is incorrect or missing.
Corrective Action: Check setpoint and refer to the M2000 computer manual for instructions to
adjust the setpoint.
2. Temperature is displayed in Celsius.
Cause: Computer is programmed to display in Celsius.
Corrective Action: Turn the computer off then press
1658.
1.7.5 Filtration Malfunctions
The majority of filtration problems arise from operator error. One of the most common errors is
placing the filter pad on the bottom of the filter pan rather than over the filter screen.
Whenever the complaint is “the pump is running, but no oil is being filtered,” check the installation
of the filter pad, including that the correct size is being used. While you are checking the filter pad,
verify that the O-rings on the filter pan suction tube are present and in good condition. Missing or
worn O-rings will allow the pump to suck air and decrease its efficiency.
If the pump motor overheats, its thermal overload will trip and the motor will not start until it is
reset. If the pump motor does not start, press the red reset switch located on the front of the motor.
If the pump then starts, something caused the motor to overheat. It may be just that several frypots
in a large battery of fryers were being filtered one after the other and the pump became hot. Letting
the pump cool down for at least a half-hour is all that is required in this case. More often, the pump
overheated for one of the following reasons:
•
Shortening that remained in the pan after previous filtering solidified in the suction tube
recess in the bottom of the pan or the suction tube, itself. Adding hot oil to the pan and
waiting a few minutes will usually correct this problem. A flexible wire can be used to clean
out the suction tube and the recess in the bottom of the pan. NEVER use compressed air to
blow solidified shortening out of the suction tube!
•
The operator attempted to filter oil that was not heated. Cold oil is thicker and causes the
pump motor to work harder and overheat.
If the motor hums but the pump does not rotate, there is a blockage in the pump. Incorrectly sized or
installed paper will allow food particles and sediment to pass through the filter pan and into the
pump. When sediment enters the pump, the gears can bind up and cause the motor to overload,
tripping the thermal overload. Solidified shortening in the pump will also cause it to seize, with
similar results.
1-29
A pump seized by debris or hard shortening can usually be freed by manually moving the gears with
a screwdriver or other instrument as illustrated on the following page. Make sure power to the
pump motor is off before trying this.
1. Disconnect power to the filter system.
PUMP
Sediment
Particle
2. Remove the input plumbing from the pump.
Up for
reverse
3. Use a screwdriver to manually turn the gears.
•
•
Turning the pump gears backwards will
release a hard particle and allow its
removal.
FLOW
Down for
forward
Turning the pump gears forward will push
softer objects and solid shortening through
the pump and allow free movement of the
gears.
Filter pads that are installed incorrectly will also allow food particles and sediment to pass through
and clog the suction tube recess on the bottom of the filter pan or the suction tube, itself. Particles
large enough to block the suction tube recess or the suction tube may indicate that the crumb tray is
not being used.
The electronics of the FootPrint PRO system, illustrated in the schematic below, are simple and
straightforward.
Microswitches, which are attached to handles for
each vat and wired in parallel, provide the 24 VAC
required to activate the pump relay coil when the
handles are moved to the ON position. The
activated pump relay coil pulls in the pump motor
switch, supplying power to the pump motor.
Line VAC
Pump Heater Tape
24 VAC
Verifying Solenoid Operation
Solenoids
Proper operation of the 24 VAC manifold and
pump solenoids can be verified by removing
the pump motor lead from terminal 4 of the
pump motor relay in the filter wiring box and
then activating the oil return lever. Proper
solenoid operation will be evidenced by an
audible “click” or vibration of both the pump
solenoid and the manifold solenoid.
Micro-switches
Pump Relay Coil
Pump Motor
M
Pump Motor Switch
FootPrint PRO Schematic
1.7.6 Leakage
Leakage of the frypot will usually be due to improperly sealed high-limit thermostats, temperature
probes, and drain fittings. When installed or replaced, each of these components must be sealed with
1-30
Loctite® PST56765 sealant or equivalent to prevent leakage. In very rare cases, a leak may develop
along one of the welded edges of the frypot. When this occurs, the frypot must be replaced.
If the sides or ends of the frypot are coated with oil, the most likely cause is spillage over the top of
the frypot rather than leakage.
The clamps on the rubber boots that hold the drain tube sections together may loosen over time as
the tubes expand and contract with heating and cooling during use. Also, the boot itself may be
damaged. If the section of drain tube connected to the drain valve is removed for any reason, ensure
that its rubber and clamps are in good condition and properly fitted around the drain tube when it is
reinstalled. Also, check to ensure that the drain tube runs downward from the drain along its whole
length and has no low points where oil may accumulate.
1.8
Troubleshooting Guides
The troubleshooting guides on the following pages are intended to assist service technicians in
quickly isolating the probable causes of equipment malfunctions by following a logical, systematic
process. An additional set of operator troubleshooting guides is contained in Chapter 6 of the
BIPH52/55-MPH52/55 Series Installation and Operation Manual (P/N 819-6087). It is suggested
that service technicians thoroughly familiarize themselves with both sets.
1.8.1 Troubleshooting the 24 VAC Circuit
Prior to checking for problems associated with the 24 VAC circuit, ensure that the unit is connected
to a power supply, the drain valve is fully closed, and the controller is on and is calling for heat
(green dot appears under heat indicator and display toggles between LOW and TEMP).
NOTE: All voltage measurements must be made within 4 seconds of the unit calling for heat. If unit
does not fire within 4 seconds, ignition modules will lock out and controller must be turned off, then
on to reset.
The following processes will assist you in troubleshooting the 24 VAC circuit and ruling it out as a
probable cause:
•
24 VAC is not present on the interface board J3 pin 9 (LED 5 (GV)) and, on dual units, on
J1 pin 9 (LED 1 (GV)).
1. If LED 3 is not continually lit, the probable causes are a failed 24 VAC transformer or failed
wiring between transformer and interface board.
2. If LED 3 is continually lit, check the right PWR terminal (LED 4) for 24 VAC. On dual
units, also check the left PWR terminal (LED 2) for 24 VAC. Verify that the F2 fuse is not
blown.
a. If 24 VAC is not present, the probable cause is a failed interface board, blown fuse or a
defective heat relay.
b. If 24 VAC is present, check for 24 VAC on V1S (or V1D and V2D, if dual unit).
1-31
i. If 24 VAC is not present, check the fuses. If they are good, the probable causes are
failed ignition module(s) or a failed interface board. Replace the questionable
ignition module with one known to be good to isolate the cause.
ii. If 24 VAC is present, the probable cause is a failed interface board.
•
24 VAC is present on interface board J3 pin 9 (LED 5 (GV)) and, on dual units, on J1 pin 9
(LED 1 (GV)).
1. If 24 VAC is not present across the gas valve main coil (MV terminals), probable causes are
an open high-limit thermostat or a failed wire between the interface board and gas valve. Be
sure to check both valves on dual units. It may also be caused by a failed drain safety switch.
Check continuity of high-limit thermostat and drain safety switch. If both are zero, problem
is in wiring.
2. If 24 VAC is present across the gas valve main coil (MV terminals), the 24 VAC circuit is
okay and the problem may be with the gas valve. Be sure to check both valves on dual units.
1-32
24 VOLT CIRCUIT
With Interface Board 106-0386 and
One 807-3366 (FV) Ignition Module
24V
TRANSFORMER
J3 PIN 8
FUSE
NOTE: Some units may
be wired in this manner.
LED
3 (24V)
LED
4 (PWR)
Heat Relay
(K3 Replaceable)
IGNITION
MODULE
PWR (right side)
V1S
Left Flame
Sensor
Right Flame
Sensor
PWR (left side)
IGNITION
MODULE
High Voltage
to Left Ignitor
High Voltage
to Right Ignitor
Jumper
V2S
V1D
LED
5 (GV)
LED
J3 PIN 9
J3 PIN 9
HIGH
LIMIT
SWITCH
This switch used only with
built-in filtration systems.
DRAIN
SAFETY
SWITCH
GAS
VALVE
1-33
5 (GV)
24 VOLT CIRCUIT
With Interface Board 106-0386 and
Two 807-3365 (DV) Ignition Modules
24V
TRANSFORMER
J3 PIN 8
FUSE
LED
Heat Relay
(K2 Replaceable)
2 (PWR)
Heat Relay
(K3 Replaceable)
LED
LED
PWR
High Voltage
to Ignitor
IGNITION
MODULE
Flame Sensor
Flame Sensor
IGNITION
MODULE
High Voltage
to Ignitor
V1D
LED
LED
J1 PIN 9
J3 PIN 9
HIGH
LIMIT
SWITCH
DRAIN
SAFETY
SWITCH
4 (PWR)
PWR
V2D
1 (GV)
3 (24V)
HIGH
LIMIT
SWITCH
This switch used only with
built-in filtration systems.
DRAIN
SAFETY
SWITCH
GAS
VALVE
GAS
VALVE
LEFT VAT
RIGHT VAT
1-34
5 (GV)
1.8.2 Troubleshooting the Gas Valve
Prior to checking for problems associated with the gas valve, ensure that the unit is calling for heat.
Also, for non-CE units, verify that the gas valve is in the ON position.
The following processes will assist you in troubleshooting the gas valve and ruling it out as a
probable cause:
•
If 24 VAC is not present across gas valve main coil, the probable cause is the 24 VAC circuit.
Refer to the 24 VAC circuit troubleshooting guide.
•
If 24 VAC is present across gas valve main coil, check the incoming gas pressure and compare
to the tables in Section 2.3 of the Installation and Operation manual.
1. If incoming gas pressure is not correct, the probable cause is a problem with the gas supply
to fryer.
2. If incoming gas pressure is correct, check the outgoing gas pressure and compare it to the
tables on Page 2-4 of the Installation and Operation manual.
a. If outgoing gas pressure is not correct, the probable cause is an improperly adjusted or
failed gas valve. Adjust the valve by following the procedure “Check Burner Manifold
Pressure” in Section 1.4 of this manual.
If the valve cannot be adjusted, replace it.
b. If outgoing gas pressure is correct, the gas valve is okay.
1.8.3 Troubleshooting the Temperature Probe
CAUTION
Disconnect the M2000 computer before testing temperature probe resistances to
avoid invalid readings
Prior to checking for problems associated with the temperature probe, inspect the probe body for
damage while it is still in the frypot. Remove and replace the probe if it is bent, dented, or cracked.
Also, inspect leads for fraying, burning, breaks, and/or kinks. If found, replace the probe.
The following processes will assist you in troubleshooting the gas valve and ruling it out as a
probable cause:
Before testing the probe, determine the temperature the cooking oil using another thermometer or
pyrometer placed at the tip of the questionable probe.
•
If resistance through J3 pins 2 and 6 (J1 pins 2 and 6 for left side of dual unit) is not
approximately equal to that given in the Probe Resistance Chart for the corresponding
temperature, the probe has failed and must be replaced.
1-35
•
If resistance through J3 pins 2 and 6 (J1 pins 2 and 6 for left side of dual unit) is
approximately equal to that given in the Probe Resistance Chart for the corresponding
temperature, measure the resistance through each of the previously tested pins to ground.
1. If resistance is not 5 mega-Ohms or greater in each pin, the probe has failed and must be
replaced.
2. If resistance is 5 mega-Ohms or greater in each pin, the probe is okay.
1.9
Probe Resistance Chart
Probe Resistance Chart
For use with PRO Series fryers manufactured with Minco Thermistor probes only.
F
60
65
70
75
80
85
90
95
100
105
110
115
120
125
OHMS
1059
1070
1080
1091
1101
1112
1122
1133
1143
1154
1164
1174
1185
1195
C
16
18
21
24
27
29
32
35
38
41
43
46
49
52
F
130
135
140
145
150
155
160
165
170
175
180
185
190
195
OHMS
1204
1216
1226
1237
1247
1258
1268
1278
1289
1299
1309
1320
1330
1340
C
54
57
60
63
66
68
71
74
77
79
82
85
88
91
F
200
205
210
215
220
225
230
235
240
245
250
255
260
265
OHMS
1350
1361
1371
1381
1391
1402
1412
1422
1432
1442
1453
1463
1473
1483
1-36
C
93
96
99
102
104
107
110
113
116
118
121
124
127
129
F
270
275
280
285
290
295
300
305
310
315
320
325
330
335
OHMS
1493
1503
1514
1524
1534
1544
1554
1564
1574
1584
1594
1604
1614
1624
C
132
135
138
141
143
146
149
152
154
157
160
163
166
168
F
340
345
350
355
360
365
370
375
380
385
390
395
400
405
OHMS
1634
1644
1654
1664
1674
1684
1694
1704
1714
1724
1734
1744
1754
1764
C
171
174
177
179
182
185
188
191
193
196
199
202
204
207
1.10
Principal Wiring Connections
AIR
PRESSURE
SWITCH
(CE AND SOME
EXPORT UNITS)
N.C.
N.O.
COM
C1
LINE VOLTAGE (L1)
1
BLACK
TO T1 & J3 PIN 11
GROUND
2
GREEN
TO GROUND
LINE VOLTAGE (COM)
3
WHITE
TO T2 & C5 PIN 1
FROM TRANSFORMER BOX
24VAC
4
RED
12VAC
5
ORANGE
TO J3 PIN 3
12VAC
6
BLUE
TO J3 PIN 1
WHITE/BLACK
HOOD RELAY
7
LINE VOLTAGE (L1)
8
LINE VOLTAGE (COM)
9
1
2
TO J1 PIN 8 & J3 PIN 8
TO J3 PIN 5 (12VDC)
DRAIN SOLENOID
HEAT STRIP
BLK
3
FILTER PUMP
4
FROM TRANSFORMER BOX
5
WHT
6
7
BLK
8
GRN
9
BLK
C1 PIN 1
T1
C2 PIN 1
C1 PIN 3
T2
C2 PIN 3, C2 PIN 12
(IN COMPONENT BOX)
FILTER PUMP
SOLENOID
252 and 452's ONLY, On 352 & 552's Heat
strip is attached to pins 7 & 9 of Line
Connector C3
LEFT VAT
FROM
J1
RIGHT OR FULL VAT
TO
1
PROBE
2
J2
FROM
J2 PIN 14
J3 PIN 1
1
GROUND
2
3
COMPUTER (12VAC)
4
COMPUTER
4
RT HEAT RELAY (K2)
5
COMPUTER
5
RELAYS (12VDC) & J3 PIN 5
6
J2 PIN 15
COMPUTER
6
7
C2 PIN 13 (BL DOWN)
COMPUTER
7
8
NOT USED
9
GAS VALVE
10
C2 PIN 10 (BL UP)
K3
12
GROUND
GND
GROUND
MODULE VALVE 1
V2D
J1 PIN 9
J1 PIN 8 VIA K1
OPTIONAL DRAIN SWITCH
PWR
AD
COMPUTER
9
ALR (RIGHT)
10
COMPUTER
11
AD (LEFT)
12
J2 PIN 1
PROBE
2
J2 PIN 14
C1 PIN 5 (12VAC)
3
J2 PIN 3
LT HEAT RELAY (K1)
J2 PIN 5
5
C1 PIN 7
PROBE
6
J2 PIN 13
K5
7
C2 PIN 15 (BL DOWN)
8
PWR VIA K2
9
GAS VALVE
K5
C1 PIN 4 (24VAC)
K3
V1S OR V1D
RIGHT ALARM OUT (FULL VAT)
SOUND DEVICE
K5
10
C2 PIN 14 (BL UP)
C1 PIN 1 (L1)
11
BLOWER VIA K4
12
C5 PIN 2
LEFT ALARM OUT (DUAL VAT)
J3 PIN 6
13
COMPUTER
J1 PIN 2 & J3 PIN 2
14
COMPUTER
J1 PIN 6
15
COMPUTER
K4
GROUND
MODULE VALVE 1 (DUAL VAT)
AS
V2S
GND
GROUND
V1D
J3 PIN 9
J3 PIN 8 VIA K2
PWR
MODULE 25V
OPTIONAL DRAIN SWITCH
ALR
J2 PIN 10
MODULE VALVE 1 (FULL VAT)
V1S
J3 PIN 9
MODULE 25V
J2 PIN 12
TO
1
4
8
11
J3
C1 PIN 6 (12VAC)
GROUND
3
K3
V2D
FROM
COMPUTER (12VAC)
J3 PIN 3
PROBE
C1 PIN 4 (24VAC)
TO
C3
1
LINE VOLTAGE L1
2
GROUND
3
LINE VOLTAGE COM
TO FILTER BOX
4
C2
FROM T1, JUMPERED TO PIN 8
1
GROUND, JUMPERED TO PIN 11
2
JUMPERED TO PIN 9 AND T2
3
JUMPERED TO PIN 6
4
JUMPERED TO PIN 7
5
5
K
AC
BL
N
EE
GR E
IT
WH
E
U
BL E
G
AN
OR
OIL RETURN SWITCH
6
7
8
9
RED
HEAT STRIP
ON 352 0R 552
WHITE & BLACK
JUMPERED FROM PIN 4
6
BLUE
TO OIL RETURN SWITCHES OF ADJACENT FRYERS
JUMPERED FROM PIN 5
7
ORANGE
TO OIL RETURN SWITCHES OF ADJACENT FRYERS
JUMPERED FROM PIN 1
8
JUMPERED FROM PIN 3
FROM J1 PIN 10
9
10
GROUND, JUMPERED FROM PIN 2
11
FROM T2, JUMPERED TO PINS 3 & 9
12
C5
FROM J1 PIN 7
13
C1 PIN 3
1
FROM J3 PIN 10
14
J3 PIN 12
2
FROM J3 PIN 7
15
1-37
BLOWER
1.11
Wiring Diagrams
1.11.1 Main
The Heat Strip is
not present here on
352/355’s and
552/555’s.
HEAT STRIP
TO TRANSFORMER
BOX
COMPUTER OR CONTROLLER
FILTER
PUMP
SOLENOID
TO J2
FILTER
PUMP
SOUND DEVICE
GND
J2
SENSE 2
24V
RELAY
FV OR
RIGHT DV
HEAT &
BLOWER
RELAY
K2
ALARM(GND)
VALVE(GND)
24VAC(GND)
GV
K3
GND
V1D
PWR
ALR
V1S
PWR
GND
ALARM
VALVE
24VAC
SPARK 2
COMPUTER GROUND
DETAIL
WHT
K4
RIGHT
BL
RELAY
BLK
K1
GND GV LEFT
BL
V2D
RELAY
PWR
AD
AS PWR LEFT DV
HEAT &
V2S
BLOWER
TO J3 PIN2
J3
TO J3 PIN6
AIR
12V
GND
FULL VAT
SENSE 1
3
TO J3 PIN9
1
RED
SOUND
GND 2
J1
TEMP
PROBE
GND
(BURNER)
HIGH
LIMIT
SPARK 1
BLK
A
A
FULL VAT
SOUND DEVICE
BLK
FOR UNITS WITH NO
SAFETY DRAIN SWITCH
ADD IN-LINE SPLICE
RIGHT IGNITOR
LEFT IGNITOR
SAFETY
DRAIN
SWITCH
NC
NO COM
BLK
MV
MV
BLK
SOUND
1
2
3
AIR
12V
SPARK 2
RELAY
K2
GND
(BURNER)
24V
FV OR
RIGHT DV
HEAT &
BLOWER
RELAY
ALARM(GND)
VALVE(GND)
24VAC(GND)
PWR
GND
K3
SPARK 2
COMPUTER GROUND
DETAIL
SPARK 1
GND
(BURNER)
DUAL VAT
SPARK 1
A
RED
WHT
A
ALARM
VALVE
24VAC
TEMP
PROBE
DUAL VAT
LEFT IGNITOR
HIGH
LIMIT
BLK
RIGHT IGNITOR
OIL RETURN HEATER FRONT
LINE VOLTAGE (L1)
T2
LINE VOLTAGE(COM)
1 2
TO J3 PIN12
DETAIL A-A
T1
TO C2 PIN1
TO C2 PIN12
TO C2 PIN3
SAFETY
DRAIN
SWITCH
COM
NC
NO
BLK
BLK
WHITE
FOR UNITS WITH NO
SAFETY DRAIN SWITCH
ADD IN-LINE SPLICE
ALARM(GND)
GV
GND
VALVE(GND)
V1D
MV
24VAC(GND)
PWR
BLOWER
TO J1 PIN9
GND
GV
GND
V1D
PWR
ALR
V1S
TO J1 PIN8
24VAC
K4
RIGHT
BL
RELAY
TO J1 PIN2
K1
GND GV LEFT
BL
V2D
RELAY
PWR
AD
AS PWR LEFT DV
HEAT &
V2S
BLOWER
ALARM
VALVE
SENSE 1
J3
J1
ALARM(GND)
VALVE(GND)
24VAC(GND)
SENSE 2
24VAC
FUSE
ALR
V1S
PWR
Refer to "PRINCIPAL WIRING CONNECTIONS"
on Page 1-37 for detail of connection points
J1, J2, J3, C2, C3, and C5.
INSET
HONG KONG
UNITS ONLY
8051315C/ 8051526B
1-38
GAS
VALVE
MV
BLK
BLK
SENSE 1
GAS
VALVE
GND
J2
GND
SENSE 2
1.11.2
Transformer / Filter Boxes
1.11.2.1 MPH152/155 Transformer / Filter Box
1-39
ORANGE
1-40
WHITE
RED
BLACK
GREEN
GREEN TO
BODY
RED
HOOD
RELAY
CAUTION: THIS PLUG IS NOT BEING USED IN ITS
STANDARD 5-WIRE 120/208V NEMA L-21-20P
CONFIGURATION. DO NOT CONNECT TO A DTANDARD
120/208V 5 WIRE POWER SUPPLY.
BLK
HOOD
RELAY
ORG
120
VAC
WHT
NEUTRAL
8051523D
1.11.2.2 BIPH252/255 and 452/455 Transformer / Filter Box (Domestic)
8051340C
1.11.2.3 BIPH252/255 and 452/455 Transformer / Filter Box (International)
1-41
ORANGE
1-42
WHITE
RED
BLACK
GREEN
ORG
120
VAC
GREEN TO
BODY
RED
HOOD
RELAY
CAUTION: THIS PLUG IS NOT BEING USED IN ITS
STANDARD 5-WIRE 120/208V NEMA L-21-20P
CONFIGURATION. DO NOT CONNECT TO A
DTANDARD 120/208V 5 WIRE POWER SUPPLY.
BLK
HOOD
RELAY
WHT
1.11.2.4
BIPH352/355 Transformer / Filter Box (Domestic)
Pump Heater
Strip Wires
1.11.2.5 BIPH352/355 Transformer / Filter Box (International)
1-43
not
applicable to fryers
manufactured before
6/96
not
applicable to
fryers
manufactured
before 6/96
Simplified Wiring Diagrams
1.12.1
BIPH52/55 Series Full Vat
1-44
M
T
(ONE DUAL FUNCTION HEAT/BLOWER RELAY (K3))
1.12
1-45
LEFT
IGNITOR
H
V
TD
GND
BNR
VALVE
GND
25V+
ALARM
LEFT IGNITION
MODULE
2
ALARM
V2D
L
PWR
J1
AIR SWITCH ONLY ON
CE AND SOME
EXPORT UNITS
DRAIN SAFETY
SWITCH ONLY ON
UNITS WITH BUILT-IN
FILTRATION
M
T
HEAT
L-HEAT
LED 2
AIR
LED 3
24V
F2
FUSE
8
TROUBLE
ON/OFF
ON/OFF
TROUBLE
A
M
11
14
13
4
10
5
3
1
POWER
11
14
13
4
10
5
3
1
HEAT
R-HEAT
LED 4
2
T
2
2
F1
12
12
12
A
K2
HEAT
RELAY
11
6
1K
47K
1/50
4
9
6
R
PWR
J3
J2
V1D
ALARM
TEMP
PROBE
6
POWER
AIR LED not
applicable to fryers
manufactured before
6/96
LED 5
R-GV
9
8
24V
BLOWER
14
A
LED 6
3
LED 1
1
12V
5
L-GV
9
HIGH
LIMIT
4
GV
OPTIONAL
AIR SWITCH
14
1K
47K
1/50
8
12V
DRAIN SAFETY
SWITCH
15
A
K1
HEAT
RELAY
4
HIGH
LIMIT
GV
DRAIN SAFETY
SWITCH
15
6
TEMP
PROBE
LINE
VOLTAGE
HOOD
RELAY
BIPH52/55 SERIES – DUAL-VAT – AFTER JULY 1999
SD
H
V
TD
RIGHT
IGNITOR
PROBE CIRCUIT
12 VAC
24 VAC
SOUND DEVICE CIRCUIT
12 VDC
LINE VOLTAGE
BNR
GND
VALVE
GND
25V+
ALARM
RIGHT IGNITION
MODULE
F1 Fuse not
applicable to
fryers
manufactured
before 6/96
1.12.2
BIPH52/55 Dual Vat
T
D
H
V
ALARM
1-46
LEFT
IGNITOR
GND
BNR
VALVE
GND
25V+
LEFT IGNITION
MODULE
AIR SWITCH ONLY ON CE
AND SOME EXPORT UNITS
DRAIN SAFETY SWITCH
ONLY ON UNITS WITH
BUILT-IN FILTRAION
V2S
1
2
LED 6
12V
1
1
12V
2
LED 2
ALARM
L
PWR
L HEAT
HOOD
RELAY
4
5
3
3
ON/
OFF
POWER
AIR
OPTIONAL
AIR
SWITCH
AIR LED not
applicable to fryers
manufactured before
6/96
3
LINE VOLTAGE
5
5
A
11
14
14
TROUBLE
10
10
1K
47K
1/50
K3
HEAT
RELAY
LED 3
24V
F2
FUSE
8
24V
13
13
4
4
M
T
2
11
11
BLOWER
HEAT
12
F1 Fuse not
applicable to
fryers
manufactured
before 6/96
F1
LED 5
R-GV
9
HIGH
LIMIT
GV
DRAIN SAFETY
SWITCH
V1S
J2
ALARM
LED 4
J3
R
PWR
R-HEAT
6
TEMP
PROBE
BIPH52/55 SERIES – FULL-VAT –AFTER JULY 1999
SD
VALVE
H
V
TD
PROBE CIRCUIT
12 VAC
24 VAC
SOUND DEVICE CIRCUIT
12 VDC
LINE VOLTAGE
RIGHT
IGNITOR
GND
BNR
GND
25V+
ALARM
RIGHT IGNITION
MODULE
1.12.3 BIPH52/55 Series Full Vat (Australia and Pacific Rim)
BIPH52/55-MPH52/55 GAS FRYERS
CHAPTER 2: PARTS LIST
2.1
Accessories
15
6
7
14
2
9
1
8
4
3
11
12
13
16
10
ITEM
1
2
3
4
*
5
6
7
8
9
*
10
11
12
13
14
15
*
16
17
PART #
803-0271
803-0099
803-0133
803-0132
803-0136
810-0070
810-0073
803-0197
803-0209
806-3407
806-3068
826-0993SP
910-7443
810-0478
806-1698SP
806-1699
810-0074
810-0073
810-2793
809-0171
809-0921
826-0900
826-1045
17
18
19
5
COMPONENT
Basket, Twin
Basket, Full (cannot be used with basket lifts)
Basket Support Rack, Dual Vat
Basket Support Rack, Full Vat
Basket Support Screen, Full Vat (screen w/handle used in place of Item 4)
Coupling, Gas Line Female Quick Disconnect
¾-inch
1-inch
Cleanout Rod, 27-inch (Fryer's Friend)
Brush, Frypot
Cover, Frypot, Dual Vat
Cover, Frypot, Full Vat
Handle Kit, Frypot Cover (includes handle and screws)
Connecting Strip, Frypot
Gas Line, 1-Inch Dormont Flexible
36-Inch (for gas line only (w/o Items 12 and 13), use 810-0088)
48-Inch (for gas line only (w/o Items 12 and 13), use 810-0085)
Quick-Disconnect Fitting, 1-Inch Male
Quick-Disconnect Fitting, 1-Inch Female
Hanger, Basket
Thumbscrew, ¼-20 X 1⅜-inch Basket Hanger
Spacer, Basket Hanger
Kit, Chain Restraint
Bushing, Flexible Gas Line (813-0032)
2-1
ITEM
PART #
18
812-1378
19
812-1374
*
803-0219
*
803-0170
*
803-0002
*
826-1157
* Not illustrated.
COMPONENT
Drain Extension, Non-Filter Full Vat Fryer
Drain Extension, Non-Filter Dual Vat Fryer
Pad, McDonald’s FPIII Universal Filter
Filter Pack, Paper – 100 Sheets
Powder, Filter – 80 Packages
Kit, Fuse and Fuse Puller (2 Fuses)
2-2
2.2
Cabinetry
2.2.1
Backs, Doors, Flue Caps, Sides, Top Caps, Standoffs and Cap-N-Splash Assemblies
18
1
17
2
5
9
3
8
7
20
15
16
6
22
25
14
4
23
24
9
13
11
12
10
21
19
2-3
ITEM
1
PART #
210-6581
200-6581
2
210-6580
200-6580
3
210-6542
200-6540
4
210-6541
200-6539
5
210-6545
200-6547
6
7
8
9
10
11
12
13
14
15
210-6544
200-6546
200-6419
200-5865
826-1374
106-3966
809-0266
210-6816
823-4729
823-4730
210-5549
106-3579
106-3537
106-3535
106-3536
16
210-5525
106-3539
106-3540
106-3542
106-3543
17
211-6510SP
201-6633
18
212-6510SP
202-6633
19
824-1310
824-1357
823-4702
823-4704
823-4706
COMPONENT
Back, Single Upper
Stainless Steel
Cold Rolled Steel
Back, Single Lower
Stainless Steel
Cold Rolled Steel
Back, Double Upper (for 2-, 4-, and 5-station fryers – does not include Items 7-9)
Stainless Steel
Cold Rolled Steel
Back, Double Lower (for 2-, 4-, and 5-station fryers – does not include Items 7-9)
Stainless Steel
Cold Rolled Steel
Back, Triple Upper (for 3- and 5-station fryers – does not include Items 7-9)
Stainless Steel
Cold Rolled Steel
Back, Triple Lower (for 3- and 5-station fryers – does not include Items 7-9)
Stainless Steel
Cold Rolled Steel
Clip, Flue Support
Support, Flue Cap
Screw, #10 X ½-inch Hex Washer Head (Pkg. of 25)
Door, Left or Right (Left shown – move handle to bottom for Right)
Screw, #10 X ½-inch Phillips Truss Head
Handle, Door
Hinge, Left Door Upper
Hinge, Right Door Upper
Flue Cap-Stainless Steel (Does not include Item 27)
Single Fryer
2-Station Fryer
3-Station Fryer
4-Station Fryer
5-Station Fryer
Flue Cap - Aluminized Steel for use with Cap-N-Splash
Single Fryer
2-Station Fryer
3-Station Fryer
4-Station Fryer
5-Station Fryer
Side, Left Standard Cabinet
Stainless Steel
Enameled Steel
Side, Right Standard Cabinet
Stainless Steel
Enameled Steel
Top Cap (Cap for 5-staion fryer shown)
Single Fryer (use 824-1689 for fryers mfd. After 3.15.06)
2-Station Fryer (use 824-1690 for fryers mfd. After 3.15.06)
3-Station Fryer (use 823-5733 for fryers mfd. After 3.15.06)
4-Station Fryer (use 824-5734 for fryers mfd. After 3.15.06)
5-Station Fryer (use 824-5735 for fryers mfd. After 3.15.06)
2-4
ITEM
20
PART #
200-6582
200-6553
200-6554
200-6555
200-6556
21
22
23
24
25
823-3066
823-3067
823-3068
823-3070
823-3069
826-1351
809-0171
809-0402
809-0535
COMPONENT
Standoffs
Single Fryer
2-Station Fryer
3-Station Fryer
4-Station Fryer
5-Station Fryer
Cap-N-Splash Assemblies
Single Fryer
2-Station Fryer
3-Station Fryer
4-Station Fryer
5-Station Fryer
Nut Retainer, ¼-20 (Pkg. of 10 – for basket hanger thumbscrew) for Std. Fluecap
Thumbscrew, ¼-20 x 1⅜-inch (for use on Standard Fluecap)
Thumbscrew, ¼-20 x ½-inch (for use on Cap-N-Splash Assembly)
T-Nut, ¼-20 x 7/16-inch (for use on Cap-N-Splash Assembly)
2-5
2.2.2 Filter Cabinet Bases, Casters, Framing, and Related Components
The 5-station cabinet illustrated is typical of
all BIPH52/55 Series Gas filter cabinets. All
base and framing components used in
BIPH52/55 Gas filter cabinets are identified,
but not all components are used in every
configuration.
3
1
5
2
4
6
7
8
19
11
9
37
15
12
31
35
10
34
36
14
13
34
18
All cabinet screws, unless otherwise
indicated, are #10 x 1/2-inch Hex
Washer Head P/N 826-1374, sold in
packages of 25.
17
16
21
23
20
25
22
27
31
Not shown is the Base Shield
P/N 200-6036
24
26
25
29
See Page 2-4 for upper hinges.
25
28
NOTE:
2- and 3-station
fryers have 4 casters; 4- and
5-station fryers have 6.
30
31
32
32
33
33
2-6
ITEM
1
2
3
4
5
6
7
8
9
10
11
12
13
14
15
16
17
18
19
20
21
22
23
24
25
26
27
28
29
30
31
32
33
34
35
36
37
*
PART #
106-4303
106-4304
106-4305
106-4306
210-5819
210-6698
210-5046
210-5623
900-7730
900-9430
900-9318
200-5474
200-5478
200-9217
200-6031
200-2235
200-6550
200-1953
200-6507
810-1105
810-2890
810-2891
810-2892
810-2893
200-2213
200-9818
200-6326
200-7031
201-9467
202-9467
823-4651
823-4652
200-2102
823-4653
200-6609
200-6610
200-5473
823-4510
823-4630
823-4629
823-4628
823-4732
823-4733
810-0944
810-0327
809-0953
809-0191
809-0417
201-6720
200-6697
202-6720
200-6036
COMPONENT
Frame, Control Panel, Two Station, (use 106-5221SP mfd. After 3.15.06)
Three-Station, Standard (use 106-5018SP mfd. After 3.15.06)
Four-Station, Standard (use 106-5019 mfd. After 3.15.06)
Five-Station, Standard (use 106-5020 mfd. After 3.15.06)
Bezel, Two-Controller
Bezel, Three-Controller
Bezel, One-Controller
Bezel, Blank
Brace, Cabinet Top Two-Station
Three-Station
Four-Station
Five-Station
Divider, Cabinet
Post, Cabinet Front
Post, Filter Door
Bracket, Component Box Support
Post, Cabinet Rear
Brace, Front Cabinet
Support, Cross Cabinet
Magnet, Door
Manifold, Rear (for units w/ filtration also see page 2-17 for additional parts)
Two-Station
Three-Station
Four-Station
Five-Station
Bracket, Rear Bridge Support
Bridge, Filter Pump
Gusset, Left Rear Corner
Gusset, Right Rear Corner
Support, Left Filter Rail
Support, Right Filter Rail
Slide, Filter Pan Lid Left
Slide, Filter Pan Lid Right
Brace, Side Channel
Channel, Side Base
Channel, Front Base (not used in two-station fryers)
Three-Station
Four-Station
Five-Station
Channel, Rear Base Two-Station
Three-Station
Four-Station
Five-Station
Hinge, Lower Left
Hinge, Lower Right (attach to Hinge Bracket 200-5478 in 4- & 5-station fryers)
Caster w/Brake, 8½ to 10-inch Adjustable (3-inch wheel)
Caster w/o Brake, 8½ to 10-inch Adjustable (4-inch wheel)
Bolt, ¼-20 x ¾-inch Hex Head
Washer, ¼-inch Lock
Nut, ¼-20 Flange
Mount, Rear Flush Rod Offset, Left
Mount, Rear Flush Rod Holder, Center
Mount, Rear Flush Rod Offset, Right
Base Shield
2-7
2.2.3 Non-Filter Cabinet Bases, Casters, Framing, and Related Components
The 5-station cabinet illustrated is typical of
all MPH52/55 Series Gas non-filter cabinets.
All base and framing components used in
MPH52/55 Series Gas non-filter cabinets are
identified, but not all components are used in
every configuration.
3
1
5
2
2
6
7
8
11
10
13
22
All
cabinet
screws,
unless
otherwise
indicated, are #10 x 1/2inch Hex Washer Head
P/N 826-1374, sold in
packages of 25.
14
12
24
15
17
15
19
15
18
See Page 2-4 for upper hinges.
NOTE:
2- and 3-station
fryers have 4 casters; 4- and
5-station fryers have 6.
20
21
22
22
23
23
2-8
ITEM
1
2
3
4
5
6
7
8
9
10
11
12
13
14
15
16
PART #
106-4302
106-4303
106-4304
106-4305
106-4306
210-5819
210-6698
210-5046
210-5623
200-5498
900-7730
900-9430
900-9318
200-5474
200-5478
200-6614
200-2235
200-6550
200-1953
200-6507
810-1105
823-3223
823-4691
823-4693
823-4694
823-4653
200-6616
200-6623
200-6624
200-6625
200-6627
17
18
19
20
21
22
23
24
200-6626
200-6628
823-4732
823-4733
810-0944
810-0327
809-0953
809-0191
809-0417
COMPONENT
Frame, Control Panel
Single-Station, Standard (use 106-5016 mfd. After 3.15.06)
Two-Station, Standard (use 106-5221SP mfd. After 3.15.06)
Three-Station, Standard (use 106-55018SP mfd. After 3.15.06)
Four-Station, Standard (use 106-5019 mfd. After 3.15.06)
Five-Station, Standard (use 106-5020 mfd. After 3.15.06)
Bezel, Two-Controller
Bezel, Three-Controller
Bezel, One-Controller
Bezel, Blank
Brace, Cabinet Top
Single Fryer
Two-Station
Three-Station
Four-Station
Five-Station
Divider, Cabinet
Post, Cabinet Front
Bracket, Component Box Support
Post, Cabinet Rear
Brace, Front Cabinet
Support, Cross Cabinet
Magnet, Door
Manifold, Rear (not present in single fryers)
Two-Station
Three-Station
Four-Station
Five-Station
Channel, Side Base
Channel, Front Base
Single Fryer (also used as rear base channel in single-station fryers)
Two-Station (also used as rear base channel in single-station fryers)
Three-Station (also used as rear base channel in single-station fryers)
Four-Station
Five-Station
Channel, Rear Base
Four-Station
Five-Station
Hinge, Lower Left
Hinge, Lower Right (attach to Bracket 200-5478 in 3-, 4-, & 5-station fryers)
Caster w/Brake, 8½ to 10-inch Adjustable (3-inch wheel)
Caster w/o Brake, 8½ to 10-inch Adjustable (4-inch wheel)
Bolt, ¼-20 x ¾-inch Hex Head
Washer, ¼-inch Lock
Nut, ¼-20 Flange
2-9
2.3
Controllers and Associated Components
1
2
1
1
2
ABC
ITEM
1
PART #
106-1269
106-0672
106-5950
*
807-3520
* Not illustrated.
3
DEF
1
JC
4
GHI
5
JKL
6
MNO
7
PQR
8
STU
9
VWX
2
0
YZ-
* -
COMPONENT
Computer, McDonald’s M2000 Gas Fryer
Full Vat (Domestic U.S.) Can also be programmed for Dual Vat.
Full Vat (CE) Can also be programmed for Dual Vat.
Full Vat (CE) Can also be programmed for Dual Vat (Australia Only)
M2000 Speaker
2-10
2.4
Drain, Filtration, and Oil Return System Components
2.4.1 Filtration System Components
2-11
ITEM
PART #
1
106-2617SP
826-1980
823-3930SP
813-0568
826-1392
810-2198
826-1372
826-1979
810-2012
200-2240
810-2183
810-2091
823-5146
823-5249
823-4678
823-4708
1a
2
3
4
5
6
7
8
9
10
11
12
13
14
15
16
17
18
19
20
21
22
23
24
25
26
27
823-4638
823-4640
823-4624
823-4642
823-4639
823-4641
823-4625
823-4643
200-6473
200-6474
809-0247
816-0625
809-0969
810-2493
811-1071
823-3879
810-1055
810-1668
813-0530
813-0838
807-2484
810-2773
810-2787
813-0165
810-1680
813-0265
813-0342
813-0298
826-1264
826-1785
826-1712
826-1756
826-1270
826-1755
COMPONENT
Pan Assembly, FootPrint Pro Filter (incl. O-rings, rollers, nuts & crumb tray)
Pan Assembly – No Screen
Pan Assembly, Filter
Plug, ⅛-inch NPT Socket Head
O-Ring (two required) (Pkg. of 5)
Roller, Filter Pan
Nut, ¼-20 Hex Flange (Pkg. of 10)
Kit- Contains four each of roller 810-2198 and ¼-20 Flange Nut 809-0059
Rail Set, Filter Pan Roller (includes one left and one right)
Screen, Sana Grid
Ring, Filter Pad Hold-Down Ring (11.20-inch X 19.10-inch)
Ring, Filter Paper Hold-Down Ring (13.47-inch X 21.41-inch)
Tray, Filter Pan Crumb
Lid, Filter Pan
Tube, 3-inch Center Drain (Open Both Ends)
Closed One End
Tube, 3-inch Round Drain (823-4625 illustrated)
Dual Vat, Long (one end closed)
Dual Vat, Long (open both ends)
Dual Vat, Short (one end closed)
Dual Vat, Short (open both ends)
Full Vat, Long (one end closed)
Full Vat, Long (open both ends)
Full Vat, Short (one end closed)
Full Vat, Short (open both ends)
Spreader, Long (open both ends, no drain valve connection)
Spreader, Short (open both ends, no drain valve connection)
Nut, 8-32 Hex Keps
Sleeve, Round Drain Connector
Clamp, Round Drain Sleeve
Elbow, ¼-inch NPT X 90° Tube Compression
Tube, ¼-inch OD Teflon Manifold Vent
Suction Tube, FootPrint Pro Female
Flexline, ⅝-inch OD X 11.50-inch
Adapter, ⅝-inch OD X ½-inch Male
Tee, ½-inch X ½-inch X ¼-inch Reducing
Nipple, ¼-inch NPT Close
Solenoid Valve w/Female Pins
Adapter, ½-inch OD Flare x ¼-inch NPT
Flexline, ½-inch OD X 5.00-inch
Elbow, ½-inch NPT X 90° Street
Flexline, ⅝-inch OD x 11.50-inch
Nipple, ½-inch NPT X 2.50-inch
Elbow, ½-inch NPT X 45° Street
Nipple, ½-inch NPT X 2.00-inch
Pump and Gasket Kit (for gasket only, order P/N 816-0093)
Motor and Gasket Kit, 50/60 Hz (for gasket only, order P/N 816-0093)
100V
115V
208V
220-240V
250V
2-12
2.4.2 Drain Valves and Associated Components
2-13
ITEM
1
*
2
3
4
5
6
7
8
9
10
11
12
13
14
15
16
17
18
19
20
21
22
23
24
25
26
27
28
29
30
31
32
PART #
810-1569
810-1427
806-7915SP
806-7916SP
809-0589
810-1427
810-1568
810-1567
106-3760SP
106-5607SP
106-5606SP
816-0135
810-1018
806-8137
816-0220
807-2103
901-2348
826-1366
824-1602
900-2936
809-0540
816-0639
200-6496
810-1114
809-0196
810-1165
900-2934
809-0539
824-1637
824-1636
106-2671
810-1338
812-1226SP
812-1227
COMPONENT
Valve Assembly, 1.25-inch Full-Vat Non-Filter Drain (includes handle)
Lock Pin Handle for 1.25-inch Valve Assembly
Valve Assembly, 1-inch Left Dual-Vat Non-Filter Drain (complete assembly)
Valve Assembly, 1-inch Right Dual-Vat Non-Filter Drain (complete assembly)
Nut, ½-13 2-Way Lock (used on non-filter drain valves)
Handle w/Lock Pin, Full Vat
Handle w/Lock Pin, Left Drain Valve Dual Vat
Handle w/Lock Pin, Right Drain Valve Dual Vat
Valve Assembly, 1.25-inch Full-Vat w/Filter Drain (complete assembly)
Valve Assembly, 1-inch Left Dual-Vat w/Filter Drain (complete assembly)
Valve Assembly, 1-inch Right Dual-Vat w/Filter Drain (complete assembly)
O-Ring, Drain Valve
Valve, 1.25-inch Drain
Bracket Assembly, Drain Safety Switch
Insulation, Drain Safety Switch
Microswitch, Lever Activated
Cover, Drain Safety Switch
Nut, 4-40 Hex Keps (Pkg. of 25)
Handle, Full-Vat Drain Valve
Retainer, Full-Vat Drain Valve Nut
Nut, ½-13 2-Way Lock
Grip, Drain Valve Handle
Support, 3-inch Drain Tube
Valve, 1-inch Dual-Vat w/Filter Drain
Washer, ⅜-inch Flat
Washer, ⅜-inch Teflon
Retainer, Dual-Vat Drain Valve Nut
Nut, ⅜-16 2-Way Lock
Handle, Left Dual-Vat Drain Valve
Handle, Right Dual-Vat Drain Valve (Must order item 16 and item 30 to fit)
Bracket Assembly, Dual-Vat Drain Safety Switch
Valve, 1-Inch Dual-Vat Non-Filter Drain
Drain Valve Extension
Full-Vat (1.25-inch)
Dual-Vat (1-inch)
2-14
2.4.3 Rear Flush Oil Return Line Components
2-15
ITEM
1
2
3
4
PART #
106-3452
106-3453
810-2493
809-0601
211-6701
212-6701
5
6
7
8
*
9
9a
10
11
12
13
14
15
16
17
18
19
20
21
22
23
24
25
901-2772
902-2772
813-0165
813-0087
810-2201
900-2935
810-1668
810-2786
807-2484
810-2890
810-2891
810-2892
810-2893
813-0156
816-0220
807-4101
826-1366
826-1359
809-0250
200-8745
807-0125
813-0700
816-0643
810-1067
810-2787
810-1680
811-1071
COMPONENT
Valve Assembly, Microswitch and Ball Valve
Valve Rear Flush Assembly, Left Side
Valve Rear Flush Assembly, Right Side
Elbow, 90° x ¼-inch
Clip, Rod End Clevis
Shaft, Rear Flush Valve
For use in Left oil return valve assemblies.
For use in Right oil return valve assemblies.
Handle, Rear Flush Valve
For use in Left oil return valve assemblies.
For use in Right oil return valve assemblies.
Elbow, 90° x ½-inch Street
Nipple, 1½-inch BM NPT
Valve, ½-inch Ball
Oil Return Valve Nut Retainer
Adapter, Male ⅝-inch Flexline to ½-inch NPT Male
Adaptor, ½-inch Flare x ½ -inch NPT
Valve, ¼-inch NPT Solenoid Vent
Manifold, BIPH52 Rear Flush Oil Return
Two-Station Fryer
Three-Station Fryer
Four-Station Fryer
Five-Station Fryer
Cap, ½-inch Pipe
Insulation, Rear Flush Switch
Microswitch, Lever Activated
Nut, 4-40 Keps Hex (Pkg. of 25)
Screw, 4-40 x ¾-inch Slotted Round Head (Pkg. of 25)
Nut, 6-32 Keps Hex
Cover, Microswitch Rear Flush
Bushing, .50 ID Heyco SB-750-8 Nylon
Nipple, ¼ NPT x 3-inch
Grip, Oil Return Handle
Flexline, ⅝-inch OD x 8.50-inch Oil Return
Flexline, ½” x 5.00-inch Pump to Oil Return Manifold
Flexline, ⅝-inch OD x 6.50-inch Oil Return Manifold to Pump
Tube, ¼-inch OD Teflon Manifold Vent
2-16
19
10
4
9
2-17
19
15
5
22
22
26
11
24
17
13
25
1
7
3
15
20
10
2
1
7
15
20
17
24
16
11
21
28
23
25
2
9
19
6
22
Left module is not present in full-vat units.
See NOTE 1 on Page 2-23.
28
21
U.S., Canadian, and Mexican Units
CE and Non-CE Export Units Except Austraila and Hong Kong
23
18
10
21
12
2
2
22
21
1
3
7
5
15
17
24
16
17
27
24
13
16
Hong Kong Units
20
Australian Units
8
21
6
21
12
28
23
10
23
21
25
21
25
22
2.5
Electronics and Electrical Components
(for Controllers, Page 2-10)
2.5.1 Component Boxes
ITEM
1
2
3
4
*
*
5
6
7
8
9
10
PART #
810-1164
200-5996
807-1926
807-3483
826-2024
826-1721
807-3484
106-0531SP
816-0217
807-2971
807-1006
807-3366†
807-3365†
COMPONENT
Block, One-Piece Screwless Terminal
Box, One-Piece Component
Bushing, .875-inch Split
Cable, 21-inch Ignition H50/H52 –For 807-3366/3365 Modules
Cable, Ignition - 1 wire / 1 rajah
Cable, Ignition – 2 wire / 2 rajah
Connector, Rajah
Fuse Assembly, Inline
Insulation, Terminal Block Paper
Ignition Module, Australian
Ignition Module, CE and Non-CE export (except Australia, Canada, HK, Mexico)
Ignition Module, Dual-Spark Full-Vat (U.S., Canadian, HK, and Mexican units)
Ignition Module, Single-Spark Ignition Module Dual-vat (U.S., Canadian, HK,
and Mexican units)
11
826-2264
Interface Board Kit; U.S., CE and non-CE (except Hong Kong)
106-6706
Interface Board SMT, U.S., CE and non-CE (except Hong Kong)
807-4330
Sound Device/Speaker Adapter Harness SMT
807-4343
Wire Harness, SMT Interface Board to Ignition Module
12
106-0387
Interface Board, Australian
13
806-4973
Interface Board, Hong Kong
14
807-1359
Mount, Ty-Wrap
15
826-1366
Nut, 4-40 Keps Hex (Pkg. of 25)
16
809-0250
Nut, 6-32 Keps Hex
17
807-0833
Relay, DPDT 5A 12VDC Latch (See NOTE 1.)
18
806-2071
Cable, 15-pin Computer to Interface Board
19
809-0441
Screw, #8 X 1½-inch Hex Washer Head
20
826-1359
Screw, 4-40 X ¾-inch Slotted Round Head (Pkg. of 25)
21
809-0098
Screw, 6-32 X 1¼-inch Slotted Round Head
22
826-1346
Spacer, Ignition Module (Pkg. of 10)
23
810-2763
Spacer, Interface Board
24
810-2243
Spring, Relay Retaining
25
826-1337
Tab, ¼-inch Terminal (Pkg. of 5)
26
807-1948
Ty-Wrap
27
806-6085SP Wire Assembly, Ignition Module
28
807-3843
Fuse 3A 250V Domestic
807-3293
Fuse 5A 125V International Only
*
807-1200
Ignition Wire, 27”
*
807-1878
Ignition Wire, 19”
*
807-3520
Sound Device, High Output
* Not illustrated.
† For Dual-vat units, use 807-3365 Single Spark Ignition Module (see NOTE 1).
NOTE 1: U.S., Canadian, Hong Kong, and Mexican units use two different modules depending upon the
configuration of the frypot. Dual-Vat units use two 807-3365 Single-Spark Ignition Modules. Full-Vat units
use one 807-3366 Dual-Spark Ignition Module. Also, in full-vat units, only one latch relay (Item 17) is used,
located in the lower right socket.
2-18
2.5.2 Transformer Boxes
2-19
14
7
8
37
24
F
28
5
25
22
19
11
18
36
30
30
13
16
35
30
30
19
26
30
31
32
19
33
30
2
9
14
7
8
37
24
G
28
5
38
25
22
19
11
39
36
30
30
13
35
30
19
26
30
31
32
19
33
30
19
30
2
6
2.5.2 Transformer Boxes Continued
2-20
ITEM
PART #
A
106-1380
B
106-3818
C
106-4888
D
106-3819
E
106-3817
F
106-3824
G
106-3823
1
106-3820
2
106-3821
3
106-1011
4
106-1016
5
106-3827
6
106-4990
7
106-3825
8
106-3826
9
106-3316
10
200-1415
11
200-6721
12
200-2318
13
807-0012
14
807-0070
15
807-0155
16
807-0680
17
807-0800
18
807-1973
19
807-1999
20
807-2176
21
809-0052
22
826-1362
23
826-1363
24
809-0123
25
826-1389
26
826-1366
27
809-0247
28
826-1376
29
826-1359
30
809-0360
31
809-0656
32
810-1164
33
816-0217
34
824-1242
35
824-1301
36
807-1683
37
807-0157
38
816-0219
39
810-1163
40
106-4894
41
106-4893
Continued on Next Page
COMPONENT
Box Assembly, Transformer
100-120V FMPH152/155, FMPH352/355, FMPH452/455
100-120V BIPH 252/255, BIPH 452/455, FMPH252/255
100-120V BIPH 352/355
208-240V BIPH 252/255 and BIPH 452/455 CE/Non-CE Export
250V BIPH 252 and BIPH 452 CE/Non-CE Export
208-240V BIPH 352/355 CE/Non-CE Export
250V BIPH 352/355 CE/Non-CE Export
Cable Assembly, Transformer Box #1
Cable Assembly, Transformer Box #2
Cable Assembly, Transformer Box Line
Cable Assembly, Transformer Box Filter Pump
Cable Assembly, Transformer Box #1 (On Box G this PN# becomes 106-4898)
Cable Assembly, Transformer Box Line
Cable Assembly, Transformer Box #3
Cable Assembly, Transformer Box Filter Pump
Cable Assembly, Transformer Box Line
Cover, Transformer Box
Plate, Strain Relief
Cover, Transformer Box Cable Plate
Relay, 18 Amp 1/3-HP 24V Coil
Terminal, Ground Lug
Connector, 9-Pin Male
Transformer, 208-240V/24VAC 50/60Hz 20VA
Transformer, 100-120V/24VAC 50/60Hz 50VA ( On Box C PN# is 807-1238)
Terminal, Post
Transformer, 208-240V V/F Dual Voltage
Transformer, 100-120V V/F Dual Voltage
Nut, 10-24 Hex
Nut, 1/4-20 Hex (Pkg. of 10)
Screw, 8-32 X 1/2-inch Slotted Truss Head (Pkg. of 25)
Screw, 10-24 X 3/4-inch Slotted Truss Head
Screw, 1/4-20 X 3/4-inch Hex Head (Pkg. of 10)
Nut, 4-40 Keps Hex (Pkg. of 25)
Nut, 8-32 Keps Hex
Nut, 10-32 Keps Hex (Pkg. of 10)
Screw, 4-40 X 3/4-inch Slotted Round Head (Pkg. of 25)
Screw, #8 X 3/8-inch Hex Washer Head
Screw, 4-40 X 3/8-inch Slotted Round Head
Block, One-Piece Screwless Terminal
Insulation, Terminal Block Paper
Box, Transformer BIPH252, 452
Box, Transformer BIPH352, 552
Relay, Hood 12V DC
Connector, 6-Pin Male
Paper, CE Triple Terminal Block Insulating
Block, 3 Places Screwless Terminal
Cable Assembly, Transformer Box Filter Pump
Cable Assembly, Transformer Box Line
2-21
Continued from Previous Page
ITEM
PART #
COMPONENT
*
WIR 0623
Wire Assembly, PH52 Hood Relay
*
WIR0634
Wire Assembly, FPP50 Transformer/Filter Box (used in Item E)
*
WIR0635
Wire Assembly, FPPH350 Transformer Filter Box (used in Item G)
*
WIR0439
Wire Assembly, Transformer Box (used in Items B, D, and E)
*
WIR0447
Wire Assembly, Transformer Box (used in Item A)
*
WIR0580
Wire Assembly, Transformer Box (used in Item C)
* Not illustrated
2.5.3 High-Limit Thermostat and Temperature Probe
1
3
2
ITEM
PART #
1
2
3
826-1177
806-4206
210-0681
COMPONENT
Thermostat Assembly, HE FM High-Limit 425°F/218°C
Temperature Probe
Probe Guard
2-22
2.7
Frypots and Associated Components
2.7.1 Full-Vat Frypot Components
2-23
ITEM
1
2
3
4
5
6
7
8
9
10
11
12
13
14
15
16
17
18
19
20
21
22
23
24
25
26
27
28
29
30
31
32
33
34
35
36
37
38
39
40
41
42
*
*
*
*
*
*
PART #
106-1019SP
200-0936
200-0937
200-2227
826-1372
826-1371
809-0362
826-1383
809-0500
809-0804
826-1340
810-0500
826-1072
812-0355
812-0356
816-0577
812-0404
812-0457
812-0706
812-0993
812-1029
814-0048SP
816-0057
816-0560
816-0561
823-0969
823-1777
823-3323SP
823-3142
823-3304
823-3305
823-3315
823-3316
824-0863
824-0864
900-1031
900-1049
900-1221
900-1515
900-4452
930-0818
900-4253
910-2474
106-1049SP
106-1050SP
106-1053
826-0929
826-0931
COMPONENT
Flue Assembly, Full-Vat
Back, Left Full-Vat Combustion Chamber
Back, Right Full-Vat Combustion Chamber
Retainer, Full-Vat Upper Insulation
Nut, ¼-20 Flange Hex (Pkg. of 10)
Screw, #8 X ½-inch Hex Head Drill Point (Pkg. of 25)
Screw, #8 X 1¼-inch Hex Washer Head Drill Point
Washer, Steel (Pkg. of 5)
Screw, #10 X ½-inch Hex Washer Head 410 SS
Nut, ¼-20 Keps Hex
Spacer, .25-inch X 1.187-inch (Pkg. of 10)
Spacer, .25-inch X .9375-inch
Burner, Universal Replacement
Insulation, Full-Vat Lower Rear
Insulation, Burner Sight Glass
Insulation, Burner
Insulation, Left or Right Front Seal
Insulation, Full-Vat Lower Front
Insulation, Upper Burner Rail
Insulation, Upper Oil Zone
Insulation, Combustion Chamber Side
Glass, Burner Sight
Gasket, Plenum
Insulation, Full-Vat Upper Front
Insulation, Left or Right Outer Front
Plenum, Full-Vat
Side and Rail, Left Full-Vat Combustion Chamber
Frypot, Full-Vat 439 SS
Side and Rail, Right Full-Vat Combustion Chamber
Front, Full-Vat Right Combustion Chamber
Front, Full-Vat Left Combustion Chamber
Retainer, Left Full-Vat Lower Front Insulation
Retainer, Right Full-Vat Lower Front Insulation
Retainer, Left Full-Vat Upper Insulation
Retainer, Right Full-Vat Upper Insulation
Retainer, Burner Sight Glass
Retainer, Plenum Gasket
Retainer, Rear Insulation
Brace, Upper Oil Zone Insulation
Retainer, Combustion Chamber Side Insulation
Bracket, Flue to Frypot
Strip, Fluecap Retainer
Pot-to-Pot Gap Clip
Frypot Assembly Full-Vat w/RF HE (NAT)
Frypot Assembly Full-Vat w/RF HE (PRO)
Frypot Assembly Full-Vat w/RF HE (MFG)
Insulation Kit, Complete Full-Vat
Insulation Kit, Burner Full-Vat
* Not Illustrated
2-24
2.7.2 Dual-Vat Frypot Components
2-25
ITEM
1
2
3
4
5
6
7
8
9
10
11
12
13
14
15
16
17
18
19
20
21
22
23
24
25
26
27
28
29
30
31
32
33
34
35
36
37
38
39
40
41
*
*
*
*
*
*
PART #
106-1018SP
200-0941
200-2229
826-1372
809-0360
809-0362
826-1383
809-0500
809-0804
826-1340
810-0500
826-1072
812-0354
812-0356
816-0577
812-0404
812-0458
812-0688
812-0706
812-0993
812-1029
814-0048SP
816-0057
816-0558
816-0559
823-0970
823-2822
823-2823
823-3324SP
823-3302
823-3303
824-0865
824-0866
900-0914
900-1031
900-1049
900-1515
900-4452
930-0818
900-4253
824-0541
910-2474
106-1079SP
106-1080SP
106-1070
826-0930
826-0932
COMPONENT
Flue Assembly, Dual-Vat
Back, Dual-Vat Combustion Chamber
Retainer, Dual-Vat Upper Insulation
Nut, ¼-20 Flange Hex (Pkg. of 10)
Screw, #8 X ⅜-inch Hex Head
Screw, #8 X 1¼-inch Hex Washer Head Drill Point
Washer, Steel (Pkg. of 5)
Screw, #10 X ½-inch Hex Washer Head 410 SS
Nut, ¼-20 Keps Hex
Spacer, .25-inch X 1.187-inch (Pkg. of 10)
Spacer, .25-inch X .9375-inch
Burner, Universal Replacement
Insulation, Dual-Vat Lower Rear
Insulation, Burner Sight Glass
Insulation, Burner
Insulation, Left or Right Front Seal
Insulation, Dual-Vat Lower Front
Insulation, Flue Collector
Insulation, Upper Burner Rail
Insulation, Upper Oil Zone
Insulation, Combustion Chamber Side
Glass, Burner Sight
Gasket, Plenum
Insulation, Dual-Vat Lower Front
Insulation, Dual-Vat Upper Front
Plenum, Dual-Vat
Side and Rail, Left Dual-Vat Combustion Chamber
Side and Rail, Right Dual-Vat Combustion Chamber
Frypot, Dual-Vat 439 SS
Front, Dual-Vat Combustion Chamber
Retainer, Dual-Vat Lower Front Insulation
Retainer, Left Dual-Vat Upper Insulation
Retainer, Right Dual-Vat Upper Insulation
Retainer, Lower Rear Insulation
Retainer, Burner Sight Glass
Retainer, Plenum Gasket
Brace, Upper Oil Zone Insulation
Retainer, Combustion Chamber Side Insulation
Bracket, Flue to Frypot
Strip, Fluecap Retainer
Riser, DV Pot Divider W/A
Pot-to-Pot Gap Clip
Frypot Assembly Dual-Vat w/RF HE (NAT)
Frypot Assembly Dual-Vat w/RF HE (PRO)
Frypot Assembly Dual-Vat w/RF HE (MFG)
Insulation Kit, Complete Dual-Vat
Insulation Kit, Burner Dual-Vat
* Not Illustrated
2-26
2.8
Gas Supply and Combustion System Components
See Section 2.7 for burners
and burner isulation part
numbers.
1
2
3
4
5
6
PH252/255 Full Vat Gas Manifold
(Typical)
The example illustrated is typical of
BIPH52/55-MPH52/55
Fryer
Gas
Manifolds. Each manifold is assembled
from standard 1/2-, 3/4-, and 1-inch
NPT black iron pipe nipples, elbows,
tees, plugs, and unions, which may be
locally aquired.
2-27
See Section 2-9 for details of
gas valves and related
components.
ITEM
PART #
1
2
3
4
5
*
826-0981
826-0982
826-1002
826-1371
106-2996SP
106-2999SP
106-2994SP
106-2997SP
106-2995SP
106-2998SP
106-3000SP
106-3001SP
816-0554
809-0938
806-8806SP
6
*
812-1137
810-1221
810-0386
810-0413
812-1028
812-1134
810-0403
810-0437
812-1144
812-1145
810-0642
826-1196
*
826-1197
*
807-2263
* Not illustrated.
COMPONENT
Ignitor (includes gasket 816-0059, which may be ordered separately)
Natural Gas (G20, G25)
Propane (G30, G31)
Manufactured Gas
Screw, #8 X ½-inch Hex Head (Pkg. of 25)
Blower Assembly, Combustion Air (includes harness and Items 4, and 5)
100V 50/60 Hz (Left)
100V 50/60 Hz (Right)
115V 50/60 Hz. (Left)
115V 50/60 Hz (Right)
208-240V 50/60 Hz (Left)
208-240V 50/60 Hz (Right)
230V 50/60 Hz CE (Left)
230V 50/60 Hz CE (Right)
Cover, Blower Motor (component of all blowers listed above)
Screw, 10-32 X ⅝-inch Philips Truss Head (secures Item 4 to Item 3)
Harness Assembly, Blower Motor (component of all blowers listed
above)
Orifice, Burner
1.95 mm Propane/Butane (G30, G31) (0-4999 Ft, 0-1524 M) (CE)
2.00 mm Propane/Butane (0-4999 Ft, 0-1524 M) (Japan only)
2.10 mm Propane/Butane (0-4999 Ft, 0-1524 M)
2.16 mm Propane/Butane (G30, G31) (5000-6999 Ft, 1525-2133 M)
2.20 mm Propane/Butane (G30, G31) (7000-10,999 Ft, 2134-3352 M)
3.10 mm Natural Gas (G20, G25) (0-4999 Ft, 0-1524 M) (Japan only)
3.40 mm Natural Gas (G20, G25) (0-4999 Ft, 0-1524 M)
3.60 mm Natural Gas (G20, G25) (5000-6999 Ft, 1525-2133 M)
3.65 mm Natural Gas (G20, G25) (7000-8999 Ft, 2134-2743 M)
3.70 mm Natural Gas (G20, G25) (9000-10,999 Ft, 2744-3352 M)
5.95 mm Manufactured Gas (0-4999 Ft, 0-1524 M)
Conversion Kit, Natural Gas (G20, G25) to Propane/Butane (G30, G31)
CE only
Conversion Kit, Propane/Butane (G30, G31) to Natural Gas (G20, G25)
CE only
Switch, Air Pressure (use 807-2262 in units with 100VAC power supply)
2-28
2.9
Gas Valves and Associated Components
5
NOTE: Items 5, 6, 7, and 8
are used with both CE and
Non-CE gas valves.
6
7
9
10
11
8
1
12
13
4
15
Non-CE Gas Valve Assembly
(Typical)
14
NOTE: The gas tube and
enrichment tube fittings are
assembled
in
varying
configurations depending
upon the location of the
valve and whether the
associated frypot is a fullor a dual-vat pot.
16
18
13
2
17
3
19
CE Gas Valve Assembly
(Typical)
20
11
10
21
22
23
2-29
ITEM
PART #
1
2
3
826-1122
826-1120
826-1123
826-1121
810-1715
810-1041
4
5
6
7
810-0691
810-0494
810-1355
810-1354
810-1353
8
9
10
11
12
13
14
15
16
17
18
19
20
21
22
23
811-0800
813-0301
813-0302
813-0304
813-0405
813-0378
813-0340
813-0154
810-1176
813-0377
813-0354
813-0016
810-1006
813-0495
810-1025
810-1026
COMPONENT
Valve, Non-CE Gas
Natural Gas (G20, G25)
Kit Natural Gas w/ flexlines and hardware
Propane Gas (G30, G31)
Kit, Propane Gas w/ flexlines and hardware
Valve, CE Gas (G20, G25, G30, G31)
Accessory Kit (contains parts to adapt Item 2 to specific fryer configuration)
Tube, ⅛-inch Vent
Ferrule (Nut), Orifice
Gas Line, ⅜-inch OD X 15-inch SS Flexible
Gas Line, ⅜-inch OD X 12-inch SS Flexible
Gas Line, ⅜-inch OD X 9-inch SS Flexible (Used on some split pot applications)
Tube, ⅛-inch OD X 12.5-inch Enrichment (cut and form to fit)
Tee, ¼-inch Male NPT to ⅜-inch Tube
Elbow, ¼-inch Male NPT to ⅜-inch Tube 90° (used on DV valve)
Bushing, ½-inch NPT to ¼-inch NPT Flush Reducing
Nipple, ⅛-inch NPT X 2-inch
Fitting, ⅛-inch NPT Cross
Adapter, ⅛-inch NPT to ⅛-inch Tube
Plug, ⅛-inch NPT Hex Head Pipe
Tap, ⅛-inch NPT Pressure
Tee, ⅛-inch NPT Female
Elbow, ⅛-inch NPT X ⅛-inch Tube Compression
Nipple, ⅛-inch NPT X Close
Bushing, ¼-inch NPT to ⅛-inch NPT Reducing
Tee, ¼-inch Male NPT to Female NPT
Connector, ¼-inch Male NPT to ⅜-inch Tube
Tee, ¼-inch Male NPT to Female NPT Street
2-30
2.10
Wiring Assemblies and Harnesses
Filter Associated Wiring
1
2
ITEM
1
2
PART #
807-3584
807-2001
COMPONENT
Cable, Filter Lower 9-Pin Plug to 807-2001 15-Pin (C2) Connector
Cable, 810-3584 15-Pin C2 Connector to Component Box
1
2
3
Gas Valve Wiring
ITEM
1
2
3
PART #
COMPONENT
806-3941SP Harness, Full Vat Gas Valve
806-3940SP Harness, Dual Vat Gas Valve
806-9678SP Plug Assembly, CE Gas Valve
2-31
Main Wiring Harnesses
U.S. and Non-CE harness (shown)
has two unterminated wires.
Unterminated wires.
CE harness has two unterminated
wires plus two additional wires with
push-on terminals.
ITEM
PART #
COMPONENT
807-1978
807-2168
U.S. and Non-CE Export Main Wiring Harness
CE Main Wiring Harness
1
2
4
ITEM
PART #
1
806-6083
2
3
4
807-1696
807-1560
106-1020
3
COMPONENT
Power Cord, 120V w/Grounding Plug 5 wire (w/Ring Terminals, no
Clamp)
Power Cord, CE
Strain Relief
Pump Motor to Transfer Box Wiring Assembly
2-32
6
1
7
2
8
3
9
4
10
5
11
Transformer Box Cable Assemblies
2-33
ITEM
PART #
1
2
3
4
5
6
7
8
9
10
11
106-1011
106-1016
106-3821
106-3820
106-3316
106-4990
106-3825
106-3826
106-3827
106-4894
106-4893
COMPONENT
Cable Assembly, Transformer Box Line (See NOTE 1)
Cable Assembly, Transformer Box to Filter Pump (See NOTE 2)
Cable Assembly, Transformer Box #2 Position (See NOTE 7)
Cable Assembly, Transformer Box #1 Position (See NOTE 3)
Cable Assembly, Transformer Box Line (See NOTE 4)
Cable Assembly, Transformer Box Line (See NOTE 8)
Cable Assembly, Transformer Box #3 Position (See NOTE 5)
Cable Assembly, Transformer Box to Filter Pump (See NOTE 5)
Cable Assembly, Transformer Box #1 Position (See NOTE 5)
Cable Assembly, Transformer Box to Filter Pump (See NOTE 6)
Cable Assembly, Transformer Box Line (See NOTE 6)
NOTE 1: Item 1 is used in transformer boxes B and D on page 2-19.
NOTE 2: Item 2 is used in transformer boxes A, B and D on page 2-19.
NOTE 3: Item 4 is used in transformer boxes A, B, D and E on page 2-19.
NOTE 4: Item 5 is used in transformer boxes C and F on pages 2-19 and 2-20.
NOTE 5: Items 7, 8 and 9 are used in transformer boxes C, F and G on pages 2-19 and 2-20.
NOTE 6: Items 10 and 11 are used in transformer box E on page 2-19.
NOTE 7: Item 3 is used in transformer boxes A-F on pages 2-19 and 2-20.
NOTE 8: Item 6 is used in transformer box G on page 2-20.
2-34
2.11
Miscellaneous Connectors and Terminals
1
6
11
ITEM
2
3
7
8
9
10
13
12
PART #
1
807-1068
2
807-0158
3
807-0156
4
807-0159
5
807-0875
6
807-1067
7
807-0157
8
807-0155
9
807-0160
10
807-0804
11
826-1341
12
826-1342
13
807-2518
* Not illustrated.
5
4
COMPONENT
2-Pin Female
6-Pin Female
9-Pin Female
12-Pin Female
15-Pin Female
2-Pin Male
6-Pin Male
9-Pin Male
12-Pin Male
15-Pin Male
Terminal, Female Split Pin (Pkg of 25)
Terminal, Male Split Pin (Pkg of 25)
Plug, Mate-N-Lock (Dummy Pin)
2-35
THIS PAGE INTENTIONALLY LEFT BLANK
Frymaster, L.L.C., 8700 Line Avenue, PO Box 51000, Shreveport, Louisiana 71135-1000
Shipping Address: 8700 Line Avenue, Shreveport, Louisiana 71106
TEL 1-318-865-1711
FAX (Parts) 1-318-219-7140
PRINTED IN THE UNITED STATES
FAX (Tech Support) 1-318-219-7135
SERVICE HOTLINE
1-800-551-8633
819-6094
MAY 2006