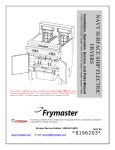
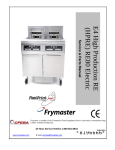
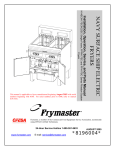
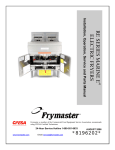
Download Frymaster E4 Fryer User Manual
Transcript
RE SERIES E4 ELECTRIC FRYERS Service & Parts Manual Frymaster, a member of the Commercial Food Equipment Service Association, recommends using CFESA Certified Technicians. 24-Hour Service Hotline 1-800-551-8633 www.frymaster.com E-mail: [email protected] MAY 2009 *8196150* NOTICE IF, DURING THE WARRANTY PERIOD, THE CUSTOMER USES A PART FOR THIS ENODIS EQUIPMENT OTHER THAN AN UNMODIFIED NEW OR RECYCLED PART PURCHASED DIRECTLY FROM FRYMASTER DEAN, OR ANY OF ITS AUTHORIZED SERVICE CENTERS, AND/OR THE PART BEING USED IS MODIFIED FROM ITS ORIGINAL CONFIGURATION, THIS WARRANTY WILL BE VOID. FURTHER, FRYMASTER DEAN AND ITS AFFILIATES WILL NOT BE LIABLE FOR ANY CLAIMS, DAMAGES OR EXPENSES INCURRED BY THE CUSTOMER WHICH ARISE DIRECTLY OR INDIRECTLY, IN WHOLE OR IN PART, DUE TO THE INSTALLATION OF ANY MODIFIED PART AND/OR PART RECEIVED FROM AN UNAUTHORIZED SERVICE CENTER. DANGER Copper wire suitable for at least 167°F (75°C) must be used for power connections. DANGER The electrical power supply for this appliance must be the same as indicated on the rating and serial number plate located on the inside of the fryer door. DANGER This appliance must be connected to the voltage and phase as specified on the rating and serial number plate located on the inside of the fryer door. DANGER All wiring connections for this appliance must be made in accordance with the wiring diagrams furnished with the equipment. Wiring diagrams are located on the inside of the fryer door. DANGER Do not store or use gasoline or other flammable vapors and liquids in the vicinity of this or any other appliance. WARNING Do not attach accessories to this fryer unless fryer is secured from tipping. Personal injury may result. WARNING Frymaster fryers equipped with legs are for permanent installations. Fryers fitted with legs must be lifted during movement to avoid damage and possible bodily injury. For a moveable or portable installation, Frymaster optional equipment casters must be used. Questions? Call 1-800-551-8633 or email at [email protected]. WARNING Do not use water jets to clean this equipment. WARNING This equipment is intended for indoor use only. Do not install or operate this equipment in outdoor areas. i DANGER Adequate means must be provided to limit the movement of this appliance without depending on or transmitting stress to the electrical conduit. A restraint kit is provided with the fryer. If the restraint kit is missing contact your local Frymaster Factory Authorized Service Center (FASC) for part number 826-0900. DANGER Prior to movement, testing, maintenance and any repair on your Frymaster fryer, disconnect all electrical power from the fryer. ELECTRICAL POWER SPECIFICATIONS kW 14 14 14 14 14 14 ALL EPRI 14kW (SOLID STATE) 17 17 17 17 17 17 ALL EPRI 17kW (SOLID STATE) 22 22 22 22 22 22 kW 14 14 14 VOLTAGE 208 240 480 220/380 240/415 230/400 208 240 220/380 240/415 208 240 480 220/380 240/415 230/400 208 240 220/380 240/415 208 240 480 220/380 240/415 230/400 VOLTAGE 208 240 480 Three (3) Phase Requirements MINIMUM SIZE WIRE PHASE SERVICE AWG mm2 3 3 3 3 3 3 3 3 3 3 3 3 3 3 3 3 3 3 3 3 3 3 3 3 3 3 3 3 3 4 4 4 3 3 4 4 3 3 3 4 4 4 3 3 4 4 3 3 3 4 4 4 6 6 8 6 6 6 6 6 6 6 6 6 6 6 6 6 6 6 6 6 4 4 6 6 6 6 16 16 10 16 16 16 16 16 16 16 16 16 16 16 16 16 16 16 16 16 25 25 16 16 16 16 Single Phase Requirements MINIMUM SIZE WIRE PHASE SERVICE AWG mm2 1 2 3 34 1 2 4 25 1 2 8 10 ii AMPS PER LEG L1 39 34 17 21 20 21 39 34 21 20 48 41 21 26 24 25 48 41 26 24 61 53 27 34 31 32 L2 39 34 17 21 20 21 39 34 21 20 48 41 21 26 24 25 48 41 26 24 61 53 27 34 31 32 AMPS 68 59 30 L3 39 34 17 21 21 21 39 34 21 20 48 41 21 26 24 25 48 41 26 24 61 53 27 34 31 32 4 RE SERIES E ELECTRIC FRYERS TABLE OF CONTENTS CAUTIONARY STATEMENTS........................................................................................................ i ELECTRICAL POWER SPECIFICATIONS ................................................................................. ii CHAPTER 1: Service Procedures 1.1 General .............................................................................................................................. 1-1 1.2 Replacing a Controller....................................................................................................... 1-1 1.3 Replacing Component Box Components .......................................................................... 1-1 1.4 Replacing a High-Limit Thermostat.................................................................................. 1-3 1.5 Replacing a Temperature Probe ........................................................................................ 1-3 1.6 Replacing a Heating Element ............................................................................................ 1-5 1.7 Replacing Contactor Box Components ............................................................................. 1-6 1.8 Replacing a Frypot ............................................................................................................ 1-7 1.9 Built-In Filtration System Service Procedures .................................................................. 1-9 1.9.1 Filtration System Problem Resolution ............................................................... 1-9 1.9.2 Replacing the Filter Motor, Filter Pump and Related Components ................. 1-10 1.9.3 Replacing the Filter Transformer or Filter Relay............................................. 1-12 1.10 Basket Lift Service Procedures ....................................................................................... 1-12 1.11 Interface Board Diagnostic Chart.................................................................................... 1-15 1.12 Probe Resistance Chart.................................................................................................... 1-16 1.13 Wiring Diagrams ............................................................................................................. 1-17 1.13.1.1 Basket Lift Wiring 208-250V........................................................................... 1-17 1.13.1.2 Basket Lift Wiring 100-120V........................................................................... 1-18 1.13.2.1 Component Wiring Standard............................................................................ 1-19 1.13.2.2 Component Wiring Fryer and Half .................................................................. 1-20 1.13.3 Tilt Switch Wiring............................................................................................ 1-21 1.13.4 Component Wiring – Fast Ready ..................................................................... 1-22 1.13.5 Fast Ready Computer Wiring........................................................................... 1-23 1.13.6 Fast Ready Computer Harness Wiring ............................................................. 1-24 1.13.7 Fast Ready Control Wiring............................................................................... 1-25 1.13.8 Contactor Box-Delta Configuration ................................................................. 1-26 1.13.9 Contactor Box-WYE Configuration................................................................. 1-27 1.13.10 Terminal Block Wiring .................................................................................... 1-28 1.13.11 Oil Disposal Wiring.......................................................................................... 1-29 1.13.12 Simplified RE14/17/22 Full-Vat Delta Wiring ................................................ 1-30 1.13.13 Simplified RE14/17/22 Dual-Vat Delta Wiring............................................... 1-31 1.13.14 Simplified RE14/17/22 Full-Vat Export WYE Wiring .................................... 1-32 1.13.15 Simplified RE14/17/22 Dual-Vat Export WYE Wiring................................... 1-33 1.13.16 Simplified RE14/17/22 Full-Vat EPRI Wiring ................................................ 1-34 1.13.17 Simplified RE14/17/22 Full-Vat EPRI Export WYE Wiring .......................... 1-35 CHAPTER 2: Parts List 2.1 Accessories........................................................................................................................ 2-1 2.2 Basket Lift Assembly and Associated Parts...................................................................... 2-2 2.3 Cabinetry ........................................................................................................................... 2-4 2.3.1 Backs, Control Panel Frames, Doors, Sides, Tilt Housings and Top Caps........ 2-4 2.3.2 Cabinet Bases, Braces and Associated Parts ...................................................... 2-7 2.4 Drain System Components................................................................................................ 2-9 2.4.1 Drain Tube Sections and Associated Parts......................................................... 2-9 2.4.2 Drain Valves and Associated Parts (Units with Built-In Filtration) ................ 2-11 iii RE SERIES E4 ELECTRIC FRYERS TABLE OF CONTENTS cont. 2.4.3 Drain Valves and Associated Parts (Units without Built-In Filtration) ........... 2-15 Electronics and Electrical Components........................................................................... 2-16 2.5.1 Component Boxes ............................................................................................ 2-16 2.5.2 Contactor Boxes ............................................................................................... 2-18 2.5.3 Fuse Boxes ....................................................................................................... 2-22 2.5.4 Terminal Blocks ............................................................................................... 2-23 2.5.5 Heating Element Assemblies and Associated Parts ......................................... 2-24 2.5.5.1 Element Assemblies and Hardware.................................................. 2-24 2.5.5.2 Element Tube Assemblies ................................................................ 2-26 2.5.6 Controllers ........................................................................................................ 2-27 2.5.7 Wiring............................................................................................................... 2-28 2.5.7.1 Contactor Box Wiring Assemblies 12-Pin Dual Vat........................ 2-28 2.5.7.2 Contactor Box Wiring Assemblies 12-Pin Full Vat......................... 2-29 2.5.7.3 Contactor Box Wiring Assemblies 6-Pin Left Element ................... 2-30 2.5.7.4 Contactor Box Wiring Assemblies 9-Pin Right Element ................. 2-30 2.5.7.5 Main Wiring Harnesses .................................................................... 2-31 2.5.7.6 Component Box, Filter Pump and Basket Lift Wiring Harnesses ... 2-33 2.5.7.7 Component Box to Filter Pump Harness.......................................... 2-34 2.5.7.8 Basket Lift Harness .......................................................................... 2-34 2.5.7.9 Interface Board to Controller Wiring Harness 15-Pin...................... 2-34 2.6 Filtration System Components ........................................................................................ 2-35 2.7 Frypots and Associated Components .............................................................................. 2-38 2.8 Oil Return System Components ...................................................................................... 2-40 2.9 Oil Disposal Plumbing .................................................................................................... 2-42 2.10 Oil Disposal Wand .......................................................................................................... 2-43 2.11 Wiring and Pin Connectors ............................................................................................. 2-44 2.12 Fasteners.......................................................................................................................... 2-45 2.5 iv RE SERIES E4 ELECTRIC FRYERS CHAPTER 1: SERVICE PROCEDURES 1.1 General Before performing any maintenance on your Frymaster fryer, disconnect the fryer from the electrical power supply. When electrical wires are disconnected, it is recommended that they be marked in such a way as to facilitate re-assembly. 1.2 Replacing a Controller 1. Disconnect the fryer from the electrical power supply. 2. The controller bezel is held in place by tabs at the top and bottom. Slide the metal bezel up to disengage the lower tabs. Then slide the bezel down to disengage the upper tabs. 3. Remove the two screws from the upper corners of the control panel. The control panel is hinged at the bottom and swings open from the top. 4. Unplug the wiring harness from the connector on the back of the controller and disconnect the grounding wire from terminal adjacent to the connector. Remove the control panel assembly by lifting it from the hinged slots in the control panel frame. 15-Pin Connector Ground Wire Terminal 5. Remove the controller from the control panel assembly and install the replacement controller. Reinstall the control panel assembly by reversing steps 1 and 2. 1.3 Replacing Component Box Components 1. Disconnect the fryer from the electrical power supply. 2. The controller bezel is held in place by tabs at the top and bottom. Slide the metal bezel up to disengage the lower tabs. Then slide the bezel down to disengage the upper tabs. 1-1 3. Remove the two screws from the upper corners of the control panel and allow the control panel to swing down. 4. Unplug the wiring harness from the 15-pin connector on the interface board and disconnect the grounding wire from terminal adjacent to the 15-pin connector on the back of the controller. Remove the control panel assembly by lifting it from the hinge slots in the control panel frame. 5. Disconnect the wiring from the component to be replaced, being sure to make a note of where each wire was connected. 6. Dismount the component to be replaced and install the new component, being sure that any required spacers, insulation, washers, etc. are in place. NOTE: If more room to work is required, the control panel frame assembly may be removed by removing the hex head screws that secure it to the fryer cabinet (see illustration below). If this option is chosen, all control panel assemblies must be removed per steps 1 and 2 above. The cover plate on the lower front of the component box may also be removed if desired. Removing the component box itself from the fryer is not recommended due to the difficulty involved in disconnecting and reconnecting the oil-return valve rods, which pass through openings in the component box. Remove these three screws at each end. Remove these two screws from the center supports. Removing the Control Panel Frame and Top Cap Assembly 7. Reconnect the wiring disconnected in Step 3, referring to your notes and the wiring diagrams on the fryer door to ensure that the connections are properly made. Also, verify that no other wiring was disconnected accidentally during the replacement process. 8. Reverse steps 1 through 4 to complete the replacement and return the fryer to service. 1-2 1.4 Replacing a High-Limit Thermostat 1. Remove the filter pan and lid from the unit. Drain the frypots into a Shortening Disposal Unit (SDU) or other appropriate metal container. DANGER DO NOT drain more than one full frypot or two split frypots into the SDU at one time. 2. Disconnect the fryer from the electrical power supply and reposition it to gain access to the rear of the fryer. 3. Remove the four screws from both the left and right sides of the lower back panel. 4. Locate the high-limit that is being replaced and follow the two-black wires to the 12-pin connector C-6. Note where the leads are connected prior to removing them from the connector. Unplug the 12-pin connector C-6 and using a pin-pusher push the pins of the high-limit out of the connector. 5. Using a wrench, carefully unscrew the high-limit thermostat to be replaced. 6. Apply Loctite™ PST 567 or equivalent sealant to the threads of the replacement and screw it securely into the frypot. 7. Insert the leads into the 12-pin connector C-6 (see illustration below). For full-vat units or the left half of a dual-vat unit (as viewed from the rear of the fryer) the leads go into positions 1 and 2 of the connector. For the right half of a dual-vat unit (as viewed from the rear of the fryer), the leads go into positions 7 and 8. In either case, polarity does not matter. 8. Reconnect the 12-pin connecting plug C-6. Use wire ties to secure any loose wires. 9. Reinstall the back panels reposition the fryer under the exhaust hood, and reconnect it to the electrical power supply to return the fryer to service. 1.5 Replacing a Temperature Probe 1. Remove the filter pan and lid from the unit. Drain the frypots into a Shortening Disposal Unit (SDU) or other appropriate metal container. DANGER DO NOT drain more than one full frypot or two split frypots into the SDU at one time. 1-3 2. Disconnect the fryer from the electrical power supply and reposition it to gain access to the rear of the fryer. 3. Remove the four screws from both sides of the lower back panel. Then remove the two screws on both the left and right sides of the back of the tilt housing. Lift the tilt housing straight up to remove from the fryer. 4. Locate the red and white wires of the temperature probe to be replaced. Note where the leads are connected prior to removing them from the connector. Unplug the 12-pin connector C-6 and using a pin-pusher push the pins of the temperature probe out of the connector. 5. Raise the element and remove the securing probe bracket and metal tie wraps that secure the probe to the element (see illustration below). 6. Gently pull on the temperature probe and grommet, pulling the wires up the rear of the fryer and through the element tube assembly. 7. Insert the replacement temperature probe (wires first) into the tube assembly ensuring that the grommet is in place. Secure the probe to the elements using the bracket which was removed in Step 5 and the metal tie wraps which were included in the replacement kit. 8. Route the probe wires out of the tube assembly following the element wires down the back of the fryer through the Heyco bushings to the 12-pin connector C-6. Secure the wires to the sheathing with wire ties. 9. Insert the temperature probe leads into the 12-pin connector C-6 (see illustration below). For full-vat units or the right half of a dual-vat unit (as viewed from the rear of the fryer) the red lead goes into position 3 and the white lead into position 4 of the connector. For the left half of a dual-vat unit (as viewed from the rear of the fryer), the red lead goes into position 9 and the white lead into position 10. NOTE: Right and left refer to the fryer as viewed from the rear. 1-4 10. Secure any loose wires with wire ties making sure that the lead wires will not interfere with the movement of the springs. Rotate the elements up and down making sure that movement is not restricted and that the wires are not pinched. 11. Reinstall the tilt housing and back panels, reposition the fryer under the exhaust hood, and reconnect it to the electrical power supply to return the fryer to service. 1.6 Replacing a Heating Element 1. Perform steps 1-3 of section 1.5, Replacing a Temperature Probe. 2. On dual-vat fryers, and on full-vat fryers where the temperature probe is attached to the element being replaced, disconnect the wire harness containing the probe wiring. Using a pin pusher, disconnect the probe wires from the 12-pin connector C-6. 3. In the rear of the fryer directly behind the frypot disconnect the 6-pin connector for the left element (as viewed from the front of the fryer) or the 9-pin connector for the right element. Press in on the tabs on each side of the connector while pulling outward on the free end to extend the connector and release the element leads (see photo below). Pull the leads out of the connector and out of the wire sleeving. 4. Raise the element to the full up position and support the elements. 5. Remove the hex head screws and nuts that secure the element to the tube assembly and pull the element out of the frypot. NOTE: Full-vat elements consist of two dual-vat elements clamped together. For full-vat units, remove the element clamps before removing the nuts and screws that secure the element to the tube assembly. 6. If applicable, recover the probe bracket and probe from the element being replaced and install them on the replacement element. Install the replacement element in the frypot, securing it with the nuts and screws removed in Step 5 to the tube assembly. Ensure the gasket is between the tube and element assembly. 7. Route the element leads through the element tube assembly and into the wire sleeving to prevent chafing. Ensure that the wire sleeving is routed back through the Heyco bushing keeping it clear 1-5 from the lift springs. Also ensure that the wire sleeving extends into the tube assembly to prevent the edge of the tube assembly from chafing the wires. Press the pins into the connector in accordance with the diagram on the following page, and then close the connector to lock the leads in place. NOTE: It is critical that the wires be routed through the sleeving to prevent chafing. Index Marker marks Position 1 6L 3 2 1 3 2 1 6 5 4 6 5 4 9 8 5L 4L 6 R 3L 2L 1L 5 4R R 7 3R 2 1R R 8. Reconnect the element connector ensuring that the latches lock. 9. Insert the temperature probe leads into the 12-pin wiring harness connector C-6 (see illustration below). For full-vat units or the right half of a dual-vat unit, the red lead goes into position 3 and the white into position 4. For the left half of a dual-vat unit, the red lead goes into position 9 and the white into position 10. NOTE: Right and left refer to the fryer as viewed from the rear. 10. Reconnect the 12-pin connector C-6 of the wiring harness disconnected in Step 2. 11. Lower the element down onto the basket rack. 12. Reinstall the tilt housing and back panels, reposition the fryer under the exhaust hood, and reconnect it to the electrical power supply. 1.7 Replacing Contactor Box Components 1. If replacing a contactor box component above the built-in filter system, remove the filter pan and lid from the unit. Drain the frypots into a Shortening Disposal Unit (SDU) or other appropriate metal container. If replacing a contactor box component in a non-filter unit or a frypot that’s not over the filter pan, drain the frypot above the box into a Shortening Disposal Unit (SDU) or other appropriate metal container. DANGER DO NOT drain more than one full frypot or two split frypots into the SDU at one time. 1-6 2. Disconnect the fryer from the electrical power supply. 3. Remove the two screws securing the cover of the contactor box. The contactor boxes above the filter pan are accessed by sliding under the fryer. They are located to the left and right above the guide rails (see photo below). The contactor boxes of non-filter units or frypots not over the filter pan are accessed by opening the fryer door directly under the affected frypot. Remove two screws to access contactor box components above the filter pan. 4. The contactors and relays are held on by threaded pin studs so that only removal of the nut is required to replace the component. 5. After performing necessary service, reverse steps 1-4 to return the fryer to operation. Left and right views of mechanical contactor box components. 1.8 Replacing a Frypot 1. Drain the frypot into the filter pan or, if replacing a frypot over the filter system, into a Shortening Disposal Unit (SDU) or other appropriate metal container. If replacing a frypot over the filter system, remove the filter pan and lid from the unit. DANGER DO NOT drain more than one full frypot or two split frypots into the SDU at one time. 2. Disconnect the fryer from the electrical power supply and reposition it to gain access to both the front and rear. 1-7 3. Slide the metal bezel up to release the bottom tabs, then slide the bezel down to disengage the upper tabs. 4. Remove the two screws from the upper corners of the control panels and allow them to swing down (see illustration and photo on page 1-1). 5. Unplug the wiring harnesses and ground wires from the backs of the controllers. Remove the controllers by lifting them from the hinge slots in the control panel frame. 6. Remove the tilt housing and back panels from the fryer. The tilt housing must be removed first in order to remove the upper back panel. 7. To remove the tilt housing remove the hex head screws from the rear edge of the housing. The housing can be lifted straight up and off the fryer. 8. Remove the control panel by removing the screw in the center and the nuts on both sides. 9. Loosen the component boxes by removing the screws, which secure them in the cabinet. 10. Dismount the top cap by removing the nuts at each end that secure it to the cabinetry. 11. Remove the hex head screw that secures the front of the frypot to the cabinet cross brace. 12. Remove the top-connecting strip that covers the joint with the adjacent frypot. 13. Unscrew the Teflon vent/vacuum-breaker tube fitting, unscrew the nut located on the front of each section of drain tube, and remove the tube assembly from the fryer. 14. Remove the covers from the drain safety switch(es) and disconnect the switch wiring at the switch(es). 15. At the rear of the fryer, unplug the 12-pin connector C-6 and, using a pin pusher, disconnect the high-limit thermostat leads. 16. Disconnect the oil return flexline(s) at the frypot end(s). 17. Raise the elements to the “up” position and disconnect the element springs. 18. Remove the machine screws and nuts that secure the element tube assembly to the frypot. Carefully lift the element assembly from the frypot and secure it to the cross brace on the rear of the fryer with wire ties or tape. 19. Carefully lift the frypot from the fryer and place it upside down on a stable work surface. 20. Recover the drain valve(s), oil return flexline connection fitting(s), and high-limit thermostat(s) from the frypot. Clean threads and apply Loctite™ PST 567 or equivalent sealant to the threads of the recovered parts and install them in the replacement frypot. 21. Carefully lower the replacement frypot into the fryer. Reinstall the hex head screw removed in step 7 to attach the frypot to the fryer. 1-8 22. Position the element tube assembly in the frypot and reinstall the machine screws and nuts removed in step 14. 23. Reconnect the oil return flexlines to the frypot, and replace aluminum tape, if necessary, to secure heater strips to the flexlines. 24. Insert the high-limit thermostat leads disconnected in step 13 (see illustration on page 1-3 for pin positions). 25. Reconnect the drain safety switch wiring to the switch(es) in accordance with the diagram below then reinstall the switch covers. RIGHT DRAIN SAFETY SWITCH ORANGE Pin 15 J4 BLUE Pin 1 C6 LEFT DRAIN SAFETY SWITCH (DUAL-VAT ONLY) ORANGE Pin 7 J4 BLUE Pin 7 C6 26. Reinstall the drain tube assembly. 27. Reinstall the top connecting strips, top cap, control panel, component box, tilt housing and back panels. 28. Reinstall controllers in the control panel frame and reconnect the wiring harnesses and ground wires. 29. Reposition the fryer under the exhaust hood and reconnect it to the electrical power supply. 1.9 Built-in Filtration System Service Procedures 1.9.1 Filtration System Problem Resolution One of the most common causes of filtration problems is placing the filter paper on the bottom of the filter pan rather than over the filter screen. CAUTION Ensure that filter screen is in place prior to filter paper placement and filter pump operation. Improper screen placement is the primary cause of filtration system malfunction. Whenever the complaint is “the pump is running, but no oil is being filtered,” check the installation of the filter paper, and ensure that the correct size is being used. While you are checking the filter paper, verify that the O-rings on the pick-up tube of the filter pan are in good condition. Missing or worn O-rings allow the pump to take in air and decrease its efficiency. If the pump motor overheats, the thermal overload will trip and the motor will not start until it is reset. If the pump motor does not start, press the red reset switch (button) located on the rear of the motor at the front of the fryer. 1-9 If the pump starts after resetting the thermal overload switch, then something is causing the motor to overheat. A major cause of overheating is when several frypots are filtered sequentially, overheating the pump and motor. Allow the pump motor to cool at least 30 minutes before resuming operation. Pump overheating can be caused by: • Solidified shortening in the pan or filter lines, or • Attempting to filter unheated oil (cold oil is more viscous, overloading the pump motor and causing it to overheat). If the motor runs but the pump does not return oil, there is a blockage in the pump. Incorrectly sized or installed paper/pads will allow food particles and sediment to pass through the filter pan and into the pump. When sediment enters the pump, the gears bind, causing the motor to overload, again tripping the thermal overload. Shortening that has solidified in the pump will also cause it to seize, with the same result. Sediment Particle Oil Flow Sediment Particle Up for reverse Down for forward A pump seized by debris or hard shortening can usually be freed by manually moving the gears with a screwdriver or other instrument. Disconnect power to the filter system, remove the input plumbing from the pump, and use a screwdriver to manually turn the gears. ● Turning the pump gears in reverse will release a hard particle. ● Turning the pump gears forward will push softer objects and solid shortening through the pump and allow free movement of the gears. Incorrectly sized or installed paper/pads will also allow food particles and sediment to pass through and clog the suction tube on the bottom of the filter pan. Particles large enough to block the suction tube may indicate that the crumb tray is not being used. Pan blockage can also occur if shortening is left in the pan and allowed to solidify. Blockage removal can be accomplished by forcing the item out with an auger or drain snake. Compressed air or other pressurized gases should not be used to force out the blockage. 1.9.2 Replacing the Filter Motor, Filter Pump, and Related Components 1. Remove the filter pan and lid from the unit. Drain the frypots into a Shortening Disposal Unit (SDU) or other appropriate metal container. 1-10 DANGER DO NOT drain more than one full frypot or two split frypots into the SDU at one time. 2. Disconnect the fryer from the electrical power supply and reposition it to gain access to both the front and rear. 3. Disconnect the two flexlines running to the oil-return manifold at the rear of the fryer as well as the pump suction flexline at the end of the filter pan connection (see photo below). Disconnect flexlines indicated by the arrows. 4. Loosen the nut and bolt that secures the bridge to the oil-return manifold. 5. Remove the cover plate from the front of the motor and disconnect the motor wires. 6. Unplug the pump motor assembly 6-pin connector C-2 and, using a pin pusher, disconnect the vent vacuum-breaker solenoid (pins 2 and 5) that is attached to the oil return manifold. 7. Remove the two nuts and bolts that secure the front of the bridge to the cross brace and carefully slide the bridge rearward off the cross brace until its front end can be lowered to the floor. Undo the single nut holding it in place in back. Be careful not to let the rear of the bridge slip off the manifold at this point. 8. Get a good grip on the bridge, carefully pull it forward off the oil-return manifold, and lower the entire assembly to the floor. Once on the floor, pull the assembly out the front of the fryer. 9. When required service has been completed, reverse steps 6-12 to reinstall the bridge. NOTE: The black motor wires go on the top terminal, the white on the bottom. The pump solenoid valve wires go in positions 1 and 4 of the 6-pin connector C-2; the vent vacuum-breaker solenoid valve wires go in positions 2 and 5; the red/black heater tape wires go into position 3 and the violet/white wires go into position 6 (see illustration on the following page). 1-11 10. Reconnect the unit to the electrical power supply, and verify that the pump is functioning correctly (i.e., when a filter handle is placed in the ON position, the motor should start and there should be strong suction at the intake fitting and outflow at the rear flush port.) 11. When proper operation has been verified, reinstall the back panels and the filter pan and lid. 12. Reposition the fryer under the exhaust hood and reconnect it to the electrical power supply to return the fryer to service. 1.9.3 Replacing the Filter Transformer or Filter Relay Disconnect the fryer from the electrical power supply. Remove the left controller from the fryer to expose the interior of the left component box. The filter transformer and relay are located as shown in the illustration below. NOTE: The right component box is identical to the left except that the filter transformer and relay are not present. The components are held on by threaded pin studs so that only removal of the nut is required to replace the component. Filter Relay Filter Transformer Dual-vat configuration illustrated. In full-vat units, left filter handle is not present. 1.10 Basket Lift Service Procedures RE Series electric fryers may be equipped with automatic basket lifts. Basket lifts always come in pairs, although each operates independently. A modular basket lift (illustrated on the following page) is a self-contained sub-assembly consisting of a pair of toothed rods which support removable basket lift arms, a pair of reversibledrive gear motors, and four microswitches. The gear motors engage the teeth of the rods, moving them up or down depending upon the motors’ direction of rotation. The microswitches at the upper and lower limits of movement stop the motors when the basket is in the full up or full down position. 1-12 Timing circuitry in the controller initiates and stops basket lift operation depending upon the variables programmed by the operator. When the product button is pressed, the timing circuitry activates a coil in the basket lift relay to supply power to the lower microswitch. The microswitches stop the motor at the lift’s upper and lower travel limits and reverse the direction of current flow thus reversing the motor direction. When the product button is pushed on the computer/controller, current flows through a coil in the basket lift relay, causing the lower circuit to be activated. The basket lift lowers, closing the normally open upper-micro-switch. When the downward-moving rod opens the lower normally closed microswitch, the power to the motor ceases to flow. When the computer/controller times out, the current to the relay coil is cut, allowing the upper circuit to be activated. The basket lift then raises and re-closes the lower microswitch. When the basket lift rod clears the upper microswitch, the microswitch reopens, power to the circuit is cut, and the motor stops. Pushing the product button restarts the cycle. Problems with the basket lift can be grouped into three categories: ● Binding/jamming problems ● Motor and gear problems ● Electronic problems 100-120V C onfiguration 208-250V C onfiguration BINDING/JAMMING PROBLEMS Noisy, jerky or erratic movement of the lifts is usually due to lack of lubrication of the rods and their bushings. Apply a light coat of Lubriplate® or similar lightweight white grease to the rod and bushings to correct the problem. With the modular basket lift, another possible cause of binding is improper positioning of the motor, which prevents the gear from correctly engaging the teeth in the rod. To correct the problem, loosen the screws that hold the motor in place and move it forward or backward until the rod has just enough slack to be rotated slightly. 1-13 MOTOR AND GEAR PROBLEMS With the modular basket lift, the most likely problem to be encountered in this category is erratic motion of the lift due to a worn drive gear. Failure to keep the lift rod and bushings properly lubricated will cause unnecessary wear of the gear. The problem is corrected by replacing the worn gear. If the lift cycles correctly but fails to remain in the up position (i.e., goes up, but then slowly settles back down into the frypot), the problem is a failed motor brake. A failed motor brake cannot be repaired and requires replacement of the motor itself. If power is reaching the motor but the motor fails to run, the motor is burned out and must be replaced. ELECTRONIC PROBLEMS Within this category are problems associated with the relays, microswitches, capacitors, resistors, interface board, wiring, and controls. The most common problem in this category is a lift that continuously travels up and down. This is usually caused by a microswitch that is out of adjustment. Troubleshooting the electronics of a modular basket lift is simply a process of verifying current flow through the individual components up to and including the motor. Using a multimeter set to the 250 VAC range, check the connections on both sides of the component for the presence of the applied line voltage. The schematic below and the wiring diagram on page 1-16 can identify the components and wiring connection points. 1-14 1.11 Interface Board Diagnostic Chart The following diagram and charts provide ten quick system checks that can be performed using only a multimeter. Diagnostic LED Legend CMP 24 HI HI HT HT AL AL indicates power from 12V transformer indicates power from 24V transformer (RH) indicates output (closed) from right latch relay (LH) indicates output (closed) from left latch relay (RH) indicates output from right heat relay (LH) indicates output from left heat relay (RH) indicates output (open) from right latch relay (LH) indicates output (open) from left latch relay PN 106-6664 NOTE – When testing the test points on J1 and J2 test use the illustration above disregarding any silk-screened numbers on the board depicting the location of Pin 1. Pin 1 is located in the bottom right corner of Both J1 and J2. These test points are ONLY for RE Series boards with J1 and J2 plugs on the front of the board. Meter Setting 12 VAC Power 24 VAC Power *Probe Resistance (RH) *Probe Resistance (LH) High-Limit Continuity (RH) High-Limit Continuity (LH) Latch Contactor Coil (RH) Latch Contactor Coil (LH) Heat Contactor Coil (RH) Heat Contactor Coil (LH) Test 50 VAC Scale 50 VAC Scale R X 1000 OHMS R X 1000 OHMS R X 1 OHMS R X 1 OHMS R X 1 OHMS R X 1 OHMS R X 1 OHMS R X 1 OHMS Pin 3 of J2 2 of J2 11 of J2 1 of J1 9 of J2 6 of J1 8 of J2 5 of J1 7 of J2 4 of J1 Pin 1 of J2 Chassis 10 of J2 2 of J1 6 of J2 9 of J1 Chassis Chassis Chassis Chassis Results 12-16 VAC 24-30 VAC See Chart See Chart 0 - OHMS 0 - OHMS 3-10 OHMS 3-10 OHMS 11-15 OHMS 11-15 OHMS * Disconnect 15-Pin harness from the computer/controller before testing the probe circuit. 1-15 1.12 Probe Resistance Chart Probe Resistance Chart For use with fryers manufactured with Minco Thermistor probes only. F 60 65 70 75 80 85 90 95 100 105 110 115 120 125 OHMS 1059 1070 1080 1091 1101 1112 1122 1133 1143 1154 1164 1174 1185 1195 C 16 18 21 24 27 29 32 35 38 41 43 46 49 52 F 130 135 140 145 150 155 160 165 170 175 180 185 190 195 OHMS 1204 1216 1226 1237 1247 1258 1268 1278 1289 1299 1309 1320 1330 1340 C 54 57 60 63 66 68 71 74 77 79 82 85 88 91 F 200 205 210 215 220 225 230 235 240 245 250 255 260 265 OHMS 1350 1361 1371 1381 1391 1402 1412 1422 1432 1442 1453 1463 1473 1483 1-16 C 93 96 99 102 104 107 110 113 116 118 121 124 127 129 F 270 275 280 285 290 295 300 305 310 315 320 325 330 335 OHMS 1493 1503 1514 1524 1534 1544 1554 1564 1574 1584 1594 1604 1614 1624 C 132 135 138 141 143 146 149 152 154 157 160 163 166 168 F 340 345 350 355 360 365 370 375 380 385 390 395 400 405 OHMS 1634 1644 1654 1664 1674 1684 1694 1704 1714 1724 1734 1744 1754 1764 C 171 174 177 179 182 185 188 191 193 196 199 202 204 207 1.13 Wiring Diagrams 1.13.1.1 Modular Basket Lift Wiring Diagram 208-250V 1-17 1.13.1.2 Modular Basket Lift Wiring Diagram 100-120V 1-18 1.13.2 1.13.2.1 Component Wiring Standard Fryers 1-19 1.13.2.2 Component Wiring- Fryer and Half 1-20 1.13.3 Tilt Switch Wiring Standard Fryer and half 1-21 1.13.4 Component Wiring - Fast Ready 1-22 1.13.5 Fast Ready Computer Wiring 1-23 1.13.6 Computer Harness - Fast Ready 1-24 1.13.7 Control Wiring - Fast Ready 1-25 1-26 14kW / 17kW EPRI/TRIAC SSR ELEMENT / CONTROL WIRING 22kW EPRI/TRIAC SSR ELEMENT / CONTROL WIRING 60 AMP FUSES FRYER AND HALF WIRING HIGH VOLTAGE TO COMPONENT BOX MERCURY CONTROLS CIRCUIT MERCURY ELEMENT WIRING 1.13.8 Contactor – DELTA Configuration 1.13.9 Contactor Box - WYE Configuration Export 1-27 1.13.10 Terminal Block Wiring 1-28 1.13.11 Oil Disposal Wiring 1-29 L3 CONTROL CIRCUIT L1 1-30 2 2 COMP 12 1 1 1 12V 2 C6 24V K4 LATCH RELAY 12 VDC 9 DRAIN SAFETY SWITCH 3 3 STANDBY / OFF POWER 7 7 INTERFACE BOARD 3 6 1 HIGH LIMIT 5 5 2 14 14 AL 11 3 TROUBLE 10 10 24V FUSE 24V COMPUTER / CONTROLLER J3 J2 FIRE CUTOFF MAIN POWER SWITCH 13 13 10 4 M T 4 4 C6 TEMP PROBE HT HEAT K3 HEAT RELAY HI HT RELAY 11 11 J3 J2-7 J2-8 HIGH - LIMIT RELAY J2 L1 SD C1-8 3 PHASE POWER TERMINALS C6-5 1C 3 4 1 2 3 TILT SWITCH 12 VDC LINE VOLTAGE 2C HEATING CONTACTOR PROBE CIRCUIT 12 VAC 24 VAC SOUND DEVICE CIRCUIT C6-6 C1-9 TILT SWITCH RELAY LATCHING CONTACTOR 1 2 3 GND OPTIONAL TILT SWITCH 1 2 L3 C6-5 and C6-6 are jumpered and C1-9 goes directly to heat contactor if tilt switch is not present. C1-4 C1-12 L2 ELECTRIC RE14/17/22 SERIES - FULL-VAT 1.13.12 Simplified RE14/17/22 Series – Full Vat Wiring 1.13.13 Simplified RE14/17/22 Series – Dual Vat Wiring 1-31 N J3 J2 1 1-32 1 3 3 3 1 6 C6 ON/OFF POWER 7 7 24V K4 LATCH RELAY 12 VDC 9 DRAIN SAFETY SWITCH 2 HIGH LIMIT 5 5 2 14 14 AL 11 3 TROUBLE 10 10 24V FUSE 24V COMPUTER/CONTROLLER 2 2 COMP 12 HOOD RELAY 1 CUT- 12V OFF Applicable to McDonald's Units Only FIRE L1 13 13 M T K3 HEAT RELAY HT HI 4 4 HEAT J2-8 HI RELAY 11 11 C1-8 J3 SD J2 J2-7 HT RELAY INTERFACE BOARD C6 10 4 TEMP PROBE C6-5 C1-4 C1-12 N L1 3 4 1C 1 2 3 GND TILT C6-6 SWITCH C1-9 TILT SWITCH RELAY 1 2 3 LATCHING CONTACTOR L3 OPTIONAL TILT SWITCH 1 2 L2 ELECTRIC RE14/17/22 SERIES - FULL-VAT EXPORT PROBE CIRCUIT 12 VAC 24 VAC SOUND DEVICE CIRCUIT 12 VDC LINE VOLTAGE 2C HEATING CONTACTOR 3 PHASE POWER TERMINALS 1.13.14 Simplified RE14/17/22 Series – Full Vat Wiring (EXPORT) WYE 1.13.15 Simplified RE14/17/22 Series – Dual Vat Wiring (EXPORT) WYE 1-33 1.13.16 Simplified RE14/17/22 Series – Full Vat Wiring EPRI 1-34 1.13.17 Simplified RE14/17/22 Series – Full Vat Wiring EPRI (EXPORT) WYE 1-35 RE SERIES E4 ELECTRIC FRYERS CHAPTER 2: PARTS LIST 2.1 Accessories 1 2 6 3 4 5 7 8 9 11 10 ITEM 1 2 * 3 4 5 PART # 809-0171 810-2793 809-0921 803-0197 803-0209 823-5772 823-5807 6 806-3068 806-3071 106-6349 7 803-0099 8 803-0271 9 803-0122 * 803-0123 * 803-0113 10 803-0132 11 803-0106 * 824-1664 * 824-1720 * 807-1575 * 807-1576 * 803-0002 * 803-0170 * Not illustrated. COMPONENT Thumbscrew, ¼ -20 X 1⅜-inch Hanger, Wireform Basket (use 810-2794 for Fryer ½) Spacer, Basket Hanger Cleanout Rod, 27-inch Brush, Frypot Connecting Strip, Frypot (use 823-6000 for LH, use 823-5966 for RH Fryer ½) Connecting Strip, Frypot Deep Cabinet Cover, Full-Vat Frypot Cover, Dual-Vat Frypot Cover, Full-Vat Frypot Deep Cabinet Basket, Full-Vat Basket, Dual-Vat (Twin) Sediment Tray, Left Dual-Vat Sediment Tray, Right Dual-Vat Sediment Tray, Full-Vat (use 803-0365 for FV Deep Cabinet) Rack, Full-Vat Basket Support (use 803-0364 for FV Deep Cabinet) Rack, Dual-Vat Basket Support Spreader Pan Cover, Spreader Pan Heatlamp, Merco 120V 2 Bulb (use 806-5278SP for 120V Lamp Assembly) Heatlamp, Merco 240V 2 Bulb (use 806-5285SP for 240V Lamp Assembly) Powder, Filter (80 1-Cup Applications) Pack, 100-Sheet Filter Paper 2-1 8 10 9 21 2-2 12 5 16 22 11 18 17 2 27 3 20 3 14 17 15 28 1 25 4 17 26 24 17 35 29 32 31 34 30 33 2.2 Basket Lift Assembly and Associated Parts 2.2 Basket Lift Assembly and Associated Parts cont. ITEM PART # 106-1805SP 1 810-1012 2 813-0035 3 807-2513 4 901-8499 5 902-8499 6 807-0159 7 900-5529 8 812-0442 9 807-2572 10 806-5964SP 11 200-2942 12 826-1366 13 809-0247 14 807-1683 15 106-2770SP 16 809-0082 17 826-1374 18 826-1359 19 826-1361 20 826-1371 21 809-0503 22 809-0186 23 WIR-0166SP 24 910-4776 25 809-0127 26 823-2704 27 823-2705 28 810-0179 29 806-9110SP 30 910-8112 31 810-0194 32 810-0374 33 809-0508 34 809-0190 35 809-0047 * 106-5957 * Not illustrated. COMPONENT Basket Lift Assembly, 200-220VAC w/Relay (Items 1-23) Rod, Basket Lift Bushing, Bronze Capacitor, 12.5 μFarad 330VAC Chassis, Left Basket Lift Chassis, Right Basket Lift Connector, 12-Pin Female Gusset, Basket Lift Motor Insulation, Microswitch Microswitch Motor Assembly, 208-240VAC Modular Basket Lift Mount, Modular Basket Lift Nut, 4-40 Hex Keps (Pkg. of 25) Nut, 8-32 Hex Keps Relay, 12VDC Resistor Assembly, 208-220VAC Modular Basket Lift Ring, Bushing Retainer Screw, #10 X ½-inch Hex Washer Head (Pkg. of 25) Screw, 4-40 X ¾-inch Slotted Round Head (Pkg. of 25) Screw, 8-32 X 1-inch Slotted Truss Head (Pkg. of 25) Screw, #8 X ½-inch Drill Point Hex Head (Pkg. of 25) Screw, 8-32 X ½-inch Hex Head Washer, #8 Lock Wire Bundle, 200-250VAC Basket Lift w/Relay Cover, Modular Basket Lift Rear S/S (Use 900-4776 for Mild Steel) Screw, ¼-20 X ½-inch Slotted Round Head Arm, Left Basket Lift Arm, Right Basket Lift Button, Plug Roller Assembly, Basket Lift Bracket, Basket Lift Roller Roller, Basket Lift Spacer, Basket Lift Roller Bolt, ¼-20 X 1¼ -Inch Washer, ¼-inch Flat Nut, ¼-20 Cap Wiring Harness, RE Series Electric Basket Lift (Plugs into Item 6) 2-3 2.3 Cabinetry 2.3.1 Back Panels, Control Panel Frames, Doors, Sides, Tilt Housings, and Top Caps 1 2 3 4 21 5 17 20 18 19 6R 10 16 6L 14 15 8 13 9 12 11 2-4 7 2.3.1 Back Panels, Control Panel Frames, Doors, Sides, Tilt Housings & Top Caps cont. ITEM PART # COMPONENT 1 220-0421 220-1973 220-0419 220-0423 220-0425 220-0611 2 220-0501 220-1977 220-0487 220-0491 220-0499 220-0616 3 106-5016 106-6846 106-5221 106-5018 106-5019 106-5020 4 823-5494 823-5999 823-5497 823-5489 823-5575 823-5581 5 106-5195 106-7060 106-5196 106-5197 106-5198 106-5199 * * * * 6L 200-9614 200-9610 200-9611 231-0323 231-1345 6R 232-0323 232-1345 7 810-1105 8 231-0352 9 232-0352 10 910-0889 11 910-0890 12 809-0359 13 106-4397 106-6899 14 809-0266 15 210-9739 * Not illustrated. Back Panel, Upper (Panel for five station fryer shown) Single Station Fryer CRS (Use 230-0422 for Stainless Steel) Fryer ½ Station Fryer CRS Two Station Fryer CRS (Use 230-0420 for Stainless Steel) Three Station Fryer CRS (Use 230-0424 for Stainless Steel) Four Station Fryer CRS (Use 230-0546 for Stainless Steel) Five Station Fryer CRS (Use 230-0612 for Stainless Steel) Back Panel, Center (Panel for five station fryer shown) Single Station Fryer CRS (Use 230-0502 for Stainless Steel) Fryer ½ Station Fryer CRS Two Station Fryer CRS (Use 230-0490 for Stainless Steel) Three Station Fryer CRS (Use 230-0492 for Stainless Steel) Four Station Fryer CRS (Use 230-0500 for Stainless Steel) Five Station Fryer CRS (Use 230-0617 for Stainless Steel) Frame, Control Panel (Frame for five station fryer shown) Single Station Fryer Fryer ½ Station Fryer Two Station Fryer Three Station Fryer Four Station Fryer Five Station Fryer Tilt Housing (Housing for five station fryer shown) Single Station Fryer ½ Station LH ½ fryer (use 823-5965 for RH ½ fryer) Two Station Three Station Four Station (use 106-7516 for Cracker Barrel) Five Station Top Cap (Top cap for five station fryer shown) Single Station (Also requires four 809-0079 1/4-20 Nutserts) Fryer ½ Station LH ½ fryer (use 106-6838 for RH ½ fryer) (Also requires four 8090079 1/4-20 Nutserts) Two Station (Also requires four 809-0079 1/4-20 Nutserts) Three Station (Also requires six 809-0079 1/4-20 Nutserts) Four Station (Also requires eight 809-0079 1/4-20 Nutserts) Five Station (Also requires ten 809-0079 1/4-20 Nutserts) Heat Shield Single Station Two Station (Two are used on Four Station) (One used on Five Station) Three Station (One used on Five Station) Side, Standard Cabinet Left SS (use 221-0323SP for Enameled Steel) Side, Left Deep Cabinet SS Side, Standard Cabinet Right SS (use 222-0323SP for Enameled Steel) Side, Right Deep Cabinet SS Magnet, Door Side, Filter Ready Cabinet Left SS (use 221-0352 for Cold Rolled Steel) Side, Filter Ready Cabinet Right SS (use 222-0352 for Cold Rolled Steel) Cover, 5-inch X 5-inch Access Cover, 5-inch X 7-inch Access Screw, #8 X ¼-inch Hex Washer Head Door, Left or Right (Left shown – move handle to opposite side for Right) - Standard Door, Left or Right – Fryer ½ Screw, #10 X ½-inch Phillips Truss Head Handle, Eurolook Door (use 230-2088 for Fryer ½ handle) continued on the following page... 2-5 2.3.1 Back Panels, Control Panel Frames, Doors, Sides, Tilt Housings & Top Caps cont. ITEM PART # COMPONENT 16 106-4067 * 810-0275 * 809-0970 17 823-5440 18 210-5046 19 210-5623 20 210-5819 21 210-6698 * Not illustrated. Pin Assembly, Door Spring, Door Pin Retaining Ring Cove, Element Tilt Housing (use 823-5726 for Fryer ½) Bezel, One-Controller (use 230-1953 for Fryer ½) Bezel, Blank Bezel, Two –Controller Bezel, Three-Controller 2-6 2.3.2 Cabinets, Bases, Braces, and Associated Parts See Page 2-39 for rear bridge support/oil return manifold. 20 1 2 10 25 8 4 7 26 18 28 12 9 14 15 17 19 3 See Page 2-34 for filter rails and associated hardware. 13 11 6 16 30 21 27 22 29 24 19 23 The 5-Station cabinet illustrated is typical of most RE Series Electric cabinets. All components used in RE Series cabinets are identified, but not all components are used in every configuration. 2-7 5 2.3.2 Cabinets, Bases, Braces, and Associated Parts cont. ITEM PART # COMPONENT 1 2 3 4 5 6 7 106-3828 106-3829 200-1651 200-1659 200-2293 200-3774 200-7036 220-1740 200-7037 200-7038 200-7039 200-7040 8 9 10 11 12 13 * 14 15 * * 16 17 18 19 20 21 * * 22 23 24 25 26 27 28 29 30 * * 200-5356 220-1711 200-2284 200-2295 200-2725 200-3592 231-0323 232-0323 220-1100 220-1095 220-1093 220-1294 222-0610 221-0610 220-1446 200-6498 200-4424 810-2346 200-4786 210-6862 824-1393 824-4557 823-5782 221-0621 809-0131 810-2970 810-1494 826-1376 826-1374 809-0417 809-0429 200-5417 823-5589 823-4558 823-4560 823-4561 823-4562 810-1234 810-3010 Upright Assembly, Left Upright Assembly, Right Support, Cross Cabinet (use 220-1742 for Fryer ½) Divider, Cabinet (use 220-1348 for Deep Cabinet Divider) Brace, Single Station Lower Brace, Double Station Lower Brace, Front Horizontal Single-Station Fryer (use 220-0624 for Single-Station Lower Brace) Fryer ½ Station Fryer Two-Station Fryer Three-Station Fryer Four-Station Fryer Five-Station Fryer Brace, Rear Horizontal Single-Station Fryer Fryer ½ Station Fryer Two-Station Fryer Three-Station Fryer Four-Station Fryer Five-Station Fryer Side, Cabinet LH S/S (use 221-0323 for CRS)(use 231-1345 for Deep Cabinet) Side, Cabinet RH S/S (use 222-0323 for CRS)(use 232-1345 for Deep Cabinet) Support, RE Bottom Contactor Box Support, RE Rear Contactor Box Brace, RE Front Contactor Box Brace, Contactor Box Single-Station Fryer Front Bracket, RH Contactor Box Mount (use 222-1845 for Fryer ½) Bracket, LH Contactor Box Mount (use 221-1845 for Fryer ½) Bracket, Contactor Box Mount SCF Deep Cabinet Bridge, Contactor Box Single-Station Fryer Post, Door Magnet, Door Support, Oil Return Manifold Hinge, Door Bracket, Rear Support (use 200-8253 for Fryer ½) Channel, Base Side Channel, Base Side SCF Deep Cabinet Channel, Base Left Side Single-Station Fryer (use 222-0621 for RH side) Bolt, ¼-20 X ¾-inch Hex Head (also used w/Item 27 to mount filter rails) Caster with Brake Caster without Brake Nut, 10-32 Keps Hex (Pkg. of 10) Screw, #10 X ½-inch Hex Washer Head (primary cabinet screw)(Pkg. of 25) Nut, ¼-20 Hex Flange Bolt, ¼-20 X 2-inch Hex Head Brace, Rear Channel Corner Channel, Base Rear Single-Station Fryer Base (use 220-1737 for Fryer ½) Two-Station Fryer Three-Station Fryer Four-Station Fryer Five-Station Fryer Leg, Stainless Steel 8.5-inch Adjustable (mounts with Items 27 and 28) Leg, Single Fryer Single-Station Fryer * Not illustrated. 2-8 2.4 Drain System Components 2.4.1 Drain Tube Sections and Associated Parts See next section for Drain Valves 2-9 2.4.1 Euro-Look Drain Tube Sections and Associated Parts cont. ITEM 1 PART# 823-4625 823-4624 823-5943 823-6003 2 823-4643 823-4642 3 823-4639 823-4638 4 823-4641 823-4640 5 823-4892 823-5944 823-6004 6 816-0625 7 809-0969 * 816-0630 8 810-2492 * KIT6033 * 811-1071 * Not illustrated. COMPONENT Drain Tube, Left/Right End Short Full-Vat Dual-Vat Fryer ½, RH ½ Fryer Fryer ½, LH ½ Fryer Drain Tube, Left/Right Open Short Full-Vat Dual-Vat Drain Tube, Right End Long Full-Vat Dual-Vat Drain Tube, Left/Right Open Long Full-Vat Dual-Vat Drain Outlet Center Dump Fryer ½, RH ½ Fryer Fryer ½, LH ½ Fryer Sleeve Clamp Vinyl Cap Fitting, Quick-Connect Straight (receives Teflon vent tube) Kit, Round Drain Clamp (contains 2 of Item 7 and 1 of Item 6) Tube, Teflon Vent (sold by the foot) 2-10 2.4.2 Drain Valves and Associated Parts (Units with Built-In Filtration) 4 1 2 3 5 6 7 11 Single Footprint Full-Vat Drain Valve Assembly 106-6300 8 9 10 12 2.4.2 Drain Valves and Associated Parts (Units with Built-in Filtration) cont. ITEM PART # COMPONENT 1 809-0540 Nut, ½-13 2-Way Hex Lock 2 900-2936 Retainer, Full-Vat Nut Drain Valve 3 824-1602 Handle, Full-Vat Drain Valve 4 816-0639 Cap, Red Handle 5 809-0237 Nut, 4-40 Keps Hex 6 901-2348 Cover, Dual Vat Drain Safety Switch 7 807-2103 Microswitch, CE Straight Lever 8 816-0220 Insulation, Drain Safety Switch 9 106-5391 Bracket Assembly, Full-Vat Drain Safety Switch Single FP Only 10 810-1018 Valve, 1.25-inch Full-Vat Drain 11 810-1165 Washer, Teflon Drain Valve 12 816-0135 O-Ring, Round Drain 2-11 2.4.2 Drain Valves and Associated Parts (Units with Built-In Filtration) cont 1 4 2 3 Compression Washers 6 Full-Vat Drain Valve Assembly 106-3760 / Fryer ½ 106-7004 5 7 8 9 11 10 12 13 2.4.2 Drain Valves and Associated Parts (Units with Built-In Filtration) cont. ITEM PART # COMPONENT 1 809-0540 Nut, ½-13 2-Way Hex Lock 2 900-2936 Retainer, Full-Vat Drain Valve Nut 3 824-1602 Handle, Full-Vat Drain Valve 824-1740 Handle, Fryer ½ Half Vat 4 816-0639 Cap, Red Handle 5 809-0237 Nut, 4-40 Keps Hex 6 901-2348 Cover, Dual Vat Drain Safety Switch 7 807-2103 Microswitch, CE Straight Lever 8 816-0220 Insulation, Drain Safety Switch 9 810-1165 Washer, Teflon Drain Valve 10 200-6496 Support, 3” Drain 11 806-8137 Bracket Assembly, Full-Vat Drain Safety Switch 106-7005 Bracket Assembly, Fryer ½ 12 810-1018 Valve, 1.25-inch Full-Vat Drain 13 816-0135 Round Drain O-Ring 2-12 2.4.2 Drain Valves and Associated Parts (Units with Built-In Filtration) cont. 2-13 2.4.2 Drain Valves and Assoc. Parts (Units with Built-In Filtration) cont. ITEM PART # COMPONENT 1 816-0639 Cap, Drain Handle 2 809-0539 Nut, ⅜-16 2-Way Hex Lock 3 900-2934 Retainer, Dual-Vat Drain Valve Nut 4a 824-1636 Handle, Dual-Vat Right Drain Valve 4b 824-1637 Handle, Dual-Vat Left Drain Valve 5 809-0237 Nut, 4-40 Keps Hex 6 901-2348 Cover, Dual Vat Drain Safety Switch 7 807-2103 Microswitch, CE Straight Lever 8 816-0220 Insulation, Drain Safety Switch 9 810-1165 Washer, Teflon Drain Valve 10 809-0196 Washer, ⅜-inch Flat 11 106-2671 Bracket Assembly, Dual-Vat Drain Safety Switch 106-6304 Bracket Assembly, Dual-Vat Drain Safety Switch Single Footprint Only 12 810-1114 Valve, 1-inch Dual-Vat Drain 13 816-0135 Round Drain O-Ring * 823-5592 Tube, Drain Single-Station Only with Filter * Not illustrated. 2-14 2.4.3 Drain Valves and Associated Parts (Units without Built-In Filtration) 1 4 2 3 5 ITEM 1 2 3 4 5 PART # 810-1569 806-7915SP 806-7916SP 812-1226 812-1227 COMPONENT Valve, 1.25-inch Non-Filter Full-Vat Drain Valve, 1-inch Non-Filter Dual-Vat Left Drain Valve, 1-inch Non-Filter Dual-Vat Right Drain Drain Extension, 1.25-inch Drain Extension, 1-inch 2-15 2.5 Electronics and Wiring Components 2.5.1 Component Boxes 2-16 2.5.1 Component Boxes cont. ITEM PART # COMPONENT 1 106-5592 Box Assembly, Component Standard 106-6747 Box Assembly, Component Fryer ½ 2 200-3300 Bracket, Component Box Strain Relief 3 806-9495SP Terminal Block √ 4 807-0012 Relay, Filter 18 Amp ⅓ HP 24V √ 5 807-0670 Relay, Filter Mintex DPDT 24V 6 807-0037 Terminal, ¼-inch Push-on 7 807-0121 Bushing, Heyco Plastic AB-625-500 8 807-0922 Holder, Buss Fuse HPS 9 807-2278 Fuse, 20 Amp 10 810-2446 Plug, Button .50 Heyco Double “D” √ 11 807-4036 Switch 807-3575 Plug, Carling Switch Hole (used on some models without a switch) 12 807-1947 Plug, Button .875 Dome 13 807-1321 Holder, AGC Panel Mount ¼” Fuse (Some models use item 10 here.) 14 807-1597 Fuse, 3 AMP Slow-Blow 15 810-2445 Plug, Button .625 Heyco Double “D” 16 106-5750 Harness Assembly, RE FV Control 106-5751 Harness Assembly, RE DV Control √ 17 807-0855 Transformer, 100-120V/12V 20VA √ 18 807-0800 Transformer, 100-120V/24V 50VA Filter √ 807-2181 Transformer, 100-120V/24V 62VA Filter √ 19 807-0680 Transformer, 208-240V/24V 20VA Filter √ 20 807-2191 Transformer, 208-240V/12V 30VA √ 21 807-0979 Transformer, 208-240V/12V 43VA √ 22 807-2180 Transformer, 208-240V 50VA Filter * 807-3892 Transformer, 440/480 12/24V (used in non-filter fryers) 23 Interface Board (On SMT interface boards the relays are not replaceable.) √ 826-2260 Standard, Full- or Dual-Vat (SMT) √ 826-2261 EPRI, Full- or Dual-Vat 826-2262 Fast Computer, Full- or Dual-Vat * 807-3932 Relay, Latch/Heat 12VDC SPDT 12A Sealed (On SMT interface boards the relays are not replaceable.) * 24 25 26 27 28 √ 29 * 30 * 106-6501 220-0565 220-1061 200-6654 230-0834 816-0217 810-0045 806-7179SP 807-4330 809-0349 826-2249 Fallback Controller Assembly RE Guard, Finger Domestic and Non-CE Guard, Finger Non-Domestic and CE Brace, Component Box Guard, RE Box Switch Paper, Insulating Terminal Block Bushing, .875 Diameter 11/16” Sound Device Std. (Use 810-3141 for SMT sound device with SMT connector) Sound Device Adapter Harness (SMT) Spacer, 4mm X 6mm Aluminum RE Hood/Ansul Interlock Kit (includes terminal block, wires and connectors) * Not illustrated. √ Recommended parts. 2-17 2.5.2 Contactor Boxes 2.5.2.1 Left and Right Over the Filter Pan Contactor Box Configurations 2-18 2.5.2.1 Left and Right Over the Filter Pan Contactor Box Configurations cont. NOTES: Left and right contactor box assemblies are mirror images of one another. With the exception of the box itself, most components of a left-hand assembly are the same as those in the corresponding right-hand assembly and vice versa. The configurations illustrated show most possible components, but a particular configuration may not have all the components shown. ITEM 1 PART # 106-5488 106-7066 823-5736 106-5489 106-6819 823-5748 810-2554 807-1947 807-0064 807-0922 221-0482 222-2072 222-0482 220-1912 807-0070 807-1071 807-0884 807-2284 807-2283 810-1202 806-8674 806-8673 COMPONENT Box Assembly, Left Contactor Standard (Over the Filter Pan) Box Assembly, Left Contactor Fryer ½ Half Fryer on Left 2 Box Assembly, Left Contactor EPRI (Over the Filter Pan) 3 Box Assembly, Right Contactor Standard (Over the Filter Pan) Box Assembly, Right Contactor Fryer ½ Half Fryer on Right 4 Box Assembly, Right Contactor EPRI (Over the Filter Pan) 5 Plug, Cord Cutout 1.125 Button 6 Plug, .875 Diameter Dome 7 Transformer, 480V/120V 150VA 8 Holder, Bus Fuse * Cover, Left Hand Standard Contactor Box Cover, Left Hand Fryer ½ Half fryer on Left * Cover, Right Hand Standard Contactor Box Cover, Right Hand Fryer ½ Half fryer on Right 9 Terminal, Ground Lug √ 10 Contactor, 24V 30 Amp Mercury √ 11 Contactor, 24V 50 Amp Mercury √ 12 Contactor, 24V 50 Amp Mechanical (only in 14kW & 17kW units) √ 13 Contactor, 24V 63 Amp Mechanical (only in 22kW units) √ 14 Contactor, 24V 40 Amp Mechanical 15** Heatsink Assembly, DV Solid State Relay (See components below) 16** Heatsink Assembly, FV Solid State Relay (See components below) Components of Items 15 and 16 √ 17 826-1562 Kit Relay, Solid State 40 Amp 280V with Heatsink 18 807-2749 Heatsink, Solid State 19 807-0037 Terminal, ¼-inch Push-on 20 807-2278 Fuse, 20 Amp 21 106-6204 Filter Assembly, EPRI (used in CE WYE-configured EPRI units only) 22 807-0922 Holder, Bus Fuse * 221-0610 Bracket, Left Hand Contactor Box Mounting * 222-0610 Bracket, Right Hand Contactor Box Mounting * 807-0012 Relay, Tilt Switch 18 Amp 1/3 HP 24 V Coil * Not illustrated. ** Full Vat has three relays 826-1562, Dual-Vat has six relays. √ Recommended parts. 2-19 2.5.2.2 Large Center Contactor Box Configurations (Non-Filter, Not over the Filter and Single Units) 2-20 2.5.2.2 Large Center Contactor Box Configurations (Non-Filter, Not Over the Filter and Single Units) cont. ITEM 1 1a 2 * 3 4 5 6 7 √ 8 √ 9 √ 10 √ 11 √ 12 13** 14** PART # 106-6081 106-6255 106-6173 106-6244 810-2554 807-1947 221-0482 222-0482 807-0070 807-1071 807-0884 807-2284 807-2283 810-1202 806-8674 806-8673 COMPONENT Box Assembly, Contactor (Non-Filter or Not Over the Filter Pan) Box, Assembly Contactor (Non-Filter or Not Over the Filter Pan)120/440/480V Box Assembly, Contactor EPRI (Non-Filter or Not Over the Filter Pan) Box Assembly, Contactor Single-Station Fryer Only Plug, Cord Cutout 1.125 Button Plug, .875 Diameter Dome Cover, Left Hand Contactor Box Cover, Right Hand Contactor Box Terminal, Ground Lug Contactor, 24V 30 Amp Mercury Contactor, 24V 50 Amp Mercury Contactor, 24V 50 Amp Mechanical (only in 14kW & 17kW units) Contactor, 24V 63 Amp Mechanical (only in 22kW units) Contactor, 600V 40 Amp 3-Pole Heatsink Assembly, DV Solid State Relay (See components below) Heatsink Assembly, FV Solid State Relay (See components below) Components of Items 13 and 14 √ 15 826-1562 Kit Relay, Solid State 40 Amp 280V with Heatsink 16 807-2749 Heatsink, Solid State 17 807-0037 Terminal, ¼-inch Push-on 18 807-2278 Fuse, 20 Amp 19 823-5729 Plate, Contactor Back Cordset 20 220-1087 Bracket, Box Connecting 21 220-1088 Cover, Contactor Box Front 22 220-1089 Cover, Contactor Box Top (Non-Filter or Not Over the Filter Pan) * 220-1175 Cover, Contactor Box Top Full Vat Single-Station Fryer Only * 220-1373 Cover, Contactor Box Top Dual Vat Single-Station Fryer Only 23 220-1152 Cover, Contactor Box Top EPRI (Non-Filter or Not Over the Filter Pan) 24 106-6204 Filter Assembly, EPRI (used in CE WYE-configured EPRI units only) √ 25 807-0064 Transformer, 480V/120V 150VA 26 807-0922 Holder, Bus Fuse * 807-0012 Relay, Tilt Switch 18 Amp 1/3 HP 24 V Coil *Not illustrated. ** Full Vat has three relays 826-1562, Dual-Vat has six relays. √ Recommended parts. 2-21 2.5.3 Fuse Boxes Left 22kW and Single Phase Fuse Box Assembly 106-5505/106-6678 10 Right 22kW and Single Phase Fuse Box Assembly 106-5506/106-6679 11 9 8 6 7 12 5 1 3 2 ITEM PART # 1 2 3 4 5 6 7 200-2334 810-0519 221-0523 222-0523 809-0434 823-5585 823-5557 823-5797 807-3970 807-0501 807-2240 807-0070 807-0128 8 9 10 11 12 4 COMPONENT Door Hinge Cover, LH Fuse Box Cover, RH Fuse Box (Used on Single Station Fryers also) Screw, #10 x ⅜” Hex Box, LH Fuse Box, RH Fuse Box, Single Station Fryer Only Block, 3 Pole 600V 175A Terminal Fuse Block, Buss #2968 3-Pole Fuse, 60 AMP 300VAC Terminal, Ground Lug Bushing, Insulating Heyco 2-22 2.5.4 Terminal Blocks ITEM PART # 1 2 823-5631 823-5632 823-5797 220-0801 807-3970 807-0070 807-0128 3 4 5 6 COMPONENT Box, LH Rear Terminal Block Box, RH Rear Terminal Block Box, Single Station Fryer Only (see previous page for cover 222-0523) Cover, Rear Terminal Block Box Block, 3 Pole 600V 175A Terminal, Ground Lug Bushing, Insulating Heyco 2-23 2.5.5 Heating Element Assemblies and Associated Parts 2.5.5.1 Element Assemblies and Hardware NOTE: These elements apply only to the RE series fryers. For the previous model elements see manual PN 819-5990. 2-24 2.5.5.1 Heating Element Assemblies and Associated Parts cont. ITEM PART # COMPONENT 1 826-2198 826-2201 826-2208 √ 826-2192 √ 826-2197 826-2210 826-2200 826-2205 826-2193 826-2199 826-2206 826-2194 826-2207 826-2204 826-2195 826-2202 826-2211 826-2196 826-2203 826-2209 √ 2 826-2212 807-4324 3 816-0681 4 816-0480 5 816-0688 6 809-1003 * 809-0766 7 230-0784 8 809-0518 9 910-2042 10 230-0781 11 230-4902 12 230-4101 13 809-0567 14 810-1212 15 230-4903 16 230-4103 823-5627 17 810-3030 810-3031 18 220-1190 220-0464 220-1855 19 220-0733 20 810-1233 * Not illustrated. √ Recommended parts. Element Kits – includes gaskets, grommets, tie wraps, screws and nuts. 200V 17.0 kW (also used for 220V 8.5 kW) 200V 18.5 kW 200V 11.0 kW 208V 17.0 kW 208V 18.5 kW The wire harnesses must 208V 11.0 kW be replaced when 220V 17.0 kW (also used for 240V 8.5 kW) replacing 22kW elements 220V 11.0 kW on all fryers, except 440V 230V 17.0 kW and 480V, manufactured 230V 18.5 kW before March 2007. (See 230V 11.0 kW Page 2-30 for wire 240V 17.0 kW 240V 11.0 kW harnesses.) 400V 8.5kW 440V 17.0 kW 440V 18.5 kW 440V 11.0 kW 480V 17.0 kW 480V 18.5 kW 480V 11.0 kW Probe, Temperature RE – includes tie wraps and grommet. Probe, Temperature Fast Ready Grommet, Probe Plug, .375-inch Dome Gasket, Element Screw, 10-32 X ⅜-inch Hex Head SS Nut, 10-32 Keps Hex Head SS Bracket, Temperature Probe Screw, 8-32 X ⅜-inch Slotted Hex Head Clamp, Element (Short) Clamp, Element (Long) Support, Full-Vat Element Rear Support, Full-Vat Element Front (use 823-5621 for 17kW Front Support) Tie-Wrap, Metal Pin, .125 X .5-inch Split Support, Dual-Vat Element Rear Dual Vat Support, Dual-Vat Element Front Dual Vat 14kW Support, Dual-Vat Element Front Dual Vat 17kW Spring, Element Lift Left Spring, Element Lift Right Bracket, Lower Spring Single Foot Print Bracket, Lower Spring Bracket, Lower Spring Fryer ½ Bracket, Lower Spring Mating Handle, Element Lift 2-25 2.5.5.2 Element Tube Assemblies 2-26 2.5.5.2 Element Tube Assemblies cont. ITEM PART # 1 106-7653SP 106-6736 2 106-7654SP 3 810-3246 4 106-5329 5 106-5330 6 220-0122 7 220-0123 8 106-7651 9 106-7652 10 810-2992 810-3135 11 810-2993 * 809-0766 * 106-6587 * 106-6588 * 810-3007 * 230-0794 * Not illustrated. COMPONENT Tube Assembly RE Element, Full-Vat Tube Assembly RE Element Fryer ½ LH Half Fryer (use 106-6061 RH Half Fryer) Tube Assembly RE Element, Dual-Vat Bushing and Tube Assembly, Dual-Vat Bracket Assembly, LH Element Tube Support Bracket Assembly, RH Element Tube Support Plate, Element Tube Support Inner Plate, Element Tube Support Outer Bracket Assembly, LH Upper Spring (use 106-6569 for 17kW) Bracket Assembly, RH Upper Spring (use 106-6570 for 17kW) Tube, FV Element Mounting Tube, Fryer ½ LH Half Fryer (use 810-3036 RH Half Fryer) Bushing, Tube End Teflon Nut, 10-32 Hex HD SS Magnetic Position Sensor Assembly Magnetic Position Sensor Assembly with Bracket Magnet Bracket, Magnetic Position Sensor Wire 2.5.6 Controllers NOTE: See Page 2-33 for Interface Board to Controller Wiring Harness ITEM PART # 1 √ 826-2395 826-2396 826-2332 826-2405 826-2397 826-2398 √ 2 826-2399 826-2400 826-2329 826-2476 √ Recommended parts. COMPONENT Computer Magic III.5 Full-Vat (CE) Dual-Vat (CE) Full-Vat (Non-CE) Dual-Vat (Non-CE) Full-Vat (EPRI/Solid State) Dual-Vat (EPRI/Solid State) Digital Controller Full-Vat (CE) Dual-Vat (CE) Full-Vat (Non-CE) Dual-Vat (Non-CE) continued on the following page 2-27 2.5.6 Controllers cont. ITEM PART # 3 826-2330 106-4366 826-2401 826-2402 4 * 826-2538 106-4334 802-2021 COMPONENT Basket Lift Timer Full-Vat (CE) Dual-Vat (CE) Full-Vat (Non-CE) Dual-Vat (Non-CE) Solid-State (Analog) Controller Full-Vat Dual-Vat Graphic Sheet of Symbols 2.5.7 Wiring 2.5.7.1 Contactor Box Wiring Assemblies – 12-Pin Dual-Vat C-1 ITEM 1 PART # COMPONENT 106-5980SP Contactor Box Harness Assembly Dual Vat Standard (See wiring diagrams on pages 1-19.) EPRI (uses harness above plus wire kits WIR0734 and WIR0737) (See wiring diagrams on pages 1-26 and 1-27.) 2-28 2.5.7.2 Contactor Box Wiring Assemblies – 12-Pin Full-Vat C-1 ITEM 1 2 PART # COMPONENT 106-6031SP Contactor Box Harness Assembly Full Vat Standard (See wiring diagrams on pages 1-19.) EPRI (uses harness above plus wire kits WIR0733 and WIR0736) (See wiring diagrams on pages 1-26 and 1-27.) 106-7042 Fryer and ½ Contactor Box Harness Assembly 2-29 2.5.7.3 Contactor Box Wiring Assemblies – 6-Pin (Left Element) 1 2 ITEM 1 2 PART # 106-6768 106-7849 106-6771 106-7851 1 BLUE 2 BLUE 3 BLUE 4 BLACK 5 BLACK 6 BLACK 1 BLUE 2 BLUE 3 BLUE 4 BLACK 5 BLACK 6 BLACK COMPONENT 14/17 kW Standard Mercury 22 kW Triac SSR 14/17 kW Mechanical Contactor 22 kW Mercury and High Amp Mechanical Contactor 2.5.7.4 Contactor Box Wiring Assemblies – 9-Pin (Right Element) 1 1 BLUE 2 BLUE 3 BLUE 4 BLACK 5 BLACK 6 BLACK 7 8 9 2 1 BLUE 2 BLUE 3 BLUE 4 BLACK 5 BLACK 6 BLACK 7 8 9 ITEM 1 2 PART # 106-6769 106-7850 106-6772 106-7852 COMPONENT 14/17 kW Standard Mercury 22 kW Triac SSR 14/17 kW Mechanical Contactor 22 kW Mercury and High Amp Mechanical Contactor 2-30 2.5.7.5 Main Wiring Harnesses - Full and Dual Vat 12-Pin Female Connector 807-0159 (Rear of Fryer) 15-Pin Male Connector 807-0804 (Rear of Component Box) C6 J4 12-Pin Male Connector 807-0160 (Contactor Box) USED ONLY ON DUAL VAT HARNESSES C1 C6 C1 J4 FULL VAT HARNESS 807-4194 C6 C1 J4 DUAL VAT HARNESS 807-4195 2-31 2.5.7.5 Main Wiring Harnesses – Fryer and ½ FRYER AND ½ HARNESS 807-4364 2-32 2.5.7.6 Component Box, Filter Pump and Basket Lift Wiring Harnesses 2 1 4 3 ITEM 1 2 3 4 PART # 106-5750 106-6639 106-5751 106-6644 106-5935 106-5957 106-6640 COMPONENT Full Vat Control Harness J4 to J2 (Standard) Full Vat Control Harness J4 to J2 (EPRI) Dual Vat Control Harness J4 to J1 and J2 (Standard) Dual Vat Control Harness J4 to J1 and J2 (EPRI) Filter Pump C2 to Component Box Wiring Harness Basket Lift Harness Assembly (Standard) Basket Lift Harness Assembly (EPRI) 2-33 2.5.7.7 Component Box to Filter Pump Harness 2.5.7.8 Basket Lift Harness 2.5.7.9 Interface Board to Controller Wiring Harness – 15-Pin 2-34 2.6 Filtration System Components 2-35 2.6 Filtration System Components cont. ITEM PART # COMPONENT * 826-1979 Filter Pan Roller Kit (four each of Items 7 and 8) * 826-1980 Service Filter Pan (Item 5 minus Item 2) * 826-1981 Service Filter Pan Assembly (Service Filter Pan above plus Items 3 and 4) √ * 826-1392 O-Ring (Pkg. of 5; used with Item 5) * 813-0568 Plug, ⅛-inch Socket Head Pipe (component of Item 5; two required) * 106-5911 Heater Strip Assembly, 100-120V 25W 18” 806-5933SP * 106-2852SP Heater Strip Assembly, 208-250V 25W 18” 1 823-4787 Lid, Multi-Vat Fryers Filter Pan 106-6243 Lid, Single Station Fryer Only Full Vat Filter Pan 106-6310 Lid, Single-Station Fryer Only Dual Vat Filter Pan 106-6461 Lid, RE SCF Deep Cabinet Filter Pan 106-6735 Lid, Fryer ½ Filter Pan 2 810-2874 Crumb Tray, Multi-Vat Fryers(component of Item 5) 824-1707 Crumb Tray, Single Station Fryer Only 823-5812 Crumb Tray, RE SCF Deep Cabinet 824-1734 Crumb Tray, Fryer ½ 3 810-2910 Hold-Down Ring for Paper 13.65 x 21.41 Multi-Vat Fryers 823-5774 Hold-Down Ring for Paper 8.98 x 19.39 Single Station Fryer Only 823-5811 Hold-Down Ring for Pad 15.75x 20.02 SCF Deep Cabinet 823-5934 Hold-Down Ring for Paper 8.98 x 21.04 Fryer ½ 4 200-2124 SanaGrid Filter Screen Standard 220-1316 SanaGrid Filter Screen, Single Station Fryer Only 220-1461 SanaGrid Filter Screen, SCF Deep Cabinet 220-1795 SanaGrid Filter Screen, Fryer ½ 5 106-2617SP Pan, One-Piece Filter Multi-Vat Fryers (includes Item 2) 823-5594 Pan, One-Piece Filter Single Station Fryer Only 823-5933 Pan, One-Piece Filter Fryer ½ Pan, Filter RE SCF Deep Cabinet (use 810-2805 Caster Front, 2” and 810-2807 823-5798 Caster Rear 2” rigid) 6 * √ * 7 8 * 9 10 810-2012 230-1381 826-1979 810-2198 826-1372 809-0191 823-4675 200-3556 200-6709 11 809-0503 12 809-0247 13 823-3879 823-5591 * Not illustrated. √ Recommended parts. Rail Set, Filter Pan Roller (includes one left and one right) Slide, Filter Pan SCF Deep Cabinet Roller Kit (includes 4 rollers, 4 nuts and 4 lock washers) Roller, Filter Pan and Rail Nut, ¼-20 Hex (Pkg. of 10) Washer, Lock 1/4 Spring ZP Bracket, Lid Support Guide, Filter Pan Lid Left Right Screw, 8-32 X ½-inch Slotted Truss Head Nut, 8-32 Hex Keps Suction Tube, Multi-Vat Fryer Suction Tube, Single-Station Fryer Continued on next page… 2-36 2.6 Filtration System Components cont. ITEM 14 15 PART # 200-4408 106-5981 220-1378 220-2069 200-4409 106-5982 220-1379 220-2070 16 √ √ √ 17 * √ 18 19 * 20 21 22 23 24 25 26 27 28 29 30 826-1785 826-1712 826-1756 826-1270 826-1755 826-1264 816-0093 807-11973 810-2902 807-2484 810-2493 811-1071 813-0342 813-0530 813-0022 813-0838 813-0304 810-1668 810-1669 810-1680 810-1057 810-1043 106-5910 106-5906 31 809-0401 32 200-7112 824-1705 220-1346 220-2080 220-1837 33 813-0003 34 813-0298 35 813-0537 36 813-0165 * Not illustrated. √ Recommended parts. COMPONENT Rail, Left Pan Filter Multi-Vat Fryers Support Assembly, Left Single Station Fryer Only Support, Left Filter Pan SCF Deep Cabinet Support, Left Filter Pan Fryer ½ Rail, Right Filter Pan Multi-Vat Fryers Support Assembly, Right Single Station Fryer Only Support, Right Filter Pan SCF Deep Cabinet Support, Right Filter Pan Filter ½ Motor and Gasket Kit 100V 50/60 Hz 115V 50/60 Hz 208V 50/60 Hz 220-240V 50/60 Hz 250V 50/60 Hz Pump and Gasket Kit 4 GPM 2-piece Gasket, Pump/Motor Seal Kit, Pump Viking Pump, Viking 8 GPM SCF Deep Cabinet Valve, ¼-inch Solenoid Fitting, ¼-inch x 90° Quick-Connect Tubing, ¼-inch OD Teflon Vent (sold by the foot) Elbow, ½-inch 45° Street Tee, ½-inch X ¼-inch X ½-inch Reducing Nipple, ½-inch Close Nipple, ¼-inch Close Bushing, ½-inch to ¼-inch Flush Adapter, ⅝-inch to ½-inch NPT Male Adapter, ⅝-inch to ½-inch NPT Female Flexline, 6.5-inch Oil Return Flexline, 13-inch Oil Return Flexline, 9.5-inch Oil Return Wiring Harness, Filter Pump 115/120V Filter Harness 208/230/240/250V Filter Harness Screw, 10-32 X ¾-inch Hex Trim Head (Pkg. of 5) Bridge, Filter Motor Multi-Vat Fryers Bridge Filter Motor Single Station Fryer Only Bridge, Filter Motor SCF Deep Cabinet Bridge, Filter Motor Fryer ½, Half Fryer LH side Bridge, Filter Motor Fryer ½, Half Fryer RH side Tee, ½-Inch Nipple, ½-inch 2.0-inch Nipple, ¼-inch 2.0-inch Elbow, ST ½-inch x ½-inch NPT 90° BM 2-37 2.7 Frypot Assemblies and Associated Parts 2-38 2.7 Frypot Assemblies and Associated Parts cont. ITEM PART # COMPONENT 1 Frypot Assembly (does not include Item 6) 2 823-5545SP Frypot, Full-Vat Filter with Insulation (for use on EPRI units) 3 823-5359SP Frypot, Full-Vat Filter w/o Insulation (for use on Standard units) 823-5996 Frypot, Half-Vat Filter w/o Insulation LH (for use on Fryer ½ LH units) 823-5723 Frypot, Half-Vat Filter w/o Insulation RH (for use on Fryer ½ RH units) 823-5783 Frypot, Full-Vat Filter w/o Insulation Deep Cabinet (for use on Standard Deep units) 4 823-5551SP Frypot, Dual-Vat Filter with Insulation (for use on EPRI units) 5 823-5482SP Frypot, Dual-Vat Filter w/o Insulation (for use on Standard units) √ 6 Thermostat Assembly, High-Limit 826-2454 Non-CE Full Vat 425°F (218°C) (17kW FV and 14kW FV)(Color-Coded Black 806-7543) 826-2456 Non-CE Dual Vat 435°F (224°C) (22kW, 17kW DV and 14 kW DV) (ColorCoded Red 806-8035) 826-2455 CE 415°F (213°C) (14kW and 17kW CE) (Color-Coded Yellow 806-8132) 826-2457 CE 405°F (207°C) (22 kW FV and DV CE) (Color-Coded White 806-8536) 7 812-0211 Insulation, Kaowool 17-inch X 10-inch X ½-inch (4 required per pot) 8 900-4100 Retainer, Side Insulation 9 900-4101 Retainer, Front Insulation 10 900-1345 Retainer, Rear Insulation 11 826-1376 Nut, 10-32 Keps Hex (Pkg. of 10) NOTES: The frypots for EPRI-equipped units are insulated; those for non-EPRI (standard) units are not. EPRI frypot assemblies 806-5545SP and 806-5551SP consist of Items 2 and 4 respectively, plus insulation (Items 7-10). When replacing insulation or adding insulation to a bare frypot, the individual pieces (sides, front, and back) are cut to fit from Item 7 when installed. Each frypot requires four uncut pieces of insulation. √ Recommended parts. 2-39 2.8 Oil Return System Components 22 21 Typical Rear-Flush Oil Return Plumbing 20 19 Full-vat rear-flush plumbing is shown on the left side of the oil return manifold; dual-vat plumbing is shown on the right side. Plumbing for a two-fryer battery is illustrated, but all components except the oil return manifold are the same regardless of the number of fryers in the battery. 13b 11 13a 14 13a 12 1 15 16 18 2 17 10 3 4 1 5 6 7 8 9 2-40 2.8 Oil Return System Components cont. ITEM 1 2 3 4 5 6 7 8 9 10 11 12 13a * * 13b 14 15 16 17 18 PART # 106-5596 106-6410 106-5597 807-2103 106-5595 200-5401 816-0220 826-1366 810-2534 810-3081 810-2533 816-0643 809-0601 810-2532 810-1057 810-1055 810-1668 813-0165 813-0062 813-0087 813-0908 810-0278 200-5438 900-2935 813-0460 813-0907 * 810-3142 19 810-3015 20 810-3016 21 810-3017 22 810-3018 * Not illustrated. COMPONENT Handle Assembly, Full-Vat and Right Dual-Vat Rear Flush Complete Handle Assembly, Full-Vat Deep Cabinet Complete Handle Assembly, Left Dual-Vat Rear Flush Complete Microswitch, Straight Lever Bracket Assembly, Microswitch Bracket, Handle Retainer Insulation, Oil Return Microswitch Nut, 4-40 Keps Hex (Pkg. of 25) Rod, Full-Vat and Right Dual Vat Rear Flush Rod, Full-Vat Right Hand Deep Cabinet Rod, Left Dual Vat Rear Flush Grip, Oil Return Valve Handle Clip, Clevis Flexline, 7.0-inch Multi-Vat Units Flexline, 13.0-inch Single Footprint Only Full Vat and Dual Vat Left Side Flexline, 11.5-inch Single Footprint Only Dual Vat Right Side Adapter, ⅝-inch to ½-inch NPT Male Elbow, ½-inch X 90° Street Elbow, ½-inch X 90° BM Nipple, ½-inch X 1.50-inch NPT Adapter, ½-inch NPT M/T 90º (used only on cabinet side) Valve, ½-inch Ball Handle, Rear Flush Valve Retainer, Oil Return Valve Nut Nipple, ½-inch X 3.0-inch NPT Cap, 15/16-inch Valve Safety Manifolds Manifold, Fryer ½ Station Fryer Manifold, Two-Station Fryer (use 810-2543 for non-filter units) Manifold, Three-Station Fryer (use 810-2544 for non-filter units) Manifold, Four-Station Fryer (use 810-2545 for non-filter units) Manifold, Five-Station Fryer (use 810-2546 for non-filter units) 2-41 2.9 Oil Disposal Plumbing 2-42 2.9 Oil Disposal Plumbing cont. ITEM PART # 106-5959 106-5933 1 106-6033 2 220-0922 3 220-0963 4 807-2484 5 809-0601 6 810-0487 7 810-1043 * 810-1055 8 810-1668 9 810-2493 10 811-1071 11 813-0003 12 813-0022 13 813-0062 14 813-0093 15 813-0165 16 813-0173 17 813-0304 18 813-0429 19 813-0571 20 813-0807 21 816-0637 22 823-5685 823-5809 23 813-0265 * 810-1669 * 813-0253 * 813-0298 * 106-6407 * Not illustrated. COMPONENT Plumbing, Front Oil Disposal Plumbing, Rear Oil Disposal Valve Assembly, Oil Disposal Rod, Oil Disposal Bracket, Oil Disposal Rod Valve, Solenoid ¼-inch NPT Clip, Clevis Right Rod End Coupling, Male Flexline, ½-inch ID x 9.50” Flexline, ½-inch ID x 11.50” Adaptor, Male ⅝-inch OD x ½-inch Fitting, 90° Quick Connect Tube Tubing, ¼-inch OD Tee, ½-inch x ½-inch x ½-inch BM Nipple, ½-inch x Close NPT BM Elbow, ½-inch 90° BM Nipple, ½-inch x 4.0” NPT BM Elbow, Street ½-inch x ½-inch NPT 90° BM Union, ½-inch NPT BM Bushing, ½-inch x ¼-inch BM Flush Nipple, ½-inch x 13.0” NPT BM Nipple, ¼-inch x 1½-inch BM Bushing, ¼-inch x ⅛-inch Cap, Vinyl Blue 5/16-inch x 3.0” Bracket, Assembly Quick Disconnect Bracket, Assembly Quick Disconnect SCF Deep Cabinet Nipple, ½-inch x 2.50” NPT BM Adapter, Female ⅞-inch O.D. x ½-inch Nipple, ½-inch x 10.00” NPT BM Nipple, ½-inch x 2.00” NPT BM Switch Assembly RE Wand 2.10 Oil Disposal Wand ITEM PART # 1 2 3 106-4395 810-0490 810-1471 810-0603 COMPONENT Oil Disposal Wand Assembly Quick Disconnect ½-inch Female Hose, 24-inch Wand 2-43 2.11 Wiring Connectors and Pin Connectors ITEM PART # 1 807-1068 2 807-0158 3 807-0156 4 807-0159 5 807-0875 6 807-1067 7 807-0157 8 807-0155 9 807-0160 10 807-0804 11 826-1341 12 826-1342 13 807-2518 807-0928 √ 14 806-4855 √ 15 230-2345 √ 16 807-4660PK √ * * Not illustrated. √ Recommended parts. COMPONENT 2-Pin Female 6-Pin Female 9-Pin Female 12-Pin Female 15-Pin Female 2-Pin Male 6-Pin Male 9-Pin Male 12-Pin Male 15-Pin Male Terminal, Female Split Pin (pkg. of 25) Terminal, Male Split Pin (pkg. of 25) Plug, Mate-N-Lock (Dummy Pin) Extract Tool Pin Pusher Pin Pusher Screwdriver Assembly SMT Pin Extractor SMT Pin Service Repair Kit 2-44 2.12 Fasteners ITEM * * * * * * * * * * * * * * * * * * * * * * * * * * * * * * * * * * * * * * * * PART # 809-0429 809-0514 809-0448 826-1366 826-1358 809-0247 826-1376 809-0766 809-0581 809-0020 826-1372 809-0417 809-0535 809-0540 826-1359 826-1365 809-0357 809-0359 809-0360 826-1371 809-0364 809-0518 809-0104 826-1363 826-1360 826-1330 809-1003 826-1375 809-1000 826-1374 809-0266 809-0434 809-0123 826-1389 809-0582 809-0184 809-0190 809-0191 809-0193 809-0194 COMPONENT Bolt, ¼-inch – 20 x 2.00-inch Hex Head ZP Tap Capscrew, 5/16-inch-18 NC Hex Clip, Tinnerman Nut, 4-40 Keps Hex (Pkg. of 25) (809-0237) Nut, 6-32 Keps Hex (Pkg. of 25) (809-0049) Nut, 8-32 Keps Hex Nut, 10-32 Keps Hex (Pkg. of 10) (809-0256) Nut, 10-32 Keps Hex SS Nut, ½ NPT Locking Nut Cap 10-24 NP Nut Grip ¼-inch 1/4-20 Hex NP (Pkg. of 10) (809-0059) Nut Flange ¼-inch 1/4-20 Serr Nut, "T" ¼-inch-20 x 7/16 SS Nut, Lock ½-inch-13 Hex 2-Way ZP Screw, 4-40 x ¾-inch Slotted Round Head (Pkg. of 25) (809-0354) Screw, 6-32 x ⅜-inch Slot Head (Pkg. of 25) (809-0095) Screw, 6 x ⅜-inch Phillips Head NP Screw, 8 x ¼-inch Hex Washer Head Screw, 8 x ⅜-inch Hex Washer Slot Head Screw, 8 x ½-inch Hex Head ZP (Pkg. of 25) (809-0361) Screw, 8 x ⅝-inch Hex Washer Head ZP Screw, 8-32 x ⅜-inch Hex Washer Slotted Head SS Screw, 8-32 x ½-inch Slotted Head ZP Screw, 8-32 x ½-inch NP (Pkg. of 25) (809-0103) Screw, 10-24 x 5/16-inch Round Slot Head ZP (Pkg. of 25) (809-0024) Screw, 10-32 x ⅜-inch Slot Head SS (809-0117) Screw, 10-32 x ⅜-inch Hex Trim Head SS Screw, 10-32 x ¾-inch Hex Trim Head SS (Pkg. of 5) (809-0401) Screw, 10-32 x 1¼-inch Hex Sck C/S Screw, 10 x ½-inch Hex Head (Pkg. of 25) (809-0412) Screw, 10 x ½-inch Phillips Head ZP Screw, 10 x ⅜-inch Hex Washer Head NP Screw, 10 x ¾-inch Slot Head Screw, 1/4-20 x ¾-inch Hex Head ZP (Pkg. of 10) (809-0131) Washer ½ NPT Locking Washer, #10 LK ZP Washer, .625 X .275 X 40 Flat SS Washer, Lock 1/4 Spring ZP Washer, Flat 1/4 Nylon Washer, Flat 5/16 ZP 2-45 Frymaster, L.L.C., 8700 Line Avenue, Shreveport, Louisiana 71106 TEL 1-318-865-1711 FAX (Parts) 1-318-219-7140 PRINTED IN THE UNITED STATES SERVICE HOTLINE 1-800-551-8633 (Tech Support) 1-318-219-7135 819-6150 MAY 2009