1
a;‘.
..)
-prolecfpf V&r&e&&.'~
.
*.. ;---,
>+:
A
_*
_-_-.-
_"
.,
2
9’
._
,.
Published by:
i. f'*'
'.
_\c
.
I
Superintendent of Documents
-'I,..
*..
pr',-\
.k-., Consumer Information Centek-. d (..
-'
- :.P.O.
:.P.O,Box '1OOt
Pueblo; Coloradq
81002‘
.'
-_
.
0
USA
-*
,
_ * k_
y..
-a.<
_
"..
.z
,.Available from:.. .
'- .:.,
.:-i_
..
'2,
.
,’
9.
--
-
*
--
I
b.
.*.
I..,:,
-
i_
. - ._
E
.
j
-
::
-.:ty
1..
‘.:,-*.
,.d:;‘s’
,
_
2:>
.c3
‘*...,
r
.:
.
I’
:
..
,
;.
X.-.
Z&.-.
-’
-3,.
,
.
,
A*
,
3
II
’
-.c
F
‘.
. .:
i’,
.;
’
”
j :
j-
-
I,
*
t
.d
,
’
,%.\
.,i
‘.%
‘.
,
,5
r
a
c
:.
Reprod-yced.by permission.
.
-7
.
,
-
-,
fJ
‘.
<*
~.
‘.
0 \
same as above
_
.’
.
.-i-
l
.
--
I
i
.
7
.
‘.
Reproduction .of this microfiche document in
any
form is subject to the same restrictions as those
of. the original,-document.. .p'
*
)-
/
.d
v
.
.
-‘.‘.
*
/
>
L_
”
L
*
k
. .
-
-.
I
*
..
;
.,.
..
e
’
‘.
i?
-=
.
.
.’
#
‘*,
~
j&T;
,
.
_’
r
q-
.
’
~
_ 4
‘Drub Bhkes
Chap:5
Chap.
.
p_
'iha;.
:.
2
:,.';i"
‘.. 7.
6.
?
9
Brake Hydraulic Systems
Pokier Brakes
I .*
Chap. 7
*
Chap.. 8 __
a
.
-
d
-.O~arbur~tar,{ibuild
D
:l
..,
,’
?
: L
,’
',3 ,
B
,
*'
Air' Conditioning’
-.L
Tgnition Syftenzs, Part- I-
Chap.
10-l
Ignition~sSystem$ .Part 2
Chap.
1 1 __
Spark. Plugs
Chap.
12.<.1
Grqase,’ O!$. And filter
-+,
0.
.
,.
_
<,
)_ *
!d . .
C@ge
;-s
m,
h
0
.
.
cr;
L
.
/
L
d
.._
‘,
-.,
.
-
,
i
‘I
.a
1.
-
:.
‘,
I.
‘.
4
_
3
I
r‘
,
a
^
”
.-
I
:
..
t
:
,.
.”
S)
#
.-
1 ’
‘”
”
,. :
6: ‘~
@ k
.-
:q.
‘_
P
<-(;
>‘.
_
.
,
_’
i
,.
*
I
d
.4 ir For.ccJ’s
.4 Fl.TC$EDD.
!‘.
” ,
4
1
ub
\i’ i t /I
DRIVER
Nortorl
-t
h’
c
,IIayazirlc
Stafj’,
A’bB,
CA ‘Yj4OY
,
e.
;
‘.
,fk+
”
ad4 ,i’
_
.
_
‘a
:7
r
.+
*’
,
x
.
e
.
7,
”
c
j~~~-~~~~~~~~~~.~~
;
;;_
-----.-
-/-
_
.g
l
1:
*;
:
~
m:
i. .~
i
‘.\I\,:
;;
.A
USFr)
).
1,
Tp&-g
_
I
5.
/
.I
i’
‘_
4 I
;
”
t.
-1
‘-
I
%
I.
!
a
,
,
e
I
-
-’
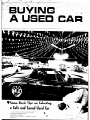
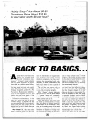
Some Basic Tips on Selecting
a Safe and Sound bed, Car
’
For
U.S.
by the
d’le
Washington.
’
1
Stock
Superlll@ndent
Government
No.
Pnntiny
D.C.
204
al
Documents.
.
OffIce
’
‘2
008-070-Oq406-2
A1ivI46.V.2
9
9
r.--
: Catalog
No.
-...
---
D 301.72’
/
i
‘I
-3
I
4
‘/
:-
.
a
.
.
3
.
*’
/
“.
.,..L
’
s>-
,/
_
,
..
z
^
,P
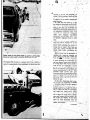
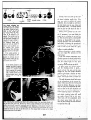
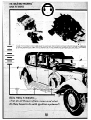
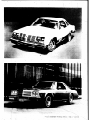
f ~9” were thinking
about a, new
car this fall, y& prob.ably ran light
down to chedk’,olit
Dktroit’s latest
offerings.
And, unless, you.‘re still.,
out cold,‘from
the ,.sho$k OY seeing
the price stickers,
you migl&have
decided you’re really interested
in
a Jtite-model
used car after ail.
But with the price-.of used oars skyrocketing, yciu’re goi&-to r&e
a prettyhealthy investment
in a used car-in
fact you may spend about as much as
you’d o@nalp
planned
to drop on a
neti car.30 now more than ever -before,
it’s important to shop carefully and get,
a good deal on Fused
car you .really
,want..
When’ you’re buying ‘a new car you
really don’t have to wbrry too muchabout whether the ca; i6 safe and reliable. But with any used car it’s impor:
tant to make sure thd car is i,n top
condition
for maximum
driving safety
and pleasure. So. with this article we’ll
b
hanginaniQt&
7 I and
you ‘might
like.
.
MARKti
car for a feiv years
as well get a car you,’
i
-
’
c
After evaluating
your wants, n&ds
*
and financial status: get a feel for the , 1
market on the car you’re interested in.
Your base credit union shoqld be glad,
.’ to give. you the “blue book” price on’.
any car, but the true going price is most
accurately
reflected
in newspaper
ads.
So get a feel for price and’availability
’ on “your” cat by ,:scanriing the papers
* before you’re ready to buy.
When you’re checking
out the ads
yau’ll probably
see cars you’re inter; ‘:
_.
ested in listed by’new. car ‘dealers, used
.
car lots and private
owners.
So the
logical question is where to buy? Well,
-‘.I ._ ’
Z’ each of the three possibilities
has various advantages
and disadvantages.
But
before we go any further we want to
‘-.. i ‘y ,~
.,
‘.
say one thing-DIAGNOSTICS!
DIAGNOSTIC
’ Buying
TESTING
a used
car.’
k
*
.. 1
or a&mechanic
can do as thorou gfia
job checking 06 a car for less money.
:And the small?amou’nt
of mangy you
spend having a car checked out’ now can
CI
save ybu
a lot ,of bread:; hassle,. and
.disappointment
in the. future. Another
idvantage
is that a diagno’sti& check
the condition
‘f *many
.
. ‘will reveal
“small” items like headlight
1 im, ‘battery charge and wheel balance that -you
or riot be able’to check.
“54_- mighf’overlook
,.n,
a lot .of “minorl’
.,
*,&nd having to 11
maintenance
and T4 justmentf
after the
sale. can add up to make a good deal
*
“not s$ go.dd.” :
: So now we$e back to !he question of
where to buy a u$ed car. Well. as previously mentioned,
:ea& ‘of the possibilities has certain advantages
and dis;
..
advantages
Xiat, we’ll
run‘ through
briefly.
.
-
NEW CAR DEALER’
With a late-model
car, it’s generally
pretty hard to go wrong buying’from
a franchised
new car dealer.
A car
dealer ,keeps the best .of .his trade-ins
for his used car lot qd wholesales ihe
not-so-cherry
ones to used car dealers.
Although
youlre! going to pay *least,
Bu; ‘in most cases a used car deal
several hundred dollars more for a-car
doesn*P have a service department
al
,at a dealer’s :lot, the car has probably
a used ‘car that look; good may 1
been thoroughly
checked
and recondiright on the lot without ,being check1
tioned by the dealer’s service departor sflviced.
So ‘the main points to co
ment ‘before going on the lot. And in
sider when buying fro.m a “used c
most cases you’ll have some type of
dealer are can you have the car check’
guarantee
and the dealer’s reputation
(if
out before the purchase
and does tl
h_e’s a rebutable dealer) backing up the
dealer offer a guarantee
that’s wor
:
car in, krise something
does go wrong.
) anything?
Most dealerships
will also be glad
PRIVATE OWb&J%
0 .
: to..have the car checked out bv ai independent
test \,center
and provide
you
, A lot of people
in the used c
with the report or allow you to keep
-market opt for buying \from
priva
the car overnight to give it a thorough
(, owners, primarily becauseiof
the man
test drive and have it checked out on
they can save. Well, it’s true that yc
your own. Another
big advantage
is
can generally do better on ,price frc
that most car dealerships
will hold the
a private own’PrAespecially
if he’s
car whilei,you
arrange
financing.
This
need of cash and willing to bargain f
-;
way if you luck. onto “your” car YOU
a auick sale. The main disadvanta
don’t have to, worry about them selling
to buying from a private owner is th
it out from underneath
you if someyou generally haJe to- have cash in haI
body shows up with cash in hand.
since the owner may be prone’ to SC
to the first person who does. Also,
I.
USED CAR DEALER
private owner may be reluctant
to tu
A reputable used car dealer generally ’ his car over to you to haye it check1
offers about the s’ame ‘services’ as a new
out for a variety of legitimate
reason
car dealer and you may be able to save
So you may be buying on a strict
“as-is” basis with no-guarantee
a few bucks buying at a used car lot.
or re
:
P
are&.
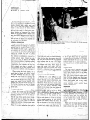
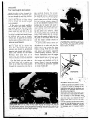
Eyeball along all niajorlarities that mean the
Check the rocker
y‘ panels for ripples or body irregubeen pressed out after a sm,ack. .
the bumpers for rt!st.
-+
The bounce test wiil give you a.gener&idea’
of thz condition of
the shocks. If the;car bounces a couple of times before returning to its original position when depressed, the shocks are worn. ’
i
*
I
‘8:
.;
I
’
f
ri” / But ‘let’s say for some reason’ you
-__ _
can’t have thercar checked out o i you
.
,‘
I want to be sure you d’on’t have a! total
‘lemon before spending
the money on
/ havihg the car tested. Well, thefe are
some basic checks everyoge, *can and
should
make , before
purchasin
any
used car.
f
Before we get into the. mecha its, of
‘*
checking out a used car, howe J”er, we
want to.point out that this is wh kre the -
_-
,
write off the car-especially
if you’re
going to have to pay to$,-dollar for it.
.;
D
’
i,
J
d’..
,
continued
.
/
\.
^ s+=--a..
“i’i’
. -_ -<:-,!sy
,:
‘cbntind
eBUYIi4G
!
..
Ii’ USED
*
CAR’
don’t buy a doi!i*Oie <thing to keei ’ ;i_.- \
mind is that nob all Oaf these the :cks
aIjply to a c!unkel ,r;as much as to a new
A final point con-
by ;Y foreign
car niechanic.
hydraulic’{ystern
by tiolding do& firmly on the pedal for thirty seconds
stays firm the *brake system js okay.
I
>.
-.
You should be able to get a good feel ‘:
for whethec the car had a hard life by I/
simple observation.
If the car-has been; ii
- sitting for a\yhile,
b’e. sure to check 1
underneath
it for’ splotches
of liquid /
that indicate transmission.
rear-end or !
cooling system leaks. Check the tail- 1
pipe: if it is oily or gunky. the engine/
has internal, problems. Cafefully eyeball’
all major body panels for ripples or,il
irregularities
that indicate the ,car has
been pressed
out after a crunch.
A’
.a once-smacked
car is best avoided sincg
it could have suffered other ‘damage in
the crash.
When eyeing the body panels, it’s a
good idea to check the rocker panels
for rust. Although
it’s rare on a Iat,dmodel car, rust could be starting. 0
an older-car rustmay
have been painted r
over so check tli& paint for pitting. Aldo
:check the. splash guards behind each
bumper fbr rust and crash *damage--/f
’
ihe bumper brackets are new or weldid.
r y&. can assume the car was smacked
h. giuite hard.
)‘.
0
‘_.
;.
-:-se
; . . i ‘*.,:T
,. -., (
ej~
‘Z
I%.
0
.
ing to have to sink &me money into.
fr”ont-end work and/or.wheel
balancing.’
that the owner drove t&
the front-end out of alignmeht
indicate that he was a -b’it sloppy
basic maintenance
such as
and lubes. Don’t forget to
little play is acceptable,
but ii there’s
a a lot of eive there’ mav be suspension
or wheel bearing #oblems.
If possible,
check underneath
the car to see if the
exhaust’system
is i.n good conditionnot rusted, and if the car had a’ recent
lube.
,__
..
UNDER HOOD
-
_
af er the sale can make
oso i godd:.
.
a good deal not
. e
S EEyIbiG AND S&ENSION
Alt,hough
it’s a bit .difficult to tell
toI’ inuch about the car’s suspension
&em
through casual observation,
you
c& check the steering play and shock
a,ti sokbers. Watch #the front wheels while
~ y u slowly turh the’ 2teering wheel (eng ne on w@ power
steering);
there
-s e ould not -be more than. two inches of
.
The next step is opening
the hood
and having a look around. If the engine
hasn’t been cleaned, check for oil’ leaks.
A lot .of oil and .gunk around the oil
filler tube means internal engine problems, Pull the dipstick
and look carefully for water droplets that indicate a
blown head gasket and a very costly
repair bill. If the oil is very dirty, tht
owner probably
wasn’t careful
aboul
regular maintenance.
RADIATOR
L
ITailpipe should be dry. If it is black,
problems.
,o
J
--;
;I’.
,
pi
,,i
._ - -_-
,
internal
..z.--
gunky or oily the engine yo&bly:,has,
_I d/
-‘a
i
.
n
. .
._.
‘;,
.-..’ \
r.
I
-‘-
”
an automatic
transmission.
pull the
transmission
dipstick
and check
the
color and condition
of the fluid. It
should be sparkly red. If i,t is orange,
black, has carbon specks 0; smells like
varnish
the traixmission
is in definite
need of an overhaul.
Pu!i the PCV
valve out and see if it”clicks freely, if
it does the owner probably kept up on
. ,$
d
_,: >
I?-
,‘A~,
/
regular
aintenance.
Finally, just “check
around T
#under the hood-is
the battery
clean,
qu-e. the terminals
and cables’
clean and uncorroded?
INSIDE
l.
,
I I
If things look good und;er the hood
’ you can ,check out the inside of the car.
Fjrst 1ookcfo.r lube stickers on the inside
w
I
of the door post--the
frind service stations put there to tell wh& the car ‘was
serviced.~.These
may ‘indicde $w well
<the oylner kept the car serviced (unless
he did his own maintenance)
and you
might be able to match up the mileage,
on the odometer
with that shown on
the service stickers j&t to be sure the
milea$e figure is correct. Also,“if you’re
.buying from a lot, you might be able
to get the previous owner’s name off the
lube stickers or perh.aps you can find
his name on an,VoldW credit card sliu
“somewh‘ere in the car. In’,,any cask, if
you can find the previous owner’s name
yob can give him a ring and ask him
about the car.
Inside the car check all of the equipment and accessdries
to be sure theywork. Items like the turn. signals, heater
and defroster
are a m&t of cours6:
Also, make sure the windowi and doors
‘/ open and close cdrrectly.S.If. the interior
’ shows excessive
wear,
you tan
assume
: the car has had a lot of miles or at least
’ hard ones.
Be sure to check the brake hydraulic
system by holding down firmly on the
‘pedal for at least thiity &conds-if
the
pedal stays firm, the hidraulic
system
is okay. On a manual transmission
car,
continued.
i
’
’
.
..
check to see that the clutch has no more
tham I inch of free play. 1 basic wav
to check the chltch is to put the car in
iear, apply the cuicrgencv brake (engine
running) and rel‘ease thc~ clutch-if
the
clut:ch is okay. the engine
\\ill ~tnll
when the clutch is rel’ea~td. Make sure
you make this le<;t in an open arc;\. \vith
no one in front of: the car.
L
.’
son to have the car diagnosed
or at
least a compression
check shade to determine
the internal
condition
of the
-.’
engine. ’ _.
After, ycju get’s feel for the car. head
out for :I tkscrtcd stretch of road ?vhere
!‘otI can salcly make some quick stops
to cheek .,the hrakcs. On t&c way you
can make ;I few- acceleration
tests to *
further
check engine qperntion.
From
TEST DRIVE
..
a standing
start accelcr’ate briskly and
After checking out the insitle of the
smoorhlv
to ahut
50 mph. The car
car. you’re ready for a test drive. Listen
ihould
accelerate
without
miss,ing or
carefully
when you crank the engine.
making any unusual noises-check
the
_.‘.
I he engine should ‘start quickly and
rearview
mirror for blue smoke while
easily. After the engine
warms a bit
you’re accelerating.
Also be listening
rev it a few times and check the cglor,
for an];. !~,;u?ual ;,~YII~&I&c&, noises like
of the exhaust smoke.
If’ the ex&ustbytraansmission’i
cIGnks.‘=.&Hu6~‘- ehhaust
smoke is black you’re in need of at least ,” smoke or strange noises are good reaa carb adjustment.
But if the exhaust
sons to look for Linother car.
smoke is blue there’s a definite engine
When ~OLI get to a nice stretch of
problem.
Run the eniine
at various
deserted
road where
you can safely
speeds and listen for misses, hesitations.
test the btxkes. make some progressively
or unusual noises. Any irregular engine
harder stops. Make sure the car stops
operation
is an indication
that at least
evenly
and quickly
without
pulling,
a tuneup is needed and it’s a good reascreeching,
or making
any unusual
,
I
.,
-
,
’
8
\
*
noises. \Vhen you get the feel of the
brakes. try locking them on for just an
instant. If the brakes won’t lock there’s
something
v.rang with them.
’
Finall!,. drive the car over various
road qurfncc? to get a feel for ride comfort and noise Icvels. If the car drifts
on the roxl or won’t track straight
down the road when you release your
grasp from the wheel briefly. there’s a
definite
alignment
prohle’m.
If the
wheels se‘em to bounce or hop you know
they, neecl lo be balanced.
So, if the car rides ahd handles to
your liking and everything else checked
out. you may-have
lilst bought a new
used
car-congraiul:itions.
But,
if
things dicln‘t cheek out just right, be
prepared
to look for another
car or
make sure the “deal” you’re getting is
qaving you enough so you can afford
lo get the car in shape. And. if you
just picked up a second-car
clunker,
check out this mdnth’s article on keeping up an oldie on page 16. @
,,
*-
/
-by
0
5.
I
L
‘8;
.
-
,
$
-‘4_
I.
0
,
5,
i.
.-
‘.
.
,
,
,,
.
I.’
-
iHE-Dk~YI\RD
i!lEDiA-N
kcently many people h*ave gotten very tune consciou*not
* ,
musically
but ,mechanically,.
Fuel’ shortages
and high gag
4;
prices make maximizing
g;?s
mileage
t’he “in” thihg. But
many driveis still think there
The Backyard
Mechanic
is designed
are super-trick ways of tuning a car to
to serve-as only a general guide to the
dodble ,the gas mileage.
-’
maintenance
topics discussed.
Since”
Well, unfort’unately there* aren’t any
basic procedures
vary from car to car,
’ magic iricks or gadgeti that will sub;a manual
should beU consultAd
when
stantially increase fuel economy. The
truth is that your car operates at best
*
_
*
k
’ e$ciency when ‘it is tuned properly to Ci’\
sp+f+ations.i:So
the real way-to get
maximum -performance
and ,gas mile-/
age is to perform, a th&‘ough tuneup.
But by “thorough”
we mean more
than just ‘slapping in points and plugs
‘-although
this alone will usually im.z
-.prove ptrfdrmance.
A good ‘tuneup. can be broken ’
down &to three major steps that‘ be*
gin with fan inspection
offhc. basic
systems, such as the fuel and el‘ectiical
systems. Phase two is.the &ual tuneup step of replaci3g
i Plition- pacts.
1
And the last step i’s ma &‘nig t&c ultraimport&t
final settings and adjust‘*’
.ments. We’ll outline the basics of the
first !Y’I, steps here, and next mbnth
we’ll cover the use of> tuneup equipment for makihg
the final ad&t’1
.
ments.
:
7
-.
.
.;
I
=
1(1
/
\
1
‘-.
P
1
.
._
(1
:.
,i’
/
q
i
2,
,
:-R
-
”
-.2
I .-
-3
performing
any maintenance.
And an)
job,s’ that the “backyard
mechanid’
feels
are
beiond
his’ capabilities
should be left to ex’perts.
* _
7
. s,..
_I
.‘.
D
I ‘4.Tr
Y’.
0
.
E
water:
{o?abls! paper element filtc
available for around $3 at
a
The first thing you should dp bestores. You can check-the rrtter by
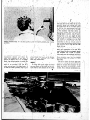
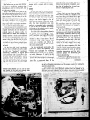
Next make sure ‘the battery case
f&e beginning a tuneup. is glance
holding it up tb the
:he sunlight or to!a
,and terminals
are clean. Corroded
through a manual to get a good idea
bright,
light bulb. If you can’t sek
se&
termina.l’s -should be e!&d
”
&d
with . , bright,light
,. .
’
light
coming
through
’ of what y:u’re going to do and what
‘ough
all
the
way
steel wool or a special cleaning tbol,
equipmeili
and parts are needed.
around the filter, ii should definitesuch as pictured.
When r‘emoving
It’s usually a good idea to pick up
the battery cables for cleaning, ,be! * ly be rep’aced.
.
regularly replaced parts, such’as filGas Filter-A
plugged g& filter
sui-e to remove the ground cable
can stall your engine
cold wlthoul
without.
ters, when they a&on
sale. But-it
Iglne colcl
firsp,(the cable that runs t6 the ear,,
warning.
Sin_ce
there’s
to
you don’t have< replacement parts
there’s
no
way tc
frame or engine-the
negative cabI&..
on hand, your best bet-is waiting uncheck
the’
filter,
f+
-it.
should.
be
r&
on nearly all America0 c rs a
til you check things out before bu*
‘placed
tun&p..Qere
Naced at every tun&p..J$ere
are
most iTports).
Connect t t-ii&d%
* .
two
basic
types
of
-gas
ing parts. This-way.you won’t go-out
gas
filters-+e
last when reinstalling
the cables. A
type used on most
produci‘s.
and pay for par-t’s not really needed.
7osi GM produci‘s
dirty battery case can be washed
(Rochester
carbs)
)
installs
inside
the
After’checking
a manual’the first
with
baking
&da
solution’i and
carb.
Most
other
carsuse
an
in-line
-I sfep in a tuneup is’a quick inspecrinsed with clean: water. Coat the
fi,lter that clamps1s in the fuel line
tion bf <the basic Components that
tops of the cleaned battery termibetween
the fuel?I pvmp and the
affect reliability
and performance..
nals with petroleum
jelly to- help
carb.
Some,of the most important checks
prevent corrosion. Finally, trace the
The, -GM-type.,#jlter
.Je..re_#jlter can .Je.,rethat requi.re nothing more than a
positive battery cable to,make sure
placed by very carefully
removing‘
zarefully removing
couple of minutes
and common .L all electrical connections are tightthe fuel line at the
le carb while holdtools are listed *below.
especially at the starter.
ing a rag undeS the
Iin2 connecjion
he lini?
Battery-First,
after removing-any -’
,f!ir Filter-A
dirty air ‘filter
reto catch ledking gasoline. . When YO’L
yo’u
jewelry, ‘pc
.pop off the battery fi‘iier
strrct’s air flow to the carburetor and
remove the line-note how the filter
tel
caps and check to see tha’t the wacauses if-to burn’more
gas. So, a.
housapd spring insert in the.filtltr
hous,
ter level is up to the fill line or over
clean aii filter is-essential. for best
fiIJ+
ing so you can install~ttie .pew fil&l
&&y”i.
&&y”&
D
the
plates in all cells. If the-level is’, I gas mileage. Most cars_ use ,a,~,&_I
correctly.
s c,,.
” ..4,
.k;::g
GENERAL
-\
,s
low, bring it up with distilled
;
.)
CHECKS
__ Tap water .is okay in,an emergehcy.
.
,N
.
I...
1
xial cleatjng tool work<.best
rdded terminals.
-
on
The gas filter fits inside the carb on most...GM products. ,ln-line filters
nearly all other cars.
1
_ ‘.
.
-
. .
n
ia
’ The in-line ‘filter
tither
clamps’
into the fuel 4ine or, on mo.st Ford
products,
it screws into the’.carb
with the fuel line clamped
ta the”
other
end. The new filter
can be
clamped
into place exactly
as the
018 filter came out.
*
ar.e used on
-The PCV filter is lbcated. in the-rocker
arm cover or intake
manifold on most cars and should 68 replaced at every tuneup.
Id
1 ;’
cover or intake maLifold.
Pull the
old valve out of, its rubber
grommet and insert.the
new valve being
sure it is properly
seated
in the
grommet.
:
connected
at the
manifold
and,.that
09
air cleane;
a::d Lo it’s not leaking.
Spark Plug Wires-Pjug
wires are
;
very freoupntly
neglected jte”ms that
i
can cabse plenty of problems. Wires
-.
pith cracked or damaged
insulation
The h’eat riser iS a simple valve
should be replaced. The,best way to
‘.
that controls, heating of the, intake
install new wires is to buy a replace-‘
’ ’
manifold
by exhaust
gases. If the
En&ion
Systems,Emission
sysfor your’car’s
envalve sticks ‘it causes all kinds of * ment besigned
terns should be properly maintained
gine. ‘TheS’e kits come with wires
’
prob!ems.
L.ocaje the heat riser on’
to. keep, emissions
down :and ‘perprecut
to-the
proper
size.
The,pnly
-.,.
’
the
exh.aust
.pipe
or%rossover
near
J
formance.
up. The “Backyard
Metrick is replacing
one wire at a,time
;
the exhaust, manjfold*and
check it.
ch$nic,“’
Parts VII and VIII in’.thefor free operation.
A sticking
valve- :’ so-,you get the wires into the dlsJuly and August
DRIVERS, covertributor
cap correctly.
If the wires. _
;
can be freed with solvent.
’
“emission system checks, But’during’
are
bil.soaked
but
not
damaged
they
*
,
’ a~.;funeup your main concerns should
Mdst
cars ,since
197 1 and*,
canebe cLeaned with soLvent.
be the PCV system and. the heat. ’ many older4-model
cars have a spe-.’
‘clean. Garb-At
every tuneflp., if..
riser and/or thermostati:
air clean-.
cial thermostatically-controlled
air,~~
not more frequently,
a can’of carb’ .- ’ 5
* ‘er.
cleaner $instead of the heat riser:.
combustionchamber
cleaner,should
.~.SL
An easy way to check the PCV
And -a few Ears still use both sysbe sprayed down the carb throat acsystem is to place a sheet of paper * terns. If your car uses altherm
alit-’
0
cording
to’the
instructions
on the
over the oil filler neck.’ If the- paper
cleaner there will b,e a’hot air tube
‘can. The outside 8 the carb-es,peis pulled in by suction., the system
or’ pipe running’
from the exhaust
cially the choke pl’ate and linkagesis operating.
Even if the system is-,
manifold
to the air cleaner
intake.
should also be sprayed clean with
’ operating
this is the perfect time to
The previously
mentioned
“Back-“)
carb or choke solvent. Be sure the
‘- install ‘a new PCV valve-the
valve
yard Mechanics”l’cover
therm0
bir
choke operates freely, _.
should” be replaced
every
lO.OOQ
cleaner maintenance-but
your pri:
.
miles or so. To replace the valve *’ -?tiary .!$$cern~shouldbe
checking to
simply
!&ate
it in the -rocker arm
,
see t.hat the heat tube is properly
.;continued
.), -1
/
E
_-_
_
I.-“”
2
r
‘I
ill
; _,
_
‘:i’
1’
.I
- I_
-
\,
IS
\
,d
.\
!‘
,
continued--
Y THE
f
;-
BACKYARD
&
&‘----:
I;
-
a-.
-z
1
-
MECHANIC
.’
_’
,.
,
,,,
-:;-- JJJNEUp-l
<
11,
.,
~‘.;:-j;.
7,:
-1::
r;3
After .cKecking out t.he mentioned
~~itizrhs, as well.as basics like the drive
belts and the master cylinder reservoir. you’re ready to get into the
actual tuneup. The only tools you
need in addition to ordinary
hand
-p3ls are a pliig gapping tool Xi?&
’ feeler gauges-unless
you have a GM
product in which case y,o” do$t even
,need feeler gauges.‘Naturally~
y%uJl
need spark .pli;gs at-&~ &neyp~ kit-$,
these arc discussed later.
fEefore bEginning the tuneupY. how- :
’ ever. you should perform a com&E?&
sion check. Checking the compressi&%
tells~you’the internal condition of theengine-primarily
what kind of shape
the valves and piston rings are in.
This check is-important
since an engine; down on compression
canlt..be
very etfectively tuned, and some eni
@lies can be damaged when run wjth’
ia
burned valves.
In a future “Backyard
Jvfechanic”
we will feature an entire article on
doing a thorough compression
and
cylinder balance test. But in the mean-,
r
time. here is a very simple way. to
get 3 good. idea of your engine’s in= ternal condition. Pull the coil wire out
<
of the distributor and ground it to the
firewall or engine. Then crank,‘the engine over-with the starter for a-bout
20 seconds. If the enrine cranks fairlv
evenly. the compre&ion
should be
okay. But if there is a lot of variation
,
in the cranking speed a complete corn’:
pression cheek should be made.
he heat riser used on‘ m&t older cars is located ‘near the exhaust manifold. It
6’
ould be regularly doused with solve# to keep it’,operating freely. On cars with’
therm0 air cleaners, make sure the, heat tube or pipe is connected at the manifold
*
y
‘1
i i
._
II
FS
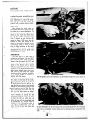
Light carbon deposits shouldbe
scraped off the distributor cap contacts.
carbon buildup or cracks in the cap call for a new cap. o
If you have compressed air available it’s a good idea to blow out &he
PLUGS
plug dzprkssions
to keep junk from
After checking the compression,‘
falling in the .hole when the plug is
the first ignition parts you’ll want to
removed. Pull off the.wires on a cou- ’
replace are the spark plugs. But be-’
ple of plugs and carefully remove the .
fore running out to buy new-plugs,---pl.ugs.
Si$ce.the removed
it’s a good idea to remoge a .couple
warn% grab them with a ‘rag or leave
of the old plugs andlexamine
them tothem in: the plug socket tool to inspect
see if= the fuel mixture is burning - d them. ‘If the plugs have a cru’rnbly’
piqperly.
If you have a four--or six-’
chocoiate-brown
deposit;,the engine is
c)Tltnder engine. ‘removing -@he plugs
burning .okay. ‘But, if the plugs. are
should be a snap with a plug wrench:
black and oily, either the plug is burn_ or spark plug sjckct and ratchet:But
ing too cold or oil is, leaking in,to t
‘if you have a Y-8 or air conditioning.
combustion chambers and fo,uling the -.
some .of.thc plugs may be tricky to get
fouling, is comm’on with
plugs-oil
.r’to. ‘Rilakz a survey under the’hood to .‘,- older engines that have worn piston ’
:’
rings. In either case a -hotter burning
,,” XC if you need any kind of special
,.’ . cxtcnsions
or swivel adapters to get to
plug should. be used. On the other
the plugs.
‘:
i
plugs
will
be
0
:~
:’
- _
Heavy
the engine ,is burning too hot and’
colder burning plugs are definitely
needed..
.
4 good place to buy ‘new plugsis
at a discount store. But check the application charts very” carefully to ge7the correct plug for your engine. Fre“quently the same’size engine uses a
different plug, depending on the year
or horsepower rating of the:engine. If
you’re, changing to a different heat
plug, be especially careful. If
have trouble determining, what
to switch to, take one of the old
$/ugs to a parts ‘house and have them
s& you’ up-with* the right plug.
6
.j
> ” .-I
.(
‘*
* con&wed
%
i.
THE
BACKYAR-D
0.:
.j7
them finger tight before tightening
them with 8 ,socket or torque wrench. i
..
^,
POINTS
After:changing
all? the .plugs you’re
ready td get into the distributor.‘Installing new ignition points and con-’ penser are the only, tricky. parts of a
.ti.~neue--but
even this job is.simple
if you work carefully.
While ~some
people recommend
removing the distributoz to work on it-you
can avoid
‘a lot of potential problems by leaving
it in place atid simply being careful.
: The rriost important thing when*replacing the ignition parts is not lbsing
screws-espethe small hold-down
cially not dropping the& down into
the distribtuor.
Magnet@ed
yrewRotor
N6n-GM distributor.
Condenser
Points
drivers arf: a big help for this job. ’
Note where wires connect.
_
I
’
When .you’re reBdy tb iepiace the-.
..
1.
d
.
points, the *first thini y,ou’li, need to
GM DISTPIBUT6RS
-’
do ,is remove the distributor
cap,
the ‘&de hole on the points is posiMos’t GM cars..have...caps with -a spe-..
tioned -over. the guide post. Tighten
On .a GM-type distribtuor- the first
_ cial lockink catch. To’ rempve Ithis
. thi’ng you’l!- see with the distributor
down the screw and hook the wires
;
-‘type cap. simply fuse a, scrkwdriver
to the points. Since the point hdjustcap removed is a large ‘round rotor
hnd turn the screw heads in the cap
ment is made externally with a GMheld in place by two screws. Loosen
until the locks release (see photo),
typl distributor,
you can put ‘in the
the screws and lift the rotor straight
Most other type caps ar&eld
in place \ up to.remove
new rotor and lock down the distribuit. Now the points $and
by external clips that. dan be”popped
tor cap. Now you’re ready to fire up
,condensc.r
should
be visible
(see
off
with a screwdriver.
the engine and adjust the points.
,photo),
unless you have a window
Check the removed cap very care- ’ radio antenna
in which case tliere
*Locate the adjustiag access window
fully for cracks or excessive carbbn
will be a shigld ‘over the points that I* on t6e distributor
cap Xsee photo)
deposit
on the inside ~contacts. If
>[&I qimpl’y ~~11:off. Now you can-see
and insert the allen wrerich that
eitherja 1 e found, a new cap should be
that’l Ith’e points and condbnser
are
comes with the tuneup kit. If the en-i
install&d. When installing the new cap
held in place by set screws. Also’ -’ gine; fails tb‘ start, turn the wrench
make an accurate drawing bf where
notice that there‘ are two wires that~
one way, then the other intil the enthE.plug wires fit into tqe cap so you
gine fires, I,f the engine still fails tb
attach to the poi#ts., Generally ‘the
can install the new wires properly,If
wires fit in a cli$ and can be simply
start.,, go back and doublecheck
your
the wires do get crossed hnd the enpulled loose. However, on some:oars
.work.
_.
gme wdn’t start or runs poorly, a
..,..,_
adjust ttie poi&s, with thi: knthe- wires are held in place by a small
”To
,,.‘.-,_,,_,.
service manual has a-diagr,-‘fn of hbw
nutLyou
may ,geed - ;.a+mall
igriition
gin?. runni,ng
turn
the
adjusting
the
wires,fit
into
the
cap.
wrench
to
loosen,;ahrs
nut.
After
rewrefich
tP
the
right
(clockwise)
‘uhtil
:,
I .
If, the distiibutor
cap. is -in good
mbving the wires from the points,, very
the &gine starts to miss- &dies. Then
‘condition,
gently scrape any carbon
carefully loosen the conden$er:;then
simpl$ turn the wrencK one-half turn
. off the contacts -with aJscrewdrivei
I the points by removing the hold-down
back to the left. This should be the
and spray opt tpe inside of the cap
screws. Lift the parts off the-plate.
correct point gap setting. But the seti
with solvent. Wipe the cap clean with
Spray the distributor
plate w’
ting should also bq checked with a
a rag and pull it out of your way.
solvent and ge‘fitly bipe it and the disdwell meter-this
procedure
will be
There are basically
two ‘types of ,
tributor
cam clean. Then take the’
covered next month..
distributors
and the procedure fo! in- . small tube of lubricant supplied ‘Cwit
OTHER tiPE
DISTRIBUTORS
stalling and adjusting the poiyts difthe tuneup kit and coat the cam with
fers. We’ll discuss the. two types sepInstalling
and adjusting points on
lube. ‘Now you’re ready todnstall thk
arately, beginning with the type used
the other type distribute!
used .on
new condenser and ,points. .Place the
on nearly all GM) prodqcts. The acnearly all nag-GM’ cars -and on most
new condenser&
the plate exactly
companying
pictures .should get you
import cars is basically the same exas the old part came off and lock it.
.oriented if you’ve-never
replaced igcept fqr the point adjustment.
The’ac- I
do\;n with the screw. Then place the
nition pa+.
companying
pictures
should
clarify
points on the plate, ‘being very sure
Y
*
14
,,
1. “:
C’
,
e
_
--.
a
I
9
.”a
;‘-
l
m
_.
__.._. _..- --_ __._...Don’t tighten it all the way because
you stjll have to adjust the points.
To adjust the points. you have -toA
f&3 get the point Flubbing block,on a
lob; of the distributor cam (see photo). l%‘do this, tuin the engine by
hand -with the fan.. or if your car has
a clutch-operated
fan you can have a
buddy tap ‘the starter until the rubbing block is on the peak of a cam
lobe and the points are open.
,.~Now with-the points held open by
‘the cam. carefully insert aclean feeler
gauge of the correct size (your manual gives the gap spec) in betweeri
the pojnts. Insert a screwdriver iri the
special adjusting
slots (see photo)
and adjust the gap until the gauge
drags lightly when inserted
in the
gap. Then. carefully tighten the set
screw and double-check
the gap. The
.gap frequently
cha;ges
when the
‘screw is tightened,
Install the new
&or by lining up the guide insrde the
Fotor with the groove on the cam and
t’wist the rotor slightly unil it slides
all th& way down on the cam. Re-install the distributor
cap and you
shobld be all set.
The engine should fiie up. Tf’not.
io back and check your work-especially the point gap. If it’s too narrow
or too wide. the engine won’t start.
The points should also be checked
with a dwell meter. As previously
mentioned,
this will be covered next
month.
Now your car should run a whole
,lot better. But you’re not finished yet.
The final settings of point dwell. timing, and carburetion
are what make
the difference between a car, that runs
and one that runs great. So hang .on
‘til next month wheti we:11 give. you
tips on super-tuning.‘@
,t
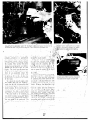
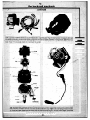
To adjusi the point gap, the, rubbing block must be on a high lobe of the distributor
cam. Special rings that fit ovei the cam and hold the points open to the proper gap
are available. These save the trouble of cranking the engine to get the rubbing block
*“.
.
j
-\
_
.a
.
i
.A
:,
Q
.
a.
i
i
~
.a.>-
I
\
‘\
~\
*
j.
I
\\
\
‘\
\
1
./
5
\
r”,
‘.
\\.
a
,i,;
5
\.
.
j.
I
‘\
D
~
'j\
:
~_
brighter-flashing
power timing light is
\, the only, way to. go as we’ll\ explain
. . later. So if you buy a complete. tune- _
\\_ m’g essential components. and instalf-.
up kit be sure it has a power timing
“1. ing new- ignition parts.. However, we 1 light-either
A.C.- or D.C.-powereda\
’
“‘“\didn’t get into, the most important
is‘okay, but the.D.C. is handier. You
might also consider buying the tune- _
part of a general“tuneup-the
final
I
adjustments.
So this -month, we’ll fin- . up ,items individually
since most distaunt. and. department
stores regy--~
ish thing”s pff by outlining ‘ho-y to use
{the special tuneup equipment to make
larjy place tuneup equipment
on sale.
\hP final tune settings.
: ,
By ,?vatching the newspaper
ads you
\
can probably pick up a good-quality
\ The main items you’ll need forputting a super-tune on an en&ne are a
timing light and tach/dwelb for about
‘/
1 ‘\
dwqllmeter,
.preferably
a
combination
what you’d pay for a+kit containing,> \
‘*
;, tach/dwell,
and a timing light. ,This .%’ less accurate instruments.
i-5
.;“- -\,, equipment
is available at your base
: auto shop. But if you’re real!y into
‘i
i-+g. !&&yl&--~~~.”
, yr-ThefirstJtep
in final-tuning
bn ‘_
‘,\_ pick up the necessary
equipment
at
I engine, is, setting the dwell angle\
‘, a discount store for around $25 and -” this is basically’ just a more precise
0,
have your own%home. tuneup center.
measurement,
of, the point gap. By
Many stores carry special tuneup,
reading
.how
.long
-~~~.
~-c the
_ points stay
c
kits that contain the essential equipclosed before opening
(&&%<n;lment. But. while these kits are handy,
gine. running), ‘a dwellmeg
most of the less expensive ones- come
;:
/ ._
with the weak-flasmng
neon bulb
--------t~mlng-l19h~h~h~atlvely
rnaccu:rate and very difficult to use. Then
gauge there’s no reason to check the
dwell. But this isn’t true, as evidenced
by the very existence of the’dwellmeter. Generally if the points are set
to specs with a gauge they’ll be,pretty
close on the d.wwdl-but not always.
So checking the.points
lvith a dwellmeter should be part of~‘every- tuneup.
~- To use the “dwellmeter
all. you
have to “do‘ is attach one of the
meter’s .leads at the&coil and ground
the other lead. ‘Trace, the wire that
runs from the djstributbrtd
the coil.
._
~.
_
.
I
,.
..~
I- ;,.
.
r
-~ --r---\
-i’
Y...
-.- .._-.__
t
_
-
i-
.~
2g’
.
r 46
i.,,...
ii-
.:
’ \\(5
t
1 hc\--
-4
._
x
.:I‘.:
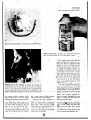
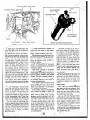
One lead of the dwellmeter
hooks to the posltlve
COIL ~ermlnal:lf
the t&minal
%.:
covered
with an insulator
boot,
lift the boot
slightly
and wrap one end of 9
straightened
pape:cllp
around
the terminal.
Then clamp
onto the paper dip.
1
\
..
.$
the “s\vltch to either six or eight
cylinder--\\hichc~er
is apprclpriatc
(WC picture 1. If you 3rC testin: n
four-Cylinder CnginC. se+,,thc sclectiQ
on CiFht Cvlindcr 2nd nicnt>ll) double
the, rcnding. After gcttins ‘thc\xglctcr
ho&cd up ;rncl propcrl! set. Ch&k a
mar&l
for the dwell spcc on your
&yinc. The d\i<ll 5peclfic:rtion ma!
be givsn n5 ;I single \;llu~ or in the
form of an acceptnblc
range- For
.* linstancc. the wxpt;ihlc
clwcll mi#t
bc yi\,ccn.:l\ 36 to A(!,! In this cxc
‘Yhc best IS is .to shciot for the rniddlc
of
the
To
the
r;ince.
Cheek the dncll
enFine
:Ind
t:rkc
sin;$!
;hc
start
ii
the
dncll
to0
sniAll
D
thc.‘:&@$;
ducll
rc;lcliny
mcyj4
;irfx nclt st;l! in? cl(JxClong
ay
4?T$&s
u rcn:eh
into-
the
xjusting
.$t
‘turn’?
until the cl~cll is +&it
the clkcll is high. turn thc$ut
find’
on.
rf
ClWkCiWCll
\\,isc t(~ open
tllc
points.
,;5f’the
IS Imv. ~0 CoLlntcr-clock~~i.~ to close
t tic pin t-s-,
Acliustin~ the dwell on a non-G.M.
.
..
distrihutc~r
can hc ;I Ixlin since It’s
mot-c of ;I tria-:incl-error
procedure
of acljustin~ the points until, the corrcct tl~cll is ohtainctl. Hmvcvcr. withy
you
%;I\ TV rcmemhcr
I~~~~~~k~-~inc,aF~c-,
ciiou$-
he, n;~rrcycd.
The
this IS that
s
B’
c;In
cil:t 0ut
~1 lot
i
All cars since 1971. have the vital ;peclflcatlons
contalned
on a special
Information plate in the engine compatimeht
W
I
of
h;~sslc. R>mow the ;distrihutor
cap
maPC cut-c the idle Y<rc;ison:tl~lv clos?
2nd rotor 2nd have your hclpcr kaiik
to the proper qwd to insure 2 &m-ect
?IK; the cnginc just ton? Cnough to
dwell reading. II’ the clucll angle is
get i ;I rcadlng on tlie n1ctCr. ,Thcn
not to SpcCs. the points riced
to
he
~- ~~
gnp:.:yd-,
rc;ldiusted. Too hiph :I rlwell nicnnmX- - niakc the apl”“pri;itc/pi;int,
justment-4iiph
rca‘dihg wiclcr ‘@lk
the points arc st;r!‘ing closed too long
Iti\\ rc;?~-lq n;irroiwr
gap-2nd
hnVc
-the
gap needs to Iw widcncd. A
‘low
set the meter
“,-p ;,! !‘p’,’
sh~~tild’“hc made smnller.
Scttijlg the d\vcll on ri ‘G.,M”~y$&
uct with’ the cutcrqnl +i@ $lJu~$y
nicr$c’n
snap. Simpiv inwrt the alk.$
;I hcllxr
rcadinp-
is
‘._ i>,
Y.G’
a.;
r
f$ef.‘ore testing the’engine,
,,,,.I?,O$iher
tach or dw811 and to SIX o.r eight
cylinder--whIchever
settings
are appro’ v.‘,: &+te.
F or a four;cylinder
engine
men.-::... 2.~t$&
double the elght.*cyllnder
reading.
:;y .,,;‘-:i’;y-‘it .I
‘> :
:I:
I.&z‘ $;,‘,t,;~ ‘.!
* i
1 ,- .f%. V‘. 3-d
.-a
yqt; -.:‘,:;T;\
+$:&&f ? ‘“dj
”
‘+,,
:‘:$
. *
‘1 ,I
*‘!,f(
,*
. ,L
”
r
!‘
you can
chccL the iicw sGiG~?Gmti*uc
this~
/
proccdurc until ~0
get an aCccpt:ll7lc
rC:ldinF. Doing tl Is prwcnts
ha\ing
~~~ _
,,
I
continued
THE BACKYARD
MECHANIC
to adjust the points, reinstall the rotor
and cap, and start the engine after
each adjustment to check the’dwell.
You can also work this system by
yourself with a remote starter switch.
I
DWELL HOLD
After getting the dwell right on,
you should perform a dwell hold test
to check for a worn distributor. To
do this simply increase engine speed
slowly as you watch the dwell reading. If the reading increases more
than 3 degrees as you increase idle
speed to about 1500 rpm, the distributor is worn and should be replaced or thoroughly checked out by
a mechanic. Also, if there is more
than a slight variation
in the dwell
at idle, or if the points won’t hold
adjustment/you
can be pretty sure
*
the distributor is worn.
CARBURETION
The next step in a final tune is
setting the carburetor.
On post-1971
cars all you really have to worry
about is the idle speed. All 1971 and
newer cars have the idle mixture
preset at the factory and a special
limiter cap installed over the adjust
ing screw. This cap prevents the screw
from being turned more than onehalf turn to help keep the engine
’ operating within emission standards.
It is strictly illegal to remove or
tamper with this screw.
So on a newer car, locate the limiter cap(s) at the base of the darburetor and simply check to see that it
i8 turned out as far as it will go. Locate the idle setscrew
at the throttle
linkage or anti-dieseling
solenoid and
&,‘Qou’re ready to set the idle. But you
don’t just adjust the screw until the
idle is at the right speed on today’s
cars. Most newer cars. require rather
exotic methods of setting the idle
speed. For instance, some cars have
toq’have the -idle set while they are
idling in gear with the headlights and
all accessories on. Always check a
manual or the information
plate in
the engine compartment
(see picture) for the correct idle speed and
adjustment
procedures.
;
c
__’ ”
,,
Hot idle speed is set at the solenoid or on the throttle
specs and special procedures when setting idle.
,’
r_
linkage. Be sure to follow all
‘_
4.e
On cars newer thai ‘71 the idle mixture does not require’ adjustment-the
mixture is
preset at the factory and special limiter caps’ placed over the adjusting screws.“,Cn
older’cars an acceptable mixtu’re setting can be obtained using a tachohneter (see
text).
s
.,
.-
~,’
.II..
F
,.
A couple of other points to remember are to be sure the engine is
fully warm and off the fast idle cam
.
when adjusting the curb idle. Ah-if the idle is set with the air cleaner
off-double
check it with the cleaner
unit in place. :Finally,
never try to
smooth out the idle by turning the
--speed up-a
higher idle just wastes
’
gas %nd contributes to dieseling.
On a j&-l 9.7 1 car you will probably need to set ‘the--idle mixture as
well as the idle speed. A fairly good
idle mixture setting can be made
using the tachometer.
Locate the
mixture screw(s) at the base of the
carb-one-barrel
carbs have one mixture screw while two- and four-barrel
carbs have two mixture screws. Turn
the screw in until the idle roughens,
then turn the screw out slowly until
the highest possible tach reading is .
obtained. If there are two idle screws,
repeat the ,procedure on the second
screw. You may need to turn the idle
speed down before adjusting the second screw -as the enginemay.
race
when the first mixture is.reset. With
the mixture set, simply set the idle ’
to the correct speed following the
procedure
shown
in the manual.
Once again be sure the engine is fully
warmed and double-check
the speed
after installing the air cleaner.
?he power timing light emits a very bright flash and if
more accurate and easier to use than the simple neon
bulb light.
Theq:most common power timing light is the D.C. type that simply
attaches to the car battery. Hook the red lead to the positive battery terminal and the black lead to the negative terminal.
:
TIMING
After setting the idle you’re r
to make the final and most impo
adjustment-the
ignition
timing:
lot of people neglect timing because
they think it is an involved job. Tim,ing is critical on today’s cars and
should be set very carefully at every
tuneup.
B,ut timing
an engine is
really very simple if you avoid the
common mistakes of many backyard
:mechanics.
Fiyt of all, the neon bulb timing
ljght/rs very difficult to use and barely
ade’&te.
These weak, flashing lights
can be used”only in a dark garage and
then must be held right next to the
timing marks. And
‘ newer cars espec
light this close t
hassle- and can be very dangerous
con1‘inued
.--
il
&Jr
.1
‘b
.
i
:
-+
The third lead of the D.C. light
sim.ply inserts into the number
one plug wire pick-up at the
distributor cap. The plug wire
is installed in the’top
of the
connector to complete the circuit.
I
I
.
_
.
-
/,
.
-.
”
.“S
0
‘”
:
“..,,
.
‘>
,..~
i_
continued
THZ
11
’
BACKYARD
IVWX~NIC
,l
,:‘i
:
7
1
.
----o
.
‘.
s
,,,I
since you risk getting the light‘s leads
or your’hands
caught in the fan. So
if you ,,do’n’t have a power light. your
best bet is. heading for the hobby
shop and using~ a good light. You’ll
get a more accurate setting with a lot
less trouble.
Hooking up a power timing light
. is”. quite simple. An A,C.-powered
light (this *type is pretty rare anymore) simply plugs into a standard
household’ electrical outlet’. The more
common D.C.-powered
light has two
leads that connect to the battery. Attach the- red lead to the positive battery terminal and the black lead to the
j negative terminal.
Both type lights
have a third lead that has a ‘special
connector that inserts into. the, number one cylinder plug wire pickup on
the distributor cap.
A manual shows, the location of
the number one cylinder pickup at
the distributor cap. On an in-line engine you can locate the .number one
plug insert by simply tracing the plug
wire from the first cylinder to the
distributor cap. ‘On a V-eight engine
the number
one “cylinder
may be
either the first cylinder on the right or.
left bank-you’ll
have to check your
. ’
, manual.
After locating the number one plug
wire. pull the plug wire out of- the cap
and install the timing light connector.
Then reinstall the plug wire into the
top of the connector (see picture).
The type and location of the timing
:
marks varies consider-ablv. Hnwever
most manuals have addiagram or a
picture showing
exactly what the
marks look like and where&v.
are
‘located. So if you check z&zuz
Jo;
’ shouldn’t have any trouble finding
the marks. But you may need to ro‘late the engine by hand -or by tapping
the starter until the marks become
visible. Also. you’ll probably have to
clean the grease and grim.e off the
marks with solvent so you can see
them better.
The timing marks arc generallv
located on the lower front nullevoron
the vibration
damper
(below the
-. fan).
tan). There
-Iherr is usually a &stationary
:
I’.
1
.,__
._.._
s :....
c
-
.
:..:-
: ..”~~
‘~‘t’&ning pointer::o.n~ the en$ne block
help you see’the mark when the enand
e gine is’ running,
,,
re is
pulley. But on
Start the engine and let it warm,
tl
timone
mark
on
The
engine must be fully warmed
_
rally,
ing marks are
and idling at the proper. speed to set
“. there wiff be a mark .for TDC (top
the timing.’ While the engine warms,
dead centef) and a; series .of ‘marks
check the manual or the information
to the right of TDC indicating
de:
sticker to see if there are any special
grees before TDC and marks to the
procedures for timjng. Nearly au enleft “indicntini
degrees after TDC.
gines must be timed with the vacuum
Most cars time before TDC so the
ndvancc line removed at the distribumarks to the right -of the TDC line
tor -and ,plugged. The best way to
are what you will be concerned with.
plug the lure is by attaching a vacuum
After locating and cleaning
the
gauke or inserting a golf tee in, the
_ _marks. very carefully make a neat
end of thcline.
line with white chalk or white enamel
With the,, engine warrr;‘*and ihlinK
paint over the correct timing mark
at the, correct speed and the advance ~8(given in your manual).
This will
-lint plwgged; aim the light carefully
‘.
:,
a
series’“d’ti~n&
mar+
QII
the
-
I
.“L .
FIRING ORDER
II
L
,
0
*
.
..,s‘“,.
,;;,?,$$$
‘,
,
:;q,!, /_ ”
’ :-‘(:,;. ;,:, ;.
:,;..,,
I 1,‘”.a’,,
’
I
.
I
;
,;:
‘:
j
’
of the timing//marks used on yaur-ca$+
Check a manual for ttie t$pe’and’lodation
engin&this
varies greatly. Mark the correct timing iine<.wjth white chalk or-paint’to
/ ..
’
. help make them visible. ( -
.A
-.Y
,_
..A
**
_..a-:
-
i
at..t& timing mark.s. Not aiming the
- light p,ropcrly is one of the primary
causes of timiia error-so
be sure
to
the light’at about a 45:” angle
and sight directly down the light.
The timine light will flash each time
the numder~ one cylinder fires and
make the timing’ marks appear to
stand still. The mark and timing
pointer will align on each flash if the
engine is in time. If they don’t line
up. you will have to adjust the timing
by rotating the distributor.
To do
this you first have to loosen the clamp
bolt that holds the distributor
in
place. On most oldeiengines
the bolt
is easy to get to. How~rCin
many
newer engines thebolt
is located bekeep
.
%
.
,
hind the distributor
and YOU may
need a special distributor wrench or
a swivel attachment on a ratchet extension to get to the bolt.
To adjust the timing, simply rotate
the distributor’slowly
until the timing
mark and pointer align. Then carefully lock down the clamp bolt and
double check the setting to ,be sure
it didn’t change when the distributor
was tightened.
With the timing set you can test the
mechanical
advance by gradually increasing engine ‘speed while aiming
the timing light at the marks. If the
advance is working, the timing mark
will jump ahead. Qn ‘older cars you.
can also check the vacuum advance
‘.
:
by reinstalling the vacuum line at
the distributor.
The timing
mark
should jump ahead slightly. On most
cars sinee 197’1 there is little or no
vacuum advance at low speeds SO
you can’t check the-vacuum advance
in this manner.
Now you’re finally done. But go
back and quickly double-check everything again just to be sure you’ve got
the engine super-tuned for max performance and gas mileage. You might
also consider going to a dyno tune
shop to have your car’s engine scopedand dynoed.
For a modest price
(around
$10) you can be doubly
sure, everything is working right and
that: your engine is super-tuned. @
%’
:
i
‘\
THE BACK-YARD
ii!EtHANlC
-
‘,
,
“\b
.i
,
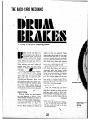
;*+ D~DU~il#\#
I
.
.*
--~
.‘It -~---~~~--..
It’s easy to up.-youl’ stopping
power
l .
I
.rakes are the one part of a
simple as they are essential. While
car that nearly every driver is
drum brake service can be a bit more
concerned about. And its no
involved than disc work, if you study
wonder-losing
your brakes
a serviee manual and work carefully,
would be traumatic at best. Although
you can easily and safely do a combrake failures are quite rare with toplete brake job at home with ordinary
day’s dual-master cylinder, heavy-duty
tools and equipment.
In addition,
brake systems, your car’s brakes do : you’ll save a-nice bundle of cash.
r require some basic care and ‘inain-Since m&t newer dars are equipped
tenance to keep
with front disc brakes, we’ll only be
and safely.
~ concerned
with rear ‘drum brakes
The most corn
here. However, the prokedure for re. ante is checking the brake linings
lining front drum brakes, is basically
and/or pads for wear and replacing
the same as for rear brakes.* So, if.
them wh,en they are worn too thin.
you have drum brakes a’11the way
This is the subject we’ll deal with in
around, you shouldn’t have any probthis Backyard Mechanic. Next time
lems doing a complete brake ‘job .by
we’ll pick up with some of t.he regufollowing ,the basic procedures given
1% checks and service needed to keep
here and in a service manual.
your car’s brake system doing its ~ WHEN TO REUNE
:.
thing-like
inspecting and bleedingYour
-car
usually’
lets
you
know
the hydraulic system, and checking the
when it.s brakes need help by not stop.
self adjusters.
ping like it should, by giving youless
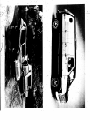
(&+SIMPLE’SYSTEM~
and 1es.S brake pedal to work with,
and sometrmes by issuing uoisy warnBecause. brakes are one hundred
per cent essential to d&ng,
many * ings when you hit-the brakes. But its.
1
~
backyard-.type mechanics are leary of
doing any brake system maintenance.
But as we discovered in khe Backyard .Mechanic Part V, :‘May ‘73
DRIVER,
that. dealt with -disc brake
service, brake systems are “about a&
r
y:
.-
;
continued
* The only re& difference is the way the
drums come off. Tlvhackyard
MecHanic, Jon ‘74 DR!VER,, covers jronf drum
removal and repac!,$n$“bf
jront wh;el
hearings-a
.joh yuu’jl i&t to do &en
you reline the brakes.:
I
9
!.
I
:!’
.
._
<n
il,,.
;--
:,,
1
\
/
.3
..
,’
1’
)
:
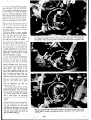
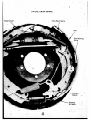
Adjusting or -’
Bottom Return.,
Spring
.c__ -b
v. o
..-/:
-
R
:t’:
_,
.
”
2
f
*:
‘L-0
+
;.
0
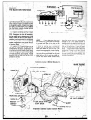
TYPICAL
DRUM
BRAKE
J
. \
Wheel
i
cylinder
, :.
..Shoe
Return
Spring,
1
continued
-___
BACK-YARD
MEbHANIC.
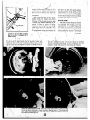
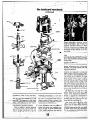
The brzke adjustment oft&
has to be backed ofi\to remove each Ldrum. Locate
the access slot (u>ual,ly on
the backing plate behind
,the brake assembly). While
holding
the
self-adjuster
lever away frcirh the star
wheel as shown in the diagram; turn the?&eel
with
a brake’adjusting
spoon or
scEpuKlriver until the brake
is completely backed off.
Make sure the emergency
brake is released when you
loosen the brakes.
P
.
not--a very safe noi economical idea
,to wait until the brakes are this far
gone to replace the linings. In most
cases. letting the linings wear extrathin causes damage to ihe brake drum
which could have been avoided or
made less costly by timely replacement of,the linings.
a
The best and only certain way to
be sure of the cotidition
of drum
brakes is to rqgularly pull the drums
and check the linings for thickness.
The brake shoes should be replaced
when the linings get down to less than
%-inch above the metal on bonded
linings, or above the rivets and riveted shoes. If the linings are soake+
.
your car without the rear drums.
with brake fluid you should also Fe-”
To finish .your preparation.
locate
place the shoes in addition to_Qnitig
a machine shop that offers while-youthe fluid leak.
-w-._
,x wait service in case you need to have
It’s usually
recommended-that
the, brake drums machined.
Many
brakes-both
front and n&-be
inbase auto hobby shops have the .spespected at least every ..lO.OOO miles.
cial lathes and equipment needed for
But rear brakes imrm&
wear about
doing brake’ machine work. So. if
twice as long as front brakes, and
.you’re
not working at the hobby shop.
pulling the rear dr_ums can be a hassle.
SO. if YOUknow when the rear braces: ? you may be able to-save some bread
by hiving machine work done there.
were last relined or checked, you can
&.When you’ve checked out the local
get by with checking them every othe;
;,parts
house and machine-shop
you’-re
*time you inspect the fropt brakes,
set to. begin. If you’ve got your tools.
,, ,“. However. a fau!ty automatic adjuster,
and a clean surface to lay out parts
4’. / among other things, can cause the
rear linings to 80 fast and put a dan- II on. all you need are some clean rags*a&d .denatured alcohol...Ybu
should
gerous-$&n,
on the-front binders. So
also havk some paper and pencil to
don’t hesit’ate- to pull the rear dr&-ns
make any sketches of the brake asat the first sigh- of any brake prob0 lems.
sembly needed to supplement the diagrams in your service manual. Some
GElTlNG READY
smhrt caniera enthusiasts find a black
atid white Polaroid is the easiest way
Because pulling the rear drums can
to hake a fo@proof record of how the
be a hassle you should be prepared to
‘assembled brake should.look.
go ahead and do a complete brake
job-if
necessary-when
you pull the
When you’v’c got cverythiti; organdrums. But since there’s no way -to
izcd chock the. front wheel< to keep..
tell exactly what parts and/or service
the car from rolling and carefully
are
required
(if
any)
before
you
pull
raj!e the .car’s rear end just enough
f the drums. the best bet is to check to
to get the wheels off the ground. Place
be sure the local shop has parts-for
safety stands securely under the car’s
your car before you begin. You’ll also
frame. Remove both rear wheels and
need some transportation
to get you
+ release. the emergency brake. Finally,
to the shop to pick up any needed
place 9 block of wood under the br@e
parts since you can’t very well drive
pedal to prevent accidentally’depress_’
.-
1.
5_
:=
_,a-.
.I’
ing the pedal-something
which+an
cause real problems when the brakes
are d-&assembled.
a
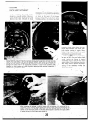
REMOVING TjiE-MUMS
When yo;‘re ready to get inio
thing:. the first step is removing the
brake drums. The- same type drum
brakes have been used on all American cars except Vega since 1970, and
on most cars since 1966. so. the procedure is basically the same for newer cars. Generally all that’s required
is ba king off on the brak6 adjustment
‘I so th drums can be -pulled free. To
-:i .do thi 5, first cemov,: the/rubber plugs
J ,that cbver th< braire -&ess
slots= usually’?located on tl-i’e,backing plate
behind*the brake assenibly.-Some cars
may have a filled access slot that will
have to be punched qut to gain access
to the adjyster.
Insert a brake adjusting tool (costs
about. SO cents) or: sc’rewdriver in the
slot, Then. while, holding the automatic ddjusjcr le+er away from the
star wheel with (i small screwdriver,
turn* the adjuste! up until the drum
turns freely (see diagram).
Give {he
,adjuster four or fivi good turns to
make sure ttie:brakcs are coinpletely
backed off ., ’
If the d&m won’t budge after
loosening thi brakes, you rfiay have
to use’ a w eel pulleL>. Chec,$ your
”
a
.I
24
li _. .’
‘I
1
:
i .,
I
-..-
.
<
:
_-
*.*
I
.- .
B
‘/
(\
..2
:1
c
2
.
2
’ #-
a...4-r;’
rrianual for~fhe specs on your car. If a
-wheel puller.is needed, you should be
able to rent*or borrow one>from the
J parts house .-where you are getting
your parts.
After removing both drums, immedi?tely check the linings and drums
for *year. If the linings are worn past
%-Inch, they. should de$nitely be replaced\. If there is plenty of lining,
. rough ‘iup the lining with fine, sandpaper and clean the assembly -with
alcohol before reinstalling the drum.
If replacjment
linings are needed; the
I
Brakes,
prc’.aclju@ by,usingbpkc
(
best bet is to stick with good-quality,
asbestos-bonded
brake shoes. While
* relined shoes are a little
‘brakes are only asgood
So the small amount
er linings isn’t worth your safety.
.
MACHINE
WORi
1,.
F
J
T&&rake drums should be cleaned
and-checked
fof. .warp&
and heat
discoloration. If the inside suj-face of
the drums have grooves or cratches
large,enough to,catch a finge f nail, the r
Idrums should be “turned.”
‘urning is
‘,t
’
T
’
*
-
(‘:,
_ continued
BACK-YARD
MECH’ANIC’
simply. machining
drums to a smooth
since grinding the
there 1s less than
the inside of the
surface. However.
drunks down until
.60-inch of drum
7, .’
1
thickness is, :I very dnn$rous
practi?e.
most drums can bc turned only on&.
or twice at the most. If the drums
have a sharp edge at the back of the
braking surface. the drum has been
Using”aSpecial
biake spring tool, tarefully remove the primary and secondary. retur.n
springs from the shoes.,If you do not, hav,e the special spring tobl, you can use vise
grips to pop the springs off. But us;- extreme caution with either tool because the ,
‘_ springs can pop lease at dangerously high Lqlocities. Check the springs for wear and
.
damage and plack them in an appropriate container. If you’ve had problem’s with
dragging or noisy brakes yqu might consider.r.eplacing
these springs-especially
if
,
.t
‘they are w&n. corroded, or Weak.
.
.z
T
a
3..
:
I
!
turned at least once-have
the machine shop measure the drum care,fully before turning it again.. Most
shops will give you a trade-in for your
’ old drums if you need new on&.
If tiie brn$%drums
riced ‘turning, ’
be sure to h.& the new brake shoes
I
arced. Arcing the linings is simply
machininfi them so they, fit the drum
more closely. This&elimi&tcs the nor- .’
ma1 lining w&r-in period. .However,
s/7
-arcing is not necessary
unless the
F
.drums are turned.
i
.‘P
*
,
D
.
After removing the springs, carefully. release the self-adjuster unit following the’ in\ structions in your manual. Next,;elease
the parking brake cable and remove the old
shpcs. Discdnnect the.,parking brake IeGer from the removed’shoe so it can be-installed on the new shoe. Screw out the star wheel adjuiter assembly and apply grease
or spray lubricant to the threads and reinstall it.
,
i
,
G
/
:
‘i
\
26
-
I
J
:
.
BqOT ’
”
cup
,
P&ON
r-e
r
.gwER
BOOT
1
-
CUP
BLECDER
.‘REilJR\N SPRiNG
SCREW
PI&ON,
I
Finally, when you pick up the new
brake shoes, be sure to grab a couple
of wheel cylinder repair kits. You
may not need to rebuild the wheel
cylinders, b,ut you.might as well have
the kits handy just in case (this will
be discuss,ed later). The shop should
also be glad to take back the kits if
you don’t use them.
When you’ve
picked ‘up the new
brake shoes and had the drums turned (if necessary) you can finish She
brake job in a matter of an hour or
so. The.rest of the job is a mechanicti
process as illustrated in the accompanyirig pictures. Just work darefully
and slowly, following the procedures
recommended
in your manual.
Be
sure to work on one wheel at a time
so you can use the propxly assembled
br ke as a quick reference.
When everything is back together
y u can repeat “the process on ithe
c
other wheel.
With ,both wheels completed, have
operate the brake pedal while
spin both drums,. by, hand to be.
brakesS work. If they both
check out, loi can’button~ everything
up and go f%%cautious test dri\;e.
If th$re arenIt any unusual noises
and the braking action is goodyou’re all set. Go easy on the new
linings -fo: the first couple hundred
miles to give them a, chance, to wear
m-especially
if they haven’t been
arced. Yoti’ll also need to adjust the
brakes several times as they wear in.
The self adjusters should take care
of the adjustments in the normal fashion-when
you drive in reverse and
apply the brakes. However, you may
need to bring the adjustment. up manually at first so the self adjusters can.
take over. To do this, simply use a
brake adjusting spoon or screwdriver
as you did before. .Turn the adjusting
star wheel (parking brake off) until
the br%ke ‘tightens &x. all the way.’
Then back off the adjustment
until
the wheel. turns freely. Be sure to
ba,ck off both brakes the same amount
to equalize them. @
d
rhe wheel cylinders .-are
:ritical since they .expand
:he brake shoes to* operate
:he brake. Check the cylin
ders for leaks by pulling
jack on the rubber cap.
4ny fluid inside the cylinjer means the unit will
lave to be rebuilt or realaced. The cylinder can be
*ebuilt by simply installing
:he new parts included in a
.ebuilt kit. easy-to-follow injtructions
come, with the
tit. HoF,ever, wheel cylinjers can only be rebuilt if
:he bores are in good confition. Light scratches can
with crocus
3e cleaned
30th and a rag soaked with
:lean brake fluid. But deep
gouges call for a new cylinder.
J
If the whee+.!cylinder is
yebuilt or replaced, you will
Teed to bleed j the brake
system to remove any air
:hat .entered when the cylnc?er was opened. This will
,e covered next month.
.
’
\
+
.
’
‘1
,
If the wheel cylinder is not
leaking, or after it is rebuilt,
tie cord around the cylinder
pistons to prevent ttiem
from popping off accident.
ally and leaking in air. Then
use a small broom and an
alcohol-soaked rag to thor,oughly clean tlie brate as-sembly.
. .
I
After cleaning the assetibly? and- drum with alcohol; install the new brake shoes just
as the old ones ,came out. Be Sire -to book up’the .‘seff-adjuster, and parking brake
cable properly. Make sure there, isn’t any brakeO,#lui.d .‘dr oil on. the knew linings or
drum, and double Check.the assEmbk...,@th.the d agtims- in the ‘service manual and
<A
:; ,,
the,fu!ly assembled brake. If;;everjd!hrng;is ,okay, xpand:, the ‘brake shoes by’turning
:he adfuster,wheeJ until the drum will just fit,over the.lini,ngs. Xou may have to ten.
:ralize the shoes by liand to get the drum on. The,shoes tend to-move out of place
Ndhout’the drum to hold them. ,
,
,j
.
-I
._
:
:
,/
e
_
.
’
L
_
.
.
-,,
.
*
D
;.
-
.
.
.
r
I
’
.’
4
‘,_)I
,
r-
. .
_
7?Ifi’ti
EkKYARDMECHANIC
1t.1' '.
-,tBR;AKE
'
I..
')
,~.Qyl-JRAuLIc
.
.
I.-I
*
/
d
/.
\
r__
n our last “Backyard
Mechanic”:
basic law’ of hydraulics
that is qbite
-as
we’vk a.11.secn on the tube when
be coverrd relining drum hrakec. How- ,, simple. Essentially.
the had guy dralny the tltlid from the
a fluid cannot he
ever, WC postpaned until this’month dismaster cvlindcr of the good guy’s car.
‘compressed
by pressure and is therefore
.I
CUSS~~Rof haric hydraulic system checks
-an excellen
transfer medillrD (Fig.- 1, ,
SYSTEM CHECK ’
I and maint$nancc
nty$cd
to -Fet your
page 24).
car’s brakes in 3~ condiiibn
and keep
Since your car’s hrake gysem is basicSo if pi want to keep stopping you
trhcm that \vac. So we’ll rtin throug\l
ally an airtight network
of cylinders
.thould check 1.1)~~
hydraulic system reguthese jobs here. and next mon!h ~6’11
and lines filled with flttid. what this
* Iail? to he sure the fluid level\is up and
finish off brake< 1)~ covering
power
means is that when ~OJI step on the
’ the system iy nnt leaking A quick!and
brake W-vice.
brake pedal and create pressure in the
easy check is to Gmplv depress
the .
Ther
three articles. .along ivith’the
si.stcm. the pressure bar to 50 somehrak& -pedal atid hold it. down with
.
“Bnckvnrd
Mechanic”
on disc brakes
where. If the’hrnkc
sy&m
ir jn &od
plenty of force. If the pedal stays’firm
in the Ma\, ‘73 DRIVER.
should have
workin.g condition the firessure end? up
the system is okay: But if the ficdnl
VOII covcrcd for anv rclutine hrnke servat the wheel cylinders Jar pistons on
gradually sinks to the lloor. there’s a
ICC hour car i\ I~hcf’v 10 require. But ;is
tliyc brakes). where it is iclievcd wh,cn
hydiatllic leak somewhere.
If yollr car
with anv mcchanxal
prc>hlemy. if vnu
the cylinder?
or pistons expand
and
bar power JTrnkes or vaclillni-assist
tli5.c
ha*c haming hrakc trouble \vc .rccomforce the hrnkc lini,ngs aiainst I’he drum
brakes (which most newer cars have)
mcritl that \‘o~I <eer vc1ur friendly mcor disc.
.
this cl~eck should he inadc both with
chanlc or a gc~xl i;pccinlty sllnp.
As’ 10~~ :I+ you hlive Ijrnke lini,ng and “’ the engine running and w,ti the ilznitiun -_
an aIrfight hvtlr;lulic system filled .aitll
of?‘. When performing
the icqt with ihe
HYDRAULIC SYSTEM
-7.. L’
__
fluid. vou.re..goiilg
to stop. But if YOU
cnginc off. pilmp the brake pedal six
L-m--y
.
110st people knnw: that thcli <rake<
hnvc a Ic‘ak in the yvstem th,at allows
or tight times tc1 rclcasc .the vacuum
arc h\dra;llullv
;~ct~valcdeven though’: . the prcssur$ to escap; hcfore it rcagh’es.
hkforc holding the pedal down.
thcv,may not Lno\\ exactI\, why or ho\v.
the \yhcels, you won’t stop so g od. And
Any time the pedal fail? IO hold firm
Rut the rca\on yorlr hpkc system op.
/I ehough
ilf ~OII’ lox enough fluid hr kct
JOLI \houlcl immctliatcly
find and recrafe5. ulrh ~fju+-5+g~;‘~~~
1
m
involves
a
air
in
th?
s);stcm
you
won’t
stop
at
all
.
pair
the
kah hcfore it results in hrqke
’
1
’ ,
:
co;llinucd
.2&
.
:
‘I’
. ?-4..
r
t
f
-/I’m’
+
F’L;Rq,
1°F
,.%
A‘,R “‘giJj-- r-.-y,
/
1.
,.. *-._..‘?
-~*~~~~~~~~~-R.-]~_(~
~--T
OT
-
..
.
’
/
loo -1bs.’
CE
//\lNCM# / -
I
I
Fig.
1
_._ HYDRAlft--ICS
..-- .,-BASIC
;
Principle.of hydrauliosiiiustrated.
IOh Ibs of force in the ma% cylinder is applied,
such as your foot on the brake. This ressure is exerted equally in all directions, so
there is 50 pounds of force against,a cylinder with a 0.5 square inch bore, and 100
pounds against a cylinder with a one s uare inch bore.
i
.
?&‘.
PRIMARY
! ‘i&J
.. .c
CUP
SECONDARY
CUP
.:
FITTING
VALVE
‘8
-e
,
'
s ’
.
1
i
N ASSEMBLY
P
GASKET,
I
OUTIFT
Fig.
2 MASTERCYLINDER
DISASSEMBLY
-
ASSEMBLY
',
,
!
To disa>semble master cylinder, pull rubber boot and pushrod out, remove snap ring,
and slide other fIarts out. Odiously,
dual master has ‘many more parts. For proper
i
reassembly, note order in which yours/come out.
.-
.r’
Check the hydraulic system by depressing the brake pedal and holdihg it firmly.i
If the pedal stays up, the system is okay,,
But if the pedal sinks slowly to the’floor
there is a hydraulic leak.
:30:
-
,continued
MECHANIC
THE BACKYARD
Check the master cylinder fluid reservoir
regularly. Before popping the top. clean
it thoroughly to keep gunk from contaminating the fluid. A low fluid level may
mean a leak-inspeci
immedi?tely.
demove
._
the brake. lines very carefylly, whd
-.
.’
,’
I
~
pulling th$, m’ast&cyli;der:
,
”
,
*
.:’
a-
a.
.,
-‘
,>
a
I).
”
c
P
,I”
”
.I
-
failure. But even if the system checks
out .nkny. it’s a gbod idea to make a
quick inspection of the hydraulic system
as a preventive ,fneasure.
connectors
and use on;-piece
metab I pltnE ~1;
, DOD
,
(he wiie ,bracket ‘(or. what-L
r lo&&device
is on *the ‘top) and
brake lines.
*p’ a**
remoF the lid.
Aft?: c&k&
the wheel a&a fo(
” .Jf the -revel is down-‘only
,slightly,
fluid llaks.‘, trace, the ikngth of .metal
chesk the brake line cdnnections> and
line” from each wheel11 to the master
BRAKE LINES
re.fill the reservoir with fluid and check
:
cyli,nde?. The main lines should be in-.
the level again i’n $-couple of daysspectkd for leaking connections.
dents,
Although the maste; cylinder- seenis
s&e.fluid
loss is,normalt Although it’s
and
Fig-ns
of
abrasion
at
points%here
like the” most logical? place to start a .
pgt ‘likely* the&id
level,
hydraulic .svstem inspection
your best ,y the lines turn or bend around obstrnctions
on
the
underside
of
the
frame.
If
low
without
your
beirig
bet is.10 he,$n with the brake lines. This’Bnd/or an ilivminated
: ferior braliing
way. if vnu have 3 leak it will he iso- S you don’t spot’any leaks along the brake
warning
light,
you mihht discover’ a
lines.
you
can
move
on
to
the
*baster
lated to-either
the lines or the master
‘”
:‘& Ikak? m#&
cylinder. If the. hnit is
cylinder.
) cylinder immediately-the
master cylin,, I .I / ‘h ieaking:-anywkere’
‘but fhe brake live
der >ometimes
appears
to he lcaking
-MASTER CYLINDER
connectlons
iJ sfiould he rebuilt or rewhen it’s not.
You should be able :to ‘cheik: the
brake lines without raising (hc vehicle
if you don’t mind z~ruhl%n~ on your
:back. But if you raise the car nn stands
OF ramps to make the inspection easier.
be doubly s&e the supportCar% proper’
ly secured and the vehicle is chocked.
And of course don’t get any further lmi .
dcr the vehicle than neiessary.
or’ stay e
under any longer thin you have to.
If the brake line connections.at
the
wheel arc tight. check the hack side of *
the tire an+ hacking plate very&refully?
Leaking !whcel cylinders generally leave
a telltale splotch of brake fiuid here.
Nest. inipect the flexible ho,se that cpnnects th’e main petal hrake line tir’ the
~ _hrake=.if_~:nui-&has
&se
&p4&s.
The flexible hoses are zuhject to, de’-tetiora(ion
and should he replace’d if
the \ $0~
any sighs of leaking, are
da&aGd.
or &en feel gummy. Becnu,i’e
metal lines are tougher.
m&y “newer
cars hav,e done away with the flexible
,_
\i
”
,,,
’
The. fllaslp c$inderT7is’,the
I;;afi Ofi , piaced. q .~ .
the hydraurIc system. It IS lqqted
In o ’
‘* - ,
I=
the engine
compartment p(.)pposite the I -R;BUILb;
driver and connected do thS&ak,e,pedal
,R&GilCiing a maiter cyli&&
is not I 3
by -a special rod. Th’e rn?stbc I?yljnder
at alls.the complicated job-many peopk
initiates braking when tte >rSe.‘pedal
think. Even -with +day’s
dual-.master
is deipressed b~~pushin~
out, 4 piston
cyl!riders, which have about twqice as
.
insid.e !,he cylind&.:>$x+zrting ,pressurep
many par& as the old single units, rethat is transfPrrcd.
hihtigh ihe syst,eti.b
- Building i$ just a matter of removing the
.’ $,s ‘“‘ .
3.
old parts a,nd sticking in, the, new ones.
h&w33
dYljN15i$.CHti~
_* that corn’‘’ with the rebuild kit. We won’t
go through the procedure here. but a
service. manual as well as tthe rebuild
kit!give St&p-by-step instruitions.
However, we will offei a few tips you might
j
not pick ;p from the idstructions.
First of all, a few master cylinders
l%st~replackd with a favtoiy rebuilt---T-PA minual
should specify *if the
master cylinder on your car is rebuildable-most
are. The first step in remoiring the unit 5: usually disconnecting
the
_
3
41
? -<
e. (
’
:
..,
-
i
”
^.
,
.
J,
’
Check ali brake line connections
to be sure they’re tight and not leaking. Trace the lines
from the wheels to the master cylinder looking for leaks. Flexible-type cannectors
are especially vulnerable to deterioration and damage---inspect
them extra carefully.
,-
c
push rod at the brake pedal. However.
on power-brake-equipped
cars the pushrod generally activates the power assist
and the rod shnrr/d rmt ,be renioved.
Also, when removing the unit be very
careful when disconnecting
the brake
lines. When you get the brake lines removed. all you have to do is pull thestoplight
switch and unbolt”the
unit
from the firewall or power unit.
Before disasse&ling
the unit, clean
it very thoroughly with :alcohol. When
you remove parts. clean each one in
alcohol’ and lay it on a clean cloth in
the prder in which it was removed.
Make sure the unit is clean on the
inside and check the piston hore very
:
carefully. The hore &st he smooth and
unmarred.
Tf the hore is slightlv damclean ;t with
.
. aged you c-an prohahlv
pJ crocus cloth-belt
if it is badly scoured
it must he honed smooth. or the entire
.
b
unit replaced. ‘Finally. when reassemi.
,
blinr the unit he cs{ra clean. Carefully
follow the instructions
step by step’and
luhricatc all installed parts with rlcnn
hrake fluid.’ FigtIre 2 has hlow ups of
1 sing+ and dual master cylinder which
cvi11 give ,ynu an idea of the parts involvcd. The martsr cvlintler rcnernlly
1 should 1~ hlccl nftqr being reh;ilt-thic/I
will hc coverecl In&-.
.’
*
FLUID
.~
L~~
-~~
il
One oi the most common causes of
‘poor
braking
is contaminated
hrakc
T
fluid. As prcviousli, mcntinncd.
the hvdraulic system operates nn the principle
that fluids are not comprezsihlc.
So cvcn
a~zrhnll amcnlnt of air fwhich is highly
compressible)
in the system can seriously affect braking. The system should
be hled whenever the brake pedal gets
“spongy”-indicating
contaminated
fluid
-or
when the system is opened at thg
wheel .cvlinders or master cylinder du?i’ng a hrike-job. But when you bleed the
hydraulic
system. it’s a good idea ‘to
first flush the system with special hr?kc
system cleaner or denatured
alcoho i
I
’ CLEANING
To flush the hydraulic
system. you
first need to hleed the fluid out of the
master
cylinder
-reservoir.
Open the
hleed screw(s) if the cylinder is-so eqnippcd. or loosen, the hrakc lines at the
unit. Have a buddy pump the brake
pedal slowly hut firmly while you catch
the escaping fluid in a suitable container. Be sure not to let the fluid leak on
the car-it
can ruin the finish.’ When
1 you’ve got mnst nf the fluid out of the
rcservnir.
tighten the bleed screw or
I hrabe lint cnnnecti’ons and you’re’ready
tn hecin Rushing.
Fill-jhc’master
cylinder reservoir with
cleaner or alcohol and; go to the wheel
clnsest to the master cylinder (usually’
crew
the left front) and open the hlee
on the backing plate hchind t e wheel.
Hcrc aFain you want to hc SLI - to catch
the escaping Ruid. A length of rllbher
c
hnsc that fits over the hlcccl valve to
carry the fluida
container is a good
idea Also. you can use a \pccial hl&din,c hoqc that has ;I valve in the end
which tl~~csn’t allnw air to hlced hnckcin
affcr tbc fluid escapes. These sclf-blceders arc available at any nuln store for
~aR6tit~X-aricl
~IlfiJ you to bleed the
32
t
entire system hy yourself. They also
make the job easier \\itll aLhelper.
If you’re using a hlecd hose. just open
the valve and pump the brake pedal
clnwlv hut firmly until the cleaning
agent is c~pelled thrnllgh the valve+
then clnce the valve and follow the same
procedure .gn all wheels until ‘the entire
system is pilrped of brake fluid.
. Jf you’re not tising a hlceder hose.
hpte your buddy depress
the brake
pedal. while you open the hleed screw
-he
should .tell yc+vhen
.the brake
pedal is just nhout to ihe floor so you.
can close off the bleed screw to keep
excess air from bleeding hack in. Continue this prnc:dure
until the cleaner
exits from the valve-then
repeat the
-, 3
process on each wheel.
BLEEDING
When the system is flnshed you can
fill and bleed the system. Tha prncedure
.is basically the same as with flushing the
svstem hut a hit of care,must
he eserc&d when bleeding out the air. First.
hlced the clcanine agent out of thc=fluid_
reservoir. Then tighten all hlced~$lvcs
and fill the master cylinder
reservoir
with clean brake fluid. Bleed the air
from the master cylinder hy opening tfiq
hlced screw (if $0 equipFed
nr lnnseninp thy brake line cnnnectlons and pump
the brake pcclal until the escaping fluid
clncyn’t mdkc a sputtering scjund. Close
ofT the master cylinder connection-qnd
,
refill the rcscrvoir..
‘Check a manual for the correct hlccding proccdurcs
and sequfncc
for ynllr
car. lisually. hrakcs should he hled he<inning with the wheel farthest
from
THE -BACKY;ARD
Universal
fluld that
*
“. \‘-1’
j
’
-.
- - .--~- --
and a steady stream of fluid escapes.
Now you’re ready to bleed the air.
Following
the same procedure
of
- opening
and closing the bleed screw
while the brake pedal is depressed,
listen as the, fluid escapes through the
bleed valve. When the fluid escapes
without making a sputtering sound-the
air is out of the lin’e, This may take as
many as a dozen openings and closings
of the valve, so be patient.
j
B
‘After bleeding each brake, refill the
master cylinder- and replace the cap.
Check the reservoir
frequently
while
bleeding to be sure the level.doesn’t get
,’low, &ich~.wo~ld _allowair-tobe
drawn
I in. Reoeat -the *bleeding orocedure
on
/’each wheel in sequence. If you are using
_ a self-bleeder you don’t have to worry
,/about opening ‘and closing the valve
each time. Just install the hose, open the
bleed valve and pump the brake pedal
‘.fintil the cleaning agent is expelled and
you think the air is out. The special’
valve in the bleeder keeps air from
bleeding back in.
. . ..
rour wneers me
when youve mea
brake pedal should 4? e up to the normal
*
the master
cylinder,
working
to the
wheel closest,, but this &varies. Begin
bleeding by opening the bleed screw on
the appropriate
wheel a quarter of a
turn. Have ,your ,buddy depress
the
brake pedal slowly (as before)
-letting
you know when the pedal is near the
floor sd you can close off the screw.
Continue holding-pressure
onthe
ped-al
and opening and clo’sing the bleed screw
until all the cleaning agent is removed
9
brake fluid is available.
But top-quality heavy-duty
_.
trts the needs ot your brake system Is best.
n
Bleeding can be done manually by “opening and closing the
bleed scre@ as someone pushes on the brake pedal. Special
bleeding hoses have check valves,that-brevent
air from’ bleeding
back into the system and eliminate the need for opening and
closing the bleed screw. The hose is installed’on’ the bleed valve
pumped until the’air.is released from the
- arid
.- the
..~ brake pedal
_
system.Erake
flurd shoutd beg bled into axontamer
and-thrown--out-never
use old brake fluid for any purpose.
tontimed
MECHANIC
’
33
If you’re bleeding after
relining the brakes, the pedal may not
,.‘come upas y~th?nkiMrould
i-f .the
brakes
aren’t proper1.y adjusted.
So
check this before rebleeding the lines.
Figure 3 outlines the basic steps for
bleeding the brake system.
A few other hydraulic system prob, lems you might encounter involve special p’roportio wrf$ and metering valves
u.s d in brake systems with front dkd
b74 kks- a.nd rear- drums..‘We’ll
discuss‘
these special devices as well ai the, pressure differential warning system in next
month’s power’brake installment. @
____
--
-
d
*.
’
-’ --’
*
,oA
&
‘.
lines the basic procedures
for most
each line. If a leak develops in either
system’ (front or rear) however, the
cars:
I
I/
:‘i
fluid pressure decreases and the pisPqOPORTlONlNG VALVE .
ton moves off center: triggering the
warning light.
, On vehicles equipbed with front
This system is great if you develop
disc brakes‘ and conventional
rear
a ,hydraulic leak and the light lets
drums, a special proportioning
valve
you know about it. -But as some of ,F maintains
correct fluid pressure beyou may have discovered, other things
tween the front and rear brakes to
can trigger the warning-light. In many
provide balanced braking. Although
cases, opening and bleeding the brake
the proportidnxg
valve rarely malsystem activates the light. And with
#functions, if unbalanced braking that’s
some cars the lights have,a bad habit
‘, not attributable
elsewhere develops,
PRESSURE DIFFEPENTIAL SYSTEM
r
of coming on- when the front wheels
the inexpensive
unit should be reSoon after the auto companies inare spin-balanced
on the car; or for ’ placed. The valve is factory Set and
traduced
dual-master
-.cylinders, .to
no apparent reason at all.
no attempt should be made at. ad‘>
help prevent brake failures. they,wcnt
The first thing some peo& do if’
justing the old valve. To replace the
one better with brake pressure1 dif-!
the warning light comes on tihen it
valve, simply disconnect.it
from the
- ._
ferential
warning
systems.
These
deshouldn’t
is
just
disconnect
the
light
brake
line
and
carefully
install
the B
‘,
.. vices are -d&igned~~ to activate the- -- ~and-fo~g~t--abou-t~~~~-u~-t~h~~
~~~~~at-emnk~ngsmetkeapening
;
dashboard brake-failure warning light
system is thcrc for a purpose and
inarked “R” is toward the rear-not
,*
*as soon as there is’ a loss of fluid
having a.disconnected
light won’t do
the front.
pressure in the hydraulic systemyou a lot of good if you do have ’
,
METERiNG. VALVES
I ’ /either
front or rear brakes.
a brake failure. So it’s a very good
Basically, the warning system is
idea to know how to centralize the
Most c,ars with front disc brakes
a.
a piston assembly with the brake failpist
to turn off the light without dealso have ‘another special hydraulic!
urc light switch attached to it. Fluid
activaffting the system. In most cases,
valve called a metering valve. The
from, the front and rear brake lines
!hc job is easily done-check
a manmetering
valve is .~nst,allefL in the
runs’ through the assembly and hoIdS-‘-- uarfor
the simple step-by-step probrake line to the front brakes (Fig.
the piston. ccntralizcd in its bore be- * cedures for centralizing
the warning
2) and delays fluid pressure b.uildup
.. cause there- is equal pressure from
valve on your car. Figure 1 also outto the front brakes until rear brake
s we threatened
last month,
we’re finally going to finish off
brakes in this “Backyard Mechanic.” Last time lvhen we discussed
the
brake
hydraulic
system, we didn’t get to the special valves that are important
parts. of .today’s hydraulic systerns. So we’il cover these devices
briefly before wrapping
up brakes
with a discussion
of power brake
assist units.
*
‘
)_
34”.
:
.
I
’
.
d
i
.
.
:
.
I
WARNING
c
LIGHT SWITCH-OFF PROCEDURES
a
. ~
\i.
After re ainng and bleeding any part of
the hy t raulrc system the warning light
may remain on because the pressure dif‘ferential ,valve remains in the off-center
.,
position.\
A. 1970-1973
Ford oroducts. ,General
products
and
Mot% 6 cars, Chrysler
/1971-73
American Motors cars (disc
J“ brakes) have,a self-centering valve. After
repairs or bleeding is performed:center
the valve by.applying moderate pressure
on the brake pedal. This will turn out the
a. II
r.rgnr.
I
B. To centralize the valve on 196769 Fords:
1. Switch theignition on and bleed
brakes.
2. If the front brake system was
repaired,or bled, a leak must be created
I .
- the rear brake system and vice’versa.
in
Open the bleed screw at one rear brake*
and have an assistant press the brake
pedal slowly, until the light goes out.
Quickly close the bleed screw.
3. Check
brake fluid level and
brake pedal height and firmness. Road’
test ttie car.
C. To centralize the valve on 19671970 (drum,, ‘and dis,c) and 1971-1y/a
* (dru,-m only) American Motors cars:
1. Before repairing or bleeding the
Lr-.frlr
LII
r(:-^““-^rh
+“,e,,,;#it~tt?rpl;n!
“Ia’I\lZD) UI~L”,I,ICLL
wire and remove the I
nal, contact plunger spring, and nyloa
plunger with contact.
-? on and
2. If the light haa cornt
actuated the valve, spring pres sure may
hold the pl nger. To release the pfiinger,
T:
Fig .l
,.
‘,
/
I
_
9
-.I
_.:
.
I-
Most 1972 and newer cars have special
units that combine the metering, proportioning, and brake failure warning valves
in,to one assembly located near the master cylinder (arrow). Older cars have.sepa.
rate valves located in the brake lines.
apply a small. amount
pressure.
of brake
pedal
1 NOTE: Location of the leak can be
determined by the position of$the plunger
in its bore. The top of, the plunger .~III
lean to the. side (front or rear) whxh
has the low pressure.
’
3
brake;.
.Make
...-
the
,,
nnrl _.--kl~nc-l the’
_.,_r_.. -..-
rw-mir
lnstall the spring-and plunger in
the valve with the contact down.
4. Install the’ nylon terminal ,and
connect the warning light wire to the
terminal.
5. Replace the valve a&mbly
if
any fluid leaks from the center terminal ’
opening while removing the terminal.
IMPORTANT:
.
*I
non-serwceaole,
The &itch ‘assembly
.-a.i . I.
replace n rauq.
,
is
I
.
I
r\
_..-
..-
..
.‘I
.
-1.
..
.
.*
:
I
.
&titinyd
1
THE BACKYARD
‘. ‘- .l
.
MECHA’NiC
’
I
i
:
y
”
” ‘,
‘,..’
‘-,
A -
.’
e
“’
,‘.“,
‘:,.,
.:
i
1.
-
.(...
__I;
:
.
_-
-_
,r,:
,I
.‘.
.
_”
.
‘!
:
x:“,
.I.
:
I
e,
:I-
._
,I,
‘.
: .; .I
,
-.*,
are separsted from the.m&te{) c&n- .
‘A-..
wt iI- ..^^.... - --nit
UC1 vy LIIt; yaLuuII1
u
is wi;y you ’
don’t have as good a ‘tfeefi’, with .m
.:
.,_ 1
-i,
_,
i
:
._”
1
i
’ *.
,
.;- (, ..;
‘y
‘Yi
pbwer biakes as yoli ‘do with manbril
pressure, is at the properUle&l. Like.
brakes where the brake pedal is lin$ed
pitiportioning
valves, metering valves
righ.t to, the master cylinder.
1.
i.
,
rarely malfunction. --However, if thl
L
metering -valve, is not operating propOPERATiON
erly, U~JJKL& stress is placed on the
Most POWIer brake ,units consist
J%e pqwer’brake assist unit is located &: I-,
front-$,rakes. reducing braking action
i
h,,,:,'"lI..
,-.c
,,
Ua.o!Lclll~.VL
Al piiton, control valves,
tweeil the master,cylinder
and‘ the’ fiie f i.
atid greatly increasing
frdnt brake .wall. 7: e vacuum check:valve
on this&
’
and a vacuuin connection
f&i
th,e
wear.
unit has- -a spec’ral connectnr Where. a
tl
--‘-:-c,LglLlc :-r-1.II‘lilKC manifold.
When
yodr
vacuum gauge can be qttached.
: ’ Check thk metering valve by apply;:.
.
foot is off thej brake and the vacm&.
ing the..br&os ‘very slowly ,(engine
..I:L !-. !~. &,.
UIIIL 1s m me released l&ition,n thk
$nJ. If the .m&.ringvaive
is operating
’ ~a~uut& systw--.i+ke
port is closed!
y :
tliere will. be fia ‘slight change in
A
specia!:,j&ospheric
port .remai$
’
’*
“,
c
-I pedal pressure at about one inch bf
open
10
allo\
Sr~airtopassfrompne;
.*/
:
1
1- .
.’
, -‘-c]
pedal t ravel-it
should. fkel like a
.
side
of
the
vat
Suum
piston
to
the
othei.)
-<-.
slight .bump. If the ‘valye, is not
-. .
. - .
1
.
J ms malntams tqual,.pqflre
bn the:,
m
aperating ii can be easily replaced ’
3
pistoq and-$eFps it in the qff .poii$on, ;,
by disconnectine‘it
.from ‘the brake
__. ..
When
you
hit
the
‘brake,
the
a‘tI’
b’
”
line and careful& installing the’new
.
. .a
-R .
p
mospnenc
port closes and the vacu-.
I’
Thr
,:
._’
urn
port
open
s:
Vacuum
from
the.enafter installing
the new valve-as..
,x
gine then .NI(:ks the &-it. ,piston for.*
,
,,.
*
they
should
be
any
.time
the
brake
‘.
.i.‘
_‘.
’ ward against 1the master cvlindi; opersystem i&.opened..
.’
.
.‘_
,-‘,
.I
.* ._
.-__
-‘\;.
ating rod and actuates the brakes.- lg
COMB&TlbN
VALVES
.
‘the power unit fails or the ‘engolne dies,.
_, .~’ 1.
there- is--usudly -enouhmva&um
re--.
1- ---113
1-97 1-Ce*eral-.+lotbrs+nti-Tm$njng
i’n ihe .s stem’ to &ve- you
, .duced a valve that ‘combiries the
._
assisted braking ifor- a few ~edbnds.
warning system,, proportioning,’
and
But after that.you’re going-& have to
meteiing .functions all in one unit.
use plenty of leg power.
‘.
Ford Eol!owed in’1972 with the same
Thk important thing to remember,
type unit and now most n&’ cars
aslfth’ pow& brakes is :don’t ‘freak‘ out
: utilize : a combiniiion-type
calve.
if&the power fails ‘or the ca; dies. You
These combination
9alves a;e norcan
mally* locate,d,>.at or: near the master
altiays
stop- a power-brake
.cylindQ ,,(check g manual for tl$F, . equipped. car nianu$lly in. a reason-‘.
a,ble distance-you
just have to put “:
~ .location .and specifics on your car).
: The entire unit, must be replaced if h a lot of must
:
.
,
E
‘.,‘,i
,-*
_‘.
‘::
.a<
,.F-.‘_._
-
.
,
.
..‘^
_
’
u
..
.
&.
8,
‘.
f
.--
..7
F,.
r
,_
_‘,
I:
i.
r;
rc’.
;.,
,:
.’ k
.:I
brake pedal about a dozen times to
be sure and exhaust all vacuum from
tlie system. Step on the brake pedal
and hold it down firmly. Start the
engine. If the vacuum unit is working, the brake ,pedal will move” forward siightly as the engine starts. If
the pedal stays hard and does not
move, the vacuum unit -is not func,, tioning,
The first thing to do if the power
upit is not working is to make sure’
it is getting vacuum from the engine.
Pull the vacuum hose loose from the
power unit .(-see picture) and place
your thumb over the ‘hose. There
’ should be ‘plenty of suction at the end
of the hose with the engine -idling.*
If the vacuum is weak, check the
hose very carefully for 1eaks.o: kinks.
Install a new hose if the old one is
defective.
If the hose is okay and’ th&e is
insufficient vacuum, check fjor vacuum at the intake manifold.
Place
your finger over the manifold vacuum
port, or .attach a vacuum. ga&e. The
vacuum- gauge should show at least
16 inches of -mercury with ,the engine
idling.
t
%
.heavjlweight oil on the joints at
carburetor base and intake manif
temporarily and the engine speed will
increase. leaks
can be repaired by
tightening the bolts or installing
new
gaskets if necessary.
“,
If there is plenty of vacuum at
the hose but the booster unit ~still
does&
work. the vacpum
check
valve .(see picture) is usually at fault.
This valve is a “common cause of
ter to ,operate the assist, but doesn’t
let air back\ in (vacuum out) ‘when
the $rgine
i s shut off. If the valve
comes -lOosei or fails, vacuum isn’t
maintained
in the booster unit and
the power assist can’t operate.
Most check ‘valves can be; easily
removed from the vacuum unit for inspection. Careftilly’pull (or unscrew)
the valve from the unit and disconnect it from the vacuum line.
Test the valve by blowing through
it one way and then the sther. You
I
_ _‘&%ntinued
a.
I
‘>
I
__-c
continued
VHE ~A~KYA’RD
~~dt--i~Nlc,
~
2
‘Q’
‘z
thke manifold. Remove the vacuum
should be able to blow through the
hose that runs to the power assist at .’
r end that inserts into &he power unit,
the m‘anifold and run a pencil around
but not through the end that attaches
the insi& of the open end. If the
‘_ to the va,cu,uq line. Install a new
valve if the old one is faulty. being ’ pencil cpmeq out wet. fluid is leaking
past the yac\uum cylinder piston.1 If
sure- to get, the unit placed secur&~
,”
so, the unit sJ&d be replaced. Fluid
’ in its grommet.
leaking into\ the &gine
will cause it
If the valve is i’n gbod condition
to run poorly, and‘enough ,fluid can _
“but the power unit doesn’t operate,
cause sticking valves”\gnd other seriyou better head for the local brake
I&S engine probiems. ‘Before replacshsp ‘or pick up a* factory ,Jebuilt
ing the power unit,. however, chm
power assist’unit and bolt it on. As
the master cylinder’ very carefully for.
previously mentioned.’ power assists
, leaks. Fluid-;leaking
ifit the vacuum
are hajiy to rebuild and should always
‘unit from ,the master cylinder may be
I be ,replaced with a new or factorythe.,cauqe of the excess fluid. In this,
rebuilt unit. A good:service
manual
has the specs on this job for your car. ’ cast [he master cylinder should be ’
./ .
. ..
repanied or rebuilt.
.‘The check valve is designkd to let air auf
REGULAR MAINTENANCE ’
af the assist unit when the power brakes
A power brake-related
check you
are operated, but close wlien vacuu’m
should; make-when checkin.g the brake
Most power boost units ha;e a
sto@. If the valve passes air freely from
adjustment
is to make sure, that the
filter.‘to clean the. -air drawn into
each direction, it’s faulty.
c
power unit is not causing the front
them. C?n a few boosters the unit is
external and should be .periodically
. brakes to drag. With the car’s front
iem&‘ed and cleaned witi. al?ohblend ,;aised and properly supported
?
(brakes-pibperly
adjusted),
s$n the
check your manual for the specs.
st’art the engine
However, most units hqv6 ,an in- ,, wheels. Immediately
but $0 not touch the brake pedal. The
ternal filter .thGt should be serv$ed
I
wheels shbuld coast to a stop giadwhen the booster is removed from theIually arid -torn freely. If not. have
cal. .’
,
the vacuum unit checked o,ut by an
Qne final check you can, make on
expert. Figure 3 gives the.procedure’
the power assist ‘unit is making sure
.I
for checking thq automatic adjusters
there is no brake fluid being sucked
.I
through the vacuum line into the inon drum brages.@
j.
( 0
‘,
I
I
1:,
i
. $~ i
‘p’
-
---
.
‘.
./
‘”
’
.
-:
:-. .
- ”
I
: -
\
._
$’
. .
The Bat&yard Mechanic is designed-to ‘serve as only a general guide to.
the maintenance
topics discussed.
‘Since basic procedtires vary from
icar’tscar,
4. manual should‘be co&.
sulted when performing
any maintenance.
And- any jobs that the
“backyard mechanic” feels are beyond his capabilities
should be left
to experts.
: +
;.
I .
.- ’
.
!
ri
1
.
’
_I
1
3
.”
.i
i
I
~’
-,-
,/’
_.,
‘- . .._
?
THE
--.._.
._
-\.“-
@[~~~--.
I
;,
M
&#I{--....
._____ ;;
i-
*-’
.
.
/
.‘.
._
.
.
e
:
,
;
0
:.
”
0,
.
-1
p,
%.
R
.
;!
,’
v
r
:.
,
-
..-
.I
.
,”
II
I,
b
ufiBEA[,[:y
”’
I1.
‘8
._,\*
‘, . .
’
d-y
/
--
’
A
.
1
J
/.
:
-__
-A
. .
few yea&ago a Aajor oil co&
pany bad a ,televisioq c’ommercial
featurine
CB
mi-imv
c-hrarar-
are caused by a dirty or
Sd it’s definitely a good idea to keep y
WON
nnd
flm&ionine
CZ$.
r&3-
.
/
i
continued,
-
-.
2
:
:
inexpensive kits are available; at mos’t I’ so be sprayed- clean with-choke
sol:
auto supply and discount houses and
vent to keep things working right;
. Tti’E BACKY?iPD MECHANiC
are quite simple to use
1
;
Also check. for any gasoline leaks
After removing the air cleaner asfrom the carb or fuel line when you’
.’
i
_
scmbly, the first step in-using the kit
clean the outside.
;.I
B
.
is to disconnect the gas line at the
! j
NOT FOR EVERYBODY
possibly rebuilt or even replace&
carb..After carefully disconnecting the
-\_
line-being
sure to. catch -,escaping
’
Now, if you’ve ‘beene.,having sick
-pTEW
’
8
*
I :
gasoline in a can or rag-block
off the --carb symptoms li~e~pdbr performance
---.
There .are a &pleof..ways
to regas flow with the special block-off fitand mileagezqd,
cleaning the carb
move accumulated gunk’ from-h rarbting provided with the kit. Then ats
didn’t seem:to”h‘Ff16,
mavd be in
_. ?ou
_
uretor. The ,easiest method is to use a
tach ‘the flexible solvent hose to the.
need of al’ocarbur~tor? rebuild .or refuel system cleaner that is added to
gas inlet on the carb, using,the correct’
Placeme%>$ha?$
; pOT$idin-a you’ve
the gasoline. Just’ about every auto,
size adapter from the kit. Install the
carefully‘ checked :“oW~lik&rd&as
motive products manufacturer
ma&&s
other end of the Ko~o
the can of
that could be causing” performance
1 solvent and sus’pend it from’ the un’ this,,type. cleaner fhat generally sells
problems. Industry surveys show that
u , “-‘;‘-:fo?” J&s, than $1 a can. The products
derside of the hood.
car
owners -generally blame the carbj i ..,,‘- “,1.-...
“.
r
‘, i ,,..g~..by varioys names depending
on
-Star-t the .engine and run it at varyfor poor engine performance,
7.
tlie’manufacturer~.
but they are all
ing speeds so the solvent penetraes
about 80~ per’ cent of the
‘_
4 ‘-.- essentially ,the same. ‘If you add a
through all of the jets and passages.
couple of cans” of this tybe cleaner to
Every so often briefly place- your
*
the gasoline about every oil change it
hand over the carb to’ block the air
does a fairly good job of keeping the
flow to help force the solvent through
r_ carb clean-espec.i.ally
if you start .I ” the,carb. [When all of the solvent h-ash from the time the car is new. But, this _ runthroy’gh
the carb the engine -‘will
type cleaner is not ie2lly. too efficient
die and the internal passages should
I, functioning
carb, first check to,see
at cleaning out built-up dirt and varbe ,pretty tie11 cleaned of gunk and
that the+ heat passages in the i%ke
.,._
I:
nish1.e.
varnish.
*manifold’-near
the base of the carb
To finish The job right, carefully reare clean. These passages (especially
c
CLEANING KIT
connect the-fuel~li-n&sta~he-engine
on Chevy V-8’s) sometimes plug and
.-’
---?he
most
effective
method
of
cleanand
spray
a
&n
of
aerosol
carb
clean,.
cause carb problems. Also check to
______
--.. --.
ing .a carb (especially a gunky one)
erldecarbunizer
down the throat of 1 besure the gasket between the manil
without removing it from the engine
the carb following the instructions on
~fold and carb is in gaod,fhape and the
is to run sokent diTeCt!y into the carb,
.the can. The outside surfaces of the
carb is tightened downFan
air leak
using a special gravity-feed kit. These
carb-especially
linkages-should
al- ’ here or ~~-~.~~
at the manifold couldY-be
_- - -~- .-.-._ ...
~-- ~_‘.- - ---&--.
9
c
I
.
p
.’
f’
.
l
Fuel-system cleaner
d to gas
teak-go
by various product names. Regular
use of this type cleaner helps keep the,-carb~-I_--
.
I
-./
?r
Gravity-feqd kits are the best methoid of clean;
0
J
,. .carb still gives you trouble after it..is
for anyone but a.cettified mechanic.to
tamper with a ne&wer carb in many , cEaned and properly reinstalled, your
But before we go one step further
‘
best bet is heading for a good mewe .want to emphasiie
strongly that
f ,cases.
chanic or replacing the carb.
.
’
rebuilding
is not for every/ carb, nor 1
s WHEN?
1
.s
is it for every person.
So now.you may be wondering just
- REBUILD
Only-a few years ago it used to be
-- I
when should you rebuild a carburetor.
just about standard procedure to pull
OkayLlet’s
say you ‘have an ‘older ’ ’
Well’ the main candidates
for carb
off the cat-b and rebuild$,about
every
carb that’s in need of a rebuild. The ‘
rebuilds
are
older
cars
with
oneand
1 very first Xiing yYFGlioshoui%
other tuneup. Well let’s face it, in the
get--L~-TP’two-barrel
carbs. If you’re :&sing
last few years carburetors
have gota/manual
that outlines the job for
along a car that’s logged a lot of
ten more complex; but at the same
_ your carb step-by-step.
If you’re not
miles and is running a bit sick, probtime they’ve gotten more reliable so
=
sure of yourself after checking .out
ably the ‘bsst’ investment
you can
they really don’t need major mainten&e procedure, don’t do it, Save yourmake is a reworked carb-especially
ance as often if they’re kept clean
self time and trouble by. getting a
if you do the job yourself. Of course..
.
Also because of the complexity and
factory-rebuilt.
you want to be sure,the carb is really
the emission control restric$ons, most
If you’re confident, you can handle
what’s giving you trouble.
regulti mechanics, do not attempt to
the job, you can, save a bundle by
If a sick carb is the problem, there’s.,
rebuild
many of today’s car@. In
.
picking up a carb rebuild kit and doing
no reason why the ave.age “backmost cases it’s easier and cheaper to
the overhaul. However,’ there’s a very
yard” mechanic can’t @ll ofFan older
simply remove a faulty carb and bolt
important difference in. the quality of.
model one-barrel carb and completely
on a new or factory-rebuilt
unit. The
the rebuild kits. The less expensive
rebuild it. Also, if you have a bit of
same is also true fsr-f%ir-barrel
carbs
.kits generally contain only a few new
experience
with carbs’ and/ or yoti
-many
skilled’ mechanics
find that
internal parts and new gaskets, but ’
work very carefully
and follow init’s easier to get a factory rebuild than
e
worst’ of a’11they usually have only
structions you should be able to hant$z,s,o
rework a complex four-barsketchy instructions.
The way to go
ti
i
‘die a two-barrel carb.
is with the more expensive kit ‘that
As we mentioned
previously,
the
So the fact that “real” mechanics
contains all the parts needed to cbmpost-1970
carbs
are
specially
calido not try’ to rebuild all carbs ought
_
pletely ,overhaul the carb, as well as
’ brated
and equipped
for reducing
to tell you “backyard”
;mechanics
complete instructions
and the ultrasomething.
Generally, *if you’ve
got .+ .emissions and should not be tamperessential
gauges for measuring 2he
ed with. However,
if you’re having
“carb problems with a post,l$70
carb
critical adiustment$.s
’
*
--carb problems it’s not a bad idea to
or ’ with any four-barrel %nit, you’re
When you’re
remove the carb and give it a thorough.
probably
better off ‘get&g a rebuilt
to be positive y
cleaning and: check for obvious prob- ”
one and installing it rather than fool,
lems like a punctured
float. If the
, ing-~ with the old iarb. It’s also‘ illegal
~~~
I
_
,~ ‘:-
Aerosol carb cleaners can be used to clean
the outside of the carb and sprayed down
the carb throat to clean the inside.
4
Besure to-get then best carb ,rebuild kits that contain all n cessary parts,
as well as complete instructions and the gauges needed or making the
essential adju.stments.
f
*Most rebuild
kits are designed for more than one r;nodel carb and
usually contain
more parts-especially
gaskets-than
afe. needed to re,
build any one carb. Especially for this reason, save every..removed
gasket
and part so you can be sure you use the proper replacement part:
\
~_ -
I.
0
:
$1
’
.
.,
il
continued THE .BAC-KYARD
.
.
-
:
k
.
,
i .:
5
n
-_-
~~
-
I
0 mind. First. don’t forget to remove
The next ‘thing you wan;?to do is
all jewelry and disconnect
the negacar,cfdlly remove the,-tog df’the carbMECtj/iNIC
tive battery cable (or positive cqble ~~~-6?e@r and remove the float by pulling
..
bn posi i;, ground systems)
to prethe pin as sh$wn in thC pic!ure. Gentvent
ny chance of a .burn or exploly shake the float .near ydur ear-if
I++
sin& the kits vary for the same carb‘
siof front a’ spark. Filially, to make
you ‘hear sloshing the float must be
depending on the sp.e&c model. The:%)
,c,bb
a lot easier. thoroughly
cle.an__@&ced.
Plastic floats sometimes get
best way to tie sure is to ge,t th_F-num\dhc outsidc of the carb, with solvent
soaked with gasoline and become too ’
berf;om
the carburetor
identification
before beginning.
heavy. Check float by squeezing
it
tag thacs usually mounted on top of
11 The first st:p is’d,isconnecting
the
lightly. If the float-is okay set it aside
the carb. If there isn’t a tag. you
fuel line. vacuum lines. and the, link-.
and you can go on.
shoul’d bk able to find an 1.E’ nu’mbcr
ages so the carb can be lifted off the
Another
important
consideration
somewhere on the barb.
1 manifold-never
try to rebuild
a 4 before you continue dismantling
the
carburetor on the engine. The importWhen you’pick up the rebuild, kit.
carb are the special spring and ball
ant thin&arc
to be Sure and use a’
grab plenty of capb solvent for soakassembl:ies that ire used as metering
container or a rag to catch the escap- , systems i_n most carbs. Note exactly
ing the parts clean and you’re about
the
Fady
to go. Remember.
never !‘use O ing gasbline when y6u disconnect
r
‘where and how these. assemblies
fit
fuel line. Also: be sure you know exgasoline for cleaning the carb since
and be careful not to lose anyof these
‘actly h~v and where all of the linkit is highly flammable.
J3ut also be
small parts since they tire rarely supages and .vacutm
lines attach. It’s’
careful with the carb solvent since
plied in the rebuild kits. A’fter checku.
~‘7enerally a good ‘idea to take some
it is very caustic and can burn your
ing out these special parts, you can
Polaroid shots or make some sketches *
skin. The best bet is to try, to keep
continue
the disassembly
following
tape sure you know how everything
the solvent off your hands as much as
’ the step-by-step instructions given with
goes back on. You can also label each1
possible and always .rinse the solvent
/ t-he,kit andin amanual.
mm-lpart aS ,you -remove it to help preve
off of youi skin after long exposures
:Smce the different types and styles
.
~ any mixup.
to the solvent.
of carburetors
vary greatly, we can’t
After everything
is disconne i ed
Besides common
hand tools, the
cover the entire rebuilding
process
froril’the carb, simply remove tiie nuts
only qtlier items ypu’ll need’are some
here:, However, we will generally outI
that hold the carb to the manifold
clean rags, clean cans (suchjas coffee
li:e ‘seine of the major steps using’
atid li[t tkc darb off and place it on a
,cans) td use for soaking tank:, and
plctuies
of a Rochester
two-barrel
finally some sectiyed
fia&--such
as ” ‘clean working surface. Place a wadcarb khich is a rather’ commirn carb
ded-up rag in the mqnifold
opening
TV‘dinner trays-for
organizing carts.
that. iv u’sed on ma& GM products.
/
to-prevent
any forqign ‘debris from
Befpre beginning ,to work there -are
Various carb. rebuilding tips $lso, ac,
a couple of final points to keep in ” getting inside the engtne.
coypany the f&owing pi&
T.
The first major step is removing the top of
the carb (air horn) from the carb body.
There is usually some linkages that must be
uphooked tp accomplish this. This. is the time
~~atealTj%rts
such ag metering valves
that can be easily lost.
it
*Don’t
get carried ?,tiay when you’re disassembling
the carb., (o/low
the instructions
step-by-step
and don’t tear d&m
subassemblies.@ess
specified in the instructions.
Checking the float js a very ‘important step. Remove it by pulling the retaining
pin.. Shake the float-if.
there’s gas-in it you need a new one. Rembve the&e1
‘inlet needle and seat and save them. Remove the accelerator pump and other air
I
horn parts according to iqstructions.
‘The accelerator
pump is an important
part that shoots gas into the carb under
heavy demand. A worn pump is what causes lagging acceleration.
Soak the new
Pump in light oil before installing it to be sure it seats correctly..
.i
_.
+
I
0
\
:
photos continyed
C% next
page
__,’
I
!
_,...._.. . -
i
2
\
.
b
-_.A-
-
-
.c&-hnued
,THE
1
-.
i
BACKYARD
MEQiANlC
,
-
‘-
-:m
3
*
~-
._.
Hene’s a-good example of why you,should
Soak all major parts in carb solvent f.or
save all removed parts. This carb uses
at least 30 minutes. Do not place rubber,
two sizes of balls which could be easily
plastic, or any non-metal parts in solvent
-they.qmay
disappear. These parts can ‘. mixed. All, new parts should be checked
carefully against the removed parts bebe washed in solvent and rinsed clean.
fore installation.
After al! parts have soaked clean, rinse
them thoroughly in water and. let them
air dry.
Reassemble’ the carb following instructions. Make all adjustments
very carefully according to instructions-if
you
don’t, all of your time and trouble has
been wasted. Float level is one of the
most importantsettings.
t
.’
*/
J
.y--
. /1
.;
I
! /
‘I
_,
-‘.
‘.,
.-‘c
4
portions of any operation,
are little notes that read “caution”
compartment,
not add cold. The first
radiator and usually located in front of
step in this chain is the compressor.
the car’s-radiator.
The high pressure
: WA&t@‘.
THE REFRIGERANT
The compressor is nothing more than
caused by the compressor is put to work
,-USED IN flR CONDITIONING
SYSa pume which is driven by the crankshaft
at this point and raises the boiling point
1 T.EM-S tS HAZARDOUS. YOU CAN’T
L
via a V-belt. It picks up a gaseous reof the R-l 2 to over 150 degrees F. When
SEE, TASTE, CR. SMELL IT, AND IT
frigerant from the evaporator inside the
-,- C:;(\N’T BE READILY’DETECTED.
THIS
outside’air is passed over the thin tubes
I
REFRIGERANT
BOILSAT
-21
DE:
car
and
compresses
it.
Let’s
refer
tea
.
and fins of the. condenser, it,cools and
:
I
r changes,the R-12 back to a.Jiquid, losing
this refrigeiant
(Freon) as R-12. The
GREES FARENHEIT ANDCAN
SEVERELY -INJURE YOU BYJ+EEzING.‘,’
compressor uses an electro-magnetic-;
the heat it picked up from the interior of clutch to permit it-to be turned off. when
thescar,. e
ALSO;,.dF IT COMES IN CONTACT
not needed.
-,
The liquified R-12 then enters the re-L
WITH A- HEAT SOURCE,
ITI CAN
The R-12 is metered into a cdqling
ceivei (dryer),.a small black tank’located
CHANGE
FROM A LIQUID
TO A’\
\c. o<l (evaporator), normally located inside
’ next to the condenser or,on one ,of the.
,,
: ,l=tA&W~EGAST---,
thekaron
the firewall, at about 30 psi.
fender:, wells. This unit has the job of
NOW that ,-we’ve got the’dire’ warnings
The -Rq,2 is in liquid form at this point.
separating. liquid refrig@nt
from any
out, lets take a look at your car’s air
Its boilingboint at 30 psi is just above the
gas that might.have left tbe condenser,, :
conditibning system to see how it works,
freezing po$t,of water. The R-12 there-4
and -ash filters the refrigerant and aband maybe we can clear up a few mal-.
fore tends to btsij, absorbing heat from
sorbs jany moisture it may contain. It :!’
.F. _ 2..
functions.
-. c
‘\,
,
the coil.
incorporates a sight glass, in most sysi
....tems. that allows the R-1.2 to be visually
GERATING
SHERRY
!
,,....
..--.:.--checked .for the presence ‘of bubbles.
An air&on&tioning (A/C) unit works on,
Remember this sight glass : . . its in- -5
the simple principle that when a liquid is
valuable in,troubleshooting
a/c .probconverted to a gas, it absorbs heat from
leins.
_ R-12 then flows’through a liquid line
its surroundings.
Using an immense
amount of logic, we see that .when~it’s
to the expansion valve. This valve ‘is ----i-.+2--- .._..
retionverted~-from a gaseous&&e&ae+~rom-your-,w-asrrusua iiy ioc~%t~
evaporator, and
to a’ liquid, it gives up this heat.
tray aI!-over the car). As the air passes.
usually on or near the firewall. The valve,
In order to accomplish thisfeat of heat
through,‘the evaporator, heat and moisshaped like a mushroom on some afteiremoval, .we need several components.
market systems, controls the flow of R-l 2
ture are removed.
‘,
..
,
I
,/
5~
.. .
.‘!
,
I
..’ _.:>
k
I
*
I
I
to the evaporator. It provides only the
amount of flow that the evaporator can
“handle.
SYk$M
”
I
--
.
/
:
,’
“i
B. Chedk compressor operation: The
front portion of the clutch should remain
stationary
when the compriessor
is
disengaged; If this portion of the clutch
turns withidhe belt, the compr,essor is
operat/ng%Jith.the a/c selectors switches
“on,” the clutch should be turning.
If the compressor is not running,’ be
sure‘all a/c controls are set on full or
max. Also consider that someof- these F. If all
r should operate
i’
,) I
,,
i
..
,,
t
_
--
.“’
Ba 6kmigmnt(r+-tijfiorvc~~~
_ pulleys instead of the compressor,..
Tighten the belt by pulling the cd&
i,:
pressor away from the fan, prying i\
.-j. :
carefully
with a breaker bar or, if the
mount has a square hole,. by ap lying
A
torque on@ mount ‘with a sock e&t rive. i i,
Belts should be tightened so that there
is no slack and so that they have a springy
; ,
I
feel. Moderate thumb pressure &ould
cause the-belt to yield % to 34 inoh .for,
each 10 inches between pulleys. TighfGnew belts slightly more to allow for bell
‘:
r.
stretch during break-m.
If the belts continue to slip, or are
noisy, chances are that either the pulley
_
is worn beyond limits, or you have the
Y-+X
-wrmg-be&--- __~.
~_.~_ me-&
.-
is below 50 degrees
~
,;
I
f
TROUBLESHOOTING
_
;
-,.~,
CHECK COMPRESSOR BELTS . ,
.
I
fnspect belts for cracking, fraying, or
glazing. Glazing can result from, and
-!.,
- ,.
result-inslipping.
A glazed belt will havej
a smooth, slippery surface where the belt,
1
contacts the pulley.
If the belt needs replacing. do sp, _ ’ .. d
being sure you use only the belt spe;
cified in your pwners’ manual. If your ’
compressor is 1driven. by multiple
but only. %ne is tiad, replace both.
sets aregxactly that . . . sets.
A
b’ perature
6/
--.
3.-\
.’
-.;-- ’ F
I I II
1’1 I I.1 I I
_- .., :
”
,i
.
1
-’
::;
.-_
-i’
1
:
:A
*-
I
“Z
l
1
continued
Tt-ii
,.
y
-BLOWER MOTOR
8s FAN ASSEMBL
i
BACl$YARD
~,ECHANIC
‘-
,,!,
’
’
1
’
__I
_Tf CoKageTs-pdrese&%the com’pressor
side, check wiring and connections back
to the ignitionswitch. Check for a blown
a/d fuse in the fuse block, or an!noperaT
tive thermostat (usually located behind
the temp control knob).
‘.
CCj(JL-‘AtR
\;,
.:
I.
..I). ,.-L
f3FF
-
Bfk .,.,.,.,,
“.,$,,
-Iu 2-l
BLOWER SWITCH
‘1,
/! .
\ Blower rnoior and fan operbtion
.!
/.
.
0
C. Inspect condenser-and fan: Check
I!
condenser for bent or damaged fins,rand
FOD. Straighten the fins as necessary,
__i;
: but ‘be careful not to damage any of the
m.m_._.\
:
tubes. Check the fanlor bent blades or
.‘: .:’
wobbling’, and insure that it is not slipping
td&TE
if you determine that your . from the price most a/c servicemen
1
’ due to worn belts. Remember thatcooling
a/c is low on R-l,,:! and wish to recharge
_ charge ‘to do it. An added benefit of
system mawnctions can,_cause the a/c
it Iyourself with @e of the kits- on the
having a pro do it,rs that he can evacuate
j
to function badly. ,, X-J ,
market, please consider either having
and dry your system while he’s at it for
---._ - .it done or asking your installation
little or nd extra coin. If you still want
”
D. Leaks: R-12 leaks’show up-as
hobby shop for/assistance.
No matter
to do it yourself, check with the hobby
/
oily film or substance on the...various
what the labels on, the kits say, you , shop
most of them have at least ihe
components because compressor oil
should have a gauge kit, a leak checker,
gauge kits. Trying to put two pounds
is carried around the entire system-along
and a purge kit to do the job right. By
of R-12 in a system that needs only 9--.-r
with the refrigerant. Look for oily spots
the tjmeyou’ve puEhaSe$ two or. three
ounces cannot.only be trusiraiijg,
but
on hoses and lines, and at joints. A small
possibly dangerou.sY
;amount of oil on the front of the com- ,L--liftTe cans of R-12 and the, h&e kit,
.
. you’re only about three dollars away
pressor is normal.
i,i _ _~-.'
.
;
.i'
,
I
,I
_
Illustrations
courtesy
of IMitchell Manuals, Inc.
-,
1
_
‘_._c
‘..
.
.~
I.
; AIR CONDITION&
’ -
9
./.
EVAPORATOR -,ASS&BLY
_
1.
. .
LPFAP
HAI Ii t-S
BODY Sl
n,,r-f
/
1,.
,
/
*.
I-
-+-x__
. Cl*.-a
‘\
*.,
jl
Restrict01 Motor
V&,r
Valve
-I
c *
,
INLET
-
SIGHT GLASS
RECEIVER DRIER
Trans. ‘Dipstick
‘._.!
Receiver assembly(showing sight glass
/
I
I
Blower Motor Resistor
TypicaJ&Q<~n~t-t&‘Io~~
(Ford)
//-/----E. ‘Sight glass: Start thQ engine and
adjust idle speed up or set the idle cam
on a higher notch. Locate the sight glass
and remolje any covers, and clean it
--.- with a rag (if the receiver is near the fan,
use caution to insure the rag doesn’t get
caught in the fan). Have someone‘set
a/c blower and~controls at max and watch
then sight glass. Thegtass~should~ foain
and then become clear. Unless the outside temperature
is less than 70 de- 6
grees, the glass should become completely clear within a few minutes. A
few bubbles will b$ present
at the
cooler temperatures even if the system
is-operating correctly, If a few bubbles
appear at warmer temperatures, it indidates the system is slightly low on R-12
--and-r*--_____
and-sbo&L.be-leaik_charged. If you see severe bubbling or,,
the glas.!! remains completely
clear
from startup, the system probably is
very low and needs a charge.“If the glass
foams and then turns clear, go on te G.
A-)-
/
.A” F. Line-temperature:
Carefully’..feel
,“’ along the tube that runs from the condenser to the expansion valve. It may
be hot, so watch it. The line should be
warm along its entire length. A drop in
temperature indicates a clog at the point
e of the temperature
drop. If the drop
OFcurs at the recejver, the receiver will
have to be replaced@cause it is clogged
With’moisture or dirt!
The main suction and discharge lines
‘at the compressor should showg definite
differen.ckLifi temperature! one hot- and
ome cold. If they feel about the same and
the sight glass doesn’t foam even at
starto-p, the-R+
charge is probably
Jompletely gone. ‘
~
.
_
.
v
‘
ii.,.
,q
=
.
.
’
G. Blower performance: Operate the
system-with the blower at high speed
and the temp control set at the coldest
setting. Engine should’be at fast idle.
The temperature at the discharge vents
will vary with the weather but most systerns will maintain a comfortable temperature.in all but the hottest weather.
Above 90 degrees, expect a slight reduction in cooling.
ff the outside. temperature is normal
and Ihe a/C performance-is-~U-~~~--~
normal, suspect the blower or temperature bontrol system.
If jthe blower operates on all speeds
changes i@. peed when ths?blower
switch?;?!2
4l - ovi&& it’s operational.
If R/operates on only ohe or two positkaa$ or spe,eds, suspect a faulty blower
resistor. This’tgem is located (usually) in
the engineXqmpanment
on the eva orator housing.‘@emoye ‘it and chec R ‘for
’ burning or’ s.hort/ng coils.
If the Ilever is moving an air door or
water vafve,,inspect the linkage to see if.
it is operating properly. The most com&on problem is an incorrect adjustment
or a slipping adjusting sclew. The adjust-.
met-$ is usually made on the clamp w&&h
in place. Adjust, the
the line is not cracked or kinked, have the
a valve checked.
If the a/d works OK for 2‘0 to 40 min- ’
utes and the’n begins to go away, the
evaporator core is probably freezing up.
The suction throttling valve or. de-icing
switch causes this and will have to beinspected or repaired by a qualified ale
person.
.,
If the blower doesn’t function*at all:
run a ‘jumper wire.‘from the positive
i
battery termin*al or the fuse block to the
blower motor ~ierminar. If it still doesn’t.
run, check the’groun-d strap.
‘(:
If the system’ output-is inade uate,
.even,though
the blower is goo 1 , the
temperature contr$ system may be the
glitch.. Have .a buddy..move
the temperature. control lev&~.back and forth
for a mov,., White youloo~de~th&d+sh
ing .control cable (When bnder ,hood or
dash, remove rings, Watches, bracelets).
Thecable operates either a water valvep
---or an air mixing’ door. If there is no apparent cable movement, but shifting the ~
temp control knob has an effect on cornpressor operation,
have the thermostatic switch checked by your friendly
a/c serviceperson.
~j_,
HQ&BY SHOP?
“, ’
.
: ‘Don’t forget your insrallatio~hobby
shop when you have a/c problems. Most
shops have ttie* a/c%manuals you’ll
.
need,’ and many have skilled. a/c .technicians that can help guide you through
’
the mazgof wire and tubing.
\
Also, as with other Backyard ‘Mech-:
anic articles, we advise getting and using
.
the correct shop manuals and safety
equipment. A/C servicing can require:
.1
safety goggles, insulated gioves, pres- .
sure gauge sets, and spectal.-pressure
,i
D
vessels and connections..
Don’t be afraid of doing your own’.
troubleshooting, butrememberthat major
a/c repairs are best accomplished with a
little qualified help. @
2;
,
. _
‘\+.-5l
:
’
&-
.“/’
,
‘:
,,
,’
,:
,
,I
1
’
./
‘~
-..
‘i
/
‘?
.
”
_-dj
f
‘,
._
.
;
.
‘_
-
>=
.
’
”
I
The>spark
for your- of
car Iif; ‘1’
system wiitil the gdvent:‘of the new @en,. eration systems.
Ignition Basks. The parts composing
s
the Kettering, or qoil ignition system, ate
the electrical energy source (battery),
ignition coil, condenser, -distiibutor, igni- :,
gnition. &stemq have come a
tion switch, low and high tension wiring,
long, way fron%the red ‘hot platand-the spark plugs.
inum tube used tb ignite-fuel in
The <ignition qyster&‘is, tas&d with
the hafly ‘1900s to today’s breake&ss
_\‘.
1
’
producing high voltage surges and then
ignition systems.
,
In this i’ssuti we:ll cover late mod61coij’
directing jhese surges to the correct
\\
Spark pllig at the correct time. The
ignition systiirms, alid& the next.issue
siirgf$ br sparks, must, be timed to arwe’ll move on’to the latest generation of
high
energy
systems.
~Grive at-the spark plug at an indant near’
_ ” “D ” 0’ . . . ... ‘, ,..1.Ihe end of the piston compression stroke
~“_“,;::;“L.0
. ,L: ” ‘A Quick Histo~. &till 1914, ~ignition
and”in reference, to the*+iston position.
- ->.__ ,1 sources were either th “hot tube” or
The shark from the SpaFk .plug then igthe hibh or low tensi d n magneio denites. ‘the compressed fuel/air mixture,
veloped by FipbertJ3osch and Fiederick
with th;e resulting explosion forcing the
piston back down the cylinder and pro. :
In late 1913,.the first
: ’ real improvement
ducing power.
In Ignitibn systems was developed by
The igniti6n system involves two in-“-’
arles Kettering at his Dayton Ep
gi&ering Lab (later;kpown as ‘Del$) .‘s’.‘dividual circuits”. One’ of these is the . .
primary circuit composed of .the ignifor use .on the 1913 Cadillac.
tion switch, primary Lvinding of the igni- L
Th/s ignition system, still known&day
as the Kettering .systeF, is the co11igni- ’ tion coi!, distributor contac! points, and
tion system. It w& u‘sedfrom about 1914
\
.
I j. :-\
~- +
-+L
,
j-L.-.L . . . :2-.,‘Y,
,!a, ‘_‘.
..,
-‘_. .a,
i_
.”
,.
-
..,
,,
.‘dl
.
;
]
_ ,,
..
%
./’
\
i
‘.
1.
-
.::
? _ _i
\
-.’
..
.
m
,‘::
,.,.
.’
%
_‘.
: --_
,’
4:
‘:
-2’
‘I’
\
-
’ ,gefs
.
i
;-
i
I.
d
‘/
0
secohdary .win-ding
distributor shaft causes the .coniact -%nd3ick--t&-re
through ground, the battery and’the
points to open,‘and close; )?hm
the
ignition switch. The contact points then
,points open, the current decreases
.reclose and the cycle repeats. The nextrapidly in the primary winding of the
firing spark plug will tlien be the one
ignition coil and a high voltage is Inconnected to. the distributor cap insert
duced in the cojl’s secondary winding
thit is aligned with the rotor when the
(more ‘aboutathe
phenomenon
of
,
contact points separate.- With[the ‘eninduction later).*
gine running, current f,lows’through
:
This. induci$d.,.high vgtage ,!lows
the coil primary calibrated resistance
through thg distnbutor cap to the rotor,
wire: the other lead connected between
through .the spark .plug tead and to the
spark plug. The voltage arcs’ from the e-i<the coil and solenol’d#terminal is a by-**:
pass feature (more ,about this under,
center electrode,.of the plug to the
’ \
CCJILS).
.grdund or a,ngle”&ctrode,
igniting’
‘the air/fuel mixture.
When the contacts sebarate, a’ high
.Tbe secondary current flows from the
voltage is induced in the coil’s primary
coil” secondary winding, across the diswinding. This voltage (about 250 volts)
trbutor’ rotor gap and sparkSplug gap,
causes an ‘arc to form across the conc
I
)‘D
1
*e
,
, ‘,
?
Th.is pictpral 6f the Kettering ignition. sys-”
\
tern illust?ate /(hat the system hasn’t changed
mtjdh since i 7914., Detail improvemkhts have
been made; but 6omponents remain basically ;-.
the same.1
‘9 *
,
_
-
7’
baby
.__,*
t6
~bsi;c+
,. : .‘li’. ‘.:
.,
‘.:
.,
‘, ‘.
:
,;
!’
tact points; In’ order to “quickly -$top
ij:.
and control the*primary currentarid pro-.
.
long contact point life, a ,cap.ac]tor .:
”
(called a condenser when jnstalled In .. ‘-I
ignition systems) is electrically connetted across the points. I
Motributw
Functton..,When’ you open,
;I‘
the hood, one of the first things you see
is a plastic device with a multitud.e -of ,:
wires leaving the-tog- and. scattering =,. ..
around the engine in diff&~..directkxis
‘,
it’s the distc!butor. Don’t--worry
:I : ‘:I
though, it’s not ascdmpfbated as it looks;
-’
?A distributor has three basic function&. .. ,
One 1s to open and ciose the low tension
circuit between.the .baftery and- the coil
so that the primary winding of tfre coil
/is supplied with infermlttent surges, or;’
I ‘.
Ctktinued
.
1
-\.
g .a
‘( .
&*F .
‘p.
r
‘__
”
z
.
<,,
brg’aker
’ .,
-
-
-
I,, _e
,_
I-
,,
6 --.,
.
1
1’
1
distributor
rotor
5
-.
I
cam
.
ignition
L1
primary
sbcondary
ciicuit
circuit
cdil
m
&
_
.~
,
‘,
I
8
I-
,.,
.. ._
,,r
the dlstrlbulor has Iwo functions. Drove, or the distrtbutor comes from gemon
This cutaway reveals Ihat ,ln
shah (A) and dMrtbutor drweshaft has an-extension (B) that 1s us& lo drrve the 011pump.
_’
-~
\
0
i-
ibe6w)
Distributor
for eight-cylinder
car nas ’
eight lobes on cam. and shows slot
used (0 Index rotor. Iccation of potnts
and condenser.
.th.e cam-
..
the backyard
.4
mechanic.
continued
spokes, of current. Each spike builds up
a magnetic field within.the coil. The distributor then opens its circuit.so
that
the magnetic field will collap,se and
cause ,;the coil’s secondary windings to
produce a high voltage surge (for more
info, se,e Coils).
The second function is to time these
oltage spikes with regard to engine
7equrrgments.
This is accomplished
by the’centrifugal andior-vacuum spark
advance mechanisms.
I
The last function is to distribute or
direct the soikes throuahthe
rotor, cap,
and high tension wirgg to the spark
plug that is ready to fire next.
*
e typica-XetteGr+systerr-dtstributor consists,;of a housing, drive
shaft, centrifugal advance assembly,
vacuum advance diaphragm and link-.
ay.
breaker plate assembly,
con;
denser, rotor, and distributor cap.
The distributor cap, rotor, and high
tension leads form the system which
directs the high voltag:e impulses ,.to
the spark plugs in correct sequence..
Tbe breaker plate assembly contains
the breaker lever, the contact support,
and the?condenser.
Wh;en. the point
cam attached to the distrjbultor drive shaft
ro!ates: each cam lobe contacts -the
breaker lever rubbing block and causes
the points to separate,- which.in turn
creates the voltage ‘spikes: mentioned
earlier. With every breaker point cam
revolution, one spark will be produced
for each cylinder (remember though,
since each cylinder fires at every other
crankshaft revolution in a four-stroke
engine, the distributor there(a(;e rotates
I,
The distributor shaft and weight-base
assembly is fitted with bearings and
rotates inside the distributor
shell or
housing. Centrifugal advance weights
are pivoted on studs in the weight base
or on the bottom of the breaker plate,
and are free to:-move away from the
shaft and work against calibrated adVance springs connected to the breaker
cam assembly. The breaker cam assembly slip fitspn the tob of the shaft
and rotates withthe shaft, being driven
by the.weight s&ings activated by the
advance weights.
Outward mbveme&of the weights advances the cam assembly in relation to
the shaft as engine speed increases
(I e., the more engine speed, the more
the spark is “advanced”.) and therefore
provides a means for the spark to arrive
at the spark plug earner than at I@’
speed. Each engine model requires,
an individual spark advance “curve”
to insure delivery of the spark at the right
I
,
’
_
instant for maximum powrer at all endraw air from the air-tight chamber in the
vacuum advance mechanism and this
girie $eeds.
.
An improvement in fuelieconomy
on
causes the diaphragm to be moved
engines operating under, part throttle
against the spring. This motion is transconditions is realized by supplyihg admitte”d by linkage to the breaker as:
ditional spark advance. -Vacuum adsembly. Total vacuum advance is gov\vance mechanisms
aie provided
for
erned by the amount of vacuum in the
!this purpose. Engine vacqum from the
intake manifold, up to a limit imposed by
iintake manifold is routed to a diaphragm
the design of the diaphragm,and-linkage
to. the breaker plate, and
&sembly.
, connected
the breaker plaJe rotates tb provide an
Dwell Angle. Dwell, often referred to as
. earlier, or advanced, spark.
,i
*contact angle or cam angle, is the number of degrees of cam rotation during
Centrifugal Advance. The cegtrifugal
which the points remain closed. It is
advance
mechanism
(tieiqtits
and
during this ,period that the current in the
springs) times the high volta$e spike
primary coil winding increases. Although
-produced by the ignition coil so that it
the cam angle may not change, the
is delivered, 16 the plug at the correct
length of time the contacts remain closed
time, as determined by englne speed.
decreases as engine speedicreases.
At
*When an engine is idling, the spark
higher engine spbds, the ignition coil ;
is’timed to arrive’at the plug just before
primary current doesn’t reach its maxit e piston reaches the apex ofiits travel
mum valde Iin the short-length of time
Rb C or top dead center). At higher
the points are closed. In order to store
engine speeds there is a shorter interthe maximum amount of energy obtain‘:1
1
val -of time available
for the fuel/air
able from the coil, and thereby obtain .’
’ mjxtute to ignite.and burn. Consequently,
’
sufficient energy to fire the plug, a
it’s necessary to deliver the spark earlier
breaker lever assembly
at will operate
in the combustion cycle to insure comwell at high spe&s i$. necessary. The
. plete ignition an% burning of the fuel.
dlstrlbutor IS equipped with a special
,
The centrifugal advance mechanism,
high%ate-of-break
cam and a special
*
consisting of two weights and springs,
high speed breaker lever which is
of the spark ad~determines _theAm+at
capable of following the cam’contours
Vance. The weightsare thr&n out (due
to centrifugal force) Pagain& sprin$ten- -4’ at high speeds wiihout “bouncing.” The
seoaratesthe
-;
~
’ sion as the distributor shaft rotate’s with % hi h-rateof=breakcam
poPnts faster
._~ for each degree of -rotation
increased
speed. The motion of the
_-.
-and -permits closing earlier’, thus efweights turns the breaker camBssembly
fectively increasing dwell.
so that the breake.r cam is rotated in the
.
direction
of shaft rotation to an ad;
Condenser. The iqnition condenser is
a capacitor consisting of a roll of two
vanced position with respect to the
distrib,utor d,rive shaft. The higher the
layers of thin metal foil separated by”a
-A
.~
-..“_--en-d,,
tire iurthertheweQ7its
fhmheet
rnsutation. I h IS assembTy
,
cause thecam’to rotate, thus advancing
is sealed in a smallmetal can with a flat
the spark earlier into the combustion
washer providing a tight seal.
’
. .
cycle.
The high voltage .indticed in the ‘coil
primary winding causes the condenser
Vacuum Advance. Since’centrifugal adplates to charge when the contacts first
Vance isn’t really effective at low engine
separate; the condenser then acts like
speeds we must have another means of
a short-circuit and current flows into the
‘advancing the spark under conditions
condenser to minimize arcing at the
of low engine speeds or partial- throttle
/”
~ogenings. This low sp.eed /advance is
points.
Coil. The ignition system wouldn’t be
aecompiished by the vacuum advance
system.
of much help if it didn’t have high voltage.
The vacuum advance mechanism has
to deliver to the plugs. In order to’
. j -.
a spring-loaded
diaphragm colanected
develop this high voltage, we rely on the
. by linkage to the distributor breaker plate.
ignition coil.
The spring-loaded side of the diaghragm
An ignition coil is essentially a pulse
is air-tight, and is usually connected to
transformer that steps up the low voltage
an opening in the carburetor. This openfrom the battery or alternator to a volt- .’
ing is on the atmospheric side 6f the’
age high enough to ionize the spark plug
i;
throttle’blate
when the throttle is-in-theq ap and ignite the air/fue! mixture iri the
-1---L
~___
~.
--1 idling position. In this position, there is’no
cylinder.
vacuum.
r A typical coil is madeup of a brimary _
When the throttle is partjally opened,.
winding consisting of”a few hundred
it swings past the opening oathe vacuum ‘, turns of relatively
large wire, and a
,
port. Intake manifold vacuum can then
secondary
winding--involvingmany
,
t-r
l
bon tinqd
o.:
55
I. .
\
,’
i
I.
\
‘-+.s
j
,
c.
i
.
_
3 the backyard
.
.
.I
,
continued
‘.
.
”
p”,,,..,.
--+a&
\
I
m&ha&
y
:..
:_..
-5.
t:::
:.
I- :7:
\.
WILCM
P?OII USED)
ually rotated.
c CLIP
8’
P
11
I&h+\
i
-
-
.
a
Jf.J
.,*Plw*cA
3
t-
WAstiER
-
-h
-pLL
PINK
-
-2
.
RIVEGEAR
‘.3
‘-
\
0
.
--
-
--‘--
’
:
-=
.
3
L_
’
‘I
,
thousands- of turns. off very small wire..
temperatq-decreases
to room tern-.
These, windings’ are assembled over a ---pem
the oil contracts, thus allowsoft iroL core and enetesed oy a .soft , ing room for expansion when -the coil
:+ron-shefl. This assembly is then fitted
heats up during normal operation.’ The
into a one-piece-steel or aluminum-shell
.- whj.ch_‘s then filled with oil and hermet&ally sea,lerf-bya-cotlrcap-ofL.molded
high-dielectric (insulating)~ material.
Coils are sealed to prevent entrance
of moisture: which could cause “coil
ing or burning. ,‘ln. some systems,- pah
failure. Du$g
manufacture,
the .coil
of this needed resistance may take the
case is filled’ with hot oil. As the oil
form of a ‘separa!e “resistor -or cali;
,.
56
.’
:.
‘r
’
point deterioration
because
of the
short periods of time spent cranking. ~
Also-the lowered battery voltage during ~
cranking causes a lower primary cur- ~
r&t, so the resistor bypass feature is an
offsetting feature. Byp,ass/ng the re1sistor with the engine operating will
, cause rapid deterioration.
and failure
of the points.
The Finai Link. The final link in the,
ignition chain is the
device, which appears_.
A ternally, is actual&y% complicated in
relation to engine per, - its oper&oi$id
formance that we’re going to do ,a separate BYM for spark plug
i
Next month, we’k cov
L-EDs, and X-sistors . .
explain what’all those
(DRIVER wish.es to thank’Mr:Joe Hall&-t
of, Action Auto Parts, San Berna%lino,
CA; for providing the distributors photographed for this article.)
;
:J~,,,
~.
.
%\
,
:,,
~
_,__ _i
-9
I
left: With distributor cap removed, the first thing you see is -the rotor. Rotor contact end can become pitted with ,extended use, and contact
sprrng piece on top may lose tension. Rotor is a slip fit on distributor shaft and will have an internal projection to match a slot on distributor
.‘drrve shaft to Insure correct onentatlon. right: Distributor cap should be checked occasionally for cracks and contact wear. A bad distrlbutor drrve shaft can wobble and allow the rotor lo Impact the metal contact boints imbedded in the cap. The center graphite contact button may’lose its spring-loading and not make sufficient contact with the rotor to insure complete ignition.
left: This IS the easy way to change pornts! While we don’t advise removing the distributor to change points, we do want
- -~-to point out that the screws that secure the
__ points
_ .~~_ can be easily lost into one
Ignttier+ce+i-eonnectio~
-.--lo-‘cemove
the o~.strib~l~~~~~l
of the high voltage to “run off” and may result in insufficient voltage to the spark plugs.
:
left:’ if, for some reason you find it necessary to remove the distributor, first make an illustration like this, It shows the;position of the rOtOr
relative to s.ome reference point like the vacuum advance. Since the distributor drives uses helical instead of straight Cut gears, the shaft
wilt rotale as rt’s’removed. Unless you*know the correct final rotor orientation (byyotir
drawing) you probably won’t get fhe distributor back
In correctly. right: This i,s about the point where the drive gears will begin to mesh. As you go further in, shaft will turn. If’ you haven’t made
your drawing, you won’t know where the rotor is supposed to be oriented. Also, in some cars, you won’t be able to get the distributor all
‘* ,the way in because the drive shaft extension won’t mate’with , the oil pump shaft correctly. Like we said, make that drawing before You
pull that distributor1
.i
i
-
k,
.
_I
I s
,’
-J
.
i
57
.
..
-*
;
_y=-
*.
-‘.
-
----_
r
;
.
.’
1
,--
.!
-.
~~
r
.-~
.
~,
----
_
-
-
~mf%
nice thing about the new ignition systems is that it’s pretty difficult’ to hook them up incorrectly afie
chang& Ford Dura-Spark control module shows how spade-type male connectors and keyed connector housing
to minimize assembly errors. right: GM HEI distributor cap is much changed froin conventional cap. Large we
ignition coil goes, and projectibn on left is electrical connector. Pen points to new design of spark plug wire Connectors.
.
8
I_~,-
’ %
...-c
),
7
,
;/‘.
n the fast BYM Back to Basics,
we covered the operation of the
conventional,
or Kettering, ignition system.We showed that the purpose
of fh.e ignitibn system was to develop ‘..
high voltage, time the high voltage de-+
livery with respect to engine speeds,
and then direct the voltage to the correct spark plug.
Today’s ignition systems accomplish
exactly the same thing, but they do- it
with greater accuracy, higher speed,
and, generally, less components.
No Poi’ni’s. I”t &as long hoped that,
‘eventually,
an ignition system could’ be
‘designed so that-the contacf points corn===
mon to the Kettering system could be
eliminated. The.need to eliminate points
was caused by”several
reasons. Ony,
points wear outtqufte t@pidly, considering the life of other .automotive compb-
I’
I
--_
*
*-
*-
.
-.
I
nents. Two, at higher engine speeds,
conventional
points tend -to “bounce,”
that is, they stay in. the open position
when engine (and therefore distributor
shaft) speeds are high
. the points
just do not have enough spring tension
(or enough time) to close. Three, the
rubbing block, a fiber d&ice
attached
to the points, wears quite quickly. As it
wears, dwell changes. Along with the
change in dwell, rubbing block wear
will not allow the points to open to the
specified dimension and will cause them
to burn more easily,
,_,..
Early attempts
to eliminate
points
resulted .not In point elimination, but in
reduced voltage carried by the points.
Transistor ignitions solved the problem
of point ‘burning and w,ear, but didn’t
solve the other problems
inherent in
contact points.
T~‘B-.~ii~_sixties-..ma.rked:the--beginning of the end for the Kettering.ignition
as we know it. New strides in electronic
technology
enabled manufacturers
to
develop break&less,
high-energy
ignition systems that did away with the
problems associated with conventional
ignition systems.
__~~__
’
.’
__
4%
~~
/
‘.
.L
,,; ; PA&
-
Not only are the new ignition systems
more reliable than conventional systems,
they deliver higher ‘energy levels, they
are edSier to work on, and they have
become the first link in .a chain (along.
with carburetion- and exhaust) that will
allow us to strangle harmful exhaust
emissions.
Transistor Icjnition. As we mentioned
earlier, transistor (X-sistor) ignition @as
the first attempt to really improve the
Kettering system. Transistor
systems,
have some advantages to the Backyard
Mechanic because they’ can be easily
installed in any conventional
system,
and really do inciease point life. Agood,
aftermarket transistor system will also
increase voltage levels and thereby more
fully combust the fuel/air mixture with
a resultant slight increase in power and.
mileage.
.-.-...BQw&Works.
A transistor is a small
electronic~~~~~~~~~.~~frolS
current-.
via the conductive
properties
of an
element
known as germanjum.
The
word “transistor”
,originates
from the
term “to transfer resistance.“.
The transistor in an ignition system
I provides a means of furnishing greater
current to the ignition coil with an ac__fzcllTl
panyin+l&secondary
voltage
for spark plug firing. At the same time,
!,i’
-
I
t
*
1
.
ji/ -<
‘.
‘.
I
:
’;;-,
‘\.
.----.
h
I
,Y.
__~. :m
*-‘.:o*:./‘I
9
.’
‘
.The system consists of a base circuit
(low voltage trigger circuit!, coil primary
(collector) circuit (low voltage primary
circuit), and a secondary (high voltage
coil) circuit. Current will not flow in the
primary circuit unless a current is flowing in the base circuit. ,A very small
current in the base circuit allows a much
larger current flow in the primary (collector) circuit.
In actual operation (see Fig. I), a l/zamp current flows from the battery
through the ignition contacts, a common
33 ohm resistor, the-ignition
switch;~
and back to the battery.
This small current flow (let’s call ‘it
control current) permits a large 12-amp
current to flow from the battery through
the ignition coil, the .43 ohm collector
resistor, the toroid, the transistor collector and emitter, the common .33 ohm
r&sto.r. the iqnition switch, and back to i.
the battery. Since this crrcuir soppi
the power to the ionitioncoil,
we refer
to it .as the power, or cbil, circuit.
Dt#ing the-dwell, when the. contact
points are closed, current flows in both
circuits. When the points begin to open,
the cdllapsing magneticfield
produced
in the toroid sends a reverse
pulse
through the control circuit, stopping all
electron flow in the control circuit. Because the control circuit triggers the
8ower circuit, current stoos in the Dower
( . This causes the magnetjc’ field produced by’the coil.primary
windings to
collapse, and sends very high voltage
(oenerated bv
inductance
ih the coil
L
secondary) from the doil to thle soark
pfiugs. In additiocr.high-voltage
is ‘also
’ /
induced in the primary windings of the
Dower circuit.
,r~~~
LB----II..
IL!. ..>...A
L-..ZI.-.-.
Iruurrrrarry, ISIS wouro oe surrrcrent 10
cause transistor destruction- inasmuch
as the induced voltage instantly rises
I
above the load level of the transistor
until it ‘reaches the breakdown. level of
-:, _
the zener diode. So, this js the reason
we incorporate
the condenser in the
power circuit . . it absorbs the high
voltage current and keeps it withi.n, load
‘limits until the zener protection level is
reached: Discharge of the co.ndenser
voltage. from zener level‘to system voltage takes place by revers:,flow through
1
: the power circuit, except t,:at the tran’ sistor is bypassed by ‘the ‘diode which
:J
:
. freely passes this reverse’current.
We then close the points and com0
plete the cycle by causing current flow
in the power circuit.
z
!,
.
.-:
i.d
“
7,
I,-
:,
-
;”
,
-I.
.
Ford Dura-Spark.
In the Ford DuraSpark solid-state system., the conventional breaker plate and cam assembly
is replaced by a magnetic
signal-gen.erating system which detects the dis- ’
Qiiutor shaft position and sends. electrical pulses to a control module. ,Jte
module switches off the flow of current
to he coil primary windings, inducing the
s r/condary windings to build up a high
v Rage charge which is then directed
t the spark$lugs as in a conventional
S1 Stem.
)The control,, module contains timing
circuits which then, close the primary
circuit, afl0win.g it to build up a suf- +
ficient charge that will enable the secondary windings to produce the high
voltage required to fire the next cylinder.
In effect, this timing action sets the
dwell. ‘(Remember dwell? The period ’
of time that the points in ‘a KeLtering
rotor or armature, driven by the dis:
tributor shaft, which rotates past the
stationary pole piece of a pickup coil.
The number of teeth on the armature
correspond to the number of cylinders
in the engine. A weak magnetic field-is
provided by a permanent magnet which
‘. ’
is part of the-pickup assembly.
As each tooth of the armature moves
away from the permanent
net, an
electrical signal of opposit
larity- is
generated in the pIckup coil (stator).
As the armature tooth nears the magnet
and moves away (as the distributor
shaft rotates), the ‘signals generated go
from positive to negative; howeve!, when
the armature tooth and the stator tip
are aligned, the signal is zero
, between positive and negative.
This *zero signal tells the .control
module to turn off, producing the same
effect inthe coil primary circuit as the
_
primary -windings causes
the magnetic fiefd to col-lapse and ihduces
high
voltage in the coil second-.
tween ‘alternatiehs ‘of cur-’
rent (the zero signal)
decreases. In this way the
cpntrol module knows wQen
to- open and close the primerarycircuit,~ .~-.L
.’
I+ z
j
12”.
I.
’
tion switch is first tur-ned to
the start position, the mod-.
:
*
’ ule will not. pioJde
any
,,
‘spark.
’
FIG. 1
o.Rea’ders should
also
note that because of the..
Ford transistorized ignition system is eijljlaincd in text.
(Schematic gourtesy of Ford Motor Co.)
increased
high iooltage,,
“new spark plug wirinq syssystem remain closed.) Because of the
.I terns are’ being use& ;Thel
,
inherent stability of the control module,
most apparent difference
dwell adjustments will-e
needed
is the larger-diameter of the_
with the Du,‘a-Spark system.
plug wires, up from 7 mm’
:
Signal-generating
systems generally
to 8 mm.. Also, silicone.
,’ ’
follow the pattern .of a gear-shaped, iron , . . .
5mrinued’
I
‘.
;
-.. ?’
L
I
‘I
60..
:,
:
..
,
.?
..
/
‘_
.<T
_,/
/,’
_,
i,/,
.-I
,.’
,.
continued
grease, either Ppw. 1: 1 & .&E CG627
is required wherever insjiator
areas
‘%Wffce”
‘(connect) with the distributor
cap, cb%-br.@ugs. This silicone grease
is necessary fa-preycct
high voltige
- -_
runoff.
Chevy HEI. The Chevrolet High Energy
jgnition
was introduced
in Januarjl
1974 and was used primarily on their
high-perfdrmance, models. It is similar
to the Ford breakerless and other no-,
boint systems in that the contact points’
are eliminatqdr$$nd
high voltage
is
“triggered” by an $ectronic signal, not
by the making@$$@breakirig
of conventional points.
The HEI system consists of a completely new and different distributor
.assembly that combines all the ignition
components in$ one solid state electronic unit. They, ” tributpr ehousing, encloses the vacu P$A ,and’centri&gal
advance units, .elecfrordlc module,! pic@pcoil and pole piece (knbwrl in other s.$&:
terns as the stator and reluctor), time5
core, capacitor, rotor, and distribut0.r
shaft. The distributor cap houses the
ignition coil’and is tasked with directing
“high voltage irripulses to the spark
plugs as in-conventional systems.,
A convenient
tachometer
(engine
speed gauge) connection is incorporated
in the-wiring connector on bthe side of
the distributor (except ‘77 models); however, it will activate only d&tain models
of electric tachs
better check with
your Chevy dealer before you buy.,?
tach. for this system. NOTE: The ta-
i
Static timing position of stator for eightcylinder engine. Air gap between stator and
armature must be adjusted when new stator
P-P< ?iiail~d:~A7Jjij~
air gap only with nonm?gnetic feeler gauge (brass o! plastic).
..-
-
t
.
ROLL PIN---&&
dpJ?JL
.
ARMATU.RE
ARMATURE [email protected]&CWIRE RETAINING CLIP
MAGNETICP’ICKUP&EMBLV
I=
f
--
Armature for, Fold’gystem has two indexing
grooves. Armature carin@ be installed backwards or upside down,’ but indexing roll ‘pin
must be installed or armature will shifl positions on distributor shaft.
A..Fw
-‘~~~~..-_-~
, BASECASTING
Exploded view qf Ford Dura-Spark distrit
shows simplicity of design.
______
___~
.~. .--L-.-A..-.-&
.-
‘>
j
.z
c
*
!
:hometer terminal on the distributor
ap must never .be grounded
since
Irounding can damage the circuitry of
le control module. Whet making corn-’
rression checks, disconnect the igni-ion ‘switch connector
from the HEI
;yste’m.
The wiring used with HEI is a carbonnpregnated fiber-glass conductor en:ased f$ an8 mm silicone rubber jacket.
As in the Dura-Spark
system, .the
iEl is magnetically controlled, so it’s
heory of operation is the same.
CDL On,e of the most popular afternaiket ignition systems is the CDI, or
Zapacitive Discharge Ignition. The CDI
operational theory is extremely compli:ated and lengthy, so we won’t go into
t here. Suffice to say that CDls are diferent in, theory and produce different
esults than transistor or magnetically:ontrolled
electronic
ignitions.
Magietically%ontrolled
ignitions produce a
elatively long-lasting spark that gives
:omplete combustion and therefore, low
?missions. The CDJs produce a shortived voltage of extremely high amplitude
,40,000 volts +) that is capable of flring
spark plugs under difficult conditions
such as fouled plugs or extremely high
:ompression.
Remember, in a C$l system the points
ire retained, but they carry far less
:urrent than they do in a Kettering sysem. Since the points carry less current,
hey encounter fewer problems than the
zonventional systems’ points do. CDls employ a solid-state device to
.rigger the high voltage, and this trigger,
>r electronic switch, is called a siliconezontrolled rectifier or SCR.
SCR operation .as concerns CDls is,
again, very complex.-*f you wish to know nore about the operation of CDls;con- I
jult one of the reference works we’ve
isted at the end of the article.
terns won’t work with any contemporary
-aftermarket
ignition system wit.hout’
an “extensive”-rework.
.
’ If you own an older car with conventional Kettering ignition, then the. aftermarket systems are for you.; Transistor
systems work-well on the family’ car and
are relatively. inexpensive.
CDls cost
more, but their performance ,is what you
need if you have an older car or truck
that has a slfghtly tired engine or that
you use to carry or tow heavy loads.
In a future article, we’ll give you the
-straighf skinny on spark plugs and how
they can really make or break the performance of any ignjtion system! @
r
”
I
._.
24 1977
.,
-
+’
NOTE: There just isn’t eiough
space
in DRIVER to go into the whole operational theory of solid-state devices and
associated circuits. If this article whets
your appetite, or if some circuits are
confusing, may we suggest the following reference works .,
most should
,
be available at your post library.
Incar err- i,’
7f “*allrim
._
regulating device. Two;
element semi!conductoi:
device used to’control
diiection of current flow.:
.’
.,
.~..1 __
..me-.-_
---
:/
:;,**.
1
63-
’
,
,
”
Avdltage‘
;_
f/-
-
Stat!% Replaces- con- I
tact points when used
Which 0mz.I~ For You? If you-%ave a
Practical
Electricity
by R. G. Middleiew car, of course the choice% already
ton (Audel)
ade for you. It is nearly impossible-to---....
=.
c .-Transistor
TeL.rrrruruyy
uY uI luyala,
ttempt to convert the new HEI or DuraI Staff, and Shive (Bell Lab Series)
park-equipped
cars to operate with
4~/ectronics
by Robert Irving (A. Knopf)
DI or transistor ignition. In actuality,
. semiconductor
Fundamentals
by
ou would be dealing yourself a losing
,,,.Se,Jdman and Marshal (Wiley)
and.’ The new systems are specifically
Dictionary
of Electrical
Abbreviaesigned for each car to work with
ther components of the emission coritiprls edited by D. H. Polson (Odyssey
?
rol SyStefTI; and those emlsslon sysPress)
! ,’
&
a-.--~,~
N
1-
transistor in tt
.,irl-- ,;,.,
YIU(ib d C”II
cons/sting .o f a solid
matenal (silic on). Acts
as electrical “rswftch.“.
1
:
]
;,,1,”
1;’
d
;, :
i
I”
;.
:
.; :’
‘, --, :,).,;’
;
_I
9
”
b,
RDLINUED~
c
*.
5.i
. .j
*~
:
t@GL
WIDE
GAP
DLD.EDGE
n
+ .
-
L.
(left) Oil fouling indicates clogged oil return passages, bad rings, or clcgg~d PCV v&e., Hotter plug may reliev’e symptbms, but there v
still be a mghanical
problem in the engine. (center) Carbon fouled plug indicates rich mixture, &ak
ignition, clogbed ail cleaner, high fl$
‘5
level, or Sticky carb float. (right) Center ele&ode
is too worn to allow regappirig.,Time fouy
plugs:
‘,
:
7
*
I .
.
2
’
.
,,,.+-
7
’
me
1‘.
b
\
*
c
4’
.
.
,-*
,,’
Ii
,
Chart
1
-
,
.
,
(
.
4
Plug
.:
i
.
‘“,
r
-j
Thread
-1; mm
14’mm
18 mm.
~ 718 In.
.
P
:
.
9
iron
-14
30
34
37
Aluminum
.
Heads
Ibs.
Ilk.
Ibs.
Ibs
.66
ft.
ft.
ft.
ft
,)
*
1.2
28
32
1 95
Ibs.
Ibs.
Ibs.
Ibs
Heads
J
ft
.ft.
ft.
ft.
.
,
i
.
’
I
.L
..._
9.
‘\
.’
I
;-----
.b
I
:
._
--q.L.y*
3’:
-__---
the ,datikyard mechanic
‘,
(a ” ,. .
.,
c&tinue&
7:
.
I
y
:“I .
;>
‘
<
manufactyrers)
try the following ‘pro,Wide electrode gap: ihe ‘plugs’ elecSin,c.e Teach eniine
,has differeni
’
*cedure.for installing those ,plugs:
trodes mav be worn so badly that ignj‘;femperaturaha-racteristlcs,
.each en;
clean the g$sket seat. tion voJtage”is. insufficieq to jump that
g,ine must Xuseglugs .of a specific heat
I n -Thoroughly
ing space:
‘_ ”
.’
_or ai’r gap. Yb’u can recondition a pJug
7-ra>ge.’ If performance parameters are
1 Screw,the plug in by hand as fd; as
radically changed from those origiiially
In this condition, but we don’t advise it,
+will.go.
I
envisioned for the egg&e, theh the plug
A’ conditio? like this greatly increases
’
y Carefully fit a dee’p< socket of.the
emissions too, and several plugs in the
’ ,heat range must 66 altered.
proper size over, ttie. plug and pull on
~ The hottest’ part of thd p1u.g is the
same.‘engine having this pioblem may
the wrench lightly until you feel $H’e
cause catalytic converter dverheat betip of the pose, the part that act@ly
gasket beginning to compress..
eause of insufficient burning of f&l.
sits- in the colnbustion dhamber. Heat
n Slowly
irtcpease the pull on the’
flows up thrbu-gh the insujator
and-Bridged
gap: Deposits
may havye
wrench until jlou feel the resiscande
,down through the shell. The longer the
bridged the “electrode gap so t-hat coil
“< become stiff, indicating that the’gasket
heat paZh through the, insulatbryand
voltage is drained away without d spark ^’
h>s’been jully compressed.
shell,“the’
hotter -theoplug (and vice
.accu,rring.
E.x’haust emi.ssiqns
are
n . Cleqn
the .ceramic insulator
and
ver?a), because~ the amount of heat
ho’rrendous with-this ‘kind of plug probtop cor;lductor with a dry,grease-free
that-fl,ows decreases as the. lengih -of
+,le’;“, but the.plug cab usually be cleaned:
rag to prevent possible shofling.
‘the path is increased. The “cold” plug,
%--F/a&over: IXi or moisture, or a deYOu should always use a torque
0 teriorated “prug ‘boot,” can cause volt-.
whegLused
in an engine,
has’ a tip
wrench when installirlg plugs, and inj
&e ‘to short over the. outside of the
which IS tictually colder than.the tip of
stall to the values listed in Ch.art 1.
a “hot” plug? Thus, the cold plug is
insulatqr? jl ’
These figures ar,e maximum reading%
. ’ Cra&md insulator: .High voltage m&y
recommehded when,the car is driven
and ar ., baskd on clean and dry threads’
at‘full:throttle
most of the time. Un:&ort td ground through a cracked or
on pl’6sg and igcylinder heads,
fortunately, this cold’plug
will terid to
broken.insulator.
Care taken during
Ihe fipal tightening of plugs in cast
“foul” (become covered ‘with misfire;
installation will eliminate iilbst ‘broken
iron heads should be dotie’ with the eninsulators.
Don’t cock
causing deposits) at low Speeds be‘: cause ii is not hot enough to burn off-- ‘gine at normal Operating- temperature.
wrench$&d.tri
to use a
Torque plugs iQ ahmi?Um heads with
‘deposits. Th6 fouling“‘may be-burned
the engine cold (at room temp). Plug .,
-off ,if%the ?period of low-speed driving’
installation in $uminum hezids requires
is ‘short, but loncj periods of operalion
.a
of the ease with which.
.
:, care;because
wilb bake.the -deposits on and permit
the thrkads
may .be strippe.d. Easy
current to leak across the fouled in%does it.
lator, especially during opeh throttle
o)i No-Fire. Assuming that an
_ ‘&Fire
a plug of -a?slightly hotter range.
’ operations.
Eventualty,
the ‘deposits
‘1
erigisin,,e has adequate
cd’mpr8s’s’ion,
. Plug-Gap A_djustment.-PI$Qap
become heavy’ en‘bugh tB allow all the
shduld’
~ that fuel, and air are mixed in the prdper
current to ‘flow ,thioirgh the deposiis
be set or reset only by be?ding the side
instea,d of &ross the air‘,gap>
proportions, and that ignition timing and
’
electrode.
Don’t exert pres.sure on,
Conversely,
the hot $ug will not’
dwell are correct, .ignition of the 6harg.e -. .either the .center electrode or the infoul when driven at low speeds, but if
may occur any of several ways. Actual
_ ,ysulator. When .measuring gap on used
misfire may be due .to lack of proper
it- is,’ driven continually at high’ speed it
plugs, uie a&n-type’gauge
and. not’s
will beoome so hot that ti-& tip of the in.mixture in the cylin’der. When the spark
feeler gatig& &ecause irregularities in
‘: sulatdr will burn away, as will poiions
’ is lacking, however, it may be due to
the ,electiode surface can cause in‘”
one of the following reasons:
of the e\lectrode.
correct readings. A/ways gap new plugs
5
and
always.
regap,
used
plugs
.
.
.
use
Proper hug Installation.
The spark
‘Tracking ign!tlbn: This occurs when
your tech manual to get the right gap
th,e sp_ar-k-“jtimps” from one dtiposit
pl!g gasket ‘is,.an important factor in I
specs
. dor$ take your buddy’s word
cendu?zting the’heat from the plug td 1, islX&l to another and ignites the fuel
charge at some boint along- the insulfbr it..
the ‘cylinder, hea&>~Unless plugs are
zitor nos& 7;he charge:does not actually
properly tightened and. asket tension
i Coil Polarity. If ydu pull the plugs out
misfire,, but.the effect is to retard ignition
is correct, ihis heat flo& sn ay be inter-E
bf an engine ‘and the side electrode. is
timing, Power and ecotiomy are affec%ed
heauily dished or scooped opposite the,
rirpted. Spark plugs used on swne cars
vjthout
the driver being aware of th8
center electrode,’ chances are your
(like FoMoCo ,products)
do not use
gaskets but rather the plug seat is
problem.
6 coil polarity is wrong. Polarity should
tapered
so that when ‘installed’
th’ealways be negative at the spark plug
Surfice
ignhon,
May oc,cur when
,
terminal because this con@derably detap&r be’comes the “gasket?’ ’ _
, some suiface in the combbstion cham
creases voltage required for ignition.
A cold plug may ,be ruined by excesber‘bycombs
hot enotigh to, ignite the
stve heat if driven hard..when it’s not
%is is because of the higher operating
fuel charge. Usually this occtirs before
tight,.-and if hot plcigs &&&,dri”ven hqid
temperature of the center. electrode
.
the’ spark and is then called “pragniif you remember” your high school
when> not properly tightened, we guar:
tion.” The,source’may
be an overanteeLt{hey’ll go out t& &ch
(usually
ppysics, electrons will leave the hotter
heated spark plug, v$ve surface, or
somewhere
between
Blythe:
Calisurface at-lower voltage.
glowing
cylinder
deposit: .+ormally,
fornQ a& Quartzite, Arizona).
the driyer is aware% the $oblem since
Af!ei ‘ybu’v%pyqperly
gapped the.
b the power loss it Cau,&s is-very-noticeplugs .to be, installed (tlse: a gapping
able. Engine damage can alSo result
tool or one of the gauges available’fr’efl
from’pieignition. --7
,’
‘
I
s
/
I
1
,
,,-
.’
_-
’
continued
.
*
- n
Y-z%?,
.
. :+&g&J&g
.~-F-7’
.’
c
-_.
..
.’
’
- 1
s
/
/’
**
-3
Fig. 1
1
:
Fig. 2
P
Fig. 4
-
Fig. 3 b
Fig. 5
,
’
-
:r,,
c
F
LI
’
,
y
Ash fouling may causk misfire.
Could
.,
mean engine may need valve gulae seal.
(left) Caused by deposits loosened from hot :I
engines are most usually affected by gap
high heat in the combustion chamber. Try a
Fig. 6
a no-no. It’s caluSed by
corribustion chamber deposits which Become
incandescent
and ignite fuei before the ’
plug does. Othe\r cabses .include piston
scuffing, detona Ion, cross firing, oi plug
heat range too hi&
I
,..
onto insulator. Just clean and ‘regap. (center? Two-stroke motorscycle
or dirty piston top. ,(righl) Insulator glazing occurs becau SC?6f
i
’
. ‘.
Yrebgnition’is
.
Overheated plugs h,ave a blistered, white
jnsulator
and very few deposits.
Check
fbr correct plug heat range, overadvanced
ignition timing,..cooling
system malfunctvhx&,eakin”,
intake manifold, or sticking
--
the backyard
mechanic
‘(I
coqtinued
plugs in the correct order. Telltale plugs
are colored black if fouled and red to
indicate an overheat.
Fig. l’:shows
two adjacent fouled
plugs in a six-cylinder engine. There’s
a good chance that this is due to a blown
head gasket-between the two cylinders.
Fig. 2 is drawn so that the two center
plugs-are- fouled. This suggests that
raw fuel is being “bqjled”
out of the
carburetor
into the intake manifold
after the engine is shut off. If the engine
is used for stop-start, short distance
driving, the two center plugs may foul
d.u.e to an overly rich “diet,“-.Proper
’
carburetor float level, good needle and
seat seal, and the addition of a layer
of insulation between the carb base and
manifold can help ‘relieve this “foul”
problem.
An unbalanced carburetor may produce fouled plugs in an 8-cylinder engine as shown in Fig. 3. A good look at
the fuel flow on this particular design
(consult your Mitchell’s or Motor Manuals), sho
t if the right barrel was
running rr”“”
ch, the cylinders it suppties
would foul. The remaining four w*ould
show normal plugs.
Finding the back--f.oirr plugs overheated, as in Fig., 4, may fndlcate cooling problems. There’s aMod
chance.
od cleaning of the cBoling sys- x
k/.- u
tern would restore circulation ‘to the
rear of the engine.
One overheated
plug (Fig. 5) can
indicate a leak in the intake manifold
near the location of the fouled cvlinder.
Also, check the firing order. If the overDetonation can cause actual plug damage.
heated plug is the second of two adTo stop detonation try retarding the ignijacent, consecutive
firing plugs,’ you
tion slightly, using higher octane gasoline,
could be the victim of cross fire.
and i richer mixture.
Fig. 6 shows a condition
you may
se,e..occasionally in larger V-8 engines ’
manner so that they won’t run parallel
used for light duty . ) the. two rear
for any distance, and separate plug
plugs are, oil-fouled. ‘l’f the oil drain
wires for adjacent cylinders by placing
hbles in-the re,ar <of the cylinder’ heads
t&n-at
opposite ends of the plug wire
are clogged due to “sludge,”
excess
holder or loom.
oil.‘may be pulled intq the cylinders via
), Troubleshooting
With Plugs. Champtheimake valve stems. This will probably
Ion Spark Plug Company notes that ,, /be noticed in the two rear cylinders first,*
close’ examination of spark plugs can
since the engine slants in that direction.
give you clues about the fitness of your
High oil consumption
and smoky exengine. Just as important as the exhaust when starting may accompany
..
amination, though, is keeping the plugs
this condition.
in order according
to their cylinder?‘.._
Cleaning;Used
Plugs, To us: or not
position. The location in the engine may
\ to use . . . that is the question relative
help to locate a problem that otherwise
to used, plugs. Electrode gaps ‘wear
might go undetected.
awzy at the rate of .005 to .008 inch
The dagrams
in Chart 2 illustrate:’
during a- normal. service life of 10,000
some of tile problems in the engine
miles. Plugs should be replaced if they
which may be located by keeping the+
measure out of these limits. Renewal
Cross Fire. Although it is not a.spark
Ilug problem, cross fire is an ignition
lroblem that can .cause trouble. Cross
ire, or induction leakage; can occur
whenever ignition cables are grouped
:losely together and run.in parallel for
some distance. Cross fire ‘isn’t usually
:aused by faulty cable insulation but by.
:he magnetic field which surrounds any
qigh voltage con*ductor. The lead which
s carrying high voltage ‘at any gjven
nstant tends to induce voltage in an
adjacent lead. C-ross fire is most likely
to occur between consecutive
firing
cyl/nders which are located close together in the engine block.
Cross fire can :cause engine roughness and damaging preignition or detonation. So, .even though it may no1
look pleasing, run your plug leads in a
should be performed only on those plugs
suitable for further service, and the
following
procedures
should be followed:
a- Re_move any oil deposits with a safety
solvent and dry plugs thoroughly.
n ’ Open the electrode gap wide enough
to permit cleaning and filing.
n Use an abrasive
cleaner
(sandblaster) to remove combustion deposits
on both the electrodes and *the’ insulator; and then use clean air (while
wearing your safety goggles) to blow
away all abrasive
dust. Clean and
dry the threads and connector terminal.
n File the electrode surfaces to restore
1
clean, sharp edges.
n Reset gap (remember,
bend only‘
the side elefiode).
Some people will condemn a plug if
it does not spark in a plug tester at an ,,
air pressure equal to or greater than
the engine’s
cranking
pressure.
WRON’G! Air pressure as read on a
plug tester has little relationship
to
engine cranking pressure. Why? The
plug .being tested is cold; In the ‘engine,
the electrodes
operate ,at” high temperature and require less vqage to fire
than when cold:
,’
The tester ca,n’t duplicate
an air/
fuel, mixture. Neither does it take into
consideration that a plug. does not fire
at maximum
cylinder
pressure
but
actually well ahead of TDC (top dead
center).
If you are using a plug tester, follow
.-the instructions to the letter and it will
give you a good indication of the condition of the plug . . . don? throw out a
good plug because you didn’t follow
directions.
(,
Not @y More. Like the. engine, the
modern spark plug’is a carefully engi-neered product combining, highly spe;
cialized ‘technology in ceramics, metal- L
;’
lurg&, and precision
manufactwg
techniques. It’s also very3mpticated
in its function and theory, -right?
Well, if you read this articl’e, you
should be a little less confused than
before . . . ‘and, after all, that’s .,the
theory behind the backyard ‘Mechanic
Gets Back to, the Baiicsr
‘
,DRIVER .wisbes IQ th&k the Technical
Services Division of Champion Spark
Plug Co: for allowing us to extract
from their excellent technical briefs,,,,
and also for the majority of photos used,
, in this article.
/’
,
’ /
+
,
c
76Cj
.’
,_
,’
I
.
s
“I
:-
.
-
I
‘,
i*
id
-z-
B
+
.
1 :
.
. .1
?
Hobby shop Price About $8.95
DowntowmPrice About $16.93.
Is your labor worth $8 per hour?
,i
I’:.
s.
L
---3
A
I-----N.
tion of aftermarket
oil supplements
may replenish
some of the original
chemical
components,
but they won’t
remove
the accumulated
acid, ash,
moisture,
or other contaminants
that
build up in motor oil over a period of
L,
time:
The oil filter can remove
on;y so
tmuch of the accumulated
junk before
: it, too, fails to function properly.
chassis
lubricants
Why “change”
like :you’dd oil? For &e same reasons
? . . grease “wears out” eventually,
‘and becomes contaminated
with foreign
-matter just the same as oil.
Sjnce both chassis and engine parts
are made up almostrentirely
of metal,
they are’ subject to failure caused by
contaminants
in the lubrication.
Abrasion, or the wearing away of the metal
itself, is one .problem.
Another is the
formation
of. deposits of foreign matter caused by the inability of dirty lubri-
.._-.
’
s
‘-3
cant to keep surfaces clean.’ A third
problem is ,the failure of metal caused
by the attack of -acids formed by combustion or chemical reaction . . . acids
that can be defeated only by removing
the contaminated
lubricant.
‘h
HOW often? One thing is certainyou won’t hurt your engine by changing the oil too often. We at”‘Pl$IVER
feel that frequent changes’ of oil and
.,-filter are the keys to long engine life.
With the exception of new cars using
a reputable’ synthetic
such as .Mobil
1, ,we feel that 5000 miles is the longest your car should
go w’ithout
a
change.‘In
dusty areas of the country,
3000 is about the outside limit. ‘And.
while you’re at$, don’t forget JO check
and change, if necessary,
the fuel and
air filters, too. Power brake systems
often have an air filter, and automatii
transmiss&s
have-a fluid filter . ;i”.
check ‘em when you. do your P&I,
;_
i
,”
-i
..:
.b
’
,p
nyone who’s ever been in the
military has probably
heard
the term “preventive
mainIt doesn’t
matter whether
tenance:”
you’re a dental technician,
an aircraft
crew chief, or a vehicle control officer,
maintenance
is a concept
‘. ?preventi’ve
you hear about and work with con&ually. The--,$rny
eyen has a mohthly
64-page
magaiine...called
PS, The
Preventive
kfainten&ce
Mdnthly.
Why all the emphasis
on P.M?- Be-.
cause, over and over again,
it has
been .proved that it works!
.
Preventive
maintenance,
in the
*
form of a grease job and an. oil-andoil-filter change, is probably
the best
way to prolong the life of your vehic-le’s
power plant and help insure that the
engine won’t go out to lunch when you
need it most.
_.
Why Change? Oil, like, most other
things, eventually.wears
out. The addi+
.> .
3
;s.,
..,
t
_
.-
^
*
‘.
.d”i
.
--
‘P
_.
.:
.d?
~.
PIr&3s&
r
I
zz
.--.
-e
.ir--
^_
..
_ ,-. . I
Lo-.
z-^-
--..- :~~..
:,_
.-,Pr
-- ”
;;
THE
dSAC&YIARD
_ti+--‘;
* - M~~CHANIG
/’
’
Oil, artd. .Flllter=m
.”
filter change’ are just what your car’
Lately, we’ve seen the development
of,
I
needs, so let’stag
along with Belinda
two-stage
filters and filters with inJean Proietti
oftthe
DA section
01
ternat
additive
supplies.
Both new
I
AFISC as she tripsoon over to the Norton
types appear to’be well-tested
and reliQuality: All oil cans are supposed
- able an8 seem to have gained accept- I* AFB Auto Hobby Shop.
a San Bernardino
native,
ante with the professional
racer crowd.
“Liidy,”
,, to be IabcJed with a code which indiThese new-type filters are nottoo much+ -~ -lists poetry,
dancing- and baseball
as
cates th-e oil’s service limitations.
For
her hobbies, and tells us+tt
she works
more expensTiG?hanconventional
pre-‘71 ‘cars, use oil graded
at least
on her own car most of the ,time . ..‘.
filters, and the added protection
they
SD (Service
Deluxe).
Newer cars re,
she watoh% her odometer
carefully,
quire SE (Service
Extreme)
quality.
offer may be worth the increase in-price
so she’ll know when a tube job an,di/ <
Most premium-quality
oil &II proover single-stage
cBnventiona1 filters.
.
an oil-and-fitter
change are needed.
vi‘de adequate
engine
protection;
so
AddSives:
Basically,
if you use a
: ~.-attractive
young woman
This petite,
hcgh-quality
oil and change
it, regthe choice of bcands is personal prefn
proves’ you don’t need to be. male, or
erence. If you do decide, for-“somereaularly, you don’t need addit,ives. Army
studiesJndicate
that the vast majority
son, to switch brands,
,be4&e
that
a proPessfonal”nle.~.~~.~.i.~,.~~~ke
an
<,,.__~YOU
continue
to.use, the same type
of those additives tested by the Army
, interest in your& car agd4k
mainten(detergent
or non-detergent)
and ratiftg , don’t add much to oil-‘penfortnance,
ante. Although -.awe4sed i our photog’
’ raphec’s car for the pictures, we might
(SE’or SD) thatjrou
have been &ng.
and they also want to remind you there
Most good qtYality oil filters
are
add that Lindy’s
car is a VW with
* is the possibility
of a voided warranty+
about the same . . . but be sure thl t,
over lOO,,OOO miles on it. She thinks
if such.a product is?n use when certain
’
that proves
the value’ of prevCntive
’
whatever brand or type you choose, ‘it
types of engine failure occur.
-:
meets ihe car manufaqturer’s
specifimaintenance.
Get Going: We hope ,we’ve convinced
a,
chinued
wtions
and warranty
requirements.’
e ,
-you that a grease job and an oil and
change ‘em as needed,
and we think
you’ll find that the cars of today wills
go an awfully long time before major
maintenance
is needed.
’
_
7r
f’
/
*jr
3
0
IS -
>
\
.:..
f
.)
i
jI
i
jg
,
!
I
I
@ac,kyard
:mecha@c
oorhnued
‘. ;
I.
‘~;
1. ‘_ ,.
*
:i
&;-.
_‘,
1
‘,,:;8 I
:
-‘nill&r
.laan “I Indy” proletii’signs
in
‘l:at tha
..._ Nnrton
._. _-.. AFB
_ - Auto Hobby Shop . . .
‘ect: arease
?$-$--Y ;
**iob. oil and filter.
jlr.l>:
‘;,,.,‘..,.
1
w”.:‘:‘”
“, “;.
*:+/ 9,
5 -‘.,.>.
“y...
I
-.
,_:
Once the car I8 on the’ lift and the drain
oil, receptacle/is
in place, remove the oil
drain plug fcom the oil pan. A word or two
of caution/the
oil will’be hot, and so will
you can bum fingertips
the drai/pl’
easily. ‘Also,“ic-Me * the direction in which
the jaws of the crescent wrench are facing
. . if it’s turned around, it may slip.
,
5
/
‘it h8lps to have a spotfer Ik&tn:you.put the
car ‘into the lift area . . .-t @b$ s$p..em.
‘. 9
.ployees will .usually as&I; (..a ‘_ ,_ ..
I
__
” ..
.1,. ) ,_
._
L$o%llke
she’s’ cioing It tight . . . lindy’s
,a,, ., 1 ,
‘,/”
_I
’ got plenty of light, the. catch pan is in p&e,
,I’_,’ .’ ‘,..
: ,
.6
<I/ .:i:.
and .she. has a rap td hold onto the drain
--- --~ .- ,I’ . “1
Bstor8 you put the !ift +s:urx
check- with/-a manual *that &ha
2
:y, ~‘
,“C. (_
-:,
$$ldy%‘.888i&@d
a lift, and the tool crib
:,m&%jage! gives tier the tools necessary for
$9 JQb.. . not a bad deal for-75 cents!
&“..,.~~..,
‘I.,.), ~..
.”
; i. .,.:.;
‘1
;,;3;;: : . .
:
3
cl&
I’&&
of is, Lindy has a ring that has
.’
ntimerital value. and she doesn’t
.:
~:i:8hlt t0 .rem&e it. A little duct taoe elim- *
qq&, BS,thq h&&d, and her watch dil ?zorne
ln8t,ructioi1s, foi opeiating ttie,lift ,$re its&
y&&be fore th% car aoes on the lift. if she
olaced near’ the’ cant
%@ tiorking arour;b.machinery,
or if the,
!&$@ne w&zJ,goiq ‘to -be running, she’d &a
$$$n her hairrback arid put on a scarf.
“?-. ..” r..
.
:$+y.
’
‘-- ---,I
& ;;r_, ‘, ,t ,’
&&f:*a:,-.p.,.
p&;
: ‘J.,
efh&-~ I _,
_,, .,,/.‘.. .. .(
,.
g*.y;$,‘:~.
‘; , ,.:,
-. ‘._
&a:.,
&&, , ‘,,‘.’
i,,: -.
, ,:._ _i __.I’.
.: .; ‘L, .
, :
i
a
‘4
MO8t hobby 8hOp8 have s@es’.stOresWhere
you can buy your parts.
avings-over
downtijwn prices is usual1P considerable. !
’ Shop personnel
ctin advisez.qoti on the’
! correct grades of oil, too, -if ydcl’re not quite
sure what you need.
P
I
,,.:While th
,,prepare f
10
oil Is dr8lnlng from rhi ian,
yemove the oil filter. This gag
a filter tiench
to’remove it.
16
;>
3
.
r
t
I
.. \ -,
:
.’
_-
drain from the:oil
,
Reinstall the ofl pan dliin plug. Then,
!t the gresse gun. ‘mm-prior-tg-cnstalltng-the
rrewoi!
filter, wipe
lat tt’s clear of dirt
down the filter mount on the engine block
that can be for&d Into Zwhaf you’ll be greasand apply a thin film’of 011or grease to the
- lng. Wipe the gun off with a rag so,that it
seal on the filter cantster.
won’t be so slippery. Try not to have your
finger on the trigger as you Inspect the end.
17
,
Grease tastes l~usyl
.
New filter goes In We way the old one came
\: #
Cj!
out. Inslruct!cfns
say “hand-tighten,”
but
to be.sure II doesn’t leak, you need hands
’
like $ollath
bettel to,use the filter w!ench
14
Lh
’
S
and, tighten “snugly,”
but don’t go” oveiAfter studying your manual to determine
board-and wnnkle be filter canister.
‘
where the grease fittings are,’ wipe .the
.._
. fittings clean, put the nozzle of the gun
‘.
/ ‘I
18
firmli over the fitting nipple and squeeze the
D
11
The oil filter wiench usually takes the shape
of a ,strap*or chain that fits around the filtercafx&?r. There IS only one way that IS cor.,gect=for filter wrench operation.
If ;/t slips,
you know you haye to turn it aroLmd.;
1
’:
3.
i
: -_
a
12
I
After the filter is broken loose, with the ’
,.wrench. Scarefully remove the filter and let,
It d wh vertically.
Again, the oil. and filter
. will rt e hot, and sprlled hot oil runhing’down
. your &-rri is not fu’n. Use a rag, and plan
ahead if you mu& get the filter out from above
.i
or behind obstructions:
‘2
. /
s
*
,
’ trigger. If the car has. plugs instead of fittings. go ahead and mstall fitting’s, but. be
sure to remove them and reinstall Ihe plugs
when the job is done.
-~ ~.
I
*
’
,
15
This picture shows what hapljens if the
PIppIe IS clogged or if the gun is not held
firmly enough against the fitti-n’g. Grease
shduld seep out of the joint between~the
two components,
not from around the gun
nozzle. Resecure the gun to the ,fitting and
try ,again. Fill fitting until grease just begins
to oze out. Bali joints and other fittings
wit .neoprene or rubber reservoirs shogltl
P
be lilled till they are firm. and no more. Too .,
muth grease can rupture the rgservoir.
1
+
I
Check to be, sure you’re insJaIling .tfie
proper gra@ and weight of $1 fi)r your car’s ~
I
needs. ,~
.- .
hs.
_
L
I
ma
- ,
Install the.amount of oil called for In your
owner’s manual. Don’t forget to.relnstdll
oil filler cap and PCV or srn,og co#nnedions,
I
if applicable.
.a
20
Check oil level, fire uf~ ‘the c?r aid check for ’
leaks from filter and drain plug, turn car off
and recheck oil level. Clean up-your work
area, relurn the tools; make a note of the
odometer readiiig, apd pat your&If on the
back for a job welLdone and quite a few
bucks saved.
.
l
8
(/ .
b ‘71,
a.
,=
“A rr.
-J’
‘
t
-
7
I
E
/
\
/
GOVERNMENT
,
n I
I
PRINTING
.
OFFICE
.
.
: 1984
0 - 443-270
.
3
B
‘5,
a
,
..
r
I
.p-’
’
.