1
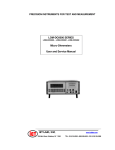
♦ PRECISION INSTRUMENTS FOR TEST AND MEASUREMENT ♦
LOM-4000 SERIES
Digital Ohmmeter
User and Service Manual
Copyright © 2005 IET Labs, Inc.
LOM-4000 im February, 2005
IET LABS, INC.
Standards • Decades • Strobes • Sound Level Meters • Bridges
534 Main Street, Westbury, NY 11590
www.ietlabs.com
TEL: (516) 334-5959 • (800) 899-8438 • FAX: (516) 334-5988
WARRANTY
We warrant that this product is free from defects in material and workmanship and, when properly used, will
perform in accordance with applicable IET specifications. If within one year after original shipment, it is found
not to meet this standard, it will be repaired or, at the option of IET, replaced at no charge when returned to IET.
Changes in this product not approved by IET or application of voltages or currents greater than those allowed by
the specifications shall void this warranty. IET shall not be liable for any indirect, special, or consequential
damages, even if notice has been given to the possibility of such damages.
THIS WARRANTY IS IN LIEU OF ALL OTHER WARRANTIES, EXPRESSED OR IMPLIED, INCLUDING BUT NOT LIMITED TO, ANY IMPLIED WARRANTY OF MERCHANTIBILITY OR FITNESS FOR
ANY PARTICULAR PURPOSE.
iii
WARNING
OBSERVE ALL SAFETY RULES
WHEN WORKING WITH HIGH VOLTAGES OR LINE VOLTAGES.
Dangerous voltages may be present inside this instrument. Do not open the case
Refer servicing to qulified personnel
HIGH VOLTAGES MAY BE PRESENT AT THE TERMINALS OF THIS INSTRUMENT
WHENEVER HAZARDOUS VOLTAGES (> 45 V) ARE USED, TAKE ALL MEASURES TO
AVOID ACCIDENTAL CONTACT WITH ANY LIVE COMPONENTS.
USE MAXIMUM INSULATION AND MINIMIZE THE USE OF BARE
CONDUCTORS WHEN USING THIS INSTRUMENT.
Use extreme caution when working with bare conductors or bus bars.
WHEN WORKING WITH HIGH VOLTAGES, POST WARNING SIGNS AND
KEEP UNREQUIRED PERSONNEL SAFELY AWAY.
CAUTION
DO NOT APPLY ANY VOLTAGES OR CURRENTS TO THE TERMINALS OF THIS
INSTRUMENT IN EXCESS OF THE MAXIMUM LIMITS INDICATED ON
THE FRONT PANEL OR THE OPERATING GUIDE LABEL.
vii
Contents
Chapter 1
INTRODUCTION ..................................................................................................................................... 1
1.1 General Description ........................................................................................................................ 1
1.2 Theory of Operation ........................................................................................................................ 1
1.3 Case Design .................................................................................................................................... 1
1.4 Available Accessories ..................................................................................................................... 1
Chapter2
SPECIFICATIONS .................................................................................................................................... 2
2.1 General: ........................................................................................................................................... 2
2.2 Measurement: ................................................................................................................................. 2
Chapter 3
OPERATION .............................................................................................................................................. 3
3.1 Initial Inspection ............................................................................................................................. 5
3.2. Safety ............................................................................................................................................ 5
3.3 Features ......................................................................................................................................... 5
3.3.1 Measurement Polarity ........................................................................................................... 5
3.3.2 Range Selection: ................................................................................................................... 5
3.3.3 Error & Status Lamps .......................................................................................................... 5
3.4 Making Measurements ................................................................................................................. 5
3.4.1 Ohmmeter Connections ........................................................................................................ 5
3.4.2 Start-up ................................................................................................................................. 6
3.4.3 Measurement ......................................................................................................................... 6
3.4.4 Current Mode ......................................................................................................................... 7
3.4.5 Over-Range .......................................................................................................................... 7
3.4.6 Open-Circuit Lead ................................................................................................................ 8
3.4.7 Low Battery .......................................................................................................................... 8
3.4.8 Connections........................................................................................................................... 8
3.5 Protection ....................................................................................................................................... 8
3.6 Temperature Compensation (Model LOM-4001 Only) .................................................................. 8
3.7 Temperature Measurement (Model LOM-4001 Only .................................................................... 8
Chapter 4
CALIBRATION ......................................................................................................................................... 9
4.1 Calibration Process ......................................................................................................................... 9
4.2 Equipment Required ........................................................................................................................ 9
4.3 Preparation ...................................................................................................................................... 9
4.4 Calibration Using MTS2 Standard .................................................................................................. 9
4.4.2 Entering a password, and Calibration ..................................................................................... 9
4.5 Calibration Using Discrete Resistance Standards ........................................................................... 9
Chapter 5
MAINTENANCE ..................................................................................................................................... 11
5.1 General ......................................................................................................................................... 11
Figures
Figure 3.2 Combined current and potential probes (Kelvin clips) ....................................................................... 6
Figure 3.3 Connections for resistance measurements with various DUT configurations .................................... 7
Figure 3.4 Connection Diagram for Pt100 plug (viewed from the rear) .............................................................. 8
LOM-4000 Series
Chapter 1
INTRODUCTION
1.1 General Description
1.3 Case Design
The LOM-4000 and LOM-4001 are accurate bench/
portable handheld Digital Milli-ohmmeters for the measurement of resistance in the range 10 µΩ to 4000 Ω.
They utilize the four-terminal (Kelvin) resistance-measurement method to eliminate the effects of lead resistance. The measured values are displayed on a 4digit, 4000-count LED display; there is also an overflow indicator. The LOM-4001 allows temperature
compensation of readings and temperature measurement if the user connects a 100-ohm platinum-resistance thermometer (PRT).
The case is ruggedly constructed from ABS plastic.
The front panel is a reverse-printed polycarbonate
overlay with clear and unambiguous text. The batteries are housed in a removable cassette for quick and
easy replacement.
Simple push-button or auto-range selection of the
range required makes the LOM-4000 Series easy to
use. Error and status warnings are illuminated when
appropriate. The unit will withstand accidental application of line voltage to the measuring terminals.
1.2 Theory of Operation
The measurement is true 4-terminal, using the Kelvin
principle. A stable current is produced across the
resistance to be measured via the current (I) terminals, and the voltage drop across the unknown resistance Rx is measured at the voltage (U) terminals.
This potential drop is then compared against the voltage drop across internal standards. The ratio of these
is then converted to the resistance value of Rx and
displayed in ohms on the digital display. Use of specially selected components assures high accuracy and
long-term stability .
1.4 Available Accessories
Supplied:
1
1
1
Set of test leads
Set of alkaline batteries
Operation Manual
Optional Lead Sets:
HSO1-P
HSO2-P
LSO3-P
LSO4-P
Duplex Handspikes with 2.5-meter
leads, for Kelvin measurements of
plates or buss bars
Similar to HSO1-P but with 2.5meter and 15-meter leads
Large Kelvin clips with 3-meter leads
– accept cables and bars up to 38
mm in diameter
Similar to LSO3 but with 3-meter
and 15-meter leads
Other Optional Accessories:
CO1 1 Meter Cable-Test Fixture – Wood Base
CO2 1 Meter Cable-Test Fixture – Metal Base
MTS2 Calibration Standard
For most efficient operation, a spare battery
cassette (BP-02) is recommended.
Introduction
1
LOM-4000 Series
Chapter 2
SPECIFICATIONS
2.1 General:
2.2 Measurement:
Digital Display:
4 digit, 0.6" high LCD, 4000 count with
automatic decimal point and polarity
indication; additional annunciator
lamps.
Resistance:
True four-terminal measurement with fixed
dc measuring currents
Measuring time:
Approximately 20 ms for normal measurement,
40 ms for average (AVE) mode
Polarity:
Selectable positive or negative current flow by
manually reversing test leads, plus an average
mode which automatically displays the average
value of the positive- and negative-polarity
measurements.
Operating temperature range:
0 to +40°C, with maximum relative
humidity of 80%
Storage temperature:
-20°C to +50°C
Power:
Five “AA” alkaline batteries supplied.
Rechargeable batteries optional.
Battery Life:
~12 hours
Dimensions:
250 x 130 x 55 mm
(9.9” x 5.1” x 2.2”)
Weight:
0.8 kg (1.5 lb)
Temperature Measurement:
-200°C to +800°C, with user-supplied
Pt100 sensor
RESISTANCE
Range
Resolution
Current
Accuracy
4kΩ
1Ω
100 µA
±(0.05% Rdg +0.02% FS)
30 ppm Rdg +1 ppm FS
Temperature Coefficient
400Ω
100mΩ
1 mA
±(0.05% Rdg +0.02% FS)
30 ppm Rdg +1 ppm FS
40Ω
10mΩ
10 mA
±(0.05% Rdg +0.02% FS)
30 ppm Rdg +1 ppm FS
4Ω
1 mΩ
10 mA
±(0.05% Rdg +0.03% FS)
30 ppm Rdg +4 ppm FS
400mΩ
100µΩ
10 mA
±(0.05% Rdg +0.05% FS)
30 ppm Rdg +25 ppm FS
40mΩ
10 µΩ
100 mA
±(0.05% Rdg +0.1% FS)
30 ppm Rdg +25 ppm FS
TEMPERATURE
Range
-50...+800 °C
2
Resolution
0.1°C
Accuracy
±0.2°C
Specification
LOM-4000 Series
Chapter 3
OPERATION
Display
Mode
LED’s
(4001
only)
Display
Value
LED
(4001
only)
Low Battery LED
Calibration
+ 4000
Units Indication
Function Keys
Operation
3
LOM-4000 Series
-
!!
"
"
#
% &
$$
'
!*
(
+ " ,
!
!
!
' "
!*
(
!
! ()
!
!
!
!
(
"
! ()
! !
(
)
!
!
,
'
.
.
(
!
.
.
.
'
.
!
*
!
!
!
"
/!
*
!
-
,
!
(
0
4
!
!*
(! !
!
(0
.
!
"
.
!!
!
(
,
Operation
LOM-4000 Series
3.1 Initial Inspection
the AUTO key puts the instrument into the auto-range
mode.
After unpacking, inspect unit for shipping damage and
report any problem immediately to the carrier, retaining packaging materials for inspection.
3.3.3 Error & Status Lamps
3.2. Safety
This unit has been designed and tested in accordance
with IEC Standard EN61010-1, entitled "Safety Requirements for Electronic Measuring Apparatus", and
has been supplied in a safe condition. This instruction manual contains information and warnings which
should be followed by the user to ensure safe operation and to keep the unit in safe condition.
The following LEDs will light to indicate the instrument status:
CAL:
Instrument is in the calibration mode.
LOBAT:
Battery capacity is nearly depleted.
(The following LED’s are for LOM-4001 only)
Rx:
3.3 Features
3.3.1 Measurement Polarity
The user can reverse the measuring-current polarity
by reversing the test leads. This is particularly useful
when evaluating circuits with thermal emf, or circuits
where diode effects can influence the measurement.
For measurements where thermal emf can cause a
large zero-error, there is an automatic-average (AVE)
button. When it is pressed, the measuring current
will automatically be reversed and the average value
displayed, thus eliminating the need for external computations. This averaging feature also doubles the
measurement time from 20 ms to 40 ms. The AVE
lamp will light to indicate that the current polarity is
changing.
3.3.2 Range Selection:
Any of the six measuring ranges can be selected
manually by simply pressing the desired RANGE UP
or DOWN buttons. Over-range is indicated by the
display reading “- - - -“.
An auto-range capability is also provided: pressing
Operation
The display shows a resistance reading.
Rc:
The display shows a compensated
resistance reading.
°C:
The display shows a temperature reading.
3.4 Making Measurements
3.4.1 Ohmmeter Connections
The LOM-D4000/1 employ a four-wire method of
measurement, i.e. four connections to the resistor
under test are required. The unit is supplied with four
leads: two voltage leads to be placed across the exact measurement points, and two current leads to be
placed “outside” the measurement points. The Kelvin
clips, shown in Figure 3.2, place voltage and current
connections at the same point.
a) Connect the red leads to the +I and +U terminals,
and the black leads to the –I and –U terminals.
b) Clip the test leads onto the resistor under test.
Cleanliness is important; if the DUT is not clean, clean
it with fine emery cloth or steel wool to remove oxides.
5
LOM-4000 Series
c) It is not always possible to use the combined
current and potential (Kelvin) clips, in which case test
leads with spade lugs—or a special test fixture - may
have to be made for a particular application.
d) Fig. 3.3 illustrates connections to various types of
test resistors
e) When measuring 4-terminal resistance standards,
or using them for calibration, the Kelvin clips may not
be usable because of terminal geometry. Make four
separate connections to the current and potential terminals
3.4.2 Start-up
Fig. 3.2 Combined current and potential probes
(Kelvin clips)
When the LOM-DO7e is first switched on, an internal self-test is automatically performed. The display
indicates +8888 followed by PASS, then performs
an automatic zero sequence and finally sets to the
4 kΩ range. The unit is now ready to make measurements. The unit will shut off automatically after
several minutes of inactivity.
If the internal checks indicate an error, the display
will read FAIL. Contact our Service Department or
your IET Representative for assistance.
3.4.3 Measurement
Connect the resistance to be measured (Rx) to the
measuring terminals in accordance with the diagram
on the instrument panel and using the most appropriate connection technique for the unknown (See Figs.
3.2 and 3.3). Select the range required or AUTO,
and the AVE measurement mode if desired (The AVE
button LED will light to indicate that the AVE functions is active. To initialize the measurement, press
the MEAS button. A single measurement will be taken
and the value held on the display. To take continuous
readings, press and hold the MEAS button until a
long beep is heard; this will activate a continuousreading mode.
6
Operation
LOM-4000 Series
Fig. 3.3 Connections for resistance measurements with various DUT
configurations
Measurements will continue until the MEAS key is
pressed again. To preserve battery life, the unit will
automatically turn off after several minutes of inactivity.
with the current flowing in both directions and displays the average of the two readings. The AVE
mode should not be used for measurement of inductive circuits.
3.4.5 Over-Range
3.4.4 Current Mode
The current mode can be set to AVE. The AVE mode
may be selected for measurements that are not inductive, in order to eliminate errors caused by thermal emf in the measurement circuit or test leads. In
the AVE mode the LOM-D4000/1 takes readings
Operation
If the measured value exceeds the upper limit of the
range selected, the display will indicate “- - - -“.
Select a higher range. In AUTO mode, this display
indicates a value above the range of the instrument.
7
LOM-4000 Series
3.4.6 Open-Circuit Lead
If one of the test leads is open-circuited, or exceeds a
preset resistance, the display will indicate “OC“.
(The I terminals are checked for compliance voltage). Measurements cannot be made if this warning
message is displayed. This warning will also be displayed if the current-lead resistance is high.
3.4.7 Low Battery
The LOBAT LED will light when the battery has
~10% charge remaining. When this occurs, a spare
battery cassette should be installed, or the existing
cassette should be resupplied with fresh--or recharged-batteries. Full measurement accuracy is maintained
even when the LOBAT LED is lit.
3.4.8 Connections
To make the most accurate possible measurements,
ensure that all test leads are in good condition, and
have less than 0.2 Ω resistance. Some spade lugs
and alligator clips - especially nickel-plated brass types
- can produce high thermal emf’s when heated. This
can sometimes cause problems , for example when
connecting to hot motor windings. Avoid such problems by using plain copper or brass connections and
keeping them clean and oxide-free.
3.5 Protection
This instrument is protected against voltages being
applied inadvertently to the terminals. A high-interrupting-capacity fuse is installed internally in the current circuit. The voltage terminals are not fused, and
will withstand up to 460 Volts without damage to the
.instrument.
To replace the protection fuse, the unit should be
opened by removing the six screws on the bottom of
the case,, but only after ac power and all input connections are removed. The protection fuse is located
on the printed circuit board. This fuse has a 40,000to-200,000 A interrupting capacity, depending on the
8
exact type used. Always replace this fuse with one
of the same current rating (1 A) and at least a 40,000
A interrupting capacity.
3.6 Temperature Compensation (Model
LOM-4001 Only)
Automatic temperature compensation is available on
the model LOM-4001. A Pt100 temperature sensor should be connected to the DIN socket next to
the measuring terminals.
To activate this function press the DISP key the Rc
LED will light to show that the displayed value is the
compensated resistance. The Pt100 sensor will measure the ambient temperature and compensate the
reading for the temperature coefficient of the measured Rx.
Different temperature coefficients may be selected
by pressing the COMP key, Copper and aluminium
coefficients are preset; a user coefficient may also
be entered. Repeated pressing of the COMP key
cycles through these options. To set the user coefficients the arrow keys are used select and increment
or decrement the digits.
3.7 Temperature Measurement (Model
LOM-4001 Only
The model LOM-4001 can also be used as thermometer using a Pt100 temperature probe inserted into
the socket next to the measuring terminals. Press the
DISP key until the °C LED lights. The LOM-4001
will now display the temperature measured by the
Pt100 sensor.
+I
-I
+U
-U
GROUND
Fig. 3.4 Connection Diagram for Pt100 plug
(viewed from the rear)
Operation
LOM-4000 Series
Chapter 4
CALIBRATION
4.1 Calibration Process
This procedure describes the standard calibration
method for the LOM-4000/1 Micro-ohmmeter using
the IET MTS2 Calibration Standard, or a method using discrete resistance standards of the required values.
CAUTION
The LOM-4000/1 comes factory-calibrated to its full
accuracy, and any recalibration by the user will invalidate this initial calibration. The user should therefore
be certain that only authorized and competent personnel are permitted access to the calibration process,
which is password-protected.
4.2 Equipment Required
IET Calibration Standard MTS2, or equivalent 4-terminal standard/s.
4.3 Preparation
4.3.1 Place the instrument in a temperature-controlled environment (20°C ±5°C) for a minimum of 2
hours. Ensure that the batteries are fresh or fully
charged.
4.4 Calibration Using MTS2 Standard
4.4.1 Connect each of the four LOM-4000/1 terminals to the equivalent terminals on the calibration standard.
Calibration
4.4.2 Entering a password, and Calibration
1. Turn the LOM-4000/1 on while holding down the
CAL key. The display will show CODE for a few
seconds and the 0000 with a flashing cursor under
the first zero. Enter the calibration code 9252 using
the UP and DOWN keys to select the digits and the
ZERO and AVE keys (with the left-and-right arrows)
to select the position. When done, press the MEAS
(OK) key. When the entry has been validated, the
instrument enters the calibration mode and the CAL
LED illuminates.
2. The display will now show 0.0, with the first digit
flashing. Set the MTS2 to zero and press OK. This
calibrates the zero on the first range. The display will
then show the full-scale reading on that range (4.000)
with the first digit flashing. Set the MTS2 to the same
value, and (if desired for better accuracy) enter the
exact calibrated value for that MTS2 setting using
the arrow keys as above. The press OK.
3. The calibration process then switches automatically to the next range. Proceed as above until all
ranges are calibrated. Then press the CAL button to
exit the calibration mode.
4.5 Calibration Using Discrete
Resistance Standards
4.5.1
Discrete, 4-terminal resistance standards may be
used in place of the MTS2 Calibration Standard. The
standards must have an uncertainty better than 0.01%
if full calibration accuracy is to be achieved. The
following nominal standards are recommended: 4 kΩ
400 Ω, 40 Ω, 4 Ω, 400 mΩ, 40 mΩ and 4 mΩ.
9
LOM-4000 Series
4.5.2
4.5.4
In all measurements the U + and - and the I + and
- terminals are connected to the equivalent terminals
(usually marked “Sense” and “Current”) on the fourterminal standards used.
Use the procedure of 4.4.1 above to perform the
calibration using discrete standards. Replace the zero
setting and resistance values of the MTS2 with the
shorting procedure above and the discrete resistance
standards to be used.
4.5.3
For the ZERO measurement, short the “Sense” terminals of the standard connected to the instrument,
using the shorting clip supplied with the standard, or a
heavy wire. All four leads between the instrument
and the standard should remain connected. Remove
the short after the ZERO calibration is completed.
10
Calibration
LOM-4000 Series
Chapter 5
MAINTENANCE
5.1 General
! CAUTION !
Normally no maintenance is required other than cleaning with a moist cloth. Avoid strong detergents or
solvents.
Replace only with the correct fuse type shown below, or an equivalent part with the same or higher
interrupting capacity:
If a failure occurs, or if the unit cannot be calibrated,
it should be returned to IET or to an IET representative. Contact IET for an RMA number before returning the unit directly to IET.
NFC 63210, Altech 1C10x38G1
or Cooper Bussman KTK-1
CAUTION: Replace only with the correct fuse
type shown below.
The input circuits are protected by a 1 A fuse located
in a holder on the printed circuit board. Open the case
by removing the six screws holding the two sections
together.. Examine the fuse and replace if necessary.
Maintenance
11