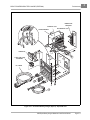
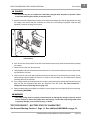
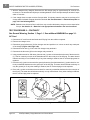
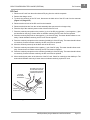
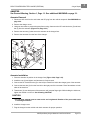
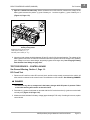
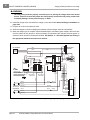
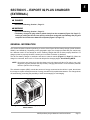
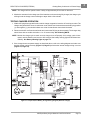
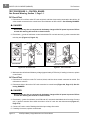
1
EXPORT
®
&
BATT E RY C H A R G E R S
2008 MAINTENANCE & SERVICE MANUAL
Manual No. 103373122
Edition Code 0408A00000
FOREWORD
Club Car battery chargers are designed and built to provide unsurpassed performance efficiency among
chargers in their class; however, proper maintenance and repair are essential for achieving maximum service
life and continued safe and reliable operation.
This manual provides detailed information for the maintenance and repair of export Club Car battery chargers,
and should be thoroughly reviewed prior to servicing the charger. The procedures provided herein must be
properly implemented, and the DANGER, WARNING, and CAUTION statements must be heeded.
This manual was written for the trained technician who already has knowledge and skills in electrical and
mechanical repair. If the technician does not have such knowledge and skills, attempted service or repairs to
the vehicle or charger may render the vehicle or charger unsafe. For this reason, Club Car advises that all
repairs and/or service be performed by an authorized Club Car distributor/dealer representative or by a Club
Car factory-trained technician.
It is the policy of Club Car, Inc. to assist its distributors and dealers in continually updating their service knowledge and facilities so they can provide prompt and efficient service for vehicle owners. Regional technical representatives, vehicle service seminars, periodic service bulletins, maintenance and service manuals, and
other service publications also represent Club Car’s continuing commitment to customer support.
This manual covers all aspects of typical battery charger service; unique situations, however, do sometimes
occur when servicing a charger. If it appears that a service question is not answered in this manual, you may
write to us at: Club Car, Inc.; P.O. Box 204658; Augusta, Georgia 30917; Attention: Technical Services.
Copyright © 2007 Club Car, Inc.
Club Car and PowerDrive are registered
trademarks of Club Car, Inc.
This manual effective August 6, 2007.
2008 Export Battery Charger Maintenance and Service Manual
Page i
ý WARNING
• Read Section 1 – Safety before attempting any service on a Club Car vehicle or charger.
• Before servicing a Club Car vehicle or charger, read complete section(s) and any referenced
information that may be relevant to the service or repair to be performed.
NOTE: This manual represents the most current information at the time of publication. Club Car, Inc. is
continually working to further improve our vehicles and other products. These improvements may
affect servicing procedures. Any modification and/or significant change in specifications or procedures will be forwarded to all Club Car dealers and will, when applicable, appear in future editions
of this manual.
Club Car, Inc. reserves the right to change specifications and designs at any time without notice
and without the obligation of making changes to units previously sold.
There are no warranties expressed or implied in this supplement. See the limited warranty found in
the vehicle owner’s manual or write to: Club Car, Inc., P.O. Box 204658, Augusta, GA 30917-4658,
USA, Attention: Warranty Administration.
Page ii
2008 Export Battery Charger Maintenance and Service Manual
CONTENTS
SECTION 1 – SAFETY
General Warning ...............................................................................................................................
1-1
SECTION 2 – CHARGER IDENTIFICATION AND SPECIFICATIONS
General Information ..........................................................................................................................
2-1
Battery Charger Specifications .........................................................................................................
2-1
Battery Charger Identification ...........................................................................................................
2-6
SECTION 3 – EXPORT POWERDRIVE BATTERY CHARGER (EXTERNAL)
General Information ..........................................................................................................................
3-1
PowerDrive Charger Features ......................................................................................................
3-2
Battery Warning Light ...................................................................................................................
3-2
The Charge Circuit ............................................................................................................................
3-3
DS, DS Villager 4, 800, 810 and 850 ............................................................................................
3-3
Turf 1 and Carryall 1 .....................................................................................................................
3-4
Precedent – 4 x 12-Volt ................................................................................................................
3-5
Precedent – 6 x 8-Volt ..................................................................................................................
3-6
Limo – 6 x 8-Volt ...........................................................................................................................
3-7
Charger Installation and Operation ...................................................................................................
3-9
AC Power Connection ..................................................................................................................
3-10
Charging Batteries ........................................................................................................................
3-11
Testing Charger Operation ...........................................................................................................
3-12
DC Cord and Plug Inspection .......................................................................................................
3-12
Checking Battery Condition After a Charge Cycle ............................................................................
3-14
Start Charge Cycle .......................................................................................................................
3-14
Troubleshooting ................................................................................................................................
3-14
Test Procedures ...............................................................................................................................
3-18
Index of Test Procedures ..............................................................................................................
3-18
2008 Export Battery Charger Maintenance and Service Manual
Page iii
Charger Repairs ...............................................................................................................................
3-30
DC Cord .......................................................................................................................................
3-30
Heatsink .......................................................................................................................................
3-31
Transformer ..................................................................................................................................
3-32
Ammeter .......................................................................................................................................
3-33
Fuse Link ......................................................................................................................................
3-34
Voltage Suppressor ......................................................................................................................
3-34
Charger Relay ..............................................................................................................................
3-35
Charger AC Circuit Breakers ........................................................................................................
3-35
Charger AC Cord ..........................................................................................................................
3-36
Charging a Battery Pack that has Low Voltage ................................................................................
3-37
SECTION 4 – EXPORT POWERDRIVE CHARGER (ONBOARD)
General Information .........................................................................................................................
4-1
PowerDrive Onboard Charger Features .......................................................................................
4-2
Battery Warning Light ...................................................................................................................
4-2
The Charge Circuit ...........................................................................................................................
4-2
Charger Operation ...........................................................................................................................
4-4
AC Power Connection ..................................................................................................................
4-4
Normal Charger Operation ...........................................................................................................
4-5
Testing Charger Operation ...........................................................................................................
4-6
Checking Battery Condition ..............................................................................................................
4-8
Troubleshooting ...............................................................................................................................
4-8
Test Procedures ...............................................................................................................................
4-11
Index of Test Procedures .............................................................................................................
4-11
Charger Repairs ...............................................................................................................................
4-26
DC Cord .......................................................................................................................................
4-26
Heatsink .......................................................................................................................................
4-27
Transformer ..................................................................................................................................
4-28
Ammeter .......................................................................................................................................
4-29
Fuse Link ......................................................................................................................................
4-30
Charger Relay ..............................................................................................................................
4-30
Charger AC Circuit Breaker ..........................................................................................................
4-31
Charger AC Cord and Retractable Cord Reel ..............................................................................
4-32
Charging a Battery Pack that has Low Voltage ................................................................................
4-33
Onboard Charger Removal and Installation .....................................................................................
4-35
DS Villager 4 ................................................................................................................................
4-35
Precedent Vehicles ......................................................................................................................
4-36
Page iv
2008 Export Battery Charger Maintenance and Service Manual
SECTION 5 – EXPORT IQ PLUS CHARGER (EXTERNAL)
General Information ..........................................................................................................................
5-1
IQ Plus External Charger Features ...............................................................................................
5-2
Battery Warning Light ...................................................................................................................
5-2
The Charge Circuit ............................................................................................................................
5-3
External Charger Installation and Operation .....................................................................................
5-4
AC Power Connection ..................................................................................................................
5-5
Charging Batteries ........................................................................................................................
5-6
External Charger Plug and Receptacle ........................................................................................
5-8
Checking Battery Condition with an External Charger ......................................................................
5-8
Start Charge Cycle .......................................................................................................................
5-8
Testing Charger Operation ...........................................................................................................
5-9
Troubleshooting ................................................................................................................................
5-10
Test Procedures ...............................................................................................................................
5-14
Index of Test Procedures ..............................................................................................................
5-14
Charger Repairs ...............................................................................................................................
5-27
DC Cord ........................................................................................................................................
5-27
Heatsink ........................................................................................................................................
5-28
Transformer ..................................................................................................................................
5-29
Ammeter .......................................................................................................................................
5-30
Fuse Link ......................................................................................................................................
5-31
Voltage Suppressor ......................................................................................................................
5-31
Charger Relay ...............................................................................................................................
5-32
Charger AC Circuit Breakers ........................................................................................................
5-32
AC Charger Receptacle ................................................................................................................
5-33
Charging a Battery Pack that has Low Voltage ................................................................................
5-34
SECTION 6 – EXPORT IQ PLUS CHARGER (ONBOARD)
General Information ..........................................................................................................................
6-1
IQ Plus Onboard Charger Features ..............................................................................................
6-2
Battery Warning Light ...................................................................................................................
6-2
The Charge Circuit ............................................................................................................................
6-2
Onboard Charger Operation .............................................................................................................
6-3
Onboard Charger AC Power Connection .....................................................................................
6-4
Charging Batteries ........................................................................................................................
6-5
Testing Charger Operation ...........................................................................................................
6-6
Checking Battery Condition with an Onboard Charger .....................................................................
6-7
Start Charge Cycle .......................................................................................................................
6-7
Troubleshooting ................................................................................................................................
6-7
2008 Export Battery Charger Maintenance and Service Manual
Page v
Test Procedures ...............................................................................................................................
6-10
Index of Test Procedures .............................................................................................................
6-10
Charger Repairs ...............................................................................................................................
6-24
DC Cord .......................................................................................................................................
6-24
Heatsink .......................................................................................................................................
6-25
Transformer ..................................................................................................................................
6-26
Ammeter .......................................................................................................................................
6-27
Fuse Link ......................................................................................................................................
6-28
Charger Relay ..............................................................................................................................
6-28
Charger AC Circuit Breaker ..........................................................................................................
6-29
Charger AC Cord and Retractable Cord Reel ..............................................................................
6-29
Charging a Battery Pack that has Low Voltage ................................................................................
6-31
Onboard Charger Removal and Installation .....................................................................................
6-34
SECTION i – INDEX
Page vi
2008 Export Battery Charger Maintenance and Service Manual
1
SECTION 1 – SAFETY
To ensure the safety of those servicing vehicles or battery chargers, and to protect the vehicles and battery
chargers from damage resulting from improper service or maintenance, the procedures in this manual must
be followed.
It is important to note that throughout this manual there are statements labeled DANGER, WARNING, or CAUTION. These special statements relate to specific safety issues, and must be read, understood, and heeded
before proceeding with procedures. There are also statements labeled NOTE, which provide other essential
service or maintenance information.
ý DANGER
• A DANGER indicates an immediate hazard that will result in severe personal injury or death.
ý WARNING
• A WARNING indicates an immediate hazard that could result in severe personal injury or
death.
ý CAUTION
• A CAUTION with the safety alert symbol indicates a hazard or unsafe practice that could
result in minor personal injury or product or property damage.
CAUT ION
• A CAUTION without the safety alert symbol indicates a potentially hazardous situation that
could result in property damage.
GENERAL WARNING
The following safety statements must be heeded whenever the vehicle or battery charger is being operated,
repaired, or serviced. Service technicians should become familiar with these general safety statements, which
can be found throughout this manual. Also, other specific warnings appear throughout this manual and on the
vehicle and battery charger.
ý DANGER
• Battery – Explosive gases! Do not smoke. Keep sparks and flames away from the vehicle and
service area. Ventilate when charging or operating vehicle in an enclosed space. Wear a full
face shield and rubber gloves when working on or near batteries.
• Battery – Poison! Contains acid! Causes severe burns. Avoid contact with skin, eyes, or
clothing. Antidotes:
- External: Flush with water. Call a physician immediately.
- Internal: Drink large quantities of milk or water. Follow with milk of magnesia or vegetable
oil. Call a physician immediately.
- Eyes: Flush with water for 15 minutes. Call a physician immediately.
2008 Export Battery Charger Maintenance and Service Manual
Page 1-1
1
SAFETY
General Warning
ý WARNING
• Do not leave children unattended on vehicle.
• Only trained technicians should repair or service the vehicle or battery charger. Anyone doing
even simple repairs or service should have knowledge and experience in electrical and
mechanical repair.
• Follow the procedures exactly as stated in this manual, and heed all DANGER, WARNING, and
CAUTION statements in this manual as well as those on the vehicle and battery charger.
• Check the vehicle owner’s manual for proper location of all vehicle safety and operation
decals and make sure they are in place and are easy to read.
• Improper use of the vehicle or failure to properly maintain it could result in decreased vehicle
performance, severe personal injury, or death.
• Any modification or change to the vehicle that affects the stability or handling of the vehicle,
or increases maximum vehicle speed beyond factory specifications, could result in severe
personal injury or death.
• Wear safety glasses or approved eye protection when servicing the vehicle or battery charger.
Wear a full face shield and rubber gloves when working on or near batteries.
• Do not wear loose clothing or jewelry such as rings, watches, chains, etc., when servicing the
vehicle or battery charger.
• Moving parts! Do not attempt to service the vehicle while it is running.
• Hot! Do not attempt to service hot motor or resistors. Failure to heed this warning could result
in severe burns.
• Use insulated tools when working near batteries or electrical connections. Use extreme
caution to avoid shorting of components or wiring.
• For vehicles with cargo beds, remove all cargo before raising the bed or servicing the vehicle.
If the vehicle is equipped with a prop rod, ensure that it is securely engaged while bed is
raised. Do not close bed until all persons are clear of cargo bed area. Keep hands clear of all
crush areas. Do not drop cargo bed; lower gently and keep entire body clear. Failure to heed
this warning could result in severe personal injury or death.
• Prior to servicing the vehicle or leaving the vehicle unattended, turn the key switch OFF,
remove the key, and place the Forward/Reverse handle or switch in the NEUTRAL position.
Chock the wheels when servicing the vehicle.
• All electric vehicles:
To avoid unintentionally starting the vehicle, disconnect the batteries as shown (Figure 1-1,
Page 1-4 through Figure 1-10, Page 1-6).
• IQ System and IQ Plus vehicles:
- Place Tow/Run switch in the TOW position before disconnecting or connecting the
batteries. Failure to heed this warning could result in a battery explosion or severe personal
injury.
- After disconnecting the batteries, wait 90 seconds for the controller capacitors to discharge.
• Never push objects of any kind into the battery charger case through the ventilation slots.
Failure to heed this warning could result in an electrical short circuit that could result in a fire.
• Do not use a battery charger if the cord, plug, or receptacle is damaged in any way. Replace
worn or damaged parts immediately. Failure to heed this warning could result in a fire,
property damage, severe personal injury, or death.
• Do not use a battery charger if it has received a sharp blow, was dropped, or was otherwise
damaged. Make sure it is operating properly before putting it back in use.
WARNING CONTINUED ON NEXT PAGE...
Page 1-2
2008 Export Battery Charger Maintenance and Service Manual
SAFETY
General Warning
ý WARNING
• External battery chargers:
Prior to servicing the charger, disconnect the AC power supply cord from the wall outlet and
the DC plug from the vehicle charger receptacle.
• Onboard battery chargers:
Prior to servicing the charger, disconnect the AC power supply cord from the wall outlet and
remove the battery charger from the vehicle. See Onboard Charger Removal on page 4-36 and
6-34.
• If wires are removed or replaced, make sure wiring and wire harness are properly routed and
secured. Failure to properly route and secure wiring could result in vehicle malfunction,
property damage, personal injury, or death.
• If battery wire terminals are damaged or corroded, they should be replaced or cleaned as
necessary. Failure to do so may cause them to overheat during operation and could result in a
fire, property damage, or personal injury.
• IQ Plus vehicles:
- Use only 4-gauge (AWG) wires with low-resistance terminals to replace battery wires on IQ
Plus models.
- Only IQ Plus chargers should be used with IQ Plus vehicles. Long-term use of a PowerDrive
battery charger with IQ Plus vehicles will damage the batteries.
• Lift only one end of the vehicle at a time. Use a suitable lifting device (chain hoist or hydraulic
floor jack) with 1000 lb. (454 kg) minimum lifting capacity. Do not use lifting device to hold
vehicle in raised position. Use approved jack stands of proper weight capacity to support the
vehicle and chock the wheels that remain on the floor. When not performing a test or service
procedure that requires movement of the wheels, lock the brakes.
ý CAUTION
• Be sure to check the batteries and charger monthly to maintain correct battery water level and
ensure the charger is operating correctly during storage.
2008 Export Battery Charger Maintenance and Service Manual
Page 1-3
1
SAFETY
General Warning
1
3
1
(+)
2
4
3
P
(–)
O
S
EG
N
EG
N
1
RUN
3
P
O
S
P
O
S
TOW
1
2
(+)
1
EG
N
2
EG
N
3
P
O
S
4
(–)
2
Figure 1-1 Precedent Battery Configuration – Style A Figure 1-2 Precedent Battery Configuration – Style B
4 x 12-Volt Batteries
4 x 12-Volt Batteries
(Viewed from driver side of vehicle)
1. Place TOW/RUN Switch in TOW before disconnecting or
connecting battery cables.
2. Remove negative battery cable.
3. Remove positive battery cable.
Connect battery cables in reverse order.
(Viewed from driver side of vehicle)
1. Place TOW/RUN Switch in TOW before disconnecting or
connecting battery cables.
2. Remove negative battery cable.
3. Remove positive battery cable.
Connect battery cables in reverse order.
3
1
3
(+)
1
(+)
TOW
RUN
1
+
(–)
2
2
2
1
(–)
2
3
6
4
3
4
5
Figure 1-3 Precedent Battery Configuration – Style C Figure 1-4 DS, DS Villager 4, 800, 810 and 850 - 12-Volt
6 x 8-Volt Batteries
Battery Configuration
(Viewed from driver side of vehicle)
1. Place TOW/RUN Switch in TOW before disconnecting or
connecting battery cables.
2. Remove negative battery cable.
3. Remove positive battery cable.
Connect battery cables in reverse order.
Page 1-4
(Viewed from driver side of vehicle)
1. Place TOW/RUN Switch in TOW before disconnecting or
connecting battery cables.
2. Remove negative battery cable.
3. Remove positive battery cable.
Connect battery cables in reverse order.
2008 Export Battery Charger Maintenance and Service Manual
SAFETY
General Warning
(+)
3
(+)
1
3
1
2
2
1
4
3
6
5
5
(–)
1
7
3
(–)
4
8
2
6
2
Figure 1-5 Turf1 and Carryall 1 Battery Configuration
Figure 1-6 Turf 2 and 252/Carryall 2 and 252/XRT 900
IQ Plus Battery Configuration
(Viewed from driver side of vehicle)
1. Place TOW/RUN Switch in TOW before disconnecting or
connecting battery cables.
2. Remove negative battery cable.
3. Remove positive battery cable.
Connect battery cables in reverse order.
(Viewed from driver side of vehicle)
1. Place TOW/RUN Switch in TOW before disconnecting or
connecting battery cables.
2. Remove negative battery cable.
3. Remove positive battery cable.
Connect battery cables in reverse order.
1
3
3
(+)
2
1
(–)
2
3
1
7
6
6
5
1
8
4
7
5
2
8
3
2
4
Figure 1-7 Transporter 4 and 6 and Carryall 6 IQ Plus
Battery Configuration
(Viewed from driver side of vehicle)
1. Place TOW/RUN Switch in TOW before disconnecting or
connecting battery cables.
2. Remove negative battery cable.
3. Remove positive battery cable.
Connect battery cables in reverse order.
Figure 1-8 Villager 6 and 8 IQ Plus Battery
Configuration
(Viewed from driver side of vehicle)
1. Place TOW/RUN Switch in TOW before disconnecting or
connecting battery cables.
2. Remove negative battery cable.
3. Remove positive battery cable.
Connect battery cables in reverse order.
2008 Export Battery Charger Maintenance and Service Manual
Page 1-5
1
1
SAFETY
General Warning
3
3
1
1
3
5
3
2
5
2
1
1
2
2
4
4
6
6
7
Figure 1-9 Limo (Manual Brake) Battery Configuration
(Viewed from driver side of vehicle)
1. Place TOW/RUN Switch in TOW before disconnecting or
connecting battery cables.
2. Remove negative battery cable.
3. Remove positive battery cable.
Connect battery cables in reverse order.
Page 1-6
Figure 1-10 Limo (AutoBrake) Battery Configuration
(Viewed from driver side of vehicle)
1. Place TOW/STORAGE/RUN Switch in STORAGE before
disconnecting or connecting battery cables.
2. Remove negative battery cable.
3. Remove positive battery cable.
Connect battery cables in reverse order.
2008 Export Battery Charger Maintenance and Service Manual
2
SECTION 2 – CHARGER IDENTIFICATION AND
SPECIFICATIONS
GENERAL INFORMATION
There are several different battery charger models available. It is important to properly identify the battery
charger type and model number before attempting to service a battery charger. See Battery Charger Identification on page 2-6.
BATTERY CHARGER SPECIFICATIONS
EXPORT POWERDRIVE EXTERNAL CHARGER
SPECIFICATIONS
MODEL NUMBER
(CCI P/N)
Export
PowerDrive External
Battery Charger
18780-11
(101831503)
18780-18
(101831504)
AC voltage: 100, 200, 220, or 240 VAC (selectable)
•
•
AC voltage (acceptable range): at 100 VAC setting
95-105
95-105
AC voltage (acceptable range): at 200 VAC setting
190-210
190-210
AC voltage (acceptable range): at 220 VAC setting
209-231
209-231
AC voltage (acceptable range): at 240 VAC setting
228-252
228-252
•
•
Max. AC current (amps) at 100 VAC / 50 Hz.
13.6
13.6
Max. AC current (amps) at 100 VAC / 60 Hz.
12.4
12.4
Max. AC current (amps) at 200 VAC / 50 Hz.
6.9
6.9
Max. AC current (amps) at 200 VAC / 60 Hz.
6.3
6.3
Max. AC current (amps) at 220 VAC / 50 Hz.
6.9
6.9
Max. AC current (amps) at 220 VAC / 60 Hz.
6.3
6.3
Max. AC current (amps) at 240 VAC / 50 Hz.
5.9
5.9
Max. AC current (amps) at 240 VAC / 60 Hz.
5.1
5.1
DC voltage (VDC) (start of charge cycle)
48
48
DC current (amps) (start of charge cycle)
17
17
AC INPUT
Frequency: 50 Hz. / 60 Hz.
POWER CONSUMPTION
DC OUTPUT
DC voltage (VDC) (end of charge cycle)
60
60
DC current (amps) (end of charge cycle)
3.5
3.5
Case – overall length
10.25 in. (26 cm)
10.25 in. (26 cm)
Case – overall width
8.687 in. (22.1 cm)
8.687 in. (22.1 cm)
DIMENSIONS/WEIGHT
2008 Export Battery Charger Maintenance and Service Manual
Page 2-1
2
CHARGER IDENTIFICATION AND SPECIFICATIONS
Battery Charger Specifications
EXPORT POWERDRIVE EXTERNAL CHARGER
SPECIFICATIONS
Export
PowerDrive External
Battery Charger
MODEL NUMBER
(CCI P/N)
18780-11
(101831503)
18780-18
(101831504)
Case – overall height
9.0 in. (22.9 cm)
9.0 in. (22.9 cm)
AC cord length
72 in. (182.9 cm)
108 in. (274.3 cm)
DC cord length
103 in. (261.6 cm)
144 in. (365.8 cm)
35 lb (15.9 kg)
35.8 lb (16.2 kg)
•
•
Weight
MOUNTING CONFIGURATION
Mounting: Set on shelf, wall mount with keyhole, or hang securely from ceiling
EXPORT POWERDRIVE ONBOARD
CHARGER SPECIFICATIONS
Model number
(CCI P/N)
Export PowerDrive Onboard Battery Charger
17790-10
(101831601)
17790-11
(101831602)
17790-12
(101831603)
17790-40
(102546902)
AC voltage: 100, 200, 220, or 240 VAC (selectable)
•
•
•
•
AC voltage (acceptable range): at 100 VAC setting
95-105
95-105
95-105
95-105
AC voltage (acceptable range): at 200 VAC setting
190-210
190-210
190-210
190-210
AC voltage (acceptable range): at 220 VAC setting
209-231
209-231
209-231
209-231
AC voltage (acceptable range): at 240 VAC setting
228-252
228-252
228-252
228-252
•
•
•
•
Max. AC current (amps) at 100 VAC / 50 Hz.
13.6
13.6
13.6
13.6
Max. AC current (amps) at 100 VAC / 60 Hz.
12.4
12.4
12.4
12.4
Max. AC current (amps) at 200 VAC / 50 Hz.
6.9
6.9
6.9
6.9
Max. AC current (amps) at 200 VAC / 60 Hz.
6.3
6.3
6.3
6.3
Max. AC current (amps) at 220 VAC / 50 Hz.
6.9
6.9
6.9
6.9
Max. AC current (amps) at 220 VAC / 60 Hz.
6.3
6.3
6.3
6.3
Max. AC current (amps) at 240 VAC / 50 Hz.
5.9
5.9
5.9
5.9
Max. AC current (amps) at 240 VAC / 60 Hz.
5.1
5.1
5.1
5.1
DC voltage (VDC) (start of charge cycle)
48
48
48
48
DC current (amps) (start of charge cycle)
17
17
17
17
AC INPUT
Frequency: 50 Hz. / 60 Hz.
POWER CONSUMPTION
DC OUTPUT
DC voltage (VDC) (end of charge cycle)
60
60
60
60
DC current (amps) (end of charge cycle)
3.5
3.5
3.5
3.5
Case – overall length
10.25 in.
(26 cm)
10.25 in.
(26 cm)
10.25 in.
(26 cm)
10.25 in.
(26 cm)
Case – overall width
8.687 in.
(22.1 cm)
8.687 in.
(22.1 cm)
8.687 in.
(22.1 cm)
8.687 in.
(22.1 cm)
Case – overall height
9.437 in.
(24 cm)
9.437 in.
(24 cm)
9.437 in.
(24 cm)
9.437 in.
(24 cm)
DIMENSIONS/WEIGHT
Specifications continued on next page...
Page 2-2
2008 Export Battery Charger Maintenance and Service Manual
CHARGER IDENTIFICATION AND SPECIFICATIONS
Battery Charger Specifications
EXPORT POWERDRIVE ONBOARD
CHARGER SPECIFICATIONS
Export PowerDrive Onboard Battery Charger
Model number
(CCI P/N)
17790-10
(101831601)
17790-11
(101831602)
17790-12
(101831603)
17790-40
(102546902)
AC cord length
17 ft. (5.2 m)
(retractable)
17 ft. (5.2 m)
(retractable)
17 ft. (5.2 m)
(retractable)
17 ft. (5.2 m)
(retractable)
DC cord length
80.5 in.
(204.5 cm)
129.5 in.
(328.9 cm)
162.5 in.
(412.8 cm)
9.5 in.
(24 cm)
37 lb (16.8 kg)
37.7 lb (17.1 kg)
38.2 lb (17.3 kg)
37 lb (16.8 kg)
•
•
•
•
Weight
MOUNTING CONFIGURATION
Mounting: Onboard (secured to the vehicle)
2008 Export Battery Charger Maintenance and Service Manual
Page 2-3
2
2
CHARGER IDENTIFICATION AND SPECIFICATIONS
Battery Charger Specifications
EXPORT IQ PLUS EXTERNAL CHARGER
SPECIFICATIONS
Model number
(CCI P/N)
Export
IQ Plus External
Battery Charger
25880-11
(102892901)
25880-18
(102892902)
•
•
AC voltage (acceptable range):
at 100 VAC setting
95-105
95-105
AC voltage (acceptable range):
at 200 VAC setting
190-210
190-210
AC voltage (acceptable range):
at 220 VAC setting
209-231
209-231
AC voltage (acceptable range):
at 240 VAC setting
228-252
228-252
•
•
Max. AC current (amps)
at 100 VAC / 50 Hz.
16.0
16.0
Max. AC current (amps)
at 100 VAC / 60 Hz.
14.6
14.6
Max. AC current (amps)
at 200 VAC / 50 Hz.
7.6
7.6
Max. AC current (amps)
at 200 VAC / 60 Hz.
7.4
7.4
Max. AC current (amps)
at 220 VAC / 50 Hz.
7.0
7.0
Max. AC current (amps)
at 220 VAC / 60 Hz.
6.7
6.7
Max. AC current (amps)
at 240 VAC / 50 Hz.
6.4
6.4
Max. AC current (amps)
at 240 VAC / 60 Hz.
6.1
6.1
DC voltage (VDC) (start of charge cycle)
48
48
DC current (amps) (start of charge cycle)
17
17
DC voltage (VDC) (end of charge cycle)
60
60
DC current (amps) (end of charge cycle)
4.7
4.7
Case – overall length
10.25 in.
(26 cm)
10.25 in.
(26 cm)
Case – overall width
8.687 in.
(22.1 cm)
8.687 in.
(22.1 cm)
Case – overall height
9.0 in.
(22.9 cm)
9.0 in.
(22.9 cm)
AC cord length
N/A
N/A
DC cord length
103 in.
(261.6 cm)
144 in.
(365.8 cm)
34.8 lb
(15.8 kg)
35.3 lb
(16.0 kg)
•
•
AC INPUT
AC voltage: 100, 200, 220, or 240 VAC
(selectable)
Frequency: 50 Hz. / 60 Hz.
POWER CONSUMPTION
DC OUTPUT
DIMENSIONS/WEIGHT
Weight
MOUNTING CONFIGURATION
Mounting: Set on shelf, wall mount with keyhole, or hang securely from ceiling.
Page 2-4
2008 Export Battery Charger Maintenance and Service Manual
CHARGER IDENTIFICATION AND SPECIFICATIONS
Battery Charger Specifications
EXPORT IQ PLUS ONBOARD CHARGER SPECIFICATIONS
Model number
(CCI P/N)
Export IQ Plus
Onboard Battery
Charger
25660-40
(102893001)
AC INPUT
AC voltage: 100, 200, 220, or 240 VAC
(selectable)
•
AC voltage (acceptable range):
at 100 VAC setting
95-105
AC voltage (acceptable range):
at 200 VAC setting
190-210
AC voltage (acceptable range):
at 220 VAC setting
209-231
AC voltage (acceptable range):
at 240 VAC setting
228-252
Frequency: 50 Hz. / 60 Hz.
•
POWER CONSUMPTION
Max. AC current (amps)
at 100 VAC / 50 Hz.
16.0
Max. AC current (amps)
at 100 VAC / 60 Hz.
14.6
Max. AC current (amps)
at 200 VAC / 50 Hz.
7.6
Max. AC current (amps)
at 200 VAC / 60 Hz.
7.4
Max. AC current (amps)
at 220 VAC / 50 Hz.
7.0
Max. AC current (amps)
at 220 VAC / 60 Hz.
6.7
Max. AC current (amps)
at 240 VAC / 50 Hz.
6.4
Max. AC current (amps)
at 240 VAC / 60 Hz.
6.1
DC OUTPUT
DC voltage (VDC) (start of charge cycle)
48
DC current (amps) (start of charge cycle)
17
DC voltage (VDC) (end of charge cycle)
60
DC current (amps) (end of charge cycle)
4.7
DIMENSIONS/WEIGHT
Case – overall length
11.75 in.
(29.9 cm)
Case – overall width
7.25 in.
(18.4 cm)
Case – overall height
9.5 in.
(24.1 cm)
AC cord length
17 ft. (5.2 m)
(retractable)
DC cord length
21.5 in.
(54.6 cm)
Weight
37.0 lb
(16.8 kg)
MOUNTING CONFIGURATION
Mounting: Onboard (secured to the vehicle)
•
2008 Export Battery Charger Maintenance and Service Manual
Page 2-5
2
2
CHARGER IDENTIFICATION AND SPECIFICATIONS
Battery Charger Identification
BATTERY CHARGER IDENTIFICATION
The battery charger can be identified by the model number printed on the charger. Refer to the appropriate
section of this manual, as indicated in the chart below, for information on troubleshooting and repairing the
battery charger. Do not attempt to service a battery charger that cannot be properly identified. If a charger
cannot be identified, contact your local Club Car dealer or distributor.
BATTERY CHARGER NAME
AND MODEL NUMBER
Export PowerDrive External Battery
Charger
18780-11 (101831503)
Export PowerDrive External Battery
Charger
18780-18 (101831504)
REFER TO
Section 3 – Export PowerDrive Battery Charger (External)
Export PowerDrive Onboard Battery
Charger
17790-10 (101831601)
Export PowerDrive Onboard Battery
Charger
17790-11 (101831602)
Export PowerDrive Onboard Battery
Charger
17790-12 (101831603)
Section 4 – Export PowerDrive Charger (Onboard)
Export PowerDrive Onboard Battery
Charger
17790-40 (102546902)
Export IQ Plus External Battery Charger
25880-11 (102892901)
Export IQ Plus External Battery Charger
25880-18 (102892902)
Export IQ Plus Onboard Battery Charger
25660-40 (102893001)
Page 2-6
Section 5 – Export IQ Plus
Charger (External)
Section 6 – Export IQ Plus
Charger (Onboard)
2008 Export Battery Charger Maintenance and Service Manual
SECTION 3 – EXPORT POWERDRIVE BATTERY
CHARGER (EXTERNAL)
ý DANGER
• See General Warning, Section 1, Page 1-1.
ý WARNING
• See General Warning, Section 1, Page 1-1.
• The battery charger DC plug must be pulled slowly from the receptacle (Figure 3-8,
Page 3-10). Jerking or pulling the DC cord out quickly could cause arcing that could damage
the plug and receptacle and could cause batteries to explode (Figure 3-9, Page 3-10).
GENERAL INFORMATION
This section includes information pertaining to service of the Export PowerDrive battery charger (model numbers 18780-11 and 18780-18). Depending on the geographic region, the charger provided with your vehicle
may be a different model. Do not attempt to service a battery charger that has not been properly identified. If
a charger cannot be properly identified, contact your local Club Car dealer or distributor.
The PowerDrive battery charger is automatic and has no external controls (Figure 3-1, Page 3-1). When the
charger is connected, there is a 2 to 15 second delay before charging begins. See following NOTE.
NOTE: At one hour and at two hours into the charge cycle, the charger will shut off in order to run a selfdiagnostic program (ammeter will drop to zero). Charging will resume in a few moments (ammeter
returns to previous rate of charge).
The onboard computer (OBC) records the amount of energy consumed as the vehicle is used, then directs
the charger to replace exactly the amount of energy needed to fully replenish the batteries. The charger shuts
off automatically, preventing the possibility of either undercharging or overcharging.
C
lu
b
C
ar
Figure 3-1 PowerDrive Battery Charger (Export)
2008 Export Battery Charger Maintenance and Service Manual
Page 3-1
3
3
EXPORT POWERDRIVE BATTERY CHARGER (EXTERNAL)
General Information
POWERDRIVE CHARGER FEATURES
• Charge Interlock:
PowerDrive battery charger DC plugs have three pins rather than two blades that most standard
charger plugs have. Two of these pins are the positive and negative leads as on standard chargers; the
third pin is a sensing lead that is the communication link between the charger and the onboard computer. When the charger plug is plugged into the vehicle receptacle, the onboard computer locks out
the vehicle drive system. This prevents the possibility of driving the vehicle while the charger is plugged
in and potentially damaging the vehicle and charger.
• Long-Term Storage Charge:
PowerDrive chargers are designed to be left connected with AC power to the charger, during off-season or long-term storage. The onboard computer will automatically activate the charger every 15 days.
To return the vehicle to service, disconnect the DC cord from the vehicle, wait 15 seconds and plug the
DC cord back in. See following WARNING. The charger will activate. Allow the vehicle to complete
one full charge cycle before putting it into service.
ý WARNING
• The charger plug must be pulled slowly from the receptacle. Jerking or pulling the DC cord
out quickly could cause arcing and burning that could damage the plug and receptacle and
could cause batteries to explode.
BATTERY WARNING LIGHT
The 48-volt electric vehicle features a dash mounted battery warning light (above the steering column) that,
when the vehicle is in operation, indicates low battery voltage or, when the vehicle is being charged, indicates
a charging problem. The battery warning light is controlled by the onboard computer.
When the batteries receive an incomplete charge because 1) the DC power cord is disconnected, 2) AC
power to charger is interrupted, 3) automatic charger shut-off occurs after 16 hours of operation, or 4) charger
malfunctions, the warning light will indicate as follows:
• The battery warning light will not illuminate if the charge is 90% or more complete. The onboard computer will retain in memory the amount of charge needed to fully replenish the batteries and will complete the charge during the next charge cycle.
• When the charger DC cord is unplugged during a charge cycle, the battery warning light will illuminate
and remain illuminated for 10 seconds if the charge is less than 90% complete but the vehicle has
enough power for 30 minutes of operation. This will alert the fleet operator that the vehicle may be
used, but that it must be charged to completion as soon as possible.
• The battery warning light will repeatedly illuminate for 10 seconds, at 4 second intervals, if the charger
times out at 16 hours and the batteries are not sufficiently charged. This indicates an abnormal charge
cycle. The charger and batteries should be checked by your Club Car distributor/dealer.
• The battery warning light will repeatedly illuminate for 10 seconds, at 4 second intervals, during a
charge cycle (with the DC plug still connected) if AC power to the charger is interrupted. The light will
go out when AC power is restored.
Page 3-2
2008 Export Battery Charger Maintenance and Service Manual
EXPORT POWERDRIVE BATTERY CHARGER (EXTERNAL)
The Charge Circuit
THE CHARGE CIRCUIT
DS, DS VILLAGER 4, 800, 810 AND 850
The vehicle charge circuit consists of the following components:
• charger receptacle
• receptacle fuse link
• sense lead fuse
• onboard computer
• batteries
The negative terminal of the receptacle is connected to the onboard computer (Figure 3-2, Page 3-3). The
10-gauge black wire from the onboard computer connects to the B– terminal on the speed controller, and the
6-gauge black wire (also on the controller B– terminal) goes through the onboard computer and connects to
the negative (–) post of battery no. 4. The positive terminal of the charger receptacle is connected to the positive (+) post of battery no. 1. The gray wire (sense lead) from the charger receptacle is connected to the
sense lead fuse, which is connected to the gray wire from the onboard computer.
If the charger works with one vehicle, but does not work with another vehicle, then most likely the problem is
in the vehicle charge circuit. Check the connections between the 18-gauge gray wire from the charger receptacle, the sense lead fuse, and the 18-gauge gray wire from the onboard computer. In addition, check the
charger receptacle fuse link and its connections.
ONBOARD
COMPUTER
SOLID STATE
SPEED CONTROLLER
FUSE LINK
S1 S2
#10 BLACK
B–
BB–
TERMINAL
B+
M–
#6 BLACK
#10 BLACK
CHARGER
RECEPTACLE
#10 BLACK
#18 GRAY
S
N
E
G
O
#10 RED
P
#18 GRAY
SENSE LEAD FUSE
1
N
E
G
P
O
S
N
2
S
G
O
G
E
S
N
O
P
E
P
3
4
Figure 3-2 Charge Circuit and Battery Configuration – DS, DS Villager 4, 800, 810 and 850
2008 Export Battery Charger Maintenance and Service Manual
Page 3-3
3
3
EXPORT POWERDRIVE BATTERY CHARGER (EXTERNAL)
The Charge Circuit
TURF 1 AND CARRYALL 1
The vehicle charge circuit consists of the following components:
• charger receptacle
• receptacle fuse link
• sense lead fuse
• onboard computer
• batteries
The negative terminal of the receptacle is connected to the onboard computer (Figure 3-3, Page 3-4). The
10-gauge black wire from the onboard computer connects to the B– terminal on the speed controller, and the
6-gauge black wire (also on the controller B– terminal) goes through the onboard computer and connects to
the negative (–) post of battery no. 6. The positive terminal of the charger receptacle is connected to the positive (+) post of battery no. 1. The gray wire (sense lead) from the charger receptacle is connected to the
sense lead fuse, which is connected to the gray wire from the onboard computer.
If the charger works with one vehicle, but does not work with another vehicle, then most likely the problem is
in the vehicle charge circuit. Check the connections between the 18-gauge gray wire from the charger receptacle, the sense lead fuse, and the 18-gauge gray wire from the onboard computer. In addition, check the
charger receptacle fuse link and its connections.
ONBOARD
COMPUTER
SOLID STATE
SPEED CONTROLLER
FUSE LINK
B+
#10 BLACK
S2
M–
B
B–TERMINAL
S1
B–
#6 BLACK
CHARGER
RECEPTACLE
#10 BLACK
RED TO
POSITIVE
TERMINAL
#10 BLACK
#18 GRAY
#18 GRAY
2
#10 RED
SENSE LEAD FUSE
To Solenoid
3
4
BLACK TO
NEGATIVE
TERMINAL
1
5
6
Figure 3-3 Charge Circuit and Battery Configuration – Turf 1 and Carryall 1
Page 3-4
2008 Export Battery Charger Maintenance and Service Manual
EXPORT POWERDRIVE BATTERY CHARGER (EXTERNAL)
The Charge Circuit
PRECEDENT – 4 X 12-VOLT
The vehicle charge circuit consists of the following components:
• charger receptacle
• onboard computer
• batteries
The negative terminal of the receptacle is connected to the onboard computer (Figure 3-4, Page 3-5 or
Figure 3-5, Page 3-6). The 10-gauge black wire from the onboard computer connects to the B– terminal on
the speed controller, and the 6-gauge black wire (also on the controller B– terminal) goes through the onboard
computer and connects to the negative (–) post of battery no. 4. The positive terminal of the charger receptacle is connected to the positive (+) post of battery no. 1. The gray wire from the onboard computer is connected to the charger receptacle.
If the charger works with one vehicle, but does not work with another vehicle, then most likely the problem is
in the vehicle charge circuit. Check wire continuity and connections between the charger receptacle, onboard
computer and batteries.
D
#6
CHARGER
RECEPTACLE
FRONT
OF VEHICLE
RE
TO SOLENOID
K
AC
#6
BL
4
ED
#10 R
#10 BLACK
#18 GRAY
BATTERY
BANK
3
1
2
K
AC
#6
BL
SINGLE
POSITION
CONNECTOR
B+
ONBOARD
COMPUTER
#10 BLAC
M–
B–
S2 S1
K
K
#6 BLAC
SPEED
CONTROLLER
Figure 3-4 Charge Circuit and Style A Battery Configuration – 4 x 12-Volt Precedent Vehicles
2008 Export Battery Charger Maintenance and Service Manual
Page 3-5
3
3
EXPORT POWERDRIVE BATTERY CHARGER (EXTERNAL)
The Charge Circuit
FRONT
OF VEHICLE
CHARGER
RECEPTACLE
EG
N
P
O
S
P
D
O
S
E
0R
#1
EG
N
EG
N
1
#10 BLACK
#18 GRAY
P
O
S
P
O
2
EG
N
3
SINGLE
POSITION
CONNECTOR
RE
TO SOLENOID
BATTERY
BANK
4
CK
BLA
#6
K
AC
#6
BL
LACK
#10 B
ONBOARD
COMPUTER
D
#6
S
ACK
#6 BL
B+
M–
B–
S2 S1
SPEED
CONTROLLER
Figure 3-5 Charge Circuit and Style B Battery Configuration – 4 x 12-Volt Precedent Vehicles
PRECEDENT – 6 X 8-VOLT
The vehicle charge circuit consists of the following components:
• charger receptacle
• onboard computer
• batteries
The negative terminal of the receptacle is connected to the onboard computer (Figure 3-6, Page 3-7). The
10-gauge black wire from the onboard computer connects to the B– terminal on the speed controller, and the
6-gauge black wire (also on the controller B– terminal) goes through the onboard computer and connects to
the negative (–) post of battery no. 6. The positive terminal of the charger receptacle is connected to the positive (+) post of battery no. 1. The gray wire from the onboard computer is connected to the charger receptacle.
If the charger works with one vehicle, but does not work with another vehicle, then most likely the problem is
in the vehicle charge circuit. Check wire continuity and connections between the charger receptacle, onboard
computer and batteries.
Page 3-6
2008 Export Battery Charger Maintenance and Service Manual
EXPORT POWERDRIVE BATTERY CHARGER (EXTERNAL)
The Charge Circuit
FRONT
OF VEHICLE
CHARGER
RECEPTACLE
#10
RE
2
1
D
#10 BLACK
#18 GRAY
#6
3
4
5
BATTERY
BANK
#10
RE
RE
D
D
TO SOLENOID
6
#6
CK
LA
B
#6
K
AC
BL
SINGLE
POSITION
CONNECTOR
B+
M–
B–
S2 S1
ONBOARD
COMPUTER
#1
0
K
AC
BL
K
AC
#6
BL
SOLID STATE
SPEED CONTROLLER
Figure 3-6 Charge Circuit and Style C Battery Configuration – 6 x 8-Volt Precedent Vehicles
LIMO – 6 X 8-VOLT
The vehicle charge circuit consists of the following components:
• charger receptacle
• receptacle fuse link
• sense lead fuse
• onboard computer
• batteries
The negative terminal of the receptacle is connected to the onboard computer (Figure 3-7, Page 3-8). The
10-gauge black wire from the onboard computer connects to the B– terminal on the speed controller, and the
6-gauge black wire (also on the controller B– terminal) goes through the onboard computer and connects to
the negative (–) post of battery no. 6. The positive terminal of the charger receptacle is connected to the positive (+) post of battery no. 1. The gray wire from the onboard computer is connected to the charger receptacle.
If the charger works with one vehicle, but does not work with another vehicle, then most likely the problem is
in the vehicle charge circuit. Check the connections between the 18-gauge gray wire from the charger receptacle, the sense lead fuse, and the 18-gauge gray wire from the onboard computer. In addition, check the
charger receptacle fuse link and its connections.
2008 Export Battery Charger Maintenance and Service Manual
Page 3-7
3
3
EXPORT POWERDRIVE BATTERY CHARGER (EXTERNAL)
ONBOARD
COMPUTER
The Charge Circuit
SOLID STATE
SPEED CONTROLLER
FUSE LINK
#10 BLACK
B–
TERMINAL
#6 BLACK
CHARGER
RECEPTACLE
#10 BLACK
#10 BLACK
#18 GRAY
#18 GRAY
#10 RED
+
SENSE LEAD FUSE
3
5
1
–
2
4
6
Figure 3-7 Charge Circuit and Battery Configuration – Limo Electric Vehicles
Page 3-8
2008 Export Battery Charger Maintenance and Service Manual
EXPORT POWERDRIVE BATTERY CHARGER (EXTERNAL)
Charger Installation and Operation
CHARGER INSTALLATION AND OPERATION
See General Warning, Section 1, Page 1-1. See additional WARNING on page 3-1.
ý DANGER
• The charging area must be ventilated. Hydrogen level in the air must never exceed 2%. The
total volume of air in the charging area must be changed five times per hour. Exhaust fans
should be located at the highest point of the roof. Contact a local HVAC engineer.
• Do not charge the vehicle batteries with the vehicle covered or enclosed. Any enclosure or
cover should be removed or unzipped and pulled back when batteries are being charged. An
accumulation of hydrogen gas could result in an explosion.
ý WARNING
• Do not bypass the sense lead fuse (not applicable to Precedent vehicles).
• Prior to servicing the charger, disconnect the AC power supply cord from the wall outlet and
the DC plug from the vehicle charger receptacle.
• The battery charger DC plug must be pulled slowly from the receptacle (Figure 3-8,
Page 3-10). Jerking or pulling the DC cord out quickly could cause arcing that could damage
the plug and receptacle and could cause batteries to explode (Figure 3-9, Page 3-10).
• Do not connect the charger to battery packs that are not compatible with the DC output
voltage specified on the charger. Overheating and transformer burnout will result.
• Do not use a battery charger if the cord, plug, or receptacle is damaged in any way. Replace
worn or damaged parts immediately. Failure to heed this warning could result in a fire,
property damage, severe personal injury, or death.
• Do not use a battery charger if it has received a sharp blow, was dropped, or was otherwise
damaged. Make sure it is operating properly before putting it back in use.
• Each charger should have its own branch circuit protection (circuit breaker or fuse) rated in
accordance with applicable national electrical codes and regulations. Improper AC supply
circuit protection may result in a fire. See Battery Charger Specifications, Section 2, Page 2-1
for maximum current draw.
• Improper connection of the equipment-grounding conductor can result in an electrical shock.
• Do not use an adapter to plug charger into a two-blade outlet or extension cord. Extension
cord or outlet must accept grounded three-blade plug. The use of an improper extension cord
could result in fire or electric shock.
• Chargers can ignite flammable materials and vapors. Do not use near fuels, grain dust,
solvents, thinner, or other flammables.
• Keep charger dry – Do not expose to rain.
• Do not block or cover the charger ventilation slots. The slots provide ventilation and prevent
the charger from overheating.
• Do not allow clothing, blankets, or other materials to cover the charger.
• Do not allow the charger to operate for more than 30 minutes at 19 or more amperes.
• Install surge arrestors on incoming AC power lines. Surge arrestors will help protect electrical
components in the charger and on the vehicle from all but direct or close lightening strikes.
2008 Export Battery Charger Maintenance and Service Manual
Page 3-9
3
E
R
.
•B
E
W FO
W AR RE
A N
• D WA RN ING CH
• N IS RN ING - AR
B
O CO ING - EF GIN
E
• T WA SM NN - XP OR G,
O R O E D L E R
O R N K CT O O B E
• A UT E ING ING M NO SIV RE AD
A T E A IN
D L D
M JU E UC - F O IN C G K D
• C EA S TS E OR R N S HA A IN TR
S G
O S T ! TH U AK SU RG E D UC
F N U T
E S E PP E S C T
• O RE NE RE HE
R E D LY IN - P W IO
IS W L
• E U QU CT D IN IN
K IT IG BE G RE HIL N M
T
P
O H H F AR VE E A
• T LE PU EN IN P U
F C TS O A N C N
H C T C P U T
E LU . R G T H U
G IS T L Y U T VO
LE B
E E F A A
•M OO U RIC EA AN T P VO LT
R . LA RG L.
C C
N
D D O LT A
E
O
TR A
M E
M
TA N D IT SH P M W AG GE
R
E R
IC
O
T .T
E
O
P
V
A IS
C P O H W OC L EA R E S
O
IN
N O
•N HA ER R A E A ILL K AR SU C BE WIT SH W
D P
G
O E
O R T M M S H IT R O F
S E
C R
C
T TE G O M M TA AZ Y E RD O CH
PA R
K D
O
;
R
H
,C R
V
R AT
E : D ED LES ET ET RT AR "+ D M TO E LO
E
K IN
O U . S ER ER A D ", R A A C C
O IVE
S G
U R
N S R.
.
TH F IN UT ! D E IN P ON AT
TP IN
N Y
,D
S
E S
A OR DIC OM O N D. N IN RO NE ED
U G
C T
IS
N
T P
C
T E
C
5 CO AT ATIC OT EG PU PE TIN ON
C ER
O M
O
R
O IO
A R E
N 4
N
•B
M R S A TO AT T V LY G TH
R
LY 8
N
D D
P E IN LLY U IV O G IN E
E
E
S C
TO VE
W FO
C E
C
IS S
IF T TIA A H ; "- LTA RO PU BA
T
C OF
W AR RE
P HIC
AC
B CU L FT UN ", GE UN T CK
O E
R L
A N
AT R C E IN B
C
N X
O E
.
• D WA RN ING CH
N T
P S
TE R HA R S LA MAT DE OR OF
E E
C N
• N IS RN ING - AR
R EN R 2 T UL CK C D T D TH ER O
B
TE D
IE T. G O AT . H H T IS
LY N
O CO ING - EF GIN
LY
S IN E 1 E SE IN R O
D ED
G .
S NN - EX O G
A T RA 5 D N G E S U
R
T S
M
R
S
S
O
O
IA
T
T
T E O N
O EC DO PL RE , R
U
TH OR E G L E. EC BAT E; HE W CK IT T
E
O
K T
N
IR E
IN
N S B A
O T BL
O CU
D
E A
N E U SW E T- O 1
G MA OT IV RE D IN
O R
E
B GE
D R E
E A
S O 0
D
D R
O
AT
S
U
Y
IT
O
0
.
,
R INS CH GA KIN DT
TH
U EN
D T .
C C TL /20
TE TH
N T
N S AR S G R
E ER
R
IT
A U G E D U
R IS
LA M H S KE ET 0/2
E
K P
Y U
E
E T-O ! 2
S WIL
Y IN
E P E S - C CT
A N
TT U
H L
0/2
W
D LY IN P W IO
IF A
N IT
U
IR
LIG
IN T
D
TS VA
40
A LS
B G RE H N
E
LL !
G LE
IN W
VH EF AR VE ILE MA
. T
O RY
S
P ILL
TS O A N C N
E
O
TO
FF F
U
W
L
C
R G
U
T C
.!
E
R
IT
K
A
E E T F HA A
M
C
P YC
H
E
U OM
TIC
LU L
AT
R . LA R G L.
TTO
50
E
C
M E
G E
M
A
M 13
H
O
E R
L
O
C B
AT T
TH
R
V
A IS
O AC
C
IN
N O
IC O 2
O
N K
60
E
D P
N O
N
G
A 0
H
E N
N
S E
LLY A
C
C
Z
E
PA R
M
O
T T
C
A
V
P
E
R
T
D O M WH S
K TIN
IO
S G
TO A
E AN
.
N D NS
,D
A INTA
B T
TE
IS
AT H
LIV IN
S
C
TE E
T
O
E T
N
R N
O H
N
IE
U E
E
S
TL B
C
A
T
E AT
R
T! T
AC
E
E
R
.
Y
IF
220 V
S
UN
IT
TH W
E ILL
AM AM STA
M ME R
ES ETE TE T AU
S R R IN TO
TH FO D M
AN R IC AT
5 CO ATE ICA
ER
AM R S LL
IO
PS REC INTI Y
D DS
IF T C AL AFT
IS O
BAT U C ER
CO F
R
NN EXTE
TE RE HAR 2 TO
RIE NT. G
E
N
E
G CTE NDE
S IN R 15
,
AR TI AT SE
D D
E R
E AL E. CO
B EA TO STO
GO C
ND
TH R
V RE D
OD. URR
S
E AG
E A IN
DE
BAT E
G K D
UN EN
,
LA
TE TH
A AS ING TR
IT T W
Y
R E
RY IS
S IL
IF
G
D U
A
AN UNIT HUTS L VA
P E S - C CT
LL
LY IN P W IO
D W
ELE
OFF RY
IN IL
G B G RE HIL N
FR
PU L
CTI
H EF A V
AU O
T C
R E E M
T
Y
P
TO M 13 CA
LU S. OR AG N C AN
LU CLE
M TO L C
E E T F HA UA
G B
AT
C BC
ON
R . L R L
CO AC
IC 20
T A
E
A G .
NE
R R
NN K
ALL A
IC P MO ME ER
CTI
EC ON
Y MP
V
S O
W S
A IS
ON
TE TO
IN
H W
N
HE A
D M
S
O E
D O
G
C
N ND
TO AIN
C R
H
S PE
C
BAT TH TES
K D
PA R
A TA
O
L
T
,C R
E
LI IN
V
R AT
C OC
VE TH TER N
E
O IVE
K IN
O A
R
IE
N
OU E
S
.
S
N S
. G
R NN TE
TL BAT
AR
E YS
O E D
D
C
E
2008 Export Battery Charger Maintenance and Service Manual
Page 3-10
Figure 3-9 Incorrect DC Plug Removal
Figure 3-8 Charger Receptacle
Charger Installation and Operation
EXPORT POWERDRIVE BATTERY CHARGER (EXTERNAL)
3
AC POWER CONNECTION
The AC line to which the charger is to be connected must be of the proper AC input voltage for the charger
and must be capable of supplying sufficient current. See Section 2 – Charger Identification and Specifications. If the battery charger is equipped with a multi-position switch for variable AC input voltage, the switch
must be set for the correct voltage before the AC cord is connected (Figure 3-10, Page 3-10). See following
CAUTION and NOTE.
CAUT ION
• Failure to set the AC input voltage selector switch to the correct voltage could result in
damage to the battery charger or batteries.
NOTE: Make sure that the AC cord provided with your charger has the proper AC plug for your location. If
it does not, contact your Club Car representative to obtain the proper cord or plug.
AC INPUT VOLTAGE
SELECTION SWITCH
(REAR CHARGER PANEL)
Figure 3-10 AC Input Voltage Selection Switch
EXPORT POWERDRIVE BATTERY CHARGER (EXTERNAL)
Charger Installation and Operation
With charger DC cord disconnected, connect the power supply cord to an AC supply within the acceptable
voltage range. See Battery Charger Specifications, Section 2, Page 2-1.
To reduce the risk of electric shock, the battery charger must be grounded. The charger is equipped with an
AC electric cord with an equipment-grounding conductor and a grounding type plug. The AC plug must be
connected to an appropriate receptacle that is properly installed and grounded in accordance with all applicable national and local electrical codes and regulations.
The use of an extension cord with the charger should be avoided. If an extension cord must be used, use a
three-conductor no. 12 AWG (American Wire Gauge) or no. 14 SWG (British Standard Wire Gauge), heavyduty cord with ground, properly wired and in good electrical condition. Keep it as short as possible (no more
than 12 feet (3.7 m)). Place all cords so they will not be stepped on, tripped over, or otherwise subject to damage or stress.
Ensure that the charger ventilation slots are unobstructed and that there is adequate ventilation.
CHARGING BATTERIES
ý WARNING
•
•
•
•
Do not bypass the sense lead fuse (not applicable to Precedent vehicles).
Be sure the fuse link is clean and tight (not applicable to Precedent vehicles).
Be sure all wire connections at the receptacle are clean and tight.
Do not rock or bend the plug. To connect the charger plug to the vehicle receptacle, grasp the
plug handle and push the plug straight into the receptacle (Figure 3-8, Page 3-10).
• Do not pull on the DC cord (Figure 3-9, Page 3-10). Do not twist, rock or bend the plug. To
disconnect the charger plug from the vehicle receptacle, grasp the plug by the handle and pull
the plug straight out of the receptacle.
• Do not connect a charger to the receptacle if the charger cord, plug, or the vehicle receptacle
is broken, damaged in any manner, or does not make a good electrical connection. Fire or
personal injury can result. Have it replaced by a qualified service person immediately. Failure
to follow these instructions could result in damage to the charger cord, the plug, and (or) the
vehicle receptacle.
• Do not use a charger if:
- The plug is too loose or does not make a good connection.
- The plug and receptacle feel hotter than normal during charge.
- The plug pin or receptacle contacts are bent or corroded.
- The plug, receptacle, or cords are cut, worn, have any exposed wires or are damaged in any
way.
• Using the charger with any of the above symptoms could result in a fire, property damage,
personal injury, or death.
1. With the charger DC cord disconnected from the vehicle charger receptacle, connect the AC power supply cord to an AC outlet designed to provide the proper AC voltage for the charger.
2. Connect the charger DC plug to the vehicle charger receptacle located on the seat support panel
(Figure 3-8, Page 3-10). The charger will activate automatically within 2 to 15 seconds after the DC plug
is connected. See following WARNING.
2008 Export Battery Charger Maintenance and Service Manual
Page 3-11
3
3
EXPORT POWERDRIVE BATTERY CHARGER (EXTERNAL)
Charger Installation and Operation
ý WARNING
• Do not rock or bend the DC plug. To connect the charger plug to the vehicle receptacle, grasp
the plug handle and push the plug straight into the receptacle (Figure 3-8, Page 3-10).
3. Monitor the ammeter for the correct charge rate. The initial charge rate will vary from 15 to 19 amps,
depending upon the condition and depth of discharge of the batteries. Slight variations in the initial
charge rate may also result from AC line input voltages that are higher or lower than the nominal input
voltage. Higher AC line voltages increase the initial charge rate while lower AC line voltages reduce the
initial charge rate.
4. Monitor the ammeter. Under normal operating conditions (when the charger is on and the batteries are
discharged), the charger will shut off in order to run a self-diagnostic program (ammeter will drop to zero)
one hour and two hours into the charge cycle. See following NOTE.
NOTE: Batteries should be put on charge at the end of each day even if the vehicle has been used for only
a short amount of time (even if for only 10 minutes).
When air temperatures fall below 65 °F (18.3 °C), batteries charged in unheated areas should be
placed on charge as soon as possible after use. Cold batteries require more time to fully charge.
New batteries will not deliver their full range until the vehicle has been driven and recharged from
20 to 50 times.
Vehicles should be restricted to 40 to 50 energy units of discharge between charges until the batteries have been properly seasoned (20 to 50 charge cycles). For maximum battery life, Club Car
recommends that electric vehicles always be recharged after 40 to 50 energy units of discharge or
each night in order to avoid deep discharging the batteries. Charging between rounds will also
extend battery life; use the CDM (Communication Display Module) (CCI P/N 101831801). See
Communication Display Module (CDM) in Section 11 of the appropriate maintenance and
service manual.
TESTING CHARGER OPERATION
1. With the DC plug disconnected from the vehicle charger receptacle, insert the AC cord into an outlet. The
charger relay should NOT close. A multimeter set to volts DC and connected across the DC plug positive
(+) and negative (–) pins should indicate zero volts. No transformer hum should be heard.
2. Disconnect the AC cord from the wall outlet and connect the DC plug to the receptacle. The charger relay
should close with an audible click after a 2 to 15 second delay. See following NOTE.
NOTE: Monitor the charge cycle to make sure the charger turns off properly. If the charge cycle is interrupted, and the batteries are less than 90% charged, the battery warning light will illuminate intermittently. See Battery Warning Light on page 3-2.
3. If the charger does not operate exactly as described above, refer to the wiring diagram and make sure
that the vehicle is wired correctly (Figure 3-2, Page 3-3 through Figure 3-7, Page 3-8) and that the
internal charger wiring is correct (Figure 3-11, Page 3-13).
DC CORD AND PLUG INSPECTION
The charger cord, plug, and receptacle are wear items and should be inspected daily. Visually inspect them
for cracks, loose connections, and frayed wiring; they must be replaced when worn or damaged. If charger
plug or receptacle show signs of corrosion or the plug is difficult to insert or remove, the receptacle contacts
Page 3-12
2008 Export Battery Charger Maintenance and Service Manual
EXPORT POWERDRIVE BATTERY CHARGER (EXTERNAL)
Charger Installation and Operation
and plug terminals should be cleaned with a good electrical contact cleaner. The plug should then be inserted
and removed several times to ensure ease of insertion, ease of removal, and good electrical contact. See
Charger Receptacle in Section 12 of the appropriate maintenance and service manual for receptacle
removal and installation. See also DC Cord Removal on page 3-30. See following NOTE.
NOTE: If the warning tag has been damaged or removed from the DC cord, have it replaced immediately.
DC CORDSET
DIODES WITH
HEATSINK
RED
RED
BLUE
TAN
BLACK
BLACK
BLACK(1)
BLACK (1)
TAN (2)
BLACK
TAN (1)
BLK
BLACK
BLACK(1)
AC CIRCUIT
BREAKERS
BLACK
BLACK
BLACK
BLACK
BLACK
BLACK
BLACK
TAN (6)
BLACK
BLACK (6)
BLACK (6)
1
2
3
4
5
6
AC VOLTAGE SELECTOR SWITCH
TAN (3)
BLACK
BLK
TERMINAL #
BLACK
BLUE
TAN (5)
CASE
GROUND
TAN (4)
RED
BLUE
BLACK
VOLTAGE
SUPPRESSOR
TAN (6)
TAN (1)
RED
GRN/YEL
FUSE
AMMETER
BROWN
BLUE
BLACK
BLACK
BLACK
A
RELAY
PRIMARY
COIL
TRANSFORMER
7
RED
9
SECONDARY
COIL
BLUE
4
BLUE
B
6
BLACK
AC CORD
BLACK
BROWN
TAN
BLACK
Figure 3-11 PowerDrive Export Charger Wiring Diagram
2008 Export Battery Charger Maintenance and Service Manual
Page 3-13
3
3
EXPORT POWERDRIVE BATTERY CHARGER (EXTERNAL)
Checking Battery Condition After a Charge Cycle
CHECKING BATTERY CONDITION AFTER A CHARGE CYCLE
See General Warning, Section 1, Page 1-1. See additional WARNING on page 3-1.
It is common practice for technicians to check the condition of a set of batteries after they have been charged
to ensure they have received a complete charge before the vehicle is used. With the PowerDrive battery
charger this practice is not necessary. The onboard computer controls and monitors the charge cycle. If any
problem occurs during a charge cycle, the battery warning light, located above the steering column in the center dash panel, will illuminate intermittently.
If the battery warning light is illuminated after a charge cycle, refer to the troubleshooting chart. See Troubleshooting on page 3-14. If the specified test procedures identify no problems, plug the DC cord into the vehicle and let it charge until the charger shuts off automatically. If a problem is found, correct it and charge the
vehicle. Normal battery voltage near the end of a charge cycle should be approximately 59 to 63 volts DC
while the charger is still operating.
START CHARGE CYCLE
1. Disconnect the DC plug from the vehicle charger receptacle.
2. Wait 20 seconds, then reconnect the DC cord to the vehicle receptacle. See following NOTE.
NOTE: The charger will not operate unless a delay of approximately 20 seconds is observed.
3. Monitor the ammeter for the charge rate. If the batteries are close to being fully charged, the charge cycle
will begin and the charge current will begin to taper within a few minutes.
TROUBLESHOOTING
See General Warning, Section 1, Page 1-1. See additional WARNING on page 3-1.
ý DANGER
• Do not touch any wire or component in the battery charger while AC power is present. Failure
to heed this warning will result in an electric shock.
ý WARNING
• Knowledge of battery charger wiring and component terminology is required before
attempting any repair (Figure 3-11, Page 3-13).
• Prior to servicing the charger, disconnect the AC power supply cord from the wall outlet and
the DC plug from the vehicle charger receptacle.
Use the following Troubleshooting Guide for troubleshooting export PowerDrive external battery chargers
(model numbers 18780-11 and 18780-18). The Troubleshooting Guide encompasses the entire battery
charging circuit. Test procedures specified in the Troubleshooting Guide can be found on the following pages.
Page 3-14
2008 Export Battery Charger Maintenance and Service Manual
EXPORT POWERDRIVE BATTERY CHARGER (EXTERNAL)
Troubleshooting
EXPORT POWERDRIVE BATTERY CHARGER TROUBLESHOOTING GUIDE
SYMPTOM
POSSIBLE CAUSES
CORRECTIVE ACTION
Relay does not close, no transformer
hum and ammeter does not move
Batteries disconnected
Connect batteries. See Figure 3-2,
Page 3-3 through Figure 3-7, Page 3-8
Battery voltage is too low
Test Procedure 1 – Battery Voltage and
DC Plug and Receptacle on page 3-18
Poor connection between plug and
receptacle
Test Procedure 1 – Battery Voltage and
DC Plug and Receptacle on page 3-18
DC plug and cord
Test Procedure 1 – Battery Voltage and
DC Plug and Receptacle on page 3-18
and Test Procedure 5 – Charger DC
Circuit Continuity Test on page 3-23
Onboard computer malfunction
Test Procedure 2 – Onboard Computer on
page 3-21
Gray sense lead fuse is blown (not
applicable to Precedent vehicles)
Test Procedure 1 – Battery Voltage and
DC Plug and Receptacle on page 3-18
Receptacle fuse link is blown (not
applicable to Precedent vehicles)
See Electrical Components section in the
appropriate maintenance and service
manual
Poor connection at 10-gauge black wire or
18-gauge gray wire at the OBC
(applicable to Precedent vehicles only)
Check wire connections
Improper AC outlet voltage
Test Procedure 3 – AC Power and
Continuity Test of AC Circuit on page 3-21
Failed AC plug and cord
Test Procedure 3 – AC Power and
Continuity Test of AC Circuit on page 3-21
Internal AC breaker
Test Procedure 3 – AC Power and
Continuity Test of AC Circuit on page 3-21
Transformer primary coil
Test Procedure 6 – Transformer on
page 3-24
Relay
Test Procedure 8 – Continuity on
page 3-26
Failed ammeter
Replace ammeter
Blown charger fuse
Test Procedure 5 – Charger DC Circuit
Continuity Test on page 3-23
Both diodes failed
Test Procedure 4B – Both Diodes Failed
on page 3-23
Onboard computer malfunction
Test Procedure 2 – Onboard Computer on
page 3-21
Failed transformer or voltage switch
Test Procedure 6 – Transformer on
page 3-24
Failed charger relay
Test Procedure 8 – Continuity on
page 3-26
Diode failed
Test Procedure 4A – Single Diode Failure
on page 3-22
Loose internal fuse connection
Tighten connection
Relay closes with an audible click but
no transformer hum and ammeter does
not move
Relay closes and transformer hums but
ammeter does not move
Relay operates intermittently
Single charger fuse link blows
Troubleshooting Guide continued on next page...
2008 Export Battery Charger Maintenance and Service Manual
Page 3-15
3
3
EXPORT POWERDRIVE BATTERY CHARGER (EXTERNAL)
Troubleshooting
EXPORT POWERDRIVE BATTERY CHARGER TROUBLESHOOTING GUIDE
SYMPTOM
POSSIBLE CAUSES
CORRECTIVE ACTION
Both charger fuse links blow or
receptacle fuse link blows
Battery is wired in reverse polarity
Check vehicle wiring
DC cord is wired in reverse polarity
Check battery charger wiring
Both diodes failed
Test Procedure 4B – Both Diodes Failed
on page 3-23
One diode failed
Test Procedure 4A – Single Diode Failure
on page 3-22
Transformer coil short-circuit failure
Test Procedure 6 – Transformer on
page 3-24
Onboard computer malfunction
Test Procedure 2 – Onboard Computer on
page 3-21
AC power supply was shut off
Test Procedure 3 – AC Power and
Continuity Test of AC Circuit on page 3-21
Onboard computer malfunction
Test Procedure 2 – Onboard Computer on
page 3-21
Batteries may be fully charged
Test Procedure 7 – Battery State of
Charge Test on page 3-25
Onboard computer malfunction
Test Procedure 2 – Onboard Computer on
page 3-21
Extremely discharged batteries or cold
temperature
Recharge batteries
Failed or weak battery
See Batteries section in the appropriate
maintenance and service manual
AC cord is shorted
Test Procedure 8 – Continuity on
page 3-26
Failed transformer or voltage switch
Test Procedure 6 – Transformer on
page 3-24
Incorrect charger wiring
Check battery charger wiring
Incorrect AC voltage selector switch
position
Check switch position for proper incoming
AC voltage selection
AC power interrupted
Test Procedure 3 – AC Power and
Continuity Test of AC Circuit on page 3-21
Onboard computer malfunction
Test Procedure 2 – Onboard Computer on
page 3-21
Charger failure
See Testing Charger Operation on
page 3-12
16 hour time out
See Battery Warning Light on page 3-2
Battery or batteries need to be replaced
See Batteries section in the appropriate
maintenance and service manual
Batteries are getting close to full
discharge capacity
Recharge batteries
Onboard computer malfunction
Test Procedure 2 – Onboard Computer on
page 3-21
Battery or batteries need to be replaced
See Batteries section in the appropriate
maintenance and service manual
Charger output is low
Charger turns off too soon
Charger goes to 16 hour time out
AC line fuse blows or AC circuit
breaker trips
Battery warning light illuminates for
ten seconds, at four second intervals
(with DC charger cord plugged in) (25
seconds, at 10 second intervals for
Precedent vehicles)
Battery warning light illuminates for
ten seconds, at four second intervals
(with DC charger cord disconnected)
(25 seconds, at 10 second intervals for
Precedent vehicles)
Page 3-16
2008 Export Battery Charger Maintenance and Service Manual
EXPORT POWERDRIVE BATTERY CHARGER (EXTERNAL)
Troubleshooting
DIODE AND
HEATSINK
PRIMARY COIL
TRANSFORMER
SECONDARY COIL
AMMETER
21
FUSE AND LENS
ASSEMBLY
9
RELAY
DC CORD
C
lu
b
C
ar
R
13
16
Figure 3-12 PowerDrive Battery Charger (Export) – Exploded View
2008 Export Battery Charger Maintenance and Service Manual
Page 3-17
3
3
EXPORT POWERDRIVE BATTERY CHARGER (EXTERNAL)
Test Procedures
TEST PROCEDURES
See General Warning, Section 1, Page 1-1. See additional WARNING on page 3-1.
INDEX OF TEST PROCEDURES
1. Battery Voltage and DC Plug and Receptacle
2. Onboard Computer
3. AC Power and Continuity Test of AC Circuit
4. Diodes
5. Charger DC Circuit Continuity Test
6. Transformer
7. Battery State of Charge Test
8. Continuity
TEST PROCEDURE 1 – BATTERY VOLTAGE AND DC PLUG AND RECEPTACLE
See General Warning, Section 1, Page 1-1. See additional WARNING on page 3-1.
1. Check the DC plug and the vehicle charger receptacle for damage, dirt, corrosion, or any condition that
might prevent a sound electrical connection.
2. Inspect the receptacle contacts to ensure that they are not damaged and they are firmly seated within the
receptacle.
3. Check the wire connections to the charger receptacle.
3.1. DS, DS Villager 4, Turf 1, Carryall 1, 800, 810, 850 and Limo vehicles: Verify that the 10-gauge
red wire from the charger receptacle is connected to the positive (+) post of battery no. 1
(Figure 3-2, Page 3-3, Figure 3-3, Page 3-4 and Figure 3-7, Page 3-8).
3.2. Make sure the two nuts that secure the two 10-gauge black wires to the receptacle fuse assembly
are tight (Figure 3-13, Page 3-18).
CHARGER RECEPTACLE
GRAY WIRE
FROM COMPUTER
SENSE LEAD
FUSE
Figure 3-13 Receptacle Wire Connections (all vehicles
except Precedent)
3.3. Check the connections of the 18-gauge gray wire from the receptacle to the sense lead fuse, and
from the sense lead fuse to the onboard computer gray wire. See following WARNING.
Page 3-18
2008 Export Battery Charger Maintenance and Service Manual
EXPORT POWERDRIVE BATTERY CHARGER (EXTERNAL)
Test Procedures
ý WARNING
• Do not bypass the sense lead fuse.
3.4. Remove the gray sense lead fuse and check it for continuity with a multimeter set to 200 ohms. The
resistance should be less than 2 ohms.
3.5. Precedent: Verify that the 10-gauge red wire from the charger receptacle is connected to the positive (+) post of battery no. 1 (Figure 3-4, Page 3-5, Figure 3-5, Page 3-6 and Figure 3-6,
Page 3-7).
4. Check battery pack voltage.
4.1. DS, DS Villager 4, 800, 810 and 850: With a multimeter set to 200 volts DC, measure the voltage
of the battery pack between the positive (+) post of battery no. 1 and the negative (–) post of battery
no. 4 (Figure 3-14, Page 3-19).
O
S
N
E
G
P
1
N
E
G
P
O
S
N
2
S
G
O
G
E
S
N
O
P
E
P
3
4
Figure 3-14 DS, DS Villager 4, 800, 810 and 850
Battery Voltage Test
4.2. Turf 1, Carryall 1 and Limo: With a multimeter set to 200 volts DC, measure the voltage of the battery pack between the positive (+) post of battery no. 1 and the negative (–) post of battery no. 6
(Figure 3-15, Page 3-19 and Figure 3-16, Page 3-19).
2
FRONT
OF VEHICLE
FRONT
OF VEHICLE
3
3
4
5
1
5
1
2
6
6
Figure 3-15 Turf 1 and Carryall 1 Battery Voltage Test
4
Figure 3-16 Limo Battery Voltage Test
2008 Export Battery Charger Maintenance and Service Manual
Page 3-19
3
3
EXPORT POWERDRIVE BATTERY CHARGER (EXTERNAL)
Test Procedures
4.3. Style A and B 4 x 12-Volt Precedent only: With a multimeter set to 200 volts DC, measure the
voltage of the battery pack between the positive (+) post of battery no. 1 and the negative (–) post
of battery no. 4 (Figure 3-17, Page 3-20 or Figure 3-18, Page 3-20).
WAVETEK
V
5XL
1000
OFF
V
500
200
200
20
200
2m
2
200
m
20
m
200
m
2000
k
200k
P
WAVETEK
V
O
S
20k
200
A
2k
5XL
1000
OFF
V
500
200
200
20
EG
N
200
EG
N
V
20
m
!
COM
200nA
FUSED
4
200
m
2000
k
!
MAX
1000 --750V
2m
2
200
m
200k
20k
200
1
A
2k
P
O
S
P
O
S
3
2
1
!
V
MAX
1000 --750V
!
COM
FRONT
OF VEHICLE
200nA
2
FUSED
EG
N
EG
N
3
200 DCV SETTING
P
O
S
4
Figure 3-17 Battery Voltage Test – Precedent Style A
Battery Configuration
(Viewed from driver side of vehicle)
1. RED probe to battery no. 1 (+).
2. BLACK probe to battery no. 4 (-).
Figure 3-18 Battery Voltage Test – Precedent Style B
Battery Configuration
(Viewed from driver side of vehicle)
1. RED probe to battery no. 1 (+).
2. BLACK probe to battery no. 4 (-).
4.4. Style C 6 x 8-Volt Precedent only: With a multimeter set to 200 volts DC, measure the voltage of
the battery pack between the positive (+) post of battery no. 1 and the negative (–) post of battery
no. 6 (Figure 3-19, Page 3-20).
WAVETEK
V
5XL
1000
OFF
V
500
200
200
20
200
2m
2
200
m
1
+
20
m
200
m
2000
k
200k
20k
2
V
!
MAX
1000 --750V
3
200
A
2k
!
COM
200nA
FUSED
6
4
5
Figure 3-19 Battery Voltage Test – Precedent Style C
Battery Configuration
(Viewed from driver side of vehicle)
1. RED probe to battery no. 1 (+).
2. BLACK probe to battery no. 6 (-).
5. Normal no-load voltage should be between 50 and 52 volts for fully charged batteries. The voltage of the
battery pack must be over 32 volts DC to allow the onboard computer to close the charger relay. If battery
pack voltage is too low to start charger, temporarily bypass the charger relay. See Charging a Battery
Pack that has Low Voltage on page 3-37.
Page 3-20
2008 Export Battery Charger Maintenance and Service Manual
EXPORT POWERDRIVE BATTERY CHARGER (EXTERNAL)
Test Procedures
TEST PROCEDURE 2 – ONBOARD COMPUTER
See General Warning, Section 1, Page 1-1. See additional WARNING on page 3-1.
1. Select a second charger that is normally connected to another vehicle and is known to operate properly.
Leave the AC cord of the second charger connected to the AC outlet that it normally is connected to. This
will ensure that AC power is present.
2. Check the AC circuit breakers on the front of the charger and reset if necessary.
3. Insert the DC cord from the second charger into the receptacle of the vehicle that is not charging properly.
4. If the second charger fails in the same manner as the first charger, then the vehicle charging circuit is not
functioning properly. See Troubleshooting on page 3-14.
5. Connect the first charger into another vehicle that is known to be functioning properly. If the charger performs as it should, then the charger is not in need of repair.
TEST PROCEDURE 3 – AC POWER AND CONTINUITY TEST OF AC CIRCUIT
See General Warning, Section 1, Page 1-1. See additional WARNING on page 3-1.
1. Disconnect AC cord from the wall outlet and DC plug from the vehicle receptacle.
2. Check the AC circuit breakers on the front of the charger and reset if necessary.
3. Check the AC line fuse or circuit breaker in the storage facility.
4. With a multimeter set to 500 volts AC, check incoming AC voltage. Insert multimeter test probes into AC
wall outlet; voltage should be within the range specified in the following chart. If proper voltage is not
present and the voltage selector switch is set for the correct voltage for your area, have building wiring
checked by a licensed electrical contractor.
SETTING ON AC VOLTAGE
SELECTOR SWITCH
MINIMUM AC VOLTAGE
PERMITTED
MAXIMUM AC VOLTAGE
PERMITTED
100 Volts AC
95
105
200 Volts AC
190
210
220 Volts AC
209
231
240 Volts AC
228
252
5. Check continuity of the AC circuit.
5.1. Remove the charger cover.
5.2. Bypass the relay.
5.2.1. To bypass the relay, locate the black wire that goes from the circuit breaker to terminal 9 on
the relay. Disconnect the black wire from the relay terminal (Figure 3-11, Page 3-13).
5.2.2. Disconnect the brown wire from relay terminal 6.
5.2.3. Use a jumper wire with alligator clips to connect the black wire from relay terminal 9 to the
brown wire from relay terminal 6.
5.2.4. Disconnect the black wire from relay terminal 7.
5.2.5. Disconnect the blue wire from relay terminal 4.
5.2.6. Use a jumper wire with alligator clips to connect the black wire from relay terminal 7 to the
blue wire from relay terminal 4.
5.3. With relay bypassed, there should be continuity across the AC cord blades (Figure 3-20,
Page 3-22).
2008 Export Battery Charger Maintenance and Service Manual
Page 3-21
3
3
EXPORT POWERDRIVE BATTERY CHARGER (EXTERNAL)
Test Procedures
AC plug may have different appearance
depending on geographic region.
Figure 3-20 AC Cord Test
6. If the circuit is not complete, check the wiring of the AC cord (16), transformer primary coil wires (21),
internal AC circuit breakers (13), voltage selector switch (9), and jumper wires (Figure 3-12, Page 3-17).
7. If the charger is wired correctly, check the continuity of the AC cord, transformer primary coil, internal AC
circuit breakers, and the jumper wires individually. See Test Procedure 8 – Continuity on page 3-26.
8. When troubleshooting and repairs are complete, remove the jumper wire and properly connect the relay
wiring. See following WARNING.
ý WARNING
• The relay wiring must be properly connected prior to placing the charger back into normal
service. Failure to remove the jumper wire and properly connect the relay wiring could result
in property damage, severe personal injury, or death.
TEST PROCEDURE 4 – DIODES
Use Test Procedure 4A – Single Diode Failure on page 3-22 for single diode failures and testing of individual
diodes. If both diodes have failed, use Test Procedure 4B – Both Diodes Failed on page 3-23.
Test Procedure 4A – Single Diode Failure
See General Warning, Section 1, Page 1-1. See additional WARNING on page 3-1.
A single diode failure is indicated by the failure of one fuse link (closed circuit diode) or by the charger output
being low (open circuit diode). If a diode has failed, the entire heatsink must be replaced. To check diodes:
1. Disconnect AC cord from the wall outlet and DC plug from the vehicle receptacle.
2. Remove the charger cover.
3. Disconnect one transformer secondary coil wire from the diode terminal (Figure 3-21, Page 3-23).
4. Using a low voltage continuity tester or multimeter set to the diode test function, connect the red (+) test
probe to the diode mounting plate and the black (–) test probe to a diode terminal and note the reading
(Figure 3-21, Page 3-23).
5. Reverse test probes and check each diode again and note the reading (Figure 3-22, Page 3-23). A
diode is designed to conduct current in one direction only. If a diode conducts current (shows continuity)
in both directions, the entire heatsink with diodes must be replaced. If a diode does not conduct current
(does not show continuity) in either direction, the entire heatsink must be replaced.
Page 3-22
2008 Export Battery Charger Maintenance and Service Manual
EXPORT POWERDRIVE BATTERY CHARGER (EXTERNAL)
Test Procedures
Disconnect
secondary
coil lead.
Figure 3-21 Diode Test
Figure 3-22 Diode Test – Probes Reversed
6. On rare occasions, a single fuse link may blow due to excessive heat. This can be caused by a loose
internal fuse connection. Check all three fuse connections inside the charger to be sure they are clean
and tight. The proper tightness for the fuse link connections is 22 in-lb (2.5 N·m).
7. Ensure the charger is wired properly and all connections are clean and tight. See following CAUTION.
CAUT ION
• If connections are not clean and tight, excessive heat will be created and the charger may
become damaged.
Test Procedure 4B – Both Diodes Failed
See General Warning, Section 1, Page 1-1. See additional WARNING on page 3-1.
To check the diodes, use Test Procedure 4A – Single Diode Failure on page 3-22. If both diodes have failed
closed, both charger fuse links will be blown. If both diodes have failed open, the relay will close and the transformer will hum, but the ammeter will not indicate any output and the AC circuit breakers may trip off. If both
diodes have failed open or closed, the entire heatsink must be replaced. To determine why both diodes failed:
1. Check the batteries and the receptacle to ensure that they are wired in the correct polarity (Figure 3-2,
Page 3-3 through Figure 3-7, Page 3-8). Also check the voltage and polarity at the receptacle.
2. Make sure the charger is wired correctly: the DC cord red wire should be connected to the center terminal
of the heatsink, the DC cord blue wire should be connected to the relay coil, and the DC cord black wire
should be connected to the left side of the ammeter (when viewed from inside the charger) (Figure 3-11,
Page 3-13). If a reverse polarity connection is made between the charger and the batteries, both fuse
links will blow when the DC cord is connected to the vehicle, whether or not the AC cord is plugged into
an outlet.
3. On rare occasions, both diodes may fail as a result of a lightning strike at the charging location.
4. Excessive heat due to a loose connection may also cause both fuse links to blow. Be sure fuse connections are tightened to 22 in-lb (2.5 N·m).
5. Ensure that the charger and vehicle are wired properly and all connections are clean and tight.
TEST PROCEDURE 5 – CHARGER DC CIRCUIT CONTINUITY TEST
See General Warning, Section 1, Page 1-1. See additional WARNING on page 3-1.
2008 Export Battery Charger Maintenance and Service Manual
Page 3-23
3
3
EXPORT POWERDRIVE BATTERY CHARGER (EXTERNAL)
Test Procedures
1. Disconnect AC cord from the wall outlet and DC plug from the vehicle receptacle.
2. Using a continuity tester (CCI P/N 1011273) or multimeter (CCI P/N 1011480) set to 200 ohms, connect
the test probes to the pins marked (+) and (–) on the DC plug (Figure 3-23, Page 3-24). Note the reading.
3. Reverse the test probes and check the DC plug again (Figure 3-24, Page 3-24). The circuit should show
continuity in only one direction.
4. If the circuit does not show continuity in either direction and the charger fuse is not blown, individually
check all connections and the continuity of the DC cord and ammeter. See Test Procedure 8 – Continuity on page 3-26. Also check the diodes (heatsink). See Test Procedure 4 – Diodes on page 3-22.
POSITIVE PIN
POSITIVE PIN
PULL HERE
PULL HERE
NEGATIVE PIN
NEGATIVE PIN
Figure 3-23 DC Plug Test
Figure 3-24 DC Plug Test – Reversed Probes
5. If the circuit shows continuity in both directions, a short circuit exists in the charger DC circuit, usually
caused by failed diodes. See Test Procedure 4 – Diodes on page 3-22. If diodes have not failed, check
the DC cord for a short circuit. See Test Procedure 8 – Continuity on page 3-26.
6. Remove the DC cord blue wire from the red wire connected to the charger relay and check continuity
between the positive and negative pins and middle pin on the DC plug (Figure 3-11, Page 3-13). There
should be no continuity.
TEST PROCEDURE 6 – TRANSFORMER
See General Warning, Section 1, Page 1-1. See additional WARNING on page 3-1.
Failure of the transformer may be caused by aging or a short circuit in adjacent coil turns. If the transformer
has failed, the ammeter will indicate low output or no output; however, the transformer may hum. A blown AC
line fuse or tripped AC circuit breaker in the charger or the storage facility may be caused by an improperly
wired charger, an improper setting of the AC voltage selector switch, or a failed transformer.
An AC circuit test should be done before performing this test procedure to ensure the continuity of the AC
cord, internal AC circuit breakers, and charger wiring. See Test Procedure 3 – AC Power and Continuity
Test of AC Circuit on page 3-21.
1. Disconnect AC cord from the wall outlet and DC plug from the vehicle receptacle.
2. Remove the charger cover.
3. Disconnect transformer secondary coil wires from the heatsink (Figure 3-25, Page 3-25).
4. To apply AC power directly to the transformer primary coil, bypass the relay. See Charging a Battery
Pack that has Low Voltage on page 3-37. See following DANGER.
Page 3-24
2008 Export Battery Charger Maintenance and Service Manual
EXPORT POWERDRIVE BATTERY CHARGER (EXTERNAL)
Test Procedures
ý DANGER
• Do not touch any wire or component in the battery charger while AC power is present. Failure
to heed this warning will result in an electric shock.
5. Make sure that the voltage selector switch (on the back of the charger) is set for the appropriate incoming
AC voltage. Also ensure that the secondary coil wires are not touching one another. With the relay
bypassed, insert the AC plug into an outlet.
Figure 3-25 Remove Secondary Coil Wires
From Heatsink
6. If the AC line fuse does not blow or the AC circuit breaker does not trip, check the transformer secondary
coil voltage.
7. Disconnect AC cord from the wall outlet.
8. Using alligator clips and a multimeter set to 500 volts AC, connect the multimeter probes to the secondary transformer coil wires.
9. Connect the AC cord to the wall outlet and monitor the multimeter for the secondary coil voltage. If measured voltage is approximately 85 volts AC or lower for the secondary coil, the transformer is shorted
internally and must be replaced.
10. If the voltage reading is normal (86 volts AC or higher), the transformer is operational. Disconnect the AC
plug from the wall receptacle and check the continuity of the DC circuit. See Test Procedure 5 –
Charger DC Circuit Continuity Test on page 3-23.
11. When troubleshooting and repairs are complete, remove jumper wire and properly connect relay wiring.
See following WARNING.
ý WARNING
• The relay wiring must be properly connected prior to placing the charger back into normal
service. Failure to remove the jumper wire and properly connect the relay wiring could result
in property damage, severe personal injury, or death.
TEST PROCEDURE 7 – BATTERY STATE OF CHARGE TEST
See General Warning, Section 1, Page 1-1. See additional WARNING on page 3-1.
2008 Export Battery Charger Maintenance and Service Manual
Page 3-25
3
3
EXPORT POWERDRIVE BATTERY CHARGER (EXTERNAL)
Test Procedures
1. With the batteries fully charged, disconnect the DC charger plug for approximately 20 seconds and
reconnect it. The ammeter should jump to a reading between 14 and 18 amps and taper to below 5 amps
within 15 minutes.
2. If the charger does not taper to below 5 amps within 15 minutes, batteries may not be receiving a full
charge and the onboard computer should be checked. See Test Procedure 2 – Onboard Computer on
page 3-21. See following NOTE.
NOTE: Batteries near the end of their useful lives may not allow the battery charge current to taper below
5 amps. See Section 13 – Batteries in the appropriate maintenance and service manual.
TEST PROCEDURE 8 – CONTINUITY
See General Warning, Section 1, Page 1-1. See additional WARNING on page 3-1.
AC Cord
1. Disconnect AC cord from the wall outlet and DC plug from the vehicle receptacle.
2. Remove the charger cover.
3. Disconnect green/yellow wire (2) from charger case and position it so it does not touch any metal part
of the charger (Figure 3-26, Page 3-26).
4. Disconnect brown wire (1) of AC cord from charger relay terminal 6.
5. Disconnect the blue wire (4) from the charger relay terminal 4.
6. Using a multimeter set for 200 ohms, place the red (+) probe on the terminal at the end of the brown wire
(1). Test for continuity on each of the flat blades and on the round pin of the AC plug. The tester should
indicate continuity on one flat blade only. If any other reading is obtained, the AC cord and plug must be
replaced.
7. Place the red (+) probe on the end of the green/yellow wire (2) and with the black (–) probe check for continuity on both flat blades and on the ground pin of the AC plug. The tester should indicate continuity on
only the ground pin. If any other reading is obtained, the AC cord and plug must be replaced.
8. Place red (+) probe on the blue wire and check for continuity on both flat blades and on the round pin of
the AC plug. The tester should indicate continuity on only one flat blade. If any other reading is obtained,
the AC cord and plug must be replaced.
4
WAVETEK
V
3
5XL
1000
OFF
V
500
200
200
20
200
2m
2
200
m
20
m
200
m
2000
k
200k
20k
200
A
2k
2
1
V
!
MAX
1000 --750V
!
COM
200nA
FUSED
200 OHM SETTING
AC plug may have different appearance
depending on geographic region.
Figure 3-26 AC Plug
Page 3-26
2008 Export Battery Charger Maintenance and Service Manual
EXPORT POWERDRIVE BATTERY CHARGER (EXTERNAL)
Test Procedures
DC Cord
1. Disconnect AC cord from the wall outlet and DC plug from the vehicle receptacle.
2. Remove the charger cover.
3. To check the continuity of the DC cord, disconnect the black wire of the DC cord from the ammeter
(Figure 3-27, Page 3-27).
4. Disconnect the red wire of the DC cord from the heatsink.
5. Disconnect the blue wire from the red wire assembly that connects to the charger relay.
6. Place the clip of the continuity tester on the red wire of the DC cord.
7. Place the continuity test probe on the positive (+) pin of the DC plug (positive (+) and negative (–) pins
are identified on the plug). If tester does not indicate continuity, the DC cord must be replaced.
8. Place the continuity test probe on the negative (–) pin of the DC plug. The tester should indicate no continuity. If tester indicates continuity, the DC cord must be replaced.
9. Place the continuity test probe on the unmarked (middle) pin of the DC plug. The tester should indicate
no continuity. If tester indicates continuity, the DC cord must be replaced.
10. Move the continuity tester clip to the black wire of the DC cord.
11. Place the continuity test probe on the negative (–) pin of the DC plug. The tester should indicate continuity. If tester does not indicate continuity, the DC cord must be replaced.
12. Place the continuity test probe on the unmarked (middle) pin of the DC plug. The tester should indicate
no continuity. If tester indicates continuity, the DC cord must be replaced.
13. Move continuity test probe to the blue wire of the DC cord. Check for continuity at the middle pin. The
tester should indicate continuity. If tester does not indicate continuity, replace DC cord.
DC CORD BLUE WIRE TO
BLUE WIRE OF VOLTAGE
SUPPRESSOR ASSEMBLY
CONNECTED TO RELAY
DC CORD
BLACK WIRE
TO AMMETER
DC CORD
RED WIRE
TO HEAT SINK
Figure 3-27 DC Cord
2008 Export Battery Charger Maintenance and Service Manual
Page 3-27
3
EXPORT POWERDRIVE BATTERY CHARGER (EXTERNAL)
Test Procedures
Transformer
The PowerDrive battery charger transformer has two sets of coils: a primary coil and a secondary coil
(Figure 3-11, Page 3-13).
Primary Coil
1. Disconnect AC cord from the wall outlet and DC plug from the vehicle receptacle.
2. Remove the charger cover.
3. Disconnect the black wires marked 1 and 6 from the AC circuit breakers.
4. Disconnect the wires marked 2, 3, 4 and 5 from the voltage selector switch.
5. Place the continuity tester probes on the primary coil transformer wires disconnected above in pairs until
all of the combinations in the following chart have been tested.
6. If the continuity readings agree with the chart, replace the voltage selector switch. If the continuity readings differ from the chart, replace the transformer.
PRIMARY COIL CONTINUITY / NO CONTINUITY CHART
NEGATIVE PROBE
1
1
POSITIVE PROBE
3
2
3
4
5
6
Continuity
Continuity
No
Continuity
No
Continuity
No
Continuity
Continuity
No
Continuity
No
Continuity
No
Continuity
No
Continuity
No
Continuity
No
Continuity
Continuity
Continuity
2
Continuity
3
Continuity
Continuity
4
No
Continuity
No
Continuity
No
Continuity
5
No
Continuity
No
Continuity
No
Continuity
Continuity
6
No
Continuity
No
Continuity
No
Continuity
Continuity
Continuity
Continuity
Secondary Coil
1. Disconnect AC cord from the wall outlet and DC plug from the vehicle receptacle.
2. Remove the charger cover.
3. Remove the transformer (tan) secondary coil wire from the upper terminal of the heatsink (Figure 3-11,
Page 3-13).
4. Remove the other transformer (tan) secondary coil wire from the bottom terminal of the heatsink and
place the continuity test clip on the ammeter buss bar (Figure 3-12, Page 3-17). Test for continuity
between the buss bar and each of the secondary coil wires (tan). The tester should indicate continuity
on both secondary coil wires. If tester does not indicate continuity on both secondary coil wires, replace
transformer. Ensure that the fuse is intact and not blown.
Page 3-28
2008 Export Battery Charger Maintenance and Service Manual
EXPORT POWERDRIVE BATTERY CHARGER (EXTERNAL)
Test Procedures
Voltage Suppressor – Failed Closed
1. Disconnect AC cord from the wall outlet and DC plug from the vehicle receptacle.
2. Remove the charger cover.
3. Using a multimeter set to the diode test function (
ç), place the black (–) probe of the multimeter on the
sense lead pin (short pin) of the DC plug. Place the red (+) probe on the positive (+) pin of the DC plug.
The multimeter should indicate no tone. If a tone is emitted (indicating a closed circuit) then the voltage
suppressor has failed and should be replaced. See following NOTE.
NOTE: All vehicles except Precedent: Repeated failure of sense lead fuses is a symptom of a voltage
supressor that has failed in a closed condition.
Precedent vehicles only: Failure of the onboard computer due to a blown internal sense lead
fuse is a symptom of a voltage supressor that has failed in a closed condition.
Relay
1. Disconnect AC cord from the wall outlet and DC plug from the vehicle receptacle.
2. Remove the charger cover.
3. Remove the brown wire from terminal 6 of the relay and black wire from terminal 9 of the relay
(Figure 3-11, Page 3-13). Place continuity tester leads on terminals 6 and 9 of the relay. The tester
should indicate no continuity. If tester indicates continuity, the relay contacts have failed closed and the
relay must be replaced.
4. Remove the blue wire from terminal 4 of the relay and black wire from terminal 7 of the relay
(Figure 3-11, Page 3-13). Place continuity tester leads on terminals 4 and 7 of the relay. The tester
should indicate no continuity. If tester indicates continuity, the relay contacts have failed closed and the
relay must be replaced.
5. With batteries connected, insert the DC plug into a receptacle. The tester should indicate continuity on
terminals 6 and 9 and continuity on relay terminals 4 and 7. If tester does not indicate continuity on both
sets of contacts, the relay must be replaced.
Ammeter
1. Disconnect AC cord from the wall outlet and DC plug from the vehicle receptacle.
2. Remove the charger cover.
3. Disconnect the black wire from the left ammeter post (as viewed from inside the charger).
4. Place the continuity tester clip on one of the ammeter posts.
5. Place the continuity test probe on the other ammeter post. The tester should indicate continuity. If the
tester does not indicate continuity, replace the ammeter.
AC Circuit Breaker
1. Disconnect AC cord from the wall outlet and DC plug from the vehicle receptacle.
2. Remove the charger cover.
3. Disconnect the wires from the AC circuit breaker.
4. Place the continuity test probes on the two terminals of the AC circuit breaker. The tester should indicate
continuity. If the tester does not indicate continuity, replace the AC circuit breaker.
2008 Export Battery Charger Maintenance and Service Manual
Page 3-29
3
3
EXPORT POWERDRIVE BATTERY CHARGER (EXTERNAL)
Charger Repairs
CHARGER REPAIRS
See General Warning, Section 1, Page 1-1. See additional WARNING on page 3-1.
ý WARNING
• Knowledge of battery charger wiring and component terminology is required before
attempting any repair (Figure 3-11, Page 3-13).
• Prior to servicing the charger, disconnect the AC power supply cord from the wall outlet and
the DC plug from the vehicle charger receptacle.
DC CORD
See General Warning, Section 1, Page 1-1. See additional WARNING on page 3-1.
DC Cord Removal
1. Disconnect AC cord from the wall outlet and DC plug from the vehicle receptacle. See preceding
WARNING.
2. Remove the charger cover.
3. Remove the DC cord black wire (4) from the ammeter by loosening the nut (1). Support the terminal as
the nut is loosened to prevent rotation of the connection (Figure 3-28, Page 3-30).
4. Remove nut attaching the red wire (6) of the charger DC cord to the heatsink.
5. Disconnect the DC cord blue wire from the blue wire of the voltage suppressor assembly connected to
the relay (coil) terminal (Figure 3-27, Page 3-27).
6. Remove wire ties securing the blue wire to the black transformer wire. Note the location of the wire ties.
7. Using pliers, squeeze the strain relief bushing and remove the DC cord.
1
4
2
3
6
Figure 3-28 DC Cord Replacement
DC Cord Installation
1. Insert the leads of the new DC cord through the hole in the charger base.
2. Attach the red wire of the new DC cord to the center terminal of the heatsink and tighten the nut to 18
in-lb (2.0 N·m) (Figure 3-27, Page 3-27).
Page 3-30
2008 Export Battery Charger Maintenance and Service Manual
EXPORT POWERDRIVE BATTERY CHARGER (EXTERNAL)
Charger Repairs
3. Attach the blue wire of the new DC cord to the blue wire of the voltage suppressor assembly connected
to the relay (coil) terminal.
4. Attach the black wire (4) of the new DC cord to ammeter. Install nut (1) onto post of ammeter slightly more
than finger tight. While holding the inside nut (2), tighten the outside nut (1) 1/4 turn (Figure 3-28,
Page 3-30). See following CAUTION.
CAUT ION
• Do not allow ammeter post to rotate as the nut is tightened. Rotation of the post could result
in a damaged ammeter.
5. Using pliers, put the strain relief bushing on the cord and insert it into the charger base.
6. Secure the blue wire to the black wire in the locations noted in step 6 of DC Cord Removal.
7. Tie the wires together as they were before the wire tie was removed. See following WARNING.
ý WARNING
• Make sure wiring is properly routed and secured. Failure to properly route and secure wiring
could result in charger malfunction, property damage, or severe personal injury.
8. Position the charger cover on the base. Install the mounting screws, starting with the bottom holes.
Tighten the screws to 11 in-lb (1.2 N·m).
HEATSINK
See General Warning, Section 1, Page 1-1. See additional WARNING on page 3-1.
Heatsink Removal
1. Disconnect AC cord from the wall outlet and DC plug from the vehicle receptacle. See WARNING on
page 3-30.
2. Remove the charger cover.
3. Remove both secondary coil transformer wires (tan) from the heatsink (Figure 3-11, Page 3-13 and
Figure 3-12, Page 3-17).
4. Remove the two red wires from the heatsink.
5. Remove the nuts and bolts that secure the heatsink to the case.
Heatsink Installation
1. Place heatsink against charger base. Make sure clear plastic insulator sheet is between the heatsink and
the charger base. Install the nuts and bolts that secure the heatsink to the case. Tighten the bolts to 22
in-lb (2.5 N·m) (Figure 3-11, Page 3-13 and Figure 3-12, Page 3-17).
2. Connect the red wire from the DC cord and the red wire from the charger relay to the center terminal post
on the heatsink. Tighten nut to 18 in-lb (2.0 N·m).
3. Connect one of the secondary coil transformer wires (tan) to the bottom terminal post of the heatsink.
Tighten nut to 18 in-lb (2.0 N·m).
4. Connect the other secondary coil transformer wire (tan) to the top terminal post of the heatsink. Tighten
nut to 18 in-lb (2.0 N·m).
5. Install the charger cover and check charger for proper operation.
2008 Export Battery Charger Maintenance and Service Manual
Page 3-31
3
3
EXPORT POWERDRIVE BATTERY CHARGER (EXTERNAL)
Charger Repairs
TRANSFORMER
See General Warning, Section 1, Page 1-1. See additional WARNING on page 3-1.
Transformer Removal
1. Disconnect AC cord from the wall outlet and DC plug from the vehicle receptacle. See WARNING on
page 3-30.
2. Remove the charger cover.
3. Note the locations of wire ties and remove the wire ties.
4. Disconnect the black primary coil leads from the AC circuit breakers and the voltage selector switch
(Figure 3-11, Page 3-13 and Figure 3-12, Page 3-17).
5. Disconnect the two tan secondary coil transformer wires from heatsink.
6. Disconnect the two black secondary coil transformer wires from the fuse.
7. Remove the four bolts and nuts that mount the transformer to the case and remove the transformer.
Transformer Installation
1. Install the transformer with the secondary coil to the rear of the charger case. Tighten the four bolts and
nuts to 28 in-lb (3.2 N·m) (Figure 3-12, Page 3-17).
2. Connect one secondary coil transformer wire (black) to one terminal of the fuse. Tighten nut to 22 in-lb
(2.5 N·m).
3. Connect the other secondary coil transformer wire (black) to the remaining terminal of the fuse. Tighten
nut to 22 in-lb (2.5 N·m).
4. Connect one secondary coil transformer wire (tan) to the top terminal post of the heatsink. Tighten nut
to 18 in-lb (2.0 N·m).
5. Connect the other secondary coil transformer wire (tan) to the bottom terminal post of the heatsink.
Tighten nut to 18 in-lb (2.0 N·m).
6. Connect the black primary coil transformer wire marked 1 to the top terminal of the top AC circuit breaker.
7. Connect the black primary coil transformer wire marked 6 to the top terminal of the bottom AC circuit
breaker.
8. Connect each of the remaining black primary coil transformer wires marked 2, 3, 4, and 5 to the corresponding terminals marked on the voltage selector switch.
9. Set the voltage selector switch to the appropriate voltage matching the incoming AC electrical service
that will be used to power the charger.
10. Tie the wires together as they were before the wire tie was removed. See following WARNING.
ý WARNING
• Make sure wiring is properly routed and secured. Failure to properly route and secure wiring
could result in charger malfunction, property damage, or severe personal injury.
11. Install the charger cover and check charger for proper operation.
Page 3-32
2008 Export Battery Charger Maintenance and Service Manual
EXPORT POWERDRIVE BATTERY CHARGER (EXTERNAL)
Charger Repairs
AMMETER
See General Warning, Section 1, Page 1-1. See additional WARNING on page 3-1.
Ammeter Removal
1. Disconnect AC cord from the wall outlet and DC plug from the vehicle receptacle. See WARNING on
page 3-30.
2. Remove the charger cover.
3. Using two wrenches to prevent the posts from turning, disconnect the DC cord black wire (5) and buss
bar (3) from the ammeter (Figure 3-29, Page 3-33).
4. Remove the two nuts (2) that secure the ammeter to the charger face.
5. Remove the ammeter from the face of the charger.
5
2
1
4
3
Figure 3-29 Ammeter
Ammeter Installation
1. Place the ammeter in position in the charger face (Figure 3-29, Page 3-33).
2. Install the nuts (2) and tighten until ammeter is firmly secured.
3. Connect the DC cord black wire (5) to the left (as viewed from inside the charger) post of the ammeter.
4. Connect the buss bar (3) from the fuse link to the right post of the ammeter. Place flat washers on both
sides of the buss bar.
5. Thread nuts (4) onto both posts of the ammeter until just past finger tight. While holding the inside nut,
tighten the outside nut 1/4 turn. See following CAUTION.
CAUT ION
• Do not allow ammeter post to rotate as the nut is tightened. Rotation of the post could result
in a damaged ammeter.
6. Install the charger cover.
7. Plug the charger into the vehicle and check ammeter for proper operation.
2008 Export Battery Charger Maintenance and Service Manual
Page 3-33
3
3
EXPORT POWERDRIVE BATTERY CHARGER (EXTERNAL)
Charger Repairs
FUSE LINK
See General Warning, Section 1, Page 1-1. See additional WARNING on page 3-1.
Fuse Link Removal
1. Disconnect AC cord from the wall outlet and DC plug from the vehicle receptacle. See WARNING on
page 3-30.
2. Remove the charger cover.
3. Remove both black secondary coil transformer wires and the buss bar (3) from the back of the fuse link
assembly (Figure 3-29, Page 3-33).
4. Remove screws from the front of the charger and remove the fuse link assembly.
Fuse Link Installation
1. Place clear plastic cover over fuse assembly and install mounting screws from front of charger face. The
center branch of the fuse assembly should be in the upper left corner when viewed from the front of the
charger.
2. Install the buss bar (3) over the center branch of the fuse assembly and ammeter post (Figure 3-29,
Page 3-33). Tighten to 22 in-lb (2.5 N·m).
3. Install a secondary coil transformer wire (black) onto one of the two remaining terminals on the back of
the fuse assembly. Install the remaining secondary coil transformer wire (black) onto the remaining terminal. Tighten to 22 in-lb (2.5 N·m).
4. Install the charger cover.
VOLTAGE SUPPRESSOR
See General Warning, Section 1, Page 1-1. See additional WARNING on page 3-1.
The voltage suppressor, which is incorporated into a wire assembly in the charger, protects the onboard computer by capturing very high, but very brief voltage spikes which occur due to the collapse of the electrical field
in the charger relay when the charger is disconnected from the vehicle. See Test Procedure 8 – Continuity
on page 3-26.
Voltage Suppressor Removal
1. Disconnect AC cord from the wall outlet and DC plug from the vehicle receptacle. See WARNING on
page 3-30.
2. Remove the charger cover.
3. Remove nut attaching voltage suppressor (18-gauge red wire) to heatsink.
4. Disconnect blue wire to DC cord at quick disconnect terminal.
5. Disconnect the voltage suppressor wire assembly from charger relay.
Voltage Suppressor Installation
Install in reverse order of removal. Tighten nut attaching voltage suppressor (18-gauge red wire) to heatsink
to 18 in-lb (2.0 N·m).
Page 3-34
2008 Export Battery Charger Maintenance and Service Manual
EXPORT POWERDRIVE BATTERY CHARGER (EXTERNAL)
Charger Repairs
CHARGER RELAY
See General Warning, Section 1, Page 1-1. See additional WARNING on page 3-1.
Charger Relay Removal
1. Disconnect AC cord from the wall outlet and DC plug from the vehicle receptacle. See WARNING on
page 3-30.
2. Remove the charger cover.
3. Disconnect all wires from the relay (Figure 3-30, Page 3-35).
4. Remove the two screws and nuts attaching relay to relay mounting bracket (Figure 3-30, Page 3-35).
5. Remove the relay.
AC CORD
CHARGER
RELAY
AC CIRCUIT
BREAKERS
Figure 3-30 Charger Relay
Charger Relay Installation
Install in reverse order of removal. Connect wires as shown (Figure 3-11, Page 3-13). Tighten hardware
securing relay to relay mounting bracket to 18 in-lb (2.0 N·m).
CHARGER AC CIRCUIT BREAKERS
See General Warning, Section 1, Page 1-1. See additional WARNING on page 3-1.
AC Circuit Breaker Removal
1. Disconnect AC cord from the wall outlet and DC plug from the vehicle receptacle. See WARNING on
page 3-30.
2. Remove the charger cover.
3. Disconnect the two black wires attached to top circuit breaker (Figure 3-11, Page 3-13).
4. Disconnect the two black wires attached to bottom circuit breaker.
5. With a pair of pliers, squeeze in the retaining tabs on the sides of the top AC circuit breaker and remove
the circuit breaker through the mounting hole in the face of the charger.
6. Repeat step 5 for the removal of the bottom circuit breaker.
AC Circuit Breaker Installation
Install in reverse order of removal.
2008 Export Battery Charger Maintenance and Service Manual
Page 3-35
3
3
EXPORT POWERDRIVE BATTERY CHARGER (EXTERNAL)
Charger Repairs
CHARGER AC CORD
See General Warning, Section 1, Page 1-1. See additional WARNING on page 3-1.
AC Cord Removal
1. Disconnect AC cord from the wall outlet and DC plug from the vehicle receptacle. See WARNING on
page 3-30.
2. Remove the charger cover.
3. Disconnect the brown wire from the AC cord from terminal 6 at the relay (Figure 3-11, Page 3-13).
4. Disconnect the blue wire from the AC cord from terminal 4 at the relay (Figure 3-11, Page 3-13).
5. Disconnect the AC cord green/yellow wire at the charger base (Figure 3-11, Page 3-13).
6. Use a pair of pliers to grip the strain relief bushing and remove it and the AC cord from the charger.
AC Cord Installation
1. Insert the brown, blue, and green/yellow leads of the new AC cord into the charger through the hole in
the charger face (Figure 3-11, Page 3-13).
2. Connect the brown wire to terminal 6 at the charger relay, the blue wire to terminal 4 at the charger relay,
and the green/yellow wire to the charger base. Tighten the screw on the green/yellow wire terminal to 18
in-lb (2.0 N·m). (Figure 3-11, Page 3-13).
3. Position the strain relief bushing on the AC cord.
4. Using pliers, install the strain relief bushing and AC cord into the mounting hole in the charger face.
5. Install the charger cover.
Page 3-36
2008 Export Battery Charger Maintenance and Service Manual
EXPORT POWERDRIVE BATTERY CHARGER (EXTERNAL)
Charging a Battery Pack that has Low Voltage
CHARGING A BATTERY PACK THAT HAS LOW VOLTAGE
See General Warning, Section 1, Page 1-1. See additional WARNING on page 3-1.
If battery pack voltage is below 34 volts, the charger will not activate. The charger relay will have to be
bypassed to activate the charger. See following WARNING.
ý WARNING
• Knowledge of battery charger wiring and component terminology is required before
attempting any repair (Figure 3-11, Page 3-13).
• Prior to servicing the charger, disconnect the AC power supply cord from the wall outlet and
the DC plug from the vehicle charger receptacle.
1. Turn key switch OFF and place the Forward/Reverse handle in the NEUTRAL position. Leave the batteries connected.
2. Disconnect AC cord from the wall outlet and DC plug from the vehicle receptacle.
3. Remove the charger cover.
4. To apply AC power directly to the transformer primary coil, the relay must be bypassed.
4.1. To bypass the relay, locate the black wire that goes from the circuit breaker to terminal 9 on the
relay. Disconnect the black wire from the relay terminal (Figure 3-31, Page 3-38).
4.2. Disconnect the brown wire from relay terminal 6.
4.3. Use a jumper wire with alligator clips to connect the black wire from relay terminal 9 to the brown
wire from relay terminal 6 (Figure 3-31, Page 3-38).
4.4. Disconnect the black wire from relay terminal 7.
4.5. Disconnect the blue wire from relay terminal 4.
4.6. Use a jumper wire with alligator clips to connect the black wire from relay terminal 7 to the blue wire
from relay terminal 4 (Figure 3-11, Page 3-13). See following DANGER.
ý DANGER
• Do not touch any wire or component in the battery charger while AC power is present. Failure
to heed this warning will result in an electric shock.
5. Plug the DC cord into the charger receptacle first, then plug the AC cord into an electrical outlet.
6. The charger should activate and begin to charge the batteries. Allow the charger to operate for one or
two hours. See following WARNING.
ý WARNING
• Do not leave the vehicle unattended while it is charging. A charger operating with a bypassed
relay could short circuit and possibly cause a fire.
7. After one or two hours, disconnect the charger AC cord from the electrical outlet first. Then disconnect
the DC cord from the charger receptacle in the vehicle.
8. Disconnect the jumper wires from the relay wires and connect each wire to the original terminal on the
relay (Figure 3-31, Page 3-38). See following WARNING.
2008 Export Battery Charger Maintenance and Service Manual
Page 3-37
3
EXPORT POWERDRIVE BATTERY CHARGER (EXTERNAL)
Charging a Battery Pack that has Low Voltage
ý WARNING
• The relay wiring must be properly connected prior to placing the charger back into normal
service. Failure to remove the jumper wire and properly connect the relay wiring could result
in property damage, severe personal injury, or death.
9. Install the charger cover and the retaining screws.
10. Plug the DC cord into the charger receptacle, then plug the AC cord into an electrical outlet.
11. Allow the charger to continue charging the batteries until the charger shuts off automatically.
12. When the charge cycle is complete, test the batteries again. If the battery pack voltage is above 34 volts
and the vehicle will not operate, it will be necessary to troubleshoot the vehicle’s electrical system to
determine which electrical component has failed. See Section 11 – Electrical System and Testing in
the appropriate maintenance and service manual.
DC CORDSET
DIODES WITH
HEATSINK
RED
RED
BLUE
TAN
BLACK
BLACK
BLACK(1)
BLACK (1)
BLACK
BLACK
BLACK
BLACK
BLACK
BLACK
TAN (1)
BLK
BLACK
BLACK(1)
AC CIRCUIT
BREAKERS
BLACK
BLACK
TAN (6)
BLACK
BLACK (6)
BLACK (6)
Figure 3-31 Export PowerDrive Charger Wiring Diagram (Relay Bypassed)
Page 3-38
2008 Export Battery Charger Maintenance and Service Manual
1
2
3
4
5
6
AC VOLTAGE
SELECTOR SWITCH
TAN (2)
BLACK
BLK
TERMINAL #
TAN (3)
BLUE
BLACK
RED
BLUE
CASE
GROUND
TAN (5)
VOLTAGE
SUPPRESSOR
TAN (4)
TAN (1)
RED
GRN/YEL
TAN (6)
BROWN
BLUE
FUSE
AMMETER
BLACK
A
RELAY
PRIMARY
COIL
BLACK
BLACK
BLACK
7
RED
9
SECONDARY
COIL
RELAY BYPASS
JUMPER WIRE
BLUE
4
BLUE
B
6
BLACK
AC CORD
BLACK
RELAY BYPASS
JUMPER WIRE
TRANSFORMER
TAN
BLACK
BROWN
3
SECTION 4 – EXPORT POWERDRIVE CHARGER
(ONBOARD)
ý DANGER
• See General Warning, Section 1, Page 1-1.
ý WARNING
• See General Warning, Section 1, Page 1-1.
GENERAL INFORMATION
This section includes information pertaining to service of the Export onboard PowerDrive battery charger.
Model number 17790-10 is used on the DS Villager 4. Model number 17790-40 is used on Precedent golf
cars. Depending on the geographic region, the charger provided with your vehicle may be a different model.
Do not attempt to service a battery charger that has not been properly identified. If a charger cannot be properly identified, contact your local Club Car dealer or distributor.
For battery chargers with model numbers listed above that are installed in vehicles other than DS and Precedent vehicles, contact your local Club Car dealer or distributor.
The PowerDrive battery charger is automatic and has no external controls (Figure 4-1, Page 4-1). When the
AC cord is plugged in, there is a 2 to 15 second delay before charging begins. The onboard computer (OBC)
records the amount of energy consumed as the vehicle is used, then directs the charger to replace exactly the
amount of energy needed to fully replenish the batteries. The charger shuts off automatically, preventing the
possibility of either undercharging or overcharging. See following NOTE.
NOTE: At one hour and at two hours into the charge cycle, the charger will shut off in order to run a selfdiagnostic program (ammeter will drop to zero). Charging will resume in a few moments (ammeter
returns to previous rate of charge).
C
lu
b
C
ar
Figure 4-1 Export PowerDrive Onboard Battery
Charger
2008 Export Battery Charger Maintenance and Service Manual
Page 4-1
4
4
EXPORT POWERDRIVE CHARGER (ONBOARD)
The Charge Circuit
POWERDRIVE ONBOARD CHARGER FEATURES
• Charge Interlock: When the AC power cord is inserted into a wall receptacle, the onboard computer
locks out the vehicle’s drive system. This prevents the possibility of driving the vehicle while the
charger is plugged in and potentially damaging the vehicle and charger.
• Long-Term Storage Charge: PowerDrive chargers are designed to be left connected with AC power
to the charger, during off-season or long-term storage. The onboard computer will automatically activate the charger every 15 days. To return the vehicle to service, disconnect the AC cord from the wall
outlet, wait 15 seconds and then plug the AC cord back in. The charger will activate. Allow the vehicle
to complete one full charge cycle before putting it into service.
BATTERY WARNING LIGHT
The 48-volt electric vehicle features a dash-mounted battery warning light that alerts the operator to any problems with the batteries or charging system. The battery warning light is controlled by the onboard computer
(OBC).
When the batteries receive an incomplete charge because 1) AC power to charger is interrupted, 2) automatic
charger shut-off occurs after 16 hours of operation, or 3) charger malfunctions, the battery warning light will
indicate as follows:
• The battery warning light will not illuminate if the charge is 90% or more complete. The onboard computer will retain in memory the amount of charge needed to fully replenish the batteries and will complete the charge during the next charge cycle.
• When the charger AC cord is unplugged during a charge cycle, the battery warning light will illuminate
and remain illuminated for 10 seconds (25 seconds for Precedent vehicles) if the charge is less than
90% complete but the vehicle has enough power for 60 minutes of operation. This will alert the operator that the vehicle may be used, but that it must be charged to completion as soon as possible.
• The battery warning light will repeatedly illuminate for 10 seconds, at 4 second intervals (25 seconds,
at 10 second intervals for Precedent vehicles), if the charger times out at 16 hours and the batteries are
not sufficiently charged. This indicates an abnormal charge cycle. The charger and batteries should be
checked by your Club Car distributor/dealer.
THE CHARGE CIRCUIT
For vehicles with onboard chargers, the charge circuit consists of the following components:
• onboard charger
• onboard computer
• batteries
DS Villager 4:
The black wire from the charger is connected to the fuse link, along with the short black receptacle wire, on
the charger receptacle (Figure 4-2, Page 4-3). One 10-gauge black wire from the onboard computer connects to other side of the charger receptacle fuse link. The other 10-gauge black wire from the onboard computer connects to the B– terminal on the speed controller, and the 6-gauge black wire (also on the controller
B– terminal) goes through the onboard computer and connects to the negative (–) post of battery no. 4. The
red wire of the charger is connected to the positive (+) post of battery no. 1. The blue wire (sense lead) from
the charger is connected, through a 3-way wire adapter at the sense lead fuse, to the gray wire that connects
the charger receptacle to the onboard computer.
Page 4-2
2008 Export Battery Charger Maintenance and Service Manual
EXPORT POWERDRIVE CHARGER (ONBOARD)
The Charge Circuit
Precedent Vehicles:
The 10-gauge black wire from the charger becomes two wires in the adapter harness (Figure 4-3, Page 4-3).
One wire connects to the onboard computer black lead wire. The second wire connects to the charger receptacle black lead wire. The 6-gauge black wire (also on the controller B– terminal) goes through the onboard
computer and connects to the negative (–) post of battery no. 4 (Figure 4-7, Page 4-12 and Figure 4-8,
Page 4-12) or battery no. 6 (Figure 4-9, Page 4-13). The 10-gauge red wire of the charger is connected to
the positive (+) post of battery no. 1. The 18-gauge gray wire from the charger becomes two wires in the
adapter harness. One wire connects to the onboard computer. The second wire connects to the charger
receptacle gray lead wire.
To check the charge circuit, check the connections between the 18-gauge gray wire from the OBC, the sense
lead fuse, DC cord red wire, DC cord black wire, and the wire connections between the batteries.
SOLID STATE
SPEED CONTROLLER
ONBOARD
COMPUTER
B+
S2
No. 10 BLACK
B–
M–
TERMINAL
S1
No. 6 BLACK
B–
CHARGER
RECEPTACLE
No. 18
GRAY
BL
#10 BLACK
No. 10
BLACK
No. 10 RED
UE
RED WIRES
TO POSITIVE
TERMINAL
No. 10 RED
+
BLACK TO
NEGATIVE
TERMINAL
ONBOARD
CHARGER
BATTERIES
–
Figure 4-2 Charge Circuit – DS Villager 4
SOLID STATE
SPEED CONTROLLER
ONBOARD
COMPUTER
B+
S2
No. 10 BLACK
TERMINAL
S1
No. 6 BLACK
No. 18
GRAY
B–
M–
B–
CHARGER
RECEPTACLE
No. 10
BLACK
No. 10 RED
RED TO
POSITIVE
TERMINAL
No. 10 RED
Three Pin
Connector
ONBOARD
CHARGER
+
BLACK TO
NEGATIVE
TERMINAL
BATTERIES
–
Figure 4-3 Charge Circuit – Precedent Vehicles
2008 Export Battery Charger Maintenance and Service Manual
Page 4-3
4
4
EXPORT POWERDRIVE CHARGER (ONBOARD)
Charger Operation
CHARGER OPERATION
See General Warning, Section 1, Page 1-1.
ý DANGER
• The charging area must be ventilated. Hydrogen level in the air must never exceed 2%. The
total volume of air in the charging area must be changed five times per hour. Exhaust fans
should be located at the highest point of the roof. Contact a local HVAC engineer.
• Do not charge the vehicle batteries with the vehicle covered or enclosed. Any enclosure or
cover should be removed or unzipped and pulled back when batteries are being charged. An
accumulation of hydrogen gas could result in an explosion.
ý WARNING
• Do not bypass the sense lead fuse (not applicable to Precedent vehicles).
• Prior to servicing the charger, disconnect the AC power supply cord from the wall outlet,
disconnect the DC cord from the vehicle, and remove the battery charger from the vehicle.
See Onboard Charger Removal on page 4-35.
• Do not connect the charger to battery packs that are not compatible with the DC output
voltage specified on the charger. Overheating and transformer burnout will result.
• Do not use a battery charger if the cord or plug is damaged in any way. Replace worn or
damaged parts immediately. Failure to heed this warning could result in a fire, property
damage, severe personal injury, or death.
• Do not use a battery charger if it has received a sharp blow, was dropped, or was otherwise
damaged. Make sure it is operating properly before putting it back in use.
• Each charger should have its own 15 or 20 ampere branch circuit protection (circuit breaker
or fuse), in accordance with the National Electrical Code ANSI/NFPA 70, and local codes and
ordinances. Improper AC supply circuit protection may result in a fire.
• Improper connection of the equipment-grounding conductor can result in an electrical shock.
• Do not use an adapter to plug charger into a two-blade outlet or an extension cord. AC outlet
must accept grounded three-blade plug. The use of an extension cord could result in fire or
electric shock.
• Do not operate a battery charger if it has received a sharp blow, was dropped, or was
otherwise damaged. Make sure it is operating properly before putting it back in use.
• Chargers can ignite flammable materials and vapors. Do not use near fuels, grain dust,
solvents, thinner, or other flammables.
• Keep charger dry – Do not expose to rain.
• Do not block or cover the charger ventilation slots. The slots provide ventilation and prevent
the charger from overheating.
• Do not allow clothing, blankets, or other materials to cover the charger.
• Do not allow the charger to operate for more than 30 minutes at 19 or more amperes.
• Install surge arrestors on incoming AC power lines. Surge arrestors will help protect electrical
components in the charger and on the vehicle from all but direct or close lightening strikes.
AC POWER CONNECTION
The AC line to which the charger is to be connected must be of the proper AC input voltage for the charger
and must be capable of supplying sufficient current. See Section 2 – Charger Identification and Specifica-
Page 4-4
2008 Export Battery Charger Maintenance and Service Manual
tions. If the battery charger is equipped with a multi-position switch for variable AC input voltage, the switch
must be set for the correct voltage before the AC cord is connected (Figure 4-4, Page 4-5). See following
CAUTION.
CAUT ION
• Failure to set the AC input voltage selector switch to the correct voltage could result in
damage to the battery charger or batteries.
NOTE: Make sure that the AC cord provided with your charger has the proper AC plug for your location. If
it does not, contact your Club Car representative to obtain the proper cord or plug.
S
UN
IT
TH W
E ILL
AM AM STA
M ME R
ES ETE TE T AU
S R R IN TO
TH FO D M
AN R IC AT
5 CO ATE ICA
E
A
R
S
R
LL
M
IO
PS REC INTI Y
D DS
IF T C AL AFT
IS O
BAT U C ER
CO F
R
NN EXTE
TE RE HAR 2 TO
RIE NT. G
E
N
E
G CTE NDE
S IN R 15
,
AR TI AT SE
D D
E R
E AL E. CO
B EA TO STO
GO C
ND
TH R
V RE D
OD. URR
S
E AG
E A IN
DE
BAT E
G K D
UN EN
,
LA
TE TH
A AS ING TR
IT T W
Y
R E
RY IS
S IL
IF
G
D U
ALL
AN UNIT HUTS L VA
P E S - C CT
LY
IN
D
IO
W
P
ELE
OFF RY
IN WIL
G B G RE HIL N
FR
PU L
CTI
H EF A V
AU O
T CY
R E E M
T
CA
PLU C
TO M
L S OR A N C AN
.
LE
U
M 13 TO L C
E GE T F HA UA
G B
AT
C BC
ON
R . L R L
CO AC
IC 20
T A
E
A G .
NE
R R
NN K
ALL A
IC P MO ME ER
CTI
EC ON
Y MP
V
S O
W S
A IS
ON
TE TO
IN
H W
N
HE A
D M
S
O E
D O
G
C
N ND
TO AIN
C R
H
S PE
C
BAT TH TES
K D
PA R
A TA
O
L
T
,C R
E
LI IN
V
R AT
C OC
VE TH TER N
E
O IVE
K IN
O A
R
IE
N
OU E
S
.
S
N S
. G
R NN TE
TL BAT
AR
E YS
O E D
D
C
E
G
C
O
V
E
R
•B
E
W FO
W AR RE
A N
• D WA RN ING CH
• N IS RN ING - AR
B
O CO ING - EF GIN
E
• T WA SM NN - XP OR G,
D
E
R
O
R
E
L
O
O R N K CT O O B E
• A UT E ING ING M NO SIV RE AD
A T E A IN
D L D
M JU E UC - F O IN C G K D
• C EA S TS E OR R N S HA A IN TR
S G
O S T ! TH U AK SU RG E D UC
F N U T
E S E PP E S C T
• O RE NE RE HE
R E D LY IN - P W IO
IS W L
• E U QU CT D IN IN
K IT IG BE G RE HIL N M
T
P
O H H F AR VE E A
• T LE PU EN IN P U
F C TS O A N C N
H C T C P U T
E LU . R G T H U
G IS T L Y U T VO
LE B
E E F A A
•M OO U RIC EA AN T P VO LT
R . LA R G L.
C C
N
D D O LT A
E
O
TR A
M E
M
TA N D. T IT SH P M W AG GE
E R
IC R P
O
T
E
O
V
A IS
C P O H W O L E R E S
C
A
O
IN
N
•N HA ER R A E A ILL K AR SU C BE WIT SH W
D OP
G
O E
O R T M M S H IT R O F
S E
C R
C
TH TE G O M M TA AZ Y; E RD OR CH
PA R
K D
O
, R
V
R A
E : D ED LE E ET R AR "+ D T E L
T
T
C
E
K
O U . SS TER ER A D ", R MA O A C OC
O IVE
S ING
U R
N S R.
.
TH F IN UT ! D E IN P ON AT
TP IN
N Y
,D
S
E S
A OR DIC OM O N D. N IN RO NE ED
U G
C T
IS
N
T P
C
T E
C
5 CO AT ATIC OT EG PU PE TIN ON
C ER
O M
O
R
O IO
A R E
N 4
N
•B
M R S A TO AT T V LY G TH
R
LY 8
N
D D
P E IN LLY U IV O G IN E
E
E
S C
TO VE
W FO
C E
C
IS S
IF T TIA A H ; "- LTA RO PU BA
T
C OF
W AR RE
P HIC
AC
B CU L FT UN ", GE UN T CK
O E
R L
A N
AT R C E IN B
C
N X
O E
.
• D WA RN ING CH
N T
P S
TE R HA R S LA MAT DE OR OF
E E
C N
• N IS RN ING - AR
R EN R 2 T UL CK C D T D TH ER O
B
TE D
IE T. G O AT . H H T IS
LY N
O CO ING - EF GIN
LY
S IN E 1 E SE IN R O
D ED
S NN - EX O G
A T R A 5 D N G E SO UN GR .
TO S
M
R IA T S B S T E
O
T
O E D P R ,R
U
TH OR E G L E. EC AT E; HE W CK IT T
K CT O LO E B EA
N
IR E
IN
N S
O T BL
O CU
D
E A
N E U SW E T- O 1
G MA OT IV RE D IN
O R
E
B GE
O
D R E
D
D. R
O IN C E G AK D
AT ,
S Y . IT SO U 00
R
T
H
IN
U E
D T
C C T /2
T T
H
N
L
N
N S S A R A S G TR
H
E
0
E
E
R
IT T
A U G E D U
R IS
LA RM H S KE ET 0/2
E
K P
Y U
E
E T-O ! 2
S WIL
Y IN
E P E S - C CT
A N
TT U
H L
0/2
W
D LY IN P W IO
IF A
N IT
U
IR
LIG
IN T
D
TS VA
40
A LS
B G RE H N
E
LL !
G LE
IN W
VH EF AR VE ILE MA
. T
O RY
S
P ILL
TS O A N C N
E
O
TO
FF F
U
W
LE
C
T C
.! RE GE T HA UA
IT
K
A RO
M
C
P Y
H
E
U
T
LU CL
AT
R . FLA R G L.
TTO M
IC
50
E
C
M E
G E
M
A
M 13
H
O
E R
L
O
C BA
AT T
TH
R
V
A IS
O C
C
IN
N
IC O
O
N
60
E
D OP
N KO
N
A 20
H
E N
N
S E
LLY A
C
Z
E
PA R
M
TE T
C
P
R AT
TIO
D O M WH S
K IN
S G
TO A
E AN
.
.
N D NS
,D
A INTA
B T
TE
IS
AT H
LIV IN
S
C
TE E
T
O
E T
N
R N
O H
N
IE
U E
E
S
TL B
C
A
T
E AT
R
T! T
AC
E
E
R
.
Y
IF
220 V
AC INPUT VOLTAGE
SELECTION SWITCH
(REAR CHARGER PANEL)
Figure 4-4 AC Input Voltage Selection Switch
Connect the power supply cord to an AC supply within the acceptable voltage range. See Section 2 –
Charger Identification and Specifications.
To reduce the risk of electric shock, the battery charger must be grounded. The charger is equipped with an
AC electric cord with an equipment-grounding conductor and a grounding type plug. The AC plug must be
connected to an appropriate receptacle that is properly installed and grounded in accordance with all applicable national and local electrical codes and regulations.
Place the charger AC cord so it will not be stepped on, tripped over, or otherwise subject to damage or stress.
The use of an extension cord with the onboard charger should be avoided.
Do not place items in the compartment where the battery charger is installed. Ensure that the charger ventilation slots are unobstructed.
NORMAL CHARGER OPERATION
1. Connect the AC power supply cord into an AC outlet designed to provide the proper AC voltage for the
charger.
2. The charger will activate automatically within 2 to 15 seconds.
Page 4-5
2008 Export Battery Charger Maintenance and Service Manual
4
Charger Operation
EXPORT POWERDRIVE CHARGER (ONBOARD)
4
EXPORT POWERDRIVE CHARGER (ONBOARD)
Charger Operation
3. Monitor the ammeter for the correct charge rate. The initial charge rate will vary from 15 to 19 amps,
depending upon the condition and depth of discharge of the batteries. Slight variations in the initial
charge rate may also result from AC line input voltages that are higher or lower than the nominal input
voltage. Higher AC line voltages increase the initial charge rate while lower AC line voltages reduce the
initial charge rate.
4. Monitor the ammeter. Under normal operating conditions (when the charger is on and the batteries are
discharged), the charger will shut off in order to run a self-diagnostic program (ammeter will drop to zero)
one hour and two hours into the charge cycle. See following CAUTION and NOTE.
CAUT ION
• Do not connect an external charger to the receptacle of a vehicle equipped with an onboard
charger while the onboard charger is activated. Charging overload will damage the onboard
computer and may cause battery damage.
NOTE: If the batteries are in a fully charged state and the vehicle has not been driven, the onboard computer will not perform the self-diagnostic test after the charge cycle starts.
Batteries should be put on charge at the end of each day even if the vehicle has been used for only
a short amount of time (even if for only 10 minutes).
When air temperatures fall below 65 °F (18.3 °C), batteries charged in unheated areas should be
placed on charge as soon as possible after use. Cold batteries require more time to fully charge.
New batteries will not deliver their full range until the vehicle has been driven and recharged from
20 to 50 times.
Vehicles should be restricted to 40 to 50 energy units of discharge (or 36 holes of golf) between
charges until the batteries have been properly seasoned (20 to 50 charge cycles). For maximum
battery life, Club Car recommends that electric vehicles always be recharged after 40 to 50 energy
units of discharge or each night in order to avoid deep discharging the batteries. Charging between
rounds will also extend battery life; use the CDM (Communication Display Module) (CCI P/N
101831801). See Communication Display Module in Section 11 of the appropriate maintenance and service manual.
TESTING CHARGER OPERATION
1. Connect the AC power supply cord to an electrical outlet. The charger relay should not close immediately, but should close with an audible click after a delay of 2 to 15 seconds. See following NOTE.
NOTE: Monitor the charge cycle to make sure the charger turns off properly. If the charge cycle is interrupted, and the batteries are less than 90% charged, the battery warning light will illuminate intermittently. See Battery Warning Light on page 4-2.
2. If the charger does not operate exactly as described above, refer to the wiring diagram and make sure
that the vehicle is wired correctly (Figure 4-2, Page 4-3) and that the internal charger wiring is correct
(Figure 4-5, Page 4-7).
Page 4-6
2008 Export Battery Charger Maintenance and Service Manual
EXPORT POWERDRIVE CHARGER (ONBOARD)
Charger Operation
DIODES WITH
HEATSINK
RED
RED
TAN
BLACK
TAN (2)
BLACK
BLACK
CASE
GROUND
BLACK
BLACK
BLACK or BROWN
GREEN or GREEN/YELLOW
TAN (3)
3
BLACK
1
WHITE or BLUE
TAN (5)
9
6
TAN (4)
7
4
AMMETER
BLACK
PRIMARY
COIL
FUSE
BLACK
RELAY
BLACK
BLACK
TAN (1)
AC CORD
B
TAN (6)
A
TRANSFORMER
SECONDARY
COIL
BLACK
CONTROL
BOARD
RED
BLUE
RED
BLUE
BLK
BLACK
TAN (1)
BLK
BLACK
BLACK(1)
AC CIRCUIT
BREAKERS
BLACK
BLACK (1)
BLACK
BLACK
BLACK
TAN (6)
BLACK
BLACK
BLACK (6)
BLACK (6)
1
2
3
4
5
6
AC VOLTAGE SELECTOR SWITCH
BLUE
TERMINAL #
RED
BLUE
BLACK
TAN
DC CORDSET
Figure 4-5 Export PowerDrive Onboard Battery Charger Wiring Diagram
2008 Export Battery Charger Maintenance and Service Manual
Page 4-7
4
4
EXPORT POWERDRIVE CHARGER (ONBOARD)
Checking Battery Condition
CHECKING BATTERY CONDITION
See General Warning, Section 1, Page 1-1.
It is common practice for technicians to check the condition of a set of batteries after they have been charged
to ensure they have received a complete charge before the vehicle is used. With the PowerDrive battery
charger this practice is not necessary. The onboard computer controls and monitors the charge cycle. If any
problem occurs during a charge cycle, the battery warning light, located above the steering column in the center dash panel, will illuminate intermittently.
If the battery warning light is illuminated after a charge cycle, refer to the troubleshooting chart. See Troubleshooting on page 4-9. If the specified test procedures identify no problems, plug the AC cord into a wall outlet and let it charge until the charger shuts off automatically. If a problem is found, correct it and charge the
vehicle. Normal battery voltage near the end of a charge cycle should be approximately 59 to 63 volts DC
while the charger is still operating.
Start Charge Cycle
1. Disconnect the AC plug from the wall outlet.
2. Wait 20 seconds, then reconnect the AC cord to the wall outlet. See following NOTE.
NOTE: The charger will not operate unless a delay of approximately 20 seconds is observed.
3. Monitor the ammeter for the charge rate. If the vehicle has not been driven since the last charge cycle
and the batteries are fully charged, the onboard computer will not perform a self-diagnostic test. The
charge cycle will begin and the ammeter will not drop to zero. If the vehicle has been driven, even if only
a few feet, the onboard computer will perform the self-diagnostic test; the ammeter will drop to zero for
2 to 3 seconds before the charge cycle continues. If the batteries are close to being fully charged, the
charge cycle will begin and the charge current will begin to taper within a few minutes.
TROUBLESHOOTING
See General Warning, Section 1, Page 1-1.
ý DANGER
• Do not touch any wire or component in the battery charger while AC power is present. Failure
to heed this warning will result in an electric shock.
ý WARNING
• Knowledge of battery charger wiring and component terminology is required before
attempting any repair (Figure 4-5, Page 4-7).
• Prior to servicing the charger, disconnect the AC power supply cord from the wall outlet,
disconnect the DC cord from the vehicle, and remove the battery charger from the vehicle.
See Onboard Charger Removal on page 4-35.
Use the following Troubleshooting Guide for troubleshooting export PowerDrive onboard battery chargers
(model numbers 17790-10 and 17790-40). The Troubleshooting Guide encompasses the entire battery
charging circuit. Test procedures specified in the Troubleshooting Guide can be found on the following pages.
Page 4-8
2008 Export Battery Charger Maintenance and Service Manual
EXPORT POWERDRIVE CHARGER (ONBOARD)
Troubleshooting
EXPORT POWERDRIVE ONBOARD BATTERY CHARGER TROUBLESHOOTING
GUIDE
SYMPTOM
POSSIBLE CAUSES
CORRECTIVE ACTION
Relay does not close, no transformer
hum and ammeter does not move
Batteries disconnected
Connect batteries. See Figure 4-6,
Page 4-12 through Figure 4-9,
Page 4-13
Battery voltage is too low
Test Procedure 1 – Battery Voltage on
page 4-11
Improper vehicle or battery charger wiring
See Figure 4-2, Page 4-3, Figure 4-3,
Page 4-3, Figure 4-5, Page 4-7,
Figure 4-6, Page 4-12, Figure 4-7,
Page 4-12, Figure 4-8, Page 4-12 and
Figure 4-9, Page 4-13
DC circuit
Test Procedure 5 – Charger DC Circuit
Continuity Test on page 4-18
Onboard computer malfunction
Test Procedure 2 – Control Board on
page 4-13
Gray sense lead fuse is blown
Test Procedure 1 – Battery Voltage on
page 4-11
Control board malfunction
Test Procedure 2 – Control Board on
page 4-13
Improper AC line voltage
Test Procedure 3 – AC Power and
Continuity Check of AC Circuit on
page 4-15
Failed AC plug and cord
Test Procedure 3 – AC Power and
Continuity Check of AC Circuit on
page 4-15
Failed AC cord reel
Test Procedure 8 – Continuity on
page 4-21
Internal AC breaker
Test Procedure 3 – AC Power and
Continuity Check of AC Circuit on
page 4-15
Transformer primary coil
Test Procedure 6 – Transformer on
page 4-19
Relay
Test Procedure 8 – Continuity on
page 4-21
Blown charger fuse
Test Procedure 4 – Diodes on page 4-16
Both Diodes failed
Test Procedure 4B – Both Diodes Failed
on page 4-17
Onboard computer malfunction
Test Procedure 2 – Control Board on
page 4-13
Failed transformer or voltage switch
Test Procedure 6 – Transformer on
page 4-19
Failed ammeter
Replace ammeter
Failed charger relay
Test Procedure 8 – Continuity on
page 4-21
Diode failed
Test Procedure 4A – Single Diode Failure
on page 4-16
Loose internal fuse connection
Tighten connection
Relay closes with an audible click but
no transformer hum and ammeter does
not move
Relay closes and transformer hums but
ammeter does not move
Relay operates intermittently
Single charger fuse link blows
Troubleshooting Guide continued on next page...
2008 Export Battery Charger Maintenance and Service Manual
Page 4-9
4
4
EXPORT POWERDRIVE CHARGER (ONBOARD)
Troubleshooting
EXPORT POWERDRIVE ONBOARD BATTERY CHARGER TROUBLESHOOTING
GUIDE
SYMPTOM
POSSIBLE CAUSES
CORRECTIVE ACTION
Both charger fuse links blow or
receptacle fuse link blows
Battery is wired in reverse polarity
Check vehicle wiring
DC cord is wired in reverse polarity
Check battery charger wiring
Both diodes failed
Test Procedure 4B – Both Diodes Failed
on page 4-17
One diode failed
Test Procedure 4A – Single Diode Failure
on page 4-16
Transformer coil short-circuit failure
Test Procedure 6 – Transformer on
page 4-19
Onboard computer malfunction
Test Procedure 2 – Control Board on
page 4-13
AC power supply was shut off
Test Procedure 3 – AC Power and
Continuity Check of AC Circuit on
page 4-15
Onboard computer malfunction
Test Procedure 2 – Control Board on
page 4-13
Batteries may be fully charged
Test Procedure 7 – Battery State of
Charge Test on page 4-20
Onboard computer malfunction
Test Procedure 2 – Control Board on
page 4-13
Extremely discharged batteries or cold
temperature
Recharge batteries
Failed or weak battery
See Batteries section in the appropriate
maintenance and service manual
AC cord is shorted
Test Procedure 8 – Continuity on
page 4-21
Failed transformer or voltage switch
Test Procedure 6 – Transformer on
page 4-19
Incorrect AC voltage selector switch
position
Check switch position for proper incoming
AC voltage selection
AC power interrupted
Test Procedure 3 – AC Power and
Continuity Check of AC Circuit on
page 4-15
Onboard computer malfunction
Test Procedure 2 – Control Board on
page 4-13
Charger failure
See Testing Charger Operation on
page 4-6
16 hour time out
See Battery Warning Light on page 4-2
Battery or batteries need to be replaced
See Batteries section in the appropriate
maintenance and service manual
Batteries are getting close to full
discharge capacity
Recharge batteries as soon as possible
Charger output is low
Charger turns off too soon
Charger goes to 16 hour time out
AC line fuse blows or AC circuit
breaker trips
Battery warning light illuminates for
ten seconds at four second intervals
(25 seconds, at 10 second intervals for
Precedent vehicles)
Page 4-10
2008 Export Battery Charger Maintenance and Service Manual
EXPORT POWERDRIVE CHARGER (ONBOARD)
Test Procedures
TEST PROCEDURES
See General Warning, Section 1, Page 1-1.
INDEX OF TEST PROCEDURES
1. Battery Voltage
2. Control Board
3. AC Power and Continuity Check of AC Circuit
4. Diodes
5. Charger DC Circuit Continuity Test
6. Transformer
7. Battery State of Charge Test
8. Continuity
TEST PROCEDURE 1 – BATTERY VOLTAGE
See General Warning, Section 1, Page 1-1.
Test Procedure 1A – DS Villager 4
1. Check the wire connections between the vehicle and battery charger (Figure 4-2, Page 4-3).
1.1. Verify that the 10-gauge red wire of the charger is connected to the positive (+) post of battery no. 1.
1.2. Verify the connection of the 10-gauge black wire from the onboard computer and the 10-gauge
black wire from the battery charger at the fuse link on the charger receptacle.
1.3. Check the connections of the DC cord blue wire (17), from the charger, and the gray wire, from the
onboard computer, to the the 3-way wire adapter (18) (Figure 4-29, Page 4-36). See following
WARNING.
ý WARNING
• Do not bypass the sense lead fuse.
1.4. Remove the gray sense lead fuse and check it for continuity with a multimeter set to 200 ohms. The
resistance should be less than 2 ohms.
2. With a multimeter set to 200 volts DC, measure the voltage of the battery pack between the positive (+)
post of battery no. 1 and the negative (–) post of battery no. 4 (Figure 4-6, Page 4-12). Normal no-load
voltage should be between 50 and 52 volts for fully charged batteries. The voltage of the battery pack
must be over 34 volts DC to allow the onboard computer to close the charger relay. If battery pack voltage
is too low to start charger, temporarily bypass the charger relay. See Charging a Battery Pack that has
Low Voltage on page 4-33.
2008 Export Battery Charger Maintenance and Service Manual
Page 4-11
4
EXPORT POWERDRIVE CHARGER (ONBOARD)
Test Procedures
O
S
N
E
G
P
1
N
E
G
P
O
S
N
S
2
G
G
E
S
N
O
O
E
P
P
4
3
4
Figure 4-6 Battery Voltage Test –
DS Villager 4
Test Procedure 1B – Precedent Vehicles
1. Check the wire connections between the vehicle and battery charger (Figure 4-3, Page 4-3).
1.1. Verify that the 10-gauge red wire of the charger is connected to the positive (+) post of battery no. 1.
1.2. Verify the connection of the 10-gauge black wires in the charger adapter harness. One wire connects to the onboard computer black lead wire. The second wire connects to the charger receptacle
black lead wire.
1.3. Verify the connection of the 18-gauge gray wires in the charger adapter harness. One wire connects to the onboard computer. The second wire connects to the charger receptacle gray lead wire.
2. Style A and B 4 x 12-Volt Precedent only: With a multimeter set to 200 volts DC, measure the voltage
of the battery pack between the positive (+) post of battery no. 1 and the negative (–) post of battery no.
4 (Figure 4-7, Page 4-12) or (Figure 4-8, Page 4-12).
WAVETEK
V
5XL
1000
OFF
V
500
200
200
20
200
2m
2
200
m
20
m
200
m
2000
k
200k
P
WAVETEK
V
O
S
20k
200
A
2k
5XL
1000
OFF
V
500
200
200
20
EG
N
200
EG
N
V
20
m
!
COM
200nA
FUSED
4
200
m
2000
k
!
MAX
1000 --750V
2m
2
200
m
200k
20k
200
1
A
2k
P
O
S
P
O
S
3
2
1
!
V
MAX
1000 --750V
!
COM
200nA
2
FUSED
FRONT
OF VEHICLE
(Viewed from driver side of vehicle)
1. RED probe to battery no. 1 (+).
2. BLACK probe to battery no. 4 (-).
Page 4-12
EG
N
3
200 DCV SETTING
Figure 4-7 Battery Voltage Test – Precedent Style A
Battery Configuration
EG
N
P
O
S
4
Figure 4-8 Battery Voltage Test – Precedent Style B
Battery Configuration
(Viewed from driver side of vehicle)
1. RED probe to battery no. 1 (+).
2. BLACK probe to battery no. 4 (-).
2008 Export Battery Charger Maintenance and Service Manual
EXPORT POWERDRIVE CHARGER (ONBOARD)
Test Procedures
3. Style C 6 x 8-Volt Precedent only: With a multimeter set to 200 volts DC, measure the voltage of the
battery pack between the positive (+) post of battery no. 1 and the negative (–) post of battery no. 6
(Figure 4-9, Page 4-13).
WAVETEK
V
5XL
1000
OFF
V
500
200
200
20
200
2m
2
200
m
1
+
20
m
200
m
2000
k
200k
20k
2
V
!
MAX
1000 --750V
3
200
A
2k
!
COM
200nA
FUSED
6
4
5
Figure 4-9 Battery Voltage Test – Precedent Style C
Battery Configuration
(Viewed from driver side of vehicle)
1. RED probe to battery no. 1 (+).
2. BLACK probe to battery no. 6 (-).
4. Normal no-load voltage should be between 50 and 52 volts for fully charged batteries. The voltage of the
battery pack must be over 32 volts DC to allow the onboard computer to close the charger relay. If battery
pack voltage is too low to start charger, temporarily bypass the charger relay. See Charging a Battery
Pack that has Low Voltage on page 4-33.
TEST PROCEDURE 2 – CONTROL BOARD
See General Warning, Section 1, Page 1-1.
DC Circuit Test
1. Disconnect AC cord from outlet. DC cord red, black, and blue wires remain connected to the vehicle. All
wires remain connected to the control board. Set multimeter to 200 volts DC. See following DANGER.
ý DANGER
• Do not touch any wire or component in the battery charger while DC power is present. Failure
to heed this warning will result in an electric shock.
2. Place black (–) probe of multimeter on terminal with blue DC cord wire and red (+) probe to terminal with
red relay wire (Figure 4-10, Page 4-14).
3. Multimeter should indicate full battery voltage (approximately 47-50 volts). If reading is incorrect, replace
control board.
2008 Export Battery Charger Maintenance and Service Manual
Page 4-13
4
4
EXPORT POWERDRIVE CHARGER (ONBOARD)
WAVETEK
V
WAVETEK
5XL
1000
OFF
V
V
5XL
1000
500
200
OFF
V
500
200
200
200
20
20
200
200
200
m
20
m
200k
20k
!
MAX
1000 --750V
200
A
2k
!
COM
20
m
200
m
2000
k
200
m
2000
k
2m
2
2m
2
200
m
V
Test Procedures
RED WIRE
TO RELAY
BLUE WIRE
TO DC
CORD
200k
20k
V
200nA
!
MAX
1000 --750V
FUSED
200
A
2k
!
COM
200nA
FUSED
500 DCV SETTING
200 DCV SETTING
WHITE OR BLUE
WIRE FROM AC CORD
Figure 4-10 DC Circuit Test
BLACK WIRE
FROM RELAY
Figure 4-11 AC Circuit Test
AC Circuit Test
1. Disconnect AC cord from outlet. DC cord red, black, and blue wires remain connected to vehicle. Set
multimeter to volts AC.
2. Disconnect white or blue wire of AC cord at terminal on control board (Figure 4-12, Page 4-14). See following DANGER.
ý DANGER
• Do not touch any wire or component in the battery charger while AC power is present. Failure
to heed this warning will result in an electric shock.
3. Place black (–) probe of multimeter, set to 500 volts AC, onto terminal with black wire from relay. Connect
red (+) probe to terminal from which the white or blue AC cord wire was disconnected (Figure 4-11,
Page 4-14).
4. Connect AC cord to outlet. Reading should be input voltage from outlet.
5. If reading is incorrect, replace control board.
BLACK WIRE TO RELAY
BLACK OR BROWN
WIRE OF AC CORD
BLUE WIRE TO RELAY
RED WIRE TO RELAY
WHITE OR BLUE
WIRE OF AC CORD
RED WIRE
TO HEATSINK
BLUE WIRE
TO DC CORD
Figure 4-12 Control Board
Page 4-14
BLACK WIRE TO RELAY
2008 Export Battery Charger Maintenance and Service Manual
EXPORT POWERDRIVE CHARGER (ONBOARD)
Test Procedures
TEST PROCEDURE 3 – AC POWER AND CONTINUITY CHECK OF AC CIRCUIT
See General Warning, Section 1, Page 1-1.
1. Disconnect the AC power supply cord from the wall outlet.
2. Check the AC circuit breakers on the front of the charger and reset it if necessary.
3. Check the AC line fuse or circuit breaker in the storage facility.
4. With a multimeter set to 500 volts AC, check incoming AC voltage. Insert multimeter test probes into AC
wall outlet; voltage should be within the range specified in the following chart. If proper voltage is not
present and the voltage selector switch is set for the correct voltage for your area, have building wiring
checked by a licensed electrical contractor.
SETTING ON AC VOLTAGE
SELECTOR SWITCH
MINIMUM AC VOLTAGE
PERMITTED
MAXIMUM AC VOLTAGE
PERMITTED
100 Volts AC
95
105
200 Volts AC
190
210
220 Volts AC
209
231
240 Volts AC
228
252
5. Check continuity of the AC circuit.
5.1.
5.2.
5.3.
5.4.
Remove the battery charger from the vehicle. See Onboard Charger Removal on page 4-35.
Remove the charger cover.
Bypass the relay. See Charging a Battery Pack that has Low Voltage on page 4-33.
With relay bypassed, there should be continuity across the AC cord blades (Figure 4-13,
Page 4-16).
6. If the circuit is not complete, check the wiring of the AC cord, AC cord reel, transformer primary coil wires
(21), internal AC circuit breakers (13), and voltage selector switch (9) (Figure 4-5, Page 4-7).
7. If the charger is wired correctly, check the continuity of the AC cord, AC cord reel, transformer primary
coil, and the internal AC circuit breaker individually. See Test Procedure 8 – Continuity on page 4-21.
8. When troubleshooting and repairs are complete, properly connect the relay wiring. See following
WARNING.
ý WARNING
• The relay wiring must be properly connected prior to placing the charger back into normal
service. Failure to remove the jumper wire and properly connect the relay wiring could result
in property damage, severe personal injury, or death.
2008 Export Battery Charger Maintenance and Service Manual
Page 4-15
4
4
EXPORT POWERDRIVE CHARGER (ONBOARD)
Test Procedures
AC plug may have different appearance
depending on geographic region.
Figure 4-13 AC Circuit Continuity Test
TEST PROCEDURE 4 – DIODES
Use Test Procedure 4A – Single Diode Failure on page 4-16 for single diode failures and testing of individual
diodes. If both diodes have failed, use Test Procedure 4B – Both Diodes Failed on page 4-17.
Test Procedure 4A – Single Diode Failure
See General Warning, Section 1, Page 1-1.
A single diode failure is indicated by the failure of one fuse link (closed circuit diode) or by the charger output
being low (open circuit diode). If a diode has failed, the entire heatsink must be replaced. To check diodes:
1. Disconnect AC cord from the wall outlet.
2. Remove the battery charger from the vehicle. See Onboard Charger Removal on page 4-35.
3. Remove the charger cover.
4. Disconnect one transformer secondary coil wire from the diode terminal (Figure 4-14, Page 4-17).
5. Using a low voltage continuity tester or multimeter set to the diode test function, connect the red (+) test
probe to the diode mounting plate and the black (–) test probe to a diode terminal and note the reading
(Figure 4-14, Page 4-17).
6. Reverse test probes and check each diode again and note the reading (Figure 4-15, Page 4-17). A
diode is designed to conduct current in one direction only. If a diode conducts current (shows continuity)
in both directions, the entire heatsink with diodes must be replaced. If a diode does not conduct current
(does not show continuity) in either direction, the entire heatsink must be replaced.
7. On rare occasions, a single fuse link may blow due to excessive heat. This can be caused by a loose
internal fuse connection. Check all three fuse connections inside the charger to be sure they are clean
and tight. The proper tightness for the fuse link connections is 22 in-lb (2.5 N·m).
8. Ensure the charger is wired properly and all connections are clean and tight. See following CAUTION.
CAUT ION
• If connections are not clean and tight, excessive heat will be created and the charger may
become damaged.
Page 4-16
2008 Export Battery Charger Maintenance and Service Manual
EXPORT POWERDRIVE CHARGER (ONBOARD)
Test Procedures
DISCONNECTED
SECONDARY
COIL WIRE
Figure 4-14 Diode Test
Figure 4-15 Diode Test – Probes Reversed
Test Procedure 4B – Both Diodes Failed
See General Warning, Section 1, Page 1-1.
To check the diodes, use Test Procedure 4A – Single Diode Failure on page 4-16. If both diodes have failed
closed, both charger fuse links will be blown. If both diodes have failed open, the relay will close and the transformer will hum, but the ammeter will not indicate any output and the AC circuit breaker may trip off. If both
diodes have failed open or closed, the entire heatsink must be replaced. To determine why both diodes failed:
1. Check the batteries and the receptacle to ensure that they are wired in the correct polarity. (Figure 4-2,
Page 4-3).
2. Make sure the charger is wired correctly: The DC cord red wire should be connected to the center terminal of the heatsink, the DC cord blue wire should be connected to the control board, and the DC cord
black wire should be connected to the left side of the ammeter (when viewed from inside the charger)
(Figure 4-5, Page 4-7). If a reverse polarity connection is made between the charger and the batteries,
both fuse links will blow when the DC cord is connected to the vehicle, whether or not the AC cord is
plugged into an outlet.
3. Make sure the charger is wired to the vehicle correctly; the DC cord red wire should be connected to the
same large post as the 6-gauge red wire connected to the positive (+) post of battery no. 1. The DC cord
blue wire should be connected to the sense lead fuse. The DC cord black wire should be connected to
the terminal block located on the vehicle component mounting plate (Figure 4-2, Page 4-3). If a reverse
polarity connection is made between the charger and the batteries, both fuse links will blow when the DC
cord is connected to the vehicle, whether or not the AC cord is plugged into an outlet.
4. On rare occasions, both diodes may fail as a result of a lightning strike at the charging location.
5. Excessive heat due to a loose connection may also cause both fuse links to blow. Be sure fuse connections are tightened to 22 in-lb (2.5 N·m).
6. Ensure that the charger and vehicle are wired properly and all connections are clean and tight.
2008 Export Battery Charger Maintenance and Service Manual
Page 4-17
4
4
EXPORT POWERDRIVE CHARGER (ONBOARD)
Test Procedures
TEST PROCEDURE 5 – CHARGER DC CIRCUIT CONTINUITY TEST
Test Procedure 5A – DS Villager 4
See General Warning, Section 1, Page 1-1.
1. Disconnect the AC cord from the wall outlet.
2. Disconnect the batteries as instructed. See General Warning on page 1-1.
3. Disconnect the DC cord blue wire (17) from the 3-way wire adapter (18) at the sense lead fuse (20)
(Figure 4-29, Page 4-36).
4. Disconnect the DC cord red wire from the positive (+) post of battery no. 1.
5. Disconnect the DC cord black wire (19) from the charger receptacle fuse link (Figure 4-29, Page 4-36).
6. Using a continuity tester (CCI P/N 1011273) or multimeter set to 200 ohms, connect the test probes to
the DC cord black wire and the DC cord red wire (Figure 4-16, Page 4-18). Note the reading.
7. Reverse the test probes and check the DC cord again (Figure 4-17, Page 4-18). The circuit should show
continuity in only one direction.
8. If the circuit does not show continuity in either direction and the charger fuse is not blown, individually
check all connections and the continuity of the DC cord and ammeter. See Test Procedure 8 – Continuity on page 4-21. Also check the diodes (heatsink). See Test Procedure 4 – Diodes on page 4-16.
9. If the circuit shows continuity in both directions, a short circuit exists in the charger DC circuit, usually
caused by failed diodes. See Test Procedure 4 – Diodes on page 4-16. If diodes have not failed, check
the DC cord for a short circuit. See Test Procedure 8 – Continuity on page 4-21.
10. Remove the DC cord blue wire from the control board and check continuity between the DC cord red,
black, and blue wires (Figure 4-5, Page 4-7). There should be no continuity.
BLUE WIRE
DC
CORD
BLUE WIRE
RED WIRE
RED WIRE
BLACK WIRE
Figure 4-16 DC Cord Test – DS Villager 4
Page 4-18
DC
CORD
BLACK WIRE
Figure 4-17 DC Cord Test (Probes Reversed) –
DS Villager 4
2008 Export Battery Charger Maintenance and Service Manual
EXPORT POWERDRIVE CHARGER (ONBOARD)
Test Procedures
Test Procedure 5B – Precedent Vehicles
See General Warning, Section 1, Page 1-1.
1. Disconnect the AC cord from the wall outlet.
2. Disconnect the batteries as instructed. See General Warning, Section 1, Page 1-1.
3. Disconnect the charger DC cord at the three pin connector (Figure 4-3, Page 4-3).
4. Using a continuity tester (CCI P/N 1011273) or multimeter set to 200 ohms, connect the test probes to
the charger DC cord black wire and red wire terminals in the three pin connector. Note the reading.
5. Reverse the test probes and check the DC cord again. The circuit should show continuity in only one
direction.
6. If the circuit does not show continuity in either direction and the charger fuse is not blown, individually
check all connections and the continuity of the DC cord and ammeter. See Test Procedure 8 – Continuity on page 4-21. Also check the diodes (heatsink). See Test Procedure 4 – Diodes on page 4-16.
7. If the circuit shows continuity in both directions, a short circuit exists in the charger DC circuit, usually
caused by failed diodes. See Test Procedure 4 – Diodes on page 4-16. If diodes have not failed, check
the DC cord for a short circuit. See Test Procedure 8 – Continuity on page 4-21.
8. Check continuity between the DC cord red, black, and blue wires (Figure 4-5, Page 4-7). There should
be no continuity.
TEST PROCEDURE 6 – TRANSFORMER
See General Warning, Section 1, Page 1-1.
Failure of the transformer may be caused by aging or a short circuit in adjacent coil turns. If the transformer
has failed, the ammeter will indicate low output or no output; however, the transformer may hum. A blown AC
line fuse or tripped AC circuit breaker in the charger or the storage facility may be caused by an improperly
wired charger, an improper setting of the AC voltage selector switch, or a failed transformer.
An AC circuit test should be done before performing this test procedure to ensure the continuity of the AC
cord, AC cord reel, internal AC circuit breakers, and charger wiring. See Test Procedure 3 – AC Power and
Continuity Check of AC Circuit on page 4-15.
1. Disconnect AC cord from the wall outlet.
2. Remove the battery charger from the vehicle. See Onboard Charger Removal on page 4-35.
3. Remove the charger cover.
4. Disconnect transformer secondary coil wires from the heatsink (Figure 4-18, Page 4-20).
5. To apply AC power directly to the transformer primary coil, bypass the relay. See Charging a Battery
Pack that has Low Voltage on page 4-33. See following DANGER.
ý DANGER
• Do not touch any wire or component in the battery charger while AC power is present. Failure
to heed this warning will result in an electric shock.
6. Make sure that the voltage selector switch (on the back of the charger) is set for the appropriate incoming
AC voltage. Also ensure that the secondary coil wires are not touching one another. With the relay
bypassed, insert the AC plug into an outlet. If the AC line fuse blows or AC circuit breaker trips, the transformer is shorted internally and must be replaced.
7. If the AC line fuse does not blow or the AC circuit breaker does not trip, check the transformer secondary
coil voltage.
2008 Export Battery Charger Maintenance and Service Manual
Page 4-19
4
4
EXPORT POWERDRIVE CHARGER (ONBOARD)
Test Procedures
8. Disconnect AC cord from the wall outlet.
9. Using alligator clips and a multimeter set to 500 volts AC, connect the multimeter probes to the secondary transformer coil tan wires.
Figure 4-18 Remove Secondary Coil Wires
From Heatsink
10. Connect the AC cord to the wall outlet and monitor the multimeter for the secondary coil voltage. If measured voltage is approximately 85 volts AC or lower for the secondary coil, the transformer is shorted
internally and must be replaced.
11. If the voltage reading is normal (86 volts AC or higher), the transformer is operational. Disconnect the AC
plug from the wall receptacle and check the continuity of the DC circuit. See Test Procedure 5 –
Charger DC Circuit Continuity Test on page 4-18.
12. When troubleshooting and repairs are complete, remove jumper wire and properly connect relay wiring.
See following WARNING.
ý WARNING
• The relay wiring must be properly connected prior to placing the charger back into normal
service. Failure to remove the jumper wire and properly connect the relay wiring could result
in property damage, severe personal injury, or death.
TEST PROCEDURE 7 – BATTERY STATE OF CHARGE TEST
See General Warning, Section 1, Page 1-1.
1. With the batteries fully charged, disconnect the AC charger plug for approximately 20 seconds and
reconnect it. The ammeter should jump to a reading between 14 and 18 amps and taper to below 5 amps
within 15 minutes.
2. If the charger does not taper to below 5 amps within 15 minutes, batteries may not be receiving a full
charge and the onboard computer should be checked. See Test Procedure 2 – Control Board on
page 4-13. See following NOTE.
NOTE: Batteries near the end of their useful lives may not allow the battery charge current to taper below
5 amps. See Batteries section in the appropriate maintenance and service manual.
Page 4-20
2008 Export Battery Charger Maintenance and Service Manual
EXPORT POWERDRIVE CHARGER (ONBOARD)
Test Procedures
TEST PROCEDURE 8 – CONTINUITY
See General Warning, Section 1, Page 1-1.
Short AC Cord and Retractable Cord Reel
Check continuity of the short AC cord and retractable cord reel at the same time.
1. Disconnect the AC cord from the wall outlet.
2. Remove the battery charger from the vehicle. See Onboard Charger Removal on page 4-35.
3. Remove the charger cover.
4. Disconnect the green or green/yellow wire (2) from charger case and position it so it does not touch any
metal part of the charger (Figure 4-19, Page 4-22).
5. Disconnect the black or brown wire (1) of the short AC cord from the control board.
6. Disconnect the AC cord white or blue wire (4) from the control board (Figure 4-19, Page 4-22).
7. Using a multimeter set for 200 ohms, place the red (+) probe on the terminal at the end of the black or
brown wire (1) (Figure 4-19, Page 4-22). With the black (-) probe, test for continuity on each of the flat
blades and then on the round pin of the AC plug (on the retractable cord reel). The tester should indicate
continuity on one flat blade only. If any other reading is obtained, the short AC cord and retractable cord
reel must be tested independently of each other.
8. Place the red (+) probe on the end of the green or green/yellow wire (2) and with the black probe check
for continuity on both flat blades and on the round pin of the AC plug (on the retractable cord reel)
(Figure 4-19, Page 4-22). The tester should indicate continuity on only the round pin. If any other reading is obtained, the short AC cord and retractable cord reel must be tested independently of each other.
9. Place the red (+) probe on the white or blue wire (4) and check for continuity on both flat blades and on
the ground pin of the AC plug (on the retractable cord reel). The tester should indicate continuity on only
one flat blade. If any other reading is obtained, the short AC cord and retractable cord reel must be tested
independently of each other.
10. If the correct readings are obtained in all of the previous steps, the short AC cord and the retractable cord
reel are functioning properly. If any of the readings are incorrect, proceed to the following test procedures
to determine which of the two components has failed.
Short AC Cord without Retractable Cord Reel
Check continuity of the short AC cord without the retractable cord reel.
1. Disconnect the AC cord from the wall outlet.
2. Remove the battery charger from the vehicle. See Onboard Charger Removal on page 4-35.
3. Remove the heatshrink from the AC cord connection between the short AC cord and the retractable cord
reel by gently cutting the heatshrink tubing (Figure 4-20, Page 4-22).
4. Disconnect the short AC cord from the retractable cord reel.
5. Remove the charger cover.
6. Disconnect the black or brown wire (1) of AC cord from the control board.
7. Using a multimeter set for 200 ohms, place the red (+) probe on the terminal at the end of the black or
brown wire (1). Test for continuity on each of the flat blades and then on the round pin of the AC plug.
The tester should indicate continuity on one flat blade only. If any other reading is obtained, the short AC
cord must be replaced. Disconnect the green or green/yellow wire (2) from charger case and position it
so it does not touch any metal part of the charger (Figure 4-21, Page 4-22).
2008 Export Battery Charger Maintenance and Service Manual
Page 4-21
4
4
EXPORT POWERDRIVE CHARGER (ONBOARD)
WAVETEK
Test Procedures
5XL
V
V
OFF
1000
500
200
200
20
200
1
2m
2
200
m
20
m
200
m
2000
k
200k
200
20k
V
!
A
2k
!
COM
MAX
1000 --750V
200nA
FUSED
4
200 OHM SETTING
2
Figure 4-19 AC Cord and Retractable Cord Reel Continuity Test
Figure 4-20 Heatshrink Removal
WAVETEK
V
5XL
1000
OFF
V
500
200
200
20
200
1
2m
2
200
m
20
m
200
m
2000
k
200k
20k
V
!
MAX
1000 --750V
200
A
2k
!
COM
200nA
FUSED
200 OHM SETTING
4
2
Figure 4-21 Short AC Cord Test
Page 4-22
2008 Export Battery Charger Maintenance and Service Manual
EXPORT POWERDRIVE CHARGER (ONBOARD)
Test Procedures
8. Place the red (+) probe on the end of the green or green/yellow wire (2) and with the black probe check
for continuity on both flat blades and on the round pin of the AC plug. The tester should indicate continuity
on only the round pin. If any other reading is obtained, the AC cord and retractable cord reel must be
tested independently of each other.
9. Disconnect the AC cord white or blue wire (4) from the control board. Place the red (+) probe on the white
or blue wire (4) and check for continuity on both flat blades and on the ground pin of the AC plug. The
tester should indicate continuity on only one flat blade. If any other reading is obtained, the AC cord and
retractable cord reel must be tested independently of each other.
10. If the correct readings are obtained in all of the previous steps, the short AC cord is functioning properly.
Proceed to the following test procedure to test the retractable cord reel.
Retractable Cord Reel
Check continuity of the AC cord and retractable cord reel at the same time.
1. Disconnect the AC cord from the wall outlet.
2. Remove the battery charger from the vehicle. See Onboard Charger Removal on page 4-35.
3. Remove the heatshrink from the AC cord connection between the short AC cord and the retractable cord
reel by gently cutting the heatshrink tubing (Figure 4-20, Page 4-22).
4. Disconnect the short AC cord from the retractable cord reel.
5. Using a multimeter set for 200 ohms, place the red (+) probe in one of the flat blade openings of the cord
reel receptacle (1) (Figure 4-22, Page 4-23). Test for continuity at the cord reel AC plug (2) on each of
the flat blades and then on the round pin of the AC plug. The tester should indicate continuity on one flat
blade only. If any other reading is obtained, the cord reel must be replaced.
6. Place the red (+) probe into the other flat blade opening of the cord reel receptacle (1). Test for continuity
on the cord reel AC plug (2) on each of the flat blades and then on the round pin of the AC plug. The tester
should indicate continuity on one flat blade only. If any other reading is obtained, the cord reel must be
replaced.
1
WAVETEK
V
5XL
1000
OFF
V
500
200
200
20
200
2m
2
200
m
20
m
200
m
2000
k
200k
20k
V
!
MAX
1000 --750V
200
A
2k
!
COM
200nA
FUSED
200 OHM
SETTING
2
Figure 4-22 Retractable Cord Reel Test
2008 Export Battery Charger Maintenance and Service Manual
Page 4-23
4
4
EXPORT POWERDRIVE CHARGER (ONBOARD)
Test Procedures
7. Place the red (+) probe into the top-center opening of the cord reel receptacle (1). Test for continuity on
the cord reel AC plug (2) on each of the flat blades and then on the round pin of the AC plug. The tester
should indicate continuity on only the round pin. If any other reading is obtained, the retractable cord reel
must be replaced.
8. If the correct readings are obtained in all of the previous steps, the retractable cord reel is functioning
properly.
DC Cord
1. Disconnect the DC cord, the AC cord from the wall outlet, and remove the battery charger from the vehicle. See Onboard Charger Removal on page 4-35.
2. Remove the charger cover.
3. To check the continuity of the DC cord, disconnect the black wire of the DC cord from the ammeter
(Figure 4-23, Page 4-27).
4. Disconnect the red wire of the DC cord from the heatsink.
5. Disconnect the blue wire from the control board.
6. Using a multimeter set for 200 ohms, place the red (+) probe on the red wire of the DC cord. Test for continuity on each of the wires on the other end of the DC cord. The tester should indicate continuity on the
red DC cord wire only. If any other reading is obtained, the DC cord must be replaced.
7. Place the red (+) probe on the blue wire of the DC cord. Test for continuity on each of the wires on the
other end of the DC cord. The tester should indicate continuity on the blue DC cord wire only. If any other
reading is obtained, the DC cord must be replaced.
8. Place the red (+) probe on the black wire of the DC cord. Test for continuity on each of the wires on the
other end of the DC cord. The tester should indicate continuity on the black DC cord wire only. If any other
reading is obtained, the DC cord must be replaced.
Transformer
The PowerDrive battery charger transformer has two sets of coils: a primary coil and a secondary coil
(Figure 4-27, Page 4-34).
Primary Coil
1. Disconnect the DC cord, the AC cord from the wall outlet, and remove the battery charger from the vehicle. See Onboard Charger Removal on page 4-35.
2. Remove the charger cover.
3. Disconnect the black wires marked 1 and 6 from the AC circuit breakers.
4. Disconnect the wires marked 2, 3, 4 and 5 from the voltage selector switch.
5. Place the continuity tester probes on the primary coil transformer wires disconnected above in pairs until
all of the combinations in the following chart have been tested.
6. If the continuity readings agree with the chart, replace the voltage selector switch. If the continuity readings differ from the chart, replace the transformer.
Secondary Coil
1. Disconnect the DC cord, the AC cord from the wall outlet, and remove the battery charger from the vehicle. See Onboard Charger Removal on page 4-35.
2. Remove the charger cover.
3. Remove the transformer (tan) secondary coil wire from the upper terminal of the heatsink (Figure 4-5,
Page 4-7).
Page 4-24
2008 Export Battery Charger Maintenance and Service Manual
EXPORT POWERDRIVE CHARGER (ONBOARD)
Test Procedures
PRIMARY COIL CONTINUITY / NO CONTINUITY CHART
NEGATIVE PROBE
1
POSITIVE PROBE
1
2
3
4
5
6
Continuity
Continuity
No
Continuity
No
Continuity
No
Continuity
Continuity
No
Continuity
No
Continuity
No
Continuity
No
Continuity
No
Continuity
No
Continuity
Continuity
Continuity
2
Continuity
3
Continuity
Continuity
4
No
Continuity
No
Continuity
No
Continuity
5
No
Continuity
No
Continuity
No
Continuity
Continuity
6
No
Continuity
No
Continuity
No
Continuity
Continuity
Continuity
Continuity
4. Remove the other transformer (tan) secondary coil wire from the bottom terminal of the heatsink and
place the continuity test clip on the ammeter buss bar (3) (Figure 4-24, Page 4-27). Test for continuity
between the buss bar and each of the secondary coil wires (tan). The tester should indicate continuity
between the buss bar and both of the secondary coil wires. If tester does not indicate continuity on both
secondary coil wires, replace transformer. Ensure that the fuse is intact and not blown.
Relay
1. Disconnect the DC cord, the AC cord from the wall outlet, and remove the battery charger from the vehicle. See Onboard Charger Removal on page 4-35.
2. Remove the charger cover.
3. Remove the black wire from terminal 6 of the relay and black wire from terminal 9 of the relay
(Figure 4-26, Page 4-31). Place continuity tester leads on terminals 6 and 9 of the relay. The tester
should indicate no continuity. If tester indicates continuity, the relay contacts have failed closed and the
relay must be replaced.
4. Remove the black wire from terminal 4 of the relay and black wire from terminal 7 of the relay
(Figure 4-26, Page 4-31). Place continuity tester leads on terminals 4 and 7 of the relay. The tester
should indicate no continuity. If tester indicates continuity, the relay contacts have failed closed and the
relay must be replaced.
5. Connect charger DC cord to batteries (Figure 4-6, Page 4-12 through Figure 4-9, Page 4-13). Use
jumper wires if necessary. The tester should indicate continuity on relay terminals 6 and 9 and terminals
4 and 7. If tester does not indicate continuity on both sets of contacts, the relay must be replaced.
Ammeter
1. Disconnect the DC cord, the AC cord from the wall outlet, and remove the battery charger from the vehicle. See Onboard Charger Removal on page 4-35.
2. Remove the charger cover.
3. Disconnect the black wire from the left ammeter post (as viewed from inside the charger).
4. Place the continuity tester clip on one of the ammeter posts.
5. Place the continuity test probe on the other ammeter post. The tester should indicate continuity. If the
tester does not indicate continuity, replace the ammeter.
2008 Export Battery Charger Maintenance and Service Manual
Page 4-25
4
4
EXPORT POWERDRIVE CHARGER (ONBOARD)
Charger Repairs
AC Circuit Breaker
1. Disconnect the DC cord, the AC cord from the wall outlet, and remove the battery charger from the vehicle. See Onboard Charger Removal on page 4-35.
2. Remove the charger cover.
3. Disconnect the wires from the AC circuit breaker.
4. Place the continuity test probes on the two terminals of the AC circuit breaker. The tester should indicate
continuity. If the tester does not indicate continuity, replace the AC circuit breaker.
CHARGER REPAIRS
See General Warning, Section 1, Page 1-1.
ý WARNING
• Knowledge of battery charger wiring and component terminology is required before
attempting any repair (Figure 4-5, Page 4-7).
• Prior to servicing the charger, disconnect the AC power supply cord from the wall outlet,
disconnect the DC cord from the vehicle, and remove the battery charger from the vehicle.
See Onboard Charger Removal on page 4-35.
DC CORD
DC Cord Removal
1. Disconnect the DC cord, the AC cord from the wall outlet, and remove the battery charger from the vehicle. See Onboard Charger Removal on page 4-35.
2. Remove the charger cover.
3. Remove the DC cord black wire (4) from the ammeter by loosening the nut (1). Support the terminal as
the nut is loosened to prevent rotation of the connection (Figure 4-24, Page 4-27).
4. Remove nut attaching the red wire (6) of the charger DC cord to the heatsink.
5. Remove the wire tie that secures the DC cord wire to the secondary coil wire (tan).
6. Remove the wire tie on the DC cord near the strain relief bushing.
7. Disconnect the DC cord blue wire from the control board (Figure 4-23, Page 4-27).
8. Using pliers, squeeze the strain relief bushing and remove the DC cord (Figure 4-23, Page 4-27).
DC Cord Installation
1. Insert the leads of the new DC cord through the hole in the charger base.
2. Attach the red wire of the new DC cord to the center terminal of the heatsink and tighten the nut to 18
in-lb (2.0 N·m) (Figure 4-23, Page 4-27).
3. Attach the blue wire of the new DC cord to the control board (Figure 4-23, Page 4-27).
4. Attach black wire of the new DC cord to ammeter. Install nut (1) onto post of ammeter slightly more than
finger tight. While holding the inside nut (2), tighten the outside nut (1) 1/4 turn (Figure 4-24, Page 4-27).
See following CAUTION.
Page 4-26
2008 Export Battery Charger Maintenance and Service Manual
EXPORT POWERDRIVE CHARGER (ONBOARD)
DC CORD
BLACK WIRE
TO AMMETER
Charger Repairs
1
DC CORD
BLUE WIRE TO
CONTROL BOARD
2
4
DC CORD
RED WIRE
TO HEATSINK
3
STRAIN RELIEF
BUSHING
Figure 4-23 DC Cord
6
Figure 4-24 DC Cord Replacement
CAUT ION
• Do not allow ammeter post to rotate as the nut is tightened. Rotation of the post could result
in a damaged ammeter.
5. Using pliers, put the strain relief bushing on the cord and insert it into the charger base.
6. Tie the wires together as they were before the wire ties were removed. See following WARNING.
ý WARNING
• Make sure wiring is properly routed and secured. Failure to properly route and secure wiring
could result in charger malfunction, property damage, or severe personal injury.
7. Position the charger cover on the base. Install the mounting screws, starting with the bottom holes.
Tighten the screws to 11 in-lb (1.2 N·m).
HEATSINK
Heatsink Removal
1. Disconnect the AC cord and remove the battery charger from the vehicle. See Onboard Charger
Removal on page 4-35. See preceding WARNING.
2. Remove the charger cover.
3. Remove both secondary coil transformer wires (tan) from the heatsink (Figure 4-18, Page 4-20) and
remove the two red wires from the heatsink.
4. Remove the nuts and bolts that secure the heatsink to the case.
Heatsink Installation
1. Place heatsink against charger base. Make sure clear plastic insulator sheet is between the heatsink and
the charger base. Install the nuts and bolts that secure the heatsink to the case. Tighten the bolts to 22
in-lb (2.5 N·m).
2. Connect the red wire from the DC cord and the red wire from the control board to the center terminal post
on the heatsink (Figure 4-5, Page 4-7). Tighten nut to 18 in-lb (2.0 N·m).
2008 Export Battery Charger Maintenance and Service Manual
Page 4-27
4
4
EXPORT POWERDRIVE CHARGER (ONBOARD)
Charger Repairs
3. Connect one of the secondary coil transformer wires (tan) to the bottom terminal post of the heatsink.
Tighten nut to 18 in-lb (2.0 N·m) (Figure 4-18, Page 4-20).
4. Connect the other secondary coil transformer wire (tan) to the top terminal post of the heatsink. Tighten
nut to 18 in-lb (2.0 N·m).
5. Install charger cover and install charger in vehicle. See Onboard Charger Installation on page 4-36.
6. Check charger for proper operation.
TRANSFORMER
See General Warning, Section 1, Page 1-1.
Transformer Removal
1. Disconnect the DC cord, the AC cord from the wall outlet, and remove the battery charger from the vehicle. See Onboard Charger Removal on page 4-35. See WARNING on page 4-26.
2. Remove the charger cover.
3. Note the locations of wire ties and remove the wire ties.
4. Disconnect the black primary coil leads from the AC circuit breakers and the voltage selector switch
(Figure 4-26, Page 4-31 and Figure 4-27, Page 4-34).
5. Disconnect the two tan secondary coil transformer wires from heatsink (Figure 4-18, Page 4-20).
6. Disconnect the two black secondary coil transformer wires from the fuse.
7. Remove the four bolts and nuts that mount the transformer to the case and remove the transformer.
Transformer Installation
1. Install the transformer with secondary coil to the rear of the charger case. Tighten the four bolts and nuts
to 28 in-lb (3.2 N·m).
2. Connect one secondary coil transformer wire (black) to one terminal of the fuse. Tighten nut to 22 in-lb
(2.5 N·m) (Figure 4-5, Page 4-7).
3. Connect the other secondary coil transformer wire (black) to the remaining terminal of the fuse. Tighten
nut to 22 in-lb (2.5 N·m).
4. Connect one secondary coil transformer wire (tan) to the top terminal post of the heatsink. Tighten nut
to 18 in-lb (2.0 N·m).
5. Connect the other secondary coil transformer wire (tan) to the bottom terminal post of the heatsink.
Tighten nut to 18 in-lb (2.0 N·m).
6. Connect the black primary coil transformer wire marked 1 to the top terminal of the top AC circuit breaker.
7. Connect the black primary coil transformer wire marked 6 to the top terminal of the bottom AC circuit
breaker.
8. Connect each of the remaining black primary coil transformer wires marked 2, 3, 4, and 5 to the corresponding terminals marked on the voltage selector switch.
9. Set the voltage selector switch to the appropriate voltage matching the incoming AC electrical service
that will be used to power the charger.
10. Tie the wires together as they were before the wire tie was removed. See following WARNING.
Page 4-28
2008 Export Battery Charger Maintenance and Service Manual
EXPORT POWERDRIVE CHARGER (ONBOARD)
Charger Repairs
ý WARNING
• Make sure wiring is properly routed and secured. Failure to properly route and secure wiring
could result in charger malfunction, property damage, or severe personal injury.
11. Install the charger cover and install the charger in the vehicle. See Onboard Charger Installation on
page 4-36.
12. Check charger for proper operation.
AMMETER
See General Warning, Section 1, Page 1-1.
Ammeter Removal
1. Disconnect the DC cord, the AC cord from the wall outlet, and remove the battery charger from the vehicle. See Onboard Charger Removal on page 4-35. See WARNING on page 4-26.
2. Remove the charger cover.
3. Using two wrenches to prevent the posts from turning, disconnect the DC cord black wire (5) and buss
bar (3) from the ammeter (Figure 4-25, Page 4-29).
4. Remove the two nuts (2) that secure the ammeter to the charger face.
5. Remove the ammeter from the face of the charger.
5
2
1
4
3
Figure 4-25 Ammeter
Ammeter Installation
1. Place the ammeter in position in the charger face (Figure 4-25, Page 4-29).
2. Install nuts (2) and tighten until ammeter is firmly secured.
3. Connect the DC cord black wire (5) to the left (as viewed from inside the charger) post of the ammeter.
4. Connect the buss bar (3) from the fuse link to the right post of the ammeter. Place flat washers on both
sides of the buss bar.
2008 Export Battery Charger Maintenance and Service Manual
Page 4-29
4
4
EXPORT POWERDRIVE CHARGER (ONBOARD)
Charger Repairs
5. Thread nuts (4) onto both posts of ammeter until just past finger tight. While holding the inside nut, tighten
the outside nut (4) 1/4 turn. See following CAUTION.
CAUT ION
• Do not allow ammeter post to rotate as the nut is tightened. Rotation of the post could result
in a damaged ammeter.
6. Install charger cover and install charger in vehicle. See Onboard Charger Installation on page 4-36.
7. Check charger for proper operation.
FUSE LINK
See General Warning, Section 1, Page 1-1.
Fuse Link Removal
1. Disconnect the DC cord, the AC cord from the wall outlet, and remove the battery charger from the vehicle. See Onboard Charger Removal on page 4-35. See WARNING on page 4-26.
2. Remove the charger cover.
3. Remove both black secondary coil transformer wires and the buss bar (3) from the back of the fuse link
assembly (Figure 4-25, Page 4-29).
4. Remove screws from the front of the charger and remove the fuse link assembly.
Fuse Link Installation
1. Place clear plastic cover over fuse assembly and install mounting screws from front of charger face. The
center branch of the fuse assembly should be in the upper left corner when viewed from the front of the
charger.
2. Install the buss bar (3) over the center branch of the fuse assembly and ammeter post (Figure 4-25,
Page 4-29). Tighten to 22 in-lb (2.5 N·m).
3. Install a secondary coil transformer wire (black) onto one of the two remaining terminals on the back of
the fuse assembly. Install the remaining secondary coil transformer wire (black) onto the remaining terminal. Tighten to 22 in-lb (2.5 N·m).
4. Install the charger cover and install the charger in the vehicle. See Onboard Charger Installation on
page 4-36.
5. Check charger for proper operation.
CHARGER RELAY
See General Warning, Section 1, Page 1-1.
Charger Relay Removal
1. Disconnect the DC cord, the AC cord from the wall outlet, and remove the battery charger from the vehicle. See Onboard Charger Removal on page 4-35. See WARNING on page 4-26.
2. Remove the charger cover.
3. Disconnect all wires from the relay (Figure 4-26, Page 4-31).
4. Remove the two screws and nuts attaching relay to mounting bracket.
5. Remove the relay.
Page 4-30
2008 Export Battery Charger Maintenance and Service Manual
EXPORT POWERDRIVE CHARGER (ONBOARD)
Charger Repairs
Charger Relay Installation
Install in reverse order of removal. Connect wires as shown (Figure 4-26, Page 4-31). Tighten nuts securing
relay to mounting bracket to 18 in-lb (2.0 N·m).
BLUE WIRE TO
RELAY
CONTROL
BOARD
CHARGER RELAY
BLACK
AC CIRCUIT
BREAKERS
1
3
4
6
7
9
BLACK
BLACK
AC CORD
RED
BLACK
A
B
BLUE
BOTTOM VIEW
OF RELAY
STRAIN RELIEF
BUSHING
BLACK WIRES TO
BLACK OR
PRIMARY COIL
BROWN WIRE GREEN
BLACK WIRES
OR
TO CONTROL
TO VOLTAGE
GREEN/
BOARD
INPUT SWITCH
YELLOW
GROUND WIRE
Figure 4-26 Charger Relay
CHARGER AC CIRCUIT BREAKER
See General Warning, Section 1, Page 1-1.
AC Circuit Breaker Removal
1. Disconnect the DC cord, the AC cord from the wall outlet, and remove the battery charger from the vehicle. See Onboard Charger Removal on page 4-35. See WARNING on page 4-26.
2. Remove the charger cover.
3. Disconnect the two black wires attached to top circuit breaker (Figure 4-26, Page 4-31).
4. Disconnect the two black wires attached to bottom circuit breaker.
5. With a pair of pliers, squeeze in the retaining tabs on the sides of the top AC circuit breaker and remove
the circuit breaker through the mounting hole in the face of the charger.
6. Repeat step 5 for the removal of the bottom circuit breaker.
AC Circuit Breaker Installation
Install in reverse order of removal.
2008 Export Battery Charger Maintenance and Service Manual
Page 4-31
4
4
EXPORT POWERDRIVE CHARGER (ONBOARD)
Charger Repairs
CHARGER AC CORD AND RETRACTABLE CORD REEL
See General Warning, Section 1, Page 1-1.
Short AC Cord Removal
1. Disconnect the DC cord, the AC cord from the wall outlet, and remove the battery charger from the vehicle. See Onboard Charger Removal on page 4-35. See WARNING on page 4-26.
2. Remove the charger cover.
3. Disconnect the AC cord black wire from the AC circuit breaker (Figure 4-26, Page 4-31).
4. Disconnect the AC cord white wire from the control board.
5. Disconnect the AC cord green wire from the charger base (Figure 4-26, Page 4-31).
6. Use a pair of pliers to grip the strain relief bushing and remove it and the AC cord from the charger.
Short AC Cord Installation
1. Insert the black, white, and green leads of the new AC cord into the charger through the hole in the
charger face (Figure 4-26, Page 4-31).
2. Connect the black wire and white wire to the control board (Figure 4-5, Page 4-7). Connect the green
wire to the charger base. Tighten the screw on the green (ground) wire terminal to 18 in-lb (2.0 N·m).
3. Position the strain relief bushing on the AC cord.
4. Using pliers, install the strain relief bushing and AC cord into the mounting hole in the charger face.
5. Install the charger cover and install the charger in the vehicle. See Onboard Charger Installation on
page 4-36.
6. Check charger for proper operation.
Retractable AC Cord Reel Removal
1. Disconnect retractable AC cord from AC outlet. See Onboard Charger Removal on page 4-35. See
WARNING on page 4-26.
2. Remove the charger cover.
3. Remove the heatshrink from the AC cord connection between the short AC cord and the retractable cord
reel by gently cutting the heatshrink tubing (Figure 4-20, Page 4-22).
4. Disconnect the short AC cord from the retractable cord reel.
Retractable AC Cord Reel Installation
Install in reverse order of removal.
Page 4-32
2008 Export Battery Charger Maintenance and Service Manual
EXPORT POWERDRIVE CHARGER (ONBOARD)
Charging a Battery Pack that has Low Voltage
CHARGING A BATTERY PACK THAT HAS LOW VOLTAGE
See General Warning, Section 1, Page 1-1.
ý WARNING
• Knowledge of battery charger wiring and component terminology is required before
attempting any repair (Figure 4-5, Page 4-7).
• Prior to servicing the charger, disconnect the AC power supply cord from the wall outlet,
disconnect the DC cord from the vehicle, and remove the battery charger from the vehicle.
See Onboard Charger Removal on page 4-35.
If battery pack voltage is below 34 volts, the charger will not activate. The charger relay will have to be
bypassed to activate the charger.
1. Turn key switch OFF and place the Forward/Reverse switch in the NEUTRAL position.
2. Disconnect the AC and DC cords and remove the battery charger from the vehicle. See Onboard
Charger Removal on page 4-35. See WARNING on page 4-26.
3. Remove the charger cover.
4. To apply AC power directly to the transformer primary coil, the relay must be bypassed.
4.1. To bypass the relay, locate the black wire that goes from the circuit breaker to terminal 9 on the
relay. Disconnect the black wire from the relay terminal (Figure 4-27, Page 4-34).
4.2. Disconnect the black wire from relay terminal 6.
4.3. Use a jumper wire with alligator clips to connect the black wire from relay terminal 9 to the black wire
from relay terminal 6 (Figure 4-27, Page 4-34).
4.4. Disconnect the black wire from relay terminal 7.
4.5. Disconnect the black wire from relay terminal 4.
4.6. Use a jumper wire with alligator clips to connect the black wire from relay terminal 7 to the black wire
from relay terminal 4 (Figure 4-27, Page 4-34). See following DANGER.
ý DANGER
• Do not touch any wire or component in the battery charger while AC power is present. Failure
to heed this warning will result in an electric shock.
5. Install the charger cover and install the charger in the vehicle. See Onboard Charger Installation on
page 4-36.
6. Plug the AC cord into an electrical outlet. The charger should activate and begin charging.
7. Allow to charge for one or two hours. See following WARNING.
ý WARNING
• Do not leave the vehicle unattended while it is charging. A charger operating with a bypassed
relay could short circuit and possibly cause a fire.
8. After one or two hours, disconnect the AC cord and remove the battery charger from the vehicle. See
Onboard Charger Removal on page 4-35. See WARNING on page 4-26.
9. Disconnect the jumper wires from the relay wires and connect each wire to the original terminal on the
relay (Figure 4-27, Page 4-34). See following WARNING.
2008 Export Battery Charger Maintenance and Service Manual
Page 4-33
4
EXPORT POWERDRIVE CHARGER (ONBOARD)
Charging a Battery Pack that has Low Voltage
ý WARNING
• The relay wiring must be properly connected prior to placing the charger back into normal
service. Failure to remove the jumper wire and properly connect the relay wiring could result
in property damage, severe personal injury, or death.
10. Install the charger cover and install the charger in the vehicle. See Onboard Charger Installation on
page 4-36.
11. Plug the AC cord into an electrical outlet.
12. Allow the charger to continue charging the batteries until the charger shuts off automatically.
13. When the charge cycle is complete, test the batteries again. If the battery pack voltage is above 34 volts
and the vehicle will not operate, it will be necessary to troubleshoot the vehicle’s electrical system to
determine which electrical component has failed. See Section 11 – Electrical System and Testing in
the appropriate maintenance and service manual.
DIODES WITH
HEATSINK
RED
RED
TAN
BLUE
TRANSFORMER
BLACK
RELAY BYPASS
JUMPER WIRE
RELAY BYPASS
JUMPER WIRE
BLACK
CASE
GROUND
BLACK
BLACK
BLACK or BROWN
GREEN or GREEN/YELLOW
TAN (2)
3
TAN (3)
1
WHITE or BLUE
BLACK
9
6
BLACK
7
4
AMMETER
TAN (5)
PRIMARY
COIL
FUSE
TAN (4)
RELAY
BLACK
BLACK
B
BLACK
A
TAN (6)
AC CORD
SECONDARY
COIL
TAN (1)
BLUE
BLACK
CONTROL
BOARD
RED
BLACK
BLK
BLACK
TAN (1)
BLK
BLACK
BLACK(1)
AC CIRCUIT
BREAKERS
BLACK
BLACK (1)
BLACK
BLACK
BLACK
TAN (6)
BLACK
BLACK
BLACK (6)
BLACK (6)
Figure 4-27 PowerDrive Onboard Charger Wiring Diagram (Relay Bypassed)
Page 4-34
2008 Export Battery Charger Maintenance and Service Manual
1
2
3
4
5
6
AC VOLTAGE SELECTOR SWITCH
BLUE
TERMINAL #
RED
BLUE
BLACK
TAN
DC CORDSET
RED
4
EXPORT POWERDRIVE CHARGER (ONBOARD)
Onboard Charger Removal and Installation
ONBOARD CHARGER REMOVAL AND INSTALLATION
See General Warning, Section 1, Page 1-1.
ý WARNING
• Knowledge of battery charger wiring and component terminology is required before
attempting any repair (Figure 4-5, Page 4-7).
• Prior to servicing the charger, disconnect the AC power supply cord from the wall outlet,
disconnect the DC cord from the vehicle, and remove the battery charger from the vehicle.
See Onboard Charger Removal on page 4-35.
DS VILLAGER 4
Onboard Charger Removal
1. Disconnect the batteries as instructed. See General Warning, Section 1, Page 1-1.
2. Remove four bolts (21), flat washers (22), lock washers (23) and nuts (24) from charger mounting brackets (Figure 4-28, Page 4-35).
21
22
C
lu
b
C
ar
23
24
Figure 4-28 Onboard Charger Mounting – DS Villager
3. Remove 10-gauge black charger DC cord wire (19) from the charger receptacle fuse link (Figure 4-29,
Page 4-36).
4. Remove 10-gauge red charger DC cord wire from the positive (+) post of battery no. 1. See Section 1 –
General Warning.
5. Disconnect the 10-gauge charger DC cord blue wire (17) from the 3-way wire adapter (18) at the sense
lead fuse (20) (Figure 4-29, Page 4-36).
6. Cut any wire tie(s) that secures the DC cord to the vehicle.
7. Lift charger and reel assembly from vehicle.
2008 Export Battery Charger Maintenance and Service Manual
Page 4-35
4
4
EXPORT POWERDRIVE CHARGER (ONBOARD)
Onboard Charger Removal and Installation
19
20
17
18
Figure 4-29 Charger DC Cord Black Wire and Blue
Wire – DS Villager 4
Onboard Charger Installation
1. Installation is reverse of removal.
2. Tighten hardware securing the black DC cord wire to 23 in-lb (2.6 N·m) and the red DC cord wire to 144
in-lb (16 N·m).
3. Install four bolts (21), flat washers (22), lock washers (23) and nuts (24) securing charger to chassis and
tighten to 108 in-lb (12 N·m) (Figure 4-28, Page 4-35).
4. Connect battery cables, positive (+) cable first, and tighten to 144 in-lb (16 N·m).
PRECEDENT VEHICLES
Onboard Charger Removal
1. Disconnect the batteries as instructed. See General Warning, Section 1, Page 1-1.
2. Disconnect the charger DC cord at the three pin connector (1) (Figure 4-30, Page 4-37).
3. Remove four bolts (2), flat washers (3), lock washers (4) and nuts (5) securing charger to chassis.
4. Lift charger assembly from vehicle.
Page 4-36
2008 Export Battery Charger Maintenance and Service Manual
EXPORT POWERDRIVE CHARGER (ONBOARD)
Onboard Charger Removal and Installation
Onboard Charger Installation
1. Installation is reverse of removal.
2. Install four bolts (2) and nuts (5) securing charger to chassis and tighten to 108 in-lb (12 N·m).
3. Connect battery cables, positive (+) cable first, and tighten to 110 in-lb (12.4 N·m).
2
1
3
C
lu
b
C
ar
4
5
Figure 4-30 Onboard Charger Mounting – Precedent
Vehicles
2008 Export Battery Charger Maintenance and Service Manual
Page 4-37
4
4
TE
K
E
C
H
O
T
S
H
C
E
.
Z
C
IR
AT
H
A
W
M
T
60
E
O
C
R
E
T
E
T
R
O
N
S
H
N
0V 50
E
T
O
T
24
D
C
H
E
S
E
0/
IT
IS
R
N
D
A
D
22
W
IO
. N
N
,
0/
T
T
E S
IF
G
LY U
C
H IE
20
N O
Y
IN
E
T R
0/ T! TLE
R
O R
N
D E
AT
E
S G
N
10 LE OU .
T
N T
R .
G
O
A AT AT
E S
O T
LE LY
C
R
P K
T
U ET- IN
S B
B !
IC E
L
O R
P N
IT O K TT
H P
E T
A
M E
N T- C E
E O
IS SPA
H
IC
A H
V R
U KE O S
L.
T TLE
T
S H
A R D
P
.
20 W IN U
IS C
! C
48
U E N
R
Y
O
H O E C
N G A
E
M T
LS LE TO LL
TA O
T S IR IT
A R E
V
E
A E
A
IN E
M HA M
T LY OF TO W SW IN
O
A V
13 IC
LL
E
S N
C
N C LA
M A LI
Y
K D E E . M A
M AT
G
IO E F
S T O C R R H E R IF
O
O
T IL
E
H T
A
IN
T TO
E C
R M
C H NT
B CO T G LU T Y
F TO
N
IV E
U
. V
E T D IN ; B RY LA
R N
Y U
R W E E MO
O ED
E
E
H
E
T C V
R A
D N
K T
T PU D H S TE D
A
D D RE AG E
R O
C C
V FF
E C
N IN UN C EN
A E
IN G - P AR E R
AT S
L O
AT
O
B N
W K,
D
O M . S B ND
IL S
N
D G
A IN S G R PO C
LE O
W T
E TIN GR E CK ED O
E AK SE IN FO
O
C
C C
G
R
T U
Y
, E A E E . AR SH CATEC LY A LA T E
N H
S
C G
G BR G G B TS C
E S
N R LT B LA
L LU
IN E E R LY H B IC
LO N E O ", SU 15 E. RR IT
IL P
G R IV HA PP G LU TR
N
H O P V "-
O
W T
R O S C U LI C C
C C RO T E; NIN T AT CU . U
.
A F
IT E P PU IV U 2 R L D
IT U
AC
H E LO T S D H LE
N P
O
T
W R A
R E
C B P O S E IT E
U IN
S FO O IN AT CH E G TIA O
E - EX N IN K W F
EC
E E T S EG U FT AR IN G
R G - O A NA E O
IS D
IN
D M
NN
E
G B
O
H N
O
A E RD A . N T A CH T. R
T A
F IN G - T R US K
CO
, Y
IS
O
E N IN
LT G O M D T Y L EN A
IS
E
R
R R
B R N G C
S
O A
D E O LL
• A R IN NE G O E
G E
,D
V LT R C E R N A TIA RR IE
W A N N IN F H
A T
G
R ", O IC
T
IN CU ER OR AT
IN
W AR O OK - T
U VO E U "+
G
P T W S ; ! D AT S T T
T B
W C M IN CE
RAT .
S E
IS S
IN U PO EA ITY RD OM E C AT
N U !
E
D
PE
P
D H
• O R ED S HE IN T M R ZA UT AT R B
O KS
E T
N A
IC
U
• W R T T D P ND LA A A D OR S IF ND TO
L. IS SPAR
UA ER D
O LE T E IN A PO H RT IN C P
E D
K
T T S R
T E
AN G
• U JU U CT CY D C TA ER R AM
X T
M AR AN
O D S E N A O S T O
R.
E C
N H E
H L E F 5
F E
A A N E
VE
O C AM
• E N U T LE S IL M R N
O N
TI ILE FL
E A
M O Q
CO
S N
W M
UC H T
C E U IC A T H
D CO
NG
• R TP TR IT E ME S T
W EN
IO
F U C N
DTR C
E. OVI
R IS
U TH M S
O
IN D EV
E
• LE IS . A LE
P RD
D NG - PR AG REM
E
D R
AR
• H O O O . G O
EA KI
T
G E
T
ES
R
• O NT R ED IN C
,R
T
G
G EA AS IN FO
O E G UR U
IN BR G GE BE .!
P
G RE
•M AR : D TP
ST
TA H E U
AR FO SIVE HAR LY HTS
TE
C T O
S
CH BE O T C PP LIG
O E
PL
•N H
RE G - EX NO S SU
TION
E
T
EC
FO IN G - DO AIN AKED
EN AR
N
NN
TH S
• BE AR NIN G - T M R N
D IE
IF
L CO AN TTER
Y
W
AR IN EC O
ER
PS BA
TICA
W N NN NG
TT
AR
AM N
EC
BA
HE
W CO OKI
E !
L EL TO 20 Y W
IS
TH ET
AL
• D O SM
IN TL
13 CALL
IF
TA
Y
•N
IN E OU
OM TI
LA
TFR MA
MA LIV
DE
KE
TO
.
S
A
RY
TO
C
E
ND
VA F AU
AC
ON D TO
SO
T
TH
CO
ILL
E
CK TE
W S OF
SE
EC
CH
IR
BA
15 . ENT UT
W
AT
E EC
NN
Z
M
SH
H
CL NN
CO
2 TO TE RR
REE TO
CY CO
60
IS
R RA CU IT
R
TH
ILL UG
TE GE AL . UN
,D
O
0V
W PL
G
TI OD
AF
ED
24
IT T
Y AR IN
IN
50
0/
. D
PU
LL CH T. GO
UN
H
N
ST
E
AL
22
RAT .
IT
IS IN
NLY U
TE
0/
TICA TI EN AR
W
O RO
TH D
PE
20
MA S IN RR IES
O KS
S G
NS
E, Y AN
0/ ! ET
E
TO TE T CU ER
O
LE LY
AG ER
L. IS SPAR
10 ET UTL
TI
R
OR TT
T AU DICA EC BATT
UA ER D
EN S AR
HIC PE
EC
TO TL O .
ST BA
AR IN RR IF
AN G
TH IE
VE O
IF
IT OU T- ING
NN
ST R R CO PS
ED THE
M AR AN
R.
D ER
Y
48 PR
UN T- CKE TT
N H E
CO
ND
ILL TE
VE
AN TT
ER
O C AM
W ME R FO 5 AM
IS CKE SO SE
TE D TO
EM TO
TI E FL
IT
CO
TT
AM
PS BA
EX
CAL
IL
E
TH
ST NLY
UN E TE AN OF ECTE
UC H T
CH
BA
TI
F SO
AM HEN
NG
W EN
IS . TH ME TH
E !
O TO WIR IT
SY O
S! EC
S NN
AM
20 W
DTR C
E. OVI IVE T
TH ET
AL EL
OD
• TH OD R LESS
CK RD EE SW
IN D EV
EC
RI CO
IN UTL
TO LY
GO TO
BA O R E E. MIN L
D NG - PR AG REM
DR N
PE IS
C
N
TH
TH
E
ON R TO
R AL
13 AL
AR
EA KI
NTA O
ER O
G BLU TE IF
•M PE GED. NG CORD
M IC
ES G RE
TH T
AI VE
,R
W C
O AT
TA AR RI
M LI
N PU DED IN ; Y
G EA AS IN FO
DU UT
O IN UN CH SE ER ELAY
PO CK,
FR M
IN BR G E
CH E: TP
TO A
TO
G RE VE G BE . AR O
ED NG RO MAT N TT D
RY
N TO
OT
AR LY
AR
•N E OU
HTS BC SH CAT TI G E K. SE BA NDS
VA AU K O D
FO SI H
L FF
D O
CH BE O T C PP LIG LU IC
EC
TH
C TE
IL O
PL
LO N LY AG AC
BA NEC
W
RE G - EX NO S SU H C TR H ON R LT BL TE C
T UTS
FO IN G - DO AIN AKED IT ELEC ITC C OPE VO "-", SULA SE
LE ON
N
T
E
EN
W
15
E. R SH CYC G C
• BE AR NIN G - T M R N SE OF
SW R PR PU E; IN
L
E FO A IN IV UN 2 TO RAT UR NIT
W
C U
AR IN EC O U K
IL U
AT
W N NN NG R RIS LTAG E BE D TO NS EG CH R GE AL D.
W PL
AR
O
R AI N U TE
IT T
W O KI - FO E
.
O
C
O
M
AG
VO
TO AF HAR INTI GO
UN INPU
IS SM G E TH
T LT C
ED T
C T. E
IS D
• D O NIN UC
PU VO ER RED", R NO ALLY AL EN AR
TH AN
• N AR ED S! E IN T W SU "+ DO IC TI RR S
E, Y
PU PO
W R
Y;
IE
ET
TH IN T MEA IT D! MAT IN CU ER
ER
RAG
• TO UTL ST ED PU D LAR AR TO ATES T TT
O TT
EC
O JU R T IN AN
AZ
ST E BA
Y PO K H T AU DIC RR IF BA
SU
ED TH
IN O
• AD EA EC C
C
M NN UEN LEAD O STARER R C PS
ND TO
O
T SH L
AM
TE D
• C EQ U IC IL MET FO 5
EX TE
FR TP TR W
F
U
IT AM ETER AN
O NEC
• O EC UN E M TH
DS ON
C
• EL IS D. TH AM SS
RIO
• TH OO TOR LE PE D IS
G N TO . G R
O R ED IN O
•M PE G UR T C
TA AR D U
:
CH TE UTP
O O
•N E
TH
Page 5-1
2008 Export Battery Charger Maintenance and Service Manual
5
SECTION 5 – EXPORT IQ PLUS CHARGER
(EXTERNAL)
ý DANGER
• See General Warning, Section 1, Page 1-1.
ý WARNING
• See General Warning, Section 1, Page 1-1.
• The battery charger DC plug must be pulled slowly from the receptacle (Figure 5-4, Page 5-7).
Jerking or pulling the DC cord out quickly could cause arcing that could damage the plug and
receptacle and could cause batteries to explode (Figure 5-5, Page 5-7).
GENERAL INFORMATION
This section includes information pertaining to service of the Export IQ Plus battery charger (model numbers
25880-11 and 25880-18). Depending on the geographic region, the charger provided with your vehicle may
be a different model. Do not attempt to service a battery charger that has not been properly identified. If a
charger cannot be properly identified, contact your local Club Car dealer or distributor.
The IQ Plus battery charger is automatic and has no external controls (Figure 5-1, Page 5-1). When the
charger is connected, there is a 2 to 15 second delay before charging begins. See following NOTE.
NOTE: At one hour and at two hours into the charge cycle, the charger will shut off in order to run a selfdiagnostic program (ammeter will drop to zero). Charging will resume in a few moments (ammeter
returns to previous rate of charge).
The onboard computer (OBC) records the amount of energy consumed as the vehicle is used, then directs
the charger to replace exactly the amount of energy needed to fully replenish the batteries. The charger shuts
off automatically, preventing the possibility of either undercharging or overcharging.
Figure 5-1 IQ Plus External Charger (Export)
Model 25880-11
5
EXPORT IQ PLUS CHARGER (EXTERNAL)
General Information
IQ PLUS EXTERNAL CHARGER FEATURES
• Charge Interlock
IQ Plus battery charger DC plugs have three pins rather than two blades common on most standard
charger plugs. Two of these pins are the positive and negative leads as on standard chargers; the third
pin is a sensing lead that is the communication link between the charger and the onboard computer.
When the charger plug is plugged into the vehicle receptacle, the onboard computer locks out the vehicle drive system. This prevents the possibility of driving the vehicle while the charger is plugged in and
potentially damaging the vehicle and charger.
• Long-Term Storage Charge
IQ Plus vehicles with IQ Plus chargers are designed to be left connected with AC power to the charger,
during off-season or long-term storage. The onboard computer will automatically activate the charger
every 15 days. To return the vehicle to service, unplug the charger DC cord, wait 15 seconds for the
computer to reset and plug the charger back in. See following WARNING. Allow the vehicle to complete one full charge cycle before putting it into service. This will ensure the batteries are at their optimum charge prior to returning the vehicle to service.
ý WARNING
• The charger plug must be pulled slowly from the receptacle. Jerking or pulling the DC cord
out quickly could cause arcing and burning that could damage the plug and receptacle and
could cause batteries to explode.
BATTERY WARNING LIGHT
IQ Plus vehicles feature a dash mounted battery warning light (above the steering column) that, when the
vehicle is in operation, indicates low battery voltage or, when the vehicle is being charged, indicates a charging problem. The battery warning light is controlled by the onboard computer.
When the batteries receive an incomplete charge because 1) the DC power cord is disconnected, 2) AC
power to charger is interrupted, 3) automatic charger shut-off occurs after 16 hours of operation, or 4) charger
malfunctions, the warning light will indicate as follows:
• The battery warning light will not illuminate if the charge is 90% or more complete. The onboard computer will retain in memory the amount of charge needed to fully replenish the batteries and will complete the charge during the next charge cycle.
• When the charger DC cord is unplugged during a charge cycle, the battery warning light will illuminate
and remain illuminated for 10 seconds if the charge is less than 90% complete but the vehicle has
enough power for 60 minutes of operation. This will alert the operator that the vehicle may be used, but
that it must be charged to completion as soon as possible.
• The battery warning light will repeatedly illuminate for 10 seconds, at 4 second intervals, if the charger
times out at 16 hours and the batteries are not sufficiently charged. This indicates an abnormal charge
cycle. The charger and batteries should be checked by your Club Car distributor/dealer.
• The battery warning light will repeatedly illuminate for 10 seconds, at 4 second intervals, during a
charge cycle (with the DC plug still connected) if AC power to the charger is interrupted. The light will
go out when AC power is restored.
Page 5-2
2008 Export Battery Charger Maintenance and Service Manual
EXPORT IQ PLUS CHARGER (EXTERNAL)
The Charge Circuit
THE CHARGE CIRCUIT
The vehicle charge circuit consists of the following components:
• charger receptacle
• receptacle fuse link
• onboard computer
• batteries
The negative terminal of the receptacle is connected to the onboard computer. The 10-gauge black wire from
the onboard computer connects to the B– terminal on the speed controller, and the 4-gauge black wire (also
on the controller B– terminal) goes through the onboard computer and connects to the negative (–) post of
battery no. 8. The positive terminal of the charger receptacle is connected to the positive (+) post of battery
no. 1 (depending on the specific vehicle model, this connection to positive (+) post of battery no. 1 is sometimes made through another electrical component such as a solenoid, or main power fuse). The gray wire
(sense lead) from the charger receptacle is connected to the sense lead fuse, which is connected to the gray
wire from the onboard computer.
If the charger works with one vehicle, but does not work with another vehicle, then most likely the problem is
in the vehicle charge circuit. Check the connections between the 18-gauge gray wire from the charger receptacle, the sense lead fuse, and the 18-gauge gray wire from the onboard computer. Also check connections
of the fuse link located on the charger receptacle (Figure 5-2, Page 5-3).
ONBOARD
COMPUTER
SOLID STATE
SPEED CONTROLLER
FUSE LINK
#10 BLACK
B–
TERMINAL
#4 BLACK
CHARGER
RECEPTACLE
#10 BLACK
#10 BLACK
#10 RED
Carryall 6
Transporter 4 and 6
Villager 6 and 8
#18 GRAY
#6 RED
#18 GRAY
#10 RED
SENSE LEAD FUSE
Turf 2 and 252
Carryall 2 and 252
XRT 900
+
BATTERIES
–
Figure 5-2 Charge Circuit
2008 Export Battery Charger Maintenance and Service Manual
Page 5-3
5
5
EXPORT IQ PLUS CHARGER (EXTERNAL)
External Charger Installation and Operation
EXTERNAL CHARGER INSTALLATION AND OPERATION
See General Warning, Section 1, Page 1-1. See additional WARNING on page 5-1.
ý DANGER
• The charging area must be ventilated. Hydrogen level in the air must never exceed 2%. The
total volume of air in the charging area must be changed five times per hour. Exhaust fans
should be located at the highest point of the roof. Contact a local HVAC engineer.
• Do not charge the vehicle batteries with the vehicle covered or enclosed. Any enclosure or
cover should be removed or unzipped and pulled back when batteries are being charged. An
accumulation of hydrogen gas could result in an explosion.
ý WARNING
• Do not bypass the sense lead fuse.
• Only trained technicians should repair or service the charger. Contact your nearest Club Car
distributor/dealer.
• Each charger should have its own dedicated 15 or 20 ampere separately protected (circuit
breaker or fuse) single phase branch circuit, in accordance with all applicable electrical codes
for the location.
• Connect the charger AC supply cord to a properly grounded, three-wire outlet of the proper
voltage and frequency as shown on the charger.
• Do not use an adapter to plug the charger with a three-prong plug into a two-prong outlet.
Improper connection of the equipment-grounding conductor can result in a fire or an
electrical shock.
• An extension cord or electrical outlet must accept a three-prong plug. Extension cord should
be a three-wire no. 12 AWG (American Wire Gauge), and be as short as possible. The use of
improper extension cord could result in fire or an electrical shock.
• Do not use near fuels, grain dust, solvents, thinners, or other flammables. Chargers can ignite
flammable materials and vapors.
• Do not expose to rain or any liquid. Keep the charger dry.
• Prior to servicing the charger, disconnect the AC power supply cord from the wall outlet and
the DC plug from the vehicle charger receptacle.
• When the charger is on, the charger DC cord may be disconnected from the vehicle receptacle
slowly. Jerking or pulling the DC cord out quickly could cause arcing and burning that could
damage the plug and receptacle and could cause batteries to explode.
• Never push objects of any kind into the charger through cabinet slots. They may touch
dangerous voltage points or cause an electrical short circuit that could result in fire or
electrical shock.
• Do not connect the charger to battery packs that are not compatible with the DC output
voltage specified on the charger. Overheating and transformer burnout will result.
• Do not connect a stationary charger to the receptacle if the charger cord, plug, or the vehicle
receptacle is broken, damaged, or does not make a good electrical connection. Fire or
personal injury can result. Have a qualified technician replace the parts.
• Do not use a battery charger if the cord, plug, or receptacle is damaged in any way. Replace
worn or damaged parts immediately. Failure to heed this warning could result in a fire,
property damage, severe personal injury, or death.
WARNING CONTINUED ON NEXT PAGE...
Page 5-4
2008 Export Battery Charger Maintenance and Service Manual
EXPORT IQ PLUS CHARGER (EXTERNAL)
External Charger Installation and Operation
ý WARNING
• Do not operate the charger if it has received a sharp blow, was dropped, or otherwise
damaged in any way.
• Have worn, cut, or damaged power cords or wires replaced immediately.
• Do not block or cover the charger ventilation slots. The slots provide ventilation and prevent
the charger from overheating.
• Do not allow clothing, blankets, or other material to cover the charger.
• Do not allow the charger to operate for more than 30 minutes at 19 or more amperes.
• Install surge arrestors on incoming AC power lines. Surge arrestors will help protect electrical
components in the charger and on the vehicle from all but direct or close lightening strikes.
ý CAUTION
• Be sure to check the batteries and charger monthly to maintain correct battery water level and
ensure the charger is operating correctly during storage.
NOTE: Charger operation instructions in the language of the user should be printed on or permanently
affixed to the top of the charger. If these instructions are not found on the charger, contact your
Club Car representative.
AC POWER CONNECTION
The AC line to which the charger is to be connected must be of the proper AC input voltage for the charger
and must be capable of supplying sufficient current. See Section 2 – Charger Identification and Specifications. If the battery charger is equipped with a multi-position switch for variable AC input voltage, the switch
must be set for the correct voltage before the AC cord is connected (Figure 5-3, Page 5-6). See following
CAUTION.
CAUT ION
• Failure to set the AC input voltage selector switch to the correct voltage could result in
damage to the battery charger or batteries.
NOTE: Make sure that the AC cord provided with your charger has the proper AC plug for your location. If
it does not, contact your Club Car representative to obtain the proper cord or plug.
With charger DC cord disconnected, connect the power supply cord to an AC supply within the acceptable
voltage range. See Section 2 – Charger Identification and Specifications.
To reduce the risk of electric shock, the battery charger must be grounded. The charger is equipped with an
AC electric cord with an equipment-grounding conductor and a grounding type plug. The AC plug must be
connected to an appropriate receptacle that is properly installed and grounded in accordance with all applicable national and local electrical codes and regulations.
The use of an extension cord with the charger should be avoided. If an extension cord must be used, use a
three-conductor no. 12 AWG (American Wire Gauge) or no. 14 SWG (British Standard Wire Gauge), heavyduty cord with ground, properly wired and in good electrical condition. Keep it as short as possible (no more
than 12 feet (3.7 m)). Place all cords so they will not be stepped on, tripped over, or otherwise subject to damage or stress.
Ensure that the charger ventilation slots are unobstructed and that there is adequate ventilation.
2008 Export Battery Charger Maintenance and Service Manual
Page 5-5
5
E
R
.
•B
E
W FO
W AR RE
A N
• D WA RN ING CH
• N IS RN ING - AR
B
O CO ING - EF GIN
E
• T WA SM NN - XP OR G,
O R O E D L E R
O R N K CT O O B E
• A UT E ING ING M NO SIV RE AD
A T E A IN
D L D
M JU E UC - F O IN C G K D
• C EA S TS E OR R N S HA A IN TR
S G
O S T ! TH U AK SU RG E D UC
F N U T
E S E PP E S C T
• O RE NE RE HE
R E D LY IN - P W IO
IS W L
• E U QU CT D IN IN
K IT IG BE G RE HIL N M
T
P
O H H F AR VE E A
• T LE PU EN IN P U
F C TS O A N C N
H C T C P U T
E LU . R G T H U
G IS T L Y U T VO
LE B
E E F A A
•M OO U RIC EA AN T P VO LT
R . LA RG L.
C C
N
D D O LT A
E
O
TR A
M E
M
TA N D IT SH P M W AG GE
R
E R
IC
O
T .T
E
O
P
V
A IS
C P O H W OC L EA R E S
O
IN
N O
•N HA ER R A E A ILL K AR SU C BE WIT SH W
D P
G
O E
O R T M M S H IT R O F
S E
C R
C
T TE G O M M TA AZ Y E RD O CH
PA R
K D
O
;
R
H
,C R
V
R AT
E : D ED LES ET ET RT AR "+ D M TO E LO
E
K IN
O U . S ER ER A D ", R A A C C
O IVE
S G
U R
N S R.
.
TH F IN UT ! D E IN P ON AT
TP IN
N Y
,D
S
E S
A OR DIC OM O N D. N IN RO NE ED
U G
C T
IS
N
T P
C
T E
C
5 CO AT ATIC OT EG PU PE TIN ON
C ER
O M
O
R
O IO
A R E
N 4
N
•B
M R S A TO AT T V LY G TH
R
LY 8
N
D D
P E IN LLY U IV O G IN E
E
E
S C
TO VE
W FO
C E
C
IS S
IF T TIA A H ; "- LTA RO PU BA
T
C OF
W AR RE
P HIC
AC
B CU L FT UN ", GE UN T CK
O E
R L
A N
AT R C E IN B
C
N X
O E
.
• D WA RN ING CH
N T
P S
TE R HA R S LA MAT DE OR OF
E E
C N
• N IS RN ING - AR
R EN R G 2 T U L CK C D T D TH ER O
B
TE D
IE T.
LY N
O
T
.
O CO ING - EF GIN
LY
S IN E 1 ATE SE HIN HR O IS
D ED
G .
S NN - EX O G
A T RA 5 D N G E S U
R
T S
M
N
O
R
S
O
O
IA
T
T
O EC DO PL RE , R
B S T E
U
TH OR E G L E. EC AT E; HE W CK IT T
E
O
K T
N
IR E
IN
N S B A
O T BL
O CU
D
E A
N E U SW E T- O 1
G MA OT IV RE D IN
O R
E
B GE
D R E
E A
S O 0
D
D R
O
AT
S
U
Y
IT
O
0
.
,
R INS CH GA KIN DT
TH
U EN
D T .
C C TL /20
TE TH
N T
N S AR S G R
E ER
R
IT
A U G E D U
R IS
LA M H S KE ET 0/2
E
K P
Y U
E
E T-O ! 2
S WIL
Y IN
E P E S - C CT
A N
TT U
H L
0/2
W
D LY IN P W IO
IF A
N IT
U
IR
LIG
IN T
D
TS VA
40
A LS
B G RE H N
E
LL !
G LE
IN W
VH EF AR VE ILE MA
. T
O RY
S
P ILL
TS O A N C N
E
O
TO
FF F
U
W
L
C
R G
U
T C
.!
E
R
IT
K
A
E E T F HA A
M
C
P YC
H
E
U OM
TIC
LU L
AT
R . L A RG L.
TTO
50
E
C
M E
G E
M
A
M 13
H
O
E R
L
O
C B
AT T
TH
R
V
A IS
O AC
C
IN
N O
IC O 2
O
N K
60
E
D P
N O
N
G
A 0
H
E N
N
S E
LLY A
C
C
Z
E
PA R
M
O
T T
C
A
V
P
E
R
T
D O M WH S
K TIN
IO
S G
TO A
E AN
.
N D NS
,D
A INTA
B T
TE
IS
AT H
LIV IN
S
C
TE E
T
O
E T
N
R N
O H
N
IE
U E
E
S
TL B
C
A
T
E AT
R
T! T
AC
E
E
R
.
Y
IF
220 V
S
UN
IT
TH W
E ILL
AM AM STA
M ME R
ES ETE TE T AU
S R R IN TO
TH FO D M
AN R IC AT
5 CO ATE ICA
ER
AM R S LL
IO
PS REC INTI Y
D DS
IF T C AL AFT
IS O
BAT U C ER
CO F
R
NN EXTE
TE RE HAR 2 TO
RIE NT. G
E
N
E
G CTE NDE
S IN R 15
,
AR TI AT SE
D D
E R
E AL E. CO
B EA TO STO
GO C
ND
TH R
V RE D
OD. URR
S
E AG
E A IN
DE
BAT E
G K D
UN EN
,
LA
TE TH
A AS ING TR
IT T W
Y
R E
RY IS
S IL
IF
G
D U
A
AN UNIT HUTS L VA
P E S - C CT
LL
LY IN P W IO
D W
ELE
OFF RY
IN IL
G B G RE HIL N
FR
PU L
CTI
H EF A V
AU O
T C
R E E M
T
Y
P
TO M 13 CA
LU S. OR AG N C AN
LU CLE
M TO L C
E E T F HA UA
G B
AT
C BC
ON
R . L R L
CO AC
IC 20
T A
E
A G .
NE
R R
NN K
ALL A
IC P MO ME ER
CTI
EC ON
Y MP
V
S O
W S
A IS
ON
TE TO
IN
H W
N
HE A
D M
S
O E
D O
G
C
N ND
TO AIN
C R
H
S PE
C
BAT TH TES
K D
PA R
A TA
O
L
T
,C R
E
LI IN
V
R AT
C OC
VE TH TER N
E
O IVE
K IN
O A
R
IE
N
OU E
S
.
S
N S
. G
R NN TE
TL BAT
AR
E YS
O E D
D
C
E
2008 Export Battery Charger Maintenance and Service Manual
Page 5-6
External Charger Installation and Operation
EXPORT IQ PLUS CHARGER (EXTERNAL)
5
AC INPUT VOLTAGE
SELECTION SWITCH
(REAR CHARGER PANEL)
Figure 5-3 AC Input Voltage Selection Switch
CHARGING BATTERIES
ý WARNING
Do not bypass the sense lead fuse.
Be sure the fuse link is clean and tight.
Be sure all wire connections at the receptacle are clean and tight.
Do not rock or bend the plug. To connect the charger plug to the vehicle receptacle, grasp the
plug handle and push the plug straight into the receptacle (Figure 5-4).
• Do not pull on the DC cord (Figure 5-5). Do not twist, rock or bend the plug. To disconnect the
charger plug from the vehicle receptacle, grasp the plug by the handle and pull the plug
straight out of the receptacle.
• Do not connect a charger to the receptacle if the charger cord, plug, or the vehicle receptacle
is broken, damaged in any manner, or does not make a good electrical connection. Fire or
personal injury can result. Have it replaced by a qualified service person immediately. Failure
to follow these instructions could result in damage to the charger cord, the plug, and (or) the
vehicle receptacle.
• Do not use a charger if:
- The plug is too loose or does not make a good connection.
•
•
•
•
- The plug and receptacle feel hotter than normal during charge.
- The plug pin or receptacle contacts are bent or corroded.
- The plug, receptacle, or cords are cut, worn, have any exposed wires or are damaged in any
way.
• Using the charger with any of the above symptoms could result in a fire, property damage,
personal injury, or death.
1. With the charger DC cord disconnected from the vehicle charger receptacle, connect the AC power supply cord to an AC outlet designed to provide the proper AC voltage for the charger.
2. Connect the charger DC plug to the vehicle charger receptacle located on the seat support panel
(Figure 5-4, Page 5-7). The charger will activate automatically within 2 to 15 seconds after the DC plug
is connected. See following WARNING.
EXPORT IQ PLUS CHARGER (EXTERNAL)
External Charger Installation and Operation
ý WARNING
• Do not rock or bend the DC plug. To connect the charger plug to the vehicle receptacle, grasp
the plug handle and push the plug straight into the receptacle (Figure 5-4, Page 5-7).
3. Monitor the ammeter for the correct charge rate. The initial charge rate will vary from 15 to 19 amps,
depending upon the condition and depth of discharge of the batteries. Slight variations in the initial
charge rate may also result from AC line input voltages which are higher or lower than the nominal input
voltage. Higher AC line voltages increase the initial charge rate while lower AC line voltages reduce the
initial charge rate.
4. Monitor the ammeter. Under normal operating conditions (when the charger is on and the batteries are
discharged), the charger will shut off in order to run a self-diagnostic program (ammeter will drop to zero)
one hour and two hours into the charge cycle. See following NOTE.
NOTE: Batteries should be put on charge at the end of each day even if the vehicle has been used for only
a short amount of time (even if for only 10 minutes).
When air temperatures fall below 65 °F (18.3 °C), batteries charged in unheated areas should be
placed on charge as soon as possible after use. Cold batteries require more time to fully charge.
New batteries will not deliver their full range until the vehicle has been driven and recharged from
20 to 50 times.
Vehicles should be restricted to 40 to 50 energy units of discharge between charges until the batteries have been properly seasoned (20 to 50 charge cycles). For maximum battery life, Club Car
recommends that electric vehicles always be recharged after 40 to 50 energy units of discharge or
each night in order to avoid deep discharging the batteries; use the CDM (Communication Display
Module) (CCI P/N 101831801). See Communication Display Module (CDM) in Section 11 of
the appropriate maintenance and service supplement.
Figure 5-4 Charger Receptacle
Figure 5-5 Incorrect Charger Cord Removal
2008 Export Battery Charger Maintenance and Service Manual
Page 5-7
5
5
EXPORT IQ PLUS CHARGER (EXTERNAL)
Checking Battery Condition with an External Charger
EXTERNAL CHARGER PLUG AND RECEPTACLE
When inserting the DC plug into the vehicle receptacle, align the raised guide on the plug with the guide slot
in the receptacle and slowly push the plug straight in (Figure 5-4, Page 5-7). To disconnect the plug from the
vehicle, firmly grasp the plug, not the cord (Figure 5-5, Page 5-7), and slowly pull plug straight out. See following WARNING and CAUTION.
ý WARNING
• Do not rock or bend the plug. To connect the charger plug to the vehicle receptacle, grasp the
plug handle and push the plug straight into the receptacle (Figure 5-4).
• The battery charger DC plug must be pulled slowly from the receptacle. Jerking or pulling the
DC cord out quickly could cause arcing that could damage the plug and receptacle and could
cause batteries to explode.
• Do not use a battery charger if the cord, plug, or receptacle is damaged in any way. Replace
worn or damaged parts immediately. Failure to heed this warning could result in a fire,
property damage, severe personal injury, or death.
ý CAUTION
• Do not connect an external charger to the receptacle of a vehicle equipped with an onboard
charger while the onboard charger is activated. Charging overload will damage the onboard
computer and may cause battery damage.
The charger cord, plug, and receptacle are wear items and should be inspected daily. Visually inspect them
for cracks, loose connections, and frayed wiring; they must be replaced when worn or damaged. If charger
plug or receptacle show signs of corrosion or the plug is difficult to insert or remove, the receptacle contacts
and plug terminals should be cleaned with a good electrical contact cleaner. The plug should then be inserted
and removed several times to ensure ease of insertion, ease of removal, and good electrical contact. See following NOTE.
NOTE: If the warning tag has been damaged or removed from the DC cord, have it replaced immediately.
CHECKING BATTERY CONDITION WITH AN EXTERNAL CHARGER
See General Warning, Section 1, Page 1-1. See additional WARNING on page 5-1.
It is common practice for technicians to check the condition of a set of batteries after they have been charged
to ensure they have received a complete charge before the vehicle is used. With the IQ Plus vehicles, this is
not necessary; the onboard computer controls and monitors the charge cycle. If any problem occurs during a
charge cycle, the battery warning light, located above the steering column in the center dash panel, will illuminate intermittently.
If the battery warning light is illuminated after a charge cycle, refer to the troubleshooting chart. See Troubleshooting on page 5-10. If the specified test procedures identify no problems, plug the DC cord into the vehicle and let it charge until the charger shuts off automatically. If a problem is found, correct it and charge the
vehicle. Normal battery voltage near the end of a charge cycle should be approximately 59 to 63 volts DC.
START CHARGE CYCLE
1. Disconnect the DC plug from the vehicle charger receptacle.
2. Wait 20 seconds, then reconnect the DC cord to the vehicle receptacle. See following NOTE.
Page 5-8
2008 Export Battery Charger Maintenance and Service Manual
EXPORT IQ PLUS CHARGER (EXTERNAL)
Checking Battery Condition with an External Charger
NOTE: The charger will not operate unless a delay of approximately 20 seconds is observed.
3. Monitor the ammeter for the charge rate. If the batteries are close to being fully charged, the charge cycle
will begin and the charge current will begin to taper within a few minutes.
TESTING CHARGER OPERATION
1. With the DC plug disconnected from the vehicle charger receptacle, insert the AC cord into an outlet. The
charger relay should NOT close. A multimeter set to volts DC and connected across the DC plug positive
(+) and negative (–) pins should indicate zero volts. No transformer hum should be heard.
2. Disconnect the AC cord from the wall outlet and connect the DC plug to the receptacle. The charger relay
should close with an audible click after a 2 to 15 second delay. See following NOTE.
NOTE: Monitor the charge cycle to make sure the charger turns off properly. If the charge cycle is interrupted, and the batteries are less than 90% charged, the battery warning light will illuminate intermittently. See Battery Warning Light on page 5-2.
3. If the charger does not operate exactly as described above, refer to the wiring diagram and make sure
that the vehicle is wired correctly (Figure 5-2, Page 5-3) and that the internal charger wiring is correct
(Figure 5-6, Page 5-9).
Figure 5-6 Export IQ Plus Battery Charger Wiring Diagram (External Charger)
2008 Export Battery Charger Maintenance and Service Manual
Page 5-9
5
5
EXPORT IQ PLUS CHARGER (EXTERNAL)
Troubleshooting
TROUBLESHOOTING
See General Warning, Section 1, Page 1-1. See additional WARNING on page 5-1.
ý DANGER
• Do not touch any wire or component in the battery charger while AC power is present. Failure
to heed this warning will result in an electric shock.
ý WARNING
• Knowledge of battery charger wiring and component terminology is required before
attempting any repair (Figure 5-6, Page 5-9).
• Prior to servicing the charger, disconnect the AC power supply cord from the wall outlet and
the DC plug from the vehicle charger receptacle.
Use the following Troubleshooting Guide for troubleshooting export IQ Plus external battery chargers (model
numbers 25880-11 and 25880-18). The Troubleshooting Guide encompasses the entire battery charging circuit. Test procedures specified in the Troubleshooting Guide can be found on the following pages.
Page 5-10
2008 Export Battery Charger Maintenance and Service Manual
EXPORT IQ PLUS CHARGER (EXTERNAL)
Troubleshooting
EXPORT IQ PLUS BATTERY CHARGER TROUBLESHOOTING GUIDE
SYMPTOM
POSSIBLE CAUSES
CORRECTIVE ACTION
Relay does not close, no transformer
hum and ammeter does not move
Batteries disconnected
Connect batteries. See Figure 5-9,
Page 5-16
Battery voltage is too low
Test Procedure 1 – Battery Voltage and
DC Plug and Receptacle on page 5-14
Poor connection between plug and
receptacle
Test Procedure 1 – Battery Voltage and
DC Plug and Receptacle on page 5-14
DC plug and cord
Test Procedure 1 – Battery Voltage and
DC Plug and Receptacle on page 5-14
and Test Procedure 5 – Charger DC
Circuit Continuity Test on page 5-20
Onboard computer malfunction
Test Procedure 2 – Onboard Computer on
page 5-17
Gray sense lead fuse is blown (not
applicable to Precedent vehicles)
Test Procedure 1 – Battery Voltage and
DC Plug and Receptacle on page 5-14
Receptacle fuse link is blown (not
applicable to Precedent vehicles)
See Electrical Components section in the
appropriate maintenance and service
manual
Poor connection at 10-gauge black wire or
18-gauge gray wire at the OBC
(applicable to Precedent vehicles only)
Check wire connections
Improper AC outlet voltage
Test Procedure 3 – AC Power and
Continuity Test of AC Circuit on page 5-17
Failed AC plug and cord
Test Procedure 3 – AC Power and
Continuity Test of AC Circuit on page 5-17
Internal AC breaker
Test Procedure 3 – AC Power and
Continuity Test of AC Circuit on page 5-17
Transformer primary coil
Test Procedure 6 – Transformer on
page 5-20
Relay
Test Procedure 8 – Continuity on
page 5-22
Failed ammeter
Replace ammeter
Blown charger fuse
Test Procedure 5 – Charger DC Circuit
Continuity Test on page 5-20
Both diodes failed
Test Procedure 4B – Both Diodes Failed
on page 5-19
Onboard computer malfunction
Test Procedure 2 – Onboard Computer on
page 5-17
Failed transformer or voltage switch
Test Procedure 6 – Transformer on
page 5-20
Failed charger relay
Test Procedure 8 – Continuity on
page 5-22
Diode failed
Test Procedure 4A – Single Diode Failure
on page 5-18
Loose internal fuse connection
Tighten connection
Relay closes with an audible click but
no transformer hum and ammeter does
not move
Relay closes and transformer hums but
ammeter does not move
Relay operates intermittently
Single charger fuse link blows
Troubleshooting Guide continued on next page...
2008 Export Battery Charger Maintenance and Service Manual
Page 5-11
5
5
EXPORT IQ PLUS CHARGER (EXTERNAL)
Troubleshooting
EXPORT IQ PLUS BATTERY CHARGER TROUBLESHOOTING GUIDE
SYMPTOM
POSSIBLE CAUSES
CORRECTIVE ACTION
Both charger fuse links blow or
receptacle fuse link blows
Battery is wired in reverse polarity
Check vehicle wiring
DC cord is wired in reverse polarity
Check battery charger wiring
Both diodes failed
Test Procedure 4B – Both Diodes Failed
on page 5-19
One diode failed
Test Procedure 4A – Single Diode Failure
on page 5-18
Transformer coil short-circuit failure
Test Procedure 6 – Transformer on
page 5-20
Onboard computer malfunction
Test Procedure 2 – Onboard Computer on
page 5-17
AC power supply was shut off
Test Procedure 3 – AC Power and
Continuity Test of AC Circuit on page 5-17
Onboard computer malfunction
Test Procedure 2 – Onboard Computer on
page 5-17
Batteries may be fully charged
Test Procedure 7 – Battery State of
Charge Test on page 5-22
Onboard computer malfunction
Test Procedure 2 – Onboard Computer on
page 5-17
Extremely discharged batteries or cold
temperature
Recharge batteries
Failed or weak battery
See Batteries section in the appropriate
maintenance and service manual
AC cord is shorted
Test Procedure 8 – Continuity on
page 5-22
Failed transformer or voltage switch
Test Procedure 6 – Transformer on
page 5-20
Incorrect charger wiring
Check battery charger wiring
Incorrect AC voltage selector switch
position
Check switch position for proper incoming
AC voltage selection
AC power interrupted
Test Procedure 3 – AC Power and
Continuity Test of AC Circuit on page 5-17
Onboard computer malfunction
Test Procedure 2 – Onboard Computer on
page 5-17
Charger failure
See Testing Charger Operation on
page 5-9
16 hour time out
See Battery Warning Light on page 5-2
Battery or batteries need to be replaced
See Batteries section in the appropriate
maintenance and service manual
Batteries are getting close to full
discharge capacity
Recharge batteries
Onboard computer malfunction
Test Procedure 2 – Onboard Computer on
page 5-17
Battery or batteries need to be replaced
See Batteries section in the appropriate
maintenance and service manual
Charger output is low
Charger turns off too soon
Charger goes to 16 hour time out
AC line fuse blows or AC circuit
breaker trips
Battery warning light illuminates for
ten seconds, at four second intervals
(with DC charger cord plugged in) (25
seconds, at 10 second intervals for
Precedent vehicles)
Battery warning light illuminates for
ten seconds, at four second intervals
(with DC charger cord disconnected)
(25 seconds, at 10 second intervals for
Precedent vehicles)
Page 5-12
2008 Export Battery Charger Maintenance and Service Manual
EXPORT IQ PLUS CHARGER (EXTERNAL)
Troubleshooting
15
5
6
2
1
3
20
19
17
4
21
8
18
11
9
10
12
14
1
16
13
17
Figure 5-7 IQ Plus Battery Charger (Export) – Exploded View
2008 Export Battery Charger Maintenance and Service Manual
Page 5-13
5
5
EXPORT IQ PLUS CHARGER (EXTERNAL)
Test Procedures
TEST PROCEDURES
See General Warning, Section 1, Page 1-1. See additional WARNING on page 5-1.
INDEX OF TEST PROCEDURES
1. Battery Voltage and DC Plug and Receptacle
2. Onboard Computer
3. AC Power and Continuity Test of AC Circuit
4. Diodes
5. Charger DC Circuit Continuity Test
6. Transformer
7. Battery State of Charge Test
8. Continuity
TEST PROCEDURE 1 – BATTERY VOLTAGE AND DC PLUG AND RECEPTACLE
See General Warning, Section 1, Page 1-1. See additional WARNING on page 5-1.
1. Check the DC plug and the vehicle charger receptacle for damage, dirt, corrosion, or any condition that
might prevent a sound electrical connection.
2. Inspect the receptacle contacts to ensure that they are not damaged and they are firmly seated within the
receptacle.
3. Check the wire connections to the charger receptacle:
3.1. Carryall 6, Transporter 4 and 6, and Villager 6 and 8: Verify that the 10-gauge red wire from the
charger receptacle is connected to the same large post of the solenoid as the 6-gauge red wire that
connects to the positive (+) post of battery no. 1 (Figure 5-2, Page 5-3).
3.2. Carryall 2 and Turf 2: Verify that the 10-gauge red wire from the charger receptacle is connected
to the positive (+) post of battery no. 1 (Figure 5-2, Page 5-3).
3.3. Verify the 10-gauge red wire of the charger receptacle is connected to the main harness red wire
at three wire plug.
3.4. Make sure the two nuts that secure the two 10-gauge black wires to the receptacle fuse assembly
are tight (Figure 5-8, Page 5-15).
Page 5-14
2008 Export Battery Charger Maintenance and Service Manual
EXPORT IQ PLUS CHARGER (EXTERNAL)
Test Procedures
CHARGER RECEPTACLE
GRAY WIRE
FROM COMPUTER
SENSE LEAD
FUSE
Figure 5-8 Receptacle Wire Connections
3.5. Check the connections of the 18-gauge gray wire from the receptacle to the sense lead fuse, and
from the sense lead fuse to the onboard computer gray wire. See following WARNING.
ý WARNING
• Do not bypass the sense lead fuse.
3.6. Remove the gray sense lead fuse and check it for continuity with a multimeter set to 200 ohms. The
resistance should be less than 2 ohms.
4. With a multimeter set to 200 volts DC, measure the voltage of the battery pack between the positive (+)
post of battery no. 1 and the negative (–) post of battery no. 8 (Figure 5-9, Page 5-16). Normal no-load
voltage should be between 50 and 52 volts for fully charged batteries. The voltage of the battery pack
must be over 32 volts DC to allow the onboard computer to close the charger relay. If battery pack voltage
is too low to start charger, temporarily bypass the charger relay. See Charging a Battery Pack that has
Low Voltage on page 5-34.
2008 Export Battery Charger Maintenance and Service Manual
Page 5-15
5
5
EXPORT IQ PLUS CHARGER (EXTERNAL)
Test Procedures
Place multimeter
red (+) probe here.
2
FRONT
OF VEHICLE
1
4
6
3
5
7
TURF 2/252 VEHICLES
CARRYALL 2/252 VEHICLES
XRT 900 VEHICLES
8
Place multimeter
black (–) probe here.
2
Place multimeter
red (+) probe here.
3
1
VILLAGER 6 AND 8
VEHICLES
6
5
4
7
8
FRONT
OF VEHICLE
Place multimeter
black (–) probe here.
Place multimeter
red (+) probe here.
Place multimeter
black (–) probe here.
7
6
1
8
5
2
FRONT
OF VEHICLE
3
4
TRANSPORTER 4 AND 6
VEHICLES
CARRYALL 6 VEHICLES
Figure 5-9 IQ Plus Battery Configuration
Page 5-16
2008 Export Battery Charger Maintenance and Service Manual
EXPORT IQ PLUS CHARGER (EXTERNAL)
Test Procedures
TEST PROCEDURE 2 – ONBOARD COMPUTER
See General Warning, Section 1, Page 1-1. See additional WARNING on page 5-1.
1. Select a second charger that is normally connected to another vehicle and is known to operate properly.
Leave the AC cord of the second charger connected to the AC outlet that it normally is connected to. This
will ensure that AC power is present.
2. Check the AC circuit breakers on the front of the charger and reset it if necessary.
3. Insert the DC cord from the second charger into the receptacle of the vehicle that is not charging properly.
4. If the second charger fails in the same manner as the first charger, then the vehicle charging circuit is not
functioning properly. See Troubleshooting on page 5-10.
5. Connect the first charger into another vehicle that is known to be functioning properly. If the charger performs as it should, then the charger is not in need of repair.
TEST PROCEDURE 3 – AC POWER AND CONTINUITY TEST OF AC CIRCUIT
See General Warning, Section 1, Page 1-1. See additional WARNING on page 5-1.
1. Disconnect AC cord from the wall outlet and DC plug from the vehicle receptacle.
2. Check the AC circuit breakers on the front of the charger and reset if necessary.
3. Check the AC line fuse or circuit breaker in the storage facility.
4. With a multimeter set to 500 volts AC, check incoming AC voltage. Insert multimeter test probes into AC
wall outlet; voltage should be within the range specified in the following chart. If proper voltage is not
present and the voltage selector switch is set for the correct voltage for your area, have building wiring
checked by a licensed electrical contractor.
SETTING ON AC VOLTAGE
SELECTOR SWITCH
MINIMUM AC VOLTAGE
PERMITTED
MAXIMUM AC VOLTAGE
PERMITTED
100 Volts AC
95
105
200 Volts AC
190
210
220 Volts AC
209
231
240 Volts AC
228
252
5. Check continuity of the AC circuit.
5.1. Remove the charger cover.
5.2. Bypass the relay. See step 4 of Charging a Battery Pack that has Low Voltage on page 5-34.
5.3. With relay bypassed, there should be continuity across the AC cord blades (Figure 5-10,
Page 5-18).
2008 Export Battery Charger Maintenance and Service Manual
Page 5-17
5
5
EXPORT IQ PLUS CHARGER (EXTERNAL)
Test Procedures
AC plug may have different appearance
depending on geographic region.
Figure 5-10 AC Cord Test
6. If the circuit is not complete, check the wiring of the AC cord (16 or 17), AC charger receptacle (14), transformer primary coil wires (21), internal AC circuit breakers (13), voltage selector switch (9), and jumper
wires (Figure 5-7, Page 5-13).
7. If the charger is wired correctly, check the continuity of the AC cord, transformer primary coil, internal AC
circuit breakers, and the jumper wires individually. See Test Procedure 8 – Continuity on page 5-22.
8. When troubleshooting and repairs are complete, remove the jumper wire and properly connect the relay
wiring. See following WARNING.
ý WARNING
• The relay wiring must be properly connected prior to placing the charger back into normal
service. Failure to remove the jumper wire and properly connect the relay wiring could result
in property damage, severe personal injury, or death.
TEST PROCEDURE 4 – DIODES
Use Test Procedure 4A – Single Diode Failure on page 5-18 for single diode failures and testing of individual
diodes. If both diodes have failed, use Test Procedure 4B – Both Diodes Failed on page 5-19.
Test Procedure 4A – Single Diode Failure
See General Warning, Section 1, Page 1-1. See additional WARNING on page 5-1.
A single diode failure is indicated by the failure of one fuse link (closed circuit diode) or by the charger output
being low (open circuit diode). If a diode has failed, the entire heatsink must be replaced. To check diodes:
1. Disconnect AC cord from the wall outlet and DC plug from the vehicle receptacle.
2. Remove the charger cover.
3. Disconnect one transformer secondary coil wire from the diode terminal (Figure 5-11, Page 5-19).
4. Using a low voltage continuity tester or multimeter set to the diode test function, connect the red (+) test
probe to the diode mounting plate and the black (–) test probe to a diode terminal and note the reading
(Figure 5-11, Page 5-19).
Page 5-18
2008 Export Battery Charger Maintenance and Service Manual
EXPORT IQ PLUS CHARGER (EXTERNAL)
Test Procedures
5. Reverse test probes and check each diode again and note the reading (Figure 5-12, Page 5-19). A
diode is designed to conduct current in one direction only. If a diode conducts current (shows continuity)
in both directions, the entire heatsink with diodes must be replaced. If a diode does not conduct current
(does not show continuity) in either direction, the entire heatsink must be replaced.
6. On rare occasions, a single fuse link may blow due to excessive heat. This can be caused by a loose
internal fuse connection. Check all three fuse connections inside the charger to be sure they are clean
and tight. The proper tightness for the fuse link connections is 22 in-lb (2.5 N·m).
7. Ensure that the charger is wired properly and all connections are clean and tight. See following CAUTION.
CAUT ION
• If connections are not clean and tight, excessive heat will be created and the charger may
become damaged.
Disconnect
secondary
coil lead.
Figure 5-11 Diode Test
Figure 5-12 Diode Test – Probes Reversed
Test Procedure 4B – Both Diodes Failed
See General Warning, Section 1, Page 1-1. See additional WARNING on page 5-1.
To check the diodes, use Test Procedure 4A – Single Diode Failure on page 5-18. If both diodes have failed
closed, both charger fuse links will be blown. If both diodes have failed open, the relay will close and the transformer will hum, but the ammeter will not indicate any output and the AC circuit breakers may trip off. If both
diodes have failed open or closed, the entire heatsink must be replaced. To determine why both diodes failed:
1. Check the batteries and the receptacle to ensure that they are wired in the correct polarity (Figure 5-2,
Page 5-3). Also check the voltage and polarity at the receptacle.
2. Make sure the charger is wired correctly: the DC cord red wire should be connected to the center terminal
of the heatsink, the DC cord blue wire should be connected to the limiter, which connects to the relay coil,
and the DC cord black wire should be connected to the left side of the ammeter (when viewed from inside
the charger) (Figure 5-6, Page 5-9). If a reverse polarity connection is made between the charger and
the batteries, both fuse links will blow when the DC cord is connected to the vehicle, whether or not the
AC cord is plugged into an outlet.
3. On rare occasions, both diodes may fail as a result of a lightning strike at the charging location.
4. Excessive heat due to a loose connection may also cause both fuse links to blow. Be sure fuse connections are tightened to 22 in-lb (2.5 N·m).
5. Ensure that the charger and vehicle are wired properly and all connections are clean and tight.
2008 Export Battery Charger Maintenance and Service Manual
Page 5-19
5
5
EXPORT IQ PLUS CHARGER (EXTERNAL)
Test Procedures
TEST PROCEDURE 5 – CHARGER DC CIRCUIT CONTINUITY TEST
See General Warning, Section 1, Page 1-1. See additional WARNING on page 5-1.
1. Disconnect AC cord from the wall outlet and DC plug from the vehicle receptacle.
2. Using a continuity tester (CCI P/N 1011273) or multimeter (CCI P/N 1011480) set to 200 ohms, connect
the test probes to the pins marked (+) and (–) on the DC plug (Figure 5-13, Page 5-20). Note the reading.
3. Reverse the test probes and check the DC plug again (Figure 5-14, Page 5-20). The circuit should show
continuity in only one direction.
4. If the circuit does not show continuity in either direction and the charger fuse is not blown, individually
check all connections and the continuity of the DC cord and ammeter. See Test Procedure 8 – Continuity on page 5-22. Also check the diodes (heatsink). See Test Procedure 4 – Diodes on page 5-18.
5. If the circuit shows continuity in both directions, a short circuit exists in the charger DC circuit, usually
caused by failed diodes. See Test Procedure 4 – Diodes on page 5-18. If diodes have not failed, check
the DC cord for a short circuit. See Test Procedure 8 – Continuity on page 5-22.
6. Remove the DC cord blue wire from the current limiter (15) connected to the charger relay and check
continuity between the positive and negative pins and middle pin on the DC plug (Figure 5-6, Page 5-9
and Figure 5-7, Page 5-13). There should be no continuity.
POSITIVE PIN
POSITIVE PIN
PULL HERE
PULL HERE
NEGATIVE PIN
NEGATIVE PIN
Figure 5-13 DC Plug Test
Figure 5-14 DC Plug Test – Probes Reversed
TEST PROCEDURE 6 – TRANSFORMER
See General Warning, Section 1, Page 1-1. See additional WARNING on page 5-1.
Failure of the transformer may be caused by aging or a short circuit in adjacent coil turns. If the transformer
has failed, the ammeter will indicate low output or no output; however, the transformer may hum. A blown AC
line fuse or tripped AC circuit breaker in the charger or the storage facility may be caused by an improperly
wired charger, an improper setting of the AC voltage selector switch, or a failed transformer.
An AC circuit test should be done before performing this test procedure to ensure the continuity of the AC
cord, internal AC circuit breakers, and charger wiring. See Test Procedure 3 – AC Power and Continuity
Test of AC Circuit on page 5-17.
1. Disconnect AC cord from the wall outlet and DC plug from the vehicle receptacle.
2. Remove the charger cover.
3. Disconnect transformer secondary coil wires from the heatsink (Figure 5-15, Page 5-21).
4. To apply AC power directly to the transformer primary coil, bypass the relay. See step 4 of Charging a
Battery Pack that has Low Voltage on page 5-34. See following DANGER.
Page 5-20
2008 Export Battery Charger Maintenance and Service Manual
EXPORT IQ PLUS CHARGER (EXTERNAL)
Test Procedures
ý DANGER
• Do not touch any wire or component in the battery charger while AC power is present. Failure
to heed this warning will result in an electric shock.
5. Make sure that the voltage selector switch (on the back of the charger) is set for the appropriate incoming
AC voltage. Also ensure that the secondary coil wires are not touching one another. With the relay
bypassed, insert the AC plug into an outlet. If the AC line fuse blows or AC circuit breaker trips, the transformer is shorted internally and must be replaced.
Figure 5-15 Remove Secondary Coil Wires
From Heatsink
6. If the AC line fuse does not blow or the AC circuit breaker does not trip, check the transformer secondary
coil voltage.
7. Disconnect AC cord from the wall outlet.
8. Using alligator clips and a multimeter set to 500 volts AC, connect the multimeter probes to the secondary transformer coil wires (1 and 5).
9. Connect the AC cord to the wall outlet and monitor the multimeter for the secondary coil voltage. If measured voltage is approximately 85 volts AC or lower for the secondary coil, the transformer is shorted
internally and must be replaced.
10. If the voltage reading is normal (86 volts AC or higher), the transformer is operational. Disconnect the AC
plug from the wall receptacle and check the continuity of the DC circuit. See Test Procedure 5 –
Charger DC Circuit Continuity Test on page 5-20.
11. When troubleshooting and repairs are complete, remove jumper wire and properly connect relay wiring.
See following WARNING.
ý WARNING
• The relay wiring must be properly connected prior to placing the charger back into normal
service. Failure to remove the jumper wire and properly connect the relay wiring could result
in property damage, severe personal injury, or death.
2008 Export Battery Charger Maintenance and Service Manual
Page 5-21
5
5
EXPORT IQ PLUS CHARGER (EXTERNAL)
Test Procedures
TEST PROCEDURE 7 – BATTERY STATE OF CHARGE TEST
See General Warning, Section 1, Page 1-1. See additional WARNING on page 5-1.
1. With the batteries fully charged, disconnect the DC charger plug for approximately 20 seconds and
reconnect it. The ammeter should jump to a reading between 14 and 18 amps and taper to below 5 amps
within 15 minutes.
2. If the charger does not taper to below 5 amps within 15 minutes, batteries may not be receiving a full
charge and the onboard computer should be checked. See Test Procedure 2 – Onboard Computer on
page 5-17. See following NOTE.
NOTE: Batteries near the end of their useful lives may not allow the battery charge current to taper below
5 amps. See Batteries section in the appropriate maintenance and service manual.
TEST PROCEDURE 8 – CONTINUITY
See General Warning, Section 1, Page 1-1. See additional WARNING on page 5-1.
AC Cord and Battery Charger AC Receptacle
1. Disconnect AC cord from the wall outlet and DC plug from the vehicle receptacle.
2. Remove the charger cover.
3. Disconnect the green/yellow wire (2) from charger case and position it so it does not touch any metal part
of the charger (Figure 5-16, Page 5-23).
4. Disconnect black wire of AC receptacle from charger relay terminal 4.
5. Disconnect other black wire of AC receptacle from the charger relay terminal 8.
6. Using a multimeter set for 200 ohms, place the red (+) probe on the terminal at the end of the black wire
removed from relay terminal 4 (4). Test for continuity on each of the flat blades and on the round pin of
the AC plug. The tester should indicate continuity on one flat blade only. If any other reading is obtained,
the AC cord or AC charger receptacle (on the front panel) may be damaged. See AC Cord on page 5-22.
See also AC Charger Receptacle on page 5-23.
7. Place the red (+) probe on the end of the green/yellow wire (2) and with the black probe check for continuity on both flat blades and on the ground pin of the AC plug. The tester should indicate continuity on
only the ground pin. If any other reading is obtained, the AC cord or AC charger receptacle (on the front
panel) may be damaged. See AC Cord on page 5-22. See also AC Charger Receptacle on page 5-23.
8. Place the red (+) probe on the blue wire and check for continuity on both flat blades and on the ground
pin of the AC plug. The tester should indicate continuity on only one flat blade. If any other reading is
obtained, the AC cord and plug must be replaced.
AC Cord
1. Disconnect the AC cord from the AC receptacle (on front of battery charger) and the incoming AC outlet.
2. Using a multimeter, set for 200 ohms, place the red (+) probe into one of the side terminals in the end
of the AC cord as shown (Figure 5-17, Page 5-23). Test for continuity on each of the flat blades and on
the round pin of the AC plug. The tester should indicate continuity on only one flat blade. If any other
reading is obtained, the AC cord has failed and must be replaced.
3. Using a multimeter, set for 200 ohms, place the red (+) probe into the other side terminal in the end of
the AC cord. Test for continuity on each of the flat blades and on the round pin of the AC plug. The tester
should indicate continuity on only one flat blade. If any other reading is obtained, the AC cord has failed
and must be replaced.
Page 5-22
2008 Export Battery Charger Maintenance and Service Manual
EXPORT IQ PLUS CHARGER (EXTERNAL)
Test Procedures
4
8
WAVETEK
V
5XL
1000
OFF
V
500
200
200
20
200
2m
2
200
m
20
m
200
m
2000
k
200k
20k
200
A
2k
2
V
!
!
COM
MAX
1000 --750V
200nA
FUSED
200 OHM SETTING
Figure 5-16 AC Plug and AC Charger Receptacle Continuity Test
4. Using a multimeter, set for 200 ohms, place the red (+) probe into the center terminal in the end of the
AC cord. Test for continuity on each of the flat blades and on the round pin of the AC plug. The tester
should indicate continuity on the ground pin only. If any other reading is obtained, the AC cord has failed
and must be replaced.
Figure 5-17 AC Cord Test
AC Charger Receptacle
1. Disconnect the AC cord from the AC receptacle (on front of battery charger) and the incoming AC outlet.
Disconnect the battery charger from the vehicle.
2. Disconnect black wire from charger relay terminal 4 (4) (Figure 5-18, Page 5-24 and Figure 5-6,
Page 5-9).
2008 Export Battery Charger Maintenance and Service Manual
Page 5-23
5
5
EXPORT IQ PLUS CHARGER (EXTERNAL)
Test Procedures
3. Disconnect green/yellow wire (2) from charger case and position it so it does not touch any metal part
of the charger (Figure 5-18, Page 5-24).
4. Using a multimeter, set for 200 ohms, place the red (+) probe on the terminal at the end of the black wire
removed from relay terminal 4 (4) (Figure 5-18, Page 5-24). Test for continuity on the appropriate pin of
the AC charger receptacle (on front of charger). The tester should indicate continuity on the ground pin
only. If any other reading is obtained, the AC charger receptacle or connecting wires have failed and must
be replaced.
5. Put the red (+) probe on the end of the green/yellow wire (2) and with the black (–) probe check for continuity on the appropriate pin of the AC charger receptacle (Figure 5-18, Page 5-24 and Figure 5-6,
Page 5-9). The tester should indicate continuity on the ground pin only. If any other reading is obtained,
the AC charger receptacle or connecting wires have failed and must be replaced.
6. Disconnect black wire from charger relay terminal 8 (8) (Figure 5-18, Page 5-24). Put the red (+) probe
on the black wire (8) and check for continuity on the appropriate pin of the AC charger receptacle. The
tester should indicate continuity on the ground pin only. If any other reading is obtained, the AC charger
receptacle or connecting wires have failed and must be replaced.
WAVETEK
V
5XL
1000
OFF
V
500
200
200
20
200
2m
2
200
m
20
m
200
m
2000
k
200k
20k
V
8
2
!
MAX
1000 --750V
200
A
2k
!
COM
200nA
FUSED
200 OHM
SETTING
4
AC CIRCUIT
BREAKERS
CHARGER
RELAY
AC CHARGER
RECEPTACLE
Figure 5-18 AC Charger Receptacle Continuity Test
DC Cord
1. Disconnect AC cord from the wall outlet and DC plug from the vehicle receptacle.
2. Remove the charger cover.
3. To check the continuity of the DC cord, disconnect the black wire (17) of the DC cord from the ammeter
(Figure 5-19, Page 5-25).
4. Disconnect the red wire (19) of the DC cord from the heatsink.
5. Disconnect the blue wire (18) from the limiter (15), which connects to the red wire assembly that connects
to the charger relay.
Page 5-24
2008 Export Battery Charger Maintenance and Service Manual
EXPORT IQ PLUS CHARGER (EXTERNAL)
Test Procedures
6. Place the clip of the continuity tester on the red wire (19) of the DC cord.
7. Place the continuity test probe on the positive (+) pin of the DC plug (positive (+) and negative (–) pins
are identified on the plug). If tester does not indicate continuity, the DC cord must be replaced.
8. Place the continuity test probe on the negative (–) pin of the DC plug. The tester should indicate no continuity. If tester indicates continuity, the DC cord must be replaced.
9. Place the continuity test probe on the unmarked (middle) pin of the DC plug. The tester should indicate
no continuity. If tester indicates continuity, the DC cord must be replaced.
10. Move the continuity tester clip to the black wire (17) of the DC cord.
11. Place the continuity test probe on the negative (–) pin of the DC plug. The tester should indicate continuity. If tester does not indicate continuity, the DC cord must be replaced.
12. Place the continuity test probe on the unmarked (middle) pin of the DC plug. The tester should indicate
no continuity. If tester indicates continuity, the DC cord must be replaced.
13. Move continuity test probe to the blue wire (18) of the DC cord. Check for continuity at the middle pin.
The tester should indicate continuity. If tester does not indicate continuity, replace DC cord.
7
15
17
5
18
8
19
10
Figure 5-19 DC Cord, Relay, and Limiter
Transformer
The IQ Plus battery charger transformer has two sets of coils: a primary coil and a secondary coil.
Primary Coil
1. Disconnect AC cord from the wall outlet and DC plug from the vehicle receptacle.
2. Remove the charger cover.
3. Disconnect the black wires marked 1 and 6 from the AC circuit breakers.
4. Disconnect the wires marked 2, 3, 4 and 5 from the voltage selector switch.
5. Place the continuity tester probes on the primary coil transformer wires disconnected above in pairs until
all of the combinations in the following chart have been tested.
6. If the continuity readings agree with the chart, replace the voltage selector switch. If the continuity readings differ from the chart, replace the transformer.
2008 Export Battery Charger Maintenance and Service Manual
Page 5-25
5
EXPORT IQ PLUS CHARGER (EXTERNAL)
Test Procedures
PRIMARY COIL CONTINUITY / NO CONTINUITY CHART
NEGATIVE PROBE
1
1
POSITIVE PROBE
5
2
3
4
5
6
Continuity
Continuity
No
Continuity
No
Continuity
No
Continuity
Continuity
No
Continuity
No
Continuity
No
Continuity
No
Continuity
No
Continuity
No
Continuity
Continuity
Continuity
2
Continuity
3
Continuity
Continuity
4
No
Continuity
No
Continuity
No
Continuity
5
No
Continuity
No
Continuity
No
Continuity
Continuity
6
No
Continuity
No
Continuity
No
Continuity
Continuity
Continuity
Continuity
Secondary Coil
1. Disconnect AC cord from the wall outlet and DC plug from the vehicle receptacle.
2. Remove the charger cover.
3. Remove the transformer (tan) secondary coil wire from the upper terminal of the heatsink (Figure 5-15,
Page 5-21).
4. Remove the other transformer (tan) secondary coil wire from the bottom terminal of the heatsink and
place the continuity test clip on the ammeter post with the short black jumper wire (7) (Figure 5-20,
Page 5-30). Test for continuity between the jumper wire and each of the secondary coil wires (tan). The
tester should indicate continuity on both secondary coil wires. If tester does not indicate continuity on
both secondary coil wires, replace transformer. Ensure that the fuse is intact and not blown.
Voltage Suppressor – Failed Closed
1. Disconnect AC cord from the wall outlet and DC plug from the vehicle receptacle.
2. Remove the charger cover.
3. Using a multimeter set to the diode test function (
ç), place the black (–) probe of the multimeter on the
sense lead pin (short pin) of the DC plug. Place the red (+) probe on the positive (+) pin of the DC plug.
The multimeter should indicate no tone. If a tone is emitted (indicating a closed circuit) then the voltage
suppressor has failed and should be replaced. See following NOTE.
NOTE: Repeated failure of sense lead fuses is a symptom of a voltage supressor that has failed in a
closed condition.
Relay
1. Disconnect AC cord from the wall outlet and DC plug from the vehicle receptacle.
2. Remove the charger cover.
3. Remove the black wire from terminal 6 of the relay and black wire from terminal 8 of the relay
(Figure 5-6, Page 5-9). Place continuity tester leads on terminals 6 and 8 of the relay. The tester should
indicate no continuity. If tester indicates continuity, the relay contacts have failed closed and the relay
must be replaced.
Page 5-26
2008 Export Battery Charger Maintenance and Service Manual
EXPORT IQ PLUS CHARGER (EXTERNAL)
Charger Repairs
4. Remove the black wire from terminal 2 of the relay and black wire from terminal 4 of the relay
(Figure 5-6, Page 5-9). Place continuity tester leads on terminals 2 and 4 of the relay. The tester should
indicate no continuity. If tester indicates continuity, the relay contacts have failed closed and the relay
must be replaced.
5. With batteries connected, insert the DC plug into a receptacle. The tester should indicate continuity on
terminals 6 and 8 and continuity on relay terminals 2 and 4. If tester does not indicate continuity on both
sets of contacts, the relay must be replaced.
Ammeter
1. Disconnect AC cord from the wall outlet and DC plug from the vehicle receptacle.
2. Remove the charger cover.
3. Disconnect the black wire from the left ammeter post (as viewed from inside the charger).
4. Place the continuity tester clip on one of the ammeter posts.
5. Place the continuity test probe on the other ammeter post. The tester should indicate continuity. If the
tester does not indicate continuity, replace the ammeter.
AC Circuit Breaker
1. Disconnect AC cord from the wall outlet and DC plug from the vehicle receptacle.
2. Remove the charger cover.
3. Disconnect the wires from the AC circuit breaker.
4. Place the continuity test probes on the two terminals of the AC circuit breaker. The tester should indicate
continuity. If the tester does not indicate continuity, replace the AC circuit breaker.
CHARGER REPAIRS
See General Warning, Section 1, Page 1-1. See additional WARNING on page 5-1.
ý WARNING
• Knowledge of battery charger wiring and component terminology is required before
attempting any repair (Figure 5-6, Page 5-9).
• Prior to servicing the charger, disconnect the AC power supply cord from the wall outlet and
the DC plug from the vehicle charger receptacle.
DC CORD
See General Warning, Section 1, Page 1-1. See additional WARNING on page 5-1.
DC Cord Removal
1. Disconnect AC cord from the wall outlet and DC plug from the vehicle receptacle. See preceding
WARNING.
2. Remove the charger cover.
3. Remove the DC cord black wire (17) from the ammeter by loosening the nut. Support the terminal as the
nut is loosened to prevent rotation of the connection (Figure 5-19, Page 5-25).
4. Remove nut attaching the red wire (19) of DC cord onto the heatsink.
2008 Export Battery Charger Maintenance and Service Manual
Page 5-27
5
5
EXPORT IQ PLUS CHARGER (EXTERNAL)
Charger Repairs
5. Disconnect the DC cord blue wire (18) from the limiter (15), which connects to the red wire assembly that
connects to the charger relay.
6. Remove the wire ties that secure the blue wire (18) to the black transformer wire. Note the location of the
wire ties.
7. Using pliers, squeeze the strain relief bushing and remove the DC cord.
DC Cord Installation
1. Insert the leads of the new DC cord through the hole in the charger base.
2. Attach the red wire of the new DC cord to the center terminal of the heatsink and tighten the nut to 18
in-lb (2.0 N·m).
3. Attach the blue wire of new DC cord to the limiter (15) (Figure 5-19, Page 5-25).
4. Attach the black wire (17) of the new DC cord to ammeter. Install nut onto post of ammeter slightly more
than finger tight. While holding the inside nut, tighten the outside nut 1/4 turn. See following CAUTION.
CAUT ION
• Do not allow ammeter post to rotate as the nut is tightened. Rotation of the post could result
in a damaged ammeter.
5. Using pliers, put the strain relief bushing on the cord and insert it into the charger base.
6. Secure the blue wire to the black wire in the locations noted in step 6 of DC Cord Removal.
7. Tie the wires together as they were before the wire tie was removed. See following WARNING.
ý WARNING
• Make sure wiring is properly routed and secured. Failure to properly route and secure wiring
could result in charger malfunction, property damage, or severe personal injury.
8. Position the charger cover on the base. Install the mounting screws, starting with the bottom holes.
Tighten the screws to 11 in-lb (1.2 N·m).
HEATSINK
See General Warning, Section 1, Page 1-1. See additional WARNING on page 5-1.
Heatsink Removal
1. Disconnect AC cord from the wall outlet and DC plug from the vehicle receptacle. See WARNING on
page 5-27.
2. Remove the charger cover.
3. Remove both secondary coil transformer wires (tan) from the heatsink (Figure 5-6, Page 5-9 and
Figure 5-7, Page 5-13).
4. Remove the two red wires from the heatsink.
5. Remove the nuts and bolts that secure the heatsink to the case.
Heatsink Installation
1. Place heatsink against charger base. Make sure clear plastic insulator sheet is between the heatsink and
the charger base. Install the nuts and bolts that secure the heatsink to the case. Tighten the bolts to 22
in-lb (2.5 N·m) (Figure 5-6, Page 5-9 and Figure 5-7, Page 5-13).
Page 5-28
2008 Export Battery Charger Maintenance and Service Manual
EXPORT IQ PLUS CHARGER (EXTERNAL)
Charger Repairs
2. Connect the red wire from the DC cord and the red wire from the charger relay to the center terminal post
on the heatsink. Tighten nut to 18 in-lb (2.0 N·m).
3. Connect one of the secondary coil transformer wires (tan) to the bottom terminal post of the heatsink.
Tighten nut to 18 in-lb (2.0 N·m).
4. Connect the other secondary coil transformer wire (tan) to the top terminal post of the heatsink. Tighten
nut to 18 in-lb (2.0 N·m).
5. Install the charger cover and check charger for proper operation.
TRANSFORMER
See General Warning, Section 1, Page 1-1. See additional WARNING on page 5-1.
Transformer Removal
1. Disconnect AC cord from the wall outlet and DC plug from the vehicle receptacle. See WARNING on
page 5-27.
2. Remove the charger cover.
3. Note the locations of wire ties and remove the wire ties.
4. Disconnect the black primary coil leads from the AC circuit breakers and the voltage selector switch
(Figure 5-6, Page 5-9 and Figure 5-7, Page 5-13).
5. Disconnect the two tan secondary coil transformer wires from heatsink.
6. Disconnect the two black secondary coil transformer wires from the fuse.
7. Remove the four bolts and nuts that mount the transformer to the case and remove the transformer.
Transformer Installation
1. Install the transformer with the secondary coil to the rear of the charger case. Tighten the four bolts and
nuts to 28 in-lb (3.2 N·m) (Figure 5-7, Page 5-13).
2. Connect one secondary coil transformer wire (black) to one terminal of the fuse. Tighten nut to 22 in-lb
(2.5 N·m).
3. Connect the other secondary coil transformer wire (black) to the remaining terminal of the fuse. Tighten
nut to 22 in-lb (2.5 N·m).
4. Connect one secondary coil transformer wire (tan) to the top terminal post of the heatsink. Tighten nut
to 18 in-lb (2.0 N·m).
5. Connect the other secondary coil transformer wire (tan) to the bottom terminal post of the heatsink.
Tighten nut to 18 in-lb (2.0 N·m).
6. Connect the black primary coil transformer wire marked 6 to the bottom terminal of the top AC circuit breaker.
7. Connect the black primary coil transformer wire marked 1 to the bottom terminal of the bottom AC circuit
breaker.
8. Connect each of the remaining black primary coil transformer wires marked 2, 3, 4, and 5 to the corresponding terminals marked on the voltage selector switch.
9. Set the voltage selector switch to the appropriate voltage matching the incoming AC electrical service
that will be used to power the charger.
10. Tie the wires together as they were before the wire tie was removed. See following WARNING.
2008 Export Battery Charger Maintenance and Service Manual
Page 5-29
5
5
EXPORT IQ PLUS CHARGER (EXTERNAL)
Charger Repairs
ý WARNING
• Make sure wiring is properly routed and secured. Failure to properly route and secure wiring
could result in charger malfunction, property damage, or severe personal injury.
11. Install the charger cover and check charger for proper operation.
AMMETER
See General Warning, Section 1, Page 1-1. See additional WARNING on page 5-1.
Ammeter Removal
1. Disconnect AC cord from the wall outlet and DC plug from the vehicle receptacle. See WARNING on
page 5-27.
2. Remove the charger cover.
3. Using two wrenches to prevent the posts from turning, disconnect the two black wires from the ammeter
(17) (Figure 5-20, Page 5-30).
4. Remove the two nuts (22) that secure the ammeter to the charger face.
5. Remove the ammeter from the face of the charger.
17
22
7
Figure 5-20 Ammeter
Ammeter Installation
1. Place the ammeter in position in the charger face (Figure 5-20, Page 5-30).
2. Install the nuts (22) and tighten until ammeter is firmly secured.
3. Connect the two black wires to the ammeter posts.
4. Thread nuts onto both posts of the ammeter until just past finger tight. While holding the inside nut,
tighten the outside nut 1/4 turn. See following CAUTION.
Page 5-30
2008 Export Battery Charger Maintenance and Service Manual
EXPORT IQ PLUS CHARGER (EXTERNAL)
Charger Repairs
CAUT ION
• Do not allow ammeter post to rotate as the nut is tightened. Rotation of the post could result
in a damaged ammeter.
5. Install the charger cover.
6. Plug the charger into the vehicle and check ammeter for proper operation.
FUSE LINK
See General Warning, Section 1, Page 1-1. See additional WARNING on page 5-1.
Fuse Link Removal
1. Disconnect AC cord from the wall outlet and DC plug from the vehicle receptacle.
2. Remove the charger cover.
3. Remove both black secondary coil transformer wires and the black jumper wire (18) from the back of the
fuse link assembly (11) (Figure 5-7, Page 5-13).
4. Remove screws from the front of the charger and remove the fuse link assembly.
Fuse Link Installation
1. Place clear plastic cover over fuse assembly (11) and install mounting screws from front of charger face.
The center branch of the fuse assembly should be in the upper left corner when viewed from the front
of the charger.
2. Install the jumper wire (18) over the center branch of the fuse assembly and ammeter post (Figure 5-7,
Page 5-13). Tighten to 22 in-lb (2.5 N·m).
3. Install a secondary coil transformer wire (black) onto one of the two remaining terminals on the back of
the fuse assembly. Install the remaining secondary coil transformer wire (black) to the remaining terminal. Tighten to 27 in-lb (3.0 N·m).
4. Install the charger cover.
VOLTAGE SUPPRESSOR
See General Warning, Section 1, Page 1-1. See additional WARNING on page 5-1.
The voltage suppressor, which is incorporated into a wire assembly in the charger, protects the onboard computer by capturing very high, but very brief voltage spikes which occur due to the collapse of the electrical field
in the charger relay when the charger is disconnected from the vehicle. See also Test Procedure 8 – Continuity on page 5-22.
Voltage Suppressor Removal
1. Disconnect AC cord from the wall outlet and DC plug from the vehicle receptacle.
2. Remove the charger cover.
3. Remove nut attaching voltage suppressor (18-gauge red wire) (2) to heatsink (Figure 5-21, Page 5-32).
4. Disconnect the limiter (4) at the quick disconnect terminal on the relay side.
5. Disconnect the voltage suppressor wire assembly from charger relay (3).
6. Remove the white fiberglass sleeve from the red heatsink wire. Retain the sleeve for use when installing
the new voltage suppressor.
2008 Export Battery Charger Maintenance and Service Manual
Page 5-31
5
5
EXPORT IQ PLUS CHARGER (EXTERNAL)
Charger Repairs
Voltage Suppressor Installation
1. Place the white fiberglass sleeve over the red wire that connects to the heatsink.
2. Install in reverse order of removal. Tighten nut attaching voltage suppressor (18-gauge red wire) to heatsink to 18 in-lb (2.0 N·m).
4
5
3
2
TO HEATSINK
Figure 5-21 Voltage Suppressor
CHARGER RELAY
See General Warning, Section 1, Page 1-1. See additional WARNING on page 5-1.
Charger Relay Removal
1. Disconnect AC cord from the wall outlet and DC plug from the vehicle receptacle. See WARNING on
page 5-27.
2. Remove the charger cover.
3. Disconnect all wires from the relay (00) (Figure 5-7, Page 5-13).
4. Remove the two screws and nuts attaching relay to the charger case.
5. Remove the relay.
Charger Relay Installation
Install in reverse order of removal. Connect wires as shown (Figure 5-6, Page 5-9). Tighten hardware securing relay to charger base to 18 in-lb (2.0 N·m).
CHARGER AC CIRCUIT BREAKERS
See General Warning, Section 1, Page 1-1. See additional WARNING on page 5-1.
AC Circuit Breaker Removal
1. Disconnect AC cord from the wall outlet and DC plug from the vehicle receptacle. See WARNING on
page 5-27.
2. Remove the charger cover.
Page 5-32
2008 Export Battery Charger Maintenance and Service Manual
EXPORT IQ PLUS CHARGER (EXTERNAL)
Charger Repairs
3. Disconnect the two black wires attached to top circuit breaker (Figure 5-6, Page 5-9).
4. Disconnect the two black wires attached to bottom circuit breaker.
5. With a pair of pliers, squeeze in the retaining tabs on the sides of the top AC circuit breaker and remove
the circuit breaker through the mounting hole in the face of the charger.
6. Repeat step 5 for the removal of the bottom circuit breaker.
AC Circuit Breaker Installation
Install in reverse order of removal.
AC CHARGER RECEPTACLE
See General Warning, Section 1, Page 1-1. See additional WARNING on page 5-1.
AC Charger Receptacle Removal
1. Disconnect AC cord from the wall outlet and DC plug from the vehicle receptacle. See WARNING on
page 5-27.
2. Remove the charger cover.
3. Disconnect the two black wires from the AC charger receptacle (Figure 5-6, Page 5-9).
4. Disconnect the green/yellow wire from the AC charger receptacle.
5. Press the retaining tabs on the top and bottom of the AC charger receptacle and remove the AC charger
receptacle from the font of the charger.
AC Charger Receptacle Installation
1. Press the AC charger receptacle into the opening in the front panel of the battery charger.
2. Connect the green/yellow (ground) wire to the center terminal of the AC charger receptacle.
3. Connect the two black wires to the bottom terminals of the AC charger receptacle.
4. Install the charger cover.
2008 Export Battery Charger Maintenance and Service Manual
Page 5-33
5
5
EXPORT IQ PLUS CHARGER (EXTERNAL)
Charging a Battery Pack that has Low Voltage
CHARGING A BATTERY PACK THAT HAS LOW VOLTAGE
See General Warning, Section 1, Page 1-1. See additional WARNING on page 5-1.
If battery pack voltage is below 34 volts, the charger will not activate. The charger relay will have to be
bypassed to activate the charger. See following WARNING.
ý WARNING
• Knowledge of battery charger wiring and component terminology is required before
attempting any repair (Figure 5-6, Page 5-9).
• Prior to servicing the charger, disconnect the AC power supply cord from the wall outlet and
the DC plug from the vehicle charger receptacle.
1. Turn key switch OFF and place the Forward/Reverse handle in the NEUTRAL position. Leave the batteries connected.
2. Disconnect AC cord from the wall outlet and DC plug from the vehicle receptacle.
3. Remove the charger cover.
4. To apply AC power directly to the transformer primary coil, the relay must be bypassed.
4.1. To bypass the relay, locate the black wire that goes from the circuit breaker to terminal 2 on the
relay. Disconnect the black wire from the relay terminal (Figure 5-22, Page 5-35).
4.2. Disconnect the black wire from relay terminal 4.
4.3. Use a jumper wire with alligator clips to connect the black wire from relay terminal 2 to the black wire
from relay terminal 4 (Figure 5-22, Page 5-35).
4.4. Disconnect the black wire from relay terminal 6.
4.5. Disconnect the black wire from relay terminal 8.
4.6. Use a jumper wire with alligator clips to connect the black wire from relay terminal 6 to the black wire
from relay terminal 8 (Figure 5-22, Page 5-35). See following DANGER.
ý DANGER
• Do not touch any wire or component in the battery charger while AC power is present. Failure
to heed this warning will result in an electric shock.
5. Plug the DC cord into the charger receptacle first, then plug the AC cord into an electrical outlet.
6. The charger should activate and begin to charge the batteries. Allow the charger to operate for one or
two hours. See following WARNING.
ý WARNING
• Do not leave the vehicle unattended while it is charging. A charger operating with a bypassed
relay could short circuit and possibly cause a fire.
7. After one or two hours, disconnect the charger AC cord from the electrical outlet first. Then disconnect
the DC cord from the charger receptacle in the vehicle.
8. Disconnect the jumper wires from the relay wires and connect each wire to the original terminal on the
relay (Figure 5-22, Page 5-35). See following WARNING.
Page 5-34
2008 Export Battery Charger Maintenance and Service Manual
EXPORT IQ PLUS CHARGER (EXTERNAL)
Charging a Battery Pack that has Low Voltage
RELAY BYPASS
JUMPER WIRE
RELAY BYPASS
JUMPER WIRE
Figure 5-22 Export IQ Plus Charger Wiring Diagram (Relay Bypassed)
ý WARNING
• The relay wiring must be properly connected prior to placing the charger back into normal
service. Failure to remove the jumper wire and properly connect the relay wiring could result
in property damage, severe personal injury, or death.
9. Install the charger cover and the retaining screws.
10. Plug the DC cord into the charger receptacle, then plug the AC cord into an electrical outlet.
11. Allow the charger to continue charging the batteries until the charger shuts off automatically.
12. When the charge cycle is complete, test the batteries again. If the battery pack voltage is above 34 volts
and the vehicle will not operate, it will be necessary to troubleshoot the vehicle’s electrical system to
determine which electrical component has failed. See Section 11 – Electrical System and Testing in
the appropriate maintenance and service manual.
2008 Export Battery Charger Maintenance and Service Manual
Page 5-35
5
5
TE
K
E
C
H
O
T
S
H
.
E
C
Z
C
IR
AT
A
H
W
M
T
60
C
E
O
E
E
T
R
N
R
T
O
N
H
S
0V 50
T
O
E
T
C
24 H
D
E
E
S
0/
IS
IT
D
R
N
D
22
,
W
N
.
IO
N A
0/
G
T
T
LY U
E S
IF
20
C
N O
IN
H IE
Y
E
T R
O R
0/ T! TLE
AT
R
N
U
S G 10
D E
E
R .
N
LE O G.
N T
T
E S
LY
O
T
LE
O
A AT AT
P K
R
T U ET- IN
C
IC E
O AR
S B
B !
L
H P
IT O K T
P N
A
IS SP
E T
E O
N T- C ET
M E
L.
H
V R
IC
U KE O S
A H
A R D
T LE
T
S
P
.
U E
N
H
C
IS
48
! C
20 W IN UT
R
O
N G A
H O E C
Y
E
M T
A R E
T S IR IT
LS LE TO LL
TA O
V
E
M HA M
A E
F O W W
O
T LY
A
IN E
O T E S
N C LA
S N
IN LL
C
13 IC
A V
Y O
K D E E . M A
IO E F
M LI
G
M
S
C
T
R R H E R IF
O AT O A
A
E
H T
E CT
C IL T VIN
T O
R M
B CO T G LU T Y
U H N
IV E
F O
N T
R W E . O
E
D
R N
; B RY LA Y UT
T C V E M
O ED
H T E IN
D N
R A
D D RE AG E
T PU D H SE E E
R O
K T
N C N T D VA F
E C
IN G P R R
C C
N
- A E
O IN U AT SE AT DS
W ,
D
L OF BA NE
O K
A IN S G OR
D G O M . B N
IL S
N
P OC
E K E
E TIN GR E K D O
W T
LE O
R A S IN F
G C TE C
C
, E A E E . R H
AT C
T U
Y C
G BR G G B S CA S
C E LY A LA SE
N H
G
IN E E R LY T B IC LO NN ER OLT B ULA . RE S L C
",
15 E R IT
LU
G R IV HA P GH LU R
IL P
T
H O P V "- S
S C P LI
N
R
C C
U
C C RO T ; IN TO AT CU U
A FO
W T
.
H E LO T S D H
R
IT E P U E N
U
C B P O S E IT ELE W R A P IV U 2 E L OD NIT P
IN AT H ER G IA
E - X N IN K
S O
U IN
T O
R G - E O A NA E W OF
E EF TO S EG UC FT R IN G
D
IS ND
O
A
IN
G B
F IN G - T M R US K
A E RD A . N TO A H T. RE TH A
E N IN
O
M
D T Y C N A
LT
, Y
B AR N G EC G R RIS
G
E R
IN
O A CO D E O LL L RE S
W AR N N IN FO E
V
G E
E R N A IA
N
H
A T
T LT R R ", O IC T UR RIE
W AR O OK - T
R
IN
U O E U
G E
O AT
P T V W S ; "+ ! D AT S C TE
W C
T B
IS SM IN C
IN U PO EA Y D OM E CT AT
S E
N U
D
IT
• O R D S! E P T M R AR T AT E B
D H
H IN
N A E
R
E T
• W R T T D PU D LA AZ AU DIC R IF
D O
N
N T
O LE T E IN A PO H RT IN CO PS
E
T T S
R
K
Y
T
U
T D
X TE
O DJU SU C C AD OC STA ER OR AM
E N
E C
T F 5
A A
H
F E
• E NN UE LE S ILL ME R N
O N
M O Q T
E A
S N
C E U IC W M T H
D CO
• R TP TR IT A E T
F U C N E M S
IO
R IS
U H M S
O
• LE IS . T A LE PE D
E
• H OD OR O . G OR
T
• O NT R T D IN C
E
G
O E G UR UT
•M P AR : D TP
TA H E U
C T O
O E
•N H
T
•
ST
TE
S
TION
E
EC
EN AR
NN
TH IES
IF
L CO AND ER
Y
TT
ER
PS BA
TICA
TT
AM N
EC
BA
HE
E !
L EL TO 20 Y W
TH ET
AL
IN TL
13 CALL
IF
Y
TA
OM TI
IN E OU
LA
FR MA
DE
MA LIV
TTO
S
RY
A
TO
.
ND
VA F AU
CKE E
AC
ON D TO
CO
ILL
T
SO
CK TE
TH
W S OF
SE
E
EC
BA
15 . ENT UT
IR
CH
E EC
NN
W
AT
CL NN
2 TO TE RR SH
M
CO
HZ
CY CO
R RA CU IT
REE TO
IS
TE GE AL . UN
60
ILL UG
,D
TH
R
W PL
AF
G
0V
O
Y AR TI OD
IT T
ED
IN
LL CH T. IN GO
24
PU
50
UN
E
.
0/
AL
ND
H
IS IN
RAT .
ST
TICA TI EN AR
22
IT
NLY U
TH D
0/
MA IN RR IES
TE
PE
O
W
E, Y AN
O KS
TO TES T CU ER
S GRO 0/20
NS
AG ER
! ET
L. IS SPAR
LE LY
O
E
T AU CA EC TT
10
TT
OR
DI
R
ET
TI
UA
ER D
UTL
AR IN RR BA
ST BA
HIC PE
TO TL O .
EN S AR
EC
AN G
ST R CO IF
ED THE
VE O
IT OU T- ING
M AR AN R.
TH IE
NN
ILL TE R PS
IF
ND
N H E
48 PR
D ER
W ME FO AM
UN T- CKE TT
Y
O C
TE D TO
CO
IT AM R 5
OVE
AN TT
IS KE
TI E AM
TO
EM
ER
EX
C
SO
FL
SE
C
TE
UN E TE AN
TH
E H
UC HIL T
TT
ST LY
PS BA
CAL
OF
IS . TH ME TH
C
F SO
NG
W
TI
S EC
BA
SY ON
O TO WIR IT
AM EN
VI
DTR C EN
S! EC
• TH OD R AM LESS
E !
OD NN
E T
20 WH
IN D EV E. O
RI CO
CK RD EE SW
AL
GO TO
TH ET
RIV EC
D G PR AG EM
PE IS
R E
IN L EL TO LY
N
ON R TO
BA
O
D
IN UTL
NN
EA KI - GAR E R
E C TH TH UE. RM AL
•M PE GED. NG RD
13 AL
ER O
ES
R
G
,R
NTA O
TA AR RI CO
TH T
IF
W C
M IC
G EA AS IN
AI
DU
N PU ED IN ; BL TE
O AT
IN BR G GE BEFO
M LIVE
CH E: TPUT
PO CK,
O IN ND CH SE Y AY
G RE
FR M
.
O
A
G U
OT
N ER DEL
AT
ED
N
AR FO SIVE HAR LY TS AR SH
•N E OU
RY TO N TO TO
TI RO M SE TT S
TH
CH BE O T C PP GH BC IC
VA AU K O D
CAT EC G E K. BA D
LU
PL
L FF
LO NN RLY AG AC TED CON
C TE
RE G - EX NO S SU LI C TR
IL O
LT BL
W
EC
N ED H EC
FO
CH O PE
LA
T UTS LE BANN
NIN G DO AI AK IT EL
IT E C O T VO "-", SU SE
O
• BE AR NIN G - T M R N W OF
E; IN 15 E. REN SH
SW R PR
SE
W
CYC C
E FO A INPU IV UN TO AT UR NIT
AR IN EC O U K
L G
W N NN NG R RIS
AG BE TO S AT H 2 R C U
IL U
AR
LT E D N EG UC R GE AL D.
W PL
R
AI
W CO OKI - FO E
IT T
VO AG O M . N TO AFTE AR TI OO
G TH
IS
T LT C
H IN G
UN INPU
ED T
• D O SM NIN CE
PU VO ER RED R O LY C T. E
IS D
U
• N AR ED S! E IN T W SU "+", O N ICAL TIAL REN AR
TH AN
S
W
PU
D
R
E, Y
ET TH IN T POMEA ITY; D! MAT IN CUR IE
ER
• TO UTL ST ED PU D R AR TO ES T ER
RAG
O TT
O JU R T IN AN LA AZ AU AT EC TT
IC R BA
ST E BA
Y PO H
SU
• AD EA NEC C AD CK ART IND OR IF
ED TH
C
M N UEN LE O ST
ND TO
ER R PS
O
TE D
• C EQ UT IC SH ILL MET FO 5 AM
FR TP TR W
EX TE
U
F
IT AM ER AN
O NEC
• O EC UN E MET TH
DS ON
• EL IS D. TH AM SS
IO C
• TH OO TOR LE PER IS
G N TO . G RD
O R
O
•M PE GED RIN T C
TA AR DU U
:
CH TE UTP
O O
•N E
TH
Page 6-1
2008 Export Battery Charger Maintenance and Service Manual
6
SECTION 6 – EXPORT IQ PLUS CHARGER
(ONBOARD)
ý DANGER
• See General Warning, Section 1, Page 1-1.
ý WARNING
• See General Warning, Section 1, Page 1-1.
GENERAL INFORMATION
This section includes information pertaining to service of the Export onboard IQ Plus battery charger (model
number 25660-40) as installed in IQ Plus vehicles. Depending on the geographic region, the charger provided
with your vehicle may be a different model. Do not attempt to service a battery charger that has not been properly identified. If a charger cannot be properly identified, contact your local Club Car dealer or distributor.
For battery chargers with model numbers listed above that are installed in vehicles other than IQ Plus vehicles, contact your local Club Car dealer or distributor.
The IQ Plus battery charger is automatic and has no external controls (Figure 6-1, Page 6-1). When the AC
cord is plugged in, there is a 2 to 15 second delay before charging begins. See following NOTE.
NOTE: At one hour and at two hours into the charge cycle, the charger will shut off in order to run a selfdiagnostic program (ammeter will drop to zero). Charging will resume in a few moments (ammeter
returns to previous rate of charge).
The onboard computer (OBC) records the amount of energy consumed as the vehicle is used, then directs
the charger to replace exactly the amount of energy needed to fully replenish the batteries. The charger then
shuts off automatically, preventing the possibility of either undercharging or overcharging.
TO
AC CORD
REEL
Figure 6-1 Onboard IQ Plus Battery Charger
6
EXPORT IQ PLUS CHARGER (ONBOARD)
The Charge Circuit
IQ PLUS ONBOARD CHARGER FEATURES
• Charge Interlock
When the AC power cord is inserted into a wall receptacle, the onboard computer locks out the vehicle
drive system. This prevents the possibility of driving the vehicle while the charger is plugged in and
potentially damaging the vehicle and charger.
• Long-Term Storage Charge
IQ Plus chargers are designed to be left connected with AC power to the charger, during off-season or
long-term storage. The onboard computer will automatically activate the charger every 15 days. To
return the vehicle to service, disconnect the AC cord from the wall outlet, wait 15 seconds and then
plug the AC cord back in. The charger will activate. Allow the vehicle to complete one full charge cycle
before putting it into service.
BATTERY WARNING LIGHT
IQ Plus vehicles feature a dash mounted battery warning light (above the steering column) that, when the
vehicle is in operation, indicates low battery voltage or, when the vehicle is being charged, indicates a charging problem. The battery warning light is controlled by the onboard computer.
When the batteries receive an incomplete charge because 1) AC power to charger is interrupted, 2) automatic
charger shut-off occurs after 16 hours of operation, or 3) charger malfunctions, the battery warning light will
indicate as follows:
• The battery warning light will not illuminate if the charge is 90% or more complete. The onboard computer will retain in memory the amount of charge needed to fully replenish the batteries and will complete the charge during the next charge cycle.
• When the charger AC cord is unplugged during a charge cycle, the battery warning light will illuminate
and remain illuminated for 10 seconds if the charge is less than 90% complete but the vehicle has
enough power for 60 minutes of operation. This will alert the operator that the vehicle may be used, but
that it must be charged to completion as soon as possible.
• The battery warning light will repeatedly illuminate for 10 seconds, at 4 second intervals, if the charger
times out at 16 hours and the batteries are not sufficiently charged. This indicates an abnormal charge
cycle. The charger and batteries should be checked by your Club Car distributor/dealer.
THE CHARGE CIRCUIT
For vehicles with onboard chargers, the charge circuit consists of the following components:
• onboard charger
• onboard computer
• batteries
The 10-gauge black wire from the charger connects to the onboard computer black lead wire. The 6-gauge
black wire (also on the controller B– terminal) goes through the onboard computer and connects to the negative (–) post of battery no. 8 (Figure 6-5, Page 6-11). The 10-gauge red wire of the charger is connected to
the positive (+) post of battery no. 1 for Turf 2/252, Carryall 2/252 and XRT 900 vehicles, and the large post
of the solenoid (battery side) for Carryall 6, Villager and TransPorter vehicles. The 18-gauge gray wire from
the charger connects to the onboard computer (Figure 6-2, Page 6-3).
Page 6-2
2008 Export Battery Charger Maintenance and Service Manual
EXPORT IQ PLUS CHARGER (ONBOARD)
Onboard Charger Operation
To check the charge circuit, check the connections between the 18-gauge gray wire from the OBC, DC cord
red wire, DC cord black wire, and the wire connections between the batteries.
SOLID STATE
SPEED CONTROLLER
ONBOARD
COMPUTER
B–
No. 10 BLACK
TERMINAL
No. 4 BLACK
Connector
No. 18 GRAY
No. 10
BLACK
Three Pin
Connector
No. 6
RED
No. 10 RED
Carryall 6
Transporter 4 and 6
Villager 6 and 8
RED TO
POSITIVE
TERMINAL
SOLENOID
No. 10 RED
Turf 2 and 252
Carryall 2 and 252
ONBOARD
CHARGER
BLACK TO
NEGATIVE
TERMINAL
+
BATTERIES
–
Figure 6-2 Charge Circuit
ONBOARD CHARGER OPERATION
See General Warning, Section 1, Page 1-1.
ý DANGER
• The charging area must be ventilated. Hydrogen level in the air must never exceed 2%. The
total volume of air in the charging area must be changed five times per hour. Exhaust fans
should be located at the highest point of the roof. Contact a local HVAC engineer.
• Do not charge the vehicle batteries with the vehicle covered or enclosed. Any enclosure or
cover should be removed or unzipped and pulled back when batteries are being charged. An
accumulation of hydrogen gas could result in an explosion.
ý WARNING
• Only trained technicians should repair or service the charger. Contact your nearest Club Car
distributor/dealer.
• Each charger should have its own dedicated 15 or 20 ampere separately protected (circuit
breaker or fuse) single phase branch circuit, in accordance with all applicable electrical codes
for the location.
• Connect the charger AC supply cord to a properly grounded, three-wire outlet of the proper
voltage and frequency as shown on the charger.
• Do not use an adapter to plug the charger with a three-prong plug into a two-prong outlet.
Improper connection of the equipment-grounding conductor can result in a fire or an
electrical shock.
WARNING CONTINUED ON NEXT PAGE...
2008 Export Battery Charger Maintenance and Service Manual
Page 6-3
6
6
EXPORT IQ PLUS CHARGER (ONBOARD)
Onboard Charger Operation
• Do not use an extension cord.
• Do not use near fuels, grain dust, solvents, thinners, or other flammables. Chargers can ignite
flammable materials and vapors.
• Do not expose to rain or any liquid. Keep the charger dry.
• Prior to servicing the charger, disconnect the AC power supply cord from the wall outlet,
disconnect the DC cord from the vehicle, and remove the battery charger from the vehicle.
See Onboard Charger Removal on page 6-34.
• Never push objects of any kind into the charger through cabinet slots. They may touch
dangerous voltage points or cause an electrical short circuit that could result in fire or
electrical shock.
• Do not use a battery charger if the cord or plug is damaged in any way. Replace worn or
damaged parts immediately. Failure to heed this warning could result in a fire, property
damage, severe personal injury, or death.
• Do not operate the charger if it has received a sharp blow, was dropped, or otherwise
damaged in any way. Make sure it is operating properly before putting it back in use.
• Have worn, cut, or damaged power cords or wires replaced immediately.
• Do not block or cover the charger ventilation slots. The slots provide ventilation and prevent
the charger from overheating.
• Do not allow clothing, blankets, or other material to cover the charger.
• Do not allow the charger to operate for more than 30 minutes at 19 or more amperes.
• Install surge arrestors on incoming AC power lines. Surge arrestors will help protect electrical
components in the charger and on the vehicle from all but direct or close lightening strikes.
ONBOARD CHARGER AC POWER CONNECTION
The AC line to which the charger is to be connected must be of the proper AC input voltage for the charger
and must be capable of supplying sufficient current. See Section 2 – Charger Identification and Specifications. If the battery charger is equipped with a multi-position switch for variable AC input voltage, the switch
must be set for the correct voltage before the AC cord is connected (Figure 6-3, Page 6-5). See following
CAUTION.
CAUT ION
• Failure to set the AC input voltage selector switch to the correct voltage could result in
damage to the battery charger or batteries.
NOTE: Make sure that the AC cord provided with your charger has the proper AC plug for your location. If
it does not, contact your Club Car representative to obtain the proper cord or plug.
Connect the power supply cord to an AC supply within the acceptable voltage range. See Section 2 –
Charger Identification and Specifications.
To reduce the risk of electric shock, the battery charger must be grounded. The charger is equipped with an
AC electric cord with an equipment-grounding conductor and a grounding type plug. The AC plug must be
connected to an appropriate receptacle that is properly installed and grounded in accordance with all applicable national and local electrical codes and regulations.
Place the charger AC cord so it will not be stepped on, tripped over, or otherwise subject to damage or stress.
The use of an extension cord with the onboard charger must be avoided.
Do not place items in the compartment where the battery charger is installed. Ensure that the charger ventilation slots are unobstructed.
Page 6-4
2008 Export Battery Charger Maintenance and Service Manual
S
UN
IT
TH W
E ILL
AM AM STA
M ME R
ES ETE TE T AU
S R R IN TO
TH FO D M
AN R IC AT
5 CO ATE ICA
E
A
R
S
R
LL
M
IO
PS REC INTI Y
D DS
IF T C AL AFT
IS O
BAT U C ER
CO F
R
NN EXTE
TE RE HAR 2 TO
RIE NT. G
E
N
E
G CTE NDE
S IN R 15
,
AR TI AT SE
D D
E R
E AL E. CO
B EA TO STO
GO C
ND
TH R
V RE D
OD. URR
S
E AG
E A IN
DE
BAT E
G K D
UN EN
,
LA
TE TH
A AS ING TR
IT T W
Y
R E
RY IS
S IL
IF
G
D U
ALL
AN UNIT HUTS L VA
P E S - C CT
LY
IN
D
IO
W
P
ELE
OFF RY
IN WIL
G B G RE HIL N
FR
PU L
CTI
H EF A V
AU O
T CY
R E E M
T
CA
PLU C
TO M
L S OR A N C AN
.
LE
U
M 13 TO L C
E GE T F HA UA
G B
AT
C BC
ON
R . L R L
CO AC
IC 20
T A
E
A G .
NE
R R
NN K
ALL A
IC P MO ME ER
CTI
EC ON
Y MP
V
S O
W S
A IS
ON
TE TO
IN
H W
N
HE A
D M
S
O E
D O
G
C
N ND
TO AIN
C R
H
S PE
C
BAT TH TES
K D
PA R
A TA
O
L
T
,C R
E
LI IN
V
R AT
C OC
VE TH TER N
E
O IVE
K IN
O A
R
IE
N
OU E
S
.
S
N S
. G
R NN TE
TL BAT
AR
E YS
O E D
D
C
E
G
C
O
V
E
R
•B
E
W FO
W AR RE
A N
• D WA RN ING CH
• N IS RN ING - AR
B
O CO ING - EF GIN
E
• T WA SM NN - XP OR G,
D
E
R
O
R
E
L
O
O R N K CT O O B E
• A UT E ING ING M NO SIV RE AD
A T E A IN
D L D
M JU E UC - F O IN C G K D
• C EA S TS E OR R N S HA A IN TR
S G
O S T ! TH U AK SU RG E D UC
F N U T
E S E PP E S C T
• O RE NE RE HE
R E D LY IN - P W IO
IS W L
• E U QU CT D IN IN
K IT IG BE G RE HIL N M
T
P
O H H F AR VE E A
• T LE PU EN IN P U
F C TS O A N C N
H C T C P U T
E LU . R G T H U
G IS T L Y U T VO
LE B
E E F A A
•M OO U RIC EA AN T P VO LT
R . LA R G L.
C C
N
D D O LT A
E
O
TR A
M E
M
TA N D. T IT SH P M W AG GE
E R
IC R P
O
T
E
O
V
A IS
C P O H W O L E R E S
C
A
O
IN
N
•N HA ER R A E A ILL K AR SU C BE WIT SH W
D OP
G
O E
O R T M M S H IT R O F
S E
C R
C
TH TE G O M M TA AZ Y; E RD OR CH
PA R
K D
O
, R
V
R A
E : D ED LE E ET R AR "+ D T E L
T
T
C
E
K
O U . SS TER ER A D ", R MA O A C OC
O IVE
S ING
U R
N S R.
.
TH F IN UT ! D E IN P ON AT
TP IN
N Y
,D
S
E S
A OR DIC OM O N D. N IN RO NE ED
U G
C T
IS
N
T P
C
T E
C
5 CO AT ATIC OT EG PU PE TIN ON
C ER
O M
O
R
O IO
A R E
N 4
N
•B
M R S A TO AT T V LY G TH
R
LY 8
N
D D
P E IN LLY U IV O G IN E
E
E
S C
TO VE
W FO
C E
C
IS S
IF T TIA A H ; "- LTA RO PU BA
T
C OF
W AR RE
P HIC
AC
B CU L FT UN ", GE UN T CK
O E
R L
A N
AT R C E IN B
C
N X
O E
.
• D WA RN ING CH
N T
P S
TE R HA R S LA MAT DE OR OF
E E
C N
• N IS RN ING - AR
R EN R G 2 T UL C K C D T D TH ER O
B
TE D
IE T.
LY N
O
T
.
O CO ING - EF GIN
LY
S IN E 1 ATE SE HIN HR O IS
D ED
S NN - EX O G
A T R A 5 D N G E SO UN GR .
TO S
M
R IA T S B S T E
O
T
O E D P R ,R
U
TH OR E G L E. EC AT E; HE W CK IT T
K CT O LO E B EA
N
IR E
IN
N S
O T BL
O CU
D
E A
N E U SW E T- O 1
G MA OT IV RE D IN
O R
E
B GE
O
D R E
D
D. R
O IN C E G AK D
AT ,
S Y . IT SO U 00
R
T
H
IN
U E
D T
C C T /2
T T
H
N
L
N
N S S AR AS G TR
H
E
0
E
E
R
IT T
A U G E D U
R IS
LA RM H S KE ET 0/2
E
K P
Y U
E
E T-O ! 2
S WIL
Y IN
E P E S - C CT
A N
TT U
H L
0/2
W
D LY IN P W IO
IF A
N IT
U
IR
LIG
IN T
D
TS VA
40
A LS
B G RE H N
E
LL !
G LE
IN W
VH EF AR VE ILE MA
. T
O RY
S
P ILL
TS O A N C N
E
O
TO
FF F
U
W
LE
C
T C
.! RE GE T HA UA
IT
K
A RO
M
C
P Y
H
E
U
T
LU C L
AT
R . FLA RG L.
TTO M
IC
50
E
C
M E
G E
M
A
M 13
H
O
E R
L
O
C BA
AT T
TH
R
V
A IS
O C
C
IN
N
IC O
O
N
60
E
D OP
N KO
N
A 20
H
E N
N
S E
LLY A
C
Z
E
PA R
M
TE T
C
P
R AT
TIO
D O M WH S
K IN
S G
TO A
E AN
.
.
N D NS
,D
A INTA
B T
TE
IS
AT H
LIV IN
S
C
TE E
T
O
E T
N
R N
O H
N
IE
U E
E
S
TL B
C
A
T
E AT
R
T! T
AC
E
E
R
.
Y
IF
220 V
AC INPUT VOLTAGE
SELECTION SWITCH
(REAR CHARGER PANEL)
Figure 6-3 AC Input Voltage Selection Switch
CHARGING BATTERIES
1. Connect the AC power supply cord to an AC outlet designed to provide the proper AC voltage for the
charger.
2. The charger will activate automatically within 2 to 15 seconds.
3. Monitor the ammeter for the correct charge rate. The initial charge rate will vary from 15 to 19 amps,
depending upon the condition and depth of discharge of the batteries. Slight variations in the initial
charge rate may also result from AC line input voltages which are higher or lower than the nominal input
voltage. Higher AC line voltages increase the initial charge rate while lower AC line voltages reduce the
initial charge rate.
4. Monitor the ammeter for about 30 seconds. Under normal operating conditions (when the charger is on
and the batteries are discharged), one hour and at two hours into the charge cycle, the charger will shut
off in order to run a self-diagnostic program (ammeter will drop to zero). See following CAUTION and
NOTE.
ý CAUTION
• Do not connect an external charger to the receptacle of a vehicle equipped with an onboard
charger while the onboard charger is activated. Charging overload will damage the onboard
computer and may cause battery damage.
NOTE: Batteries should be put on charge at the end of each day even if the vehicle has been used for only
a short amount of time (even if for only 10 minutes).
When air temperatures fall below 65 °F (18.3 °C), batteries charged in unheated areas should be
placed on charge as soon as possible after use. Cold batteries require more time to fully charge.
New batteries will not deliver their full range until the vehicle has been driven and recharged from
20 to 50 times.
Vehicles should be restricted to 40 to 50 energy units of discharge between charges until the batteries have been properly seasoned (20 to 50 charge cycles). For maximum battery life, Club Car
recommends that electric vehicles always be recharged after 40 to 50 energy units of discharge or
Page 6-5
2008 Export Battery Charger Maintenance and Service Manual
6
Onboard Charger Operation
EXPORT IQ PLUS CHARGER (ONBOARD)
EXPORT IQ PLUS CHARGER (ONBOARD)
Onboard Charger Operation
each night in order to avoid deep discharging the batteries; use the CDM (Communication Display
Module) (CCI P/N 101831801). See Communication Display Module in the appropriate maintenance and service supplement.
TESTING CHARGER OPERATION
1. Connect the AC power supply cord to an electrical outlet. The charger relay should not close immediately, but should close with an audible click after a delay of 2 to 15 seconds. See following NOTE.
NOTE: Monitor the charge cycle to make sure the charger turns off properly. If the charge cycle is interrupted, and the batteries are less than 90% charged, the battery warning light will illuminate intermittently. See Battery Warning Light on page 6-2.
2. If the charger does not operate exactly as described above, refer to the wiring diagram and make sure
that the vehicle is wired correctly (Figure 6-2, Page 6-3) and that the internal charger wiring is correct
(Figure 6-4, Page 6-6).
DIODES WITH
HEATSINK
RED
RED
TAN
BLUE
BLACK
TAN (3)
TAN (2)
BLACK
CASE
GROUND
BLACK
BLACK
BLACK or BROWN
GREEN or GREEN/YELLOW
BLACK
3
BLACK
1
WHITE or BLUE
TAN (5)
9
6
TAN (4)
7
4
AMMETER
BLACK
PRIMARY
COIL
FUSE
BLACK
RELAY
BLACK
TAN (1)
AC CORD
B
TAN (6)
BLUE
A
TRANSFORMER
SECONDARY
COIL
BLACK
CONTROL
BOARD
RED
BLACK
BLK
BLACK
TAN (1)
BLK
BLACK
BLACK(1)
AC CIRCUIT
BREAKERS
BLACK
BLACK (1)
BLACK
BLACK
BLACK
TAN (6)
BLACK
BLACK
BLACK (6)
BLACK (6)
Figure 6-4 Export IQ Plus Onboard Battery Charger Wiring Diagram
Page 6-6
2008 Export Battery Charger Maintenance and Service Manual
1
2
3
4
5
6
AC VOLTAGE SELECTOR SWITCH
BLUE
TERMINAL #
RED
BLUE
BLACK
TAN
DC CORDSET
RED
6
EXPORT IQ PLUS CHARGER (ONBOARD)
Checking Battery Condition with an Onboard Charger
CHECKING BATTERY CONDITION WITH AN ONBOARD CHARGER
Read DANGER, WARNING, and CAUTIONS beginning on page 6-3.
It is common practice for technicians to check the condition of a set of batteries after they have been charged
to ensure they have received a complete charge before the vehicle is used. With IQ Plus vehicles, this is not
necessary; the onboard computer controls and monitors the charge cycle. If any problem occurs during a
charge cycle, the battery warning light, located above the steering column in the center dash panel, will illuminate intermittently.
If the battery warning light is illuminated after a charge cycle, refer to the troubleshooting chart. See Troubleshooting on page 6-7. If the specified test procedures identify no problems, plug the AC cord into a wall outlet and let it charge until the charger shuts off automatically. If a problem is found, correct it and charge the
vehicle. Normal battery voltage near the end of a charge cycle should be approximately 59 to 63 volts DC
while the charger is still operating.
START CHARGE CYCLE
1. Disconnect the AC plug from the wall outlet.
2. Wait 20 seconds, then reconnect the AC cord to the wall outlet. See following NOTE.
NOTE: The charger will not operate unless a delay of approximately 20 seconds is observed.
3. Monitor the ammeter for the charge rate. If the vehicle has not been driven since the last charge cycle
and the batteries are fully charged, the onboard computer will not perform a self-diagnostic test. The
charge cycle will begin and the ammeter will not drop to zero. If the vehicle has been driven, even if only
a few feet, the onboard computer will perform the self-diagnostic test; the ammeter will drop to zero for
2 to 3 seconds before the charge cycle continues. If the batteries are close to being fully charged, the
charge cycle will begin and the charge current will begin to taper within a few minutes.
TROUBLESHOOTING
See General Warning, Section 1, Page 1-1.
ý DANGER
• Do not touch any wire or component in the battery charger while AC power is present. Failure
to heed this warning will result in an electric shock.
ý WARNING
• Knowledge of battery charger wiring and component terminology is required before
attempting any repair (Figure 6-4, Page 6-6).
• Prior to servicing the charger, disconnect the AC power supply cord from the wall outlet,
disconnect the DC cord from the vehicle, and remove the battery charger from the vehicle.
See Onboard Charger Removal on page 6-34.
Use the following Troubleshooting Guide for troubleshooting the export IQ Plus onboard battery charger
(model number 25660-40). The Troubleshooting Guide encompasses the entire battery charging circuit. Test
procedures specified in the Troubleshooting Guide can be found on the following pages.
2008 Export Battery Charger Maintenance and Service Manual
Page 6-7
6
6
EXPORT IQ PLUS CHARGER (ONBOARD)
Troubleshooting
IQ PLUS ONBOARD BATTERY CHARGER TROUBLESHOOTING GUIDE
SYMPTOM
POSSIBLE CAUSES
CORRECTIVE ACTION
Relay does not close, no transformer
hum and ammeter does not move
Batteries disconnected
Connect batteries (Figure 6-5, Page 6-11)
Battery voltage is too low
Test Procedure 1 – Battery Voltage on
page 6-10
Improper vehicle or battery charger wiring
See Figure 6-2, Page 6-3, Figure 6-4,
Page 6-6 and Figure 6-5, Page 6-11
DC circuit
Test Procedure 5 – Charger DC Circuit
Continuity Test on page 6-16
Onboard computer malfunction
Test Procedure 2 – Control Board on
page 6-12
Gray sense lead fuse is blown
Test Procedure 1 – Battery Voltage on
page 6-10
Control board malfunction
Test Procedure 2 – Control Board on
page 6-12
Improper AC line voltage
Test Procedure 3 – AC Power and
Continuity Check of AC Circuit on
page 6-13
Failed AC plug and cord
Test Procedure 3 – AC Power and
Continuity Check of AC Circuit on
page 6-13
Failed AC cord reel
Test Procedure 8 – Continuity on
page 6-18
Internal AC breaker
Test Procedure 3 – AC Power and
Continuity Check of AC Circuit on
page 6-13
Transformer primary coil
Test Procedure 6 – Transformer on
page 6-16
Relay
Test Procedure 8 – Continuity on
page 6-18
Blown charger fuse
Test Procedure 4 – Diodes on page 6-14
Both Diodes failed
Test Procedure 4B – Both Diodes Failed
on page 6-15
Onboard computer malfunction
Test Procedure 2 – Control Board on
page 6-12
Failed transformer
Test Procedure 6 – Transformer on
page 6-16
Failed ammeter
Replace ammeter
Failed charger relay
Test Procedure 8 – Continuity on
page 6-18
Diode failed
Test Procedure 4A – Single Diode Failure
on page 6-14
Loose internal fuse connection
Tighten connection
Battery is wired in reverse polarity
Check vehicle wiring
DC cord is wired in reverse polarity
Check battery charger wiring
Both diodes failed
Test Procedure 4B – Both Diodes Failed
on page 6-15
Relay closes with an audible click but
no transformer hum and ammeter does
not move
Relay closes and transformer hums but
ammeter does not move
Relay operates intermittently
Single charger fuse link blows
Both charger fuse links blow or
receptacle fuse link blows
Troubleshooting Guide continued on next page...
Page 6-8
2008 Export Battery Charger Maintenance and Service Manual
EXPORT IQ PLUS CHARGER (ONBOARD)
Troubleshooting
IQ PLUS ONBOARD BATTERY CHARGER TROUBLESHOOTING GUIDE
SYMPTOM
Charger output is low
POSSIBLE CAUSES
CORRECTIVE ACTION
One diode failed
Test Procedure 4A – Single Diode Failure
on page 6-14
Transformer coil short-circuit failure
Test Procedure 6 – Transformer on
page 6-16
Onboard computer malfunction
Test Procedure 2 – Control Board on
page 6-12
AC power supply was shut off
Test Procedure 3 – AC Power and
Continuity Check of AC Circuit on
page 6-13
Onboard computer malfunction
Test Procedure 2 – Control Board on
page 6-12
Batteries may be fully charged
Test Procedure 7 – Battery State of
Charge Test on page 6-18
Onboard computer malfunction
Test Procedure 2 – Control Board on
page 6-12
Extremely discharged batteries or cold
temperature
Recharge batteries
Failed or weak battery
See Batteries section in the appropriate
maintenance and service manual
AC cord is shorted
Test Procedure 8 – Continuity on
page 6-18
Failed transformer
Test Procedure 6 – Transformer on
page 6-16
Incorrect charger wiring
Check battery charger wiring
AC power interrupted
Test Procedure 3 – AC Power and
Continuity Check of AC Circuit on
page 6-13
Onboard computer malfunction
Test Procedure 2 – Control Board on
page 6-12
Charger failure
See Testing Charger Operation on
page 6-6
16 hour time out
See Battery Warning Light on page 6-2
Battery or batteries need to be replaced
See Batteries section in the appropriate
maintenance and service manual
Batteries are getting close to full discharge
capacity
Recharge batteries as soon as possible
Charger turns off too soon
Charger goes to 16 hour time out
AC line fuse blows or AC circuit
breaker trips
Battery warning light illuminates for ten
seconds at four second intervals
2008 Export Battery Charger Maintenance and Service Manual
Page 6-9
6
6
EXPORT IQ PLUS CHARGER (ONBOARD)
Test Procedures
TEST PROCEDURES
See General Warning, Section 1, Page 1-1.
INDEX OF TEST PROCEDURES
1. Battery Voltage
2. Control Board
3. AC Power and Continuity Check of AC Circuit
4. Diodes
5. Charger DC Circuit Continuity Test
6. Transformer
7. Battery State of Charge Test
8. Continuity
TEST PROCEDURE 1 – BATTERY VOLTAGE
See General Warning, Section 1, Page 1-1.
1. Check the wire connections between the vehicle and battery charger (Figure 6-2, Page 6-3).
1.1. Verify that the 10-gauge red wire from the battery charger is connected to the positive (+) post of
battery no. 1 for Turf 2/252, Carryall 2/252 and XRT 900 vehicles, or the large post of the solenoid
(battery side) for Carryall 6, Villager and TransPorter vehicles.
1.2. Verify the connection of the 10-gauge black wire from the onboard computer to the 10-gauge black
wire from the battery charger.
1.3. Check the connection of the 18-gauge gray wire from the charger to the onboard computer gray
wire.
1.4. Turf 2/252, Carryall 2/252 and XRT 900 Only: Check the fuse in the 18-gauge gray wire.
2. With a multimeter set to 200 volts DC, measure the voltage of the battery pack between the positive (+)
post of battery no. 1 and the negative (–) post of battery no. 8 (Figure 6-5, Page 6-11). Normal no-load
voltage should be between 50 and 52 volts for fully charged batteries. The voltage of the battery pack
must be over 34 volts DC to allow the onboard computer to close the charger relay. If battery pack voltage
is too low to start charger, temporarily bypass the charger relay. See Charging a Battery Pack that has
Low Voltage on page 6-31.
Page 6-10
2008 Export Battery Charger Maintenance and Service Manual
EXPORT IQ PLUS CHARGER (ONBOARD)
Test Procedures
Place multimeter
red (+) probe here.
2
FRONT
OF VEHICLE
1
4
6
3
5
7
TURF 2/252 VEHICLES
CARRYALL 2/252 VEHICLES
XRT 900 VEHICLES
8
Place multimeter
black (–) probe here.
2
Place multimeter
red (+) probe here.
3
1
VILLAGER 6 AND 8
VEHICLES
6
5
4
7
8
FRONT
OF VEHICLE
Place multimeter
black (–) probe here.
Place multimeter
red (+) probe here.
Place multimeter
black (–) probe here.
7
6
1
8
5
2
FRONT
OF VEHICLE
3
4
TRANSPORTER 4 AND 6
VEHICLES
CARRYALL 6 VEHICLES
Figure 6-5 Battery Configurations
2008 Export Battery Charger Maintenance and Service Manual
Page 6-11
6
6
EXPORT IQ PLUS CHARGER (ONBOARD)
Test Procedures
TEST PROCEDURE 2 – CONTROL BOARD
See General Warning, Section 1, Page 1-1.
DC Circuit Test
1. Disconnect AC cord from outlet. DC cord red, black, and blue wires remain connected to the vehicle. All
wires remain connected to the control board. Set multimeter to 200 volts DC. See following DANGER.
ý DANGER
• Do not touch any wire or component in the battery charger while DC power is present. Failure
to heed this warning will result in an electric shock.
2. Place black (–) probe of multimeter on terminal with blue DC cord wire and red (+) probe to terminal with
red relay wire (Figure 6-6, Page 6-12).
WAVETEK
V
OFF
V
V
5XL
1000
500
OFF
V
500
200
200
200
20
20
200
200
200
m
20
m
200k
20k
!
MAX
1000 --750V
200
A
2k
!
COM
20
m
200
m
2000
k
200
m
2000
k
2m
2
2m
2
200
m
V
WAVETEK
5XL
1000
200
BLUE WIRE
TO DC
CORD
RED WIRE
TO RELAY
200nA
200k
20k
V
!
MAX
1000 --750V
FUSED
200
A
2k
!
COM
200nA
FUSED
500 DCV SETTING
200 DCV SETTING
Figure 6-6 DC Circuit Test
WHITE OR BLUE
WIRE FROM AC CORD
BLACK WIRE
FROM RELAY
Figure 6-7 AC Circuit Test
3. Multimeter should indicate full battery voltage (approximately 47-50 volts). If reading is incorrect, replace
control board.
AC Circuit Test
1. Disconnect AC cord from outlet. DC cord red, black, and blue wires remain connected to vehicle. Set
multimeter to volts AC.
2. Disconnect white or blue wire of AC cord at terminal on control board (Figure 6-8, Page 6-13). See following DANGER.
ý DANGER
• Do not touch any wire or component in the battery charger while AC power is present. Failure
to heed this warning will result in an electric shock.
3. Place black (–) probe of multimeter, set to 500 volts AC, onto terminal with black wire from relay. Connect
red (+) probe to terminal from which the white or blue AC cord wire was disconnected (Figure 6-7,
Page 6-12).
4. Connect AC cord to outlet. Reading should be input voltage from outlet.
5. If reading is incorrect, replace control board.
Page 6-12
2008 Export Battery Charger Maintenance and Service Manual
EXPORT IQ PLUS CHARGER (ONBOARD)
Test Procedures
BLACK WIRE FROM RELAY
BLACK OR BROWN WIRE
FROM AC CORD
BLUE WIRE FROM RELAY
BLACK WIRE FROM
RELAY
WHITE OR BLUE
WIRE FROM
AC CORD
RED WIRE FROM RELAY
RED WIRE
FROM HEATSINK
BLUE WIRE
FROM DC CORD
Figure 6-8 Control Board
TEST PROCEDURE 3 – AC POWER AND CONTINUITY CHECK OF AC CIRCUIT
See General Warning, Section 1, Page 1-1.
1. Disconnect the AC power supply cord from the wall outlet.
2. Check the AC circuit breakers on the front of the charger and reset it if necessary.
3. Check the AC line fuse or circuit breaker in the storage facility.
4. With a multimeter set to 500 volts AC, check incoming AC voltage. Insert multimeter test probes into AC
wall outlet; voltage should be within the range specified in the following chart. If proper voltage is not
present and the voltage selector switch is set for the correct voltage for your area, have building wiring
checked by a licensed electrical contractor.
SETTING ON AC VOLTAGE
SELECTOR SWITCH
MINIMUM AC VOLTAGE
PERMITTED
MAXIMUM AC VOLTAGE
PERMITTED
100 Volts AC
95
105
200 Volts AC
190
210
220 Volts AC
209
231
240 Volts AC
228
252
5. Check continuity of the AC circuit.
5.1.
5.2.
5.3.
5.4.
Remove the battery charger from the vehicle. See Onboard Charger Removal on page 6-34.
Remove the charger cover.
Bypass the relay. See Charging a Battery Pack that has Low Voltage on page 6-31.
With relay bypassed, there should be continuity across the AC cord blades (Figure 6-9,
Page 6-14).
6. If the circuit is not complete, check the wiring of the AC cord, AC cord reel, transformer primary coil wires
(21), internal AC circuit breakers (13), and voltage selector switch (9) (Figure 6-4, Page 6-6).
7. If the charger is wired correctly, check the continuity of the AC cord, AC cord reel, transformer primary
coil, and the internal AC circuit breaker individually. See Test Procedure 8 – Continuity on page 6-18.
2008 Export Battery Charger Maintenance and Service Manual
Page 6-13
6
6
EXPORT IQ PLUS CHARGER (ONBOARD)
Test Procedures
8. When troubleshooting and repairs are complete, properly connect the relay wiring. See following
WARNING.
ý WARNING
• The relay wiring must be properly connected prior to placing the charger back into normal
service. Failure to remove the jumper wire and properly connect the relay wiring could result
in property damage, severe personal injury, or death.
AC plug may have different appearance
depending on geographic region.
Figure 6-9 AC Circuit Continuity Test
TEST PROCEDURE 4 – DIODES
Use Test Procedure 4A – Single Diode Failure on page 6-14 for single diode failures and testing of individual
diodes. If both diodes have failed, use Test Procedure 4B – Both Diodes Failed on page 6-15.
Test Procedure 4A – Single Diode Failure
See General Warning, Section 1, Page 1-1.
A single diode failure is indicated by the failure of one fuse link (closed circuit diode) or by the charger output
being low (open circuit diode). If a diode has failed, the entire heatsink must be replaced. To check diodes:
1. Disconnect AC cord from the wall outlet.
2. Remove the battery charger from the vehicle. See Onboard Charger Removal on page 6-34.
3. Remove the charger cover.
4. Disconnect one transformer secondary coil wire from the diode terminal (Figure 6-10, Page 6-15).
5. Using a low voltage continuity tester or multimeter set to the diode test function, connect the red (+) test
probe to the diode mounting plate and the black (–) test probe to a diode terminal and note the reading
(Figure 6-10, Page 6-15).
6. Reverse test probes and check each diode again and note the reading (Figure 6-11, Page 6-15). A
diode is designed to conduct current in one direction only. If a diode conducts current (shows continuity)
in both directions, the entire heatsink with diodes must be replaced. If a diode does not conduct current
(does not show continuity) in either direction, the entire heatsink must be replaced.
Page 6-14
2008 Export Battery Charger Maintenance and Service Manual
EXPORT IQ PLUS CHARGER (ONBOARD)
Test Procedures
7. On rare occasions, a single fuse link may blow due to excessive heat. This can be caused by a loose
internal fuse connection. Check all three fuse connections inside the charger to be sure they are clean
and tight. The proper tightness for the fuse link connections is 22 in-lb (2.5 N·m).
8. Ensure that the charger is wired properly and all connections are clean and tight. See following CAUTION.
CAUT ION
• If connections are not clean and tight, excessive heat will be created and the charger may
become damaged.
DISCONNECTED
SECONDARY
COIL WIRE
Figure 6-10 Diode Test
Figure 6-11 Diode Test – Probes Reversed
Test Procedure 4B – Both Diodes Failed
See General Warning, Section 1, Page 1-1.
To check the diodes, use Test Procedure 4A – Single Diode Failure on page 6-14. If both diodes have failed
closed, both charger fuse links will be blown. If both diodes have failed open, the relay will close and the transformer will hum, but the ammeter will not indicate any output and the AC circuit breaker may trip off. If both
diodes have failed open or closed, the entire heatsink must be replaced. To determine why both diodes failed:
1. Check the batteries and the receptacle to ensure that they are wired in the correct polarity. (Figure 6-2,
Page 6-3).
2. Make sure the charger is wired correctly: The DC cord red wire should be connected to the center terminal of the heatsink, the DC cord blue wire should be connected to the control board, and the DC cord
black wire should be connected to the left side of the ammeter (when viewed from inside the charger)
(Figure 6-4, Page 6-6). If a reverse polarity connection is made between the charger and the batteries,
both fuse links will blow when the DC cord is connected to the vehicle, whether or not the AC cord is
plugged into an outlet.
3. Make sure the charger is wired to the vehicle correctly; the DC cord red wire should be connected to the
same large solenoid post as the 6-gauge red wire connected to the positive (+) post of battery no. 1. The
DC cord blue wire should be connected to the sense lead fuse. The DC cord black wire should be connected to the terminal block located on the vehicle component mounting plate (Figure 6-2, Page 6-3).
If a reverse polarity connection is made between the charger and the batteries, both fuse links will blow
when the DC cord is connected to the vehicle, whether or not the AC cord is plugged into an outlet.
4. On rare occasions, both diodes may fail as a result of a lightning strike at the charging location.
2008 Export Battery Charger Maintenance and Service Manual
Page 6-15
6
6
EXPORT IQ PLUS CHARGER (ONBOARD)
Test Procedures
5. Excessive heat due to a loose connection may also cause both fuse links to blow. Be sure fuse connections are tightened to 22 in-lb (2.5 N·m).
6. Ensure that the charger and vehicle are wired properly and all connections are clean and tight.
TEST PROCEDURE 5 – CHARGER DC CIRCUIT CONTINUITY TEST
See General Warning, Section 1, Page 1-1.
1. Disconnect the AC cord from the wall outlet.
2. Disconnect the batteries as instructed. See General Warning, Section 1, Page 1-1.
3. Disconnect the charger DC cord at the three pin connector (8) (Figure 6-23, Page 6-35).
4. Using a continuity tester (CCI P/N 1011273) or multimeter set to 200 ohms, connect the test probes to
the charger DC cord black wire and red wire terminals in the three pin connector. Note the reading.
5. Reverse the test probes and check the DC cord again. The circuit should show continuity in only one
direction.
6. If the circuit does not show continuity in either direction and the charger fuse is not blown, individually
check all connections and the continuity of the DC cord and ammeter. See Test Procedure 8 – Continuity on page 6-18. Also check the diodes (heatsink). See Test Procedure 4 – Diodes on page 6-14.
7. If the circuit shows continuity in both directions, a short circuit exists in the charger DC circuit, usually
caused by failed diodes. See Test Procedure 4 – Diodes on page 6-14. If diodes have not failed, check
the DC cord for a short circuit. See Test Procedure 8 – Continuity on page 6-18.
8. Check continuity between the DC cord red, black, and blue wires (Figure 6-4, Page 6-6). There should
be no continuity.
TEST PROCEDURE 6 – TRANSFORMER
See General Warning, Section 1, Page 1-1.
Failure of the transformer may be caused by aging or a short circuit in adjacent coil turns. If the transformer
has failed, the ammeter will indicate low output or no output; however, the transformer may hum. A blown AC
line fuse or tripped AC circuit breaker in the charger or the storage facility may be caused by an improperly
wired charger, an improper setting of the AC voltage selector switch, or a failed transformer.
An AC circuit test should be done before performing this test procedure to ensure the continuity of the AC
cord, AC cord reel, internal AC circuit breakers, and charger wiring. See Test Procedure 3 – AC Power and
Continuity Check of AC Circuit on page 6-13.
1. Disconnect AC cord from the wall outlet.
2. Remove the battery charger from the vehicle. See Onboard Charger Removal on page 6-34.
3. Remove the charger cover.
4. Disconnect transformer secondary coil wires from the heatsink (Figure 6-12, Page 6-17).
5. To apply AC power directly to the transformer primary coil, bypass the relay. See Charging a Battery
Pack that has Low Voltage on page 6-31. See following DANGER.
ý DANGER
• Do not touch any wire or component in the battery charger while AC power is present. Failure
to heed this warning will result in an electric shock.
Page 6-16
2008 Export Battery Charger Maintenance and Service Manual
EXPORT IQ PLUS CHARGER (ONBOARD)
Test Procedures
6. Make sure that the voltage selector switch (on the back of the charger) is set for the appropriate incoming
AC voltage. Also ensure that the secondary coil wires are not touching one another. With the relay
bypassed, insert the AC plug into an outlet. If the AC line fuse blows or AC circuit breaker trips, the transformer is shorted internally and must be replaced.
7. If the AC line fuse does not blow or the AC circuit breaker does not trip, check the transformer secondary
coil voltage.
8. Disconnect AC cord from the wall outlet.
9. Using alligator clips and a multimeter set to 500 volts AC, connect the multimeter probes to the secondary transformer coil tan wires.
Figure 6-12 Remove Secondary Coil Wires
From Heatsink
10. Connect the AC cord to the wall outlet and monitor the multimeter for the secondary coil voltage. If measured voltage is approximately 85 volts AC or lower for the secondary coil, the transformer is shorted
internally and must be replaced.
11. If the voltage reading is normal (86 volts AC or higher), the transformer is operational. Disconnect the AC
plug from the wall receptacle and check the continuity of the DC circuit. See Test Procedure 5 –
Charger DC Circuit Continuity Test on page 6-16.
12. When troubleshooting and repairs are complete, remove jumper wire and properly connect relay wiring.
See following WARNING.
ý WARNING
• The relay wiring must be properly connected prior to placing the charger back into normal
service. Failure to remove the jumper wire and properly connect the relay wiring could result
in property damage, severe personal injury, or death.
2008 Export Battery Charger Maintenance and Service Manual
Page 6-17
6
6
EXPORT IQ PLUS CHARGER (ONBOARD)
Test Procedures
TEST PROCEDURE 7 – BATTERY STATE OF CHARGE TEST
See General Warning, Section 1, Page 1-1.
1. With the batteries fully charged, disconnect the AC charger plug for approximately 20 seconds and
reconnect it. The ammeter should jump to a reading between 14 and 18 amps and taper to below 5 amps
within 15 minutes.
2. If the charger does not taper to below 5 amps within 15 minutes, batteries may not be receiving a full
charge and the onboard computer should be checked. See Test Procedure 2 – Control Board on
page 6-12. See following NOTE.
NOTE: Batteries near the end of their useful lives may not allow the battery charge current to taper below
5 amps. See Batteries section in the appropriate maintenance and service manual.
TEST PROCEDURE 8 – CONTINUITY
See General Warning, Section 1, Page 1-1.
Short AC Cord and Retractable Cord Reel
Check continuity of the short AC cord and retractable cord reel at the same time.
1. Disconnect the AC cord from the wall outlet.
2. Remove the battery charger from the vehicle. See Onboard Charger Removal on page 6-34.
3. Remove the charger cover.
4. Disconnect the green or green/yellow wire (2) from charger case and position it so it does not touch any
metal part of the charger (Figure 6-13, Page 6-19).
5. Disconnect the black or brown wire (1) of the short AC cord from the control board.
6. Disconnect the AC cord white or blue wire (4) from the control board (Figure 6-13, Page 6-19).
7. Using a multimeter set for 200 ohms, place the red (+) probe on the terminal at the end of the black or
brown wire (1) (Figure 6-13, Page 6-19). With the black (-) probe, test for continuity on each of the flat
blades and then on the round pin of the AC plug (on the retractable cord reel). The tester should indicate
continuity on one flat blade only. If any other reading is obtained, the short AC cord and retractable cord
reel must be tested independently of each other.
8. Place the red (+) probe on the end of the green or green/yellow wire (2) and with the black probe check
for continuity on both flat blades and on the round pin of the AC plug (on the retractable cord reel)
(Figure 6-13, Page 6-19). The tester should indicate continuity on only the round pin. If any other reading is obtained, the short AC cord and retractable cord reel must be tested independently of each other.
9. Place the red (+) probe on the white or blue wire (4) and check for continuity on both flat blades and on
the ground pin of the AC plug (on the retractable cord reel). The tester should indicate continuity on only
one flat blade. If any other reading is obtained, the short AC cord and retractable cord reel must be tested
independently of each other.
10. If the correct readings are obtained in all of the previous steps, the short AC cord and the retractable cord
reel are functioning properly. If any of the readings are incorrect, proceed to the following test procedures
to determine which of the two components has failed.
Page 6-18
2008 Export Battery Charger Maintenance and Service Manual
EXPORT IQ PLUS CHARGER (ONBOARD)
WAVETEK
V
Test Procedures
5XL
1000
OFF
V
500
200
200
20
200
1
2m
2
200
m
20
m
200
m
2000
k
200k
20k
V
!
MAX
1000 --750V
200
A
2k
!
COM
200nA
FUSED
4
200 OHM SETTING
2
Figure 6-13 AC Cord and Retractable Cord Reel Continuity Test
Short AC Cord without Retractable Cord Reel
Check continuity of the short AC cord without the retractable cord reel.
1. Disconnect the AC cord from the wall outlet.
2. Remove the battery charger from the vehicle. See Onboard Charger Removal on page 6-34.
3. Remove the heatshrink from the AC cord connection between the short AC cord and the retractable cord
reel by gently cutting the heatshrink tubing (Figure 6-14, Page 6-19).
Figure 6-14 Heatshrink Removal
4. Disconnect the short AC cord from the retractable cord reel.
5. Remove the charger cover.
6. Disconnect the green wire (2) from charger case and position it so it does not touch any metal part of the
charger (Figure 6-15, Page 6-20).
2008 Export Battery Charger Maintenance and Service Manual
Page 6-19
6
6
EXPORT IQ PLUS CHARGER (ONBOARD)
WAVETEK
V
Test Procedures
5XL
1000
OFF
V
500
200
200
20
200
1
2m
2
200
m
20
m
200
m
2000
k
200k
20k
V
!
MAX
1000 --750V
200
A
2k
!
COM
200nA
FUSED
200 OHM SETTING
4
2
Figure 6-15 Short AC Cord Test
7. Disconnect the black wire (1) of AC cord from the control board.
8. Using a multimeter set for 200 ohms, place the red (+) probe on the terminal at the end of the black wire
(1). Test for continuity on each of the flat blades and then on the round pin of the AC plug. The tester
should indicate continuity on one flat blade only. If any other reading is obtained, the short AC cord must
be replaced.
9. Place the red (+) probe on the end of the green wire (2) and with the black probe check for continuity on
both flat blades and on the round pin of the AC plug. The tester should indicate continuity on only the
round pin. If any other reading is obtained, the AC cord and retractable cord reel must be tested independently of each other.
10. Disconnect the AC cord white wire (4) from the control board. Place the red (+) probe on the white wire
(4) and check for continuity on both flat blades and on the ground pin of the AC plug. The tester should
indicate continuity on only one flat blade. If any other reading is obtained, the AC cord and retractable
cord reel must be tested independently of each other.
11. If the correct readings are obtained in all of the previous steps, the short AC cord is functioning properly.
Proceed to the following test procedure to test the retractable cord reel.
Retractable Cord Reel
Check continuity of the AC cord and retractable cord reel at the same time.
1. Disconnect the AC cord from the wall outlet.
2. Remove the battery charger from the vehicle. See Onboard Charger Removal on page 6-34.
3. Remove the heatshrink from the AC cord connection between the short AC cord and the retractable cord
reel by gently cutting the heatshrink tubing (Figure 6-14, Page 6-19).
4. Disconnect the short AC cord from the retractable cord reel.
5. Using a multimeter set for 200 ohms, place the red (+) probe in one of the flat blade openings of the cord
reel receptacle (1) (Figure 6-16, Page 6-21). Test for continuity at the cord reel AC plug (2) on each of
the flat blades and then on the round pin of the AC plug. The tester should indicate continuity on one flat
blade only. If any other reading is obtained, the cord reel must be replaced.
Page 6-20
2008 Export Battery Charger Maintenance and Service Manual
EXPORT IQ PLUS CHARGER (ONBOARD)
Test Procedures
1
WAVETEK
V
5XL
1000
OFF
V
500
200
200
20
200
2m
2
200
m
20
m
200
m
2000
k
200k
20k
V
!
MAX
1000 --750V
200
A
2k
!
COM
200nA
FUSED
200 OHM
SETTING
2
Figure 6-16 Retractable Cord Reel Test
6. Place the red (+) probe into the other flat blade opening of the cord reel receptacle (1). Test for continuity
on the cord reel AC plug (2) on each of the flat blades and then on the round pin of the AC plug. The tester
should indicate continuity on one flat blade only. If any other reading is obtained, the cord reel must be
replaced.
7. Place the red (+) probe into the top-center opening of the cord reel receptacle (1). Test for continuity on
the cord reel AC plug (2) on each of the flat blades and then on the round pin of the AC plug. The tester
should indicate continuity on only the round pin. If any other reading is obtained, the retractable cord reel
must be replaced.
8. If the correct readings are obtained in all of the previous steps, the retractable cord reel is functioning
properly.
DC Cord
1. Disconnect the DC cord, the AC cord from the wall outlet, and remove the battery charger from the vehicle. See Onboard Charger Removal on page 6-34.
2. Remove the charger cover.
3. To check the continuity of the DC cord, disconnect the black wire of the DC cord from the ammeter
(Figure 6-17, Page 6-24).
4. Disconnect the red wire of the DC cord from the heatsink.
5. Disconnect the blue wire from the control board.
6. Using a multimeter set for 200 ohms, place the red (+) probe on the red wire of the DC cord. Test for continuity on each of the wires on the other end of the DC cord. The tester should indicate continuity on the
red DC cord wire only. If any other reading is obtained, the DC cord must be replaced.
7. Place the red (+) probe on the blue wire of the DC cord. Test for continuity on each of the wires on the
other end of the DC cord. The tester should indicate continuity on the blue DC cord wire only. If any other
reading is obtained, the DC cord must be replaced.
8. Place the red (+) probe on the black wire of the DC cord. Test for continuity on each of the wires on the
other end of the DC cord. The tester should indicate continuity on the black DC cord wire only. If any other
reading is obtained, the DC cord must be replaced.
2008 Export Battery Charger Maintenance and Service Manual
Page 6-21
6
EXPORT IQ PLUS CHARGER (ONBOARD)
Test Procedures
Transformer
The IQ Plus battery charger transformer has two sets of coils: a primary coil and a secondary coil.
Primary Coil
1. Disconnect the DC cord, the AC cord from the wall outlet, and remove the battery charger from the vehicle. See Onboard Charger Removal on page 6-34.
2. Remove the charger cover.
3. Disconnect the black wires marked 1 and 6 from the AC circuit breakers.
4. Disconnect the wires marked 2, 3, 4 and 5 from the voltage selector switch.
5. Place the continuity tester probes on the primary coil transformer wires disconnected above in pairs until
all of the combinations in the following chart have been tested.
6. If the continuity readings agree with the chart, replace the voltage selector switch. If the continuity readings differ from the chart, replace the transformer.
PRIMARY COIL CONTINUITY / NO CONTINUITY CHART
NEGATIVE PROBE
1
1
POSITIVE PROBE
6
2
3
4
5
6
Continuity
Continuity
No
Continuity
No
Continuity
No
Continuity
Continuity
No
Continuity
No
Continuity
No
Continuity
No
Continuity
No
Continuity
No
Continuity
Continuity
Continuity
2
Continuity
3
Continuity
Continuity
4
No
Continuity
No
Continuity
No
Continuity
5
No
Continuity
No
Continuity
No
Continuity
Continuity
6
No
Continuity
No
Continuity
No
Continuity
Continuity
Continuity
Continuity
Secondary Coil
1. Disconnect the DC cord, the AC cord from the wall outlet, and remove the battery charger from the vehicle. See Onboard Charger Removal on page 6-34.
2. Remove the charger cover.
3. Remove the transformer (tan) secondary coil wire from the upper terminal of the heatsink (Figure 6-12,
Page 6-17).
4. Remove the other transformer (tan) secondary coil wire from the bottom terminal of the heatsink and
place the continuity test clip on the ammeter buss bar (3) (Figure 6-18, Page 6-24). Test for continuity
between the buss bar and each of the secondary coil wires (tan). The tester should indicate continuity
between the buss bar and both of the secondary coil wires. If tester does not indicate continuity on both
secondary coil wires, replace transformer. Ensure that the fuse is intact and not blown.
Page 6-22
2008 Export Battery Charger Maintenance and Service Manual
EXPORT IQ PLUS CHARGER (ONBOARD)
Test Procedures
Relay
1. Disconnect the DC cord, the AC cord from the wall outlet, and remove the battery charger from the vehicle. See Onboard Charger Removal on page 6-34.
2. Remove the charger cover.
3. Remove the black wire from terminal 6 of the relay and black wire from terminal 9 of the relay
(Figure 6-20, Page 6-29). Place continuity tester leads on terminals 6 and 9 of the relay. The tester
should indicate no continuity. If tester indicates continuity, the relay contacts have failed closed and the
relay must be replaced.
4. Remove the black wire from terminal 4 of the relay and black wire from terminal 7 of the relay
(Figure 6-20, Page 6-29). Place continuity tester leads on terminals 4 and 7 of the relay. The tester
should indicate no continuity. If tester indicates continuity, the relay contacts have failed closed and the
relay must be replaced.
5. Connect charger DC cord to batteries (Figure 6-5, Page 6-11). Use jumper wires if necessary. The tester
should indicate continuity on relay terminals 6 and 9 and terminals 4 and 7. If tester does not indicate
continuity on both sets of contacts, the relay must be replaced.
Ammeter
1. Disconnect the DC cord, the AC cord from the wall outlet, and remove the battery charger from the vehicle. See Onboard Charger Removal on page 6-34.
2. Remove the charger cover.
3. Disconnect the black wire from the left ammeter post (as viewed from inside the charger).
4. Place the continuity tester clip on one of the ammeter posts.
5. Place the continuity test probe on the other ammeter post. The tester should indicate continuity. If the
tester does not indicate continuity, replace the ammeter.
AC Circuit Breaker
1. Disconnect the DC cord, the AC cord from the wall outlet, and remove the battery charger from the vehicle. See Onboard Charger Removal on page 6-34.
2. Remove the charger cover.
3. Disconnect the wires from the AC circuit breaker.
4. Place the continuity test probes on the two terminals of the AC circuit breaker. The tester should indicate
continuity. If the tester does not indicate continuity, replace the AC circuit breaker.
2008 Export Battery Charger Maintenance and Service Manual
Page 6-23
6
6
EXPORT IQ PLUS CHARGER (ONBOARD)
Charger Repairs
CHARGER REPAIRS
See General Warning, Section 1, Page 1-1.
ý WARNING
• Knowledge of battery charger wiring and component terminology is required before
attempting any repair (Figure 6-4, Page 6-6).
• Prior to servicing the charger, disconnect the AC power supply cord from the wall outlet,
disconnect the DC cord from the vehicle, and remove the battery charger from the vehicle.
See Onboard Charger Removal on page 6-34.
DC CORD
DC Cord Removal
1. Disconnect the DC cord, the AC cord from the wall outlet, and remove the battery charger from the vehicle. See Onboard Charger Removal on page 6-34.
2. Remove the charger cover.
3. Remove the DC cord black wire (4) from the ammeter by loosening the nut (1). Support the terminal as
the nut is loosened to prevent rotation of the connection (Figure 6-18, Page 6-24).
4. Remove nut attaching the red wire (6) of the charger DC cord to the heatsink.
5. Remove the wire tie that secures the DC cord wire to the secondary coil wire (tan).
6. Remove the wire tie on the DC cord near the strain relief bushing.
7. Disconnect the DC cord blue wire from the control board (Figure 6-17, Page 6-24).
8. Using pliers, squeeze the strain relief bushing and remove the DC cord (Figure 6-17, Page 6-24).
DC CORD
BLACK WIRE
TO AMMETER
1
DC CORD
BLUE WIRE TO
CONTROL BOARD
DC CORD
RED WIRE
TO HEATSINK
3
STRAIN RELIEF
BUSHING
Figure 6-17 DC Cord
6
Figure 6-18 DC Cord Replacement
DC Cord Installation
1. Insert the leads of the new DC cord through the hole in the charger base.
Page 6-24
2
4
2008 Export Battery Charger Maintenance and Service Manual
EXPORT IQ PLUS CHARGER (ONBOARD)
Charger Repairs
2. Attach the red wire of the new DC cord to the center terminal of the heatsink and tighten the nut to 18
in-lb (2.0 N·m) (Figure 6-17, Page 6-24).
3. Attach the blue wire of the new DC cord to the control board (Figure 6-17, Page 6-24).
4. Attach black wire of the new DC cord to ammeter. Install nut (1) onto post of ammeter slightly more than
finger tight. While holding the inside nut (2), tighten the outside nut (1) 1/4 turn (Figure 6-18, Page 6-24).
See following CAUTION.
CAUT ION
• Do not allow ammeter post to rotate as the nut is tightened. Rotation of the post could result
in a damaged ammeter.
5. Using pliers, put the strain relief bushing on the cord and insert it into the charger base.
6. Tie the wires together as they were before the wire ties were removed. See following WARNING.
ý WARNING
• Make sure wiring is properly routed and secured. Failure to properly route and secure wiring
could result in charger malfunction, property damage, or severe personal injury.
7. Position the charger cover on the base. Install the mounting screws, starting with the bottom holes.
Tighten the screws to 11 in-lb (1.2 N·m).
HEATSINK
Heatsink Removal
1. Disconnect the AC cord and remove the battery charger from the vehicle. See Onboard Charger
Removal on page 6-34. See preceding WARNING.
2. Remove the charger cover.
3. Remove both secondary coil transformer wires (tan) from the heatsink (Figure 6-12, Page 6-17).
4. Remove the two red wires from the heatsink.
5. Remove the nuts and bolts that secure the heatsink to the case.
Heatsink Installation
1. Place heatsink against charger base. Make sure clear plastic insulator sheet is between the heatsink and
the charger base. Install the nuts and bolts that secure the heatsink to the case. Tighten the bolts to 22
in-lb (2.5 N·m).
2. Connect the red wire from the DC cord and the red wire from the control board to the center terminal post
on the heatsink. Tighten nut to 18 in-lb (2.0 N·m) (Figure 6-4, Page 6-6).
3. Connect one of the secondary coil transformer wires (tan) to the bottom terminal post of the heatsink.
Tighten nut to 18 in-lb (2.0 N·m) (Figure 6-12, Page 6-17).
4. Connect the other secondary coil transformer wire (tan) to the top terminal post of the heatsink. Tighten
nut to 18 in-lb (2.0 N·m).
5. Install the charger cover and install the charger in the vehicle. See Onboard Charger Installation on
page 6-34.
6. Check charger for proper operation.
2008 Export Battery Charger Maintenance and Service Manual
Page 6-25
6
6
EXPORT IQ PLUS CHARGER (ONBOARD)
Charger Repairs
TRANSFORMER
See General Warning, Section 1, Page 1-1.
Transformer Removal
1. Disconnect the DC cord, the AC cord from the wall outlet, and remove the battery charger from the vehicle. See Onboard Charger Removal on page 6-34. See WARNING on page 6-24.
2. Remove the charger cover.
3. Note the locations of wire ties and remove the wire ties.
4. Disconnect the black primary coil leads from the AC circuit breakers and the voltage selector switch
(Figure 6-20, Page 6-29 and Figure 6-22, Page 6-33).
5. Disconnect the two tan secondary coil transformer wires from heatsink (Figure 6-12, Page 6-17).
6. Disconnect the two black secondary coil transformer wires from the fuse.
7. Remove the four bolts and nuts that mount the transformer to the case and remove the transformer.
Transformer Installation
1. Install the transformer with secondary coil to the rear of the charger case. Tighten the four bolts and nuts
to 28 in-lb (3.2 N·m).
2. Connect one secondary coil transformer wire (black) to one terminal of the fuse. Tighten nut to 22 in-lb
(2.5 N·m) (Figure 6-4, Page 6-6).
3. Connect the other secondary coil transformer wire (black) to the remaining terminal of the fuse. Tighten
nut to 22 in-lb (2.5 N·m).
4. Connect one secondary coil transformer wire (tan) to the top terminal post of the heatsink. Tighten nut
to 18 in-lb (2.0 N·m).
5. Connect the other secondary coil transformer wire (tan) to the bottom terminal post of the heatsink.
Tighten nut to 18 in-lb (2.0 N·m).
6. Connect the black primary coil transformer wire marked 1 to the top terminal of the top AC circuit breaker.
7. Connect the black primary coil transformer wire marked 6 to the top terminal of the bottom AC circuit
breaker.
8. Connect each of the remaining black primary coil transformer wires marked 2, 3, 4, and 5 to the corresponding terminals marked on the voltage selector switch.
9. Set the voltage selector switch to the appropriate voltage matching the incoming AC electrical service
that will be used to power the charger.
10. Tie the wires together as they were before the wire tie was removed. See following WARNING.
ý WARNING
• Make sure wiring is properly routed and secured. Failure to properly route and secure wiring
could result in charger malfunction, property damage, or severe personal injury.
11. Install the charger cover and install the charger in the vehicle. See Onboard Charger Installation on
page 6-34.
12. Check charger for proper operation.
Page 6-26
2008 Export Battery Charger Maintenance and Service Manual
EXPORT IQ PLUS CHARGER (ONBOARD)
Charger Repairs
AMMETER
See General Warning, Section 1, Page 1-1.
Ammeter Removal
1. Disconnect the DC cord, the AC cord from the wall outlet, and remove the battery charger from the vehicle. See Onboard Charger Removal on page 6-34. See WARNING on page 6-24.
2. Remove the charger cover.
3. Using two wrenches to prevent the posts from turning, disconnect the DC cord black wire (5) and the
buss bar (3) from the ammeter (Figure 6-19, Page 6-27).
4. Remove the two nuts (2) that secure the ammeter to the charger face.
5. Remove the ammeter from the face of the charger.
5
2
1
4
3
Figure 6-19 Ammeter
Ammeter Installation
1. Place the ammeter in position in the charger face (Figure 6-19, Page 6-27).
2. Install nuts (2) and tighten until ammeter is firmly secured.
3. Connect the DC cord black wire (5) to the left (as viewed from inside the charger) post of the ammeter.
4. Connect the buss bar (3) from the fuse link to the right post of the ammeter. Place flat washers on both
sides of the buss bar.
5. Thread nuts (4) onto both posts of ammeter until just past finger tight. While holding the inside nut, tighten
the outside nut (4) 1/4 turn. See following CAUTION.
CAUT ION
• Do not allow ammeter post to rotate as the nut is tightened. Rotation of the post could result
in a damaged ammeter.
2008 Export Battery Charger Maintenance and Service Manual
Page 6-27
6
6
EXPORT IQ PLUS CHARGER (ONBOARD)
Charger Repairs
6. Install the charger cover and install the charger in the vehicle. See Onboard Charger Installation on
page 6-34.
7. Check charger for proper operation.
FUSE LINK
See General Warning, Section 1, Page 1-1.
Fuse Link Removal
1. Disconnect the DC cord, the AC cord from the wall outlet, and remove the battery charger from the vehicle. See Onboard Charger Removal on page 6-34. See WARNING on page 6-24.
2. Remove the charger cover.
3. Remove both black secondary coil transformer wires and the buss bar (3) from the back of the fuse link
assembly (Figure 6-19, Page 6-27).
4. Remove screws from the front of the charger and remove the fuse link assembly.
Fuse Link Installation
1. Place clear plastic cover over fuse assembly and install mounting screws from front of charger face. The
center branch of the fuse assembly should be in the upper left corner when viewed from the front of the
charger.
2. Install the buss bar (3) over the center branch of the fuse assembly and ammeter post (Figure 6-19,
Page 6-27). Tighten to 22 in-lb (2.5 N·m).
3. Install a secondary coil transformer wire (black) onto one of the two remaining terminals on the back of
the fuse assembly. Install the remaining secondary coil transformer wire (black) onto the remaining terminal. Tighten to 22 in-lb (2.5 N·m).
4. Install the charger cover and install the charger in the vehicle. See Onboard Charger Installation on
page 6-34.
5. Check charger for proper operation.
CHARGER RELAY
See General Warning, Section 1, Page 1-1.
Charger Relay Removal
1. Disconnect the DC cord, the AC cord from the wall outlet, and remove the battery charger from the vehicle. See Onboard Charger Removal on page 6-34. See WARNING on page 6-24.
2. Remove the charger cover.
3. Disconnect all wires from the relay (Figure 6-20, Page 6-29).
4. Remove the two screws and nuts attaching relay to mounting bracket.
5. Remove the relay.
Charger Relay Installation
Install in reverse order of removal. Connect wires as shown (Figure 6-20, Page 6-29). Tighten nuts securing
relay to mounting bracket to 18 in-lb (2.0 N·m).
Page 6-28
2008 Export Battery Charger Maintenance and Service Manual
EXPORT IQ PLUS CHARGER (ONBOARD)
Charger Repairs
BLUE WIRE TO
RELAY
CONTROL
BOARD
CHARGER RELAY
BLACK
AC CIRCUIT
BREAKERS
1
3
4
6
7
9
BLACK
BLACK
AC CORD
RED
BLACK
A
B
BLUE
BOTTOM VIEW
OF RELAY
STRAIN RELIEF
BUSHING
BLACK WIRES TO
BLACK OR
PRIMARY COIL
BROWN WIRE GREEN
BLACK WIRES
OR
TO CONTROL
TO VOLTAGE
GREEN/
BOARD
INPUT SWITCH
YELLOW
GROUND WIRE
Figure 6-20 Charger Relay
CHARGER AC CIRCUIT BREAKER
See General Warning, Section 1, Page 1-1.
AC Circuit Breaker Removal
1. Disconnect the DC cord, the AC cord from the wall outlet, and remove the battery charger from the vehicle. See Onboard Charger Removal on page 6-34. See WARNING on page 6-24.
2. Remove the charger cover.
3. Disconnect the two black wires attached to top circuit breaker (Figure 6-20, Page 6-29).
4. Disconnect the two black wires attached to bottom circuit breaker.
5. With a pair of pliers, squeeze in the retaining tabs on the sides of the top AC circuit breaker and remove
the circuit breaker through the mounting hole in the face of the charger.
6. Repeat step 5 for the removal of the bottom circuit breaker.
AC Circuit Breaker Installation
Install in reverse order of removal.
CHARGER AC CORD AND RETRACTABLE CORD REEL
See General Warning, Section 1, Page 1-1.
Short AC Cord Removal
1. Disconnect the DC cord, the AC cord from the wall outlet, and remove the battery charger from the vehicle. See Onboard Charger Removal on page 6-34. See WARNING on page 6-24.
2008 Export Battery Charger Maintenance and Service Manual
Page 6-29
6
6
EXPORT IQ PLUS CHARGER (ONBOARD)
Charger Repairs
2. Remove the charger cover.
3. Disconnect the AC cord black wire from the AC circuit breaker (Figure 6-20, Page 6-29).
4. Disconnect the AC cord white wire from the control board.
5. Disconnect the AC cord green wire from the charger base (Figure 6-20, Page 6-29).
6. Use a pair of pliers to grip the strain relief bushing and remove it and the AC cord from the charger.
Short AC Cord Installation
1. Insert the black, white, and green leads of the new AC cord into the charger through the hole in the
charger face (Figure 6-20, Page 6-29).
2. Connect the black wire and white wire to the control board (Figure 6-4, Page 6-6). Connect the green
wire to the charger base. Tighten the screw on the green (ground) wire terminal to 18 in-lb (2.0 N·m).
3. Position the strain relief bushing on the AC cord.
4. Using pliers, install the strain relief bushing and AC cord into the mounting hole in the charger face.
5. Install the charger cover and install the charger in the vehicle. See Onboard Charger Installation on
page 6-34.
6. Check charger for proper operation.
Retractable AC Cord Reel Removal
1. Disconnect retractable AC cord from AC outlet. See Onboard Charger Removal on page 6-34. See
WARNING on page 6-24.
2. Remove the heatshrink from the AC cord connection between the short AC cord and the retractable cord
reel by gently cutting the heatshrink tubing (Figure 6-14, Page 6-19).
3. Disconnect the short AC cord from the retractable cord reel.
4. Carryall 2/252, Turf 2/252, XRT 900, Carryall 6 and Transporter 4 and 6: Remove four screws (1)
securing the cord reel housing (2), and its backing plate (3), to vehicle (Figure 6-21, Page 6-31).
5. Remove hardware securing U-shaped bracket (4) of retractable cord reel assembly (5).
5.1. Villager 6 and 8: Remove four screws (6) securing U-shaped bracket to charger.
5.2. Carryall 2/252, Turf 2/252, XRT 900, Carryall 6 and Transporter 4 and 6: Remove four bolts (7)
and locknuts (8) securing U-shaped bracket to vehicle (9).
6. Lift retractable cord reel assembly from vehicle.
Retractable AC Cord Reel Installation
1. Install in reverse order of removal.
2. Install and tighten U-shaped bracket hardware securing retractable cord reel assembly.
2.1. Villager 6 and 8: Tighten four screws (6) to 13 in-lb (1.5 N·m).
2.2. Carryall 2/252, Turf 2/252, XRT 900, Carryall 6 and Transporter 4 and 6: Tighten four bolts (7)
and locknuts (8) to 65 in-lb (7.3 N·m).
3. Carryall 2/252, Turf 2/252, XRT 900, Carryall 6 and Transporter 4 and 6: Tighten four screws (1),
securing the cord reel housing (2), and its backing plate (3), to 16 in-lb (1.8 N·m).
4. Place new heatshrink tubing over the short AC cord and connect the short AC cord to the retractable cord
reel. Slide the tubing over the connection and carefully apply heat to shrink it.
Page 6-30
2008 Export Battery Charger Maintenance and Service Manual
EXPORT IQ PLUS CHARGER (ONBOARD)
Charging a Battery Pack that has Low Voltage
3
2
8
5
5
6
1
7
9
4
4
VILLAGER 6
VILLAGER 8
TURF 2 AND 252
CARRYALL 2 AND 252
XRT 900
TRANSPORTER 4
TRANSPORTER 6
CARRYALL 6
Figure 6-21 Retractable Cord Reel Mounting Details
CHARGING A BATTERY PACK THAT HAS LOW VOLTAGE
See General Warning, Section 1, Page 1-1.
ý WARNING
• Knowledge of battery charger wiring and component terminology is required before
attempting any repair (Figure 6-4, Page 6-6).
• Prior to servicing the charger, disconnect the AC power supply cord from the wall outlet,
disconnect the DC cord from the vehicle, and remove the battery charger from the vehicle.
See Onboard Charger Removal on page 6-34.
If battery pack voltage is below 34 volts, the charger will not activate. The charger relay will have to be
bypassed to activate the charger.
1. Turn key switch OFF and place the Forward/Reverse switch in the NEUTRAL position.
2. Disconnect the AC and DC cords and remove the battery charger from the vehicle. See Onboard
Charger Removal on page 6-34. See WARNING on page 6-24.
3. Remove the charger cover.
4. To apply AC power directly to the transformer primary coil, the relay must be bypassed.
4.1. To bypass the relay, locate the black wire that goes from the circuit breaker to terminal 9 on the
relay. Disconnect the black wire from the relay terminal (Figure 6-22, Page 6-33).
4.2. Disconnect the black wire from relay terminal 6.
4.3. Use a jumper wire with alligator clips to connect the black wire from relay terminal 9 to the black wire
from relay terminal 6 (Figure 6-22, Page 6-33).
4.4. Disconnect the black wire from relay terminal 7.
4.5. Disconnect the black wire from relay terminal 4.
4.6. Use a jumper wire with alligator clips to connect the black wire from relay terminal 7 to the black wire
from relay terminal 4 (Figure 6-22, Page 6-33). See following DANGER.
2008 Export Battery Charger Maintenance and Service Manual
Page 6-31
6
6
EXPORT IQ PLUS CHARGER (ONBOARD)
Charging a Battery Pack that has Low Voltage
ý DANGER
• Do not touch any wire or component in the battery charger while AC power is present. Failure
to heed this warning will result in an electric shock.
5. Install the charger cover and install the charger in the vehicle. See Onboard Charger Installation on
page 6-34.
6. Plug the AC cord into an electrical outlet.
7. The charger should activate and begin to charge the batteries. Allow the charger to operate for one or
two hours. See following WARNING.
ý WARNING
• Do not leave the vehicle unattended while it is charging. A charger operating with a bypassed
relay could short circuit and possibly cause a fire.
8. After one or two hours, disconnect the AC cord and remove the battery charger from the vehicle. See
Onboard Charger Removal on page 6-34. See WARNING on page 6-24.
9. Disconnect the jumper wires from the relay wires and connect each wire to the original terminal on the
relay (Figure 6-22, Page 6-33). See following WARNING.
ý WARNING
• The relay wiring must be properly connected prior to placing the charger back into normal
service. Failure to remove the jumper wire and properly connect the relay wiring could result
in property damage, severe personal injury, or death.
10. Install charger cover and install charger in vehicle. See Onboard Charger Installation on page 6-34.
11. Plug the AC cord into an electrical outlet.
12. Allow the charger to continue charging the batteries until the charger shuts off automatically.
13. When the charge cycle is complete, test the batteries again. If the battery pack voltage is above 34 volts
and the vehicle will not operate, it will be necessary to troubleshoot the vehicle’s electrical system to
determine which electrical component has failed. See Section 11 – Electrical System and Testing in
the appropriate maintenance and service manual.
Page 6-32
2008 Export Battery Charger Maintenance and Service Manual
EXPORT IQ PLUS CHARGER (ONBOARD)
Charging a Battery Pack that has Low Voltage
DIODES WITH
HEATSINK
RED
RED
TAN
BLACK
TAN (2)
RELAY BYPASS
JUMPER WIRE
BLACK
CASE
GROUND
BLACK
RELAY BYPASS
JUMPER WIRE
BLACK
BLACK or BROWN
GREEN or GREEN/YELLOW
BLACK
3
TAN (3)
1
WHITE or BLUE
BLACK
9
6
AMMETER
TAN (5)
7
4
FUSE
TAN (4)
PRIMARY
COIL
BLACK
BLACK
RELAY
BLACK
BLACK
B
TRANSFORMER
A
TAN (6)
AC CORD
SECONDARY
COIL
TAN (1)
BLACK
CONTROL
BOARD
RED
BLUE
RED
BLUE
BLK
BLACK
TAN (1)
BLK
BLACK
BLACK(1)
AC CIRCUIT
BREAKERS
BLACK
BLACK (1)
BLACK
BLACK
BLACK
TAN (6)
BLACK
BLACK
BLACK (6)
BLACK (6)
1
2
3
4
5
6
AC VOLTAGE SELECTOR SWITCH
BLUE
TERMINAL #
RED
BLUE
BLACK
TAN
DC CORDSET
Figure 6-22 IQ Plus Onboard Charger Wiring Diagram (Relay Bypassed)
2008 Export Battery Charger Maintenance and Service Manual
Page 6-33
6
6
EXPORT IQ PLUS CHARGER (ONBOARD)
Onboard Charger Removal and Installation
ONBOARD CHARGER REMOVAL AND INSTALLATION
See General Warning, Section 1, Page 1-1.
ý WARNING
• Knowledge of battery charger wiring and component terminology is required before
attempting any repair (Figure 6-4, Page 6-6).
• Prior to servicing the charger, disconnect the AC power supply cord from the wall outlet,
disconnect the DC cord from the vehicle, and remove the battery charger from the vehicle.
See Onboard Charger Removal on page 6-34.
Onboard Charger Removal
1. Disconnect the batteries as instructed. See General Warning, Section 1, Page 1-1.
2. Disconnect the charger DC cord at the three pin connector (1) (Figure 6-23, Page 6-35).
3. For Carryall 2/252 and 6, Turf 2/252, XRT 900 and Transporter 4 and 6 vehicles: Carefully remove
the heatshrink tubing from the AC cord connection and disconnect the short AC cord from the retractable
cord reel (Figure 6-14, Page 6-19).
4. Remove hardware securing charger to chassis.
4.1. Villager 6 and 8: Remove four bolts (2), flat washers (3), lock washers (4) and nuts (5) from charger
mounting plates.
4.2. Carryall 2/252, Turf 2/252 and XRT 900: Remove two bolts (2) from topside of charger mounting
plate.
4.3. Carryall 6 and Transporter 4 and 6: Remove two nuts (5) from underside of charger mounting
plate.
5. Lift charger assembly from vehicle.
Onboard Charger Installation
1. Installation is reverse of removal.
2. Install and tighten hardware securing charger to chassis.
2.1. Villager 6 and 8: Tighten four bolts (2) and nuts (5) to 108 in-lb (12 N·m).
2.2. Carryall 2/252, Turf 2/252 and XRT 900: Tighten two bolts (2) to 108 in-lb (12 N·m).
2.3. Carryall 6 and Transporter 4 and 6: Tighten two nuts (5) to 108 in-lb (12 N·m).
3. For Carryall 2/252 and 6, Turf 2/252, XRT 900 and Transporter 4 and 6 vehicles: Place new heatshrink tubing (6) (CCI P/N 1017189) over the short AC cord and connect the short AC cord to the retractable cord reel (Figure 6-23, Page 6-35). Slide the tubing over the connection and carefully apply heat
to shrink it.
4. Connect battery cables, positive (+) cable first, and tighten to 110 in-lb (12.4 N·m).
Page 6-34
2008 Export Battery Charger Maintenance and Service Manual
EXPORT IQ PLUS CHARGER (ONBOARD)
Onboard Charger Removal and Installation
VILLAGER 6
VILLAGER 8
2
3
1
4
5
6
To
AC Cord
Reel
1
TRANSPORTER 4
TRANSPORTER 6
CARRYALL 6
5
2
TURF 2/252
CARRYALL 2/252
XRT 900
1
Figure 6-23 Onboard Charger Mounting Details
2008 Export Battery Charger Maintenance and Service Manual
Page 6-35
6
6
INDEX
The following index is grouped in sections, one section for each type of battery charger in the manual.
Make sure that the battery charger has been properly identified before using the index. See Battery
Charger Identification, Section 2, Page 2-6.
A
AC charger receptacle
installation ........................................................5-33
removal ............................................................5-33
testing .................................................... 5-22, 5-23
AC cord
testing ..............................................................5-22
B
battery charger
identification .......................................................2-6
specifications .....................................................2-1
C
CAUTION
definition of .........................................................1-1
D
DANGER
definition of .........................................................1-1
diodes, charger
see heatsink
I
identification of battery charger ..........................2-6
IQ Plus charger (external)
AC circuit breaker, charger
see circuit breaker
AC cord
testing ..............................................................5-22
ammeter
installation ........................................................5-30
removal ............................................................5-30
testing ..............................................................5-27
batteries
battery condition after a charge cycle ................5-8
charging batteries that have low voltage ..........5-34
state of charge test ..........................................5-22
battery charger
operation ............................................................5-6
repairs ..............................................................5-27
testing ................................................................5-9
battery condition after a charge cycle ................5-8
breaker, charger circuit
see circuit breaker
charge circuit ........................................................5-3
circuit breaker
installation ........................................................5-33
removal ............................................................5-32
testing ..............................................................5-27
cord, charger
see AC cord or DC cord
DC cord
installation ........................................................5-28
removal ............................................................5-27
testing .................................................... 5-20, 5-24
diodes, charger
see heatsink
electrical system
charge circuit ......................................................5-3
fuse link
installation ........................................................5-31
removal ............................................................5-31
heatsink
installation ........................................................5-28
removal ............................................................5-28
testing ..............................................................5-18
onboard computer
testing ..............................................................5-17
relay
installation ........................................................5-32
removal ............................................................5-32
testing ..............................................................5-26
suppressor, voltage
see voltage suppressor
test procedures
1 – faulty receptacle connection ......................5-14
1 – low battery voltage .....................................5-14
2 – onboard computer ......................................5-17
3 – AC cord continuity check ...........................5-17
3 – AC power ...................................................5-17
4 – diodes ........................................................5-18
5 – DC circuit continuity test ............................5-20
6 – transformer .................................................5-20
7 – battery state of charge ...............................5-22
8 – continuity
AC circuit breaker (internal) .........................5-27
AC cord and plug .........................................5-22
ammeter ......................................................5-27
DC cord .......................................................5-24
relay .............................................................5-26
transformer ..................................................5-25
voltage suppressor ......................................5-26
2008 Export Battery Charger Maintenance and Service Manual
Page i-1
INDEX
transformer
installation ........................................................ 5-29
removal ............................................................ 5-29
testing .............................................................. 5-20
troubleshooting .................................................. 5-10
voltage suppressor ............................................ 5-31
installation ........................................................ 5-32
removal ............................................................ 5-31
testing .............................................................. 5-26
IQ Plus charger (onboard)
AC cord, short
installation ........................................................ 6-30
removal ............................................................ 6-29
ammeter
installation ........................................................ 6-27
removal ............................................................ 6-27
testing .............................................................. 6-23
batteries
battery condition after a charge cycle ................ 6-7
charging batteries that have low voltage ......... 6-31
state of charge test .......................................... 6-18
battery charger
installation ........................................................ 6-34
removal ............................................................ 6-34
repairs .............................................................. 6-24
testing ................................................................ 6-6
battery condition after a charge cycle ................ 6-7
battery warning light ............................................ 6-2
charge circuit ........................................................ 6-2
circuit breaker
installation ........................................................ 6-29
removal ............................................................ 6-29
testing .............................................................. 6-23
control board
testing .............................................................. 6-12
cord, charger
see AC cord or DC cord
DC cord
installation ........................................................ 6-24
removal ............................................................ 6-24
testing .....................................................6-16, 6-21
diodes, charger
see heatsink
electrical system
charge circuit ..................................................... 6-2
fuse link
installation ........................................................ 6-28
removal ............................................................ 6-28
heatsink
installation ........................................................ 6-25
removal ............................................................ 6-25
Page i-2
testing .............................................................. 6-14
relay
installation ........................................................ 6-28
removal ............................................................ 6-28
testing .............................................................. 6-23
retractable AC cord reel
installation ........................................................ 6-30
removal ............................................................ 6-30
testing .............................................................. 6-20
test procedures
1 – faulty receptacle connection ...................... 6-10
1 – low battery voltage ..................................... 6-10
2 – control board .............................................. 6-12
3 – AC cord continuity check ........................... 6-13
3 – AC power ................................................... 6-13
4 – diodes ........................................................ 6-14
5 – DC circuit continuity test ............................ 6-16
6 – transformer ................................................ 6-16
7 – battery state of charge ............................... 6-18
8 – continuity
AC circuit breaker (internal) ........................ 6-23
AC cord with retractable cord reel ............... 6-18
ammeter ...................................................... 6-23
DC cord ....................................................... 6-21
relay ............................................................ 6-23
retractable cord reel .................................... 6-20
transformer .................................................. 6-22
transformer
installation ........................................................ 6-26
removal ............................................................ 6-26
testing .............................................................. 6-16
troubleshooting .................................................... 6-7
test procedures
8 – continuity
AC cord without retractable cord reel .......... 6-19
PowerDrive charger (external)
AC circuit breaker, charger
see circuit breaker
AC cord
installation ........................................................ 3-36
removal ............................................................ 3-36
testing .............................................................. 3-26
ammeter
installation ........................................................ 3-33
removal ............................................................ 3-33
testing .............................................................. 3-29
batteries
battery condition after a charger cycle ............. 3-14
charging batteries that have low voltage ......... 3-37
state of charge test .......................................... 3-25
2008 Export Battery Charger Maintenance and Service Manual
INDEX
battery charger .....................................................3-1
features ..............................................................3-2
installation ..........................................................3-9
operation ..........................................................3-11
repairs ..............................................................3-30
testing ..............................................................3-12
battery warning light ............................................3-2
charge circuit ........................................................3-3
charge interlock ....................................................3-2
circuit breaker
installation ........................................................3-35
removal ............................................................3-35
testing ..............................................................3-29
cord, charger
see AC cord or DC cord
8 – continuity
AC circuit breaker ........................................3-29
AC cord .......................................................3-26
ammeter ......................................................3-29
DC cord .......................................................3-27
relay .............................................................3-29
transformer ..................................................3-28
voltage suppressor ......................................3-29
transformer
installation ........................................................3-32
removal ............................................................3-32
testing .................................................... 3-24, 3-28
troubleshooting ..................................................3-14
voltage suppressor
installation ........................................................3-34
removal ............................................................3-34
testing ..............................................................3-29
DC cord
inspection .........................................................3-12
PowerDrive charger (onboard)
installation ........................................................3-30
AC cord, short
installation ........................................................4-32
removal ............................................................4-32
ammeter
installation ........................................................4-29
removal ............................................................4-29
testing ..............................................................4-25
batteries
battery condition after a charge cycle ................4-8
charging batteries that have low voltage ..........4-33
state of charge test ..........................................4-20
battery charger
charger features .................................................4-2
installation .............................................. 4-36, 4-37
operation ............................................................4-5
removal .................................................. 4-35, 4-36
repairs ..............................................................4-26
testing ................................................................4-6
battery warning light ............................................4-2
charge circuit ........................................................4-2
charge interlock ....................................................4-2
circuit breaker
installation ........................................................4-31
removal ............................................................4-31
testing ..............................................................4-26
control board
testing ..............................................................4-13
cord, charger
see AC cord or DC cord
DC cord
installation ........................................................4-26
removal ............................................................4-26
testing .................................................... 4-18, 4-24
removal ............................................................3-30
testing .................................................... 3-23, 3-27
electrical system
charge circuit ......................................................3-3
fuse link
installation ........................................................3-34
removal ............................................................3-34
heatsink
installation ........................................................3-31
removal ............................................................3-31
testing ..............................................................3-22
long-term storage charge ....................................3-2
onboard computer
testing ..............................................................3-21
relay
installation ........................................................3-35
removal ............................................................3-35
testing ..............................................................3-29
solenoid lockout ...................................................3-2
test procedures
1 – battery voltage ...........................................3-18
1 – DC plug and receptacle .............................3-18
2 – onboard computer ......................................3-21
3 – AC power and continuity test .....................3-21
4 – diodes ........................................................3-22
5 – DC circuit continuity test ............................3-23
6 – transformer .................................................3-24
7 – battery state of charge ...............................3-25
2008 Export Battery Charger Maintenance and Service Manual
Page i-3
INDEX
diodes, charger
see heatsink
electrical system
charge circuit ..................................................... 4-2
fuse link
installation ........................................................ 4-30
removal ............................................................ 4-30
heatsink
installation ........................................................ 4-27
removal ............................................................ 4-27
testing .............................................................. 4-16
long-term storage charge .................................... 4-2
relay
installation ........................................................ 4-31
removal ............................................................ 4-30
testing .............................................................. 4-25
retractable AC cord reel
installation ........................................................ 4-32
removal ............................................................ 4-32
testing .............................................................. 4-23
solenoid lockout ................................................... 4-2
test procedures
1 – faulty receptacle connection ...................... 4-11
1 – low battery voltage ..................................... 4-11
2 – control board .............................................. 4-13
3 – AC cord continuity check ........................... 4-15
3 – AC power ................................................... 4-15
4 – diodes ........................................................ 4-16
5 – DC circuit continuity test ............................ 4-18
6 – transformer ................................................ 4-19
7 – battery state of charge ............................... 4-20
8 – continuity
AC circuit breaker (internal) ........................ 4-26
AC cord with retractable cord reel ............... 4-21
AC cord without retractable cord reel .......... 4-21
ammeter ...................................................... 4-25
DC cord ....................................................... 4-24
relay ............................................................ 4-25
retractable cord reel .................................... 4-23
transformer .................................................. 4-24
transformer
installation ........................................................ 4-28
removal ............................................................ 4-28
testing .............................................................. 4-19
troubleshooting .................................................... 4-8
T
test procedures
8 – continuity
AC charger receptacle ................................ 5-23
AC cord and AC charger receptacle ........... 5-22
W
WARNING
definition of ........................................................ 1-1
S
specifications, battery charger ........................... 2-1
suppressor, voltage
see voltage suppressor
Page i-4
2008 Export Battery Charger Maintenance and Service Manual
Your Comments Are Appreciated
Please select your category:
Distributor/Dealer
Technician
Individual Owner
Golf Course Superintendent
Other: _____________________
Club Car Associate/Representative
In order to help us better serve you, please rate this publication in the following catgories:
Fair
Poor
Average
Good
Excellent
1. Ease of Understanding
2. Ease of Finding Information
3. Clarity of Illustrations
4. Index Usability
5. Troubleshooting Chart Usability
Comments/Suggestions
Please fax a copy of this page to (706) 228-2662.
Thank You!
Club Car Technical Publication Department
2008 Export Battery Charger Maintenance and Service Manual
Club Car, Inc.
P.O. Box 204658
Augusta, GA 30917-4658
USA
Web www.clubcar.com
Phone 1.706.863.3000
1.800.ClubCar
Int’l
+1 706.863.3000
Fax
1.706.863.5808