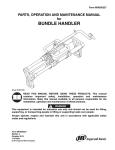
1
Form MHD56222
PARTS, INSTALLATION AND MAINTENANCE
SUPPLEMENT
ELECTRONIC CONTROL SYSTEM
for
AIR BALANCERS
(Dwg. MHP2156)
READ THIS MANUAL BEFORE USING THESE PRODUCTS. This manual
contains important safety, installation, operation and maintenance
information. Make this manual available to all persons responsible for the
installation, operation and maintenance of these products.
WARNING
This equipment is intended for industrial use only and should not be used for lifting,
supporting, or transporting people or lifting or supporting loads over people.
Always operate, inspect and maintain this balancer in accordance with applicable safety
codes and regulations.
Use this supplement in conjunction with Balance Air Service Manual Form Number
MHD56151.
Form MHD56222
Edition 3
October 2002
54030473
© 2002 Ingersoll-Rand Company
SAFETY INFORMATION
This manual provides important information for all personnel
involved with the safe installation, operation and proper
maintenance of this product. Even if you feel you are familiar
with this or similar equipment, you should read this manual
before operating the balancer.
Danger, Warning, Caution and Notice
Throughout this manual there are steps and procedures which, if
not followed, may result in an injury. The following signal words
are used to identify the level of potential hazard.
DANGER
WARNING
CAUTION
NOTICE
Danger is used to indicate the presence of
a hazard which will cause severe injury,
death, or substantial property damage if
the warning is ignored.
Safety Summary
WARNING
• Do not use balancer or attached equipment for lifting,
supporting, or transporting people or lifting or supporting
loads over people.
• The supporting structures and load-attaching devices used in
conjunction with balancers must provide a liberal safety
factor. This is the customer’s responsibility. If in doubt,
consult a registered structural engineer.
• Electrical installation should be performed by licensed
electricians in accordance with the latest edition of the
National Electrical Code (ANSI/NFPA 70) and any applicable
local, state and national electrical codes and ordinances.
Warning is used to indicate the presence
of a hazard which can cause severe injury,
death, or substantial property damage if
the warning is ignored.
Caution is used to indicate the presence of
a hazard which will or can cause injury or
property damage if the warning is
ignored.
Notice is used to notify people of
installation, operation, or maintenance
information which is important but not
hazard-related.
SAFE OPERATING INSTRUCTIONS
The following safe operating instructions have been adapted in
part from American National (Safety) Standards are intended to
avoid unsafe operating practices that could lead to injury or
property damage.
2.
3.
4.
These instructions apply only to the operating system of the
InteLIFT® Electronic Control Balancer and should be used in
conjunction with the “SAFE OPERATING INSTRUCTIONS”
provided in the Balance Air Service Manual Form Number
MHD56151.
5.
6.
7.
Safe operating instructions are provided to make operators and
maintenance personnel aware of dangerous practices to avoid and
are not necessarily limited to the following list.
1. Ensure electrical wiring to the balancer conforms to all
relevant safety codes and regulations.
8.
9.
2
Ensure all electrical connections are secure before applying
power.
Never operate equipment with damaged, frayed or twisted
electrical cables.
Before each shift or initial use, inspect balancer for visible
wear and damage.
Immediately disconnect main power if balancer is damaged.
Only licensed electrical technicians, trained on this product,
should be allowed to access electrical components to affect
troubleshooting and/or repair.
Troubleshooting of the system by licensed electrical
technicians is limited to visual inspection of components and
subassemblies once the enclosures are opened.
Before accessing electrical components, follow ‘lock-out,
tag-out’ procedures to ensure that power to the system has
been disconnected.
Disconnect air supply to balancer prior to maintenance.
MHD56222 - Edition 3
WARNING LABELS AND TAGS
Each balancer is shipped from the factory with the warning labels shown. If the labels are not attached to your balancer, order new labels
and install them. Refer to the parts list for the part numbers. Labels may be shown smaller than actual size.
Failure to follow these
warnings may result in
death, severe injury or
property damage:
Do not operate this
balancer before
reading operation and
maintenance manual
Do not lift people or loads over
people.
Do not lift more than rated load.
Do not operate unless load is
centered under balancer
Do not operate with twisted, kinked
or damaged chain or wire rope.
Do not operate a damaged or
malfunctioning balancer.
Do not remove or obscure warning
labels.
Do not remove load or handling
device until tension is released
from wire rope.
Do not operate with more than
100 psi air pressure.
Do not leave a suspended load
unattended.
Do not use handling devices or hook
that does not securely hold the load.
Do not attempt to lift a load that is
not free to move.
SPECIFICATIONS
NOTICE
• This supplement contains information only for the InteLIFT®
Electronic Control system used with an air balancer. Use this
supplement in conjunction with Balance Air Service Manual
Form Number MHD56151.
Description of Operation
The InteLIFT® Electronic Control system is integrated with the
air system of the balancer to provide an alternative method of
operation. Designed for a 115/230v, 50/60Hz single phase
electrical power supply, the electronic control system reduces
input to 24 VAC operating voltage. The system can also be
integrated with an end effector clamp device used in conjunction
with the balancer.
Balancer operation is established at the control panel module
mounted to the balancer. The control panel module allows simple
programming of functions with a keyboard and indicator lights
and confirms settings in the display window. Balancer control is
achieved via a control handle that is in a location convenient to
the operator.
Located on left hand end (as viewed facing control panel) of
balancer, the end enclosure houses the valve and manifold
assembly. This subassembly is the electric to air balancer
operation interface. The manifold assembly regulates air flow into
balancer. The pressure transducer is used in conjunction with the
‘Float’ mode for the control system.
Located on right hand end (as viewed facing control panel) of
balancer, the encoder sensor and wheel assembly control the
balancer when operated in ‘Dump’ mode.
MHD56222 - Edition 3
The InteLIFT® Electronic Control system provides additional
features and benefits not currently available with controls for air
balancers. The InteLIFT® Electronic Control provides the
combined functionality of a range of pneumatic controls and other
benefits through the use of electronics. The control panel provides
the means by which each of the control features are selected:
Dynamic Lift and Lower mode requires operation of the control
handle or force sensing load cell to move the load up or down.
Float mode allows load to be moved up or down without operator
input to a control switch or handle. Sensor feedback provides
continuous float operation.
Dump mode establishes a fixed position configuration. When
engaged, the handling device will remain steady at a
predetermined position as load is added or removed.
Smart Drop mode allows the operator to select the ‘Clamp/
Unclamp’ button regardless of load position. The balancer will
automatically operate to lower the load until only the weight of
the end effector is supported. The clamp will then open,
disengaging the load.
Up Control Disable mode prevents lifting of the load until an
end effector clamp or vacuum cup has fully engaged and secured
the load.
The InteLIFT® Electronic Control system can incorporate Part
Present optional feature consisting of photoelectric eyes, infrared
sensors, proximity switches and non-contact switches. These can
be individually designed to add functionality to the system.
Contact your distributor or technical support for additional
information.
3
Model Code Explanation:
Example: IAW020120A21SP
IA
W
020
120
A2
1
S
P
Control Pendant:
IA = InteLIFT® Pendant Control Handle with 12 ft (3.7 m) Pre-coil Cable
IB = InteLIFT® Basic unit, no controls
InteLIFT® Load Cell based ‘Load Sensing’ Control Handle with 12 ft (3.7 m) Pre-Coil
IC =
Cable
IS = InteLIFT® Control Handle with 12 ft (3.7 m) Straight Cable
Type:
W = Wire Rope
Capacity:
020 = 200 lbs (91 kg) [for available capacities, refer to Balancer Models Table]
Travel:
120 = 120 inches (3048 mm) [for available travel, refer to Balancer Models Table]
Upper Suspension Options:
00 = No Suspension
A1 = ZRA1 Aluminum Rail
A2 = ZRA2 Aluminum Rail
S2 = ZRS2 Steel Rail
S3 = ZRS3 Steel Rail
HM = Top Hook Mount
TR = T-Rail/I-Beam
AT = ZRAT Aluminum Rail
K1 = KBK1 Steel Rail
K2 = KBK2 and KBK2L Steel Rail
E4 = ETA-4 Aluminum Rail
E8 = ETA-8 Aluminum Rail
Voltage Options:
1
= 115V 50/60Hz 1PH
2
= 230V 50/60Hz 1PH
‘Z’ Stop Options:
0
= None
S
= ‘Z’ Stop
Power Cord Options:
0
= None
P
= Power Cord 6 ft (1.8 m)
Balancer Models:
Capacity (at 100 psig
[6.9 bar/690 kpa])
lbs
kg
I*W015080 [1]
150
68
I*W020120
200
91
I*W033080
330
150
I*W040060
400
182
I*W050080
500
227
I*W066040
660
300
I*W100040
1000
455
* Refer to control pendant designation.
[1] = not available with ‘Z’ Stop Option.
Model
Number
4
Nominal Vertical
Hook Travel
inches
mm
80
2032
114
2896
70
1778
57
1448
74
1880
35
889
37
940
Balancer
Diameter
inches
mm
6.5
165
10
254
Weight
lbs
60
kg
27
72
33
65
120
77
125
30
54
35
57
Wire Rope
Reeving
1
2
1
2
MHD56222 - Edition 3
INSTALLATION
Prior to installing the InteLIFT® Electronic Control Balancer,
carefully inspect components for possible shipping damage.
2.
3.
CAUTION
• Owners and users are advised to examine specific, local or
other regulations, including American National Standards
Institute and/or OSHA Regulations which may apply to a
particular type of use of this product before installing or
putting balancer to use.
NOTICE
• This supplement contains information only for the InteLIFT®
Electronic Control system used with an air balancer. Use this
supplement in conjunction with Balance Air Service Manual
Form Number MHD56151.
Mounting
Balancers can be hook or trolley mounted. Refer to Balance Air
Service Manual Form Number MHD56151 for suspension kit
installation instructions.
There are five major subassemblies comprising the InteLIFT®
Electronic Control system. Refer to Dwg. MHP2166 on page 5.
1.
2.
3.
4.
5.
Control Panel
Manifold Assembly
Encoder Sensor Assembly
Control Pendant Handle
Hook Load Cell Assembly
Lock cable in place by screwing locking ring in a clockwise
direction until fully engaged.
Place cable into cable loop strap (10) and secure with
capscrew (6) and nut (9). Ensure cable between control panel
and loop strap has a small loop, and loop strap is not
overtight.
Strain Relief
The control handle and electrical cabling are supported by a strain
relief cable (31) for all ‘straight cable’ pendant applications.
Refer to control pendant designation ‘IS’ in ‘Model Code
Explanation’ on page 4.
CAUTION
• Straight cable pendants must never be suspended without a
supporting strain relief cable.
End Effector
Refer to the supplemental documentation provided with the end
effector.
Component Locations
Power
Connection
“ON” - “OFF”
Circuit Breaker
Manifold
Assembly
Encoder
Sensor
Assembly
CAUTION
• Do not lift or support the balancer by the manifold assembly.
The manifold assembly is not designed to support the weight
of the balancer.
Control Handle Connection
WARNING
• Disconnect power from system.
Control
Panel
Control Handle
Cable Connection
CAUTION
• Avoid clamping, knotting and crushing of electrical cable.
Check cable clamps and anchoring devices are securely
attached and tight.
1.
Attach control handle assembly (35) cable to control panel
assembly (29) by inserting cable plug into port located on
bottom right hand side of control panel assembly, as viewed
facing control panel. The plug has orientation keys and must
be properly aligned to engage.
MHD56222 - Edition 3
Strain Relief
Cable
(Dwg. MHP2166)
Electrical Power Connection
Refer to ‘Wiring Diagram’, Dwg. MHP2158 on page 13 for
electrical connections.
Power Supply conductors must be sized for 1 Amp in accordance
with NEC 310-15(b) specifications.
5
230v Wiring Connections
WARNING
• Electrical installation should be performed by licensed
electricians in accordance with the latest edition of National
Electrical Code (ANAI/NFPA 70) and any applicable local,
state and national electrical codes and ordinances.
CAUTION
White
Yellow
Black
Open
3
2
1
Black White
• Before connection of the InteLIFT Electronic Control
Balancer, check to ensure that voltage specified on serial
number label matches that which is available.
®
The InteLIFT® Electronic Control system should be installed and
connected by a licensed electrician who is knowledgeable with
NEC article 430 and local regulations. Ensure voltage and
frequency of electrical supply corresponds with data on balancer
serial number label before connection.
In addition the following points are of primary importance when
installing and connecting the balancer:
Location: The balancer must be installed in an area where it will
be protected from direct exposure to rain and moisture. Protect
balancer from corrosive gases, vibration, air borne dust and
metallic particles.
Electrical Connections: If not tight and secure, may cause
operational problems. During installation electricians must make
sure that all electrical connections, including the ground
connection, are secure. Make sure all junction boxes and switch
enclosures are adequately sealed and protected for the
environmental conditions to be encountered.
InteLIFT® Electronic Control Balancers are supplied with a
power connection plug. The supplied connection plug must be
installed on the power cord to connect the main control and the
electrical power source. An optional 3 ft (0.9 m) three-prong AC
power supply cable is available.
The nominal electrical input is 115v, 50/60Hz single phase (+/10% [98 to 127v]). Optional 230v, 50/60Hz single phase (+/- 10%
[207 to 253v]) can be specified for selected applications. Contact
factory for additional information. Refer to “Wiring Diagram” on
page 13.
Converting System from 115v to 230v
1. Power down, switch off and disconnect power plug to
Balancer control panel.
2. Remove pendant control handle cable by rotating locking
ring counterclockwise until free of threads.
3. Remove upper left and right hand capscrews (13) which
attach control panel (29) to sideplates (19).
4. Allow control panel to swing down and hang freely from the
two remaining screws.
5. Locate two screws on underside of control panel just to left
of pendant connector. Loosen or remove 2 nuts to allow
access to the terminal block. Remove nuts and numbered
terminal cover.
6. Loosen screw at terminal 5 and reroute white wire to
terminal 1.
7. Loosen screw at terminal 6 and reroute brown wire to
terminal 1.
8. Tighten screws in terminal block. Install numbered terminal
block cover.
9. Install screws and nuts to attach terminal block to control
panel.
10. Swing control panel up and secure to sideplates (19) with
capscrews (13).
11. Attach pendant control handle and connect power.
6
Brown
White
4
56
Black
Orange
Red
Yellow
Blue
Grey
(Dwg. MHP2231)
Care must be taken to ensure air supply hose and electrical supply
cable are correctly installed to avoid entanglement, which can
cause damage and affect balancer operation.
Contact factory for information on additional electric power cable
festooning systems.
“ON” – “OFF” Switch and Circuit Breaker
Located on the top edge, right hand side (from facing view) of the
electric control panel, the “ON” – “OFF” switch incorporates a
circuit breaker. The circuit breaker will automatically ‘open’ if a
problem occurs with the electronic circuitry.
Ground (Earth) Connections
The power supply connection includes a grounding (earth)
conductor (green wire). Ensure grounding (earth) conductor is
connected to the green/yellow connector terminal.
WARNING
• The ground (earth), green or green/yellow wire, must not
carry any power.
Air Connection
It is recommended that an air line strainer/filter be installed
within 3 feet (1 metre) of the balancer to prevent dirt from
entering the balancer. The strainer/filter should provide 20 micron
filtration and include a moisture trap. Clean strainer/filter
periodically, as indicated by the operating environment, to
maintain its operating efficiency.
Attach air supply to balancer. Refer to ‘Balancer Control
Adjustments’ table on page 12 in “OPERATION” section to setup
InteLIFT® Electronic Control system for balancer operation.
Initial Setup
Refer to Dwg. MHP2159 on page 9 and MHP2157 on page 10.
Once the balancer has been installed, the InteLIFT® Electronic
Control system must be verified that the default factory presetting
are correct for your application to establish operational readiness.
Refer to “OPERATION” section on page 8 for set-up information.
MHD56222 - Edition 3
NOTICE
• Each time the power is turned off and back on the InteLIFT®
Electronic Control system performs a self audit to ensure all
components are connected and working properly. The
controller is pre-programmed at the factory based upon the
order information; this information is stored in nonvolatile
memory and is not lost in the event of power failure or
shutdown. If the self audit indicates a fault or operating
problem, the setup menu must be run to verify the data is
correct for this application and both end effector and handle
tare has been performed. If correctly installed and problem
remains, refer to the “TROUBLESHOOTING” section on
page 17 or call the toll free number (1-866-284-5509) for
assistance.
• The LCD window on the control panel provides information
on function, setting, adjustment parameters and current
operating mode.
If InteLIFT® ‘RED’ fault indication light illuminates, press the
emergency stop button and then press “ON”. Ensure no button on
control handle or handle load cell is depressed during self test. If
‘RED’ fault indication light stays “ON” refer to “TROUBLESHOOTING” section on page 17 to determine cause.
Lift, Lower and Balancer Speed Indication
Depress the “Lift” then “Lower” rocker switch, located on the
control handle, in each direction, alternately. Note the solenoid
indicator lights on control panel. The (+) green indicator lights
denote movement in the “UP” direction; (-) green indicator lights
denote movement in the “DOWN” direction.
Depress (grey) speed button (located on top row, right hand side
of control handle) to change balancer speed setting. There are 3
settings available: Low, Medium or High which are indicated by
the lights above the speed button. A single light indicates low
speed. The two left LED’s will light for medium speed. All three
LED’s will light for high speed.
Power “ON”
Switch “ON” - “OFF” Circuit Breaker to “ON” position. Then,
press the Power “ON” button (green) on control handle. Operator
should hear an audible “beep” indicating control power is on and
the InteLIFT® Electronic Control system is conducting a ‘self
test’ for 3 seconds. Check “Power On” and “Low Speed” LED’s
are lit on control handle along with “Power” LED light on control
panel. LCD window indication:
This information will momentarily be displayed.
Balancer
Capacity
Software
Revision No.
200 lb
2-15
LOAD CELL CAPABLE
Blank if unit is not equipped with
Load cell or is not to current revision.
Unit will operate if blank.
After three seconds of self test, the LCD window will indicate the
last set mode of operation.
Model No.
ICW
INTELI = *
OPTION = **
* FLOAT or DUMP or NONE
** INTERLOCK or SMART DROP or NONE
NOTICE
• If the “UP/DOWN” buttons on control handle are depressed
during the self test sequence, the system will become
inoperable and the InteLIFT® indication light will be constant
‘RED’ indicating the presence of a fault.
MHD56222 - Edition 3
NOTICE
• Speed settings are factory preset.
InteLIFT® Button
Depress (yellow) InteLIFT® button on control handle, located top
row center of pendant handle. Indicator light (yellow) above pendant
handle button will illuminate if float or dump mode is selected and
InteLIFT® red indicator light on control panel will flash.
If the InteLIFT® mode was set to NONE during setup the red
indicator light on the control panel will not flash.
Depress InteLIFT® button on control handle to turn selected mode
off.
If InteLIFT® mode was set to NONE then the light on the control
panel will not illuminate and the yellow indicator light above the
InteLIFT® button on the pendant will not illuminate.
Load Sensing Handle (optional feature)
The InteLIFT® load sensing handle provides a low effort, highly
intuitive user interface. Ingersoll-Rand Integrated Balancer and
end effector systems are designed and tested to assure stable,
predictable operation. It is imperative that third party or self-built
end effectors are correctly integrated with the load sensing
handle. Technical assistance with load sensing handle mounting
and integration can be obtained by calling 1-866-284-5509.
InteLIFT® Balancers with the optional load sensing handle do not
raise and lower objects by pressing buttons or switches, as in a
conventional Balancer. The standard control handle rocker switch
is removed. The signal to move an object comes from a load cell.
Thus, it is possible to move an object up or down simply by
pushing the handle in that direction.
Drawing MHP2249 on page 8 shows the components of a load
sensing handle assembly. The load cell is designed to measure
force in one axis only, as indicated by the arrows. One end of the
load cell should be attached to the end effector and the other
should be connected to the handle. The force sensing axis of the
load cell should be oriented in the vertical axis (“up-down”
direction). If load cell is not properly oriented, it will not correctly
interpret operator input; it may move up or down when operator
tries to move load laterally or it may not readily move up and
down. This can cause unstable or unsafe operation.
7
Wires located in the load cell compress/stretch when deflection
occurs causing voltage fluctuations that are detected by the
control panel.
The load cell is symmetric in shape, so it is possible for it to be
inadvertently installed upside down. This will reverse signals,
causing the Balancer to go down when handle is pressed up and
vice versa. Ensure proper installation prior to operation.
The load cell can be attached using two M6 tapped holes set on
9/16 ins. (15 mm) centers located on each end. Brackets designed
for mounting the handle and load cell are shown in the “PARTS”
section. For Balancer to function properly, “up/down control tare”
must be set. Refer to “OPERATION” section.
Force
Load
Cell
Handle
(Dwg. MHP2249)
OPERATION
The four most important aspects of operation are:
1. Follow all safety instructions when operating balancer.
2. Allow only personnel trained in safety and the operation of
this product to operate balancer.
3. Subject each balancer to a regular inspection and
maintenance program.
4. Be aware of the balancer capacity and weight of load at all
times.
WARNING
• The balancer is not designed or suitable for lifting, lowering
or moving persons. Never lift loads over people.
Control Panel
Refer to Dwg. MHP2159 on page 9.
Operators must be physically competent. Operators must have no
health condition which might affect their ability to act, and they
must have good hearing, vision and depth perception. The
balancer operator must be carefully instructed in his duties and
must understand the operation of the balancer, including a study
of the manufacturer’s literature. The operator must thoroughly
understand proper methods of hitching loads and should have a
good attitude regarding safety. It is the operator’s responsibility to
refuse to operate the balancer under unsafe conditions.
Initial Operating Checks
Balancers are tested for proper operation before leaving the
factory. Prior to placing balancer into service the following initial
operating checks should be performed.
1. After installation, check to ensure the balancer is centered
and secure.
2. Check connections and position of all electrical supply cords
and plugs.
3. If balancer is attached to a trolley, operate along the entire
length of the beam.
4. Check balancer performance when raising, moving and
lowering test load(s). Balancer and trolley must operate
smoothly prior to being placed in service.
8
The InteLIFT® control panel contains printed circuit boards which
when programmed from the display face or pendant control will
provide Balancer operating parameters.
InteLIFT® Electronic Control system set-up is performed at the
control panel and with the pendant. Control panel provides
function indicator lights and a LCD window to assist setup and
operation.
InteLIFT® Electronic Control settings are stored, and are not lost
in the event of a loss of power, or power failure. The ‘CLAMP/
UNCLAMP’ switch will remain at its initial setting:
INTERLOCK, SMART DROP, or NONE.
“ON”– “OFF” Circuit Breaker Switch
Located on the top edge, right hand side (as viewed facing control
panel) of the electric control panel, the “ON”– “OFF” switch
incorporates a circuit breaker. The circuit breaker will
automatically ‘open’ if a problem occurs with the electronic
circuitry.
MHD56222 - Edition 3
LCD Window
Balancer Direction and Solenoid Indication Lights
The two line LCD window provides function, setting and
adjustment parameters or current operating mode.
Control Panel Functions and Locations
InteLIFT®
Operation
and Fault
Red Indicator
Light*
“DOWN”
Solenoid
Green
Indicator
Lights
“ON” - “OFF”
“UP”
Circuit
Solenoid
Breaker
Green
Switch
Indicator
Lights
Power
Connection
LCD
Window
Balancer direction and solenoid operation are indicated by the
row of six green lights located on the right hand side of the LCD
window.
Two groupings of three lights on the control panel surface flash as
the load is lifted and lowered.
Power “ON” and InteLIFT® Indicator Lights
Located to the left of LCD window are two lights. The green
power light indicates, when on, that power is supplied to the
control panel.
Next to the power light is the InteLIFT® indication light. The red
indicator light will blink when one of the InteLIFT® control modes
is activated. When light is on, but not blinking, a system fault is
indicated.
Control Operation
Down <
Power
Next
“ON”
Up >
Green
Set-Up
Indicator
Control Handle
Light Shift
Cable Connection
Strain Relief
Cable
Note: Red light will blink when one of the InteLIFT® modes
is activated. When light is on, but not blinking, a system
fault is indicated.
(Dwg. MHP2159)
Refer to Dwg. MHP2157 on page 10.
The control handle allows the operator to control balancer
operation and, if used, an end effector clamping device attached to
the balancer, while maintaining operator position at the work
location, allowing exact positioning of the load.
Standard pendant cable length is 12 feet (3.7 m).
Pendants provide operator with the following control functions:
Power Off/Emergency Stop
Power On
InteLIFT® (Dump or Float “ON” or “OFF”)
Selecting Variable Speed
Up/Down Operation
Clamp/Unclamp
Power Off/Emergency Stop
Control Panel Set-Up
There are five buttons labeled ‘Shift’, ‘Set-up’, ‘Next’, ‘Up’ and
‘Down’ on the face of the control panel. System operating modes
and settings are implemented through these button, which allow
for:
• Changing operational modes.
• Running operational self test.
• Performing ‘TARE’ adjustments.
• Enabling ‘Interlock’ or ‘Smart Drop’ feature.
• Configuring for Capacity
Located on top of pendant, the Power Off/Emergency Stop
button, when depressed, shuts off electric power to the pendant
controls and control panel, stopping balancer operation.
Once stopped, balancer will not operate until the power “ON”
button located on the control handle is pressed.
Power On
After the power “ON” button is depressed, a green light will
remain lit on the control panel and pendant handle if the balancer
is ready for use.
Set-up: Allows electronic system functions to be configured.
Next: Advances to the next LCD screen within a menu.
Up/Down: Range of options based on the function feature
displayed. Up/Down buttons change selected feature or feature
parameter displayed in the LCD window (float, dump, interlock,
smart drop, etc.).
NOTICE
• Up/Down buttons on control panel do not perform the same
functions as “UP” / “DOWN” rocker switch on control handle.
MHD56222 - Edition 3
InteLIFT®
InteLIFT® button activates either Float or Dump when
programmed at the control panel. If the InteLIFT® option is not
required NONE will be programmed at the control panel and the
red light will not illuminate on the control panel when the pendant
InteLIFT® button is depressed.
Float: Allows operator to grasp attached load to raise/lower and
position load without use of control handle.
Float mode is achieved with a load cell hook or via the pressure
transducer on the unit.
Refer to Dwgs. MHP2473 and MHP2474 on page 28 for available
load cell hook assemblies.
9
Model ISW Units do not use a load cell hook assembly.
1. Ensure the correct capacity load cell hook is attached to the
Balancer.
2. Plug the load cell connector into the back of the control
pendant.
3. Ensure all connections are clean and secure.
Pendant Operation
RED
CAUTION
• When depressing the InteLIFT® pendant button for
“FLOAT” mode operation, ensure end effector and load are
freely suspended with no obstructions or supports.
“FLOAT” mode cannot be turned on prior to lifting the load.
“FLOAT” mode and load cell control handle provide the same
results and cannot be used together.
GREY
GREEN
YELLOW
Dump: Holds original position regardless of an increase or
decrease in weight.
None: When InteLIFT® function is off, balancer functions as a
lifting and lowering device.
BLUE
To change the mode of the main control unit refer to “Balancer
Control Adjustments” on page 12.
Remote Tare
Provides the capability to change the end effector tare
configuration with the pendant control by a special combination
of button activation. Changes can be accomplished from the
pendant control handle without accessing the main control panel.
Whenever this “Handle Set-Up” mode is active, the Power LED
light on the pendant handle will be off, the InteLIFT® LED light
on the pendant handle and the Low Speed LED light on the
pendant handle will both be flashing. Use the following steps:
1. With power off, depress both the grey Speed and yellow
InteLIFT® buttons.
2. Turn power on, and release both buttons after 1 or 2 seconds
(LED’s will flash).
3. Push and release the yellow InteLIFT® button (this takes the
tare).
4. Cycle power off and on, and use normally.
Speed Selection Button
Allows operator to select from three maximum speeds from the
control pendant. Depress grey speed button to cycle through and
select desired balancer operating speed. Operating speeds are Hi,
Medium and Low. When one light is on, it indicates low speed.
The two left LED’s will light for medium speed. All three LED’s
will light for high speed.
(Dwg. MHP2157)
Up/Down Operation
The rocker switch located on control handle provides the operator
with “UP” / “DOWN” control. Shifting rocker switch left operates
balancer in down direction; shifting rocker switch right operates
balancer in up direction. Releasing rocker switch automatically
causes switch to shift to neutral position and stops operation.
Operating speed is additionally controllable within the selected
speed range by the amount the rocker switch is depressed.
Partially depressing the rocker switch will provide slower
balancer speeds.
NOTICE
• “UP” / “DOWN” rocker switch on control handle does not
perform the same functions as the “UP” and “DOWN”
buttons on control panel.
When operating mode is set to FLOAT and InteLIFT® button on
control handle is on, the operator may grasp attached load to
raise/lower and position load without use of control handle. Load
will remain in last position.
FLOAT mode and a load cell handle cannot be used together.
Clamp/Unclamp Operation
The pendant “CLAMP/UNCLAMP” button engages or
disengages an end effector clamping device if used with balancer
as part of a system. Interlock is a standard feature which prevents
dropping of a supported part through inadvertent operation of the
“CLAMP/UNCLAMP” button. CLAMP/UNCLAMP operation is
achieved through the 12 pin plug located in the back of the
handle.
10
MHD56222 - Edition 3
Set “TARE” for end effector prior to using Clamp/Unclamp
feature. Refer to ‘Balancer Control Adjustments’ on page 12.
Smart Drop: Combines the operations of lowering and
unclamping. It is a programmable feature selected through the
control panel menu. When selected, the unloaded end effector
must be zeroed to insure proper operation. Once “Smart Drop” is
enabled, and the “CLAMP/UNCLAMP” button is pressed and
held down, the part will be lowered until only the weight of the
end effector is supported and then the clamped part will be
released.
End effectors with a load sensing handle should naturally hang in
the same orientation when loaded or unloaded. It should maintain
this orientation when resting on the floor or be suspended such
that it cannot be lowered to floor level. The pendant weight,
which is approximately 5 lb (2.27 kg), should not cause end
effector to tip. Lighter end effectors may require handle be
installed over the center of gravity. Failure to follow these
guidelines may cause Balancer to be less stable or more difficult
to correctly tare. Refer to Dwg. MHP2252 on page 11, which
shows a typical end effector with load sensing handle that utilizes
these practices.
Interlock: Interlock provides additional protection during normal
operation. The unloaded end effector must be zeroed as a preset to
allow for proper operation.
This programmable option enables the system to determine if
there is an unsupported load on the end effector when “CLAMP/
UNCLAMP” button is depressed. If the system detects more
weight than the unloaded end effector, the end effector will not be
allowed to unclamp. Once the load is completely supported, the
“Unclamp” function will work.
UP Control Disable
Up Control Disable mode prevents lifting of the load until an end
effector clamp or vacuum cup has fully engaged and secured the
load. Up Control Disable is available through the 12 pin
connector located in the back of the control pendant handle. Refer
to “Wiring Diagram” on page 13. Up Disable is achieved by
closing the circuit between pin H and J. Opening the circuit
allows UP operation.
(Dwg. MHP2252)
Load Sensing Handle (optional feature)
The load sensing handle is designed to respond to forces that are
much smaller than the weight of the object being manipulated.
WARNING
• All loads must be lifted with the Balancer, not the load
sensing handle. The force transmitted through the handle
must not exceed 40 lb (18 kg). Overloading the load cell can
cause permanent damage.
The handle control tare is factory calibrated before shipment. If it
is necessary to retare, refer to the “Balancer Control Adjustments”
on page 12.
The load sensing handle is sensitive and minor changes to its
installation may necessitate resetting the tare. Indications of a
Balancer that is not correctly tared include moving up or down
without operator input and entering fault mode (indicated by a
steady InteLIFT® red light on the control panel) when Balancer is
turned on.
Do not push on handle immediately after turning on Balancer.
There is a delay of approximately three seconds after green “on”
button is pressed before Balancer is ready to operate. The green
light on the panel designated Power will light at this time. If load
cell is activated before Power light is illuminated, Balancer will
enter fault mode, indicated by a steady InteLIFT® red light on the
control panel.
A Balancer in fault mode will not respond to input from the
handle. To exit fault mode, toggle power off and then on. If this
does not correct problem, retare handle.
MHD56222 - Edition 3
11
Balancer Control Adjustments
The Balancer controller is preprogrammed at the factory and the factory default setting must be verified upon initial installation or a change
in the application. Changes are easily made by powering up the unit with the new end effector or hook installed but no payload or work part
on the system. Position the hook or end effector approximately two feet off the floor and push the “Set-up” button on the main control panel.
Set-up or
Adjustment
Step Performed
Initial Set-up
Procedure
Switch “ON” - “OFF” circuit breaker on
main control panel to “ON” position.
Press green power “ON” button on the
pendant control handle.
Set-up Menu
Press Set-up button on main control panel.
Press NEXT button.
Control Panel Set-up
Adjustments, Tests and Visual
Indications
None
LCD
Window Indication
BLANK LCD
Control panel will conduct self test
and display results for 3 seconds.
Green power light on control panel
is illuminated.
After 3 seconds the LCD will
automatically change to the run
screen.
Green power and red InteLIFT®
lights are NOT illuminated.
200 lb.
2.15
LOAD CELL CAPABLE
ICW
OPTION=***
INTELI=**
*
PUSH NEXT
FOR NEXT SCREEN
To change selections
PUSH “UP” TO CHANGE
SELECTION
Set Model
Identification
Press NEXT button.
Change InteLIFT®
Operating Mode
Press NEXT button.
Select Options
Press NEXT button.
TARE End Effector Press NEXT button.
TARE Control
Handle
Exit Set-up Menu
Press NEXT button.
Press Set-up button on main control panel.
Press UP button to select model
(ICW, IAW or ISW). Unit is factory
programmed and should not require
changing.
Press UP button to select operating
mode (FLOAT, DUMP or NONE).
Press UP button to select operating
mode (INTERLOCK, SMATDRP or
NONE).
Push UP button to TARE. Hook
must be supporting end effector and
hanging freely.
Note number in bottom right of
LCD. Use UP/DOWN button on
control panel to adjust as close to
511 as possible.
Return to run screen.
SELECT MODEL
ICW
SEL. INTELI MODE
**
SELECT OPTIONS
***
PUSH “UP” KEY TO TARE
END EFFECTOR
SET UP/DOWN TO
APPROX
511
PRESS SETUP KEY TO
FINISH SETUP
* Will be displayed if a Load cell is present. If there is no Load cell the “*” will not appear.
** Will display either FLOAT, DUMP or NONE depending on the operating mode selected.
*** Will display SMATDRP, INTERLOCK or NONE depending on what is selected.
12
MHD56222 - Edition 3
Power Receptacle
ZHSEA0099
Switch Circuit Breaker
ZHSEA0098
TB6TB5TB4TB3TB2TB1
IN
OUT
RED
BLK
Black
115 VAC 115 VAC GND
FL1
CB1 White
YEL
12 VDC
BLU
BRN
WHT
12 VDC
GRY
P5
J5
Encoder
Pressure
W9
P7 1 2 3 4 5 6 7 8
P3 1 2 3 4
P2 1 2 3 4 5
W6
J7 1 2 3 4 5 6 7 8
J3 1 2 3 4
594837261
1
2
3
4
5
6
7
8
9
10
11
12
13
14
15
16
J2 1 2 3 4 5
5
3
1
4
T1
Pressure Transducer
Cable Assembly
ZHSEA0107
Main Control PCB Assembly - ZHSEA0013
J8
W7
24VACL
3 3
2 2
1 1
Large Up
Medium
Up
ORG
Encoder Cable Assembly
ZHSEA0106
RS 232
CHASSIS
B
A
GND
Vcc
GRN
RED
BLK
CHASSIS
INPUT
Va
GND
12VAC
24VAC
GND
1
2
3
4
5
6
7
8
9
10
11
12
13
14
15
16
RX+
RXTXTX+
SYNSYN+
GND
9VDC
POWER ON
ON/OFF COMMON
24VACL
E STOP
24VAC AUX
SHIELD
ORG
YEL
YEL
WHT
BLK
Small UP
Large
Down
SSR6
SSR5
SSR4
SSR1
SSR2
SSR3
BRN
RED
1
2
3
4
5
6
7
8
9
10
11
12
13
14
15
16
17
18
19
ROCKER
+5VDC
GND
OUT
1
2
3
4
5
6
7
8
9
10
11
12
P4
1
2
3
4
5
6
7
8
9
10
11
12
J4
16
15
14
13
12
11
10
9
8
7
6
5
4
3
2
1
230 VAC IN
Load Cell Assembly
ZHSEA0181
GND
Va
VV+
P4
GAIN
1
GAIN
2
UP2IN 3
DN2 IN 4
DNOUT 5
DN1IN 6
GND
7
UP1IN 8
GND
9
UPOUT 10
GND
11
Va
12
16
15
14
13
12
11
10
9
8
7
6
5
4
3
2
1
P2 J2
FL1
A
B
C
D
E
F
G
H
J
K
L
M
CB1
1
2
3
4
5
6
7 9V
8
12 VDC
YEL
BLU
12 VDC
GRY
RED
BRN
ORG
T1
WHT
BLK
WHT
WHT
YEL
BLK
TB6TB5TB4TB3TB2TB1
S3
BLK
S2
Clamp
S1
Speed
Float
PWR ON
E-Stop
White/Green
Green/White
White/Brown
White/Blue
White/Orange
Blue/White
Red/Blue
Blue/Red
White/Slate
Brown/White
Orange/White
Slate/White
Cable, Adapter ZHSEA0228-1
24VAC AUX
24VACL
24VAC Coil
LC + Output Signal
LC + Excitation
LC - Output Signal
PROX SW
UP Disable
12VDC
Chassis Ground
LC - Excitation
12VDC Common
Connection for 230 Volt AC Line Voltage
OUT
1
2
3
4
5
6
7
8
J3 P3
1
2
3
4
5
6
7
8
9
10
11
12
J1 P1
Pendant Handle Assembly
ZHSEA0148, ZHSEA0152 or ZHSEA0156
Rocker Assembly
ZHSEA0048
+5VDC
GND
OUT
ROCKER
DOWN
UP
SHIELD
TO HANDLE CHASSIS
Solenoid Cable
Assembly
ZHSEA0109
1
2
3
4
5
6
7
8
9
10
11
12
13
14
15
16
17
18
19
Pendant Cable Assembly
Main Control Cable
ZHSEA0180 or ZHSEA0067
Assembly - ZHSEA0108
P1
J1
J6 P6
Medium Down
Small
Down
Handle Board - ZHSEA0056
Main Control Enclosure Assembly - ZHSEA0001
GRN
BLU
BLK
MHD56222 - Edition 3
Loadcell
Connection for 115 volt AC Line Voltage
End Effector
WIRING DIAGRAM
(Dwg. MHP2158)
13
PREVENTIVE MAINTENANCE CHECKS AND SERVICE
NOTICE
• This supplement contains information only for the InteLIFT®
Electronic Control system used with an air balancer. Use this
supplement in conjunction with Balance Air Service Manual
Form Number MHD56151.
Preventive Maintenance
WARNING
• All new, altered or modified equipment should be inspected
and tested by personnel trained in safety, operation and
maintenance of this equipment to ensure safe operation at
rated specifications before placing equipment in service.
These preventive maintenance recommendations are designed to
prevent unexpected breakdowns and problems through periodic
inspection and maintenance. Maintenance intervals should be
based on frequency of usage and operating environment. Frequent
use, or dirty operating conditions require more frequent servicing.
Refer to the “INSPECTION AND MAINTENANCE REPORT”
on page 16. Using this report will aid in tracking component
failures and faults. We recommend the use of this report as a
preventive maintenance tool.
Frequent and periodic inspections should be performed on
equipment in regular service. Frequent inspections are visual
examinations performed by operators or service personnel and
include observations made during routine equipment operation.
Periodic inspections are thorough inspections conducted by
personnel trained in the safety, operation and maintenance of this
equipment. Inspection intervals depend upon the nature of the
critical components of the equipment and the severity of usage.
The inspection intervals recommended in this manual are based
on intermittent operation of the unit eight hours each day, five
days per week, in an environment relatively free of dust,
moisture, and corrosive fumes. If the unit is operated almost
continuously or more than the eight hours each day, more
frequent inspections will be required.
Careful inspection on a regular basis will reveal potentially
dangerous conditions while still in the early stages, allowing
corrective action to be taken before the condition becomes
dangerous.
Deficiencies revealed through inspection, or noted during
operation, must be reported to designated personnel trained in
safety, operation and maintenance of this equipment. A
determination as to whether a condition constitutes a safety
hazard must be decided, and the correction of noted safety
hazards accomplished and documented by written report before
placing the equipment back in service.
14
InteLIFT® Control System
The InteLIFT® Electronic Control system should be visually
inspected on a daily basis, prior to initial operation at the
beginning of each shift, and monitored during balancer
operations. Visual inspections should include those items noted in
the “Preventive Maintenance Inspection Schedule” on page 15.
At any indication of damage or a potential problem, an inspection
process should be conducted to determine the full extent of the
problem as well as the likely cause, if applicable. The balancer
should not be operated until the problem and cause (if applicable)
have been corrected. Ensure the InteLIFT® Electronic Control
balancer is tested by personnel qualified in the maintenance and
service of this product before placing back in service.
Cleanliness
Routine cleaning of the control panel display surface will improve
visibility and prevent the accumulation of dirt.
1. Clean the face of the control panel with non-abrasive
cleansers only. Dry completely.
2. Periodically clean surfaces to prevent the accumulation of
dirt and debris. If using liquid cleaners, carefully mist and
wipe to ensure excess liquids do not leak into the control
panel housing.
3. If required, as a result of dirt or debris accumulation at the
contacting edges of the balancer and control panel housing,
the control panel can be opened to access this area. Use low
pressure air (commercially available canned air is
recommended) to carefully blow debris away from electronic
components.
Balancers Not in Regular Use
Standby balancers, and balancers which have been idle for an
extended period, should be checked to ensure they are functioning
properly and that the electronic control settings are correct for the
balancer application. Conduct intial control panel setup steps first,
followed by specific adjustments for balancer operation.
Refer to “Preventive Maintenance Inspection Schedule” on page
15 as a guide to conducting visual inspections of InteLIFT®
Electronic Control system and components.
Refer to ‘Balancer Control Adjustments’ on page 12 to setup
InteLIFT® Electronic Control system settings and operational
tests.
NOTICE
• Refer to Balance Air Service Manual Form Number
MHD56151 for balancer testing to be conducted upon
completion of InteLIFT® Electronic Control Panel and Control
Handle setup and testing.
MHD56222 - Edition 3
Preventive Maintenance Inspection Schedule
Component
Inspection
Manifold End
Cover
Cracks, wear, damage
Control Panel
Moisture
Dirt, dust, airborne
particles
LCD window
indication
Control Handle Damaged housing,
loose buttons
Strain relief
Electrical
Wiring (supply
and harnesses)
Control Handle
operation
Insulation
MHD56222 - Edition 3
Criteria for
Operation
Cover protects electrical connections from
moisture and dirt. End cover must be secure and
undamaged.
Control panel must be dry inside and out.
In environments where small airborne particles,
dust or dirt are present, care must be taken to
ensure these materials do not enter control panel.
LCD window indication must clearly reflect the
operating mode, or setup condition of the control
panel.
Control handle must not be damaged, or buttons
worn and loose in housing.
Strain relief must support weight of pendant
handle. Wiring must not be allowed to support
weight of pendant.
Control handle functions must provide smooth and
accurate operation.
Wire insulation must not have breaks, be brittle or
support any component. Insulation must be pliable
to the touch, dry and installed with enough slack in
the line to prevent ‘pulling’ on the wire to make
connections. Wire installaton should not contact
any moving or rotating component during
operation.
Daily
(1st operation of
shift)
Frequent
(Less than 6
months/semi
annual)
Periodic
(More than 6
months/annual)
X
X
X
X
X
X
X
X
15
INSPECTION AND MAINTENANCE REPORT
Ingersoll-Rand InteLIFT® Electronic Control System for Air Balancers
Model Number:
Date:
Serial Number:
Inspected by:
Reason for Inspection: (Check Applicable Box)
1. Scheduled Periodic Inspection
____Quarterly ____Semiannually ____Yearly
Operating Environment:
2. Discrepancy(s) noted during Frequent Inspection
3. Discrepancy(s) noted during maintenance
Normal____ Heavy____ Severe____
4. Other:________________________________________
Refer to the Parts, Operation and Maintenance Manual “INSPECTION” section for general inspection criteria. Also, refer to appropriate
National Standards and codes of practice. If in doubt about an existing condition contact the nearest Ingersoll-Rand Distributor or the
factory for technical assistance.
CONDITION
COMPONENT
Pass
Fail
CORRECTIVE
ACTION
Repair
NOTES
Replace
Fasteners
Covers
Control Panel
Electrical System
Control Handle
Labels and Tags
---
Other Components
Balancer
Refer to Balancer manual MHD56151
This page may be photocopied and used by inspectors or maintenance personnel.
16
MHD56222 - Edition 3
TROUBLESHOOTING
These instructions apply only to the InteLIFT® Electronic Control system and should be used in conjunction with the
“TROUBLESHOOTING” section provided in the Balance Air Service Manual Form Number MHD56151.
Specific causes to problems are best identified by thorough inspections performed by personnel instructed in safety, operation and
maintenance of this equipment. The chart below provides a brief guide to common symptoms, probable causes and remedies.
If this guide does not solve your problem call our Toll Free Number for assistance (1-866-284-5509).
Symptom
Cause
Remedy
Power “ON” does not work.
No power to system.
Check external electrical system connections, cords
and 4 amp fuse in control panel.
Check electronic control connections and cords.
“Lift” and/or “Lower” pendant
control does not function
properly.
“Dump” Mode does not work.
Main cable not connected.
Check electronic control panel connections and cords.
“ON” - “OFF” circuit breaker switch in
“OFF” position.
Check “ON” - “OFF” circuit breaker switch is in
“ON” position.
Pendant control cable connections.
Check pendant cable control connections at pendant
and electronic control panel. Check 0.5 amp fuse in
control panel.
Control Handle “TARE” needs resetting.
Reset control handle “TARE”. Refer to ‘Balancer
Control Adjustments’ on page 12.
Pressed “UP/DOWN” rocker switch on
control handle during start-up 3 second self
test.
Restart the InteLIFT® Electronic Control system
without pushing “UP/DOWN” rocker switch during 3
second start-up self test.
Pendant or system malfunction.
Depress InteLIFT® button and ensure red light on
control panel is flashing.
Loose or disconnected electrical connection.
Check connection at encoder sensor.
Check encoder connection at control panel.
“Float” mode does not work.
Pendant or system malfunction.
Depress InteLIFT® button and ensure red light on
control panel is flashing.
Loose or disconnected electrical connection.
Check pressure sensor connection at manifold.
Check pressure sensor connection at control board.
“Clamp/Unclamp” mode does
not work.
Loose or disconnected electrical connection.
Check wiring to the servo unit on end effector.
Check pendant connection at handle and main board.
Set Interlock “TARE”
No response from balancer.
Intermittent operation.
Emergency Stop engaged.
Depress “ON” button on control.
“ON” - “OFF” switch in “OFF” position.
Shift switch to “ON” position.
Poor grounding (earth).
Correctly ground (earth) power supply. Check wiring
for broken wires.
Foreign material or moisture on electrical con- Dry or remove foreign material which may have accunectors.
mulated on electrical parts.
‘Fault’ light stays on.
MHD56222 - Edition 3
Open/Short in power supply system.
Check all switches, connections and circuit breakers in
power supply line for damaged insulation.
Improper operation.
Do not press any of the control handle buttons during
startup or “TARE” operation.
Control handle is not TARED or “TARE”
needs resetting.
Reset Control Handle “TARE”. Refer to ‘Balancer
Control Adjustments’ on page 12.
17
MAINTENANCE
1.
WARNING
• Never perform maintenance on the balancer while it is
supporting a load.
• Before performing maintenance, tag controls:
WARNING - DO NOT OPERATE EQUIPMENT BEING REPAIRED.
• Only allow personnel trained in service and repair of the
InteLIFT® Electronic Control system to perform maintenance.
• After performing any maintenance, test balancer before
returning to service.
• Shut off and tag electrical disconnect switch before
performing any maintenance.
• Electrical procedures should be performed by licensed
electricians in accordance with the latest edition of National
Electrical Code (ANAI/NFPA 70) and any applicable local,
state and national electrical codes and ordinances.
2.
3.
4.
5.
6.
7.
NOTICE
• This supplement contains information only for the InteLIFT®
Electronic Control system used with an air balancer. Use this
supplement in conjunction with Balance Air Service Manual
Form Number MHD56151.
Maintenance Intervals
The Maintenance Interval chart is based on intermittent operation
of the balancer eight hours each day, five days per week. If
operation is more than eight hours per day, or in severe
applications or environments, more frequent maintenance should
be performed.
Interval
Start of each shift
(Operator or
Maintenance
Personnel)
Yearly
(Maintenance
Personnel)
Maintenance Check
Make a thorough visual inspection of
balancer for damage. Do not operate
balancer if damaged.
Operate balancer through normal operating
cycle. Balancer must operate smoothly.
Inspect balancer for wear and damage.
Repair or replace damaged parts as
necessary.
Turn off and tag electrical disconnect switch before
performing any maintenance. Disconnect electrical cable
from control panel.
Never disassemble balancer any further than is necessary to
accomplish needed repair. A good part can be damaged
during the course of disassembly.
In general, balancers are designed to permit easy
disassembly and assembly. The use of heat or excessive
force should not be required.
Keep the work area clean to prevent dirt and other foreign
matter from getting into balancer.
When grasping a part in a vise, always use leather or copper
covered vise jaws to protect the surface of part and help
prevent distortion. This is particularly true of threaded
members, machined surfaces and housings.
If repair work can only be conducted above body height,
suitable working platforms or ladders must be made
available.
Work on electrical equipment should only be conducted by
licensed electricians, in accordance with all appropriate
electrical codes and regulations.
Disassembly
The following instructions provide the necessary information to
disassemble, inspect and repair the InteLIFT® Electronic Control
system. Parts drawings are provided in the Parts Section to assist
in locating components.
If an InteLIFT® Electronic Control Balancer is being completely
disassembled for any reason, follow the order of topics as they are
presented. When working on a balancer, it is recommended that
the balancer be removed from its mounting and placed on a clean
work bench in a well lighted area. In the process of disassembling
the balancer, observe the information provided in the “General
Maintenance Instructions”.
WARNING
• Never perform maintenance on a balancer system while is
supporting a load. Disconnect power and remove all load from
balancer system.
NOTICE
General Maintenance Instructions
NOTICE
• It is recommend that maintenance work be performed by an
Ingersoll-Rand service repair center.
All maintenance work performed on the balancer must be
recorded with the date in the inspection report.
• The following disassembly instructions apply only to the
InteLIFT® Electronic Control system subassemblies. To further
disassemble the balancer for maintenance or repair refer to
Balance Air Service Manual Form Number MHD56151.
Unless otherwise noted, part names and item numbers are from
the assembly drawing and parts list. Refer to Dwg. MHP2155 on
page 22.
Pendant Removal
Proper use, inspections and maintenance increase the life and
usefulness of your Ingersoll-Rand equipment.
It is recommended that all maintenance work on the balancer be
performed on a bench in a clean dust free work area. During the
process of disassembly, observe the following:
18
1.
2.
3.
Disconnect pendant cable from control panel by rotating
locking ring counterclockwise until free of threads.
Pull downward to disconnect pendant cable plug from
control panel plug interface.
Remove capscrew (6), nut (9) and loop strap (10) from loop
bracket (7).
MHD56222 - Edition 3
4.
To disconnect strain relief cable, remove clamp (11) from
cable (31) and pull cable through hole in loop bracket (7).
Remove cable thimble (8).
Pendant and/or Control Cable Replacement
NOTICE
• Pendant maintenance and repair should be performed by an
authorized Ingersoll-Rand service repair center. Pendant
component repair parts are not available. Replace pendant if
damaged, or inoperable.
The following instructions describe how to remove pendant from
control cable.
1. Remove three screws (51) that secure hanger plate (59) to
back of pendant body.
2. Remove two #6-32 screws located on underside of pendant
body.
3. Carefully lift and partially separate front face from pendant
body. Do not stretch or damage wires.
4. Remove two #3-48 screws securing circuit board to the
handle body (lower left and upper right).
5. Remove ring nut from 12 pin plug in back of handle body
using suitable nut wrench (ZMS20 Lumberg).
6. Carefully separate circuit board from pendant body far
enough to allow removal of 16 pin pendant control cable
connector.
The following instructions describe how to attach pendant to
control cable.
1. Install 16 pin pendant control cable connector to pendant
handle circuit board.
2. Carefully press circuit board back into pendant handle and
install ring nut on 12 pin plug from the outside of the
pendant body. Tighten nut using suitable nut wrench
(ZMS20 Lumberg).
3. Apply a small amount of Loctite #222 to threads and install
two #3-48 screws to secure circuit board to the handle body
(lower left and upper right).
4. Carefully tuck wires into pendant body and assemble front
face to pendant body. Secure with two #6-32 screws.
5. Attach hanger plate (59) to back of pendant with three
screws (51).
Manifold Removal
Manifold assembly (41) is located on left hand side of balancer
canister (22), as viewed from control panel.
1. Disconnect air line.
2. Remove standoff screw (50) in center of end cover (49).
3. Remove end cover and standoff tube (48).
4. Tag and record the colors of the individual wires connected
to the six solenoids (46). Refer to ‘Wiring Diagram’ Dwg.
MHP2158 on page 13. Disconnect wires from solenoids.
5. Remove screw (53) holding loop strap (52) to separate wire
harnesses from manifold (41).
6. Remove capscrews (47) attaching valve manifold (41) to
balancer end cover (38).
7. Remove ‘O’ ring (39) and muffler pads (40).
To remove individual solenoid valves (46) from manifold
assembly (45) conduct the following:
MHD56222 - Edition 3
NOTICE
• Tag and record the colors of the individual wires before
disconnecting from solenoid valves (46). This information will
be necessary to correctly reconnect the wires to the solenoid
valves during reassembly.
1.
2.
3.
4.
Disconnect wire harness from solenoid valves.
Loosen nut on top of solenoid valve assembly (46).
Holding coil to prevent rotation, loosen valve seat and
continue to turn it until detached from manifold.
Repeat steps 2 and 3 for remaining solenoid valves.
Pressure Transducer
Pressure transducer (44) is located on left hand side of balancer
canister (22), as viewed from control panel.
To remove pressure transducer (44) from balancer end cover (38).
1. Disconnect wire harness (36) from pressure transducer (44)
and move to side.
2. Remove pressure transducer and reducer bushing (43) from
end cover (38).
Encoder End Cover Removal
End cover (3) is located on right hand side of balancer housing
(22), as viewed from control panel.
1. Disconnect electrical harness, control panel to encoder (12)
at circuit board.
2. Remove two screws (6) and unscrew circular connector at
pendant control cable.
3. Remove capscrew (1) and washer (2) from center of end
cover assembly.
4. Remove screws (20) and pull end cover assembly out of
housing.
5. Remove ball stop nut (5).
6. Additional disassembly should only be conducted if brake or
encoder parts require replacement.
Control Panel Removal
NOTICE
• Printed circuit boards are not field repairable. The main
control panel must be replaced if a problem is traced to the
unit.
Disassembly steps are described as viewed facing the control
panel.
1. Turn off all power and disconnect balancer from power
supply.
2. Disconnect pendant control handle cable by rotating locking
ring counterclockwise until free of threads.
3. Remove upper right and left capscrews (13) which attach
control panel (29) to sideplates (19).
4. Allow control panel to swing down and hang freely from the
two remaining screws.
5. Carefully disconnect wire harnesses at the control panel
connections:
a. Electrical harness, control panel to encoder (12).
b. Electrical harness, control panel to transducer (36).
c. Electrical harness, control panel to solenoids (37)
6. While supporting the control panel, remove one capscrew
(13) then tilt and remove control panel from sideplates (19).
19
Encoder End Cover Assembly
Cleaning, Inspection and Repair
Use the following procedures to clean, inspect and repair the
components of the unit.
1.
2.
Cleaning
3.
CAUTION
• Do not use trichloroethylene to clean parts.
4.
The use of a stiff bristle brush will facilitate the removal of
accumulated dirt and sediments on the end covers and housing.
Keep control panel surface clean.
5.
Inspection
6.
All disassembled parts should be inspected to determine their
fitness for continued use. Pay particular attention to the
following:
1. Inspect all wiring and connections for worn, cracked, or
broken insulation, wires and connectors. Check for uneven
edges on ribbon cable ends.
2. Inspect all threaded items and replace those having damaged
threads.
3. Check electrical connectors to ensure prongs and locking
rings are not damaged.
4. Check that all connectors are fully seated and not offset by
one pin.
7.
Manifold Assembly
1.
2.
3.
4.
Repair
Repairs are limited to minor replacements. For major component
replacement or repair, it is recommend that maintenance work be
performed by an Ingersoll-Rand service repair center.
1. Worn or damaged parts must be replaced. Refer to the
applicable parts listing for specific replacement parts
information.
2. Replace any electrical components that have tested faulty.
3. Inspect all remaining parts for evidence of damage. Replace
or repair any part which is in questionable condition. The
cost of the part is often minor in comparison with the cost of
redoing the job.
4. Remove all nicks and burrs caused by lockwashers.
Install solenoid valve (46) in manifold (41):
a. Hold coil to prevent rotation and tighten valve seat until
snug.
b. Tighten nut on top of solenoid valve assembly (46).
Repeat step 1 through 1b for remaining solenoid valves.
Install ‘O’ ring (39) in recess on back face of manifold (41).
Install muffler pads (40).
Align holes in end cap (38) with manifold (41). Install
capscrews (47) to secure manifold to end cap.
NOTICE
• Ensure wire color to solenoid information is followed during
assembly. Refer to Manifold Solenoid Valve Identification
Table on page 21.
5.
6.
Assembly
Ensure white lettering on encoder module is visible when
mounted to end cover.
With encoder module pins pointing outward, toward
assembler, green harness wire must be located on the left.
Install electrical harness, control panel to encoder (12) to
connector on end cover assembly (3) if removed. Secure
with nylon tie (63) through loops in encoder (58) and around
harness connector.
Install ball nut stop (5) and brake assembly (6) into end of
housing (22). Install end cover assembly (3) onto end of
housing with the electrical connection located at bottom.
During assembly, align holes on outside edge of assembly
with holes located in housing.
Install capscrew (1) and washer (2) in center of end cover
assembly.
Install capscrews (20) attaching end cover assembly to
housing.
Install loop bracket (7) to end cover asembly and secure with
capscrews (6).
7.
Connect wires from electrical harness, control panel to
solenoids (37) to solenoid valves. Ensure correct wires are
connected to solenoids. Use wire color and location
information documented during removal. Refer to Dwg.
MHP2170 on page 21 and Identification Table on page 21.
Secure loop strap (52) to manifold with capscrew (53) to
secure electrical harness.
Attach air hose to manifold.
Unless otherwise noted, part names and item numbers are from
the assembly drawing and parts list. Refer to Dwg. MHP2155 on
page 22.
NOTICE
• The following assembly instructions apply only to the
InteLIFT® Electronic Control system subassemblies. For
additional balancer assembly instructions refer to Balance Air
Service Manual Form Number MHD56151.
• References to electrical connections during assembly require
correct harness attachment. During assembly, refer to the
‘Wiring Diagram’ Dwg. MHP2158 on page 13 to ensure the
correct electrical connections are made.
20
MHD56222 - Edition 3
Manifold Solenoid and Pressure Transducer Locations
2.
3.
4.
5.
6.
Place control panel assembly (29) on sideplates. Install
capscrews (13) through bottom hole on each side. When
assembled, control panel should swing freely in vertical
direction.
Attach electrical harnesses to control panel locations:
a. Electrical harness, control panel to encoder (12).
b. Electrical harness, control panel to transducer (36).
c. Electrical harness, control panel to solenoids (37).
Close control panel by swinging up and securing in place
with capscrews (13) located on upper left and right edges of
housing, as viewed from control panel face.
Insert pendant cable plug into port located on bottom right
hand side of control panel assembly, as viewed facing
control panel. Lock cable in place by screwing locking ring
in a clockwise direction until fully engaged. Ensure pendant
control handle is supported by strain relief cable attached to
loop bracket.
Connect power supply cord and turn on power.
(Dwg. MHP2170)
Pendant Assembly
Manifold Solenoid Valve Identification Table
Refer to Dwg. MHP2170 on page 21.
Solenoid
Number
1
2
3
4
5
6
Description
of Function
Balancer Up - Hi Flow
Balancer Up - Medium Flow
Balancer Up - Low Flow
Balancer Down - Hi Flow
Balancer Down - Medium Flow
Balancer Down - Low Flow
Wire
Color
Brown
Red
Orange
Yellow
Green
Blue
Pressure Transducer
1.
2.
Install reducer bushing (43) in end cap (38).
Install pressure transducer (44) in reducer bushing. Do not
over torque. Attach electrical harness, control panel to
transducer (36) to pressure transducer.
End Enclosure
1.
Install standoff tube (48) and end enclosure (49) and secure
with capscrew (50).
CAUTION
• Do not allow pendant control handle cable to support the
weight of the pendant control handle. Weight must be
supported by strain relief cable assembly to prevent damage to
electrical wires.
1.
2.
3.
4.
Ensure loop bracket (7) is securely attached to end cover
assembly (3). Place cable into loop strap and secure in place
with capscrew (6) and nut (9). Ensure cable has a short loop
between loop clamp and control panel.
Attach pendant assembly (35) cable to control panel (29) by
inserting cable plug into port located on bottom right hand
side of control panel assembly, as viewed facing control
panel.
Lock cable in place by screwing locking ring in a clockwise
direction until fully engaged.
Install strain relief cable, if supplied.
Testing
Refer to ‘Balancer Control Adjustments’ on page 12. Conduct
intial control panel setup steps first, followed by specific
adjustments for balancer operation.
Control Panel Assembly
1.
Ensure sideplates (19) are attached to the outside of tackwelded nuts located on housing body with capscrews (14).
MHD56222 - Edition 3
Refer to Balance Air Service Manual Form Number MHD56151
for balancer testing to be conducted upon completion of InteLIFT®
Electronic Control Panel and Control Handle setup and testing.
21
ELECTRONIC CONTROL ASSEMBLY PARTS DRAWING
5
21
54
‘Z’ Stop Option
Only
55
15
4
62
3
56
58
13
14
2
63
1
7
20
13
6
61
12
57
9
19
13
8
28
10
11
25
27
24
26
22
17
14
18
23
7
29
30
10
9
33
32
37
34
49
50
60
36
48
47
31
40 42
16
2
39
59
38
46
35
NOTE: Item 44 location may vary
depending upon balancer model.
41
51
44
43
52
53
(Dwg. MHP2155)
22
MHD56222 - Edition 3
ELECTRONIC CONTROL ASSEMBLY PARTS LIST
Item
No.
1
2
3
4
5
6
7
8
9
10
11
12
13
14
15
16
17
18
19
20
21
22
23
24
25
26
27
28
29
• 30
31
32
33
34
35
36
37
38
39
• 40
41
42
43
• 44
45
Description
of Part
Capscrew
Washer
End Cover Assembly w/o ‘Z’ Stop
End Cover Assembly w/ ‘Z’ Stop
‘Z’ Brake Assembly
Ball Nut Stop
Capscrew
Loop Bracket (ISW Models)
Loop Bracket (IAW and ICW Models)
Thimble
Nut
Loop Strap
Clamp
Electrical Harness, Encoder
Screw, Main Enclosure
Screw
‘Z’ Stop Plate
Sleeve
Washer, Grounding
Nut, Grounding
Sideplate, Enclosure
Screw
Screw
Housing Assembly
Nut
Screw
Plate
Wire Rope Guide
Nameplate
Warning Label, Balancers
Housing Liner
Control Panel Assembly
Power Plug (AC)
Cable
Warning Label, Electrical
Capacity Label
Warning Label, Pendant
Pendant Assembly, w/Straight Cable
Pendant Assembly, w/Pre-Coil Cable
Load Cell Handle, w/Pre-Coil Cable
Electrical Harness, Transducer
Electrical Harness, Solenoids
End Cap
‘O’ Ring
Muffler Pads
Valve Manifold
Capscrew
Reducer 1/4 x 1/8 NPT
Pressure Transducer
Manifold Assembly (includes items 37, 41,
46, 52, 53 and 60)
MHD56222 - Edition 3
Qty.
Total
150 lb (68 kg)
1
2
1
1
1
3
ZHSEA0010
--ZHSEA0034
ZHSEA0163
1
2
1
1
1
1
4
2
1
1
2
1
2
()
2
1
2
1
1
1
1
1
1
1
1
1
1
1
1
---
10071 (2)
ZHSEA0009
10124
--10116
---
10402
1
1
1
1
1
2
1
1
1
1
1
15515
ZHSEA0068-1
Part Number
200 lb (91 kg)
330 lb (150 kg) 500 lb (227 kg)
10017
74516
ZHSEA0012
ZHSEA0016
ZHSEA0032
ZHSEA0038
ZHSEA0011
ZHSEA0030
Y99-41
ZHSEA0087
ZHSEA0232
31477
Y192-1-Z
ZHSEA0086
ZHSEA0195
ZHSEA0106
ZHSEA0088
ZHSEA0085
ZHSEA0035
ZHSEA0036
32356
ZHSEA0091
ZHSEA0092
ZHSEA0084
10072 (8)
ZHSEA0029
ZHSEA0005
ZHSEA0039
--10120
10125
10114
10115
10118
ZHSEA0120
71148175
ZHSEA0041
ZHSEA0042
ZHSEA0040
ZHSEA0001
ZHSEA0147
33323-XXX-X-A
71125751
10403
10404
10398
10445
ZHSEA0148
ZHSEA0156
ZHSEA0152
ZHSEA0107
ZHSEA0109
15016
15751
ZHSEA0078
ZHSEA0069
10013
10018
ZHSEA0079
ZHSEA0080
ZHSEA0068-2
ZHSEA0068-3
ZHSEA0068-4
23
Item
No.
• 46
47
48
49
50
51
52
53
54
55
56
57
58
59
60
62
63
Description
of Part
Solenoid Coil, 1/32 in. Orifice
Solenoid Coil, 3/64 in. Orifice
Solenoid Coil, 5/64 in. Orifice
Solenoid Coil, 3/32 in. Orifice
Solenoid Coil, 1/8 in. Orifice
Solenoid Coil, 5/32 in. Orifice
Capscrew
Standoff Tube
End Enclosure
Standoff Screw
Screw
Loop Strap
Screw
Encoder Disc
Spacer w/o ‘Z’ Stop
Spacer w/ ‘Z’ Stop
Screw
Plate
Encoder
Bracket
Pipe Plug
Screw
Nylon Tie
Qty.
Total
2
2
1
1
1
3
1
1
1
1
2/4
1
1
1
1
1
1
Part Number
150 lb (68 kg)
200 lb (91 kg)
330 lb (150 kg) 500 lb (227 kg)
ZHSEA0071
--ZHSEA0072
--ZHSEA0073
----ZHSEA0074
--ZHSEA0075
--ZHSEA0076
Y99-478
ZHSEA0158
ZHSEA0081
ZHSEA0146
ZHSEA0188
ZHSEA0190
ZHSEA0157
ZHSEA0095
ZHSEA0023
ZHSEA0025
ZHSEA0161
--ZHSEA0162
ZHSEA0027(2)
ZHSEA0027(4)
--ZHSEA0026
ZHSEA0024
ZHSEA0186
ZHSEA13500
ZHSEA0017
ZHSEA0196
•
Recommended spare, for one balancer, 2 years normal operation.
For 400, 660 and 1000 lb (182, 300 and 455 kg) reeved balancers refer Balance Air Service Manual Form MHD56151 for additional
information.
Additional Parts and Kits
Power Supply Cord 3 ft (0.9 m)
Encoder Kit includes items (54) encoder disc
and (58) encoder sensor
Pre-Coil Cable Assembly
12 ft (3.7 m) Straight electric cable
Loctite® 222
Grease
1
ZHSEA0103
1
ZHSEA0170
1
1
1
4 cc
ZHSEA0180
ZHSEA0067
ZHSEA0235
10549673
Replacement fuses for the control panel are available from RadioShack or Digi-Key 1-800-244-4539. www.digikey.com
Refer to the following fuse capacities and part numbers:
5 x 20 mm SLO-BLO Fuses
Ingersoll-Rand Part Numbers Manufacturers’ Part Numbers
1/2 Amp
ZHSEA0237
F972-ND
2 Amp
ZHSEA0238
F978-ND
4 Amp
ZHSEA0239
F981-ND
24
MHD56222 - Edition 3
‘Z’ BRAKE ASSEMBLY – 150 LB (68 KG) BALANCER
Refer to unit breakdown for
applicable end cover assembly
5
6
9
4
7
8
3
2
Note: Apply Loctite 242
on screw threads during assembly.
(Dwg. MHP1959)
Item
No.
--2
3
4
5
6
7
8
9
Description
of Part
‘Z’ Brake Assembly, 150 lb (68 kg) Balancer Unit
Shaft
Pivot Shaft
Brake Rotor
Brake Shoe
Bushing
Radial Bearing
Screw
Spring
Qty.
Total
1
1
1
1
1
1
1
1
1
Part
Number
ZHSEA0034
13112
13113
ZHSEA0033
13116
65054
65074
ZHS70427
76517
Refer to Balance Air Service Manual Form MHD56151 for parts information and additional information.
MHD56222 - Edition 3
25
‘Z’ BRAKE ASSEMBLY – 200/330/500 LB (91/150/227 KG) BALANCER
Refer to unit breakdown for
applicable end cover assembly
6
7
12
8
12A
9
2
11
5
4
3
10
Note: Apply Loctite 242
on screw threads during assembly.
(Dwg. MHP1960)
Item
No.
Description
of Part
--2
3
4
5
6
7
8
9
10
11
12
12A
‘Z’ Brake Assembly
Shaft
Shaft Retainer
Pivot Shaft
Brake Rotor
Brake Shoe
Thrust Washer
Bushing
Radial Bearing
Screw
Screw
Spring
Heavy Spring *
Qty.
Total
1
2
1
1
1
1
2
1
1
2
2
1
1
Part Number
200 lb (91 kg)
330 lb (150 kg)
ZHSEA0032
13112
13122
13123
ZHSEA0020
13125
65063
65073
65074
ZHS70232
70427
76517
76520
500 lb (227 kg)
ZHSEA0038
13142
ZHSEA0037
ZHS70445
* Heavy Brake Spring (Item 12A) replaces Spring (Item 12).
Refer to Balance Air Service Manual Form MHD56151 for parts information and additional information.
26
MHD56222 - Edition 3
LOAD SENSING ASSEMBLY DRAWING AND PARTS LIST
51
72
71
70
(Dwg. MHP2243)
Item
No.
51
70
71
72
Description
of Part
Screw
Load Cell (incl’s electrical connector and 30 in.
cable)
Load Cell Bracket
Handle Bracket*
Qty.
Total
3
Part Number
1
ZHSEA0181
1
1
54037635
54037627
ZHSEA0190
* Order separately.
MHD56222 - Edition 3
27
LOAD CELL ASSEMBLY DRAWINGS
Reeved Bottom Hook
(Capacities 400 lb, 660 lb and 1000 lb)
106
91
93
88
89
94
95
87
86
90
92
96
100
98
101
97
99
Single Fall Hook
102
80
104
103
81
82
83
105
84
85
(Dwg. MHP2473)
(Dwg. MHP2474)
28
MHD56222 - Edition 3
LOAD CELL ASSEMBLY PARTS LIST
Item
No.
----80
81
82
83
84
85
86
87
88
89
90
91
92
93
94
95
96
97
98
99
100
101
102
103
104
105
106
Description
of Part
Load Cell Assembly (incl’s items 80 to 85)
Reeved Load Cell Assembly
(incl’s items 86 to 106)
Eye Bolt
Load Cell, 250 kg
Washer
Nut
Pin
Bottom Hook
Plate
Nut
Nut
Bearing
Sheave
Spacer Block
Thrust Washer
Capscrew
Thrust Washer
Thrust Bearing
Guard
Drive Pin
Retainer Block
Plate
Pin
Capscrew
Capscrew
Nut
Load Cell, 1000 kg
Bottom Hook
Label, Warning
MHD56222 - Edition 3
Qty.
Total
---
Part Number
---
80102130
1
1
1
1
1
1
1
4
1
2
1
1
1
1
4
1
2
2
1
1
2
1
4
1
1
1
1
80105612
80096407
Y13-4-C
10431
Y178-23
80096423
10428
10431
10437
65012
40689
10438
65061
95841839
65061
65059
10423
10440
10421
10442
10435
10426
10429
Y11-108-C
80101983
80102437
10444
80096480
29
PARTS ORDERING INFORMATION
InteLIFT® Electronic Control Balancers are designed and
constructed to provide long, trouble-free service. In time it may
become necessary to order and install new parts to replace those
that have been subjected to wear.
The use of other than Ingersoll-Rand replacement parts may
result in decreased balancer performance, and may invalidate the
warranty. For prompt service and genuine Ingersoll-Rand parts,
provide your nearest Distributor with the following:
1. Complete model number and serial number as they appear on
the labels.
2. Part number and part description as shown in the parts
section.
3. Quantity required.
The model and serial number label is located on the balancer
housing.
Model/Serial Number Label Plate
InteLIFT®
Return Goods Policy
If it becomes necessary to return the complete balancer or certain
parts to the factory, contact the Distributor from whom you
purchased the balancer, or the nearest Ingersoll-Rand Distributor
in your area.
Ingersoll-Rand will not accept any returned goods for warranty
or service work unless prior arrangements have been made and
written authorization has been provided from the location where
the goods were purchased.
NOTICE
• Continuing improvement and advancement of design may
cause changes to InteLIFT® Electronic Control Balancer which
are not included in this manual. Manuals are periodically
revised to incorporate changes. Always check the manual
edition number on the front cover for the latest issue.
Disposal
When the life of the balancer has expired, it is recommended it be
disassembled, degreased and parts separated as to materials so
that they may be recycled.
Model Number: ______________________________________
For additional information contact:
Ingersoll-Rand
1872 Enterprise Drive
Rochester, MI 48309
Phone: (248) 293-5700
Fax: (248) 293-5800
Serial Number: ______________________________________
or
Date Purchased: _____________________________________
Europe, Middle East and Africa
Ingersoll-Rand
Douai Operations
111, Avenue Roger Salengro
59450 Sin Le Noble, France
Phone: (33) 3-27-93-08-08
Fax: (33) 3-27-93-08-00
For your convenience and future reference it is recommended that
the following information be recorded.
Associated Publication References:
Publication
Balance Air Service Manual
Control Panel Replacement Kit
Load Sensing Handle Kit
‘Z’ Rail System
Part Number
MHD56151
MHD56233
MHD56231
MHD56159
Manuals are available at the Ingersoll-Rand web site: www.irhoist.com
30
MHD56222 - Edition 3
WARRANTY
Limited Warranty
Ingersoll-Rand Company (I-R) warrants to the original user its
Products to be free of defects in material and workmanship for a
period of one year from the date of purchase. I-R will repair,
without cost, any Product found to be defective, including parts
and labor charges, or at its option, will replace such Products or
refund the purchase price less a reasonable allowance for
depreciation, in exchange for the Product. Repairs or replacements
are warranted for the remainder of the original warranty period.
I-R makes no other warranty, and all implied warranties
including any warranty of merchantability or fitness for a
particular purpose are limited to the duration of the expressed
warranty period as set forth above. I-R’s maximum liability is
limited to the purchase price of the Product and in no event
shall I-R be liable for any consequential, indirect, incidental,
or special damages of any nature rising from the sale or use of
the Product, whether based on contract, tort, or otherwise.
If any Product proves defective within its original one year
warranty period, it should be returned to any Authorized I-R
Service Distributor, transportation prepaid with proof of purchase
or warranty card.
Note: Some states do not allow limitations on incidental or
consequential damages or how long an implied warranty lasts so
that the above limitations may not apply to you.
This warranty does not apply to Products which I-R has
determined to have been misused or abused, improperly
maintained by the user, or where the malfunction or defect can be
attributed to the use of non-genuine I-R parts.
This warranty gives you specific legal rights and you may also
have other rights which may vary from state to state.
Important Notice
It is our policy to promote safe delivery of all orders.
This shipment has been thoroughly checked, packed and inspected
before leaving our plant and receipt for it in good condition has
been received from the carrier. Any loss or damage which occurs
to this shipment while enroute is not due to any action or conduct
of the manufacturer.
Visible Loss or Damage
If any of the goods called for on the bill of lading or express
receipt are damaged or the quantity is short, do not accept them
until the freight or express agent makes an appropriate notation on
your freight bill or express receipt.
Damage Claims
You must file claims for damage with the carrier. It is the
transportation company’s responsibility to reimburse you for
repair or replacement of goods damaged in shipment. Claims for
loss or damage in shipment must not be deducted from the
Ingersoll-Rand invoice, nor should payment of Ingersoll-Rand
invoice be withheld awaiting adjustment of such claims as the
carrier guarantees safe delivery.
You may return products damaged in shipment to us for repair,
which services will be for your account and form your basis for
claim against the carrier.
Concealed Loss or Damage
When a shipment has been delivered to you in apparent good
condition, but upon opening the crate or container, loss or damage
has taken place while in transit, notify the carrier’s agent
immediately.
MHD56222 - Edition 3
31
United States Office Locations
For Order Entry and Order
Status
Ingersoll-Rand
Distribution Center
P.O. Box 618
510 Hester Drive
White House, TN 37188
Phone: (615) 672-0321
Fax: (615) 672-0801
Technical Support
Ingersoll-Rand
ECOE
1725 US Hwy 1 North
Southern Pines, NC 28387
Phone: (866) 284-5509
Fax: (910) 692-7822
Web Site:
www.irco.com
Regional Sales Offices
Ingersoll-Rand
1872 Enterprise Drive
Rochester, MI 48309
Phone: (248) 293-5700
Fax: (248) 293-5800
International Office Locations
Offices and distributors in
principal cities throughout the
world. Contact the nearest
Ingersoll-Rand office for the
name and address of the
distributor in your country or
write/fax to:
Canada
National Sales Office
Regional Warehouse
Toronto, Ontario
51 Worcester Road
Rexdale, Ontario
M9W 4K2
Phone: (416) 213-4500
Fax: (416) 213-4510
Order Desk
Fax: (416) 213-4506
Russia
Ingersoll-Rand
Kuznetsky Most 21/5
Entrance 3
Moscow 103895 Russia
Phone: 7-501-923-91-34
Fax: 7-501-924-46-25
Australia
Ingersoll-Rand Ltd.
Landmark Corporate Center
Level 2
454-472 Nepean Highway
Frankston, Vic 3199
Latin America Operations
Australia
Ingersoll-Rand
Production Equipment Group Phone: 61 3 8781 1600
Fax: 61 3 8781 1611
730 N.W. 107 Avenue
Suite 300, Miami, FL
33172-3107 USA
Phone: (305) 559-0500
Fax: (305) 222-0864
Europe, Middle East and
Africa
Ingersoll-Rand
Douai Operations
111, Avenue Roger Salengro
59450 Sin Le Noble, France
Phone: (33) 3-27-93-08-08
Fax: (33) 3-27-93-08-00
Printed in USA
Asia Pacific Operations
Ingersoll-Rand
42 Benoi Road
Jurong, Singapore 629903
Phone: 65-861-1555
Fax: 65-861-0317